

Latest & Greatest
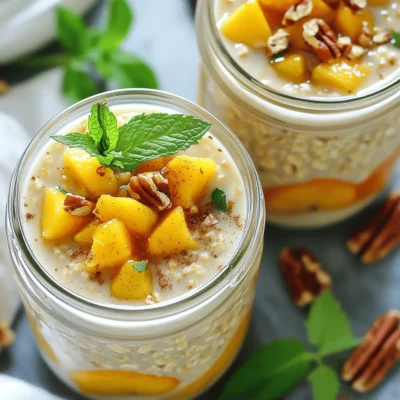
Peach Cobbler Overnight Oats Tasty and Simple Recipe
Looking for a quick, tasty breakfast? Let me introduce you to Peach Cobbler Overnight Oats! This simple recipe combines fresh
Read more…
Mediterranean Quinoa Salad Fresh and Flavorful Dish
Looking for a bright and tasty dish that’s packed with nutrients? Try my Mediterranean Quinoa Salad! With fresh veggies, feta
Read more…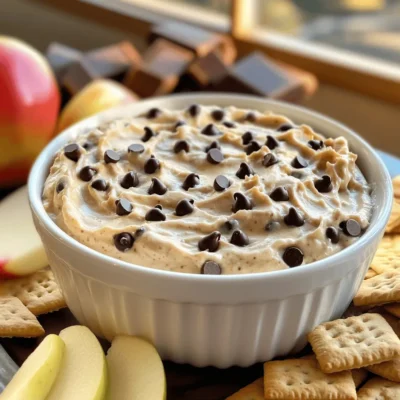
Chocolate Chip Cookie Dough Dip Tasty and Simple Treat
If you love the taste of raw cookie dough, I have the perfect treat for you! Chocolate Chip Cookie Dough
Read more…
Spicy Veggie Stir Fry Quick and Tasty Meal Idea
Looking for a quick and tasty meal? You’ll love this Spicy Veggie Stir Fry! Packed with vibrant flavors and easy
Read more…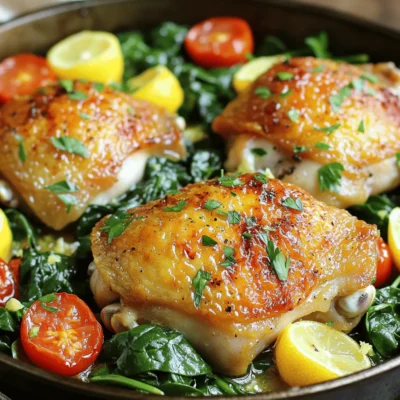
One-Pan Lemon Garlic Chicken Easy and Flavorful Meal
Craving a tasty meal without the fuss? You’ll love this One-Pan Lemon Garlic Chicken! It’s simple to make and full
Read more…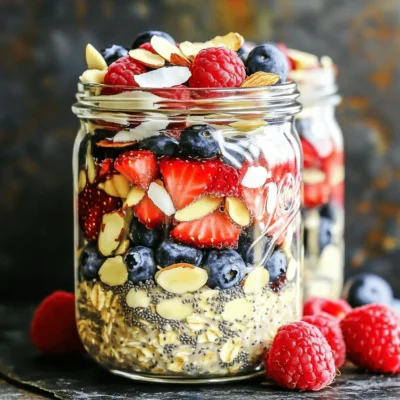
Overnight Oats with Berries Easy and Nutritious Meal
Looking for a quick, tasty breakfast that’s also packed with nutrients? Overnight oats with berries are the perfect solution! In
Read more…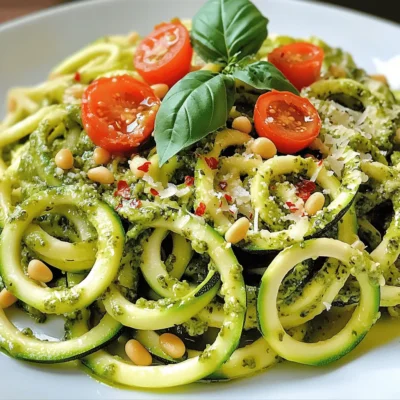
Zucchini Noodles with Pesto Flavorful and Fresh Dish
Looking for a tasty, healthy meal that’s easy to make? Zucchini noodles with pesto might be the dish for you!
Read more…
Creamy Mushroom Risotto Flavors in Every Bite
Are you ready to savor every bite of a creamy mushroom risotto? This dish combines simple, fresh ingredients to create
Read more…browse recipes


![To make Healthy Banana Oat Muffins, gather these simple and wholesome ingredients: - 2 ripe bananas, mashed - 1 cup rolled oats - 1/2 cup almond milk (or any milk of choice) - 1/4 cup honey or maple syrup - 1/4 cup coconut oil, melted - 1 teaspoon vanilla extract - 1 teaspoon baking powder - 1/2 teaspoon baking soda - 1/2 teaspoon ground cinnamon - 1/4 teaspoon salt - Optional: 1/4 cup chopped nuts or chocolate chips These ingredients blend well for a tasty and nutritious snack. The ripe bananas add natural sweetness and moisture. The rolled oats give a hearty texture. Almond milk keeps it light and dairy-free, but you can use any milk you like. Honey or maple syrup sweetens the muffins without refined sugar. Coconut oil adds rich flavor and moisture. Baking powder and soda help the muffins rise. Ground cinnamon gives warmth and spice. A pinch of salt balances the flavors. If you want to add extra crunch, toss in some nuts or chocolate chips. Check the [Full Recipe] for exact measurements and tips to make these muffins shine! - Preheat your oven to 350°F (175°C) and prepare your muffin tin with liners. - Take 2 ripe bananas and mash them in a large bowl until they are smooth. - Pour in 1/2 cup of almond milk, 1/4 cup of honey (or maple syrup), 1/4 cup of melted coconut oil, and 1 teaspoon of vanilla extract. Mix until the wet ingredients blend well. - In a separate bowl, combine 1 cup of rolled oats, 1 teaspoon of baking powder, 1/2 teaspoon of baking soda, 1/2 teaspoon of ground cinnamon, and 1/4 teaspoon of salt. Stir these dry ingredients together. - Gradually add the dry mix to the wet mix. Stir gently until just combined. - If you want, fold in 1/4 cup of chopped nuts or chocolate chips. This adds flavor and texture. - Spoon the muffin batter into the prepared muffin tin. Fill each cup about 3/4 full. - Bake in the preheated oven for 18-22 minutes. Check with a toothpick; it should come out clean. - Let the muffins cool in the tin for 5 minutes. Then move them to a wire rack to cool completely. This recipe makes 12 tasty muffins. Enjoy them warm, or as a snack later! For the full recipe, check out the details above. To get the best muffin texture, avoid overmixing the batter. When you mix too much, your muffins can turn tough. Stir just until the dry ingredients blend with the wet ones. This keeps your muffins light and fluffy. For baking time, aim for 18 to 22 minutes. You'll know they are done when a toothpick inserted in the center comes out clean. If it has wet batter on it, bake a few more minutes. Keep an eye on them to avoid overbaking, which can dry them out. If you want to swap honey or maple syrup, you can use agave nectar or brown sugar. Both options will still keep your muffins sweet. Adding spices can boost the flavor and nutrition. Consider mixing in ground flaxseed or chia seeds for extra fiber. You can also try cinnamon or nutmeg for a warm taste. These small changes can make a big difference in both nutrition and flavor. Serve your muffins warm for the best taste. You can dust them with powdered sugar or top them with Greek yogurt. This adds a nice touch and makes them look inviting. For a breakfast spread, arrange the muffins on a colorful platter. You can add fresh fruit or yogurt cups next to them. This makes your table look bright and appealing. Guests will enjoy picking from a beautiful display! {{image_2}} You can easily change some ingredients in this recipe. Here are a few simple swaps: - Whole Wheat Flour: If you want a different texture, use whole wheat flour instead of oats. This will give your muffins a denser feel while still being healthy. - Dairy-Free and Nut-Free: For a dairy-free option, use oat milk or soy milk. If you need a nut-free choice, choose sunflower oil in place of coconut oil. Adding new flavors can make these muffins even more exciting: - Adding Fruits: Try mixing in blueberries or diced apples. These fruits add natural sweetness and great texture. - Incorporating Spices: Add spices like nutmeg or ginger for extra warmth. These spices can really elevate the flavor profile of your muffins. Finish your muffins with fun toppings or drizzles: - Toppings: You can top your muffins with yogurt, nuts, or coconut flakes to enhance the look and taste. These add a nice crunch and extra nutrition. - Drizzles or Syrups: A drizzle of honey or maple syrup can provide a sweet touch. This makes each bite more delightful. Feel free to explore these variations to make your Healthy Banana Oat Muffins your own! For the complete recipe, refer to the Full Recipe. To keep your Healthy Banana Oat Muffins fresh, store them in an airtight container. This helps maintain moisture and flavor. You can keep them at room temperature for up to three days. If you want them to last longer, refrigeration is a good option. Just remember, refrigeration may change the texture a bit. Freezing is a great way to save muffins. Here’s how you can do it: 1. Cool Completely: Let the muffins cool on a wire rack. 2. Wrap Well: Wrap each muffin in plastic wrap. Then, place them in a freezer bag. 3. Label and Freeze: Write the date on the bag and put it in the freezer. For best quality, eat the muffins within three months. To thaw, place them in the fridge overnight or at room temperature for a few hours. Reheating muffins can bring back their soft texture. Here are the best methods: - Microwave: Place a muffin on a microwave-safe plate. Heat for about 15-20 seconds. Check if it’s warm enough for you. - Oven: Preheat your oven to 350°F (175°C). Wrap muffins in foil and heat for 10-15 minutes. This method makes them crispy outside and soft inside. Following these tips will help keep your muffins tasting great! For the full recipe, check out the details above. Yes, you can easily make these muffins vegan. To start, substitute the honey or maple syrup with agave nectar or brown rice syrup. For the almond milk, use any plant-based milk you like. Instead of coconut oil, try applesauce or mashed avocado. These swaps keep the muffins moist and tasty. To make your muffins gluten-free, use gluten-free rolled oats. You can also swap in almond flour or coconut flour. These flours add unique flavors and textures. Just remember, gluten-free flours may need a little more liquid. Adjust the almond milk to get the right batter consistency. You can add a lot of fun mix-ins to your muffins. Popular choices include chopped nuts, chocolate chips, or dried fruit. For a fruity twist, add blueberries or raspberries. You can also change up the spices. Try nutmeg for warmth or a dash of ginger for a kick. These muffins stay fresh for about four days at room temperature. Store them in an airtight container to keep them moist. If you notice any mold or an off smell, discard them. To extend freshness, you can freeze the muffins. They last up to three months in the freezer. When ready to eat, thaw at room temperature or warm in the microwave. These healthy banana oat muffins are easy and fun to make. We covered simple ingredients, step-by-step instructions, and various tips to perfect your muffins. You can enjoy many flavor variations and know how to store leftovers. Remember, customizing these muffins makes them unique to you. Try freezing extras for later or reheating them for a quick snack. Get creative with your add-ins and impress everyone at breakfast. Now, it’s time to bake and enjoy these tasty treats!](https://foodishtalk.com/wp-content/uploads/2025/07/37602722-0d5b-4c8d-bdfa-c0705ee5ab27.webp)
Healthy Banana Oat Muffins Nutrient-Packed Recipe
Looking for a tasty snack that’s packed with nutrients? You’re in the right place! My Healthy Banana Oat Muffins recipe combines simple ingredients for…
My Latest Desserts

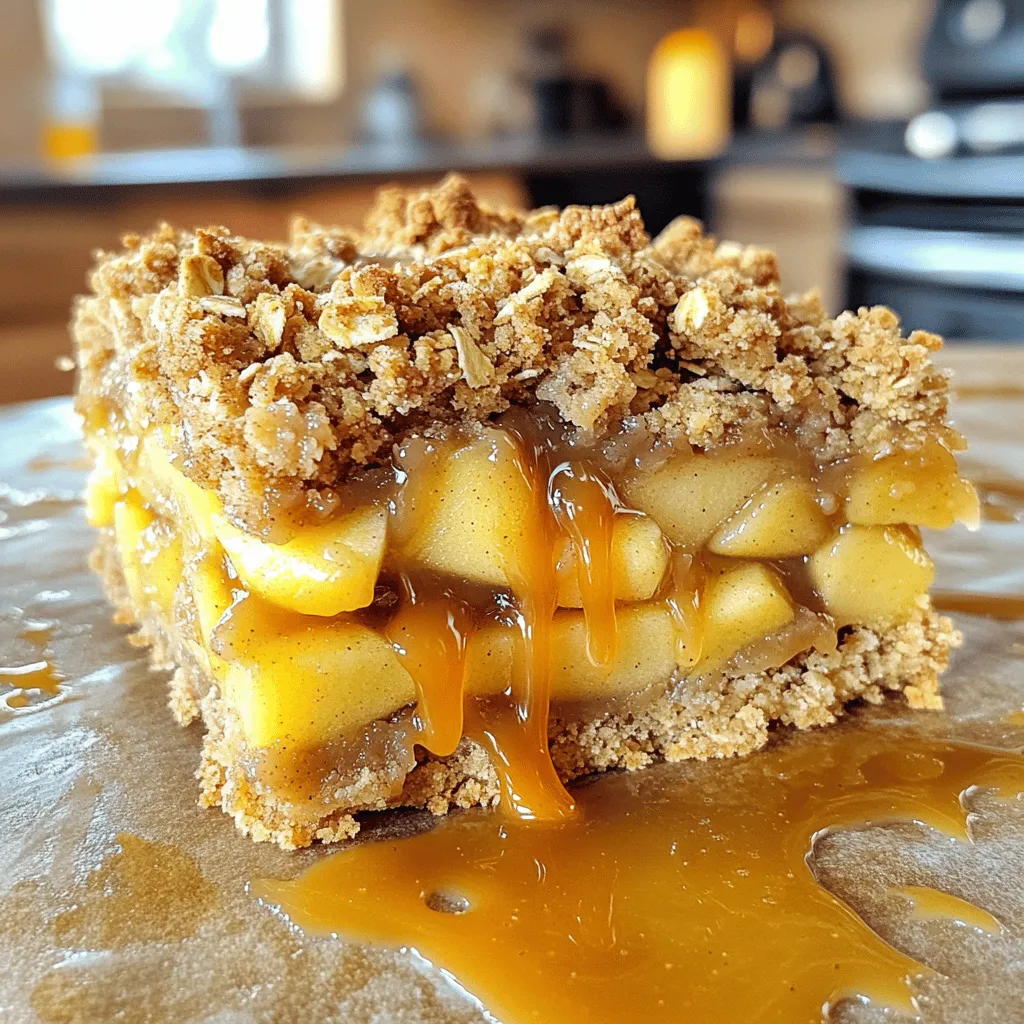
Miso Caramel Apple Crumble Bars Easy and Delicious Treat
If you’re looking for a treat that combines sweet apples, rich miso caramel, and a crunchy crumble, you’ve found it! Read Full Recipe-
Pumpkin Cheesecake Swirl Brownies Irresistible Delight
Get ready to savor the magic of fall with my Pumpkin Cheesecake Swirl Brownies! These decadent treats combine rich brownie Read Full Recipe -
Cherry Tahini Energy Bites Healthy Snack Recipe
Looking for a quick, healthy snack? Let me introduce you to Cherry Tahini Energy Bites! Packed with flavor and nutrition, Read Full Recipe -
Root Beer Cream Bars Irresistible and Simple Treat
If you love the sweet nostalgia of root beer, you’re in for a treat! Root Beer Cream Bars combine creamy Read Full Recipe -
Cherry Chocolate Lava Mug Cake Delightful Recipe
Craving something sweet and quick? You’re in for a treat with my Cherry Chocolate Lava Mug Cake! This recipe packs Read Full Recipe -
Caprese Stuffed Cupcakes Flavorful and Unique Treat
Are you ready to treat your taste buds to something new? Caprese Stuffed Cupcakes mix fresh flavors and fun in Read Full Recipe -
Mango Tajin Cake Pops Tasty and Fun Treats
Craving a unique treat? Try my Mango Tajin Cake Pops! These fun bites blend sweet mango with the zesty kick Read Full Recipe -
Matcha Pistachio Energy Bites Nourishing Snack Option
Looking for a tasty and healthy snack? Let me introduce you to Matcha Pistachio Energy Bites! Packed with oats, nuts, Read Full Recipe -
Peanut Butter Pickle Cake Jars Delightful and Unique Treat
Are you ready to try something truly different? Peanut Butter Pickle Cake Jars combine sweet and tangy flavors in a Read Full Recipe -
Healthy Banana Oat Muffins Nutrient-Packed Recipe
Looking for a tasty snack that’s packed with nutrients? You’re in the right place! My Healthy Banana Oat Muffins recipe Read Full Recipe


hey,
i’m !
I’m so happy you’re here!
I pour heart and skill into every recipe I create. I know you’ll taste the difference now let’s enjoy this flavorful adventure together.
![- 9 lasagna noodles - 2 cups ricotta cheese - 1 large egg - 3 cups fresh spinach, chopped - 1 cup mozzarella cheese, shredded - 1/2 cup Parmesan cheese, grated - 3 cups marinara sauce - 1 teaspoon dried oregano - 1/2 teaspoon black pepper - Salt to taste - Olive oil, for sautéing You can swap ricotta cheese with cottage cheese for a lighter option. If you want a vegan version, try tofu blended with a bit of lemon juice. For cheese, use a mix of gouda or fontina for a different flavor. Each cheese gives a unique taste to the lasagna. I love using fresh spinach because it adds vibrant color and flavor. Fresh spinach is also packed with nutrients. If you use frozen spinach, make sure to thaw it first. Squeeze out excess water after thawing. This step keeps your lasagna from being too watery. First, preheat your oven to 375°F (190°C). This step helps cook the lasagna evenly. While the oven warms up, prepare your baking dish. A 9x13 inch pan works great. Next, cook the lasagna noodles according to the package. Aim for al dente, so they hold up well. Drain the noodles and lay them flat on a clean kitchen towel. This keeps them from sticking together. To get perfectly sautéed spinach, heat a drizzle of olive oil in a skillet over medium heat. Add the chopped spinach. Sauté it for about 3-4 minutes until it wilts. Stir gently to avoid burning. Once it’s ready, remove it from the heat and let it cool. Cooling the spinach is key. It prevents the ricotta from getting too runny when mixed. Now it’s time to layer the lasagna. Start by spreading a thin layer of marinara sauce on the bottom of your baking dish. Place 3 lasagna noodles over the sauce. Next, spread half of the ricotta-spinach mixture over the noodles. Then, add 1 cup of marinara sauce and half of the mozzarella cheese. Repeat this process with another set of noodles and fillings. Finish with the last 3 noodles on top, cover with marinara sauce and sprinkle Parmesan cheese. This order helps each layer shine. Proper sauce distribution ensures a moist, flavorful dish. For the full recipe, check [Full Recipe]. To prevent your lasagna from becoming watery, avoid over-saucing. Use just enough marinara sauce to keep everything moist. Also, make sure to drain your spinach well after cooking. This keeps extra moisture from ruining your layers. For the best cheese melt, bake your lasagna at 375°F for 25 minutes covered, then 15 minutes uncovered. This technique helps the cheese get bubbly and golden without burning. Letting it rest before serving also helps the layers hold together. Pair your lasagna with a fresh side salad. A simple mix of greens, tomatoes, and a light vinaigrette works well. Garlic bread is also a great choice. It complements the rich flavors of the dish. For wine, try a medium-bodied red like Chianti. It enhances the flavors of the cheese and sauce. If you prefer white wine, a crisp Pinot Grigio also pairs nicely. For an attractive presentation, cut the lasagna into neat squares. Serve on a colorful plate to make the dish pop. A sprinkle of fresh basil on top adds a bright touch. When plating, use a spatula to lift each piece carefully. This keeps the layers intact and looks great on the plate. You can also drizzle a bit of marinara sauce around the edges for extra flair. {{image_2}} You can add ground meat for a heartier meal. Ground beef or turkey works well. Cook the meat in a pan until it's brown. Drain the fat before mixing it into the sauce. If you're looking for a meatless option, try using vegetarian meat alternatives. Products like lentils or plant-based crumbles add protein and flavor. They blend nicely with the spinach and cheese. To make a dairy-free version, swap out the ricotta. Use blended tofu or cashew cream instead. They create a creamy texture without the dairy. For a complete vegan meal, add vegetables like mushrooms or zucchini. Nutritional yeast can replace Parmesan for a cheesy flavor. This makes your lasagna both tasty and plant-based. If you need gluten-free noodles, try rice or chickpea pasta. They hold up well in baking. Make sure to check the labels for gluten-free certification. When it comes to sauce and cheese, look for gluten-free brands. Many major brands offer gluten-free options. This way, everyone can enjoy a delicious slice of lasagna. To keep your lasagna fresh, store it in an airtight container. Cover it tightly with plastic wrap or aluminum foil. This helps prevent the lasagna from drying out. You can also use a glass dish with a lid for easy storage. Leftovers last in the fridge for about 3 to 5 days. Always make sure to check for any signs of spoilage before eating. If you notice any bad smells or mold, it's best to throw it away. Freezing lasagna is easy. First, let it cool completely after baking. Then, cut it into portions for easy serving later. Wrap each piece tightly in plastic wrap, then in aluminum foil. This prevents freezer burn and keeps the flavor. When ready to eat, you can reheat frozen lasagna. Place it in the fridge overnight to thaw. For best results, heat it in the oven at 375°F. Cover the dish with foil to keep it moist. Bake for about 25 minutes, then remove the foil for another 10 minutes. This warms it through and gives a nice golden top. You can prep ingredients ahead of time for quick assembly. Cook the noodles and store them in a separate container. Keep the sauce and cheese in their own bowls too. Chop the spinach and store it in a sealed bag. For freshness, store each ingredient separately. This way, when you're ready to make your lasagna, you can put it together quickly. It's a great way to save time on busy days. For more tips on preparation, check the Full Recipe. How long to bake lasagna at 375°F? Bake your lasagna for 25 minutes covered with foil. Remove the foil and bake for 15 more minutes. This helps the cheese melt and turn golden. The total cooking time is about 40 minutes. Can you assemble lasagna ahead of time? Yes, you can! Assemble your lasagna, cover it tightly, and store it in the fridge. It can stay there for a day before baking. This makes dinner prep easy. Can I use no-boil noodles for this recipe? Absolutely! No-boil noodles work well in this recipe. They absorb moisture from the sauce while baking. This makes for a great texture. How much spinach should I use if substituting with frozen? If using frozen spinach, use about 1.5 cups. Make sure to thaw and drain it well. This way, it won’t make your lasagna watery. What is the secret to a layer lasagna? The secret is in the sauce. Spread a thin layer on the bottom first. Then, layer evenly with noodles, filling, and sauce. This keeps everything from sliding around. How can I make my lasagna spicy? Add red pepper flakes to the marinara sauce for some heat. You can also use spicy sausage instead of ground beef. Both options add great flavor. To wrap up, making lasagna can be simple and fun. You need basic ingredients like noodles, ricotta, and spinach. Remember to sauté your spinach well for flavor. Layering is key to a tasty dish. Use tips for cooking and serving to impress. Consider variations like meat, vegan options, or gluten-free noodles. Store leftovers properly to enjoy later. With these guidelines, you can make a delicious lasagna that satisfies every time. Happy cooking!](https://foodishtalk.com/wp-content/uploads/2025/05/87d2422d-9969-4394-a62b-3b1ac444d723-300x300.webp)


Plum Ginger Kombucha Pop Refreshing and Flavorful Drink
Are you ready to discover a drink that bursts with flavor and refreshment? In this blog, I’ll show you how to make a delightful…

