

Latest & Greatest

Orange Fig Jam Delightful and Easy Homemade Recipe
If you’re looking for a tasty treat that’s easy to make, you’ve found the right place! In this guide, I’ll
Read more…
Peach Lemonade Refreshing Summer Beverage Recipe
Looking for a refreshing drink to cool off this summer? You’re in the right place! In this blog post, I’ll
Read more…
No Bake Chocolate Oat Bars Easy and Tasty Treat
Looking for a simple treat? I’ve got you covered with No Bake Chocolate Oat Bars! These bars are quick to
Read more…
Fudgy Chocolate Zucchini Brownies Easy and Rich Treat
If you love rich, fudgy brownies, you’re in for a treat! My Fudgy Chocolate Zucchini Brownies steal the show with
Read more…
Peach Muffins Flavorful and Easy Baking Recipe
Are you ready to bake something delicious and simple? These peach muffins burst with flavor and bring the taste of
Read more…
Stuffed Yellow Squash Flavorful and Nutritious Meal
Are you ready to impress your family with a tasty, nutritious meal? Stuffed yellow squash is a simple, delicious option
Read more…
Savory Tomato Pie Simple and Flavorful Delight
Are you ready to dive into a dish that’s both simple and bursting with flavor? This Savory Tomato Pie will
Read more…
Easy Canned Peach Cobbler Simple and Delicious Recipe
If you crave something sweet, this Easy Canned Peach Cobbler is for you! In just a few simple steps, you
Read more…browse recipes


![- 2 cups all-purpose flour - 1 tablespoon baking powder - 1/2 teaspoon salt - 1/4 teaspoon black pepper - 1 cup shredded sharp cheddar cheese - 1/2 cup grated parmesan cheese - 1/2 cup cold unsalted butter, cubed - 1/2 cup buttermilk - 1 large egg - Fresh chives, chopped (for garnish) To create these savory cheese scones, start with the main ingredients. All-purpose flour forms the base. You will also need baking powder to help them rise. Salt and black pepper add flavor and balance. For the cheese, I love using sharp cheddar for its bold taste. Parmesan adds a nice depth and richness. You can mix these two or try your favorites. Next, you need some additional ingredients. Cold unsalted butter brings flakiness to the scones. Buttermilk adds moisture and tang. An egg helps bind everything together. Finally, fresh chives give a burst of color and flavor as a garnish. Check the [Full Recipe] for detailed steps and tips to make these cheese scones perfect for any meal! First, preheat your oven to 400°F (200°C). This step helps the scones bake evenly. Next, line your baking sheet with parchment paper. This keeps the scones from sticking and makes cleanup easier. In a large bowl, whisk together the following dry ingredients: - 2 cups all-purpose flour - 1 tablespoon baking powder - 1/2 teaspoon salt - 1/4 teaspoon black pepper Make sure they blend well. The baking powder helps the scones rise. The salt and pepper add flavor. Now, add the cold butter, cut into small cubes. Use your fingers or a pastry cutter to work the butter into the flour mix until it looks like coarse crumbs. This step creates a flaky texture. Next, stir in: - 1 cup shredded sharp cheddar cheese - 1/2 cup grated parmesan cheese Mix well so the cheese spreads evenly throughout the dough. In a separate bowl, whisk together: - 1/2 cup buttermilk - 1 large egg Combine these wet ingredients well. Then, pour them into the dry mix. Gently stir until just combined. Be careful not to overmix, as this can make the scones tough. Turn the dough out onto a lightly floured surface. Pat it into a rectangle about 1 inch thick. Use a sharp knife to cut the dough into squares or triangles. Place them on the lined baking sheet with space between each scone. Bake in the preheated oven for 15-20 minutes. Check for doneness when they turn golden brown on top. Once done, remove them from the oven. Let them cool slightly, then garnish with fresh chives before serving. For the full recipe, check the recipe card. Cold ingredients are key for great scones. Use cold butter and buttermilk. This keeps the scones flaky. If the butter warms up, the dough won’t rise well. Avoid overmixing the dough. Mix until just combined. Overmixing makes the scones tough. You want them light and airy, not dense and chewy. Pair your savory cheese scones with soups or salads. They go well with creamy tomato soup or a fresh garden salad. Enjoy them as a side for brunch too. Serve your scones fresh from the oven. They taste best warm. If you need to reheat, warm them in the oven for a few minutes. Fresh herbs can elevate your scones. Try adding rosemary or thyme for extra flavor. They add a nice touch and make your scones look pretty. Spices can also give your scones a kick. Consider adding a pinch of cayenne or smoked paprika. This adds warmth and depth to the scone's flavor. {{image_2}} You can make your scones pop with fresh herbs. Try adding chopped chives, rosemary, or thyme to the dough. These herbs add flavor and aroma. When pairing herbs with cheese, think about the cheese's strength. For example, chives work well with sharp cheddar. Rosemary shines with creamy goat cheese. Mixing these flavors gives your scones a bright twist. If you love heat, consider adding jalapeños or red pepper flakes. These ingredients create a delicious kick in your scones. For a spicy twist, use pepper jack cheese. This cheese blends well with the heat and adds creaminess. Alternatively, sharp cheddar with red pepper flakes creates a bold flavor. Both options make your scones exciting and full of life. Mixing sweet and savory can create a unique scone experience. Try adding honey or fruit like figs or apples. These ingredients balance well with sharp cheeses like cheddar. Drizzle honey on top before serving for a lovely finish. For a fun twist, serve with a sweet fruit jam. This combination brings new life to your savor cheese scones and makes them hard to resist. For the full recipe, refer to the Savory Cheese Scones section. To keep your savory cheese scones fresh at room temperature, place them in a sealed container. This helps lock in moisture and prevents them from drying out. You can store them this way for up to three days. If you want to enjoy them warm, just pop them in the oven for a few minutes before serving. If you want to save the scones for later, freezing is a great option. First, let the scones cool completely. Then, wrap each scone in plastic wrap. Place them in a freezer bag, and label it with the date. They can last up to two months in the freezer. When you’re ready to eat them, reheat them in the oven at 350°F (175°C) for about 10-15 minutes for the best results. This keeps them soft and tasty. You should check your scones for any signs of spoilage. If they smell off or have an unusual texture, it's best to discard them. Mold is another clear sign that they are no longer good. Always trust your senses; if something seems off, don’t take chances. Enjoy your scones fresh to appreciate their flavor and texture. Savory cheese scones taste best fresh. They last about 2 to 3 days at room temperature. Store them in an airtight container. If you want them to last longer, freeze them. They keep well in the freezer for up to 3 months. To enjoy them later, thaw in the fridge overnight. Reheat in the oven to restore their warmth and crunch. Yes! You can mix and match cheeses. Try mozzarella for a milder taste or feta for a tangy kick. Gouda adds a rich flavor, while blue cheese gives a strong punch. Just keep the total amount of cheese the same as in the recipe. This way, your scones will still rise and stay fluffy. Savory cheese scones pair well with many dishes. Serve them warm with soup for a cozy meal. They also go great with salads, adding a nice texture. Try them with a dollop of cream cheese or butter. For a fun twist, use them as a base for a savory sandwich. Enjoy the flavors of your choice! This article covered how to make savory cheese scones, starting with the must-have ingredients like flour, cheese, and buttermilk. I shared step-by-step instructions to guide you through mixing and baking, plus tips for texture and flavor. Remember, using cold ingredients is key for the best scones. You can customize these scones with herbs or spices for fun twists. With proper storage, you can enjoy them fresh or reheated later. Dive into baking, and enjoy your delicious creations!](https://foodishtalk.com/wp-content/uploads/2025/05/12a912b3-969e-43ee-84c8-996b12089b1f.webp)
Savory Cheese Scones Perfect for Any Meal
Savory cheese scones are my go-to for any meal. They blend rich cheese flavors with a tender crumb. Whether you enjoy them for breakfast,…
My Latest Desserts

Healthy Banana Oat Muffins Nutrient-Packed Recipe
Looking for a tasty snack that’s packed with nutrients? You’re in the right place! My Healthy Banana Oat Muffins recipe Read Full Recipe-
No-Bake Chocolate Oat Bars Simple and Tasty Treat
Looking for a quick, tasty treat? You’re in the right place! My No-Bake Chocolate Oat Bars are simple to make Read Full Recipe -
No-Bake Chocolate Oatmeal Bars Simple and Tasty Treat
Looking for a simple and tasty treat that’s also healthy? You’ve found it! My No-Bake Chocolate Oatmeal Bars are a Read Full Recipe -
Peach Pie Cruffins Delightful and Simple Recipe
Are you ready to dive into a sweet and flaky treat? Peach Pie Cruffins are a delightful twist on classic Read Full Recipe -
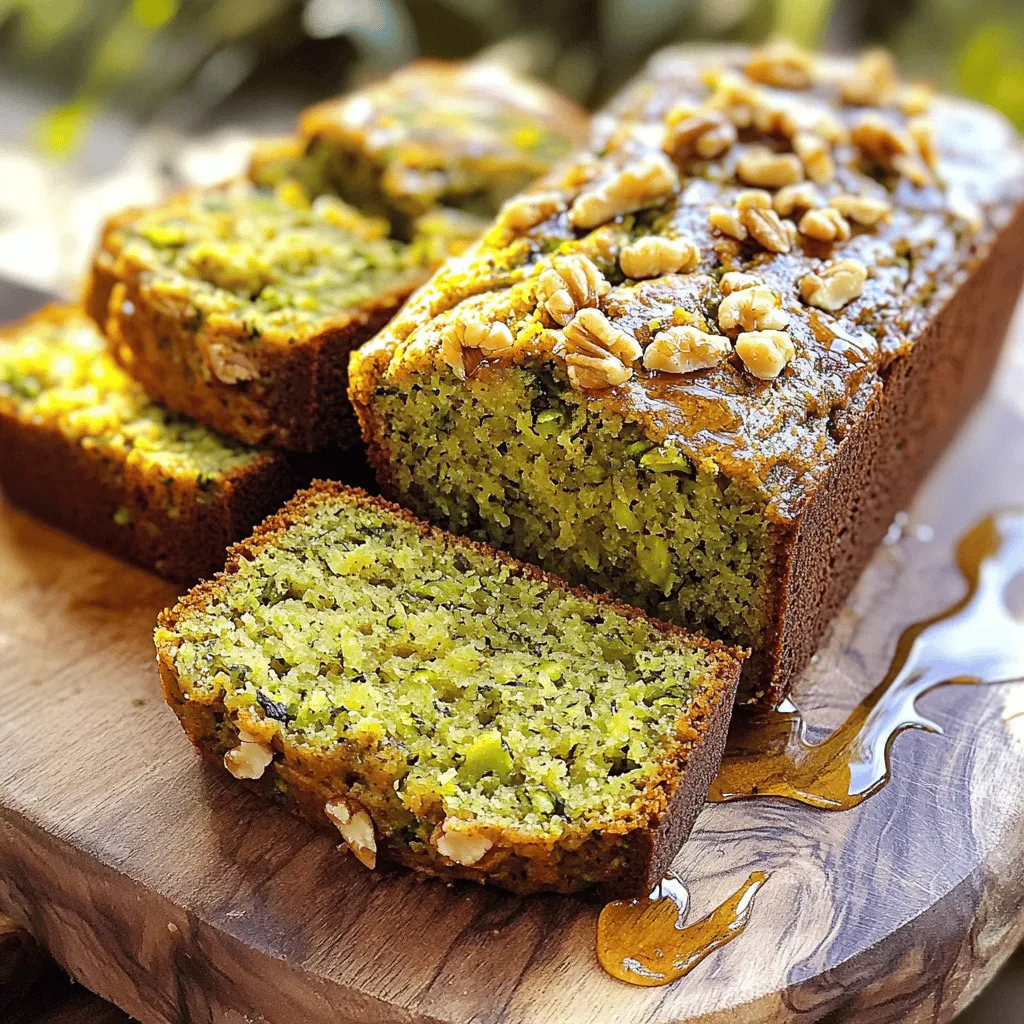
Retro Zucchini Bread Healthy and Flavorful Delight
Are you ready to bake a delicious, healthy treat? Retro Zucchini Bread is packed with flavor and goodness. This simple Read Full Recipe -
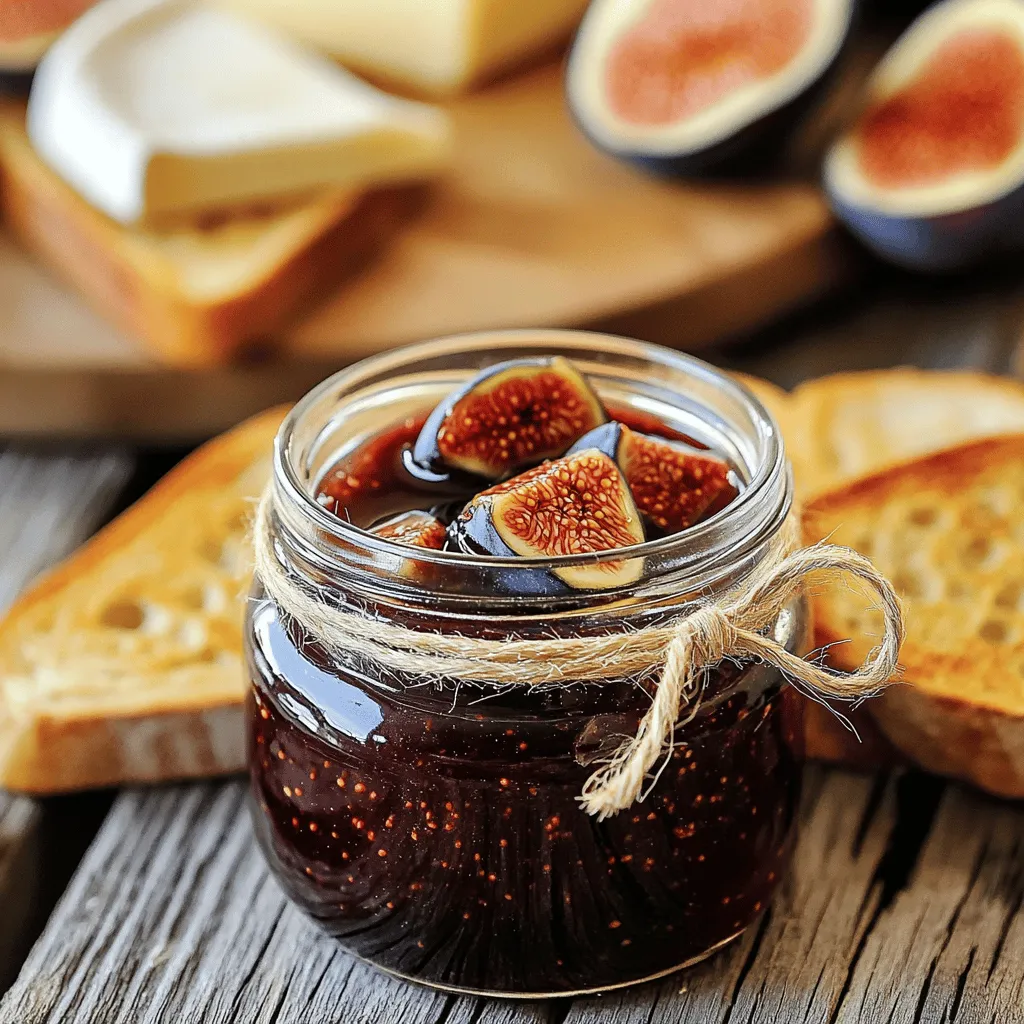
Classic Fig Jam Simple and Delicious Recipe
Are you ready to savor the sweet taste of summer year-round? Making classic fig jam is simple and rewarding. With Read Full Recipe -
Fresh Peach Cobbler Flavorful and Easy Recipe Guide
Craving a sweet treat that showcases the juicy goodness of fresh peaches? You’re in the right place! In this guide, Read Full Recipe -
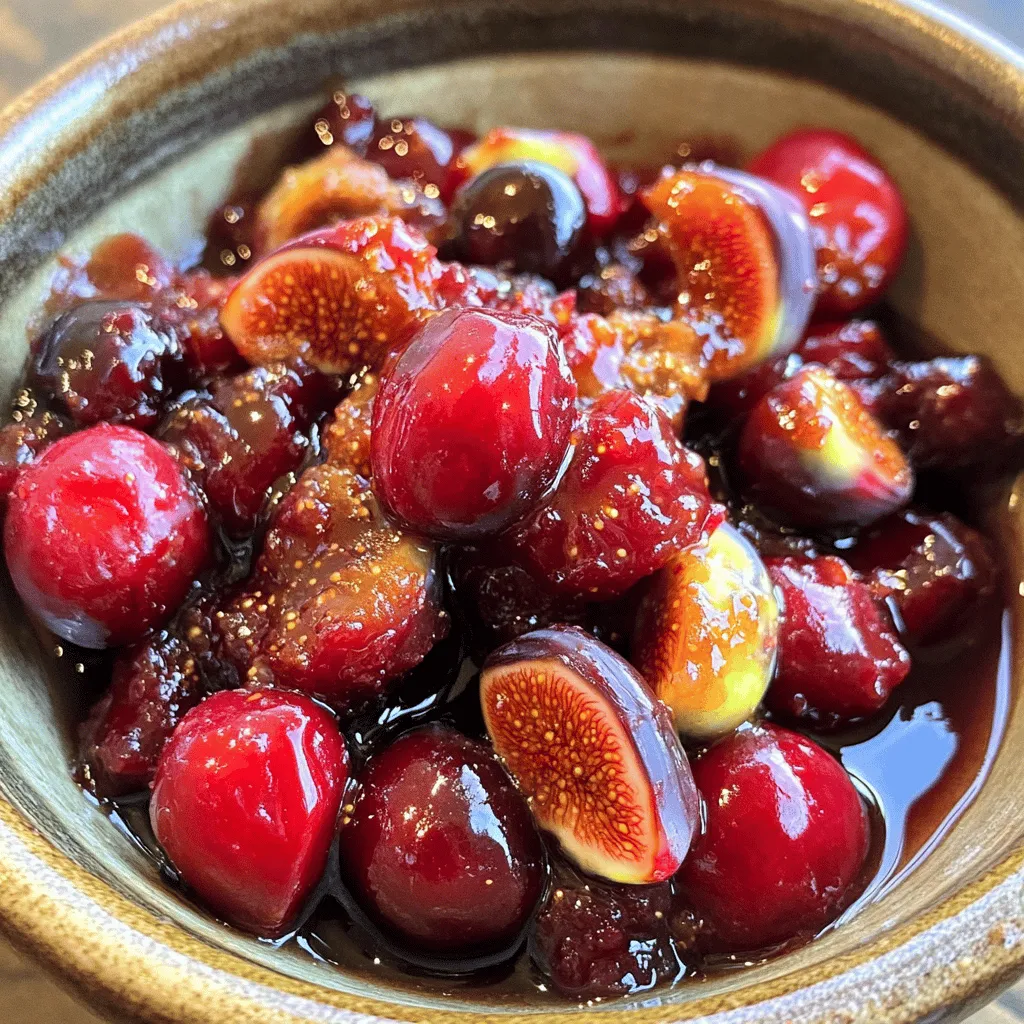
Ginger Fig Cherry Compote Flavorful and Easy Recipe
Are you ready to explore a dish that bursts with flavor? This Ginger Fig Cherry Compote is not only easy Read Full Recipe -
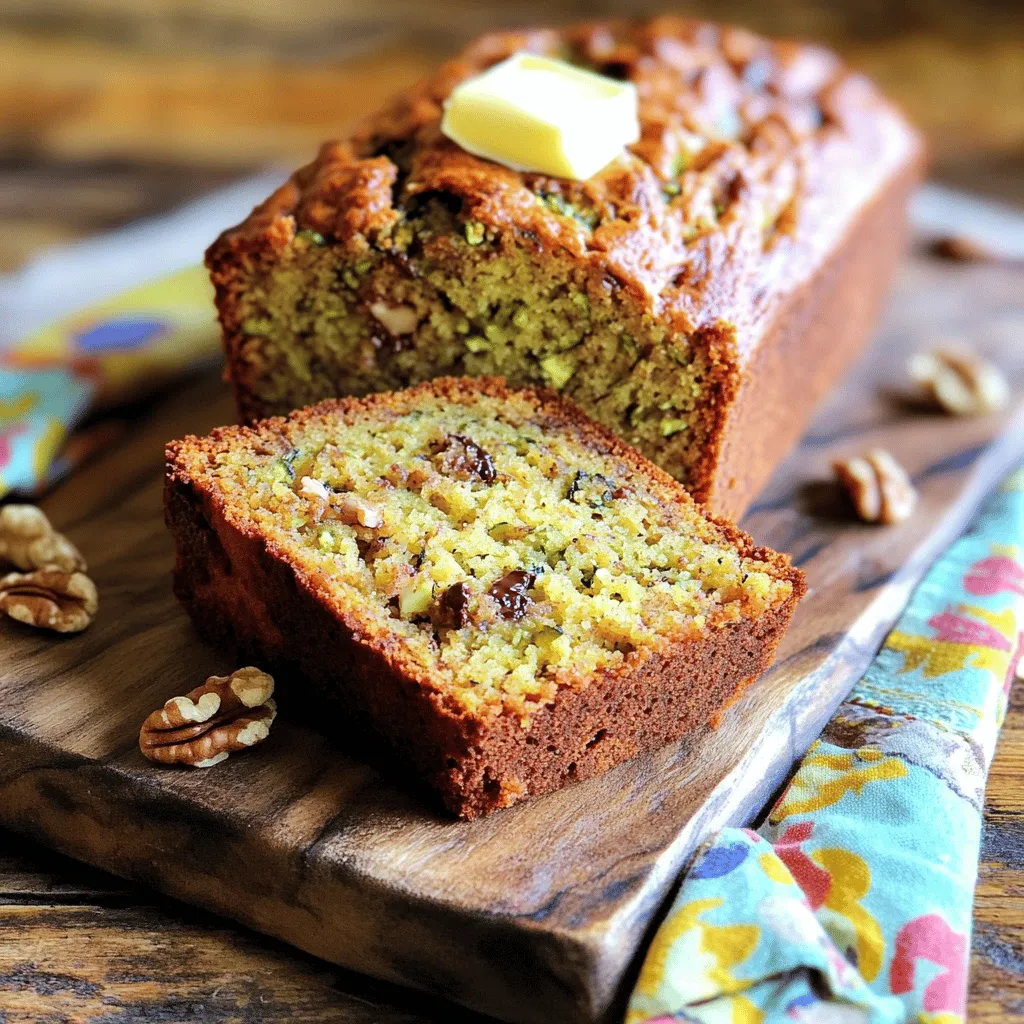
Zucchini Banana Bread Flavorful and Moist Recipe
Do you love warm, fresh bread that bursts with flavor? You’re in the right spot! This Zucchini Banana Bread recipe Read Full Recipe -
Fig Cake with Almond and Honey Delight Recipe
Are you ready to indulge in a delightful treat? My Fig Cake with Almond and Honey recipe combines rich flavors Read Full Recipe


hey,
i’m !
I’m so happy you’re here!
I pour heart and skill into every recipe I create. I know you’ll taste the difference now let’s enjoy this flavorful adventure together.


![To make Blueberry Heaven Cookies, you need the following ingredients: - 1 cup unsalted butter, softened - 1 cup brown sugar, packed - 1/2 cup granulated sugar - 2 large eggs - 1 teaspoon vanilla extract - 2 1/2 cups all-purpose flour - 1 teaspoon baking soda - 1/2 teaspoon salt - 1 cup fresh blueberries (or frozen, but thawed) - 1/2 cup white chocolate chips - Zest of 1 lemon These ingredients work in harmony to create a sweet, soft cookie. The butter gives it richness, while the sugars add sweetness. Eggs bind the dough and provide moisture. The flour and baking soda help the cookies rise and create a nice texture. You can customize your cookies by adding: - 1/2 cup chopped nuts (like walnuts or pecans) - 1/4 cup coconut flakes - 1 teaspoon cinnamon for warmth These extras can change the flavor and texture. Nuts add crunch, coconut brings a tropical twist, and cinnamon can enhance the sweetness. - Blueberries: Fresh blueberries burst with flavor and juice when baked. They provide vitamins and antioxidants. Frozen blueberries work too, but thaw them first. - White Chocolate Chips: They add creaminess and sweetness. You can swap them for dark chocolate chips for a richer taste. - Lemon Zest: This adds a bright, fresh flavor that balances the sweetness. It enhances the overall taste and aroma of the cookies. For the full recipe, refer to the [Full Recipe]. To start, gather your ingredients. You will need butter, sugars, eggs, vanilla, flour, baking soda, salt, blueberries, white chocolate chips, and lemon zest. First, preheat your oven to 350°F (175°C). Line two baking sheets with parchment paper. This step keeps the cookies from sticking. In a large bowl, cream the softened butter with brown and granulated sugar until fluffy. This takes about 2 minutes. Next, add the eggs one at a time. Mix well after each egg. Stir in the vanilla extract for great flavor. In another bowl, whisk together the flour, baking soda, and salt. Gradually add this dry mix to the creamed ingredients. Mix until just combined. Be careful not to overmix. Now, gently fold in the fresh blueberries and white chocolate chips. Use a spatula to avoid crushing the berries. Using a cookie scoop or tablespoon, drop the batter onto the baking sheets. Space them about 2 inches apart. This gives them room to spread. Sprinkle a little lemon zest on top of each cookie for a fresh twist. Bake the cookies for 12-15 minutes. Look for golden edges with soft centers. Remove them from the oven and let them cool on the baking sheet for 5 minutes. This helps them set before moving them. After 5 minutes, transfer the cookies to a wire rack. Let them cool completely. For a fun presentation, stack the cookies in a glass jar. You can also place them on a decorative plate. Garnish with extra blueberries and a mint sprig. This makes them look as good as they taste! Enjoy these Blueberry Heaven Cookies with friends or family. For the full recipe, refer to the recipe section. To make the best Blueberry Heaven Cookies, follow these tips: - Use Softened Butter: Start with butter at room temperature. This helps create a light texture. - Don’t Overmix: Mix until just combined to keep cookies tender. - Chill the Dough: If you have time, chill the dough for 30 minutes. It helps with shaping and keeps cookies from spreading too much. - Use a Cookie Scoop: This ensures even-sized cookies. They’ll bake uniformly and look great. Here are some common mistakes to watch out for: - Using Cold Butter: Cold butter can lead to hard cookies. Always soften it first. - Skipping the Baking Soda: Baking soda is key for a nice rise. Don’t forget it! - Overbaking: Check cookies 2 minutes before the timer goes off. They should be golden at the edges but soft in the center. - Crushing Blueberries: Gently fold in blueberries to keep them whole and juicy. Want to take your cookies to the next level? Try these ideas: - Citrus Zest: Add more lemon zest for a brighter flavor. Orange zest also works well. - Nuts: Chopped walnuts or pecans add a nice crunch. - Spices: A pinch of cinnamon can add warmth and depth. - Dried Fruit: Replace some blueberries with dried cranberries for a different twist. For a full recipe, check the [Full Recipe]. {{image_2}} If you don't have blueberries, you can swap them out. Raspberries and chopped strawberries work well. You can also use chopped apples for a different flavor. Each fruit will give a unique twist to your cookies. You can mix in fun ingredients to change the taste. Here are some ideas: - 1/2 cup chopped walnuts or pecans for crunch - 1/2 cup dried cranberries or cherries for sweetness - 1/2 cup shredded coconut for a tropical feel Try different combinations to discover your favorite mix! You can easily make these cookies gluten-free. Use a 1:1 gluten-free flour blend instead of all-purpose flour. For vegan cookies, replace the eggs with flaxseed meal or applesauce. Also, use vegan butter and dairy-free chocolate chips. These changes will keep the cookies delicious and safe for everyone. For the full recipe, check out the Blueberry Heaven Cookies section. To keep your Blueberry Heaven Cookies fresh, store them in an airtight container. Place parchment paper between layers of cookies to prevent sticking. Keep the container at room temperature for up to five days. For added softness, you can include a slice of bread in the container. The bread will help retain moisture. You can freeze Blueberry Heaven Cookies for later enjoyment. First, let the cookies cool completely. Then, place them in a single layer on a baking sheet. Freeze for about an hour. Once frozen, transfer them to a freezer-safe bag or container. Label the bag with the date. These cookies can last up to three months in the freezer. When ready to eat, just thaw at room temperature. Blueberry Heaven Cookies stay tasty for about five days at room temperature. If you want to enjoy them warm, you can reheat them. Place a cookie in the microwave for about 10-15 seconds. This will make it soft and warm again. You can also use an oven. Preheat it to 300°F and heat the cookies for about five minutes. Enjoy your warm treats! To keep your cookies fresh, store them in an airtight container. Place parchment paper between layers to avoid sticking. They stay good for about a week at room temperature. For longer storage, put them in the fridge to last up to two weeks. Yes, you can use frozen blueberries for Blueberry Heaven Cookies. Just make sure to thaw and drain them first. This helps keep the dough from getting too wet. Frozen blueberries may be softer, so handle them gently to avoid smashing them. You can make Blueberry Heaven Cookies healthier by swapping some ingredients. Use whole wheat flour for added fiber. Replace half the butter with applesauce to cut fat. You can also reduce sugar by a quarter and still enjoy sweet cookies. Adding nuts can boost protein too. Pre-made Blueberry Heaven Cookies are not common, but you may find similar ones in local bakeries. Large grocery stores sometimes carry gourmet cookies. You can also check online for bakeries that ship cookies. However, making them at home is a fun and tasty way to enjoy them! For the full recipe, check out the recipe section above. You now have all you need to make Blueberry Heaven Cookies. We covered the ingredients, step-by-step instructions, and baking tips. You can even try different variations to suit your taste. Remember, the key is to avoid common mistakes and enhance flavors. When stored properly, these cookies will stay fresh and tasty. They can also be frozen for later! Enjoy making and sharing these delicious treats. Happy baking!](https://foodishtalk.com/wp-content/uploads/2025/07/df761a7e-65c5-4d0f-a070-a35edd335824-300x300.webp)
![- 8 oz fettuccine pasta - 1 lb shrimp, peeled and deveined - 2 tablespoons Cajun seasoning - 2 tablespoons olive oil - 1 small onion, finely chopped - 3 cloves garlic, minced - 1 cup heavy cream - 1 cup cherry tomatoes, halved - 1/2 cup grated Parmesan cheese - 1/4 cup chopped fresh parsley - Salt and pepper to taste - Large pot for boiling pasta - Skillet for cooking sauce and shrimp - Mixing bowls - Measuring cups and spoons To make Creamy Cajun Shrimp Pasta, you need simple yet bold ingredients. The fettuccine pasta gives a nice base, while the shrimp adds protein. Cajun seasoning brings the heat and flavor. Olive oil is perfect for cooking your shrimp. You should also gather some fresh veggies. The onion and garlic will create a great aroma. Heavy cream makes your sauce rich and smooth. Cherry tomatoes add a pop of color and sweetness. Parmesan cheese ties everything together with its salty flavor. Fresh parsley will add a nice touch at the end. You will need a large pot to boil your pasta. A skillet is key for cooking the sauce and shrimp. Mixing bowls help when preparing ingredients. Make sure to have measuring cups and spoons ready to get the right amounts. For the full recipe, check out the [Full Recipe]. To start, boil your fettuccine pasta in a large pot of salted water. Follow the package instructions to cook it until it's al dente. This means it should be tender but still have a slight bite. After draining the pasta, remember to save about 1/2 cup of the cooking water. This water is starchy and will help make your sauce creamy. Next, take your shrimp and toss it in a bowl with Cajun seasoning. Make sure every shrimp is well-coated. This gives them a nice kick. Heat olive oil in a large skillet over medium heat. Once hot, add the shrimp and cook for about 2-3 minutes on each side. They should turn pink and be fully cooked. Remove them from the skillet and set them aside. In the same skillet, add the chopped onion. Sauté it until it becomes soft and clear, about 3-4 minutes. Then, add minced garlic and cook for another minute. Pour in the heavy cream and let it simmer gently. Add halved cherry tomatoes and cook for about 2-3 minutes until they soften. Now, mix in the grated Parmesan cheese. Stir it until it melts and blends well. If the sauce is too thick, add some of that reserved pasta water to reach your desired creaminess. Finally, return the cooked shrimp and fettuccine to the skillet, tossing everything together. Adjust the flavor with salt and pepper as needed. For the full recipe, refer to the [Full Recipe]. To avoid overcooking the shrimp, watch the color. Cook them until they turn pink, about 2-3 minutes per side. If they cook too long, they will become rubbery. For the perfect creamy consistency, add the cream slowly. Stir often and adjust with reserved pasta water if it gets too thick. You can boost the flavor with extra spices. Consider adding smoked paprika or red pepper flakes for heat. Fresh herbs like thyme or basil can also elevate the dish. When seasoning, taste as you go. This helps balance the flavors and prevent over-seasoning. Serve the creamy pasta in shallow bowls for a lovely look. Garnish with fresh parsley and a sprinkle of Parmesan cheese. Adding cherry tomato halves on top will brighten the dish. These simple touches make your meal more inviting and fun to eat. Enjoy every bite! {{image_2}} You can switch shrimp for other proteins. Chicken works well and adds a nice flavor. Just cook it until golden brown. Sausage is another tasty choice. It gives a different kick and pairs well with the sauce. For a vegetarian option, use mushrooms or tofu. Mushrooms add a nice umami flavor. Tofu soaks up the sauce, making each bite tasty. Both options keep the dish hearty and satisfying. Feel free to swap fettuccine for other pasta types. Penne or linguine can work just as well. Choose a pasta that you love. Whole-grain or gluten-free pasta is also an option for health-conscious cooks. If you want a lighter dish, try low-fat cream. You can use half-and-half or even a plant-based milk. This keeps the dish creamy while cutting some fat. Cajun seasoning is key to this dish's flavor. If you like more heat, add extra seasoning or red pepper flakes. Just a little can make a big difference. If you prefer a milder flavor, reduce the amount of Cajun seasoning. You can also use smoked paprika for a subtle smokiness without too much heat. This way, you can enjoy the dish at your own spice level. For the full recipe, check out the Creamy Cajun Shrimp Pasta details above. To keep your creamy Cajun shrimp pasta fresh, store it right. First, let it cool down to room temperature. Then, pack it in airtight containers. Glass or plastic containers work well. Make sure to seal them tightly to prevent air from getting in. You can keep leftovers in the fridge for up to three days. When you're ready to enjoy leftovers, reheat them gently. The best method is on the stovetop. Add a splash of water or some extra cream to the pan. This helps restore the creamy texture. Heat it over low to medium heat, stirring often. Avoid high heat to keep the pasta from drying out. If you want to freeze your pasta, do it right away. Place the cooled pasta in a freezer-safe container. Leave some space at the top, as it will expand when frozen. You can freeze it for up to three months. To thaw, move it to the fridge overnight. For reheating, use the stovetop method again. Add a little liquid to help regain that creamy goodness. Enjoy your Creamy Cajun Shrimp Pasta any time! Creamy Cajun Shrimp Pasta can last up to three days in the fridge. Store it in an airtight container. Before eating, check for signs of spoilage. If it smells sour or has a strange texture, it's best to toss it. Yes, you can prep parts of this recipe ahead. Cook the pasta and shrimp in advance, then store them separately. The sauce can also be made and stored in the fridge. Just warm everything up before serving. This makes dinner easy on busy nights. Pair this dish with a light salad or garlic bread. A fresh green salad with a simple vinaigrette works well. You can also serve it with a glass of chilled white wine, like Sauvignon Blanc. Absolutely! This recipe is great for meal prep. Portion it into containers for easy meals. You can also freeze individual servings. Just reheat in the microwave or on the stove, adding a splash of cream if needed. For the full recipe, check out our detailed instructions! This blog post covered creamy Cajun shrimp pasta, from ingredients to storage tips. You learned how to cook perfectly seasoned shrimp and create a smooth sauce. We shared useful tips for flavor and presentation, plus tasty variations for dietary needs. Finally, you now know how to store and reheat leftovers. Enjoy making this dish, and remember, cooking can be fun and creative!](https://foodishtalk.com/wp-content/uploads/2025/05/f4e3a5cc-4090-4fa7-bb11-b0ae6a84493b-300x300.webp)
Peach Lemonade Refreshing Summer Drink Recipe
Looking for a cool and refreshing summer drink? Peach lemonade is just what you need! This simple recipe blends ripe peaches and fresh lemons…