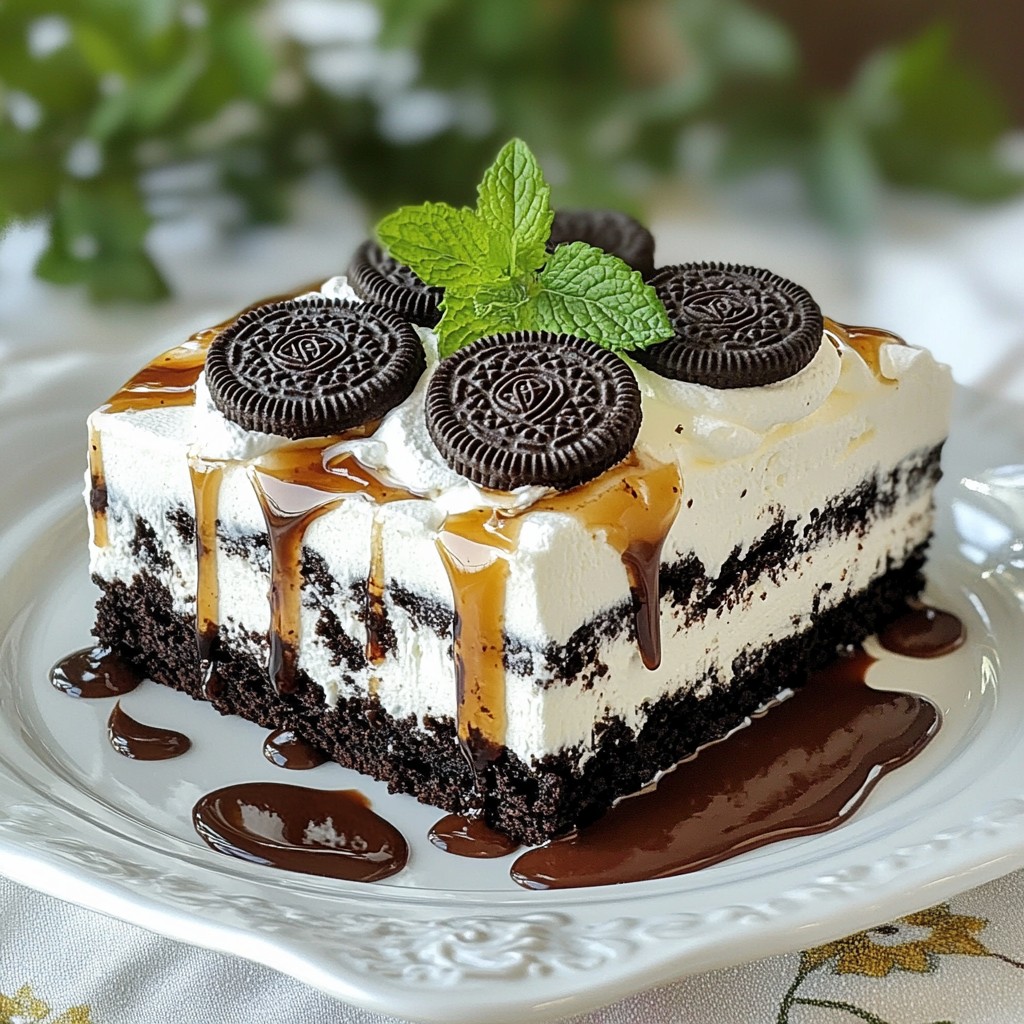
If you’re in the mood for a sweet treat, you’ll love this Easy Oreo Icebox Cake. With just a few simple ingredients, you can whip up a delightful no-bake dessert that’s perfect for any occasion. I’ll guide you through each step, from making the creamy filling to layering those iconic Oreo cookies. Get ready to impress your friends and family without turning on the oven! Let's dive in!
Why I Love This Recipe
- Deliciously Decadent: This cake is the ultimate indulgence for Oreo lovers—rich, creamy, and utterly satisfying.
- Simple Preparation: No baking required! Just layer the ingredients and let the refrigerator do the work.
- Perfect for Any Occasion: This icebox cake is a crowd-pleaser, making it ideal for parties, picnics, or a cozy family dessert.
- Customizable: Add your own twist with toppings like fresh fruit or different flavored syrups to make it your own.
Ingredients
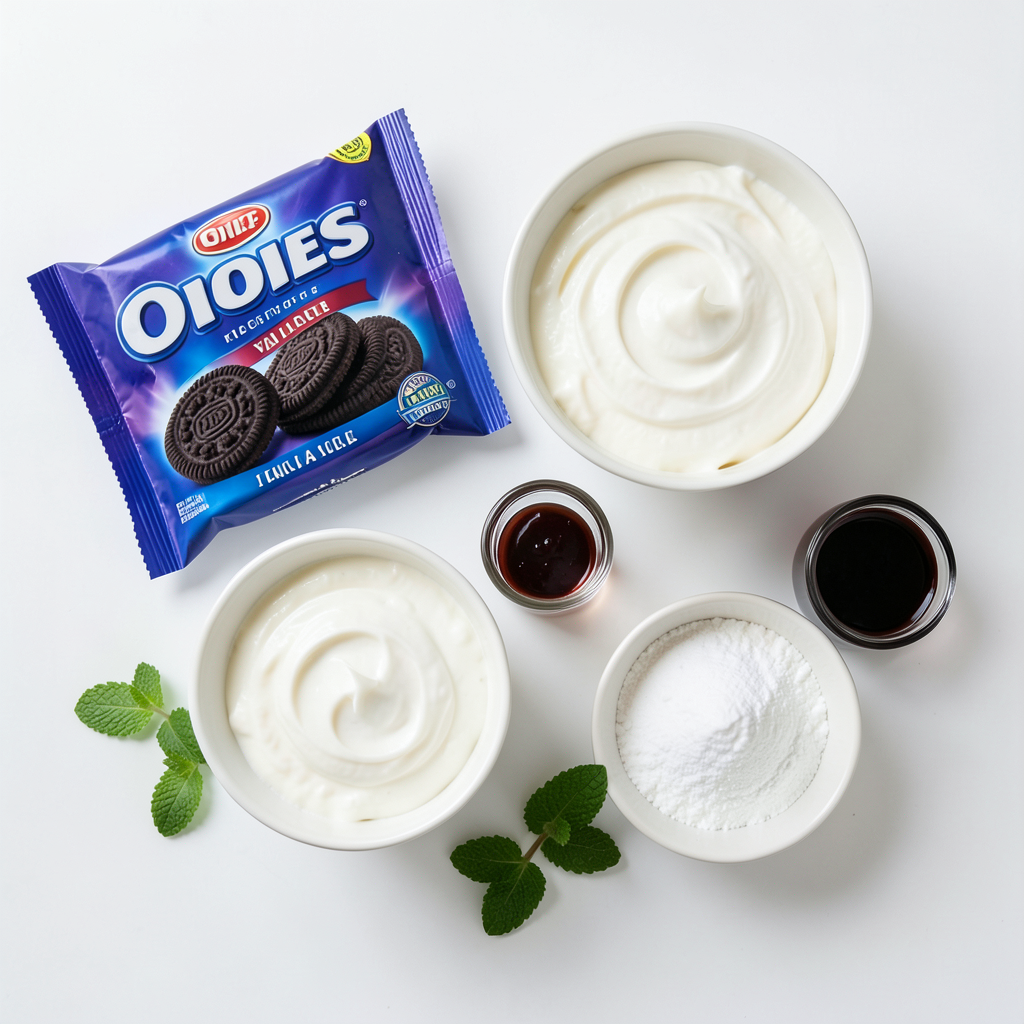
To make the Oreo Icebox Cake, you need these simple ingredients:
- 2 packages of Oreo cookies
- 4 cups heavy whipping cream
- 1 cup powdered sugar
- 1 teaspoon vanilla extract
- Optional: 1/2 cup chocolate syrup for drizzling
- Optional: Fresh mint leaves for garnish
These ingredients make a rich and creamy dessert that is easy to prepare. The Oreo cookies give it a great crunch, while the whipped cream adds a light and airy texture. You can add chocolate syrup for extra sweetness and mint leaves for a nice touch. Each ingredient plays a key role in making this dessert delightful and fun.
Step-by-Step Instructions
Preparing the Whipped Cream
- Combining Ingredients
Start by taking a large bowl. Add 4 cups of heavy whipping cream, 1 cup of powdered sugar, and 1 teaspoon of vanilla extract. Mix these together well. This blend gives the cake its sweet and rich flavor.
- Whipping to Soft Peaks
Use an electric mixer on medium speed. Whip the mixture until it forms soft peaks. This means the cream should hold its shape but still be smooth and creamy. Be careful not to overwhip. If you do, it will become grainy.
Assembling the Cake
- Layering Oreo Cookies
Grab an 8x8 inch square dish. Place a single layer of Oreo cookies at the bottom. Fit them closely together. This creates a nice base for the cake.
- Spreading Whipped Cream
Take about one-third of the whipped cream. Spread it evenly over the layer of cookies. Make sure to cover all the cookies well. This will help the cookies soften as they chill.
Final Assembly and Refrigeration
- Layering Process Repetition
Repeat the layering process. Add another layer of Oreo cookies, then another layer of whipped cream. Keep going until you fill the dish. End with a layer of whipped cream on top.
- Covering and Refrigerating
Cover the cake with plastic wrap. Place it in the fridge for at least 4 hours, or even overnight. This waiting time helps the cookies soften and blend well with the cream.
Tips & Tricks
Tips for Perfect Whipped Cream
- Avoiding Overwhipping: Whipped cream is great until it becomes butter. Whip it just until soft peaks form. If you overwhip, it will turn grainy. Stop as soon as you see those soft peaks.
- Achieving the Right Texture: You want your whipped cream to be light and fluffy. Mix on medium speed to keep it smooth. This texture helps it spread better on the cookies.
Assembly Tips
- Ensuring Cookie Layers Fit: Place the Oreo cookies close together in your dish. This helps the layers stick and gives a nice look. You can even break some cookies to fit any gaps.
- Smoothing Whipped Cream Evenly: Use a spatula to spread the whipped cream. Start from the center and move outwards. This way, you get an even layer on each cookie layer.
Serving Suggestions
- Best Practices for Serving: Use a sharp knife to slice the cake. This helps keep the layers intact. Serve the pieces right away for the best taste.
- Presentation Ideas: Drizzle chocolate syrup over the top for a rich touch. Add fresh mint leaves for color and a fresh taste. Use fun dessert plates to make it special!
Pro Tips
- Choose the Right Cookies: While regular Oreos work perfectly, consider using flavored Oreos like mint or peanut butter for a unique twist.
- Whip to Perfection: To ensure your whipped cream holds its shape, make sure your mixing bowl and beaters are cold before you start.
- Layering Technique: For a more visually appealing cake, alternate the direction of the Oreo cookies in each layer to create a pattern.
- Make Ahead: This cake tastes even better the next day as the flavors meld together, so consider making it a day in advance!
Variations
Flavor Variations
You can change the flavor of your icebox cake easily. Try using different types of Oreo cookies. Mint Oreos add a fresh taste. Peanut Butter Oreos bring a rich, nutty flavor. You could even mix flavors for a fun twist.
Adding flavored extracts can also change the cake's taste. A few drops of almond or coconut extract can make a big difference. This small change can elevate the cake to a new level.
Additional Toppings
Toppings can make your cake look and taste even better. You can sprinkle crushed Oreos on top for extra crunch. Chocolate shavings also add a nice touch. They look great and taste amazing.
If you want more sweetness, try drizzling caramel sauce over the top. It adds a rich flavor that pairs well with the creamy whipped cream. You can also use chocolate syrup for a classic touch, as mentioned in the recipe.
Dairy-Free or Vegan Options
If you want a dairy-free or vegan cake, there are simple swaps. Use coconut cream instead of heavy whipping cream. This way, you still get a creamy texture. Just chill the coconut cream before whipping it for the best results.
For a vegan version, choose vegan Oreo cookies. Many stores sell these. This way, everyone can enjoy a slice of this delicious treat.
Storage Info
Proper Storage Methods
To keep your Oreo icebox cake fresh, store it in the fridge. Place it in an airtight container. This helps prevent the cake from drying out and absorbing other odors. If you don’t have a container, cover it tightly with plastic wrap. Make sure it covers the whole dish, sealing out air.
Freezing the Cake
You can freeze the cake if you want to save some for later. To freeze, wrap the cake tightly with plastic wrap. Then, put it in a freezer-safe container. This keeps it safe from freezer burn. When you're ready to enjoy it, take it out of the freezer. Let it thaw in the fridge for several hours, or overnight. This way, the cream stays nice and smooth.
Shelf Life of the Cake
This cake tastes best within three days. After that, the cookies may get too soft. Look for signs like a change in smell or texture. If it smells off or feels slimy, it’s time to toss it. Keeping it stored properly helps it stay fresh longer.
FAQs
Can I make this cake ahead of time?
Yes, you can make this cake a day or two ahead of time. Just keep it in the fridge. The flavors will blend well, and the cookies will soften more. This cake is best served cold, so making it early helps.
What if I don't have heavy whipping cream?
If you don't have heavy whipping cream, you can use milk and butter. Mix 3/4 cup of milk with 1/4 cup of melted butter. Another option is to use canned coconut milk. Just chill it first, then whip it.
How long should I refrigerate the cake?
You should refrigerate the cake for at least four hours. However, letting it chill overnight is better. This gives the cookies time to soften. The longer it sits, the more delicious it becomes!
This Oreo cake is easy to make and fun to eat. We covered how to whip cream, layer cookies, and refrigerate. I shared tips for the best texture and serving ideas. You can also try different flavors or make it vegan. Remember to store it right for the best taste. Enjoy making your cake, and share it with friends. It’s a treat everyone loves!