Skip to content
DisclaimerTerms Of UseGDPR PolicyCookie Policy

Foodish Talk

  • Home
  • Drinks
  • Appetizers
  • Dinner
  • Dessert
  • About
  • Contact
  • Privacy Policy
DisclaimerTerms Of UseGDPR PolicyCookie Policy

NO-ING-IMG

- 2 large apples, peeled, cored, and diced - 1 cup brown sugar - 1 teaspoon cinnamon - 2 tablespoons lemon juice - 1 cup caramel sauce (store-bought or homemade) - 1 package refrigerated pie crusts (or homemade) - 1 egg (for egg wash) - 1 tablespoon milk - 1 tablespoon granulated sugar (for topping) You can change the flavor of your hand pies by adding different spices. Try nutmeg or ginger for warmth. You can also mix in nuts like pecans or walnuts for crunch. For a twist, add dried cranberries or raisins to the apple mix. When choosing apples, look for ones that feel firm and heavy. The skin should be smooth with no bruises. Popular varieties for pies include Granny Smith, Honeycrisp, or Fuji. Each brings a unique flavor and texture to your filling. If you can, smell the apple. A sweet aroma means it's fresh and ready to use. To start, grab a medium bowl. Add 2 large apples that you have peeled, cored, and diced. Then, mix in 1 cup of brown sugar, 1 teaspoon of cinnamon, and 2 tablespoons of lemon juice. Stir until the apples are fully coated. Let this mixture sit for about 10 minutes. This time allows the flavors to mix together nicely. Next, heat a saucepan over medium heat. Add the apple mixture you prepared earlier. Cook it for about 5 to 7 minutes. You want the apples to soften a bit, but they shouldn't turn mushy. Once done, take the pan off the heat and let the apples cool for a while. Now, preheat your oven to 400°F (200°C). Roll out the refrigerated pie crusts on a floured surface. Use a cookie cutter or glass to cut them into 4-inch circles. You should get about 8 to 10 circles. Take one circle and place about a tablespoon of the apple filling in the middle. Drizzle some caramel sauce over the apples. Fold the dough over the filling to form a half-moon shape. Press the edges together firmly to seal them. Use a fork to crimp the edges for a nice finish. In a small bowl, whisk 1 egg with 1 tablespoon of milk for an egg wash. Brush this wash on the tops of each pie, then sprinkle them with 1 tablespoon of granulated sugar. Place the hand pies on a parchment-lined baking sheet. Bake them for 20 to 25 minutes, until they turn golden brown and flaky. Let them cool slightly before you enjoy them! To make a flaky crust, keep your ingredients cold. Use cold butter and ice water. When mixing, don’t overwork the dough. This keeps it light and airy. Roll the dough gently on a floured surface. Aim for a thickness of about 1/8 inch. Too thick and it won't bake well. Too thin and it tears easily. After cutting, chill the dough circles for 10 minutes before filling. This step helps the crust hold its shape. Store leftover hand pies in an airtight container. Keep them in the fridge for up to three days. For longer storage, freeze them. Wrap each pie in plastic wrap, then place in a freezer bag. These can last up to three months. When ready to enjoy, just reheat in the oven. Preheat to 350°F (175°C) and bake for about 10-15 minutes. This warms them through and keeps the crust crispy. Spices can elevate your hand pies. Besides cinnamon, try nutmeg or allspice for warmth. A touch of vanilla extract in the filling adds depth. You can also mix in some ginger for a spicy kick. If you’re feeling adventurous, add a teaspoon of almond extract. This gives a unique flavor twist. Just remember to keep the balance. You want the apple and caramel flavors to shine through. {{image_2}} You can switch up the flavors in your hand pies. Try using pears, peaches, or berries. For a fun twist, mix fruits! Combine apples with cranberries for a tart bite. Each fruit gives a unique taste and texture. If you follow a vegan diet, use plant-based butter and an egg substitute. You can use flaxseed meal mixed with water. For gluten-free hand pies, choose gluten-free pie crusts. Many brands offer tasty options. These simple swaps let everyone enjoy this treat. Toppings can make your hand pies special. Instead of sugar, sprinkle cinnamon or nutmeg on top before baking. For a glaze, mix powdered sugar with a bit of milk. Drizzle this over warm pies for a sweet finish. You can even add nuts or coconut for crunch! To store leftover hand pies, place them in an airtight container. Make sure they cool completely first. This keeps them fresh for about 2-3 days. If you want to keep them longer, refrigeration is a good choice. Just remember to reheat them before serving. You can freeze hand pies for later use. First, let them cool completely. Then, wrap each pie in plastic wrap. After that, place them in a freezer-safe bag or container. They can last up to 3 months in the freezer. When you’re ready to eat them, simply take them out to thaw. To reheat hand pies, preheat your oven to 350°F (175°C). Place the pies on a baking sheet. Bake for about 10-15 minutes, or until heated through. This method keeps the crust crispy. If you're in a hurry, you can use a microwave. Just be aware that it may make the crust soft. Yes, you can make these hand pies ahead of time. Prepare the filling and dough, then assemble the pies. Before baking, wrap them well and chill in the fridge for up to 24 hours. You can also freeze them for longer storage. Just remember to bake them from frozen for a longer time. If you don’t have caramel sauce, you can use dulce de leche. This will add a rich flavor, similar to caramel. You can also try chocolate sauce for a different twist. For a healthier option, maple syrup works well too. Each choice will give your hand pies a unique taste. To keep your hand pies crisp, use a few tricks. First, make sure the apple filling is not too wet. Cook the apples until they soften but stay firm. Second, brush the crust with egg wash. This adds a barrier against moisture. Lastly, bake the pies until they are golden brown. This will ensure a flaky and delicious crust. You learned how to make delicious hand pies from scratch. We covered ingredients, steps, and tips for success. Remember, picking fresh apples is key to great flavor. Flaky crusts come from technique, while fun variations keep things interesting. As you experiment, don't hesitate to customize your pies. Store leftovers properly to enjoy later. With this knowledge, you can create tasty treats for any occasion. Dive into this fun cooking adventure and enjoy every bite!

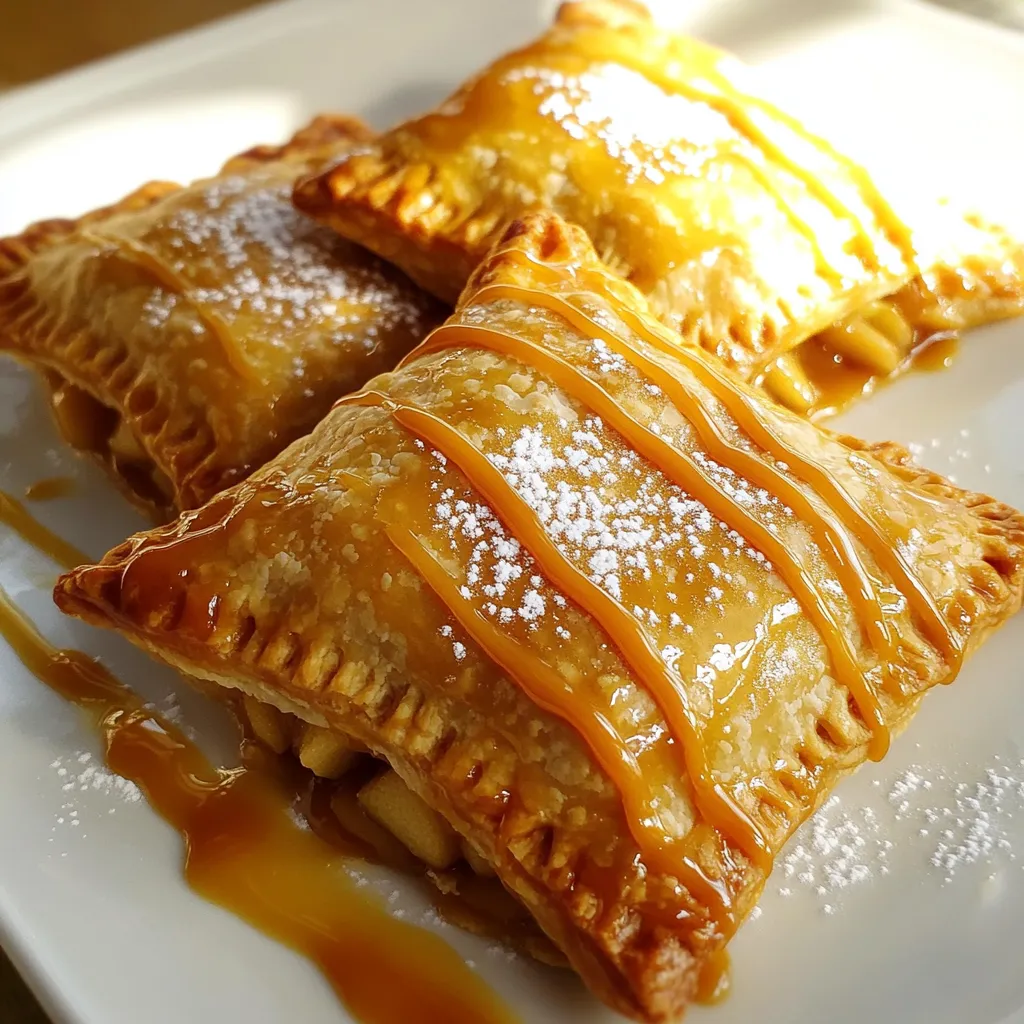
Caramel Apple Hand Pies Flavorful Dessert Delight

Caramel Apple Hand Pies are a tasty treat that’s easy to make and fun to eat. These sweet, flaky desserts

- 2 cups all-purpose flour - 1 cup granulated sugar - 1 tablespoon baking powder - ½ teaspoon baking soda - ½ teaspoon salt - 1 large egg - 1 cup buttermilk - ⅓ cup vegetable oil - 1 teaspoon vanilla extract - 1 ½ cups fresh blueberries - Streusel topping ingredients: - ½ cup all-purpose flour - ⅓ cup brown sugar, packed - ¼ cup unsalted butter, softened - ½ teaspoon cinnamon The right ingredients make a huge difference in flavor and texture. I love using fresh blueberries. They burst in your mouth as you bite into the muffin. For the dry mix, I stick with all-purpose flour. It gives the muffins a nice, soft crumb. Granulated sugar adds sweetness, while baking powder and baking soda help the muffins rise. A pinch of salt balances everything out. When it comes to wet ingredients, I use buttermilk for its tangy flavor. It keeps the muffins moist and fluffy. Mixing in vegetable oil adds richness, and vanilla extract makes everything taste better. The streusel topping is what makes these muffins special. It's easy to make and adds a sweet crunch. The mix of flour, brown sugar, butter, and cinnamon gives a lovely flavor. Gather these ingredients, and you’re on your way to bakery-style muffins that will impress everyone! Set your oven to 375°F (190°C). This step is key for even baking. Line a 12-cup muffin pan with paper liners or grease it lightly. The liners help with easy removal. In a large bowl, whisk together: - 2 cups all-purpose flour - 1 cup granulated sugar - 1 tablespoon baking powder - ½ teaspoon baking soda - ½ teaspoon salt Mix these dry ingredients well. This helps the flavors blend together. In another bowl, whisk one large egg. Then, add: - 1 cup buttermilk - ⅓ cup vegetable oil - 1 teaspoon vanilla extract Mix until the batter is smooth. This gives the muffins a nice texture. Pour the wet mixture into the dry ingredients. Gently fold them together. Be careful not to overmix. The batter should still be a little lumpy. This keeps the muffins light and fluffy. Now, gently fold in 1 ½ cups of fresh blueberries. Do this carefully to avoid breaking the berries. You want them whole for juicy bites. In a small bowl, mix together: - ½ cup all-purpose flour - ⅓ cup brown sugar, packed - ¼ cup unsalted butter, softened - ½ teaspoon cinnamon Use a fork or your fingers to blend until crumbly. This topping adds a sweet crunch. Divide the muffin batter evenly among the prepared muffin cups. Fill each cup about ¾ full. Sprinkle the streusel topping generously over each muffin. Bake in the oven for 18-20 minutes. A toothpick should come out clean when they are done. Let the muffins cool in the pan for 5 minutes. Then, transfer them to a wire rack. This helps them cool evenly. For serving, arrange them on a platter with fresh blueberries for a pretty display. Enjoy warm! To make bakery-style muffins, focus on a few key steps. First, mix the dry and wet ingredients separately. This keeps the baking powder active. Second, do not overmix the batter. A few lumps are okay. This helps the muffins rise better. Lastly, fill each muffin cup about three-quarters full. This gives them the nice dome shape we love. One common mistake is overmixing. This can lead to dense muffins. Mix just until combined and avoid beating the batter. Another mistake is not using fresh ingredients. Check your baking powder and baking soda for freshness. Old ingredients can ruin your muffins. Lastly, do not skip the streusel topping. It adds flavor and a lovely crunch. If you're looking for substitutions, here are some ideas. Use whole wheat flour for a healthier option. You can also swap buttermilk for regular milk or a plant-based milk. For a dairy-free option, try coconut oil instead of vegetable oil. If you have nut allergies, skip the nuts in the topping. These changes will still yield tasty muffins. {{image_2}} You can swap blueberries for many other fruits. Raspberries, chopped strawberries, or diced peaches work well. Each fruit adds a unique taste. Try blackberries for a bold flavor. Apples or pears give a lovely sweetness. This lets you enjoy muffins year-round. Want to spice things up? Add a teaspoon of cinnamon or nutmeg to your batter. A splash of almond or lemon extract brightens the taste. You can even mix in mini chocolate chips for a sweet twist. These small changes create exciting flavors in every bite. If you want to make your muffins healthier, consider these tips. Replace some sugar with applesauce or mashed bananas. Use whole wheat flour instead of all-purpose for added fiber. You can also use Greek yogurt instead of buttermilk for less fat. These swaps help keep the muffins light and tasty. To keep your blueberry streusel muffins fresh for a few days, follow these tips: - Let the muffins cool completely. - Store them in an airtight container. - Keep them at room temperature. - They will stay fresh for up to three days. These steps help keep the muffins soft and tasty. If you notice any moisture, place a paper towel in the container. This will absorb excess moisture and keep your muffins from getting soggy. If you want to save muffins for later, freezing is a great option. Here are some tips: - Allow the muffins to cool completely. - Wrap each muffin tightly in plastic wrap. - Place the wrapped muffins in a freezer-safe bag. - Label the bag with the date for easy tracking. You can freeze the muffins for up to three months. When you're ready to eat one, just remove it from the freezer and let it thaw at room temperature. To enjoy your muffins warm, reheating is key. Here are some methods: - For a quick fix, use the microwave. Heat each muffin for 10-15 seconds. - For a crispier texture, use the oven. Preheat to 350°F (175°C) and place muffins on a baking sheet for 5-10 minutes. These methods keep the muffins tasting fresh and delicious. Enjoy your blueberry streusel muffins warm for the best flavor! Yes, you can use frozen blueberries. They work well in this recipe. Here are some best practices: - Do not thaw the blueberries before adding them to the batter. This keeps them from breaking. - Use the same amount as fresh blueberries, about 1 ½ cups. - Fold them in gently to avoid color bleeding. Look for these signs of perfectly baked muffins: - The tops should be golden brown. - A toothpick inserted in the center should come out clean or with a few crumbs. - The muffins should spring back when lightly touched. Yes, you can prep the batter ahead of time. Here’s how: - Mix the dry ingredients in one bowl and wet ingredients in another. - Store them separately in the fridge for up to 24 hours. - When ready, combine the mixtures and fold in the blueberries. These muffins pair well with several options: - Serve with a dollop of yogurt for creaminess. - Add a side of fresh fruit for a colorful plate. - Pair with coffee or tea for a cozy morning treat. This post covered everything you need for perfect blueberry muffins. We discussed essential dry and wet ingredients, the right techniques for mixing, and tips for a bakery-style finish. Remember, avoid overmixing to keep your muffins fluffy. Try seasonal fruits and healthier options for variety. Store muffins properly to keep them fresh, and remember to reheat gently. With these steps, your blueberry streusel muffins will impress every time.

Blueberry Streusel Muffins Bakery Style Delight

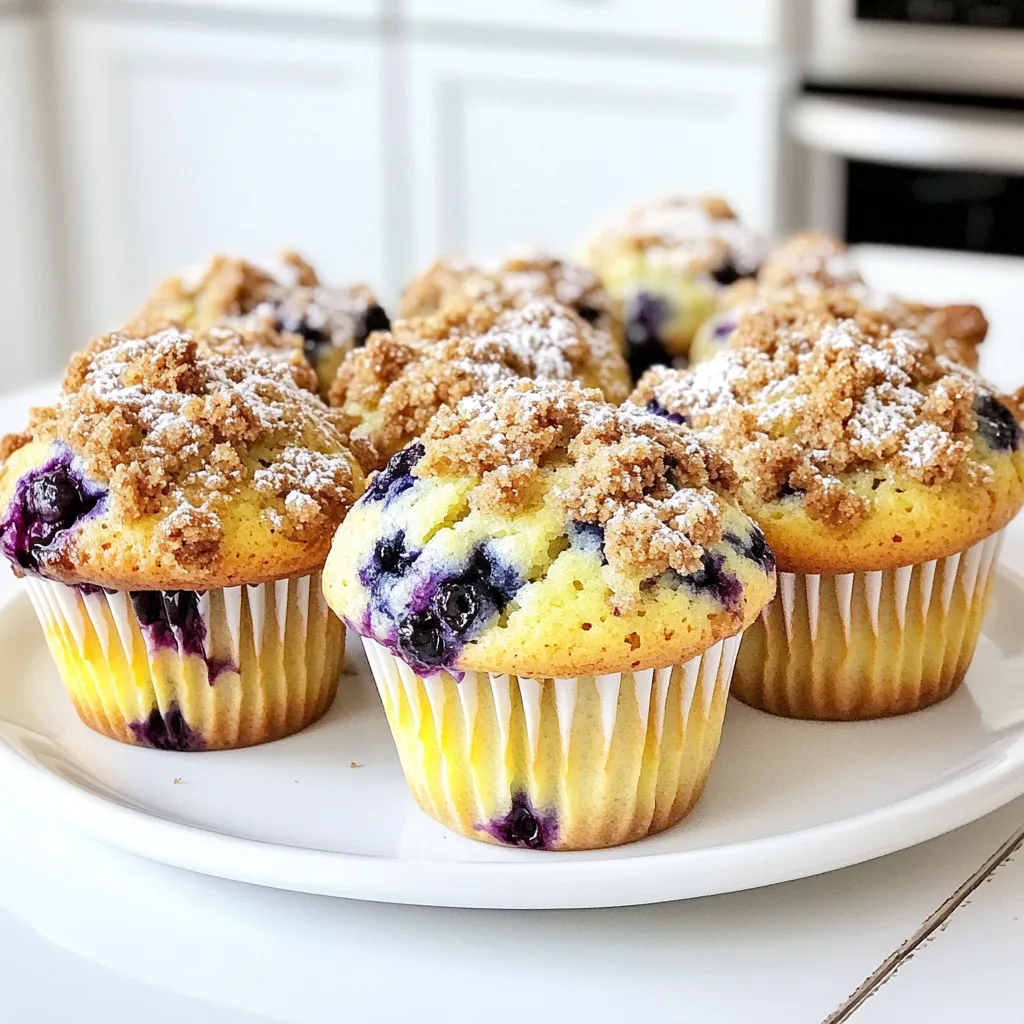
Craving a warm, fresh muffin that tastes just like the ones from your favorite bakery? Look no further! My Blueberry

- 1 cup unsalted butter, melted - 1 cup brown sugar, packed - 1/2 cup granulated sugar - 2 large eggs - 2 teaspoons vanilla extract The main ingredients for Snickerdoodle Blondies create a rich, soft base. I love using unsalted butter because it gives the best flavor. The mix of brown sugar and granulated sugar adds sweetness and depth. Eggs help bind everything together, while vanilla extract brings a warm aroma. - 2 cups all-purpose flour - 1 tablespoon cornstarch - 1 teaspoon baking powder - 1/2 teaspoon baking soda - 1/2 teaspoon salt - 1 tablespoon ground cinnamon For the dry mix, all-purpose flour is key to a chewy texture. Cornstarch makes them soft and fluffy. Baking powder and baking soda help them rise. A touch of salt balances the sweetness, and ground cinnamon gives that classic snickerdoodle flavor. - 1/2 cup white chocolate chips - Cinnamon sugar topping If you want to add a twist, white chocolate chips are a great choice. They melt beautifully and add sweetness. You can also sprinkle cinnamon sugar on top before baking for extra flavor. This topping gives a lovely crunch and enhances that snickerdoodle taste. 1. Preheat your oven to 350°F (175°C). This helps the blondies bake evenly. 2. Grease a 9x13-inch baking pan or line it with parchment paper. This makes for easy removal. 3. In a large bowl, mix together the melted butter, brown sugar, and granulated sugar. Whisk until smooth and creamy. 4. Add the eggs, one by one. Mix well after each egg. Then, stir in the vanilla extract for extra flavor. 1. In a separate bowl, whisk together the flour, cornstarch, baking powder, baking soda, salt, and ground cinnamon. Mixing these well helps distribute the leaveners. 2. Gradually add the dry mix to the wet ingredients. Stir gently until just combined. If you want, fold in white chocolate chips for a sweet twist. 1. Spread the blondie batter evenly in your prepared pan. You want it nice and flat. 2. For a snickerdoodle touch, sprinkle a light dusting of cinnamon sugar on top. Mix 1 tablespoon of sugar with 1 teaspoon of cinnamon for this. 3. Bake in the oven for 20-25 minutes. Check for doneness by inserting a toothpick in the center. It should come out with a few moist crumbs, not wet batter. 4. Let the blondies cool in the pan for about 10 minutes. After that, transfer them to a wire rack to cool completely. Once cool, cut into squares and enjoy! - Using room temperature ingredients: Start with butter and eggs at room temp. This helps mix evenly. Warm butter blends well with sugar, giving a smooth batter. - How to avoid overmixing: Mix just until the flour vanishes. Overmixing makes blondies tough. Stir gently for a soft, chewy treat. - Optimal cooling time: Let blondies cool in the pan for about 10 minutes. Then move them to a wire rack. This makes sure they set well. - Presentation tips with cinnamon sugar and ice cream: Serve blondie squares on a nice plate. Sprinkle with cinnamon sugar for flair. Add a scoop of vanilla ice cream on the side for extra delight. - What to do if blondies are too dry or underbaked: If too dry, check next time for baking time. If underbaked, bake a few more minutes. Use a toothpick to test; it should come out with moist crumbs, not wet batter. {{image_2}} You can change the flavor of your snickerdoodle blondies easily. One fun way is to add nuts. Chopped pecans or walnuts add a nice crunch. You can also mix in chocolate chips for a sweet twist. Dark, milk, or even butterscotch chips work well. Try swapping spices, too. Nutmeg adds warmth and depth. It pairs nicely with cinnamon for a cozy taste. If you need gluten-free blondies, swap the all-purpose flour for a gluten-free blend. Most blends work well in this recipe. You can also make dairy-free blondies. Use coconut oil or a dairy-free butter substitute. For eggs, try flaxseed or applesauce. These options keep the blondies soft and delicious. Snickerdoodle blondies can fit any season. In fall, add pumpkin spice for a warm flavor. This spice mix gives a cozy vibe. For winter, try peppermint. Adding crushed candy canes gives a fun holiday twist. It adds both color and a refreshing crunch. Enjoy these variations and make your blondies unique! Store your blondies at room temperature in an airtight container. They stay fresh for about three days. If you want them to last longer, you can put them in the fridge. Just make sure to wrap them well. This keeps them moist and tasty. To freeze leftovers, let the blondies cool completely. Cut them into squares first. Wrap each square tightly in plastic wrap. Then, place them in a freezer bag. They can last for up to three months in the freezer. When you're ready to eat them, just take a square out and let it thaw at room temperature. You can also microwave them for a few seconds if you want them warm. Snickerdoodle blondies stay fresh for about three days at room temperature. In the fridge, they can last up to a week. If frozen, they will keep their taste and texture for about three months. Always check for any signs of spoilage before eating. Yes, you can use substitutes for both types of sugar. For brown sugar, try coconut sugar or maple sugar. They give a nice flavor and similar texture. For granulated sugar, you can use regular cane sugar or a sugar substitute like erythritol. Each will change the taste slightly, but they work well. If you want a vegan option, you have choices. You can use flaxseed meal mixed with water. Mix 1 tablespoon of flaxseed meal with 3 tablespoons of water. Let it sit for five minutes. Another option is unsweetened applesauce. Use 1/4 cup of applesauce for each egg. This keeps the blondies moist. To check if your blondies are done, look at the edges. They should be light golden brown. The center will look set, not wet. You can also gently press down in the middle. It should spring back slightly. If it does, your blondies are ready! You now have all the tools to make perfect snickerdoodle blondies. From essential ingredients to baking tips, every step helps create that warm, sweet treat. Remember, use room temperature ingredients and avoid overmixing for the best texture. Don't hesitate to get creative with add-ins and seasonal variations. Whether you're storing leftovers or adapting the recipe for dietary needs, these blondies can fit any occasion. Enjoy every bite and share your delicious creations!

Snickerdoodle Blondies Easy Dessert Recipe Delight

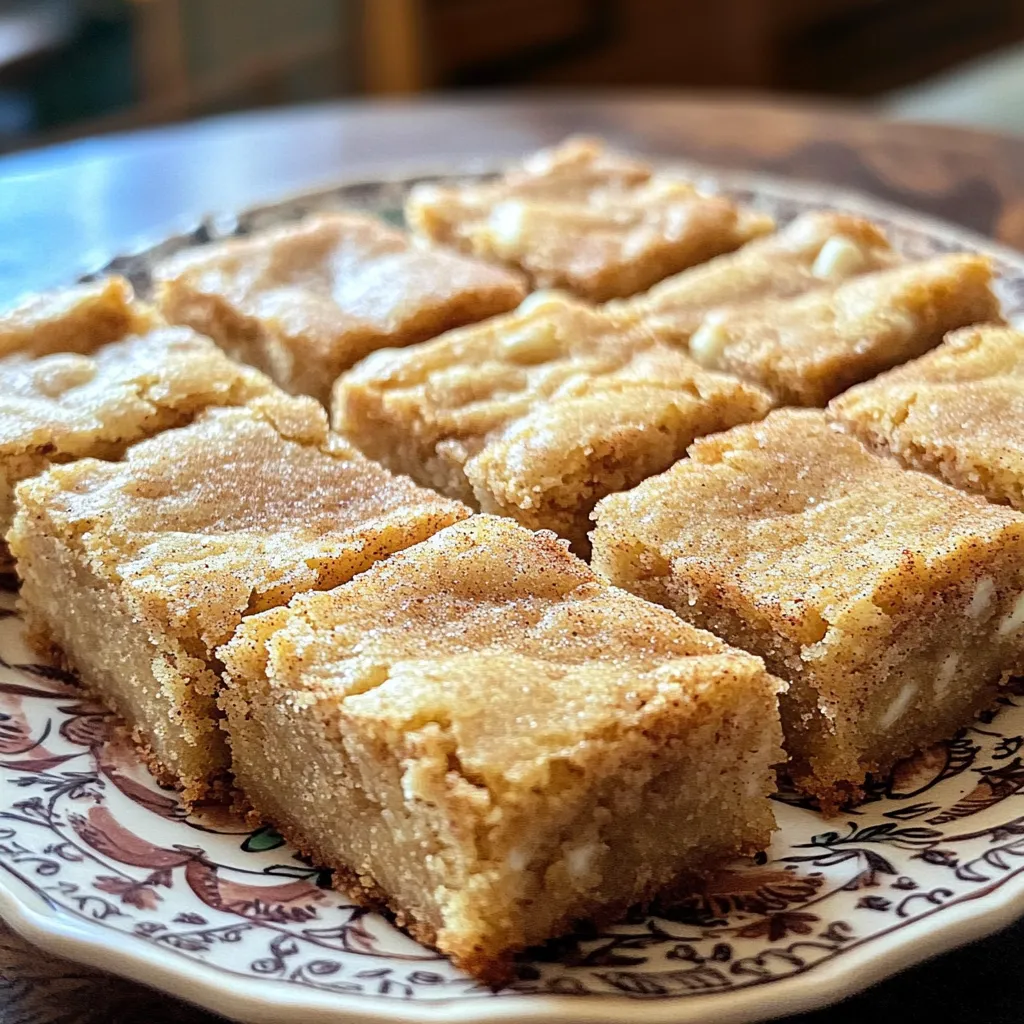
Craving a sweet treat? Snickerdoodle Blondies are the answer! This easy dessert recipe combines warm cinnamon flavors with a gooey,

- 1 pound salmon fillet (skin removed) - 3 tablespoons honey - 3 tablespoons low sodium soy sauce - 2 cloves garlic (minced) - 1 tablespoon fresh ginger (grated) - 1 tablespoon olive oil - Salt and pepper to taste - 1 tablespoon sesame seeds (optional) - Chopped green onions for garnish This recipe starts with fresh salmon. I prefer skinless fillets for easy bites. You need about one pound. Next, grab some honey. It adds a sweet touch. You'll want three tablespoons. Low sodium soy sauce follows. This gives a nice umami flavor. Use three tablespoons here too. You'll also need garlic and ginger. Mince two cloves of garlic and grate one tablespoon of fresh ginger. These ingredients really boost flavor. Olive oil is next; one tablespoon helps with cooking. Don't forget salt and pepper. You can add them to taste. If you want, sprinkle sesame seeds on top. They add a nice crunch. Lastly, chop some green onions for garnish. They add color and freshness. These ingredients come together for a tasty dish you’ll love! First, take a medium bowl. In this bowl, whisk together the following ingredients until smooth: - 3 tablespoons honey - 3 tablespoons low sodium soy sauce - 2 cloves garlic, minced - 1 tablespoon fresh ginger, grated - 1 tablespoon olive oil This mix will give your salmon bites a sweet and savory flavor. Make sure it is well combined. Next, cut a pound of salmon fillet into bite-sized cubes. Add these cubes to the marinade. Stir gently to coat each piece of salmon. Let it marinate for 15 to 30 minutes. This time allows the flavors to soak in deep. Now, it's time to cook. Preheat your air fryer to 400°F (200°C). While it heats, lightly spray the air fryer basket with non-stick cooking spray. This step helps prevent sticking. Once preheated, place the marinated salmon bites in a single layer in the basket. Avoid overcrowding them; this ensures they cook evenly. Air fry the salmon bites for 7 to 10 minutes. Shake the basket halfway through cooking. The salmon should be crispy and cooked through when done. After cooking, remove the salmon bites and sprinkle with salt and pepper. If you like, add sesame seeds for extra crunch. Top with chopped green onions for a fresh look. Enjoy your tasty, quick meal! To get the best taste from your salmon bites, marinating is key. I suggest letting the salmon sit in the marinade for at least 15 minutes. If you have time, 30 minutes is even better. This helps the flavors soak in deeply. The honey gives sweetness, while the soy sauce adds saltiness. Garlic and ginger bring a nice kick too. Preheating the air fryer is a must. Set it to 400°F (200°C) before adding the salmon. This step ensures even cooking and helps the salmon get crispy. A hot air fryer cooks the salmon quickly, sealing in moisture. This makes for tender bites. One common mistake is overcrowding the basket. When you pack in too many pieces, they don’t cook well. Instead, place the salmon bites in a single layer. This allows hot air to circulate around each piece. If you need to cook more, do it in batches. You will enjoy better results this way. {{image_2}} You can switch the salmon for other proteins. Chicken works great here. Just cut it into bite-sized pieces, like the salmon. Tofu is another great option. Use firm tofu and press it to remove extra water. This helps it absorb the marinade better. Both chicken and tofu will cook in a similar way. Want to mix up the flavors? Try adding spices. A pinch of cayenne can give a little heat. You can also add citrus zest, like lemon or lime. This will brighten the dish and add freshness. Don’t be afraid to experiment with spices you love. Each will bring a different twist to the honey garlic taste. These salmon bites are tasty on their own, but they pair well with sides. Serve them with steamed rice for a filling meal. You can also add some roasted vegetables for color and nutrition. Broccoli or bell peppers work well. For a light salad, try a simple green mix. The flavors of the salmon will shine through with any of these options. To store your leftover salmon bites, place them in an airtight container. Make sure they cool down first. Store them in the fridge for up to three days. Always keep the bites covered to avoid drying out. This keeps them fresh and tasty. When ready to eat, check for any signs of spoilage. You can freeze these salmon bites if you have extras. Place them in a single layer on a baking sheet. Freeze them for about an hour. After that, transfer them to a freezer-safe bag. Remove as much air as you can. They will stay good for up to three months. Make sure to label the bag with the date. To reheat your salmon bites, the air fryer is best. Preheat it to 350°F (175°C). Place the salmon bites in the basket for about 5 minutes. This keeps the texture crispy. You can also use a microwave, but it may make them soft. If you use the microwave, heat in short bursts and check often. Enjoy your delicious bites again! For the best flavor, I recommend marinating the salmon for 15 to 30 minutes. This gives the fish time to soak up the honey, soy sauce, garlic, and ginger. The longer you marinate, the deeper the flavor. Just don’t go overboard; too long can make the fish too salty. Yes, you can use frozen salmon! Just make sure to thaw it first. Place the frozen salmon in the fridge overnight or run it under cold water for a quick thaw. Once thawed, cut it into cubes and follow the same marinating steps. This method works well and keeps the salmon fresh. These salmon bites pair well with many sides. Here are some great options: - Steamed rice or quinoa - Roasted vegetables like broccoli or asparagus - A fresh green salad - Sweet potato fries for a tasty crunch Feel free to mix and match your favorites for a complete meal! This blog shared a tasty salmon recipe using honey and garlic. I detailed ingredients, step-by-step instructions, and tips for best results. You can mix in variations and pair with different sides. Remember to store leftovers properly for freshness. Try this recipe for a quick meal that’s full of flavor. With simple steps, you’ll impress your friends and family. Enjoy your cooking adventure and savor every bite!

Air Fryer Honey Garlic Salmon Bites Tasty and Quick

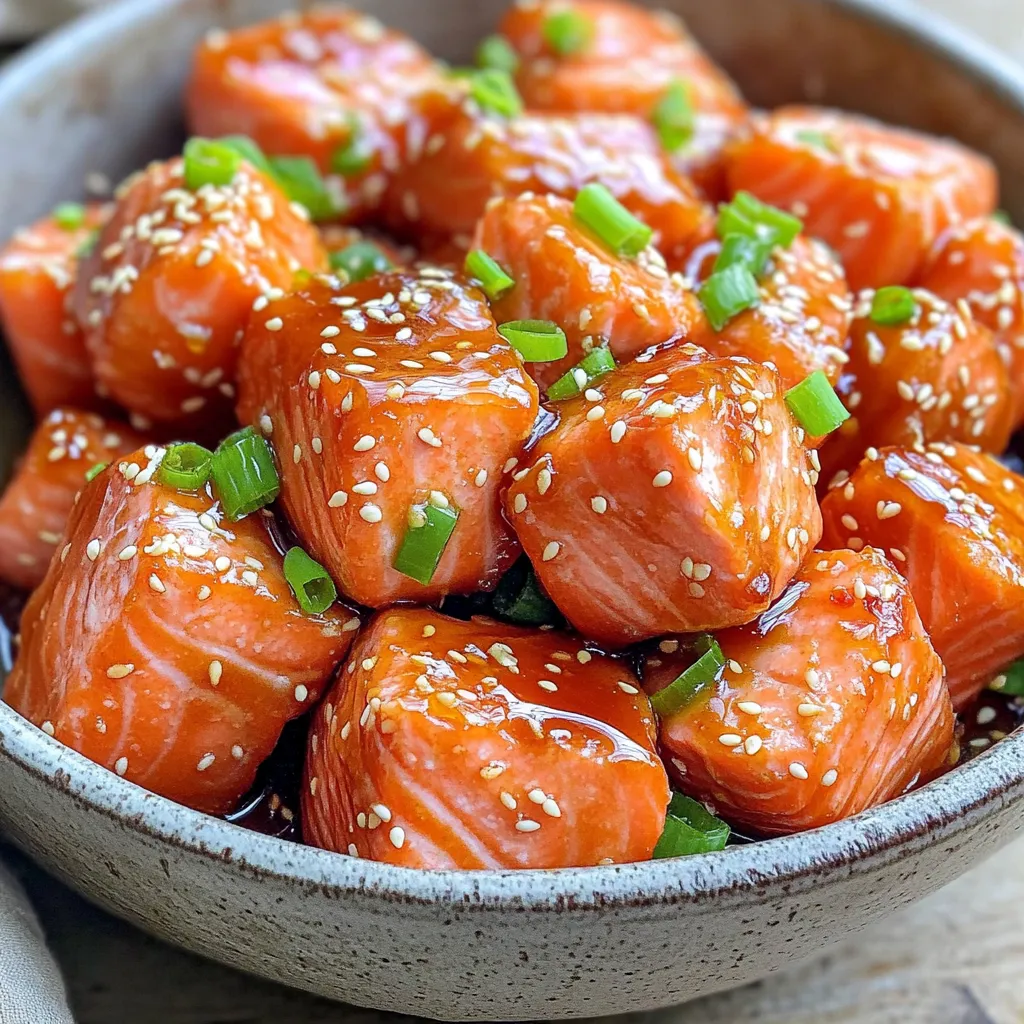
Are you ready to treat yourself to a tasty meal? These Air Fryer Honey Garlic Salmon Bites are quick, easy,

To make Caramel Pecan Monkey Bread, you need the following ingredients: - 3 cans of refrigerated biscuit dough - 1 cup chopped pecans - 1 cup brown sugar - ½ cup granulated sugar - 1 teaspoon ground cinnamon - ½ cup unsalted butter (1 stick) - ½ cup caramel sauce - 1 teaspoon vanilla extract - Cooking spray These ingredients blend together to create a warm, sweet treat. The biscuit dough forms the soft base, while pecans add a nice crunch. The brown sugar and cinnamon mix creates a cozy flavor. The butter and caramel sauce make it rich and gooey. You can use store-bought caramel sauce or make your own for extra fun. Remember, using fresh ingredients always makes a difference. Enjoy gathering these items, as each plays an important role in your delicious dessert! 1. Preheat your oven to 350°F (175°C). This ensures even baking. 2. Grease a bundt pan with cooking spray. This keeps the bread from sticking. 3. In a bowl, mix the brown sugar, granulated sugar, and cinnamon. Stir until well blended. 4. Open the biscuit dough and cut each biscuit into quarters. Roll each piece into a ball. 1. Toss each dough ball in the sugar mixture. Make sure they are fully coated. 2. In a separate bowl, combine chopped pecans with a few tablespoons of the sugar mix. This adds flavor. 3. Layer half of the biscuit balls in the bundt pan. Sprinkle half of the pecans on top. 4. Pour half of the melted butter and half of the caramel sauce over the first layer. 5. Repeat the layers with the remaining biscuit balls, pecans, butter, and caramel. 6. Bake for 30-35 minutes. The top should be golden brown and the dough cooked through. 1. Let the monkey bread cool for about 10 minutes after baking. 2. Carefully invert the bundt pan onto a plate. This releases the monkey bread. 3. Drizzle any remaining caramel sauce over the top before serving. Enjoy the sticky goodness! To make sure your monkey bread bakes evenly, keep the oven at 350°F. This temperature helps the dough cook through without burning. Always use a bundt pan and grease it well with cooking spray. This step stops the bread from sticking and makes it easy to flip out. Use refrigerated biscuit dough for the best texture. It puffs up nicely when baked. For a stronger pecan flavor, mix chopped pecans with some of the sugar and cinnamon blend. This extra step makes the nuts more tasty and brings out their crunch. Serve your monkey bread warm for the best flavor. A drizzle of extra caramel sauce on top adds sweetness. You can also sprinkle powdered sugar or more chopped pecans for decoration. This not only looks great but also brings extra flavor. Pair it with coffee or milk for a perfect dessert experience. {{image_2}} You can make your Caramel Pecan Monkey Bread even more fun! Add chocolate chips for a sweet twist. Just toss in about a cup of chocolate chips with the dough balls. You can also mix in dried fruits like raisins or cranberries. They add a nice chewiness and burst of flavor. If you want to switch up the nuts, try using almonds or walnuts. Almonds give a nice crunch, while walnuts add a rich taste. Just chop them up like you do with pecans. Mix them into the layers for a new nutty flavor. If you are gluten-free, you can still enjoy this treat. Look for gluten-free biscuit dough in stores. Many brands make great options that taste just as good. For those who need a vegan option, swap the butter for plant-based butter. You can also use coconut oil if you like that flavor. For the caramel, choose a vegan caramel sauce or make your own. Just use coconut milk and brown sugar to create a creamy, tasty sauce. These swaps make the recipe fit various diets while keeping it delicious! To keep your leftover monkey bread fresh, store it in an airtight container. This helps prevent it from drying out. If you don’t have a container, wrap it tightly in plastic wrap. It’s best to store it at room temperature for up to two days. If you plan to keep it longer, place it in the fridge for up to a week. Just remember that refrigeration can change its texture. When you want to enjoy your monkey bread again, reheating is key. The best way to reheat is in the oven. Preheat your oven to 350°F (175°C). Place the monkey bread on a baking sheet and cover it with foil. Heat for about 10-15 minutes until warm. This keeps it soft and gooey. You can also use the microwave, but be careful. Heat it in short bursts of 10-15 seconds. Check it often to avoid drying it out. The oven method gives you a better result, but the microwave is quick and easy. Enjoy your treats warm! Can I make Caramel Pecan Monkey Bread in advance? Yes, you can make this dish ahead of time. Prepare the monkey bread up to the point of baking. Cover it tightly with plastic wrap and refrigerate. When you are ready, just bake it straight from the fridge. It may need a few extra minutes in the oven. This makes it easy for parties or family gatherings. What can I substitute for the butter? If you need a butter substitute, try using coconut oil or margarine. Both work well and still give a rich flavor. You can also try unsweetened applesauce for a lighter option, but it may change the taste a bit. How do I know when the monkey bread is done? Check for a golden brown top and firm texture. You can insert a toothpick into the center. If it comes out clean, the monkey bread is done. The dough should not feel sticky to the touch. If it’s still soft, give it a few more minutes in the oven. Now you know how to make Caramel Pecan Monkey Bread. We covered the key ingredients, step-by-step instructions, and tips for baking and serving. You learned about tasty variations and proper storage, too. This delightful treat is easy to make and sure to impress. With the right ingredients and steps, you can enjoy this warm, gooey bread any time. Have fun experimenting with flavors and sharing this treat with others!

Caramel Pecan Monkey Bread Irresistible Dessert Recipe

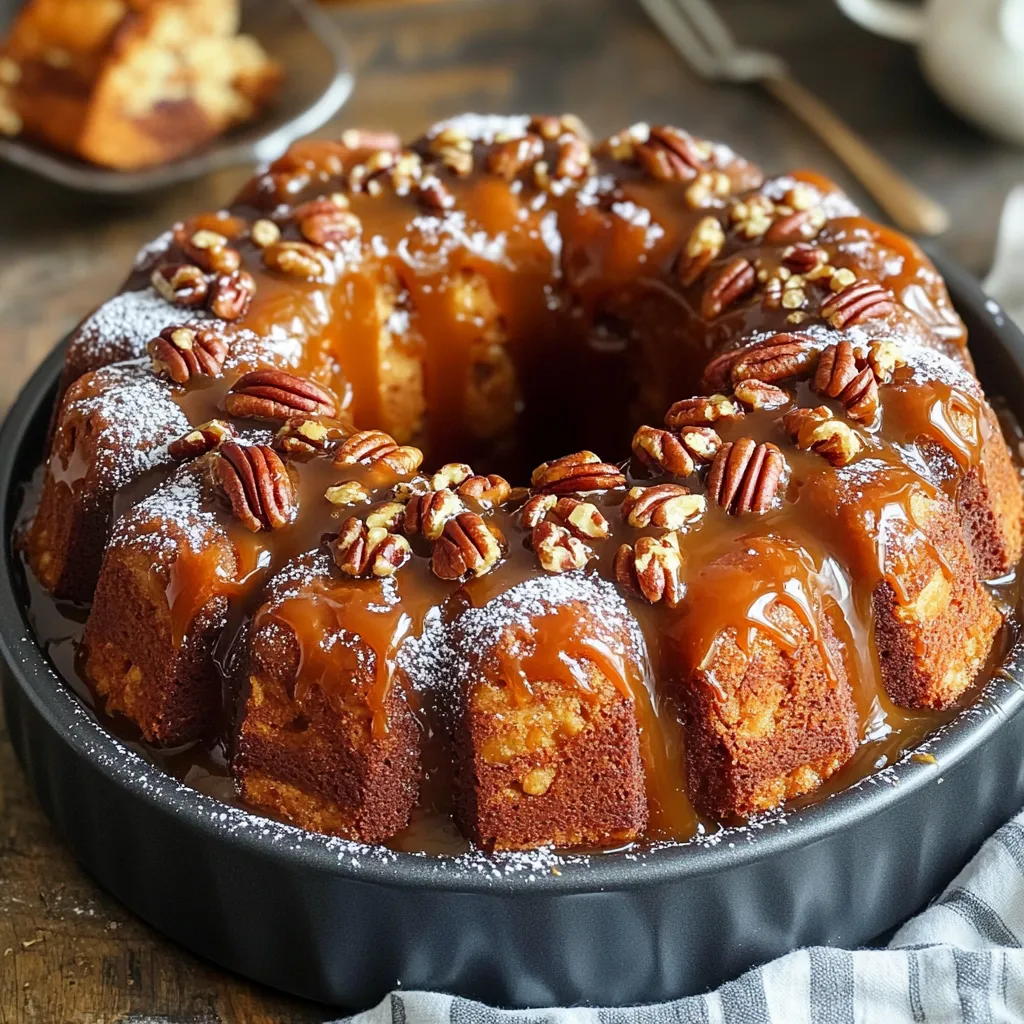
Are you ready to indulge in a sweet, gooey treat? This Caramel Pecan Monkey Bread is a dessert you won’t

To make high-protein egg white muffins, you will need: - 6 large egg whites - 1 cup spinach, chopped - 1/2 cup bell peppers, diced (any color) - 1/2 cup cherry tomatoes, halved - 1/4 cup red onion, finely chopped - 1/2 cup low-fat cottage cheese - 1/2 teaspoon garlic powder - 1/2 teaspoon onion powder - Salt and pepper to taste - Fresh herbs (e.g., parsley or chives) for garnish These muffins pack a punch of nutrition. Egg whites are low in calories and high in protein. They help build muscle and keep you feeling full. Spinach adds vitamins A and C, along with iron, which is great for energy. Bell peppers give a boost of vitamin C and fiber. Cherry tomatoes add antioxidants and a sweet taste. Low-fat cottage cheese is rich in protein and calcium, supporting bone health. Garlic powder and onion powder bring flavor without extra calories. You can easily adjust this recipe for different diets. For a dairy-free option, swap cottage cheese with silken tofu or a dairy-free cheese. If you need it vegan, use a plant-based egg substitute and skip the cheese. For gluten-free needs, this recipe is already gluten-free. Feel free to mix in your favorite veggies based on what you have at home. Just keep the overall volume the same to ensure they bake well. To start, preheat your oven to 350°F (175°C). This step is key for even cooking. Next, lightly grease a muffin tin with cooking spray or olive oil. This helps the muffins release easily. In a large bowl, combine 6 large egg whites and 1/2 cup of low-fat cottage cheese. Whisk the two together until the mixture is smooth. This adds protein and creaminess to your muffins. Now, it’s time to add some color and nutrients. Chop 1 cup of spinach and dice 1/2 cup of bell peppers. You can use any color of bell pepper you like. Halve 1/2 cup of cherry tomatoes and finely chop 1/4 cup of red onion. Mix all these veggies into your egg mixture. Stir well to combine. This step ensures every bite is full of flavor. Season the mixture with 1/2 teaspoon of garlic powder, 1/2 teaspoon of onion powder, and add salt and pepper to taste. Pour the mixture evenly into the prepared muffin tin. Fill each cup about 3/4 full to allow space for rising. Bake in your preheated oven for 15-20 minutes. Keep an eye on them. You want the muffins to be set and lightly golden on top. When done, remove the muffin tin from the oven. Let it cool for a few minutes. To release the muffins, gently run a knife around the edges. This helps them pop out without breaking. For even baking, make sure the oven is fully preheated. Place the muffin tin in the center of the oven. This helps with air circulation around the muffins. If you have a convection oven, use it! The fan helps bake the muffins more evenly. Rotate the muffin tin halfway through baking for the best results. Lastly, avoid opening the oven door too often. This can cause the muffins to sink. Follow these tips, and you’ll bake delicious, high-protein egg white muffins every time! Each muffin has about 6 grams of protein. This comes mostly from egg whites and cottage cheese. These ingredients help build and repair muscles. If you eat two muffins, that gives you 12 grams of protein. This is great for breakfast or a snack. One muffin has around 60 calories. This is low for a filling snack. Most of the calories come from egg whites and cottage cheese. The vegetables add very few calories while giving you fiber and nutrients. This makes these muffins a healthy choice. Egg whites are low in calories and high in protein. They have no fat and no cholesterol. This makes them great for heart health. They also contain many vitamins and minerals. These include riboflavin and selenium, which help keep your body healthy. Eating egg whites can help you feel full longer, which is perfect for weight management. {{image_2}} To get a light and fluffy texture in your egg white muffins, start by whisking the egg whites and cottage cheese until smooth. The cottage cheese adds creaminess and protein. Avoid overmixing once you add the veggies. Gently fold them in to keep the muffins airy. Baking them until they are just set will give you that perfect bite. Use a non-stick muffin tin for easy removal. A silicone muffin pan can also work well. Both options help prevent sticking. A whisk is key for mixing your ingredients. I also recommend a spatula to fold in your veggies. Finally, an oven thermometer ensures your oven is at the right temperature for even baking. These muffins are great for meal prep! You can make a big batch on the weekend. Store them in the fridge for up to five days. For longer storage, freeze them in an airtight container. You can grab one in the morning for a quick breakfast. They’re also perfect for a snack or post-workout meal. You can easily change the flavors of your egg white muffins. For a spicy kick, add diced jalapeños or a dash of hot sauce. Want something sweet? Mix in some chopped apples and a pinch of cinnamon. You can also use different veggies. Try zucchini, mushrooms, or kale for a fresh twist. For extra protein, swap in Greek yogurt for the cottage cheese. The flavor possibilities are endless! To make these muffins vegetarian, simply keep the egg whites and cottage cheese. For a vegan version, replace the egg whites with silken tofu blended until smooth. You can also use unsweetened plant-based yogurt instead of cottage cheese. Add nutritional yeast for a cheesy flavor without dairy. This keeps the dish rich in nutrients while being plant-based. These muffins are already gluten-free if you use the right ingredients. Check that your cottage cheese is gluten-free. If you prefer a different base, try using chickpea flour. Mix it with water to create a thick batter. This can add a unique flavor and extra fiber. Always check labels to ensure all ingredients are safe for gluten-free diets. To keep your high-protein egg white muffins fresh, place them in an airtight container. You can store them in the fridge for up to five days. If you want to keep them longer, freezing is a great option. Just make sure they cool completely before packing them away. When you're ready to enjoy a muffin, you can reheat it easily. Use the microwave for about 30 seconds to 1 minute. If you prefer, you can warm them in the oven at 350°F (175°C) for about 10 minutes. This helps them regain their nice texture. - What is the shelf life of these muffins? These muffins last about five days in the fridge. If frozen, they can last for three months. Just make sure to wrap them well. - Can I freeze high-protein egg white muffins? Yes, you can freeze them! Just put them in a freezer-safe bag or container. This keeps them fresh and ready for later. - How can I make these muffins dairy-free? To make these muffins dairy-free, swap the cottage cheese with a dairy-free alternative. You can use silken tofu or a non-dairy yogurt. Both options work well and keep the muffins moist. This post covered everything about high-protein egg white muffins. I shared key ingredients, their benefits, and substitutions. You learned steps for preparation and baking, with tips for even results. Understand the nutritional info, focusing on protein and calories. I also gave ideas for variations, storage tips, and FAQs. Now, you have the tools to make tasty, nutritious muffins that fit your needs. Enjoy these healthy bites as part of your meals!

High-Protein Egg White Muffins Packed with Flavor

Looking for a tasty way to pack in protein? High-Protein Egg White Muffins are your answer! These muffins are not

Here’s what you need for No-Bake Pumpkin Cheesecake Parfaits: - 1 cup pumpkin puree - 8 oz cream cheese, softened - 1/2 cup powdered sugar - 1 tsp vanilla extract - 1 tsp ground cinnamon - 1/2 tsp ground ginger - 1/4 tsp nutmeg - 1 cup whipped cream (or 1 cup heavy cream, whipped) - 1 1/2 cups graham cracker crumbs - 1/4 cup unsalted butter, melted - 1/4 cup brown sugar Each ingredient plays a key role in creating the perfect parfait. Pumpkin puree gives a rich flavor and creamy texture. Cream cheese adds a smoothness that’s hard to resist. Powdered sugar sweetens the mix without grittiness. Vanilla extract brings warmth, while spices like cinnamon, ginger, and nutmeg add depth. Whipped cream lightens the cheesecake filling, making it airy. The graham cracker crumbs provide a crunchy base, and melted butter helps bind them together. Brown sugar enhances the sweetness, making each bite delightful. When choosing pumpkin puree, look for a brand with no added sugar or spices. Quality cream cheese should be full-fat for the best flavor. Check the expiration date to ensure freshness. If you need gluten-free options, use gluten-free graham crackers. Many brands offer these, and they work just as well. For dairy-free needs, try cream cheese made from nuts or tofu. Coconut whipped cream can replace regular whipped cream too. If you want a sweetener swap, use maple syrup or agave nectar instead of powdered sugar. Just adjust the amount to taste, as these options are less concentrated. To start, I make the graham cracker base. Here’s how: - Combine Ingredients: In a mixing bowl, add 1 1/2 cups of graham cracker crumbs, 1/4 cup of melted unsalted butter, and 1/4 cup of brown sugar. - Mix Until Coated: Stir until the crumbs feel damp and look like wet sand. This mix will form the crunchy layer. Next, I prepare the cheesecake filling. It’s all about smoothness: - Beat Cream Cheese: In a large bowl, use an electric mixer to beat 8 oz of softened cream cheese until it’s creamy and smooth. - Add Flavor: Mix in 1 cup of pumpkin puree, 1/2 cup of powdered sugar, 1 tsp of vanilla extract, and spices like 1 tsp of cinnamon, 1/2 tsp of ginger, and 1/4 tsp of nutmeg. Blend until everything is well mixed. - Fold in Whipped Cream: Finally, gently fold in 1 cup of whipped cream. This makes the filling light and airy. Be careful not to deflate it! Now it’s time to layer the parfaits. Here’s my method to make them look great: - Start with Graham Crackers: In clear glasses or parfait dishes, add a generous spoonful of the graham cracker mix at the bottom. - Add Cheesecake Filling: Next, spoon in the pumpkin cheesecake filling. Repeat this layering until the glasses are full. - Finish with Filling: End with a layer of the cheesecake filling on top. This creates a beautiful finish. For a nice touch, you can add extra whipped cream on top and sprinkle some graham cracker crumbs for garnish. Chilling is key for flavor! Here’s why and how: - Refrigerate: Cover the parfaits with plastic wrap and refrigerate. This helps the flavors meld together. - Chill Time: Let them chill for at least 2 hours. This wait makes the parfaits even better! Before serving, remove them from the fridge. Enjoy the creamy, pumpkin goodness! When making no-bake desserts, some common mistakes can ruin your dish. Here are a few to watch out for: - Overmixing the cream cheese: This can make it too runny. Mix until just smooth. - Not chilling long enough: The parfait needs time to set. Chill for at least 2 hours. - Not folding whipped cream properly: Use a gentle hand to keep it airy. For perfect whipped cream, here’s a tip: Make sure your bowl and beaters are cold. This helps the cream whip up faster and better. To elevate the flavor of your pumpkin cheesecake, consider adding more spices. Here are a few great options: - Allspice: This spice adds warmth and depth. - Cloves: A little goes a long way for a bold taste. - Cardamom: This spice gives a unique twist to pumpkin. For added crunch, try topping your parfaits with: - Chopped nuts: Walnuts or pecans work great. - Toasted coconut: This adds a lovely texture and flavor. - Chocolate shavings: For a sweet finish, sprinkle some on top. {{image_2}} You can easily add fun flavors to your No-Bake Pumpkin Cheesecake Parfaits. Try mixing in chocolate or caramel for a richer taste. - Chocolate: Swirl in some melted chocolate into the pumpkin mixture. This adds a sweet twist. You can also sprinkle chocolate chips between layers. - Caramel: Drizzle caramel sauce between layers or on top. This gives a nice contrast to the pumpkin flavor. You can also play with seasonal spices. While cinnamon is great, consider adding: - Allspice: It gives a warm, spicy flavor. - Cloves: A little goes a long way for depth. - Cardamom: Adds a unique, fragrant note to the mix. Pair these parfaits with other desserts or coffee for a lovely treat. - Desserts: Serve with vanilla ice cream or chocolate cake. This makes a great dessert spread. - Coffee: These parfaits go well with your morning coffee or after dinner. They are a sweet finish that complements the bitter taste. These parfaits are perfect for many occasions. - Holidays: Thanksgiving and Halloween are great times to serve them. They fit right in with festive meals. - Parties: Make them for a casual get-together or a fancy dinner. They impress guests with their look and taste. No matter when you serve them, these parfaits always shine! To keep your No-Bake Pumpkin Cheesecake Parfaits fresh, follow these tips: - Use airtight containers: This helps prevent air from drying out the dessert. - Layer carefully: Keep layers intact to maintain the parfait's look and taste. - Refrigerate promptly: Store leftovers in the fridge within two hours after serving. I recommend using glass jars or plastic containers. They are easy to stack and will keep your parfaits safe. Yes, you can freeze No-Bake Pumpkin Cheesecake Parfaits, but with some care. Here’s how: - Freeze before adding toppings: Leave off whipped cream and extra crumbs until serving. - Cover tightly: Use plastic wrap or an airtight lid to prevent freezer burn. When you're ready to enjoy them, follow these thawing tips: - Thaw in the fridge: Move parfaits to the fridge overnight for a slow thaw. - Serve chilled: Enjoy them cold for the best taste and texture. No-Bake Pumpkin Cheesecake Parfaits can last about three to four days in the fridge. Make sure to store them in an airtight container. This keeps them fresh and tasty. If you see any changes in texture or smell, it is best to discard them. Yes, you can make these parfaits ahead of time! They are perfect for meal prep or special events. You can prepare them a day or two in advance. Just keep them covered in the fridge until you are ready to serve. This allows the flavors to blend well. If your leftover parfaits have settled, don’t worry! You can gently stir them with a spoon. This will help mix the layers back together. If needed, add a little fresh whipped cream on top to lighten them up. Enjoy your parfaits just like before! In this post, we explored the ingredients, steps, and tips for making No-Bake Pumpkin Cheesecake Parfaits. I shared the roles of each ingredient and gave options for substitutions. You learned about preparation, layering, and chilling techniques that ensure success. I also highlighted common mistakes to avoid and ways to enhance flavors. Finally, we discussed storage and freezing tips. With these insights, you can create a delightful dessert that impresses and satisfies everyone. Enjoy making and sharing this tasty treat!

No-Bake Pumpkin Cheesecake Parfaits Easy and Creamy

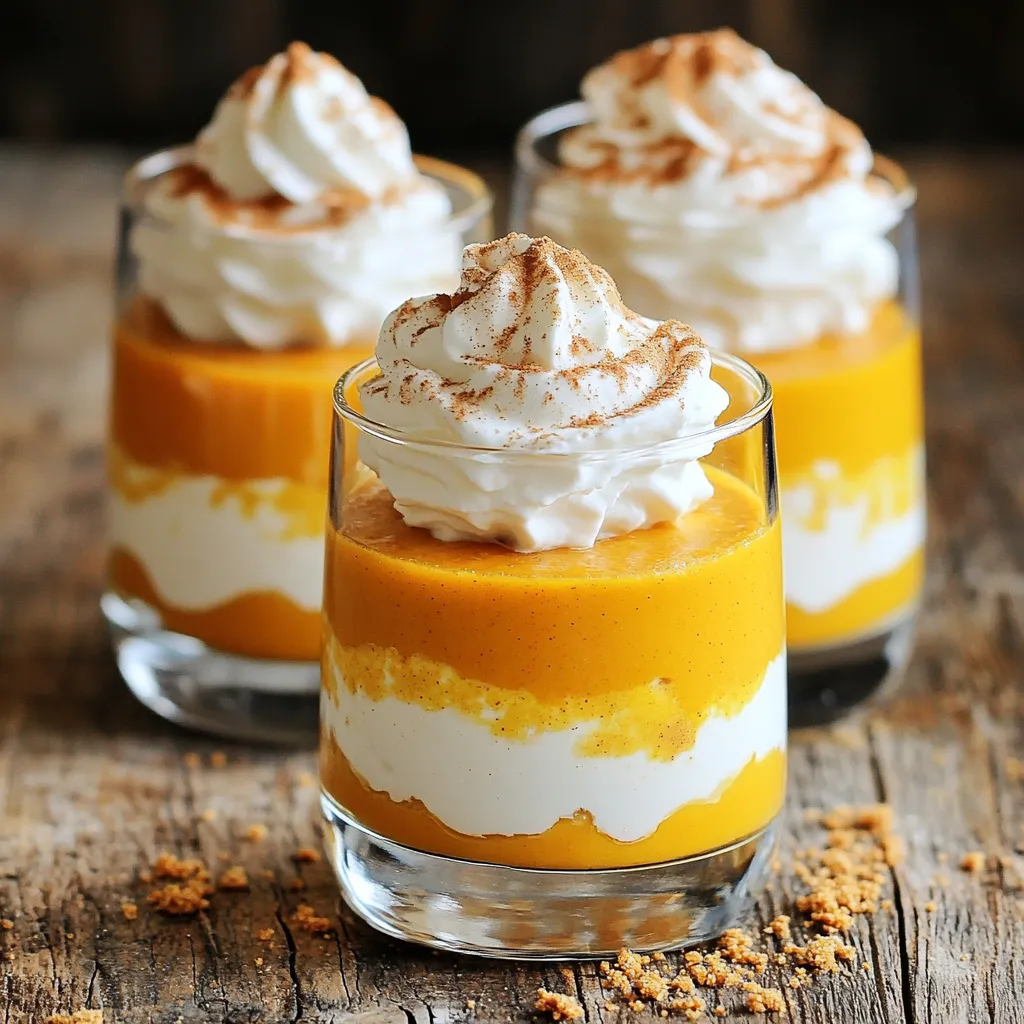
If you crave a sweet, seasonal treat without the fuss of baking, you’re in for a delight! My No-Bake Pumpkin

To make Apple Pie Overnight Oats, you need a few key ingredients. These create the base and flavor: - 1 cup rolled oats - 1 cup unsweetened almond milk (or any milk of your choice) - 1 medium apple, peeled and diced - 1 tablespoon maple syrup (adjust for sweetness) - 1 teaspoon vanilla extract - 1 teaspoon ground cinnamon - 1/4 teaspoon nutmeg - A pinch of salt These ingredients work together to mimic the warm, sweet taste of apple pie. You can enhance your oats with a few optional ingredients. These add creaminess and richness: - 2 tablespoons Greek yogurt (optional, for creaminess) Adding Greek yogurt makes the oats smooth and rich. It also boosts protein, making your breakfast more filling. When you serve your oats, toppings can add texture and flavor. Here are some great ideas: - Chopped walnuts or pecans for crunch - A sprinkle of cinnamon on top These toppings give your dish a delightful finish. They also make your breakfast look beautiful and inviting. Enjoy your Apple Pie Overnight Oats! To start, gather all your ingredients. In a medium bowl, combine: - 1 cup rolled oats - 1 cup unsweetened almond milk (or any milk of your choice) - 1 medium apple, peeled and diced - 1 tablespoon maple syrup (adjust for sweetness) - 1 teaspoon vanilla extract - 1 teaspoon ground cinnamon - 1/4 teaspoon nutmeg - A pinch of salt If you want creaminess, add 2 tablespoons of Greek yogurt. Mix everything well. This ensures all flavors blend nicely. You will smell the sweet spices and apples. That aroma will make you excited for tomorrow's breakfast! Once the mixture is ready, it's time to transfer it. Use individual jars or airtight containers. If you like, layer the oats for a fun look. Cover each container with a lid. Place them in the fridge. Let them soak overnight or for at least four hours. This soaking time allows the oats to soften and the flavors to meld together. In the morning, take the oats out of the fridge. Give them a good stir to mix everything again. Taste them and adjust the sweetness if needed. For a tasty crunch, top with chopped walnuts or pecans. If you want, sprinkle a bit more cinnamon on top. Now, you're ready to enjoy your apple pie overnight oats! To make your oats super creamy, use Greek yogurt. It adds richness and a nice texture. If you want a lighter version, skip the yogurt. Instead, let the oats soak longer. The longer they sit, the softer they get. Stir them well before eating to blend everything nicely. Sweetness is key to a great dish. Start with one tablespoon of maple syrup. After soaking, taste your oats. If you want more sweetness, add a little more syrup. You can also try honey or agave. Choose what you like best. The apple adds natural sweetness too, so keep that in mind. To get the best flavor, mix everything well. Make sure the spices and apple are evenly spread. Letting the oats soak overnight helps all the flavors blend. You can add a pinch of salt to boost the taste. Try adding extra spices like ginger or allspice for a twist. Don’t be afraid to experiment! {{image_2}} If you want to make this recipe healthier, swap dairy for plant-based options. Use almond milk or oat milk instead of regular milk. Both give a nice creamy texture. If you miss creaminess, add a scoop of coconut yogurt. It’s rich and tasty, and it keeps things dairy-free. To boost protein, add Greek yogurt or protein powder. Mix in two tablespoons of Greek yogurt for extra creaminess. If you like protein powder, add a scoop when you combine the oats. This keeps your breakfast filling and helps fuel your day. While apple pie is delicious, you can try other flavors too. Swap apples for ripe bananas for a tropical twist. Add a tablespoon of cocoa powder for a chocolate version. You can also mix in berries for a fresh and fruity taste. The options are endless! Explore flavors to keep your breakfast exciting. To keep your apple pie overnight oats fresh, use airtight containers. Glass jars work great. They prevent spills and keep the oats tasty. If you want to serve them later, store them in the fridge. This keeps them cool and safe to eat. Avoid leaving them out at room temperature. These oats stay good for about five days in the fridge. Each day, the flavors get better! If you want to enjoy them longer, check for signs of spoilage. Look for odd smells or changes in texture. If they seem off, it’s best to toss them. You can freeze your apple pie overnight oats for up to three months. Use freezer-safe containers or bags. When you want to eat them, take them out a day ahead. Place them in the fridge to thaw overnight. This way, your breakfast will be ready to enjoy! Yes, you can use quick oats. They will soak up liquid faster. This means your oats will be softer in the morning. However, they may not have the same chewy texture as rolled oats. If you like a creamier feel, quick oats can work well. You can use any milk you enjoy. Options include cow’s milk, soy milk, or oat milk. Each type of milk will change the flavor slightly. Choose one that fits your taste or dietary needs. Overnight oats last up to five days in the fridge. Make sure to store them in airtight containers. This keeps them fresh and prevents them from absorbing other smells. If you notice any odd smells or colors, it’s best to toss them out. Yes, you can make these oats vegan easily. Just use plant-based milk and skip the Greek yogurt. You can also use maple syrup as your sweetener. This keeps the oats tasty and vegan-friendly. Overnight oats offer many health benefits. They are high in fiber, which helps digestion. They also provide lasting energy for your morning. Oats can lower cholesterol and help control blood sugar levels. Adding fruits and nuts boosts the nutrition even more. This article guides you through making delicious apple pie overnight oats. We covered key ingredients, added flavors, and toppings to enhance your dish. I shared step-by-step instructions for preparation and tips for perfect creaminess. You learned about healthy swaps, flavor variations, and smart storage tips. In the end, overnight oats are easy, tasty, and healthy. Enjoy experimenting with flavors and make this dish your own!

Apple Pie Overnight Oats Irresistible Morning Fuel

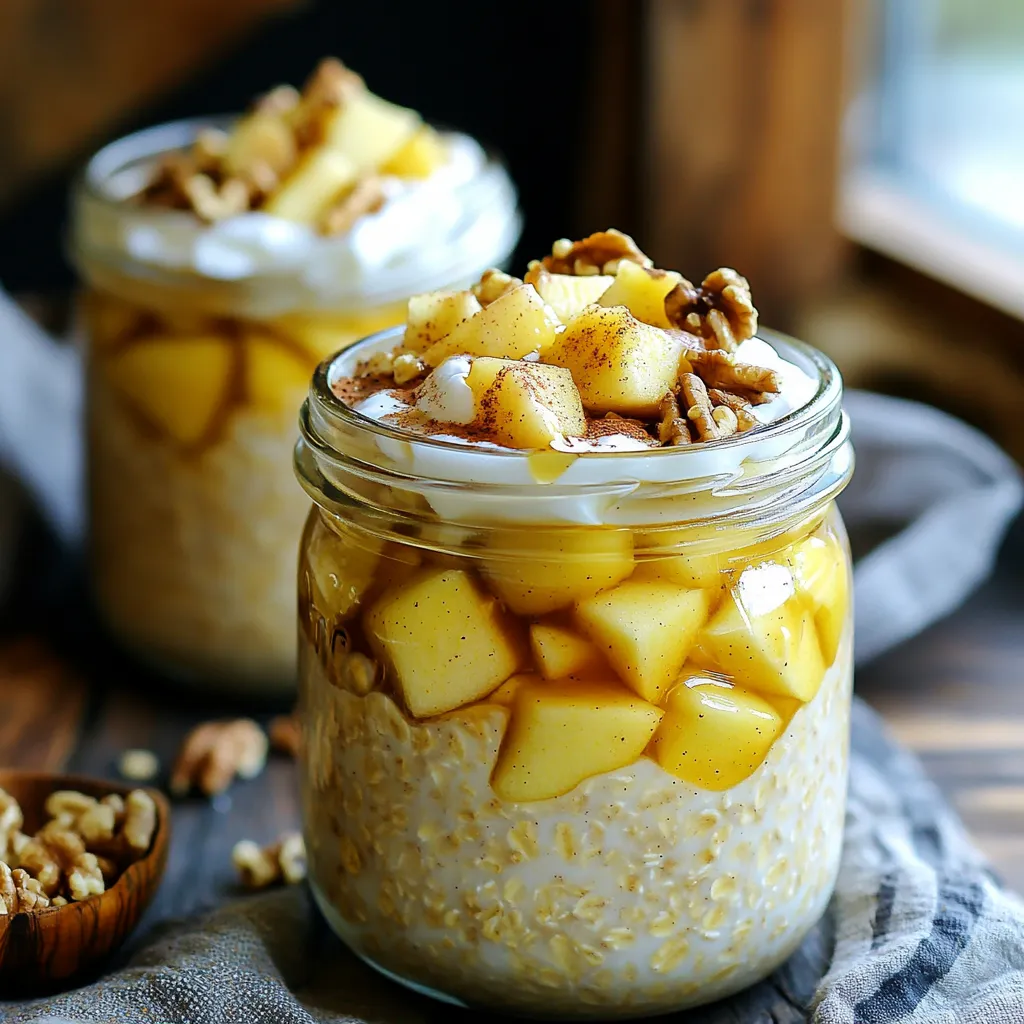
Start your day with a tasty twist! Apple Pie Overnight Oats bring the warmth of fresh-baked pie to your breakfast

When making slow cooker maple glazed carrots, you need the right ingredients. Each one plays a key role in creating the dish's sweet and savory flavor. Here’s what you need: - 2 lbs baby carrots, peeled and trimmed - 1/4 cup pure maple syrup - 2 tablespoons unsalted butter, melted - 1 teaspoon ground cinnamon - 1/2 teaspoon ground ginger - 1/4 teaspoon nutmeg - Salt and pepper to taste - 1 tablespoon fresh parsley, chopped (for garnish) Baby carrots are sweet and tender. They cook nicely in the slow cooker. Maple syrup gives the dish its rich sweetness. Unsalted butter adds a creamy texture. The ground spices bring warmth and depth. Cinnamon, ginger, and nutmeg all work well together. You can adjust the salt and pepper to your liking. Finally, fresh parsley adds a pop of color and freshness to your dish. With these simple ingredients, you can create a delightful side dish. Each bite will be a burst of flavor. Enjoy the process of preparing this sweet treat! To start, gather your ingredients. You will need: - 2 lbs baby carrots, peeled and trimmed - 1/4 cup pure maple syrup - 2 tablespoons unsalted butter, melted - 1 teaspoon ground cinnamon - 1/2 teaspoon ground ginger - 1/4 teaspoon nutmeg - Salt and pepper to taste - 1 tablespoon fresh parsley, chopped (for garnish) In a large bowl, mix the maple syrup, melted butter, cinnamon, ginger, nutmeg, salt, and pepper. Whisk until everything blends well. This will create a sweet and spicy glaze. Next, place the baby carrots in the slow cooker. Pour the maple mixture over the carrots. Make sure to stir until each carrot gets coated in the glaze. This will help them soak up all the flavors. Cover the slow cooker and set it to cook. You can choose low for 4-5 hours or high for 2-3 hours. Check for tenderness with a fork. Once they are soft, they are ready to shine! After the cooking time, stir the carrots gently. This helps recoat them in the glaze. Then, transfer the glazed carrots to a serving dish. For a pop of color, sprinkle chopped parsley on top. The fresh herbs will add a nice touch to this sweet dish. Enjoy your delicious slow cooker maple glazed carrots! To make your carrots burst with flavor, use fresh baby carrots. Their sweet taste shines in this dish. The pure maple syrup plays a key role in flavor. Choose high-quality syrup for the best results. The mix of spices—cinnamon, ginger, and nutmeg—adds warmth. Adjust the spices to suit your taste. If you love cinnamon, feel free to add more! Cooking time can change based on your slow cooker. If cooking on low, aim for 4-5 hours. For a quicker option, cook on high for 2-3 hours. Check the carrots for tenderness. They should be soft but not mushy. If they need more time, keep cooking in 30-minute increments. This way, you’ll get the perfect texture. Maple glazed carrots look great on any table. Serve them with roasted meats or grilled fish. They make a lovely side for holiday meals. For a pop of color, sprinkle fresh parsley on top. The bright green contrasts nicely with the orange carrots. You can also add a squeeze of lemon for extra zing. This dish is sure to impress your guests! {{image_2}} You can swap out baby carrots for other veggies. Try using sliced parsnips or sweet potatoes. Both will soak up the maple glaze well. For a twist, add a splash of orange juice. The juice brightens the flavors and adds a nice zing. In the fall, add cooked butternut squash for a rich taste. During spring, toss in some fresh peas for color and crunch. You can also add cranberries for a festive touch during the holidays. Each season brings new flavors to explore. You can make maple glazed carrots on the stovetop too. Just simmer the carrots in a pot with the maple glaze. Cook until tender, stirring often. If you prefer roasting, spread the carrots on a baking sheet. Drizzle with the glaze and roast at 400°F for about 25 minutes. This method gives a nice caramelization and depth of flavor. You can keep leftover maple glazed carrots for up to four days. Place them in an airtight container. Store them in the fridge. Be sure to let them cool before sealing. This helps keep the carrots fresh and tasty. To reheat, use a microwave or a saucepan. If using a microwave, heat on medium power. Stir the carrots every minute. This helps them warm evenly. If using a saucepan, add a splash of water. Heat over low until warm, stirring often. This keeps the glaze nice and sticky. You can freeze these carrots for up to three months. First, let them cool completely. Then, place them in a freezer-safe bag. Squeeze out the air before sealing. When ready to eat, thaw them overnight in the fridge. Reheat them in a saucepan or microwave for best results. Yes, you can use frozen carrots. Frozen carrots work well in slow cookers. They may take a little longer to cook. If you use frozen carrots, add an extra 30 minutes to your cook time. You might lose some texture, but the flavors will still shine. If you don't have maple syrup, honey or agave syrup works. These sweeteners offer a different flavor, but they still taste great. Use the same amount as the recipe calls for. You can also try brown sugar mixed with a bit of water for a similar effect. You can prepare the carrots a day in advance. Mix the maple glaze and coat the carrots as usual. Store them in the fridge overnight. On the day you plan to serve, just pop them in the slow cooker and cook. This saves time and makes meal prep easy. This blog post explored how to prepare baby carrots with maple syrup and spices. You learned about the key ingredients, step-by-step cooking tips, and variations for unique flavors. I also shared storage info and answers to common questions. Always remember, great dishes start with simple ideas. Use these tips to elevate your meals. Enjoy the caramelized sweetness and vibrant taste of roasted carrots!

Slow Cooker Maple Glazed Carrots Simple and Sweet Dish

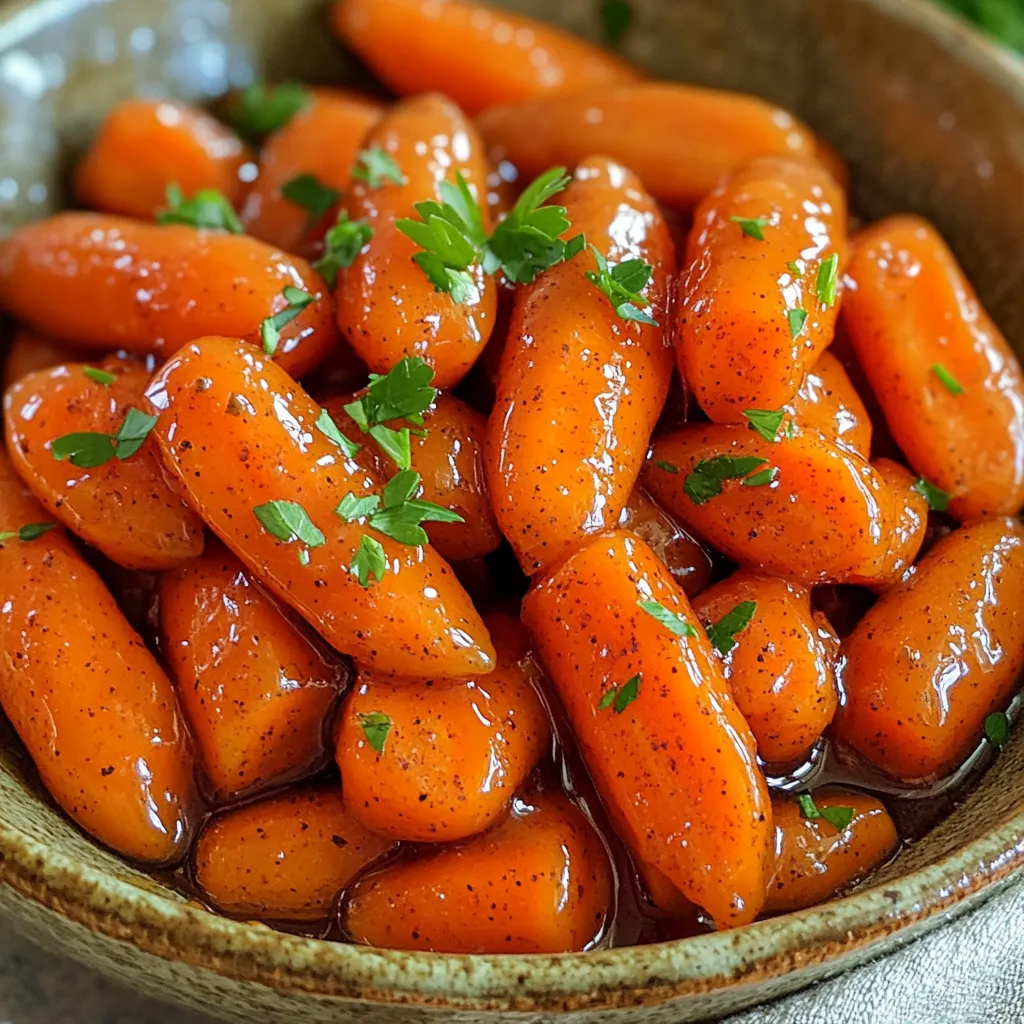
Looking for a simple, sweet side dish that delights your taste buds? Slow Cooker Maple Glazed Carrots are the answer!

- 1 lb chicken tenderloin - 1/2 cup all-purpose flour - 1 cup breadcrumbs (panko for extra crunch) - 2 large eggs - 1 teaspoon garlic powder - 1 teaspoon onion powder - 1 teaspoon smoked paprika - Salt and pepper to taste For the chicken tenders, I use chicken tenderloin. It’s juicy and cooks fast. I season the flour with garlic powder, onion powder, smoked paprika, salt, and pepper. This mix adds a lot of flavor. For the breading, I use eggs and breadcrumbs. I like to use panko for extra crunch. - 1/4 cup honey - 1/4 cup Dijon mustard - 1 tablespoon apple cider vinegar - A pinch of cayenne pepper (optional, for heat) The honey mustard sauce is simple yet tasty. I mix honey and Dijon mustard for a sweet and tangy flavor. Apple cider vinegar adds a nice zing. If you want it spicy, I suggest adding cayenne pepper. - Cooking spray - Additional tools needed: bowls for breading, whisk, measuring cups, and an air fryer I always use cooking spray for air frying. It helps the chicken crisp up nicely. You will need a few bowls for the breading process. A whisk is great for beating the eggs. Don’t forget to measure your ingredients for the best results! Rinse the chicken tenderloins under cold water. This step removes any surface bacteria. Next, dry the chicken well with paper towels. Wet chicken will not hold the breading well. Now, set up your breading station. You need three bowls for this. In the first bowl, mix flour with salt, pepper, garlic powder, onion powder, and smoked paprika. This mix adds great flavor. In the second bowl, whisk the eggs until blended. The eggs will help the coating stick. In the third bowl, place the breadcrumbs. I recommend using panko for extra crunch. Now, it’s time to coat the chicken. Start by dipping each tenderloin into the flour mixture. Make sure it’s fully covered. Next, dip it into the egg wash. This step helps the breadcrumbs stick. Finally, coat the chicken with the breadcrumbs. Press down gently to ensure they stick well. This process gives you crispy chicken tenders. Preheat your air fryer to 390°F (200°C). This takes about 5 minutes. While it heats, spray the basket with cooking spray. This helps prevent sticking. Place the coated chicken tenders in a single layer. Do not overcrowd the basket, or they won’t cook evenly. Lightly spray the tops with cooking spray to help them crisp up. Now, air fry the chicken for 10 to 12 minutes. Flip them halfway through. They should be golden brown and reach an internal temperature of 165°F (75°C). Enjoy the delicious aroma filling your kitchen! To get the best chicken tenders, focus on crispiness. Use panko breadcrumbs for extra crunch. Lightly spray the chicken tenders with cooking spray before cooking. This helps them turn golden and crispy. For even cooking, flip the chicken tenders halfway through. This ensures all sides get that perfect golden color. Use tongs to flip them gently. This way, they won’t lose their coating. A great honey mustard sauce balances sweetness and tanginess. Start with equal parts honey and Dijon mustard. This mix gives a nice flavor. If you want it sweeter, add more honey. For more tang, increase the mustard. You can also enhance the sauce by adding a pinch of cayenne pepper. This adds a fun kick. Feel free to play with spices like garlic powder or paprika for extra flavor. Serve the chicken tenders on a rustic wooden platter. Line the platter with parchment paper for a cozy look. This adds a nice touch to your meal. Garnish with fresh parsley for a pop of color. Serve the honey mustard in a small bowl on the side. This makes it easy for dipping. You can also add some carrot sticks or celery for a crunchy side. {{image_2}} You can spice up your chicken tenders in many ways. For a spicy kick, try adding cayenne pepper or chili powder to the flour mix. You can also mix in some paprika or cumin for extra flavor. If you like herbs, add dried oregano, thyme, or parsley. These herbs will enhance the taste and smell of your dish. Feel free to get creative with your favorite spices! If you need a gluten-free option, you can make simple swaps. Use gluten-free breadcrumbs made from rice or corn. Instead of flour, try almond flour or coconut flour. Both give a great texture and flavor. Just check the labels to ensure they meet your needs. These changes will keep your chicken tenders tasty while being gluten-free! You can cook chicken tenders in various ways. The air fryer is quick and gives a great crunch. If you use a regular oven, bake them at 400°F for about 15-20 minutes. This method can turn out crispy, too, but may take longer. Frying in a pan with oil is another option. Just heat the oil in a skillet and cook until golden brown. Each method can yield delicious results, so choose what works best for you! To keep your chicken tenders fresh, use airtight containers. Glass or plastic containers work well. Store them in the fridge for up to three days. If you want to keep them longer, consider freezing. Reheat your chicken tenders in the air fryer for the best results. Set it to 350°F (175°C) and cook for about 5 to 7 minutes. This method keeps the tenders crispy and tasty. You can also use an oven at 375°F (190°C), but the air fryer is my favorite. To freeze chicken tenders, let them cool completely first. Place them in a single layer on a baking sheet. Freeze them for about an hour, then transfer them to freezer bags. They can stay fresh for up to three months. Remember to label your bags with the date! To make sure chicken tenders are done, check the internal temperature. It should reach 165°F (75°C). You can use a meat thermometer for this. Also, look for golden brown color. The chicken should not be pink inside. If it is, cook it a bit longer. Yes, you can use frozen chicken tenderloins. First, thaw them in the fridge overnight. If you're short on time, place them in a sealed bag and run under cold water for quick thawing. Once thawed, follow the same breading and cooking steps as fresh chicken. You may need to add a few extra minutes to the cooking time. Honey mustard sauce can be healthy in moderation. It has natural sweetness from honey and tang from mustard. To make it lighter, consider using less honey or choosing a low-sugar mustard. You can also mix in Greek yogurt for a creamy twist without extra fat. Enjoy it as a dip, but keep track of how much you use! You now have a complete guide to making chicken tenders and honey mustard sauce. Use fresh chicken tenderloins, seasonings, and a simple breading process for great taste. Remember to preheat your air fryer to achieve that perfect crisp. Think about variations to keep things exciting. You can spice it up or try gluten-free options. Storing leftovers properly ensures you enjoy them later. With this knowledge, cooking will be fun and easy. Enjoy your tasty creations!

Air Fryer Chicken Tenders Honey Mustard Delightful Dish

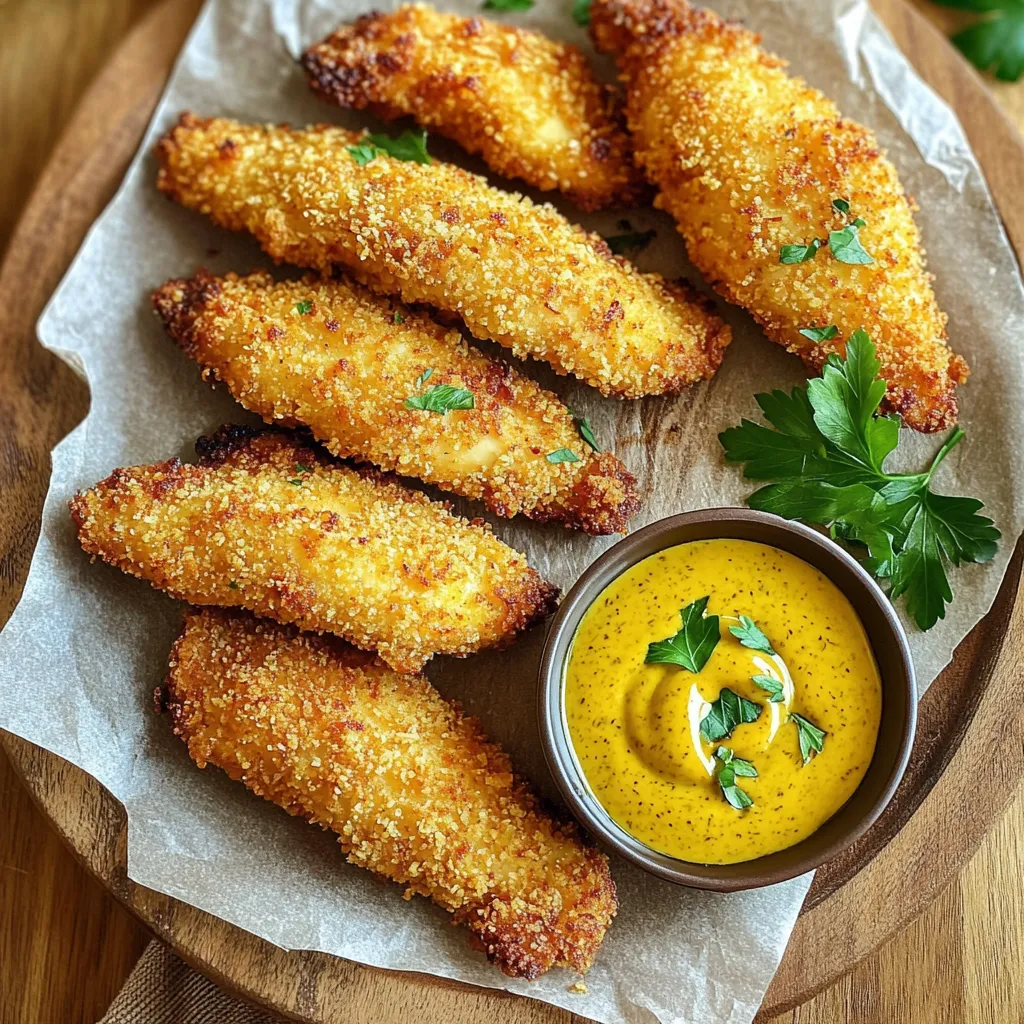
Are you ready to elevate your dinner game? This Air Fryer Chicken Tenders Honey Mustard Delightful Dish delivers crispy, juicy

Older posts
Newer posts
← Previous Page1 … Page7 Page8 Page9 … Page84 Next →

dsad

© 2026 Foodish Talk • Built with GeneratePress

Our Policies

  • Copyright Policy
  • Cookie Policy
  • GDPR Policy
  • Privacy Policy
  • Disclaimer
  • Terms Of Use

More Information

  • Home
  • About
  • Contact
  • Appetizers
  • Dessert
  • Dinner
  • Drinks
©2026, Foodish Talk About Back To Top