Peanut Butter Cup Cheesecake Bars No Bake Delight

WANT TO SAVE THIS RECIPE?

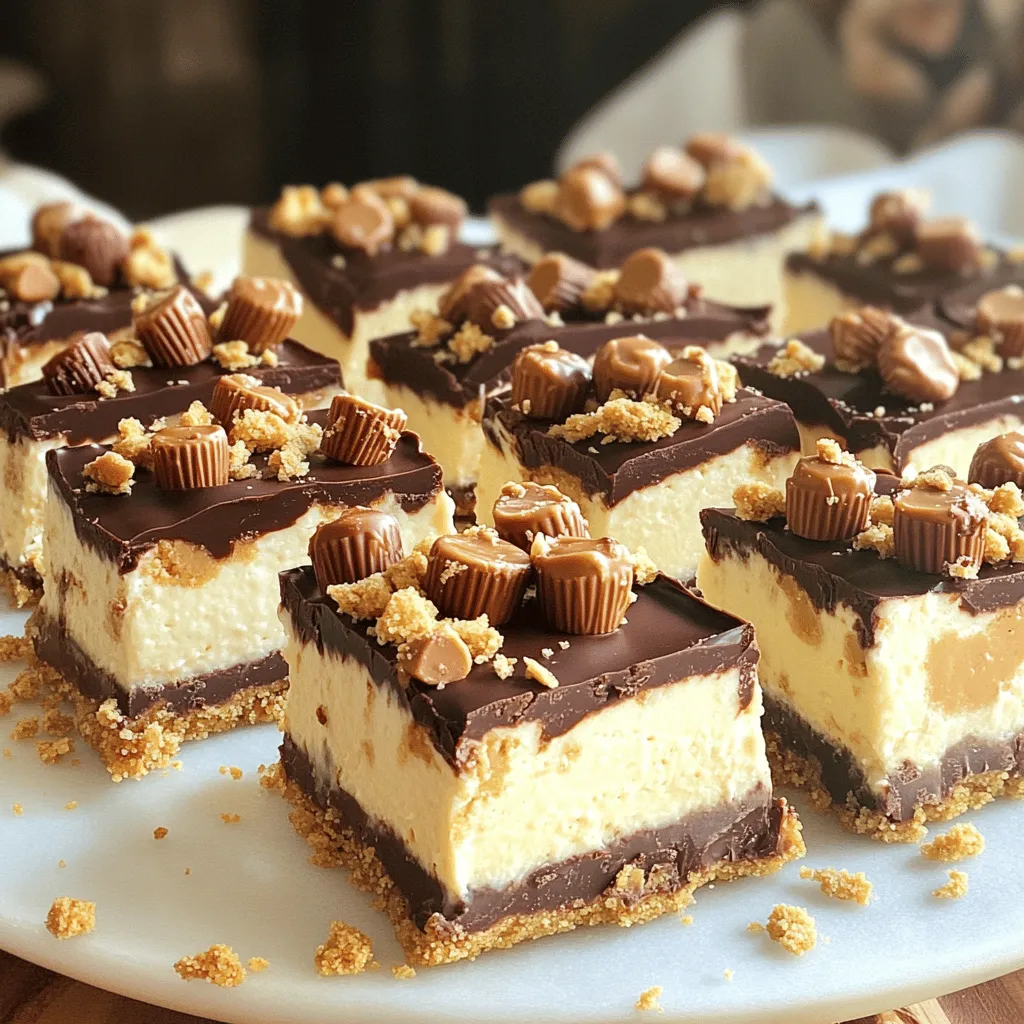
Craving a sweet treat that’s quick and easy? Look no further than these No-Bake Peanut Butter Cup Cheesecake Bars! With creamy filling and a rich crust, this dessert will impress anyone. You’ll find all the ingredients and steps laid out to help you create a delicious, dreamy dessert in no time. Get ready to satisfy your sweet tooth with this delightful recipe!

Ingredients

List of Ingredients for Peanut Butter Cup Cheesecake Bars No Bake

– 1 ½ cups graham cracker crumbs

– ⅓ cup sugar

– ½ cup unsalted butter, melted

– 8 oz cream cheese, softened

– 1 cup creamy peanut butter

– 1 cup powdered sugar

– 1 tsp vanilla extract

– 1 cup heavy whipping cream

– 1 cup mini peanut butter cups, chopped

– Extra mini peanut butter cups for topping

Key Ingredient Functions

Graham cracker crumbs form a crunchy crust.

Sugar adds sweetness to balance flavors.

Unsalted butter binds the crust together.

Cream cheese gives the cheesecake its creamy texture.

Creamy peanut butter provides rich flavor and creaminess.

Powdered sugar sweetens the filling and helps it set.

Vanilla extract adds depth to the flavor.

Heavy whipping cream creates lightness and fluffiness.

Mini peanut butter cups add fun texture and flavor bursts.

Suggested Brands for Ingredients

– For graham cracker crumbs, I recommend Honey Maid.

– Use Domino sugar for reliable sweetness.

– Land O’Lakes makes great unsalted butter.

– Philadelphia cream cheese is my go-to for richness.

– Jif is a top choice for creamy peanut butter.

– 10X powdered sugar by Domino is perfect for this recipe.

– McCormick is a trusted brand for vanilla extract.

– For whipping cream, use Horizon Organic for quality.

– Reese’s mini peanut butter cups are the best topping choice.

Step-by-Step Instructions

Detailed Steps to Prepare the Crust

To start, gather your ingredients. You need graham cracker crumbs, sugar, and melted butter. In a medium bowl, mix 1 ½ cups of graham cracker crumbs, ⅓ cup of sugar, and ½ cup of melted butter. Stir until the mix is crumbly. Next, take a greased 9×9-inch baking dish. Press the crumb mixture firmly into the bottom. This forms your crust. Place the dish in the refrigerator while you make the filling.

How to Make the Cheesecake Filling

Now, let’s create the cheesecake filling. In a large bowl, beat 8 oz of softened cream cheese and 1 cup of creamy peanut butter together. Mix until it’s smooth and creamy. Gradually add 1 cup of powdered sugar and 1 tsp of vanilla extract. Keep mixing until everything is smooth. In another bowl, whip 1 cup of heavy cream until stiff peaks form. Gently fold the whipped cream into the peanut butter mix. Finally, stir in 1 cup of chopped mini peanut butter cups, saving some for later.

Final Assembly and Refrigeration

Spread the cheesecake filling evenly over your chilled crust. Use a spatula to smooth the top. Now, take the reserved mini peanut butter cups and press them lightly into the filling. Cover the dish and place it in the refrigerator. Let it chill for at least 4 hours, or until it’s firm. Once set, cut the bars and serve them cold. Enjoy every bite of this no-bake treat!

Tips & Tricks

Best Practices for Creamy Texture

To get a smooth and creamy filling, start with room-temperature cream cheese. This ensures it blends well with peanut butter. Beat them together until there are no lumps. Once mixed, fold in the whipped cream gently. This keeps the mixture light and airy.

How to Prevent Soggy Crust

To avoid a soggy crust, press the graham cracker mixture firmly into the dish. This helps it hold together. Make sure to chill the crust while you prepare the filling. This sets it well before adding the creamy layer.

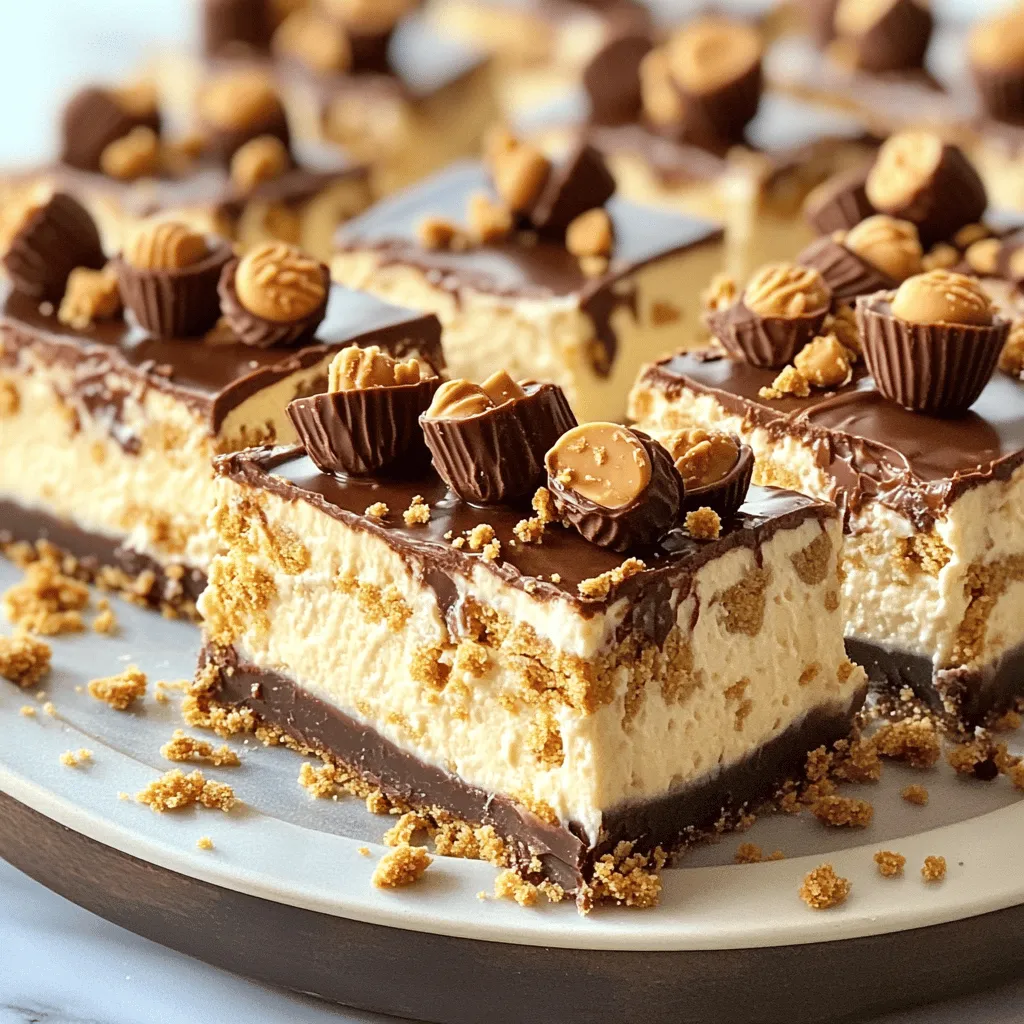
Presentation Suggestions for Serving

For a beautiful presentation, slice the bars neatly and place them on a nice platter. You can drizzle melted chocolate or caramel on top for flair. Adding some crushed graham crackers enhances the look and adds a nice crunch. Adjust the layout for a neat, inviting display.

Variations

Alternative Toppings for the Bars

You can get creative with toppings for these bars. Try adding a layer of melted chocolate on top. This adds a rich flavor. You can also sprinkle crushed nuts or even drizzle caramel sauce for a sweet touch. If you love texture, add more chopped mini peanut butter cups on top. They look great and taste amazing.

Flavor Variations

Mixing flavors can make these bars even better. You can add a bit of cocoa powder to the filling. This makes a chocolate peanut butter flavor that is hard to resist. If you want a fruity twist, try adding some crushed strawberries or raspberries. They brighten the flavor and add a nice contrast.

Gluten-Free Options for the Crust

To make a gluten-free crust, use gluten-free graham cracker crumbs. You can find these at most grocery stores. Another option is to use ground almonds or oats. Just mix them with the same amount of sugar and melted butter. This makes a tasty crust that everyone can enjoy.

Storage Info

How to Store Peanut Butter Cup Cheesecake Bars

To keep your Peanut Butter Cup Cheesecake Bars fresh, store them in an airtight container. I suggest putting a layer of parchment paper between the bars and the container. This helps prevent sticking. Place them in the fridge for best results. They will stay fresh and tasty for several days.

Freezing Instructions

You can freeze these cheesecake bars to enjoy later. First, cut the bars into pieces. Wrap each piece tightly in plastic wrap. Then, place the wrapped bars in a freezer-safe container. They can last for up to three months in the freezer. To eat, just thaw them in the fridge overnight.

Shelf Life and Best Before Tips

These bars taste best when eaten within a week. However, if kept in the fridge, they can last about 5 to 7 days. Always check for any changes in smell or texture before eating. For the best flavor, enjoy them within the first few days.

FAQs

Can I use crunchy peanut butter instead of creamy?

Yes, you can use crunchy peanut butter. It adds a fun texture. The bits of peanut give the bars an extra crunch. Just make sure to stir it well. The flavor will stay rich and tasty.

How do I know when the bars are fully set?

You can tell the bars are set when they feel firm to the touch. After chilling for at least four hours, gently press the top. If it feels solid, they are ready. You can also check by cutting a small piece. It should hold its shape. If it wobbles too much, give it more time in the fridge.

Can I substitute graham cracker crumbs with something else?

Yes, you can use other crumbs. For a gluten-free option, try almond flour or gluten-free crackers. You can also use vanilla wafers for a sweet twist. Just crush them into fine crumbs first. This will give your crust a new flavor.

You learned how to make no-bake peanut butter cup cheesecake bars. We covered the key ingredients, their roles, and brand suggestions. I detailed steps for the crust, filling, and assembly. Effective tips help you achieve a creamy texture and prevent a soggy crust. We explored topping variations and gluten-free options. Finally, I shared storage tips to keep your bars fresh. Enjoy creating these delicious treats! They are perfect for sharing or treating yourself.

- 1 ½ cups graham cracker crumbs - ⅓ cup sugar - ½ cup unsalted butter, melted - 8 oz cream cheese, softened - 1 cup creamy peanut butter - 1 cup powdered sugar - 1 tsp vanilla extract - 1 cup heavy whipping cream - 1 cup mini peanut butter cups, chopped - Extra mini peanut butter cups for topping - Graham cracker crumbs form a crunchy crust. - Sugar adds sweetness to balance flavors. - Unsalted butter binds the crust together. - Cream cheese gives the cheesecake its creamy texture. - Creamy peanut butter provides rich flavor and creaminess. - Powdered sugar sweetens the filling and helps it set. - Vanilla extract adds depth to the flavor. - Heavy whipping cream creates lightness and fluffiness. - Mini peanut butter cups add fun texture and flavor bursts. - For graham cracker crumbs, I recommend Honey Maid. - Use Domino sugar for reliable sweetness. - Land O'Lakes makes great unsalted butter. - Philadelphia cream cheese is my go-to for richness. - Jif is a top choice for creamy peanut butter. - 10X powdered sugar by Domino is perfect for this recipe. - McCormick is a trusted brand for vanilla extract. - For whipping cream, use Horizon Organic for quality. - Reese's mini peanut butter cups are the best topping choice. To start, gather your ingredients. You need graham cracker crumbs, sugar, and melted butter. In a medium bowl, mix 1 ½ cups of graham cracker crumbs, ⅓ cup of sugar, and ½ cup of melted butter. Stir until the mix is crumbly. Next, take a greased 9x9-inch baking dish. Press the crumb mixture firmly into the bottom. This forms your crust. Place the dish in the refrigerator while you make the filling. Now, let’s create the cheesecake filling. In a large bowl, beat 8 oz of softened cream cheese and 1 cup of creamy peanut butter together. Mix until it’s smooth and creamy. Gradually add 1 cup of powdered sugar and 1 tsp of vanilla extract. Keep mixing until everything is smooth. In another bowl, whip 1 cup of heavy cream until stiff peaks form. Gently fold the whipped cream into the peanut butter mix. Finally, stir in 1 cup of chopped mini peanut butter cups, saving some for later. Spread the cheesecake filling evenly over your chilled crust. Use a spatula to smooth the top. Now, take the reserved mini peanut butter cups and press them lightly into the filling. Cover the dish and place it in the refrigerator. Let it chill for at least 4 hours, or until it’s firm. Once set, cut the bars and serve them cold. Enjoy every bite of this no-bake treat! To get a smooth and creamy filling, start with room-temperature cream cheese. This ensures it blends well with peanut butter. Beat them together until there are no lumps. Once mixed, fold in the whipped cream gently. This keeps the mixture light and airy. To avoid a soggy crust, press the graham cracker mixture firmly into the dish. This helps it hold together. Make sure to chill the crust while you prepare the filling. This sets it well before adding the creamy layer. For a beautiful presentation, slice the bars neatly and place them on a nice platter. You can drizzle melted chocolate or caramel on top for flair. Adding some crushed graham crackers enhances the look and adds a nice crunch. Adjust the layout for a neat, inviting display. {{image_2}} You can get creative with toppings for these bars. Try adding a layer of melted chocolate on top. This adds a rich flavor. You can also sprinkle crushed nuts or even drizzle caramel sauce for a sweet touch. If you love texture, add more chopped mini peanut butter cups on top. They look great and taste amazing. Mixing flavors can make these bars even better. You can add a bit of cocoa powder to the filling. This makes a chocolate peanut butter flavor that is hard to resist. If you want a fruity twist, try adding some crushed strawberries or raspberries. They brighten the flavor and add a nice contrast. To make a gluten-free crust, use gluten-free graham cracker crumbs. You can find these at most grocery stores. Another option is to use ground almonds or oats. Just mix them with the same amount of sugar and melted butter. This makes a tasty crust that everyone can enjoy. To keep your Peanut Butter Cup Cheesecake Bars fresh, store them in an airtight container. I suggest putting a layer of parchment paper between the bars and the container. This helps prevent sticking. Place them in the fridge for best results. They will stay fresh and tasty for several days. You can freeze these cheesecake bars to enjoy later. First, cut the bars into pieces. Wrap each piece tightly in plastic wrap. Then, place the wrapped bars in a freezer-safe container. They can last for up to three months in the freezer. To eat, just thaw them in the fridge overnight. These bars taste best when eaten within a week. However, if kept in the fridge, they can last about 5 to 7 days. Always check for any changes in smell or texture before eating. For the best flavor, enjoy them within the first few days. Yes, you can use crunchy peanut butter. It adds a fun texture. The bits of peanut give the bars an extra crunch. Just make sure to stir it well. The flavor will stay rich and tasty. You can tell the bars are set when they feel firm to the touch. After chilling for at least four hours, gently press the top. If it feels solid, they are ready. You can also check by cutting a small piece. It should hold its shape. If it wobbles too much, give it more time in the fridge. Yes, you can use other crumbs. For a gluten-free option, try almond flour or gluten-free crackers. You can also use vanilla wafers for a sweet twist. Just crush them into fine crumbs first. This will give your crust a new flavor. You learned how to make no-bake peanut butter cup cheesecake bars. We covered the key ingredients, their roles, and brand suggestions. I detailed steps for the crust, filling, and assembly. Effective tips help you achieve a creamy texture and prevent a soggy crust. We explored topping variations and gluten-free options. Finally, I shared storage tips to keep your bars fresh. Enjoy creating these delicious treats! They are perfect for sharing or treating yourself.

Peanut Butter Cup Cheesecake Bars No Bake

Indulge in these decadent Peanut Butter Cup Cheesecake Bars that blend creamy peanut butter and rich chocolate goodness in every bite! This easy recipe features a buttery graham cracker crust, a fluffy filling, and topped with mini peanut butter cups. Perfect for parties or a sweet treat at home, these bars will surely impress. Click through to explore the full recipe and treat yourself to a delightful dessert experience!

Ingredients
  

1 ½ cups graham cracker crumbs

⅓ cup sugar

½ cup unsalted butter, melted

8 oz cream cheese, softened

1 cup creamy peanut butter

1 cup powdered sugar

1 tsp vanilla extract

1 cup heavy whipping cream

1 cup mini peanut butter cups, chopped

Extra mini peanut butter cups for topping

Instructions
 

In a medium bowl, combine graham cracker crumbs, sugar, and melted butter. Mix until well combined and crumbly.

    Press the mixture firmly into the bottom of a greased 9x9-inch baking dish to form the crust. Place in the refrigerator to set while preparing the filling.

      In a large bowl, beat the softened cream cheese and peanut butter together until smooth and creamy.

        Gradually add powdered sugar and vanilla extract, mixing until fully incorporated and smooth.

          In another bowl, whip the heavy cream until stiff peaks form. Gently fold the whipped cream into the peanut butter mixture until well blended.

            Stir in the chopped mini peanut butter cups, reserving a handful for topping later.

              Spread the cheesecake filling evenly over the prepared crust. Smooth the top with a spatula.

                Garnish with the reserved mini peanut butter cups on top, pressing them lightly into the filling.

                  Cover and refrigerate for at least 4 hours, or until firm.

                    Once set, cut into bars and serve chilled.

                      Prep Time: 20 minutes | Total Time: 4 hours 20 minutes | Servings: 12

                        - Presentation Tips: Serve on a beautiful platter, arranging the bars in a neat grid. Drizzle with melted chocolate or caramel for an extra touch and sprinkle some crushed graham crackers on top for texture.

                          WANT TO SAVE THIS RECIPE?

                          Leave a Comment

                          Recipe Rating