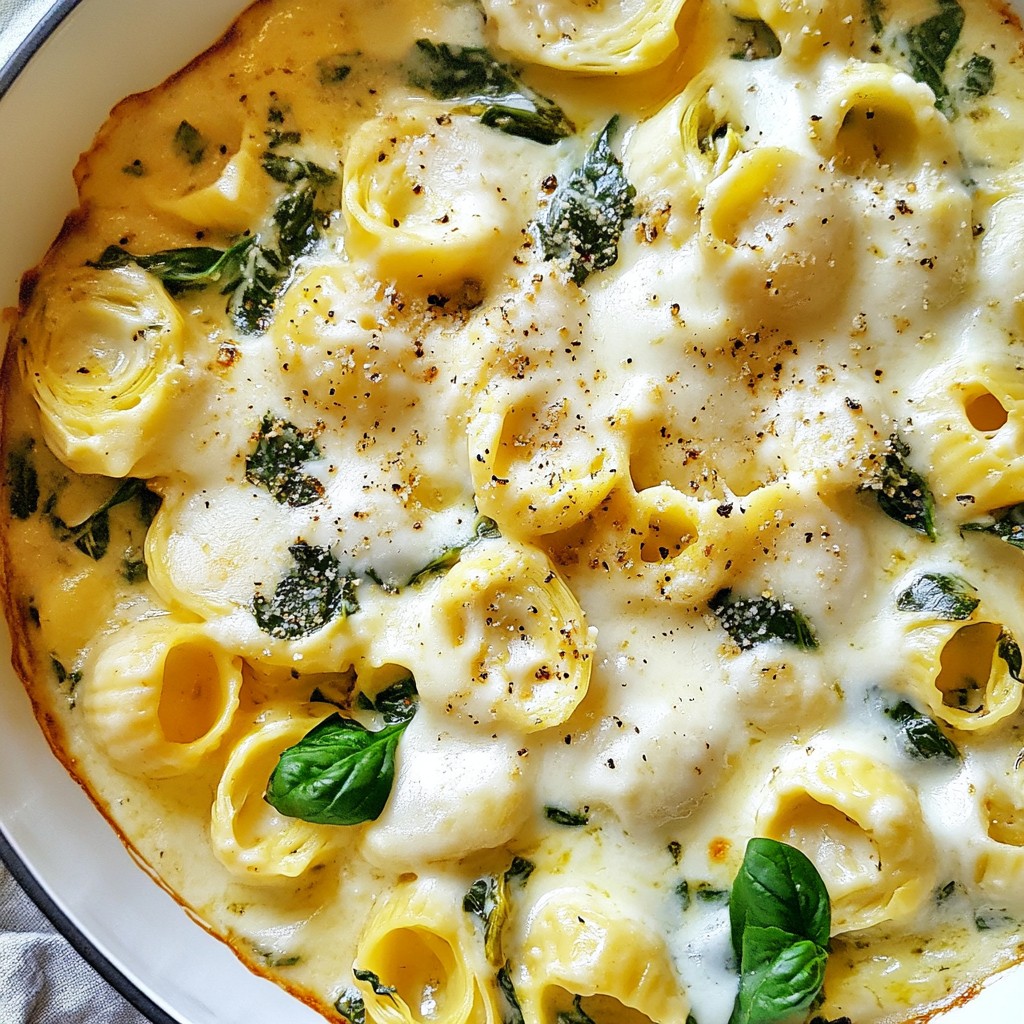
Looking for a quick and tasty meal that impresses? I've got just the dish for you! My One-Pot Spinach Artichoke Pasta saves time while delivering big flavors. Whether you’re a busy parent or a culinary novice, this recipe makes dinner easy and delicious. In this guide, I’ll share simple ingredients, step-by-step instructions, and tips to customize your meal. Let’s dive in and create a dish you’ll love!
Why I Love This Recipe
- Quick and Easy: This one-pot dish comes together in just 30 minutes, making it perfect for busy weeknights.
- Flavorful Combination: The creamy blend of spinach, artichokes, and cheeses creates a rich and satisfying flavor profile.
- Minimal Cleanup: Cooking everything in one pot means less time washing dishes and more time enjoying your meal!
- Customizable: You can easily add your favorite vegetables or protein to make this dish your own.
Ingredients
Complete List of Ingredients
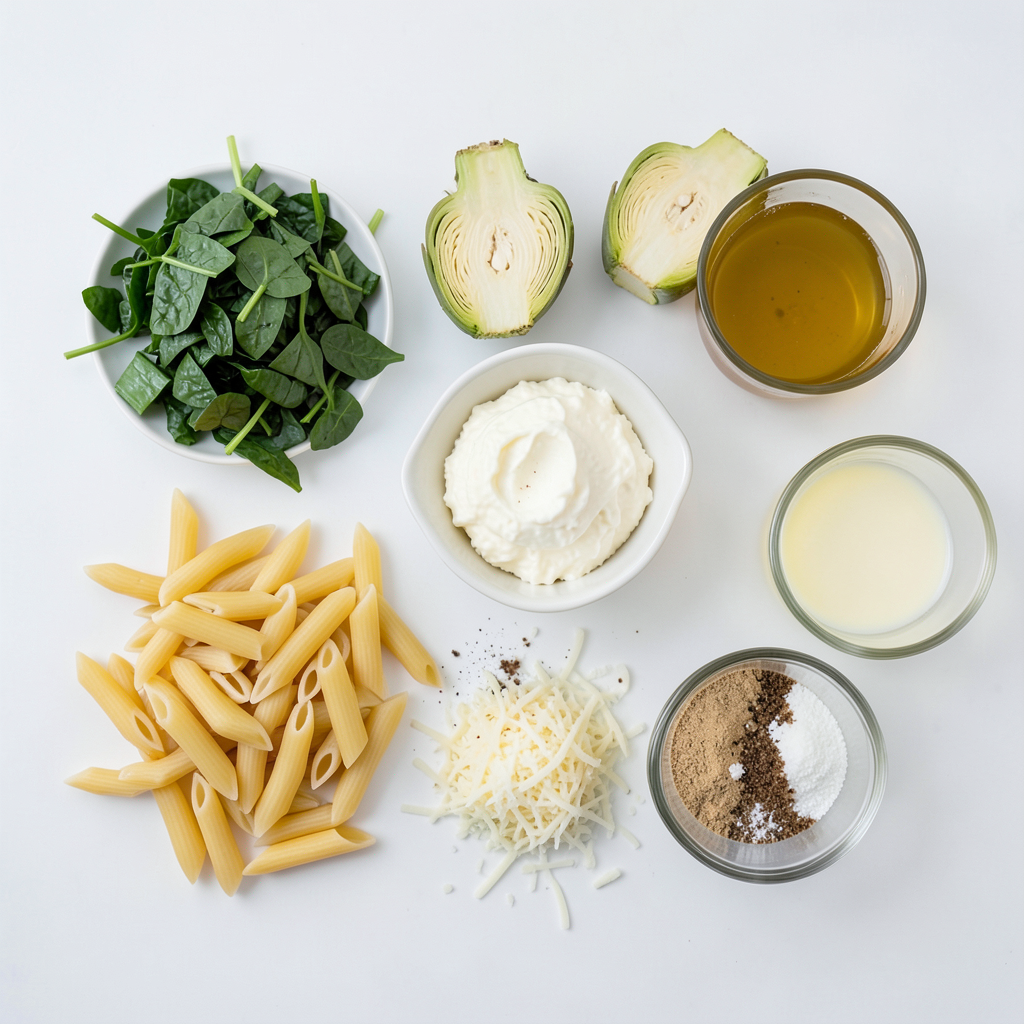
To make One-Pot Spinach Artichoke Pasta, you need:
- 12 oz pasta (penne or fusilli)
- 2 cups fresh spinach, chopped
- 1 can (14 oz) artichoke hearts, drained and quartered
- 1 cup cream cheese, softened
- 1 cup vegetable broth
- 1 cup milk
- 1 cup shredded mozzarella cheese
- 1/2 cup grated Parmesan cheese
- 3 cloves garlic, minced
- 1 teaspoon onion powder
- 1 teaspoon garlic powder
- Salt and pepper to taste
- Olive oil for drizzling
Substitute Options for Dietary Preferences
If you want to change things up, here are some swaps:
- Use gluten-free pasta for a gluten-free option.
- Replace cream cheese with a dairy-free cream cheese for vegan diets.
- Swap vegetable broth for chicken broth if you want a richer flavor.
- You can use nutritional yeast in place of cheese for a vegan twist.
Pantry Staples and Fresh Ingredients
This recipe uses both pantry staples and fresh items:
- Pasta and canned artichokes are pantry staples.
- Fresh spinach gives a nice texture and flavor.
- Garlic adds depth and aroma.
- Cream cheese and milk create a rich sauce.
Make sure to check your pantry before shopping!
Step-by-Step Instructions
Preparation Process
Start by gathering all your ingredients. You need pasta, spinach, artichoke hearts, cream cheese, broth, milk, cheeses, garlic, and seasonings. Chop the spinach and mince the garlic. Drain and quarter the artichoke hearts. This keeps everything organized and ready.
Cooking Steps
1. Heat a large pot on medium. Drizzle a little olive oil and add minced garlic. Cook for about 1 minute until it smells good.
2. Add the artichoke hearts and cook for 2-3 minutes until they get some color.
3. Pour in the vegetable broth and milk. Stir in the cream cheese until it is smooth.
4. Add onion powder, garlic powder, salt, and pepper. Mix it well.
5. Bring this mix to a gentle simmer. Now, add the pasta and chopped spinach. Stir everything together.
6. Cover the pot and let it cook for 10-12 minutes. Stir often so it doesn’t stick.
7. Once the pasta is cooked and most of the liquid is gone, take it off the heat.
8. Stir in mozzarella and Parmesan cheese until melted. Taste it and adjust seasoning if needed.
9. Serve it hot, topped with extra cheese and a sprinkle of pepper.
Tips for Achieving Perfect Texture
To get the best texture, stir the pasta often while it cooks. This helps it absorb the sauce. You want it creamy, not dry. If it seems too thick, add a splash of broth or milk. Always taste before serving to ensure it’s just right.
Tips & Tricks
Common Mistakes to Avoid
When making One-Pot Spinach Artichoke Pasta, avoid these common mistakes:
- Overcooking the pasta: Check the package time and stir often.
- Not using enough liquid: Ensure the pasta has enough broth and milk to cook.
- Forgetting to season: Add salt and pepper early for better flavor.
Expert Tips for Flavor Enhancement
To boost the flavor of your dish, try these tips:
- Add fresh herbs: Basil or parsley add a bright touch.
- Use roasted garlic: This adds depth and a sweet flavor.
- Incorporate lemon juice: A splash of lemon brightens the whole dish.
How to Customize for Personal Taste
Make this pasta your own with these ideas:
- Swap cheeses: Try goat cheese or feta for a tangy twist.
- Add veggies: Bell peppers or cherry tomatoes can add color and taste.
- Include protein: Chicken, shrimp, or beans can make it heartier.
Pro Tips
- Perfect Pasta Texture: Make sure to cook the pasta until al dente, as it will continue to absorb liquid and cook slightly more when combined with the cheese and sauce.
- Fresh Spinach Alternative: If fresh spinach is unavailable, you can use frozen spinach; just be sure to thaw and drain it well before adding it to the pot.
- Flavor Variations: Experiment with different cheeses such as goat cheese or feta for a unique twist on flavor, or add red pepper flakes for a spicy kick.
- Make Ahead: This dish can be prepared ahead of time and stored in the fridge. Reheat gently on the stove, adding a splash of milk if needed to loosen the sauce.
Variations
Vegan and Dairy-Free Alternatives
You can make this dish vegan by swapping the dairy. Use cashew cream instead of cream cheese. For the milk, try almond milk or oat milk. Nutritional yeast adds a cheesy flavor without dairy. Choose vegan mozzarella for that melty goodness.
Adding Protein: Chicken, Shrimp, or Tofu
Boost the protein in your pasta by adding chicken, shrimp, or tofu. If you use chicken, cook it first, then add it to the pot. For shrimp, toss them in during the last few minutes of cooking. Tofu is great too! Use firm tofu and sauté it before mixing.
Ingredient Swaps for Seasonal Produce
Feel free to swap in seasonal veggies to change up flavors. In spring, add asparagus or peas for a fresh taste. In fall, roasted butternut squash works well. You can also toss in different greens, like kale or arugula, for added nutrients.
Storage Info
Best Practices for Storing Leftovers
To store your One-Pot Spinach Artichoke Pasta, let it cool first. Use an airtight container to keep it fresh. This pasta dish lasts up to three days in the fridge. Keep it away from strong-smelling foods to avoid flavor changes.
Reheating Instructions
When you want to enjoy your leftovers, reheat gently. Use a microwave or a stove. If using a microwave, place it in a bowl. Add a splash of water or milk. This helps keep it creamy. Heat in 30-second bursts, stirring in between. On the stove, warm it over low heat. Stir often to avoid sticking.
Freezing Tips for Long-Term Storage
You can freeze this pasta dish if you want to store it longer. Place cooled pasta in a freezer-safe container. Leave some space at the top for expansion. This dish can last up to two months in the freezer. When ready to eat, thaw it in the fridge overnight. Reheat as mentioned before. Enjoy a tasty meal even later!
FAQs
How can I make this dish gluten-free?
To make this dish gluten-free, use gluten-free pasta. Look for brands that offer penne or fusilli shapes. Check the package to ensure it is labeled gluten-free. The rest of the ingredients are naturally gluten-free. This way, you can enjoy the same creamy taste.
Can I prepare this ahead of time?
Yes, you can prepare this dish ahead of time. Cook the pasta and mix it with the sauce. Let it cool, then store it in the fridge. When you're ready to eat, just reheat it on the stove or in the microwave. You may need to add a splash of milk to loosen the sauce.
What other cheeses can I use?
You can use many types of cheese in this dish. Try using goat cheese for a tangy flavor. Feta cheese also works well for a Mediterranean twist. If you prefer a sharper taste, use aged cheddar or Gruyère. Just remember to adjust the amounts based on your taste.
How to make it spicier or more flavorful?
To spice it up, add red pepper flakes or diced jalapeños. Stir them in while cooking the garlic. You can also add a splash of hot sauce for an extra kick. For more flavor, consider adding fresh herbs like basil or parsley when serving. These tips will make your pasta shine!
In this blog post, we explored essential ingredients, step-by-step cooking, and handy tips. You learned how to avoid common mistakes and customize your dish to suit your taste. We covered variations for different diets and shared storage tips for leftovers. Remember, the key to success lies in using fresh ingredients and practicing your skills. Embrace creativity and enjoy the cooking process. With these insights, you can make delicious meals every time!