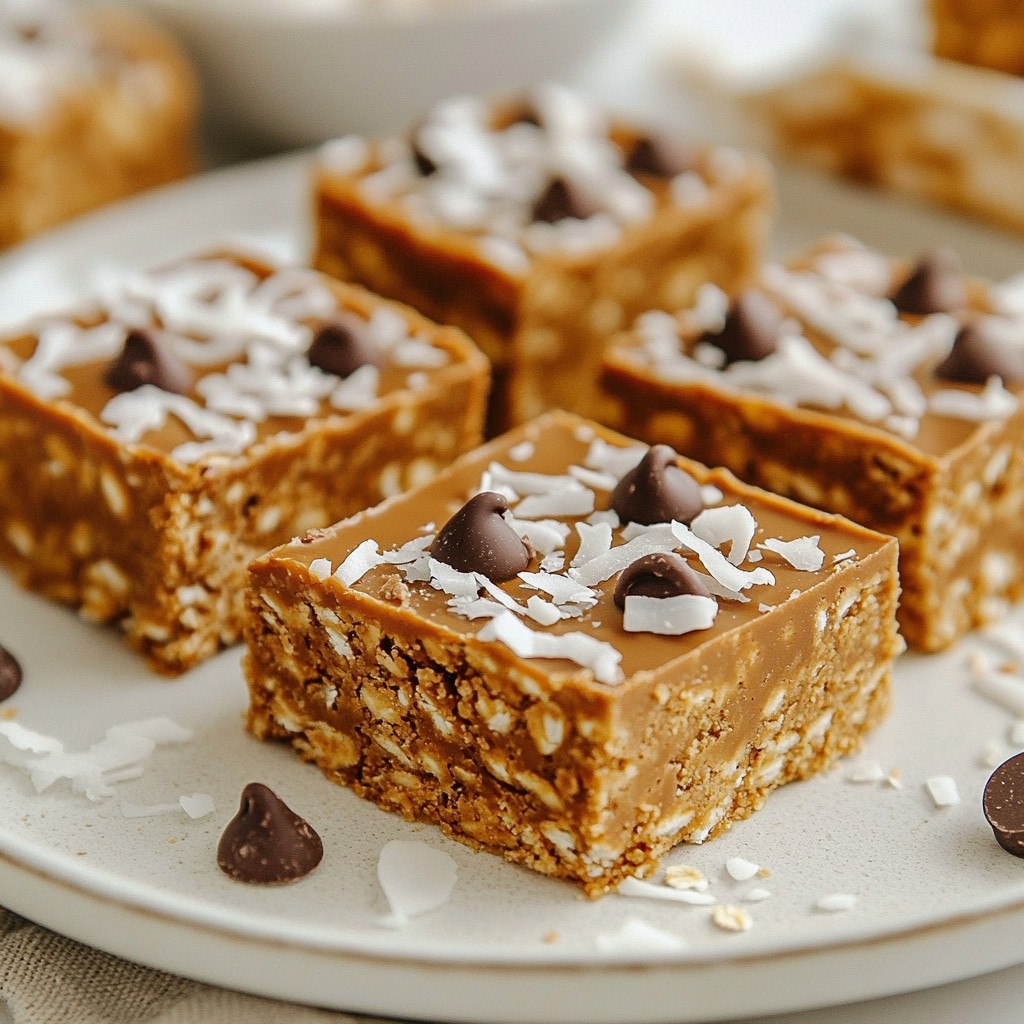
Are you craving a sweet treat that’s easy to make and requires no baking? Look no further! In this post, I'll share my simple recipe for No-Bake Peanut Butter Bars that you can whip up in no time. With just a few ingredients like creamy peanut butter and dark chocolate chips, these bars are not only delicious but also perfect for satisfying your snack attacks. Let’s dive right into the tasty details!
Why I Love This Recipe
- No Baking Required: This recipe is perfect for those hot days when you want something sweet but don’t want to turn on the oven.
- Healthy Ingredients: With wholesome ingredients like oats and peanut butter, these bars are a guilt-free treat.
- Customizable: You can easily tweak the ingredients by adding your favorite nuts or dried fruits for a personal touch.
- Quick to Make: In just 10 minutes of prep time, you can have these delicious bars chilling in the fridge!
Ingredients
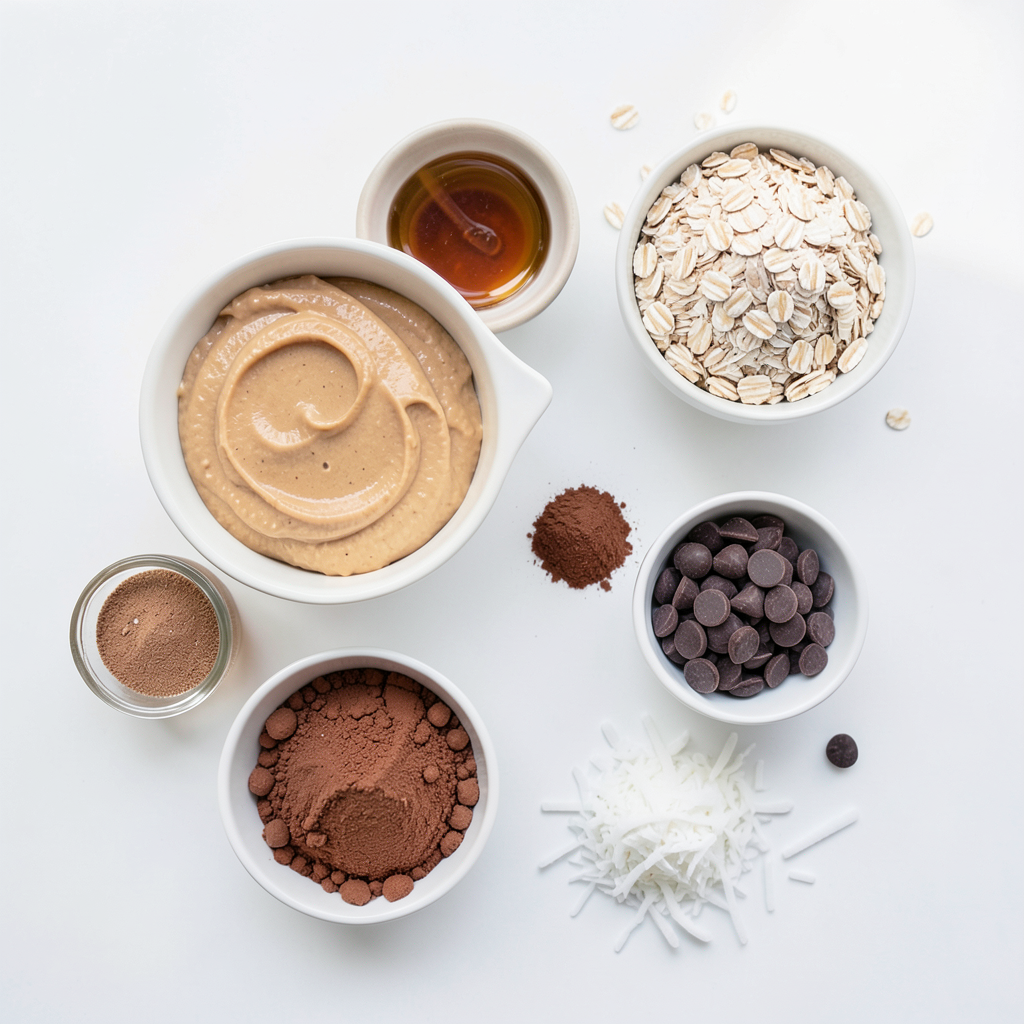
To make no-bake peanut butter bars, you need some simple ingredients. Here’s what you will need:
- 1 cup creamy peanut butter
- 1/2 cup maple syrup
- 1 teaspoon vanilla extract
- 1 1/2 cups rolled oats
- 1/2 cup unsweetened cocoa powder
- 1/2 cup dark chocolate chips (you can use dairy-free if you want)
- 1/4 cup shredded coconut (optional)
- Pinch of salt
These ingredients mix well to create a tasty treat.
What is creamy peanut butter?
Creamy peanut butter is smooth and spreadable. It gives the bars a rich flavor and a nice texture.
Why use maple syrup?
Maple syrup adds sweetness. It also helps the bars stick together. You can swap it out for honey if needed.
What role does vanilla extract play?
Vanilla extract adds a warm and sweet flavor. It enhances the taste of the peanut butter.
Why add rolled oats?
Rolled oats provide texture and bulk. They also make the bars filling and healthy.
What is unsweetened cocoa powder for?
Unsweetened cocoa powder gives a chocolatey flavor. It pairs well with peanut butter.
What about dark chocolate chips?
Dark chocolate chips add extra sweetness and richness. They are a fun surprise in every bite.
What is the purpose of shredded coconut?
Shredded coconut is an optional add-in. It adds a chewy texture and a hint of coconut flavor.
Why include a pinch of salt?
A pinch of salt balances the sweetness. It brings out the flavors in the bars.
Gather these ingredients, and you’re on your way to making delicious no-bake peanut butter bars!
Step-by-Step Instructions
Preparation Steps
1. Mixing the base ingredients
Start by taking a medium bowl. Add 1 cup of creamy peanut butter, 1/2 cup of maple syrup, and 1 teaspoon of vanilla extract. Use a spatula to mix until the blend is smooth and creamy.
2. Incorporating dry ingredients
Next, add in 1 1/2 cups of rolled oats and 1/2 cup of unsweetened cocoa powder. Stir this mixture well. Make sure every part is mixed evenly. This helps the bars hold together.
3. Adding optional ingredients
If you want, fold in 1/4 cup of shredded coconut and 1/2 cup of dark chocolate chips. This adds extra flavor and texture. Mix until they are evenly spread throughout the mixture.
4. Preparing the baking pan
Grab an 8x8 inch square baking pan. Line it with parchment paper. This step helps you remove the bars easily once they are set.
5. Pressing down the mixture
Pour the mixture into the lined pan. Use your hands or a spatula to press it down firmly. Make sure the surface is flat and even. This will make the bars easier to cut later.
Setting and Serving
1. Refrigeration time
Place the pan in the fridge. Let it chill for at least 2 hours or until the mixture is firm to the touch. This is key for getting the right texture.
2. Cutting the bars
Once set, take the pan out of the fridge. Use the edges of the parchment paper to lift the bars out. Place them on a cutting board. Cut them into squares or rectangles based on your preference.
3. Presentation recommendations
For a nice touch, serve the bars on a decorative plate. You can sprinkle some extra shredded coconut on top or drizzle melted chocolate for added flair. This makes them look as good as they taste!
Tips & Tricks
Storing for Freshness
To keep your no-bake peanut butter bars fresh, store them in an airtight container. This prevents them from drying out. If you stack them, place parchment paper between layers to avoid sticking.
In the fridge, these bars last up to a week. For longer storage, freeze them. They can stay good in the freezer for about three months. Just thaw them in the fridge before enjoying.
Perfecting the Recipe
You can adjust the sweetness of your bars easily. If you like it sweeter, add more maple syrup. Try a bit at a time until it tastes just right for you.
Customizing flavors can be fun! Add-ins like chopped nuts, dried fruit, or seeds work great. You can also swap dark chocolate chips for white chocolate for a different taste. Experiment and find your favorite mix!
Pro Tips
- Choose the Right Peanut Butter: Opt for a creamy, natural peanut butter without added sugars or oils for the best texture and flavor.
- Chill for Perfect Texture: Allow the bars to set in the refrigerator for at least 2 hours to achieve a firm and sliceable consistency.
- Customize Your Add-ins: Add in your favorite mix-ins like nuts, seeds, or dried fruits for a personalized touch to your bars.
- Storage Tips: Store the bars in an airtight container in the refrigerator to keep them fresh for up to a week.
Variations
Flavor Alterations
You can switch up the nut butter in this recipe. Almond butter or cashew butter work great. Each nut butter gives a unique taste.
For sweeteners, maple syrup is a star. But, honey, agave, or brown rice syrup can also shine. Just remember to adjust the amount if you switch.
Adding spices can change the flavor completely. A pinch of cinnamon can add warmth. You can also try a touch of nutmeg or even a dash of sea salt for a savory twist.
Texture Modifications
If you want a crunch, add in some nuts or seeds. Chopped almonds or walnuts give a nice bite. You can also use crispy rice cereal for added crunch.
For a different base, consider using puffed quinoa. This can make the bars lighter and airy. You can also swap rolled oats for almond flour for a gluten-free option.
Experiment with these ideas to make the bars your own. The possibilities are endless!
Storage Info
Best Storage Methods
To keep your no-bake peanut butter bars fresh, follow these steps:
- Refrigeration tips: Store the bars in an airtight container in the fridge. This keeps them cool and tasty. They can last up to one week when stored this way.
- Freezing for longer shelf life: If you want to keep them longer, freeze the bars. Wrap them tightly in plastic wrap, then place them in a freezer-safe bag. They can last up to three months in the freezer. When you want to eat them, thaw them in the fridge overnight.
Signs of Spoilage
Look for these signs to tell if your bars have gone bad:
- Smell: If they smell off or sour, it's best to throw them away.
- Texture: If they feel sticky or too soft, they may have spoiled.
- Color: Any change in color can also indicate spoilage. Trust your senses; if it seems off, don't eat it.
FAQs
Common Questions
Can I use natural peanut butter? Yes, you can use natural peanut butter. It adds a nice flavor. Just make sure it’s creamy and smooth. Stir it well before measuring, as natural peanut butter can separate.
How long do these bars last? These no-bake peanut butter bars last about a week in the fridge. You can store them in an airtight container. For longer storage, freeze them, and they can last up to three months.
Can I substitute ingredients for dietary restrictions? Absolutely! You can use almond butter or sun butter if you have nut allergies. For sweeteners, agave syrup works well instead of maple syrup. You can also skip the chocolate chips for a lower-sugar option.
What is the best way to cut no-bake bars? To cut the bars, first, let them chill in the fridge until firm. Use a sharp knife and cut in straight lines. For clean cuts, warm the knife slightly under hot water, then dry it off before cutting. This helps prevent sticky edges.
You now have a clear plan for making tasty no-bake bars. You learned about essential ingredients, like creamy peanut butter and dark chocolate chips. You saw step-by-step instructions to mix and set the bars just right. Helpful tips showed how to store them and even tweak the recipe for your taste. With these tips and variations, you can make bars that fit any preference. Enjoy your homemade treats!


