If you crave a refreshing dessert that’s easy to make, you’ll love these No-Bake Key Lime Pie Bars. With a crunchy crust and a creamy, tangy filling, this treat is perfect for warm days or special occasions. In just a few simple steps, you can whip up a delicious dessert to impress your friends and family. Let’s dive into the fun of making these tasty treats!
Ingredients
To make No-Bake Key Lime Pie Bars, you need simple ingredients. Here’s what you’ll need:
– 1 ½ cups graham cracker crumbs
– ¼ cup granulated sugar
– ½ cup unsalted butter, melted
– 1 (14 oz) can sweetened condensed milk
– ½ cup fresh key lime juice (about 4-5 limes)
– Zest of 2 key limes
– 1 teaspoon vanilla extract
– 1 cup heavy whipping cream
– 2 tablespoons powdered sugar
– Lime slices and whipped cream for garnish
These ingredients come together to create a bright and zesty treat. The graham cracker crumbs create a lovely crust, while the key lime juice gives that fresh and tangy flavor. Sweetened condensed milk adds creaminess, making each bite smooth. Use fresh limes for the best taste. You can also add a touch of vanilla for depth. Whipping cream and powdered sugar make a light topping that balances the tartness.
Feel free to get creative with the garnishes! Lime slices and whipped cream not only look great but also add extra flavor. As you gather these ingredients, think about how they will work together. Each one plays a key role in making this dessert a hit.
Step-by-Step Instructions
Preparing the Crust
– First, take a medium bowl. Combine 1 ½ cups of graham cracker crumbs, ¼ cup of sugar, and ½ cup of melted butter.
– Mix until it looks like wet sand.
– Next, grab a 9×9-inch baking dish. Press the mixture evenly into the bottom.
– Use the back of a measuring cup to pack it tightly.
– Chill the crust in the fridge while you make the filling.
Making the Filling
– In another bowl, whisk together one can of sweetened condensed milk, ½ cup of fresh key lime juice, the zest of 2 key limes, and 1 teaspoon of vanilla.
– Whisk until smooth and well mixed.
– Pour this mixture over the chilled crust. Spread it evenly.
Freezing and Serving
– Cover the dish with plastic wrap. Freeze it for at least 2 hours until it sets.
– Once it is set, remove the dish from the freezer. Cut the bars into squares.
– In a separate bowl, whip 1 cup of heavy cream with 2 tablespoons of powdered sugar until soft peaks form.
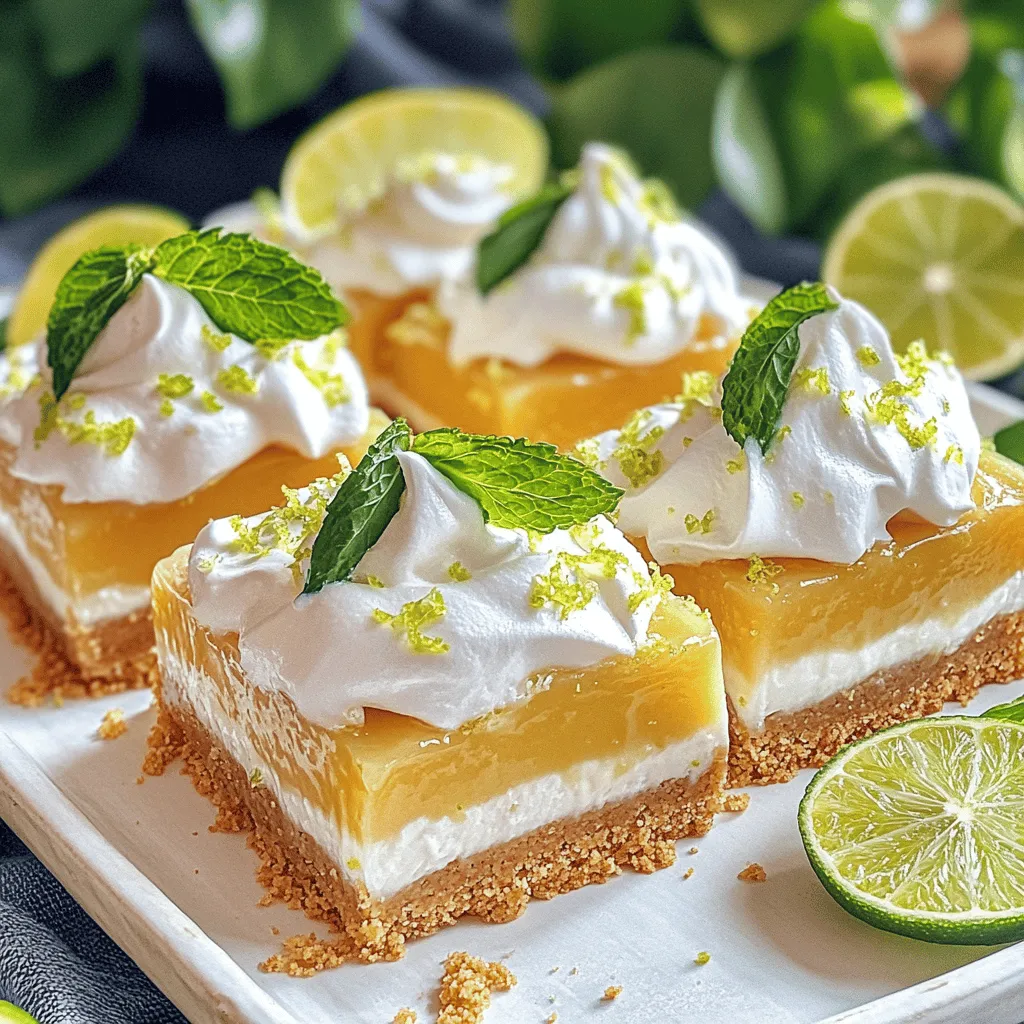
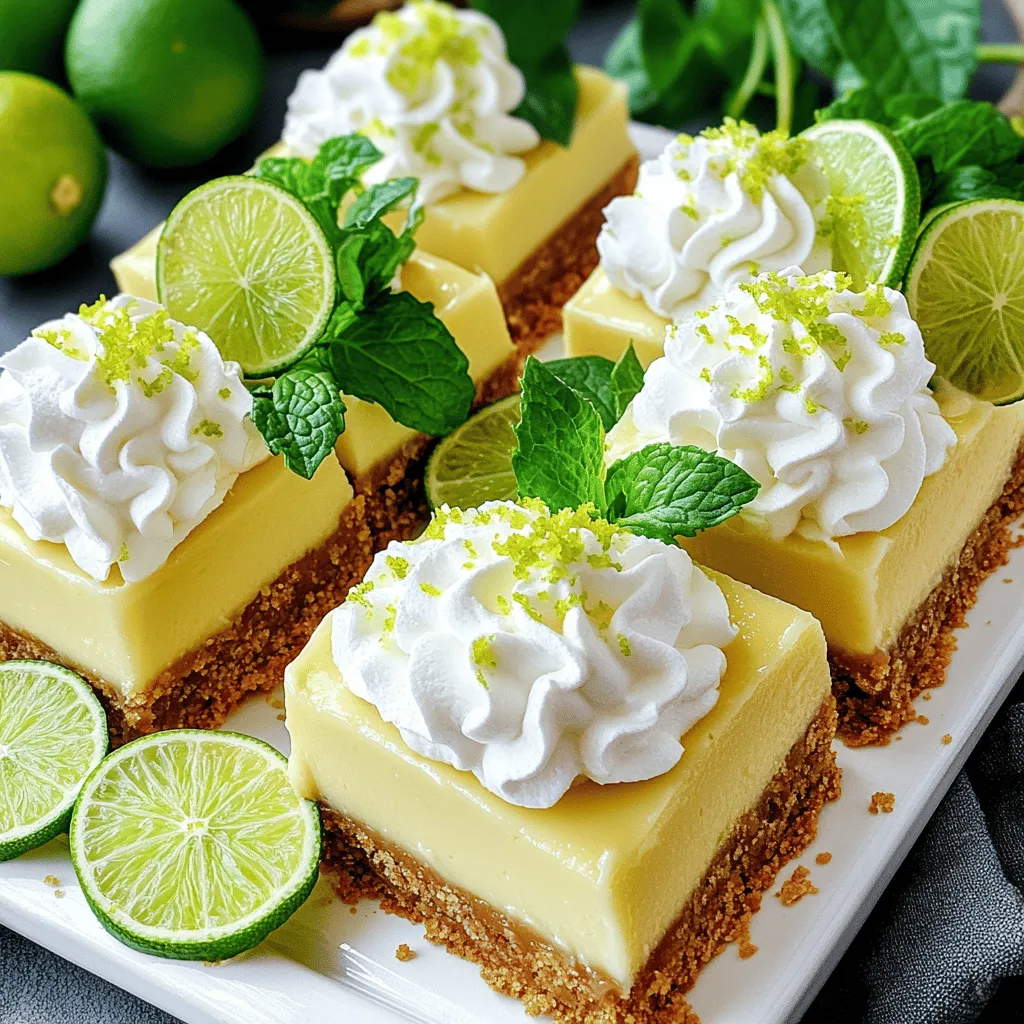
– Serve the key lime pie bars with a dollop of whipped cream and a slice of lime.
Tips & Tricks
Best Practices for a Perfect Crust
To make the best crust, pack the graham cracker mixture evenly. Press it down with a measuring cup until it feels firm. This helps keep the bars together. Use fresh ingredients for the filling, especially key limes. Fresh juice gives a brighter taste.
Tips for Whipping Cream
When whipping cream, start with chilled tools. Use a cold bowl and beaters. This helps create soft peaks. Whip the cream until it looks fluffy but not too stiff. This gives the bars a light touch.
Garnishing Suggestions
For a lovely presentation, add lime slices on top. Fresh mint leaves also brighten the look. Place the bars on a platter and arrange the garnishes. This makes your no-bake key lime pie bars look fancy and inviting.
Variations
Gluten-Free Option
You can make these bars gluten-free with a simple swap. Use gluten-free graham crackers instead of regular ones. Just crush them like normal and mix with sugar and butter. This option allows everyone to enjoy this treat without worry.
Flavor Variations
Want to mix it up? You can add coconut for a tropical twist. Grate some coconut into the filling for extra texture. You can also try using zests from other citrus fruits. Orange or lemon zests will give a new flavor. Experiment to find your favorite combination.
Serving Suggestions
These bars are great on their own, but you can elevate them. Serve with fresh fruits like strawberries or blueberries. They add color and a burst of flavor. You can also pair them with other desserts, like vanilla ice cream. This makes for a fun dessert platter.
Storage Info
How to Store Leftover Bars
To keep your key lime pie bars fresh, place them in an airtight container. Store the container in the fridge. This helps maintain their creamy texture and zesty flavor. If you used whipped cream for serving, it may lose some firmness over time. For best results, add whipped cream just before serving.
Freezing Instructions
Freezing these bars is easy. First, cut them into squares or bars. Wrap each piece in plastic wrap. Then, place the wrapped bars in a freezer-safe container. This method keeps them fresh and prevents freezer burn. To thaw, take out the desired number of bars. Let them sit in the fridge for about an hour before serving.
Shelf Life
When stored in the fridge, the bars last up to five days. They remain tasty and safe to eat during this time. If you freeze them, they can last for about three months. Just remember, the longer they sit, the more they lose flavor. Enjoy them while they’re fresh for the best taste!
FAQs
Can I use regular limes instead of key limes?
Yes, you can use regular limes. However, key limes have a unique taste. They are sweeter and more aromatic than regular limes. If you use regular limes, your bars will taste more tart. To keep the flavor bright, you may add a bit of extra sugar.
How long do these bars need to freeze?
These bars need to freeze for at least 2 hours. This time helps them set properly. If you want them super firm, freeze them longer. Just remember to cover them well to avoid ice crystals.
Can I make these bars in advance?
Yes, making these bars in advance is a great idea. You can prepare them up to 2 days ahead. Just store them in the freezer. When ready to serve, simply cut them into bars and allow them to thaw a bit. Enjoy!
This blog post shared how to create delicious key lime bars. You learned the key ingredients needed and step-by-step instructions to make them perfectly. I also included tips to help you make the best crust and whip the cream right. You can even explore variations and storage techniques for your bars. With fresh flavors and simple steps, you can impress anyone. Try making these bars for your next gathering. They are sure to be a hit! Enjoy your tasty creation!


