Ingredient Nutella Mousse Cups Irresistible Delight

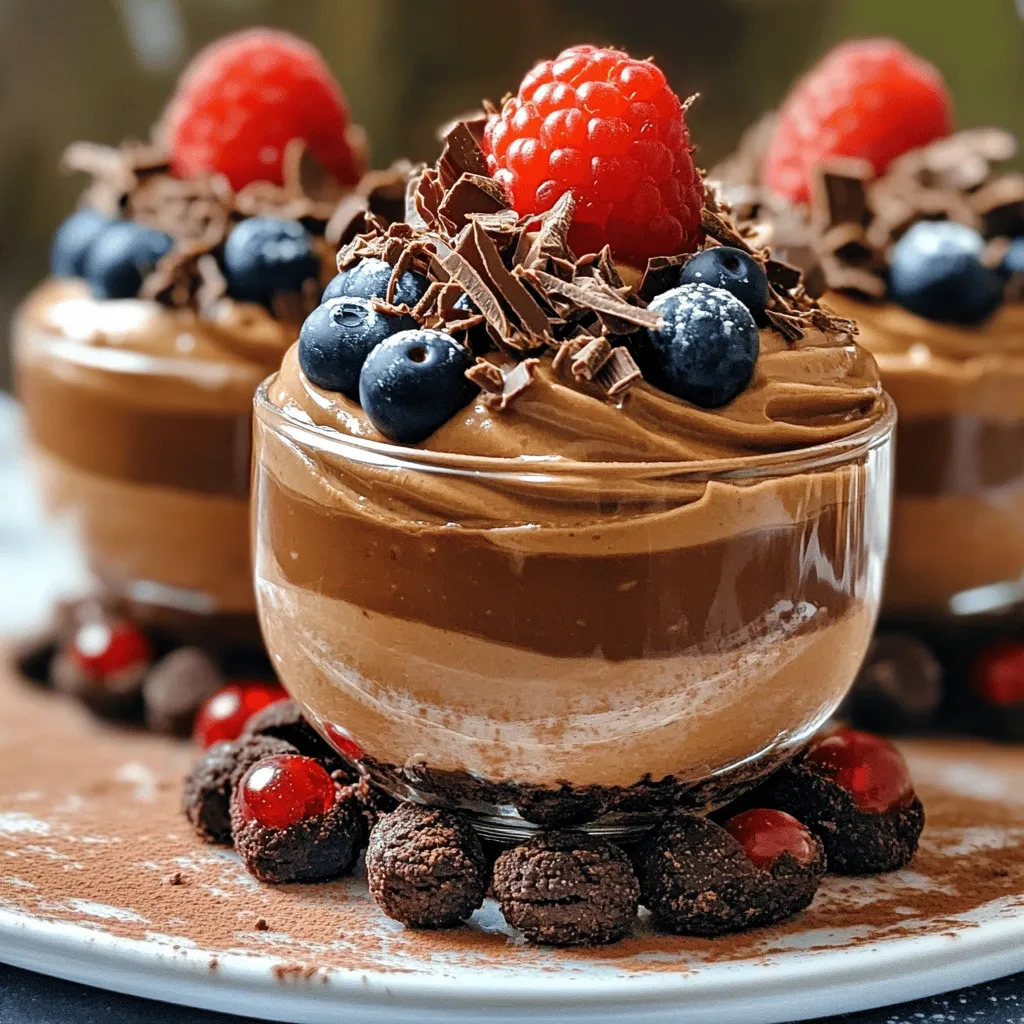
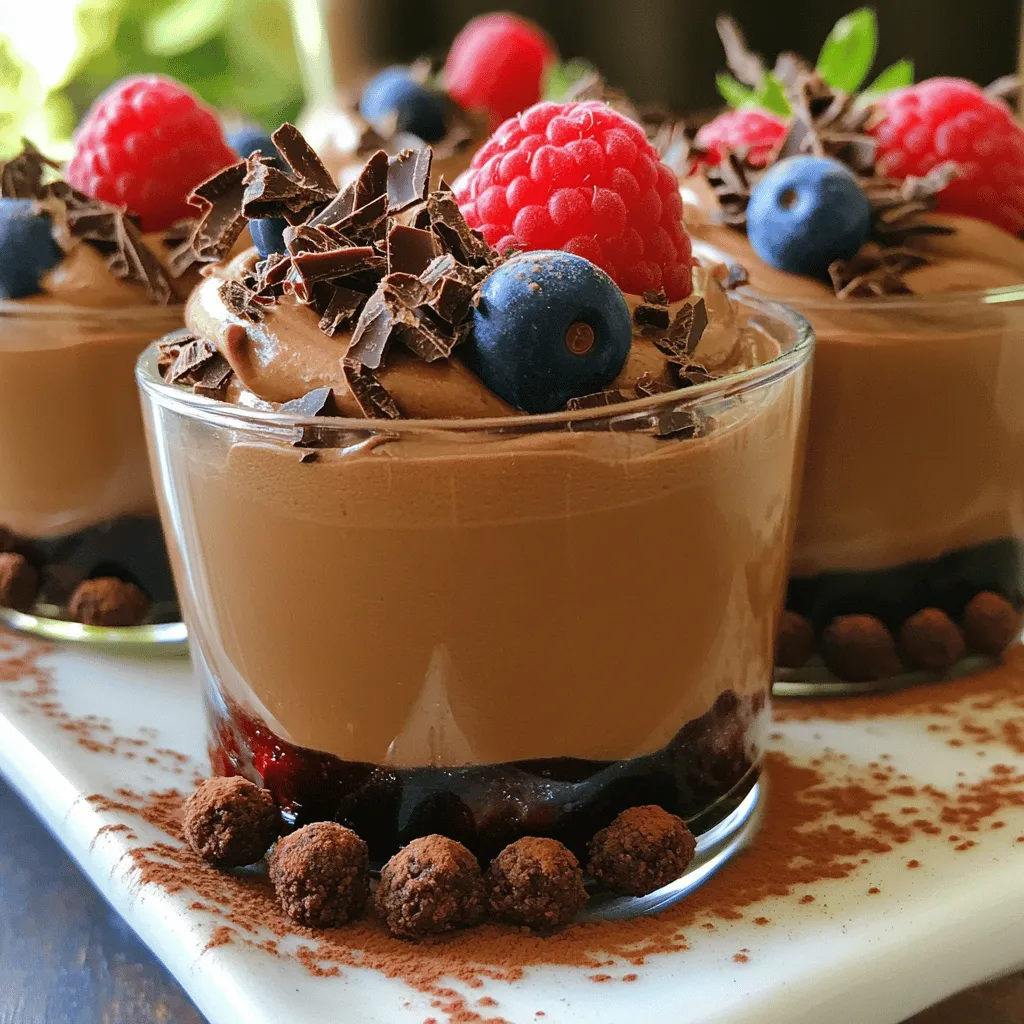
If you love chocolate, you’ll adore my Ingredient Nutella Mousse Cups! These rich and creamy delights combine Nutella with whipped cream for an easy dessert that melts in your mouth. With just a few simple ingredients and steps, you can impress your friends and family. Get ready to whip up these tasty cups that bring joy to any occasion. Let’s dive into the ingredients and get started!

Ingredients

To make Nutella mousse cups, you need a few simple ingredients. Let’s gather them first.

List of Ingredients

– 1 cup Nutella

– 1 cup heavy whipping cream

– 1/2 cup powdered sugar

– 1 teaspoon vanilla extract

– 1/4 cup chocolate shavings (for garnish)

– Fresh berries (strawberries or raspberries, for garnish)

– Mini chocolate cookies (optional, for a crunchy base)

Each ingredient plays a key role in creating this delightful dessert. Nutella gives the mousse its rich, chocolatey taste. The heavy whipping cream adds a light and fluffy texture. Powdered sugar sweetens the mousse without making it grainy. Vanilla extract brings a warm flavor that complements the chocolate.

Garnishing with chocolate shavings and fresh berries not only makes it look beautiful but also adds a nice contrast in taste. If you love a bit of crunch, you can add mini chocolate cookies at the bottom of your cups. They give a nice base and enhance the chocolate experience.

These ingredients are easy to find and make this dessert a breeze to prepare. Now, let’s enjoy making this irresistible treat together!

Step-by-Step Instructions

Preparation of the Whipped Cream

First, grab a mixing bowl. You’ll need to whisk together the heavy whipping cream, powdered sugar, and vanilla extract. This step is crucial. Whisk until you see soft peaks form. It should take about 3 to 5 minutes. If you have an electric mixer, it makes this step easier.

Combining Nutella with Whipped Cream

Next, take another bowl. Scoop a large spoonful of your whipped cream. Mix it with the Nutella. This softens the Nutella and makes it easier to blend. Stir until you see a smooth, combined mixture.

Folding Technique

Now, we need to be gentle. Take the remaining whipped cream and fold it into the Nutella mixture. Do this in batches. It’s important to keep the airy texture. If you mix too hard, it becomes flat.

Assembling the Mousse Cups

Let’s prepare the cups! If you want a crunchy base, crumble some mini chocolate cookies. Layer them at the bottom of each cup. Then, spoon the Nutella mousse into each cup until they’re full. Tap the cups gently to remove any air pockets.

Chilling the Mousse

Now comes the waiting part. Place your mousse cups in the fridge. They need to chill for at least 2 hours to set properly. This step is key for the right texture.

Tips & Tricks

How to Whip Cream Perfectly

When you whip cream, the goal is to create soft peaks. You can use an electric mixer or a hand whisk. An electric mixer makes it easier. It saves time and energy. If you use a hand whisk, it will take a bit longer, but it’s a great workout!

To know when you have soft peaks, check the cream. It should hold its shape but still look fluffy. You can turn the bowl upside down to test it, but be careful. If it falls out, you whipped too much!

Serving Suggestions

For serving, use clear cups to show off your mousse. It looks great! You can also place them on a dessert platter. Dust a bit of cocoa powder around the cups for flair. It makes the dish pop!

Garnish is key for visual appeal. Top each mousse with chocolate shavings and fresh berries. Strawberries or raspberries work well. They add color and a burst of flavor!

Troubleshooting Common Issues

If your mousse doesn’t set, don’t panic! This can happen if the cream isn’t whipped enough. Try putting the cups back in the fridge for a bit longer.

If you over-whipped the cream, it might look grainy or butter-like. You can fix this by adding a bit of fresh cream. Mix it gently to bring back a smooth texture.

Variations

Flavor Variations

You can add more flavor to your Nutella mousse. A splash of coffee or hazelnut liqueur gives it depth. This twist boosts the rich taste. You can also try different flavors. Peanut butter adds a creamy twist. Dark chocolate brings a more intense flavor. Experimenting with these options makes your mousse even more fun.

Dietary Adjustments

If you want vegan options, use coconut cream instead of heavy cream. Vegan chocolate makes it rich and creamy. You can also swap out regular cookies for gluten-free ones. This way, everyone can enjoy the mousse, no matter their diet. It’s great to have tasty choices for all.

Serving Sizes and Adjustments

Scaling the recipe is simple. If you have a big group, just double or triple the ingredients. Mini cups are a hit at parties. They look cute and are easy to grab. Use small glasses or dessert cups for a fun touch. You can serve them with fresh berries or chocolate shavings on top. This makes every cup feel special.

Storage Info

How to Store Mousse Cups

To keep your Nutella mousse cups fresh, store them in the refrigerator. Use an airtight container or cover them with plastic wrap. This will prevent any odors from other foods affecting your mousse.

Nutella mousse cups can stay fresh for up to four days. After that, the texture may change. Always check for any changes in smell or appearance before serving.

Freezing the Mousse

You can freeze Nutella mousse cups if you want to save some for later. First, place them in a freezer-safe container. Seal tightly to avoid ice crystals.

When it’s time to eat, thaw them in the fridge overnight. The mousse will lose some of its lightness and creaminess. This means you might notice a change in texture and flavor. But they will still taste great!

FAQs

Can I make Nutella mousse cups ahead of time?

Yes, you can make Nutella mousse cups ahead of time. I recommend making them up to two days in advance. Just store them in the fridge until you are ready to serve. This lets the flavors meld nicely, making each bite even more delicious.

How long does the Nutella mousse take to set?

The Nutella mousse needs at least 2 hours in the fridge to set. This time helps it firm up and creates that perfect, creamy texture. If you can wait longer, let it sit overnight for an even better result.

Is Nutella mousse gluten-free?

Yes, Nutella mousse can be gluten-free if you choose the right ingredients. Nutella itself is gluten-free. If you add mini chocolate cookies, make sure they are gluten-free as well. You can find many brands that offer gluten-free cookie options.

Can I use store-bought whipped cream instead?

You can use store-bought whipped cream. It saves time, but homemade whipped cream tastes fresher. Store-bought often has added sugars and stabilizers. If you want a light and airy mousse, making your own is the best choice.

This Nutella mousse is simple and fun to make. We covered the key ingredients, step-by-step instructions, and useful tips. Remember to keep the mousse chilled for the best taste. You can even try different flavors or dietary options. If you follow these steps, you’ll create a delightful treat every time. Enjoy sharing your delicious mousse cups with friends and family. Your dessert skills will shine!

To make Nutella mousse cups, you need a few simple ingredients. Let’s gather them first. - 1 cup Nutella - 1 cup heavy whipping cream - 1/2 cup powdered sugar - 1 teaspoon vanilla extract - 1/4 cup chocolate shavings (for garnish) - Fresh berries (strawberries or raspberries, for garnish) - Mini chocolate cookies (optional, for a crunchy base) Each ingredient plays a key role in creating this delightful dessert. Nutella gives the mousse its rich, chocolatey taste. The heavy whipping cream adds a light and fluffy texture. Powdered sugar sweetens the mousse without making it grainy. Vanilla extract brings a warm flavor that complements the chocolate. Garnishing with chocolate shavings and fresh berries not only makes it look beautiful but also adds a nice contrast in taste. If you love a bit of crunch, you can add mini chocolate cookies at the bottom of your cups. They give a nice base and enhance the chocolate experience. These ingredients are easy to find and make this dessert a breeze to prepare. Now, let’s enjoy making this irresistible treat together! First, grab a mixing bowl. You’ll need to whisk together the heavy whipping cream, powdered sugar, and vanilla extract. This step is crucial. Whisk until you see soft peaks form. It should take about 3 to 5 minutes. If you have an electric mixer, it makes this step easier. Next, take another bowl. Scoop a large spoonful of your whipped cream. Mix it with the Nutella. This softens the Nutella and makes it easier to blend. Stir until you see a smooth, combined mixture. Now, we need to be gentle. Take the remaining whipped cream and fold it into the Nutella mixture. Do this in batches. It’s important to keep the airy texture. If you mix too hard, it becomes flat. Let’s prepare the cups! If you want a crunchy base, crumble some mini chocolate cookies. Layer them at the bottom of each cup. Then, spoon the Nutella mousse into each cup until they’re full. Tap the cups gently to remove any air pockets. Now comes the waiting part. Place your mousse cups in the fridge. They need to chill for at least 2 hours to set properly. This step is key for the right texture. When you whip cream, the goal is to create soft peaks. You can use an electric mixer or a hand whisk. An electric mixer makes it easier. It saves time and energy. If you use a hand whisk, it will take a bit longer, but it’s a great workout! To know when you have soft peaks, check the cream. It should hold its shape but still look fluffy. You can turn the bowl upside down to test it, but be careful. If it falls out, you whipped too much! For serving, use clear cups to show off your mousse. It looks great! You can also place them on a dessert platter. Dust a bit of cocoa powder around the cups for flair. It makes the dish pop! Garnish is key for visual appeal. Top each mousse with chocolate shavings and fresh berries. Strawberries or raspberries work well. They add color and a burst of flavor! If your mousse doesn’t set, don’t panic! This can happen if the cream isn’t whipped enough. Try putting the cups back in the fridge for a bit longer. If you over-whipped the cream, it might look grainy or butter-like. You can fix this by adding a bit of fresh cream. Mix it gently to bring back a smooth texture. {{image_2}} You can add more flavor to your Nutella mousse. A splash of coffee or hazelnut liqueur gives it depth. This twist boosts the rich taste. You can also try different flavors. Peanut butter adds a creamy twist. Dark chocolate brings a more intense flavor. Experimenting with these options makes your mousse even more fun. If you want vegan options, use coconut cream instead of heavy cream. Vegan chocolate makes it rich and creamy. You can also swap out regular cookies for gluten-free ones. This way, everyone can enjoy the mousse, no matter their diet. It’s great to have tasty choices for all. Scaling the recipe is simple. If you have a big group, just double or triple the ingredients. Mini cups are a hit at parties. They look cute and are easy to grab. Use small glasses or dessert cups for a fun touch. You can serve them with fresh berries or chocolate shavings on top. This makes every cup feel special. To keep your Nutella mousse cups fresh, store them in the refrigerator. Use an airtight container or cover them with plastic wrap. This will prevent any odors from other foods affecting your mousse. Nutella mousse cups can stay fresh for up to four days. After that, the texture may change. Always check for any changes in smell or appearance before serving. You can freeze Nutella mousse cups if you want to save some for later. First, place them in a freezer-safe container. Seal tightly to avoid ice crystals. When it's time to eat, thaw them in the fridge overnight. The mousse will lose some of its lightness and creaminess. This means you might notice a change in texture and flavor. But they will still taste great! Yes, you can make Nutella mousse cups ahead of time. I recommend making them up to two days in advance. Just store them in the fridge until you are ready to serve. This lets the flavors meld nicely, making each bite even more delicious. The Nutella mousse needs at least 2 hours in the fridge to set. This time helps it firm up and creates that perfect, creamy texture. If you can wait longer, let it sit overnight for an even better result. Yes, Nutella mousse can be gluten-free if you choose the right ingredients. Nutella itself is gluten-free. If you add mini chocolate cookies, make sure they are gluten-free as well. You can find many brands that offer gluten-free cookie options. You can use store-bought whipped cream. It saves time, but homemade whipped cream tastes fresher. Store-bought often has added sugars and stabilizers. If you want a light and airy mousse, making your own is the best choice. This Nutella mousse is simple and fun to make. We covered the key ingredients, step-by-step instructions, and useful tips. Remember to keep the mousse chilled for the best taste. You can even try different flavors or dietary options. If you follow these steps, you'll create a delightful treat every time. Enjoy sharing your delicious mousse cups with friends and family. Your dessert skills will shine!

Ingredient Nutella Mousse Cups

Indulge in the delightful decadence of Nutella Mousse Cups with this easy recipe! With just a few ingredients like Nutella, heavy cream, and fresh berries, you can whip up a heavenly treat that will impress anyone. Perfect for gatherings or a sweet personal indulgence, these mousse cups are sure to satisfy your chocolate cravings. Click through to explore the full recipe and bring this dreamy dessert to life!

Ingredients
  

1 cup Nutella

1 cup heavy whipping cream

1/2 cup powdered sugar

1 teaspoon vanilla extract

1/4 cup chocolate shavings (for garnish)

Fresh berries (strawberries or raspberries, for garnish)

Mini chocolate cookies (for a crunchy base, optional)

Instructions
 

In a mixing bowl, whisk together the heavy whipping cream, powdered sugar, and vanilla extract until soft peaks form. This will take about 3-5 minutes of whisking, or use an electric mixer for ease.

    In another bowl, combine the Nutella with a large spoonful of the whipped cream mixture to lighten it up. Mix until combined.

      Gently fold the remaining whipped cream into the Nutella mixture in batches, being careful not to deflate the airy texture.

        Once fully incorporated, prepare your serving cups or glasses. If using mini chocolate cookies, crumble them and layer them at the bottom of each cup.

          Spoon the Nutella mousse into each cup until filled to the top. Tap gently to remove any air pockets.

            Refrigerate the mousse cups for at least 2 hours to set.

              Before serving, garnish with chocolate shavings and fresh berries on top for a pop of color and flavor.

                Prep Time: 15 minutes | Total Time: 2 hours 15 minutes | Servings: 4-6 cups

                  - Presentation Tips: Serve chilled and display them on a dessert platter, with a dusting of cocoa powder around the plates for a restaurant-quality touch.

                    Leave a Comment

                    Recipe Rating