Looking for a sweet treat that’s easy to make and dairy-free? You’re in the right place! This Dairy-Free Chocolate Banana Bark is a fun and tasty way to enjoy a delightful snack. I’ll guide you through every step, from gathering simple ingredients to freezing the final product. Whether you want to tweak the recipe or explore variations, this guide has everything you need. Let’s dive into this chocolatey adventure together!
Ingredients
List of Ingredients
To make Dairy-Free Chocolate Banana Bark, you’ll need the following items:
– 2 large ripe bananas
– 1 cup dairy-free dark chocolate chips
– 1 tablespoon coconut oil
– ½ cup unsweetened coconut flakes
– ¼ cup chopped nuts (e.g., almonds or walnuts)
– 2 tablespoons chia seeds
– A pinch of sea salt
Ingredient Substitutions
If you don’t have an ingredient, try these swaps:
– Use any nut butter instead of coconut oil for a creamy twist.
– Swap bananas for ripe strawberries or apples for a fresh taste.
– Use any type of dairy-free chocolate chips, like semi-sweet or white chocolate.
– Replace coconut flakes with crushed graham crackers for a crunchy texture.
– Use sunflower seeds if you want a nut-free option.
Nutritional Information
This treat is a great mix of flavors and nutrients. Each serving has about:
– Calories: 180
– Protein: 3g
– Carbohydrates: 25g
– Dietary Fiber: 4g
– Sugars: 10g
– Fats: 8g
– Saturated Fat: 6g
Packed with healthy fats, fiber, and natural sugars, this bark is a tasty snack. Enjoy it as a treat or a quick energy boost!
Step-by-Step Instructions
Preparation Steps
1. Start by lining a baking sheet with parchment paper. This keeps the bark from sticking.
2. Next, slice the two large ripe bananas into thin rounds. Set these aside for later.
Melting Chocolate Process
1. Take a microwave-safe bowl and add the dairy-free dark chocolate chips and coconut oil.
2. Microwave this mix in 30-second bursts. Stir between each burst until the chocolate is smooth.
Assembly and Freezing
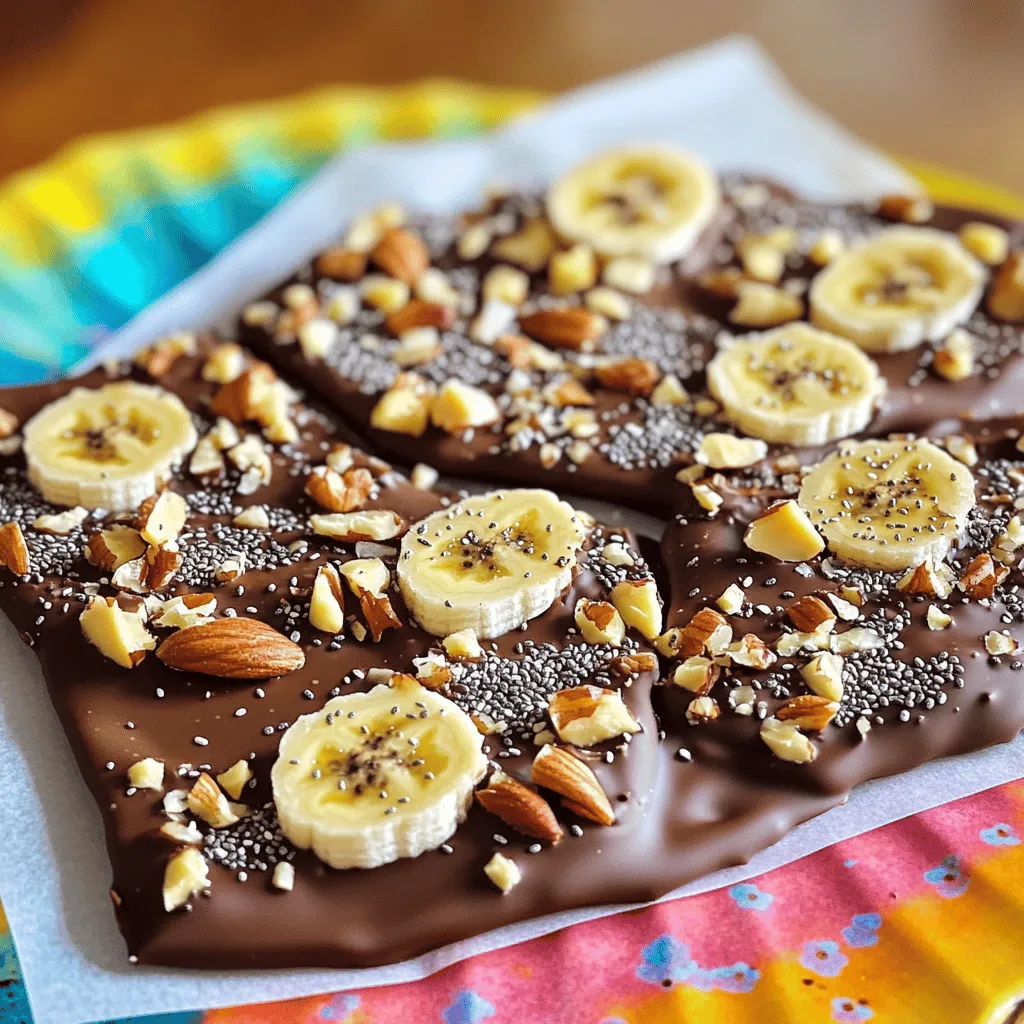
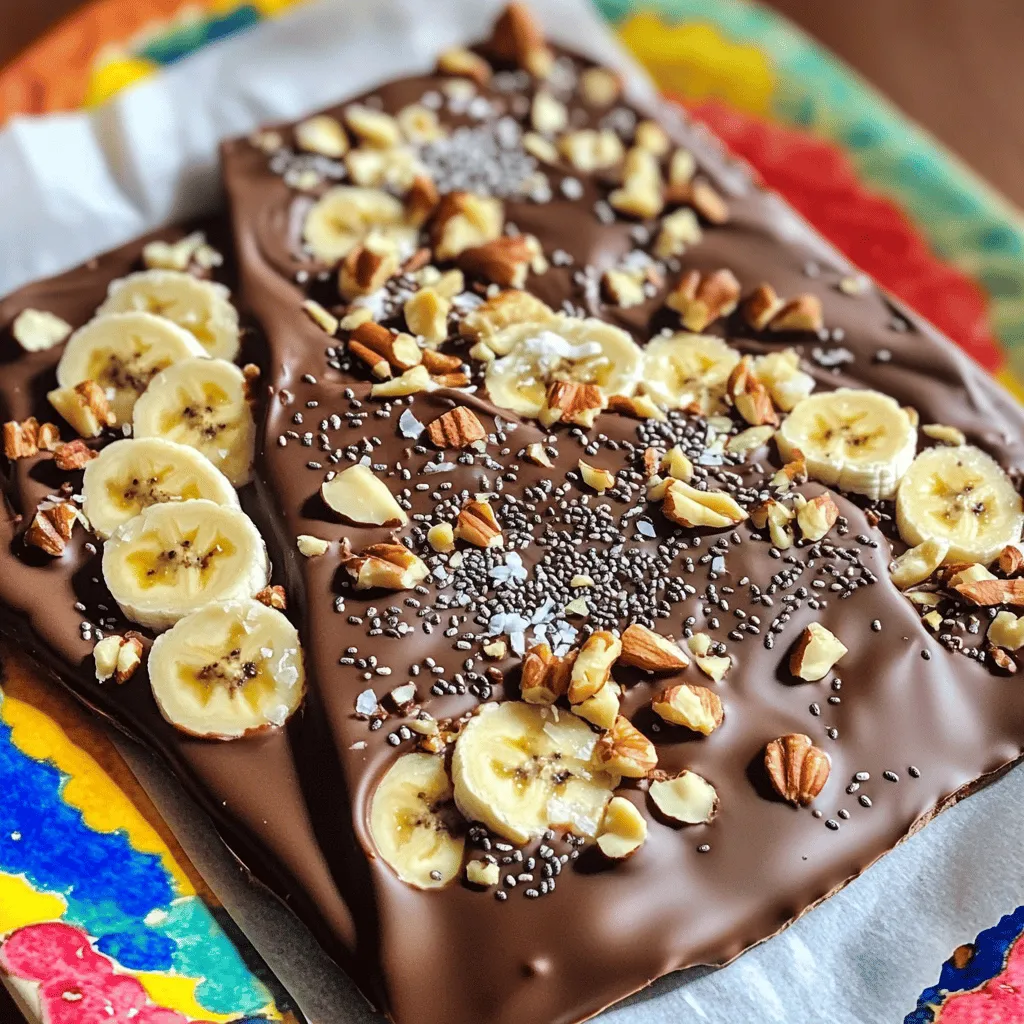
1. Once the chocolate is ready, pour it onto the parchment-lined baking sheet. Spread it out evenly into a rectangle.
2. Gently place the banana slices on top of the melted chocolate. Press them down just a bit.
3. Now, sprinkle the coconut flakes, chopped nuts, chia seeds, and a pinch of sea salt over the top.
4. Finally, put the baking sheet in the freezer. Wait for about 1-2 hours until the chocolate is firm.
5. When it’s set, break or cut the bark into pieces and enjoy!
Tips & Tricks
Best Practices for Melting Chocolate
To melt chocolate, use a microwave-safe bowl. Add the dairy-free dark chocolate chips and coconut oil. Microwave in short bursts of 30 seconds. Stir after each burst to keep the heat even. This helps avoid burning the chocolate. When it is smooth and shiny, it is ready. Remember, patience is key here!
Tips for Slicing Bananas
Use ripe bananas for the best flavor. Slice them into thin rounds, about a quarter inch thick. Thin slices help the bananas fit well in the bark. Use a sharp knife for clean cuts. If the bananas are too thick, they may not blend well with the chocolate. Place the slices on a plate and set them aside for later.
Storing Your Chocolate Bark
Once your bark is ready, cut it into pieces. Store the pieces in an airtight container. Keep them in the fridge to stay fresh. If you want to store them longer, you can freeze the bark. Just wrap it well in plastic wrap before placing it in a freezer bag. This keeps it tasty for weeks!
Variations
Adding Different Nuts and Seeds
You can get creative by adding different nuts and seeds. Try using cashews, pecans, or pistachios. Each nut gives a unique taste and crunch. For seeds, consider pumpkin or sunflower seeds. They add a nice texture and boost nutrition. Mix and match to find your favorite combo!
Flavoring Options
You can flavor your chocolate bark in fun ways. Add a dash of cinnamon for warmth. A hint of vanilla extract brings a lovely aroma. For a fruity twist, sprinkle some freeze-dried berries on top. These flavors make each bite interesting and delicious!
Using Alternative Sweeteners
If you want to cut sugar, use alternative sweeteners. Maple syrup or agave nectar can replace sugar. They add sweetness without being too heavy. You can also try a sugar-free chocolate option. This keeps your bark tasty and friendly for different diets.
Storage Info
How to Store Chocolate Banana Bark
To keep your chocolate banana bark fresh, store it in an airtight container. Use parchment paper between layers to avoid sticking. This will help maintain the bark’s texture and flavor. Place the container in a cool, dry place. Avoid direct sunlight and heat, as they can cause the chocolate to melt.
Shelf Life and Freezing Tips
When stored properly, your chocolate banana bark lasts about one week at room temperature. If you want it to last longer, freeze it. Wrap each piece in plastic wrap or foil before placing it in a freezer-safe bag. This helps prevent freezer burn. The bark can stay fresh for up to three months in the freezer.
Thawing Instructions
To thaw frozen chocolate banana bark, simply take it out of the freezer. Let it sit at room temperature for about 15 to 20 minutes. This will make it easier to bite into. Do not use a microwave to thaw it, as this can alter its texture. Enjoy your treat once it’s ready!
FAQs
Can I use different types of chocolate?
Yes, you can use different chocolates. Milk chocolate or white chocolate works well, too. Just make sure they are dairy-free if needed. Each type gives a unique taste. Dark chocolate has a rich flavor, while milk chocolate is sweeter. Experiment with what you like best.
How can I make this bark healthier?
To make this bark healthier, use less chocolate. You can add more fruits instead. Try dried cranberries or sliced strawberries for added flavor. You might also swap nuts for seeds. This will change the texture and can add protein. Using unsweetened coconut flakes can cut added sugar.
Is this recipe suitable for kids?
Absolutely! This recipe is great for kids. It has fun textures and a sweet taste. You can involve them in making it, too. Let them help slice bananas or sprinkle toppings. It is a fun way to get kids excited about cooking. Plus, it’s a healthy snack they will enjoy.
In this blog post, we explored making delicious chocolate banana bark. We covered ingredients, substitutions, and nutritional info to help you get started. The step-by-step instructions made the process easy. We shared tips for melting chocolate and storing your bark. You can mix in nuts, seeds, and flavors for fun twists. Lastly, we discussed storage methods, shelf life, and addressed common questions. Enjoy your tasty treat, and get creative with your chocolate bark!


