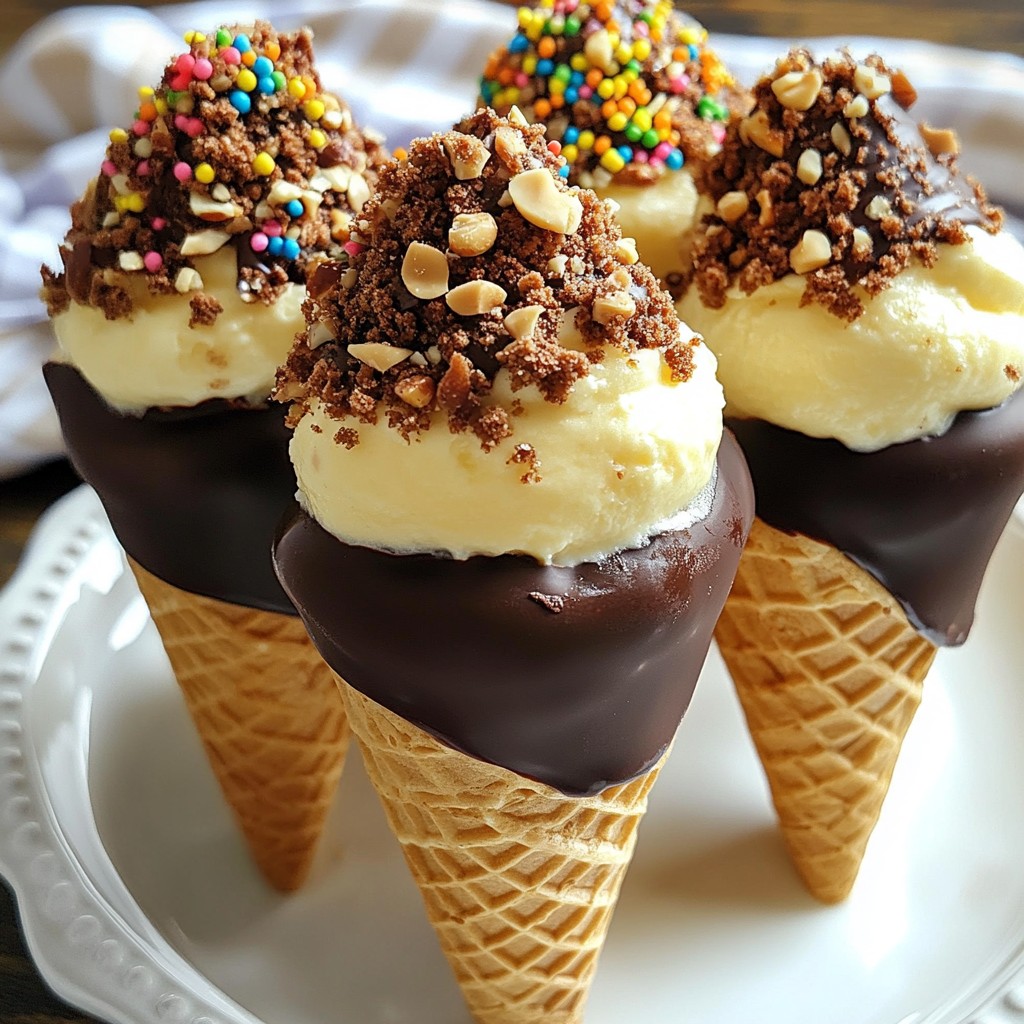
Get ready for a dessert that will steal the show: Chocolate Dipped Cheesecake Cones! With a creamy filling, a sweet chocolate shell, and your choice of toppings, these cones are both fun and delicious. You’ll find simple steps to create these treats, no baking required. Perfect for parties or a cozy night in, I promise you these cones will satisfy your sweet tooth. Let’s dive into the details!
Why I Love This Recipe
- Fun to Make: These cones are a delightful treat to assemble, making it a fun activity for kids and adults alike!
Ingredients
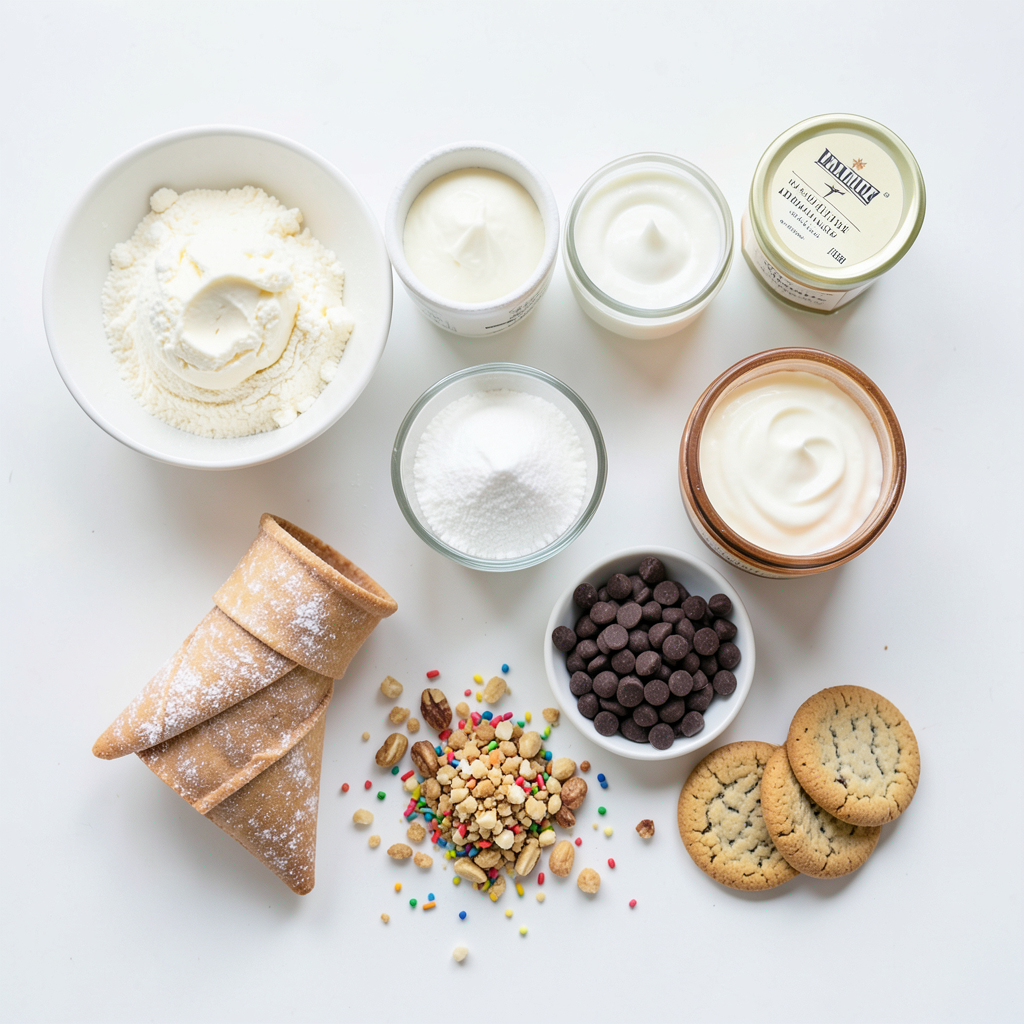
To make Chocolate Dipped Cheesecake Cones, you need some key items. Here’s what you’ll need:
- 10 sugar cones
- 8 oz cream cheese, softened
- 1/2 cup powdered sugar
- 1 teaspoon vanilla extract
- 1 cup heavy whipping cream
- 1 cup semi-sweet chocolate chips
- 1 tablespoon coconut oil (or vegetable oil)
- Optional toppings: crushed nuts, sprinkles, or crushed cookies
These ingredients come together to create a fun and tasty treat. The sugar cones serve as a crunchy base. The cream cheese gives a rich, creamy filling. Powdered sugar adds sweetness, while vanilla brings in flavor. Heavy whipping cream makes the filling light and fluffy. Semi-sweet chocolate chips melt perfectly for dipping. Coconut oil helps the chocolate stay smooth. Lastly, toppings add fun textures and flavors. You can mix and match these toppings to make each cone unique. Enjoy getting creative with your ingredients!
Step-by-Step Instructions
Preparing the Cheesecake Filling
To start, grab a mixing bowl. Whisk together the softened cream cheese, powdered sugar, and vanilla extract. Blend until it's smooth and creamy. Next, take another bowl and whip the heavy cream until it forms stiff peaks. Gently fold this whipped cream into the cheesecake mixture. Do this until everything is well combined. This step ensures a light and airy filling.
Filling the Cones
Now, let’s fill those sugar cones! Carefully spoon the cheesecake mixture into each cone. Make sure to pack the filling down gently. This ensures that each cone is filled perfectly. You want every bite to have that delicious cheesecake flavor.
Freezing Process
Once filled, place the cones upright in a tray. You can use cups if you don’t have a tray. Freeze them for at least one hour until they are set. This step is crucial, as it helps the filling hold its shape when you dip them in chocolate.
Preparing the Chocolate Coating
While the cones freeze, it’s time to prepare the chocolate coating. In a microwave-safe bowl, mix the chocolate chips and coconut oil. Heat this mixture in 30-second intervals. Stir it between each interval until it's smooth. This will create a shiny and perfect coating for your cones.
Dipping the Cones
After the cones are frozen, it's time to dip! Carefully take each cone and dip the top into the melted chocolate. Allow the excess chocolate to drip off. This gives you a nice, even layer on top of the cheesecake.
Final Freezing
While the chocolate is still wet, sprinkle your choice of toppings. You can use crushed nuts, sprinkles, or crushed cookies for extra crunch. Then, return the cones to the freezer for 15-20 minutes. This final step sets the chocolate and makes your cones ready to enjoy!
Tips & Tricks
Ensuring a Creamy Filling
To get a smooth and creamy filling, start with softened cream cheese. If the cheese is too cold, it won’t mix well. Use a whisk or mixer to blend the cream cheese with powdered sugar and vanilla. Mix until there are no lumps. Whipping the heavy cream is also key. You want it to form stiff peaks. This gives your filling a light texture. Fold the whipped cream gently into the cheese mix. Be careful not to stir too hard. You want to keep that airy feel.
Achieving Perfect Chocolate Coating
For the chocolate coating, melt your chocolate chips with coconut oil. This helps it stay smooth. Use a microwave-safe bowl and heat in 30-second bursts. Stir in between to avoid burning it. If you see clumps, it may mean the chocolate is too hot. Let it cool slightly before dipping. Dipping the cones should be quick. Let any extra chocolate drip off before moving to the next step.
Enhancing Presentation
Presentation matters when serving your cones. Try to arrange them upright in a fun cup or tray. This makes it easy for guests to grab one. Add colorful toppings on the wet chocolate for a visual treat. Crushed nuts, sprinkles, or crushed cookies add texture and fun. You can even drizzle extra chocolate over the top for flair. These small touches make your dessert stand out!
Pro Tips
- Chill Your Mixing Bowls: Place your mixing bowls in the fridge for about 10 minutes before whipping the cream. This helps achieve better volume and stability when whipping the cream.
- Use High-Quality Chocolate: For the best flavor, opt for high-quality semi-sweet chocolate chips. It makes a significant difference in the taste of your chocolate coating.
- Experiment with Flavors: Feel free to add different flavor extracts like almond or mint to the cheesecake filling for a unique twist on the classic flavor.
- Serve Immediately: These cones are best enjoyed fresh, so serve them right after the chocolate has set for the best texture and flavor experience.
Variations
Flavor Swaps
You can change the flavor of the cheesecake filling easily. Adding a few drops of almond or mint extract gives it a new twist. Try mixing in fruit puree too. This adds both flavor and color. For example, use raspberry or strawberry puree for a fruity kick.
Alternative Coatings
The chocolate coating is not just semi-sweet. You can use dark or white chocolate for different tastes. If you want fun colors, candy melts are a great option. They come in many shades and can make your cones pop with color.
Seasonal Adaptations
Make your cones festive by changing up the toppings. For holidays, try themed sprinkles or crushed candy canes. You can also adjust the flavors based on the season. In fall, add pumpkin spice to your filling for a cozy touch. In summer, lemon zest can brighten things up.
Storage Info
Storing Leftover Cheesecake Cones
To keep your leftover cheesecake cones fresh, store them in an airtight container. This helps prevent them from getting soggy or stale. Line the container with paper towels to absorb any moisture. Place the cones upright to avoid crushing the filling. Keep them in the fridge for up to three days.
Freezing Tips
You can freeze uncoated cheesecake cones. Just make sure they are filled and set first. Wrap each cone in plastic wrap to keep them safe. Place wrapped cones in a freezer bag or container. They can last up to two months in the freezer.
Thawing Instructions
To thaw frozen cones, take them out of the freezer. Leave them in the fridge overnight or for a few hours at room temperature. Avoid using a microwave, as it can change the texture of the cones. After thawing, dip them in chocolate if you want to serve them fresh. This method ensures they taste just as good as when you made them.
FAQs
How long do Chocolate Dipped Cheesecake Cones last?
Chocolate dipped cheesecake cones last about 3-5 days in the fridge. Keep them in an airtight container. They stay fresh and tasty during this time. If you freeze them, they can last for up to a month. Just remember to thaw them in the fridge before serving.
Can I make these cones ahead of time?
Yes, you can make these cones ahead of time! I often prepare them the day before a party. They freeze well, so they are great for planning. Just be sure to dip them in chocolate closer to serving time for the best texture.
What can I substitute for cream cheese?
If you need a substitute for cream cheese, try mascarpone or Greek yogurt. Both give a nice creamy texture. You can also use soft tofu blended until smooth for a dairy-free option. Each will change the flavor a bit, but they work well.
Are there gluten-free options for the cones?
Yes, you can find gluten-free sugar cones at many grocery stores. Just check the label to be sure. This way, those with gluten sensitivities can enjoy these delicious treats too!
Can I use different types of chocolate for dipping?
Absolutely! You can use dark, milk, or white chocolate for dipping. Each type adds a unique taste to the cones. You can even try flavored chocolate, like mint or orange, for a fun twist.
How do I make a mini version of these cones?
To make mini cones, use mini sugar cones. Fill them the same way, but adjust the amounts. You will need less cheesecake filling. They make cute, bite-sized treats that are perfect for parties!
These cheesecake cones are fun and easy to make. We discussed ingredients, step-by-step instructions, and tips for the perfect treat. You can mix flavors and toppings to make each cone your own. Whether you serve them at a party or enjoy them solo, they’ll impress everyone. Remember to store leftovers properly for the best taste. Enjoy your sweet creations and explore all the fun variations!