![- 4 medium yellow squash - 1 cup cooked quinoa - 1 cup black beans, rinsed and drained - 1 cup corn kernels (fresh or frozen) - 1 red bell pepper, diced - 1 small onion, finely chopped - 2 cloves garlic, minced - 1 teaspoon cumin - 1 teaspoon chili powder - Salt and pepper to taste - 1 cup shredded cheese (cheddar or Monterey Jack) - 2 tablespoons olive oil - Fresh cilantro for garnish When I make stuffed yellow squash, I start by selecting fresh, firm squash. Each squash will become a tasty vessel for the filling. I use quinoa for protein and black beans for fiber. Both add great texture and taste. Corn brings sweetness, while bell pepper and onion add crunch and flavor. Garlic, cumin, and chili powder give depth to the dish. Finally, cheese melts on top, creating a golden crust. - Chopped tomatoes for added moisture - Jalapeño for a spicy kick - Cooked ground turkey or beef for extra protein - Herb blends like oregano or thyme for added flavor I love to customize my stuffed yellow squash! Adding chopped tomatoes can make the filling juicier. If you enjoy heat, toss in some jalapeño. Ground turkey or beef can boost the protein content. Try adding herbs to change the flavor profile. The options are endless! - Calories: 350 - Protein: 15g - Carbohydrates: 45g - Dietary Fiber: 10g - Sugars: 4g - Total Fat: 12g - Saturated Fat: 6g This dish is not just delicious; it's also nutritious. Each serving offers a balance of macronutrients. You’ll get protein from quinoa and beans, making it filling. The fiber helps with digestion and keeps you satisfied. Enjoy this healthy meal without any guilt! For my [Full Recipe], check out the steps and tips to make your stuffed yellow squash perfect. First, wash your yellow squash well. This step makes sure it's clean. Next, cut each squash in half lengthwise. Use a spoon to scoop out the seeds carefully. You want to create a boat shape. Drizzle the inside with olive oil. Sprinkle salt and pepper on top. Place the squash cut side up in a baking dish. This helps them roast nicely. Heat a skillet over medium heat. Add the remaining olive oil. Once hot, add the chopped onion and bell pepper. Cook for about five minutes or until soft. Then, stir in minced garlic and cook for one more minute. The smell will be great! Now, add in your cooked quinoa, black beans, corn, cumin, chili powder, salt, and pepper. Mix everything well and heat through for about three to five minutes. Take the skillet off the heat and fold in half of the cheese. Now it’s time to stuff the squash. Pack the quinoa mixture into each half of the squash. Make sure to fill them well. Top each boat with the rest of the cheese. Cover the dish with aluminum foil. Bake in the oven for 25 minutes at 375°F. After that, remove the foil and bake for another 10 to 15 minutes. The cheese should be melted and bubbly. Once done, take them out and let them cool for a bit. Garnish with fresh cilantro for a bright touch. Enjoy your stuffed yellow squash! For the full recipe, check out Savory Stuffed Yellow Squash. When choosing yellow squash, look for firm, smooth skin. Avoid squash with soft spots or blemishes. Choose ones that feel heavy for their size. The best squash has a vibrant yellow color. Smaller squash tend to be sweeter and more tender. To ensure even cooking, cut the squash in half lengthwise. Scoop out the seeds to create a boat shape. This not only helps with cooking but also allows for more filling. Drizzle with olive oil and season with salt and pepper. Cover the baking dish with foil to trap steam, then remove it later to brown the cheese. You can make stuffed yellow squash ahead of time. Prepare the filling and stuff the squash, then cover and refrigerate. Bake it the next day for a quick meal. If you want to freeze, stuff the squash and wrap them tightly in foil. When ready to eat, thaw overnight in the fridge and bake as usual. This makes meal prep easy and delicious! For the full recipe, refer to the earlier sections. Enjoy your stuffed yellow squash! {{image_2}} You can mix and match your fillings for stuffed yellow squash. Here are some fun ideas: - Ground turkey or beef: For a heartier filling, add cooked ground meat. - Rice or couscous: Swap quinoa with rice or couscous for a different texture. - Veggies: Use mushrooms, spinach, or zucchini for extra color and taste. - Nuts and seeds: Add chopped walnuts or sunflower seeds for crunch. These options let you play with flavors and textures! Making the dish vegan is easy. Just skip the cheese and use vegan cheese instead. For gluten-free, ensure all ingredients are certified gluten-free. Here’s how: - Quinoa: This grain is naturally gluten-free and a great base. - Beans: Black beans or chickpeas add protein and fiber. - Veggies: Fill with your favorite vegetables to keep it fresh and tasty. These options make the dish inclusive for all diets! Want some heat? You can easily adjust the spice in your stuffed yellow squash. Here’s how: - Add jalapeños: Chop fresh jalapeños and mix them into your filling. - Hot sauce: Drizzle hot sauce over the stuffed squash before baking. - Pepper flakes: Sprinkle red pepper flakes for a mild kick. Adjust the heat to suit your taste! Enjoy your meal and make it your own with these variations. For the full recipe, check out the complete instructions. After making your stuffed yellow squash, let it cool down. Wrap each piece in plastic wrap or place it in an airtight container. Store it in the fridge for up to three days. This keeps the flavors fresh and ready for you to enjoy later. If you want to save some for later, freezing works well. Wrap each stuffed squash tightly in plastic wrap. Then, place them in a freezer-safe bag or container. They can stay frozen for up to three months. Remember to label the bag with the date. This will help you keep track of how long they’ve been in the freezer. To reheat, first, take the stuffed squash out of the fridge or freezer. If frozen, let it thaw in the fridge overnight. Preheat your oven to 350°F (175°C). Place the squash in a baking dish and cover with foil. Bake for about 20 minutes if refrigerated or 30-40 minutes if frozen. Check that the filling is hot and the cheese is melted. Enjoy your meal again! You can find the Full Recipe above for more details. Yes, you can use other squashes. Zucchini works very well. It has a similar texture. Acorn squash also makes a tasty option. Just adjust the cooking time if needed. Each type gives a unique flavor and look to your dish. Experimenting can lead to fun results! Check the squash for tenderness. You can easily pierce it with a fork. The cheese should be melted and bubbly too. If you see golden brown edges, that’s a great sign. Let it cool slightly before serving to avoid burns. Stuffed yellow squash goes well with many sides. A fresh green salad adds crispness. Quinoa or rice dishes complement the flavors nicely. Serve with roasted veggies for a colorful plate. You can also add a dollop of sour cream for extra creaminess. This blog post covered how to make a delicious stuffed yellow squash. You learned about the key ingredients and nutritional information. I shared step-by-step instructions for prepping, cooking, and baking the dish. You also found tips for picking squash, ensuring even cooking, and making ahead. I offered variations for different diets and discussed storage options. In closing, stuffed yellow squash is fun to make and enjoy. Customize it for your taste, and share it with others. Happy cooking!](https://foodishtalk.com/wp-content/uploads/2025/06/49d631b0-d2f0-4941-b7f1-83a6009fb232.webp)
Stuffed Yellow Squash Flavorful and Nutritious Meal
Are you ready to impress your family with a tasty, nutritious meal? Stuffed yellow squash is a simple, delicious option
Are you ready to impress your family with a tasty, nutritious meal? Stuffed yellow squash is a simple, delicious option
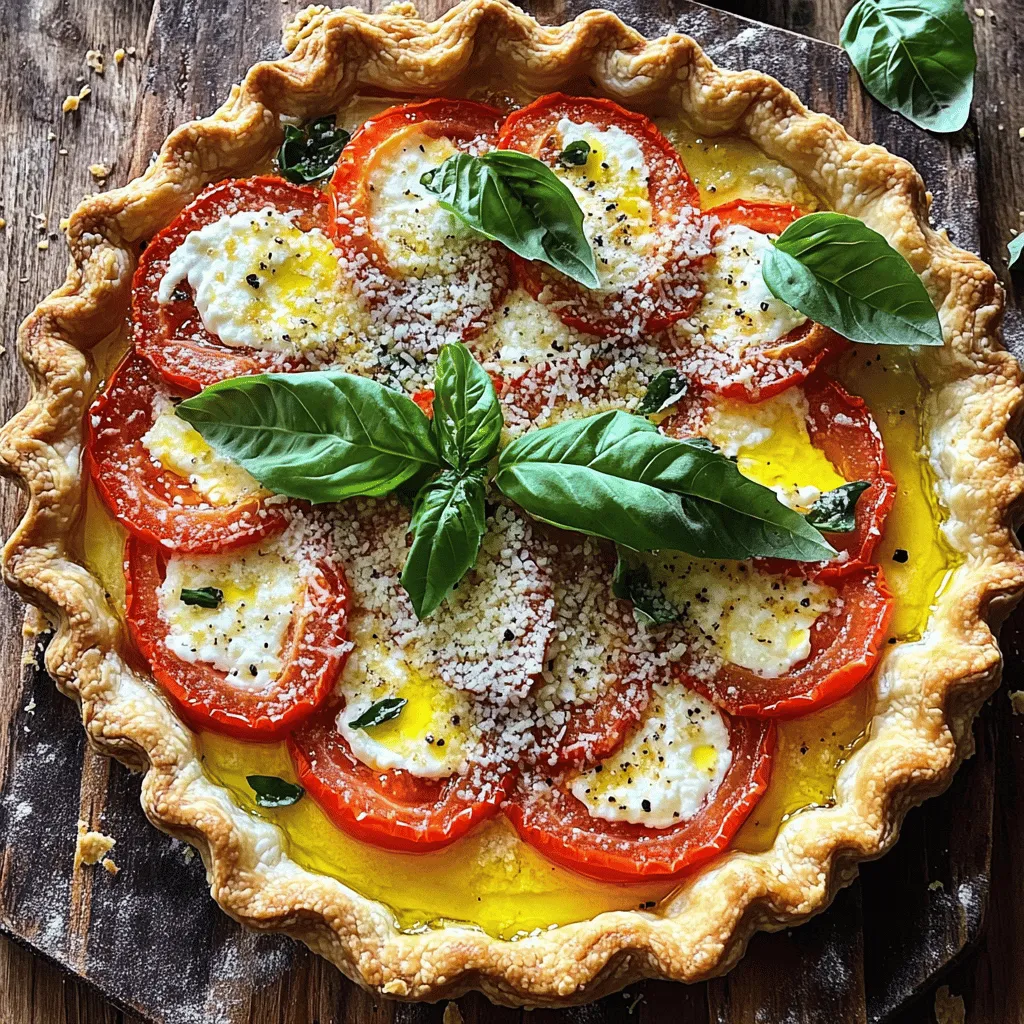
Are you ready to dive into a dish that’s both simple and bursting with flavor? This Savory Tomato Pie will
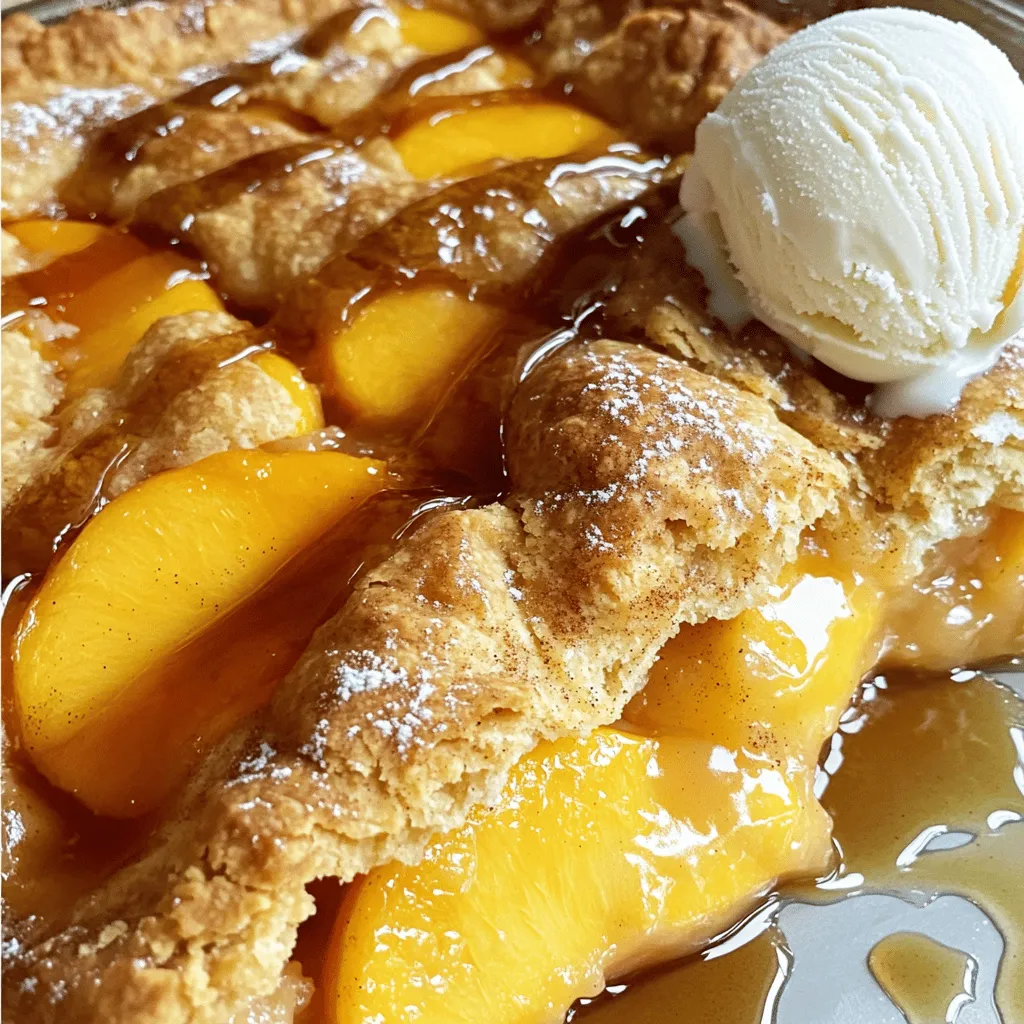
If you crave something sweet, this Easy Canned Peach Cobbler is for you! In just a few simple steps, you
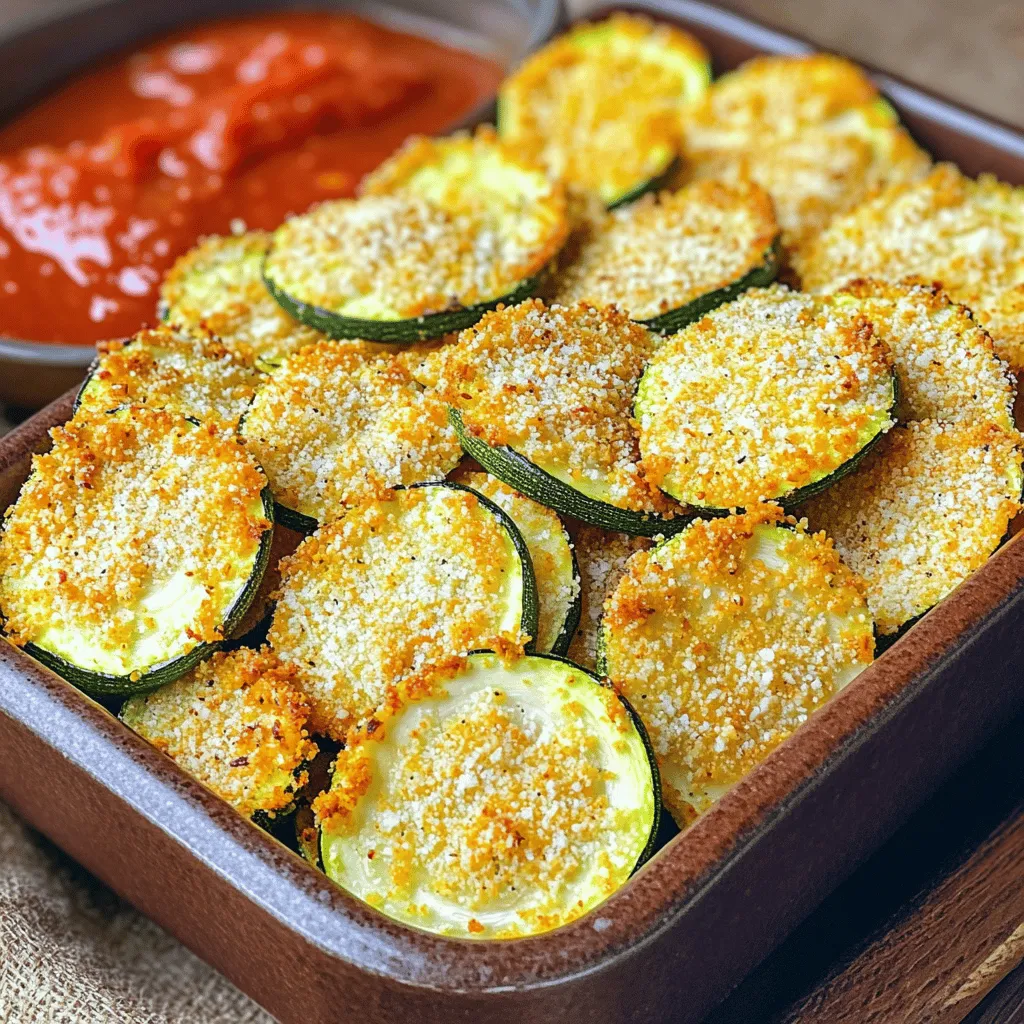
![- 2 medium zucchinis - 1 cup breadcrumbs (use panko for extra crunch) - 1/2 cup grated Parmesan cheese - 2 large eggs - 1 teaspoon garlic powder - 1 teaspoon onion powder - 1 teaspoon smoked paprika - Salt and pepper to taste - Air fryer - Mixing bowls - Measuring cups and spoons To make the best air fryer zucchini chips, start with fresh zucchinis. I love using medium zucchinis for this recipe. Their size helps achieve the right thickness for even cooking. Next, breadcrumbs add crunch. You can use regular or panko breadcrumbs, but panko gives a nice extra crunch. Parmesan cheese adds flavor and helps with browning. For seasoning, garlic powder and onion powder give great aroma and taste. Smoked paprika adds a hint of smokiness, which pairs perfectly with the zucchini. Don’t forget salt and pepper to enhance the overall flavor. You will also need an air fryer, which is key to making these chips crispy. Mixing bowls help combine your ingredients. Finally, measuring cups and spoons ensure you get the right amounts. For the full recipe and detailed steps, check out the [Full Recipe]. - Slicing Tips for Ideal Thickness For the best zucchini chips, slice the zucchinis thin. Aim for 1/4 inch thick rounds. Thin slices cook more evenly and become crispier. A sharp knife or mandoline works well for this task. - Importance of Drying for Crispiness After slicing, pat the zucchini rounds dry with paper towels. This step is key. Removing moisture helps them crisp up in the air fryer. Any leftover water can lead to soggy chips. - Mixing the Coating Mixture In a bowl, combine breadcrumbs, grated Parmesan, garlic powder, onion powder, smoked paprika, salt, and pepper. Stir these ingredients until they blend well. This mixture adds flavor and crunch to your chips. - Egg Coating Method In another bowl, beat the eggs. Dip each zucchini slice into the eggs. Make sure it’s fully coated. Let the excess egg drip off. This helps the breadcrumb mixture stick better. - Preheating the Air Fryer Preheat your air fryer to 375°F (190°C). This usually takes about 5 minutes. Preheating ensures that the chips cook evenly and get that crispy texture. - Cooking Time and Temperature Place the coated zucchini chips in the air fryer basket. Cook them for about 10-12 minutes. Flip them halfway through for an even cook. Keep an eye on them to avoid burning. - Tips for Arranging Chips in the Basket Arrange the zucchini chips in a single layer. Avoid overcrowding the basket. If you have many chips, do them in batches. This helps air circulate around each chip for maximum crispiness. For the full recipe, check the instructions above! To make the best air fryer zucchini chips, airflow is key. The air fryer circulates hot air, cooking the chips evenly. If the chips overlap, they won’t crisp up well. Always arrange them in a single layer. For oil, use just a light spray. Too much oil makes the chips soggy. A quick mist with olive oil spray adds flavor and crunch without making them greasy. These zucchini chips shine with a tasty dip. Try marinara sauce for a classic combo. Ranch dressing also pairs well and offers a cool contrast. You can also serve them alongside sandwiches or salads. They add a crunchy element to any meal. If your zucchini chips aren’t crispy, check your slicing. Make sure they are thin enough. Moisture also matters. Always pat them dry to remove excess water. To avoid burnt chips, stay close while they cook. Flip them halfway for even baking. If you notice browning, lower the temperature slightly. Adjusting cooking time can help too. For the full recipe, check out the detailed instructions to guide you through each step. {{image_2}} You can change the taste of your zucchini chips by adding different herbs and spices. Try some Italian herbs like oregano or basil for a fresh twist. You can also use cayenne pepper for a spicy kick. Just mix these in with your breadcrumbs for a fun flavor boost. Using different types of cheese can also make a big difference. Instead of Parmesan, try cheddar or mozzarella for a richer taste. You can sprinkle a little cheese on top after air frying for a melty finish. If you want to try other ways to cook zucchini chips, consider oven baking. Preheat your oven to 425°F (220°C). Place the coated zucchini on a baking sheet lined with parchment paper. Bake for about 20-25 minutes, flipping halfway, until they are golden and crispy. Another method is using a dehydrator. Slice the zucchini, season them, and arrange them in the dehydrator. Set it to 125°F (52°C) and let them dry for 6–8 hours. This method makes crunchy, healthy chips without added oil. For gluten-free options, swap regular breadcrumbs with gluten-free breadcrumbs or crushed nuts. This keeps your chips tasty and safe for those avoiding gluten. If you need vegan modifications, replace the eggs with a mixture of flaxseed meal and water. Use about 1 tablespoon of flaxseed meal with 2.5 tablespoons of water for each egg. This makes a great binding agent. You can also skip the cheese or use a vegan cheese substitute for flavor. For the full recipe, check out the details above. To keep your zucchini chips fresh, store them in a cool, dry place. The best way is to use an airtight container. This helps keep them crispy. Avoid plastic bags, as they trap moisture. If you have a food saver, that works great too. If you want to enjoy your chips again, reheating is simple. For the best results, use the air fryer. Set it to 375°F (190°C) and heat for about 5 minutes. This will bring back their crunch. For oven reheating, preheat to 350°F (175°C). Spread the chips on a baking sheet. Heat for about 10 minutes. Watch them closely to avoid burning. Freezing is an option if you have lots of chips left. First, let them cool completely. Then, place them in a single layer on a baking sheet. Freeze them for a few hours until firm. After that, transfer them to a freezer-safe bag. Remove as much air as possible. To thaw, take them out and let them sit at room temperature for about 30 minutes. Reheat them using the air fryer or oven for the best crunch. Enjoy your crispy snacks anytime! For the full recipe, check out the details above. Zucchini chips last about 2 to 3 days in a sealed container. Store them at room temperature, away from moisture. For best taste, eat them fresh. If they start to lose their crunch, they may be getting stale. Yes, you can use many vegetables! Carrots, sweet potatoes, and eggplant work well. Just slice them thinly like zucchini. Adjust the cooking time based on the type of vegetable. The best way to slice zucchini is to use a sharp knife or a mandoline. Aim for slices that are about 1/4 inch thick. This helps them cook evenly and get crispy. Thinner slices will crisp up more, but be careful not to cut them too thin. Yes, air-fried zucchini chips are a healthy snack! They have less oil than deep-fried chips. Zucchini is low in calories and high in fiber. This makes them a great choice for a light snack. You can make zucchini chips without breadcrumbs by using almond flour or coconut flour. Simply coat zucchini slices in beaten eggs, then dip them into the flour. This gives a nice crunchy texture without the carbs from breadcrumbs. You can also season them for more flavor. For the full recipe, check out the crispy air fryer zucchini chips section! You now know how to make tasty air fryer zucchini chips. We covered the key ingredients, from zucchinis to Parmesan. You learned the step-by-step process for preparing, breading, and air frying. We also shared tips for crispiness and serving ideas. Remember, you can customize your chips with different flavors or cooking methods. Enjoy your crispy snack right away, or store some for later. With this guide, you’re ready to whip up a healthy treat. Happy cooking!](https://foodishtalk.com/wp-content/uploads/2025/06/ee6611e8-2408-4457-933b-34fe8e7b6402.webp)
Looking for a crunchy snack that’s both tasty and healthy? Try making air fryer zucchini chips! This easy recipe gives
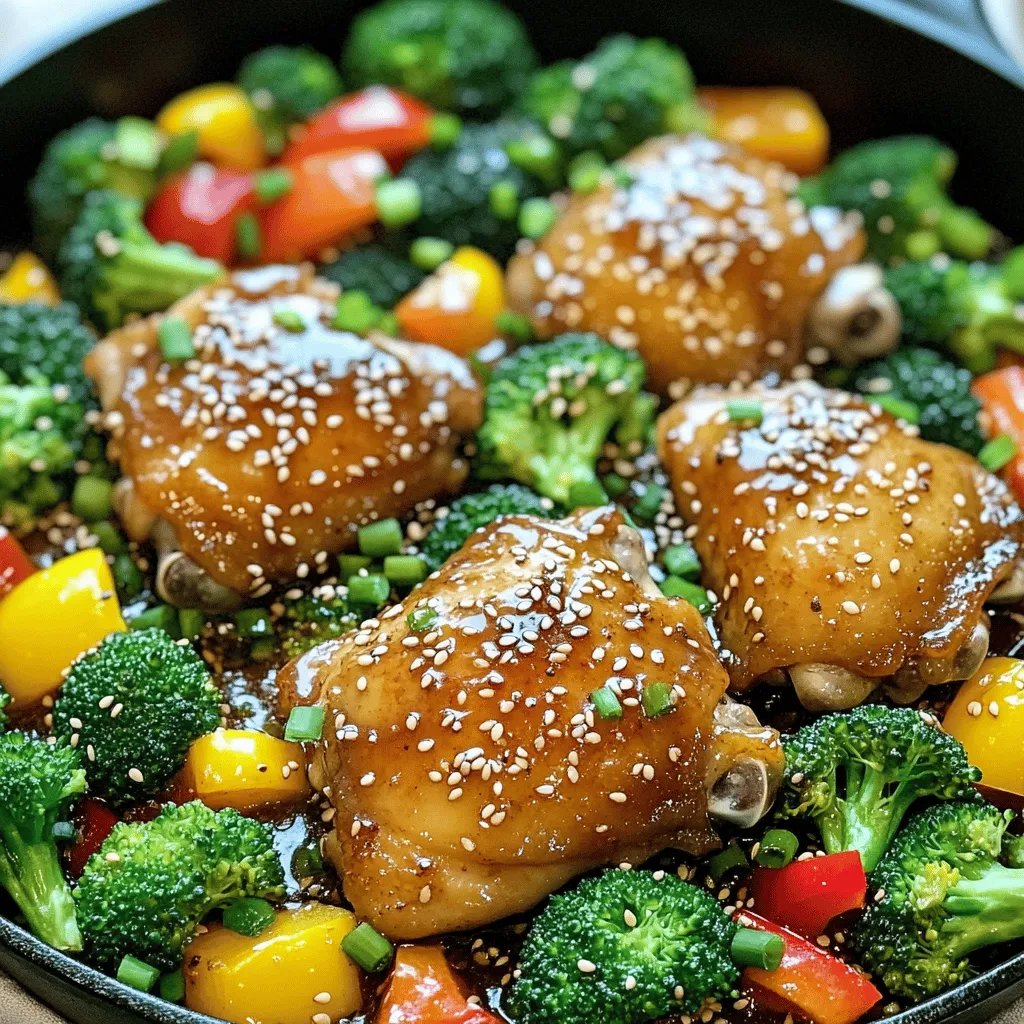
Looking for a quick and tasty meal? One Pan Honey Garlic Chicken is your answer. This dish brings together tender
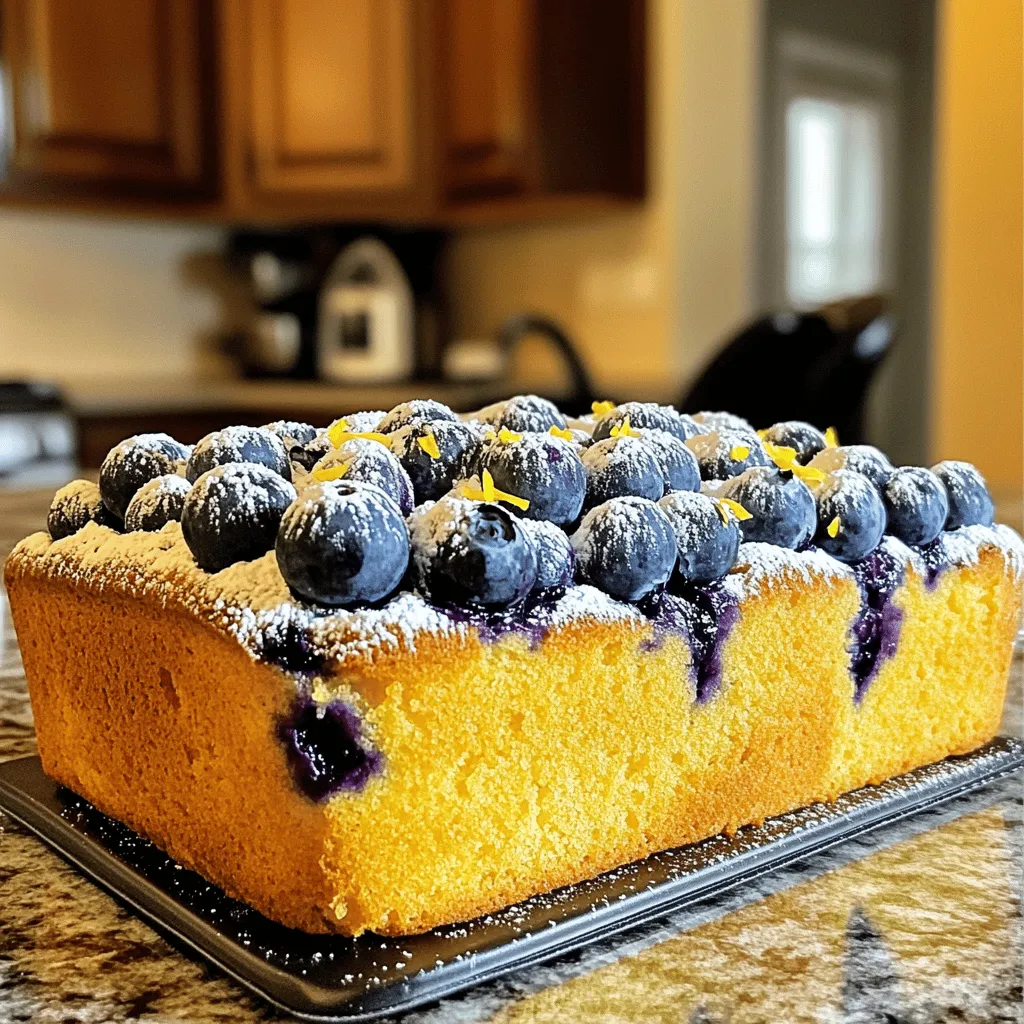
If you love sweet and tangy treats, you’re in for a delight! This Lemon Blueberry Pound Cake is a simple
Craving a tasty snack that’s both good for you and easy to make? You’re in the right place! In this
![- 1 pound baby carrots - 3 tablespoons honey - 2 tablespoons olive oil - 4 cloves garlic, minced - 1 teaspoon fresh thyme leaves - Salt and pepper - 1 tablespoon balsamic vinegar (optional) - Fresh parsley, chopped When I make honey garlic roasted carrots, I always start with the main ingredients. Baby carrots are my favorite because they are sweet and tender. If you can't find baby carrots, regular carrots work too; just cut them into sticks. Next, I mix honey for sweetness. It adds a lovely glaze to the carrots. Olive oil brings richness and helps with roasting. Minced garlic gives the dish a punch of flavor. For additional seasonings, I add fresh thyme leaves. They bring a nice herbal note. Salt and pepper are a must for balance. If you want a tangy twist, balsamic vinegar adds depth; it’s optional but worth a try. Lastly, I love to sprinkle fresh parsley on top. It adds color and freshness. This dish is not only tasty but also looks great on the table. For the complete process, check out the [Full Recipe]. - Preheat the oven to 425°F (220°C). - In a large bowl, mix honey, olive oil, minced garlic, thyme, salt, and pepper. You can add balsamic vinegar if you want more tang. - Toss the carrots into the honey garlic mix. Make sure each carrot is well-coated. - Spread the carrots out in a single layer on a baking sheet. I find that parchment paper helps the carrots not stick. - Roast the carrots for 25-30 minutes. Halfway through, flip them to ensure they cook evenly. - You want the carrots to be tender and slightly caramelized. Check for doneness by piercing them with a fork. They should be soft but not mushy. Follow the [Full Recipe] for all details and enjoy this tasty side dish! To make your honey garlic roasted carrots shine, fresh thyme is best. It adds a bright taste that dried thyme can’t match. If you have dried thyme, use half the amount to keep the flavor strong. Honey gives the dish sweetness. If you want a tangy kick, add balsamic vinegar. Just one tablespoon will do. This mix of sweet and tangy creates a great balance. For even roasting, cut your carrots to a similar size. This helps them cook at the same rate. Spread them out on the baking sheet. Avoid crowding, as this can steam the carrots instead of roasting them. Flipping halfway through the cooking time is key. This step helps achieve that beautiful caramelization and ensures they cook evenly. Garnishing with fresh parsley adds color and freshness. Just sprinkle some on top right before serving. For special occasions, serve these carrots on a nice platter. Pair them with roasted meats or grain dishes. They add a pop of color and flavor to any meal. Check out the Full Recipe for more details! {{image_2}} You can swap out carrots for other root vegetables. Try parsnips or turnips for a new taste. Sweet potatoes also work well and add a nice sweetness. Mixing different veggies gives your dish a colorful look and varied flavor. Adding spices can change the whole dish. Try a pinch of cumin or paprika for warmth. You can also switch sweeteners. Maple syrup or agave nectar works great if you want to try something new. Each swap brings a unique twist to the classic honey garlic flavor. To make this dish vegan, simply use agave syrup instead of honey. This keeps the sweetness while making it plant-based. If you are gluten-free, this recipe is perfect as it contains no gluten ingredients. Enjoy the rich taste without worry! After enjoying Honey Garlic Roasted Carrots, store any leftovers in a sealed container. This keeps them fresh and tasty. Place the container in your fridge. They will stay good for about three to five days. If the carrots seem dry, add a little olive oil before storing. When you want to eat your leftovers, the oven is the best tool. Preheat it to 350°F (175°C). Spread the carrots on a baking sheet. Heat them for about 10 to 15 minutes. This method keeps the texture and flavor intact. You can also use a microwave if you’re in a hurry. Just make sure to cover them with a damp paper towel. This keeps them moist as they warm up. If you have extra roasted carrots, freezing is a great choice. Allow them to cool completely. Then, place the carrots in a freezer-safe bag. Remove as much air as you can before sealing. They will keep well for up to three months. When you’re ready to use them, thaw them in the fridge overnight. Reheat them using the oven or microwave for the best results. For the full recipe, check out Honey Garlic Roasted Carrots 🥕. Roasting carrots takes about 25 to 30 minutes. This time will give you tender, sweet carrots. You want to cook them until they are soft and a bit caramelized. Make sure to flip them halfway through. This helps them cook evenly. Yes, you can use raw carrots. Just cut them into sticks that are about the same size as baby carrots. They may take a bit longer to cook, usually around 30 to 35 minutes. The thicker the pieces, the longer they need to roast. Honey garlic roasted carrots pair well with many dishes. They go great with roasted chicken or fish. You can also serve them with rice or quinoa for a healthy meal. They add a nice touch to any dinner plate. Check out the Full Recipe for more ideas! This article explored how to make delicious honey garlic roasted carrots. We discussed the key ingredients and shared step-by-step instructions for preparing them perfectly. You learned tips for enhancing flavor and texture, along with ways to adjust the recipe for different diets. Storage tips help you keep leftovers fresh. Roasted carrots are a tasty side dish for any meal. With these insights, you can impress everyone at your next dinner. Enjoy making this dish and don’t hesitate to experiment with flavors!](https://foodishtalk.com/wp-content/uploads/2025/06/a5caee35-fbf9-46f1-94fd-1dda3a1be69d.webp)
Looking for a side dish that packs a punch? Honey Garlic Roasted Carrots are just the ticket! This sweet and
![To make a no bake peach cheesecake, gather these ingredients: - 1 ½ cups graham cracker crumbs - ½ cup unsalted butter, melted - 2 cups cream cheese, softened - 1 cup powdered sugar - 1 teaspoon vanilla extract - 1 cup heavy whipping cream - 2 cups fresh peaches, peeled and sliced (reserve some for garnish) - 1 tablespoon lemon juice - 1 teaspoon gelatin powder (optional, for extra firmness) - 2 tablespoons water (for gelatin, if using) Each ingredient has a special role in this cheesecake: - Graham cracker crumbs form the crust, giving it a sweet and crunchy base. - Unsalted butter helps bind the crumbs together for a firm crust. - Cream cheese is the star of the filling, making it rich and creamy. - Powdered sugar adds sweetness to balance the tangy cream cheese. - Vanilla extract enhances the flavor, adding warmth and depth. - Heavy whipping cream provides lightness, making the cheesecake fluffy. - Fresh peaches bring natural sweetness and a burst of flavor. - Lemon juice keeps the peaches fresh and adds a bright note. - Gelatin powder helps set the cheesecake, giving it structure (optional). You can swap some ingredients if needed: - For graham cracker crumbs, try digestive biscuits or crushed cookies. - Use margarine instead of unsalted butter if you prefer. - For cream cheese, a vegan cream cheese works well for a dairy-free option. - If you don’t have powdered sugar, granulated sugar can be used, but it may alter the texture. - In place of heavy cream, use coconut cream for a dairy-free version. - Canned peaches can replace fresh ones, but rinse them well and drain excess syrup. Using these substitutes keeps the dessert delicious while meeting your needs! For a complete recipe, refer to the Full Recipe above. Start with the crust. In a medium bowl, mix graham cracker crumbs and melted butter. Stir until the crumbs look like wet sand. Next, press this mixture into a 9-inch springform pan. Make sure it’s even and firm. Chill the crust in the fridge while you work on the filling. Now, it’s time for the filling. In a large bowl, beat softened cream cheese with an electric mixer until smooth. Slowly add powdered sugar and vanilla extract. Mix until it’s all blended. In another bowl, whip the heavy cream until you see stiff peaks. Gently fold this whipped cream into the cream cheese mix. This makes the filling light and fluffy. Take your sliced peaches and toss them with lemon juice. This keeps them fresh and bright. Fold the peaches into the cream cheese mixture. If you want extra firmness, dissolve gelatin powder in warm water and add it to the mix. It helps hold everything together. Pour the cream cheese filling over the chilled crust. Spread it out evenly. Use a spatula to smooth the top. Cover the cheesecake with plastic wrap. Place it in the fridge for at least four hours. For best results, let it chill overnight. Once it’s set, carefully remove the sides of the springform pan. Add reserved peach slices on top for a lovely finish. For the full recipe, check out [Full Recipe]. Enjoy your delicious no-bake peach cheesecake! To achieve a super creamy texture, start with room-temperature cream cheese. Cold cream cheese can form lumps. Beat it well until it’s smooth before adding other ingredients. Folding in whipped cream gently adds air, making it light. If you want even more creaminess, consider adding sour cream or mascarpone cheese. Both will enhance flavor and texture. Choose ripe, sweet peaches for the best taste. Look for firm fruit that gives slightly when pressed. Always peel and slice them just before use to keep them fresh. Tossing the peach slices in lemon juice stops browning and adds a nice zing. If peaches are out of season, try using frozen ones. Just thaw and drain the excess liquid before using. A great presentation makes your cheesecake even more inviting. Serve each slice on chilled plates. Drizzle with a peach puree made from blending leftover peaches for a lovely touch. Top with a sprig of fresh mint for color and freshness. For an extra fancy look, sprinkle some graham cracker crumbs around the plate. This adds texture and enhances the dessert's visual appeal. For the complete guide to making this delicious treat, check out the Full Recipe. {{image_2}} You can change the flavor of your no-bake peach cheesecake easily. Try using other fruits like strawberries or blueberries. Blend the fruit into the cream cheese mixture. You can also add a splash of almond extract for a nutty taste. Chocolate lovers can mix in cocoa powder. Lemon or lime zest adds a tangy twist. Each choice brings new fun to your dessert. While graham crackers work great, you have many crust choices. Use crushed Oreos for a chocolatey base. A nut crust made from almonds or pecans adds a crunchy touch. For a gluten-free option, try almond flour or ground oats. Each crust will change the flavor and texture of your cheesecake. Serving your cheesecake can be a fun chance to impress. Slice the cheesecake into squares instead of wedges for a new look. Top each slice with whipped cream or a dollop of yogurt for creaminess. You can also drizzle fruit syrup or honey over the cheesecake. For a special touch, add a sprig of mint or edible flowers. These small details make your dessert shine. For the full recipe, check out the peachy dream no-bake cheesecake. To keep your no-bake peach cheesecake fresh, cover it tightly. Use plastic wrap or a lid for your springform pan. Store it in the fridge for up to five days. If you have leftover peach slices, store them separately. They can brown quickly, so keep them in an airtight container. You can freeze the cheesecake if you have extra. First, let it set completely in the fridge. Then, wrap it tightly in plastic wrap and aluminum foil. This will help prevent freezer burn. You can freeze it for up to three months. When you’re ready to eat, let it thaw in the fridge overnight. No-bake cheesecake does not need reheating. It’s best served cold. If it has been frozen, let it thaw completely before serving. You can slice it straight from the fridge. Enjoy it chilled for the best taste. A no-bake cheesecake usually takes about 4 hours to set in the fridge. For the best results, I suggest leaving it overnight. This extra time helps the flavors blend well. The longer it chills, the firmer it becomes. You want the filling to hold its shape when you slice it. Yes, you can use canned peaches! Just make sure to choose peaches in juice or light syrup. Drain them well to avoid extra liquid in your cheesecake. Canned peaches can add great flavor, but fresh peaches give a nice texture. If you use fresh peaches, slice them just before mixing to keep them vibrant. Gelatin helps the cheesecake hold its shape better. It adds firmness to the filling, making slicing easier. If you like a sturdier cheesecake, I recommend using it. Just be sure to dissolve it in warm water before adding it to your mix. This step ensures even distribution throughout the filling. For more tips, refer to the Full Recipe! In this blog post, we explored how to make a no-bake peach cheesecake. We detailed its ingredients, step-by-step instructions, and helpful tips. You learned about crust prep, cream cheese filling, and variations to try. Remember, you can use fresh or canned peaches and adjust the flavors. No-bake cheesecake is easy and fun to make. Enjoy your tasty dessert and share it with friends!](https://foodishtalk.com/wp-content/uploads/2025/06/5bd56131-d58f-48bc-adfa-a6a4c9846219.webp)
Are you ready to impress your friends with a dessert that’s both simple and delicious? This No Bake Peach Cheesecake
![- 1 medium zucchini, grated - 1 cup fresh blueberries (or frozen) - 1 cup all-purpose flour - 1 cup whole wheat flour - 1 teaspoon baking powder - 1/2 teaspoon baking soda - 1/2 teaspoon salt - 1 teaspoon ground cinnamon - 1/2 cup vegetable oil - 1 cup granulated sugar - 2 large eggs - Zest of 1 lemon - 2 tablespoons lemon juice - 1 teaspoon vanilla extract To make Lemon Blueberry Zucchini Bread, gather these key ingredients. The zucchini gives moisture. Blueberries add sweetness and flavor. The mix of all-purpose and whole wheat flours provides a nice texture. Baking powder and baking soda help it rise. Salt and cinnamon enhance the taste. Vegetable oil keeps it moist. Sugar adds sweetness, while eggs bind everything together. The lemon zest and juice brighten the flavor. Finally, vanilla gives a lovely aroma. - Nuts (walnuts, pecans) - Seeds (chia, flaxseed) - Spices (nutmeg, ginger) - Glazes (lemon glaze, cream cheese frosting) - Toppings (powdered sugar, lemon zest) You can elevate your bread with optional ingredients. Adding nuts or seeds boosts nutrition. They also add crunch. Spices like nutmeg or ginger can bring warmth. A lemon glaze or cream cheese frosting can make it sweeter and richer. Toppings like powdered sugar or extra lemon zest make it look fancy. - 1 cup = 240 mL - 1 teaspoon = 5 mL - 1 tablespoon = 15 mL When measuring, you can convert to metric units. This helps if you're using different measuring tools. For example, 1 cup equals 240 mL. If you need more or less, adjust the amounts. Use these conversions to keep your baking accurate. 1. First, preheat your oven to 350°F (175°C). This helps the bread bake evenly. 2. Prepare a 9x5 inch loaf pan. You can grease it with butter or use parchment paper for easy removal. 3. In a medium bowl, mix the all-purpose flour and whole wheat flour. Add baking powder, baking soda, salt, and cinnamon. Stir well and set aside. 1. In a large bowl, whisk together vegetable oil and sugar. Make sure they blend well. 2. Next, add the eggs, lemon zest, lemon juice, and vanilla extract. Whisk until smooth. 3. Now, fold in the grated zucchini gently. Add the blueberries, being careful not to burst them. 4. Gradually mix the dry ingredients into the wet ingredients. Stir until just combined. Avoid overmixing for a light bread. 1. Pour the batter into your prepared loaf pan. Spread it evenly with a spatula. 2. Bake in the preheated oven for 55-60 minutes. Check with a toothpick; it should come out clean when done. 3. When baked, remove the bread from the oven. Let it cool in the pan for 10 minutes. Transfer it to a wire rack to cool completely. This Lemon Blueberry Zucchini Bread is simple and full of flavor! For the full recipe, check out the details above. Enjoy your baking! To make great lemon blueberry zucchini bread, avoid overmixing your batter. When you mix too much, the bread can turn tough. Stir just until combined. This keeps the texture light and fluffy. Moisture is key for this bread. Grated zucchini adds moisture naturally. Make sure to squeeze out excess water after grating. Too much water can make the bread soggy. Adjusting sweetness is easy. If you like it sweeter, add more sugar. If you prefer less sweetness, cut back. Taste the batter before baking to find your perfect balance. Using fresh blueberries is best, but frozen blueberries work too. If you use frozen, do not thaw them. Adding them straight from the freezer helps keep the bread from turning blue. If your bread sinks in the middle, it could be underbaked. Always check with a toothpick. If it comes out clean, your bread is done. To prevent burning, keep an eye on your oven temperature. If the top browns too fast, cover it with foil. This protects the bread while it finishes baking. For the full recipe, check the section above. {{image_2}} You can make this lemon blueberry zucchini bread your own with fun add-ins. - Nuts: Add walnuts or pecans for extra crunch. They bring a nice flavor too. - Other fruits: Try cranberries or raspberries for a twist. These fruits add more color and taste. You can easily adjust this recipe for special diets. - Gluten-free versions: Use gluten-free flour instead of regular flour. This change keeps the bread light and tasty. - Low-sugar alternatives: Substitute granulated sugar with a sugar alternative. Stevia or monk fruit work well, making it sweeter without extra calories. Feel free to change the flavors to match your taste. - Citrus blends: Mix in some orange or lime zest. This adds a fresh burst of flavor. - Spice variations: Consider adding nutmeg or ginger. These spices give warmth and depth to your bread. These variations let you customize your lemon blueberry zucchini bread. You can find the full recipe [Full Recipe] for the base to start experimenting! To keep your Lemon Blueberry Zucchini Bread fresh, store it properly. You have two options: room temperature or refrigeration. - Room Temperature Storage: Place the bread in an airtight container. It stays good for about 2-3 days at room temperature. Make sure it's cool before sealing. This keeps it moist. - Refrigeration Tips: If you want to keep it longer, put it in the fridge. Wrap it in plastic wrap or foil first. It will last for about a week. Just remember, refrigeration can change the texture a bit. If you want to enjoy this bread later, freezing is a great option. Here’s how to do it right. - Proper Wrapping Techniques: Wrap the cooled bread tightly in plastic wrap. Then, put it in a freezer bag or an airtight container. This helps prevent freezer burn. - Thawing Instructions: When you’re ready to eat it, take it out of the freezer. Leave it in the fridge overnight or let it sit at room temperature for a few hours. It will taste just as good as fresh. You want to enjoy your bread, not eat spoiled food. Here are some signs to look for. - Recognizing Mold and Off Odors: Check for any mold on the surface. If you see any, toss the bread. Also, if it smells sour or strange, that’s a red flag. - Best Before Dates: Always keep track of how long it's been stored. If it’s past a week in the fridge or a few months in the freezer, it’s safer to throw it away. To keep your Lemon Blueberry Zucchini Bread moist, follow these tips: - Use fresh zucchini. Grate it and squeeze out some water but not all. - Add a little extra oil. This helps add moisture. - Don’t overbake your bread. Check for doneness early. - Let the bread cool in the pan. This traps moisture. These steps help make sure your bread stays tender and delicious. Yes, you can use frozen zucchini. Here are some pros and cons: Pros: - It saves time. No need to grate fresh zucchini. - It can be more convenient. Frozen zucchini is often cheaper. Cons: - It may have more water. Drain it well before using. - Texture might be softer. This can change the final look of your bread. Using frozen zucchini can work well if you prepare it right. Yes, you can make this bread vegan. Here are some substitutes: - Use flax eggs. Mix 1 tablespoon of flaxseed meal with 2.5 tablespoons of water. - Swap vegetable oil for coconut oil or applesauce. This keeps it moist. - Replace regular sugar with coconut sugar or maple syrup. These changes help you enjoy the same tasty bread without animal products. To check if your bread is done, use a toothpick. Here’s how: - Insert a toothpick into the center of the bread. - If it comes out clean, your bread is ready. - Look for a golden color and a firm top. These signs tell you your Lemon Blueberry Zucchini Bread is perfectly baked. This blog post covered everything you need for Lemon Blueberry Zucchini Bread. We talked about essential and optional ingredients. You learned handy measurement conversions, step-by-step instructions, and baking tips. I shared variations and storage info, plus answers to common questions. Baking this bread can be fun and tasty. Don't hesitate to experiment with different ingredients or flavors. Enjoy your baking journey and the delicious results!](https://foodishtalk.com/wp-content/uploads/2025/06/5c64a64b-122f-4dcb-90c8-ccde213430b7.webp)
Have you ever tried making Lemon Blueberry Zucchini Bread? If not, you’re in for a treat! This easy recipe combines
