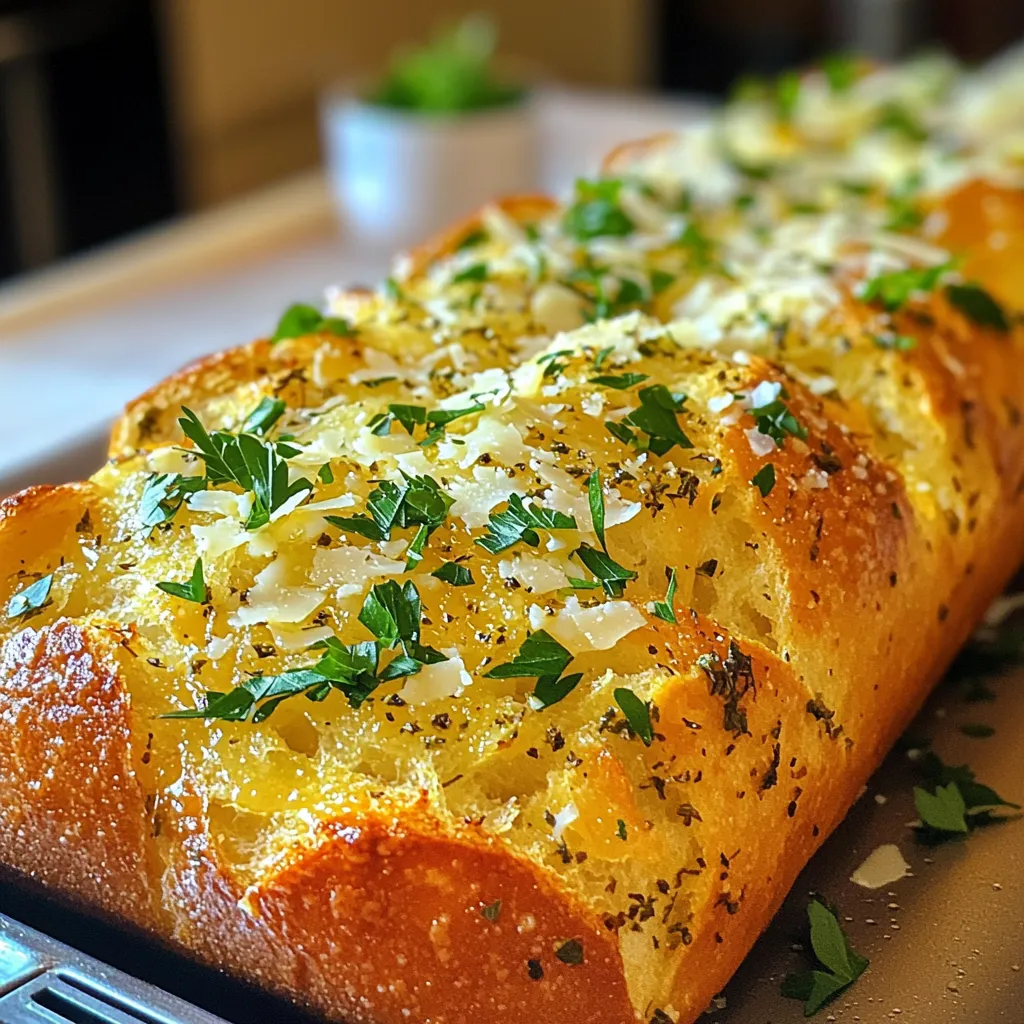
Looking for a quick and tasty snack? You’ll love my Air Fryer Parmesan Herb Garlic Bread! This crispy delight is easy to make and packed with flavor. With just a few ingredients, you’ll have a warm, golden treat in no time. I’ll guide you through each step, plus share tips and tricks to elevate your garlic bread game. Let’s dive in and get that air fryer sizzling!
Ingredients
List of Required Ingredients
To make Air Fryer Parmesan Herb Garlic Bread, gather these key ingredients:
– 1 large loaf of French or Italian bread
– 4 tablespoons unsalted butter, softened
– 3 cloves garlic, minced
– 1 teaspoon dried oregano
– 1 teaspoon dried basil
– 1 teaspoon garlic powder
– ¼ cup grated Parmesan cheese
– Salt and pepper to taste
These ingredients work together to create a rich, savory flavor that makes each bite special.
Optional Garnish Ingredients
For a little extra flair, consider adding these optional ingredients:
– Fresh parsley for garnish
Fresh parsley brightens up the dish while adding a pop of color.
Suggested Substitutions
You can make a few easy swaps if you don’t have an ingredient. Here are some ideas:
– Use a whole grain or sourdough loaf instead of French or Italian bread.
– Swap olive oil for unsalted butter if you prefer.
– Try different cheeses, like mozzarella or cheddar, in place of Parmesan.
These substitutions let you personalize the recipe to your taste. Enjoy mixing and matching!
Step-by-Step Instructions
Preparation of the Bread
First, grab a large loaf of French or Italian bread. Slice it in half lengthwise. This will give you two flat halves. Next, take a knife and make a crisscross pattern on the cut sides. This step helps the bread soak up all that yummy butter.
Mixing the Garlic Butter
In a mixing bowl, put 4 tablespoons of softened butter. Add 3 cloves of minced garlic for that rich flavor. Toss in 1 teaspoon each of dried oregano and basil. Don’t forget 1 teaspoon of garlic powder for an extra kick! Next, add ¼ cup of grated Parmesan cheese. Season with salt and pepper to taste. Mix everything together until it’s nice and smooth.
Air Frying Process
Preheat your air fryer to 350°F (175°C) for about 3 minutes. While it heats up, spread the garlic butter mix evenly over the cut sides of the bread. Make sure to fill in those crisscross scores. Place the bread halves in the air fryer basket, cut-side up. Air fry for about 5-7 minutes. Look for golden brown edges and melted butter. For extra crispiness, flip the bread and air fry for an extra 2 minutes. Once done, let it cool a bit before slicing. If you want, sprinkle some fresh parsley on top for color. Enjoy your crispy delight!
Tips & Tricks
How to Enhance Flavor
To boost the flavor of your Air Fryer Parmesan Herb Garlic Bread, choose fresh herbs. Fresh basil and parsley add a bright taste. If you want a kick, try adding red pepper flakes to the garlic butter mix. You can also add a squeeze of lemon juice for a zesty twist.
Ensuring Perfect Crispiness
For the crispiest bread, make sure you spread the garlic butter evenly. Score the bread lightly to help the flavors soak in. Preheating your air fryer is key, too. It helps the bread cook evenly and get that golden crust. If you want extra crunch, flip the bread halfway through cooking, then air fry for a few more minutes.
Common Mistakes to Avoid
Avoid using cold butter; it won’t blend well. Always use softened butter for a smooth mix. Don’t skip scoring the bread; it helps with flavor absorption. Make sure the bread fits properly in your air fryer. If it’s too tight, it won’t crisp up well. Lastly, keep an eye on the cooking time to prevent burning.
Variations
Cheese Options
You can switch up the cheese for your garlic bread. Try mozzarella for a stretchy, gooey texture. Cheddar adds a sharp bite. Goat cheese brings a creamy tang that pairs well with herbs. Use any cheese you love. Mix and match to find your favorite!
Herb Alternatives
Feel free to play with herbs in this recipe. Instead of oregano, use thyme for a warm flavor. Fresh rosemary adds a fragrant twist. You can even try dill for a unique taste. Just remember to adjust the amounts based on your choice.
Additions for Extra Flavor
Want to kick up the taste? Add red pepper flakes for heat. A sprinkle of lemon zest gives a fresh zing. You can also mix in some chopped sun-dried tomatoes for a sweet, savory touch. These small tweaks can make your garlic bread even more special!
Storage Info
How to Store Leftovers
To store leftover garlic bread, wrap it tightly in plastic wrap or foil. This helps keep it fresh. You can also place it in an airtight container. Store it at room temperature for one day. If you want it to last longer, put it in the fridge for up to three days.
Reheating Tips
To reheat the bread, I recommend using the air fryer. Set it to 350°F (175°C). Place the bread in the basket for about 3-5 minutes. This will help it regain its crispy edges. You can also use a toaster oven. If you use a microwave, it may get chewy.
Freezing Instructions
If you want to freeze garlic bread, slice it first. Wrap each slice in plastic wrap, then place them in a freezer bag. Make sure to remove as much air as possible. You can freeze it for up to three months. When you’re ready to eat, thaw it in the fridge overnight before reheating.
FAQs
Can I use pre-made garlic butter?
Yes, you can use pre-made garlic butter. It saves time and adds flavor. Just spread it on the bread like the recipe shows. Make sure to check the taste, as some brands are saltier than others.
What if I don’t have an air fryer?
If you don’t have an air fryer, don’t worry! You can bake the bread in the oven. Set your oven to 400°F (200°C). Place the buttered bread on a baking sheet. Bake for 10-12 minutes, or until golden brown. Keep an eye on it to avoid burning.
How can I make this recipe gluten-free?
To make gluten-free garlic bread, use gluten-free bread. Many stores offer great options. Just follow the same steps for mixing and cooking. The taste will still be delicious, and you won’t miss the gluten!
This blog covered everything you need for making delicious garlic bread. We discussed key ingredients and optional garnishes to elevate its taste. You learned step-by-step how to prepare, mix, and air fry your bread. We highlighted tips to boost flavor and achieve perfect crispiness. Plus, I shared ways to store leftovers and common FAQs answered.
I hope you feel ready to make this tasty garlic bread on your own. Enjoy every bite!