Skip to content
DisclaimerTerms Of UseGDPR PolicyCookie Policy

Foodish Talk

  • Home
  • Drinks
  • Appetizers
  • Dinner
  • Dessert
  • About
  • Contact
  • Privacy Policy
DisclaimerTerms Of UseGDPR PolicyCookie Policy

NO-ING-IMG

To make Cherry Tahini Energy Bites, you need a few main ingredients. Each one plays a key role in flavor and texture. Here’s what you’ll need: - 1 cup rolled oats - 1/2 cup almond flour - 1/2 cup tahini - 1/3 cup maple syrup - 1/2 cup dried cherries, chopped - 1/4 cup pumpkin seeds - 1 teaspoon vanilla extract - 1/4 teaspoon sea salt These ingredients blend well together. The oats give a nice chew, while the tahini adds creaminess. Dried cherries bring sweetness, and pumpkin seeds add crunch. This mix makes a tasty, healthy snack. You can customize your bites with optional add-ins. I like to suggest adding: - 1 tablespoon chia seeds Chia seeds add a nice texture and boost the nutrition. They are high in fiber and omega-3s. You can also think about adding other seeds or nuts if you like. Each serving of these Cherry Tahini Energy Bites is packed with good nutrition. Here’s a rough idea of what you get per bite: - Calories: 120 - Protein: 3g - Fat: 6g - Carbohydrates: 15g - Fiber: 2g They are a great energy source! They provide a balance of protein, healthy fats, and carbs. These bites can help you stay full and energized. For the full recipe, check out the section above. Start by gathering your dry ingredients. In a large mixing bowl, add: - 1 cup rolled oats - 1/2 cup almond flour Stir these together until they mix well. This step gets the base ready for your energy bites. The oats provide fiber, while the almond flour adds healthy fats. Now, let’s mix the wet ingredients. In a separate bowl, combine: - 1/2 cup tahini - 1/3 cup maple syrup - 1 teaspoon vanilla extract - 1/4 teaspoon sea salt Stir this mixture until it is smooth and creamy. The tahini gives a nutty flavor, while the maple syrup adds sweetness. Next, pour the wet mix into the dry ingredients. Mix well until everything is combined. Add in: - 1/2 cup dried cherries, chopped - 1/4 cup pumpkin seeds - Optional: 1 tablespoon chia seeds Stir again to evenly distribute the cherries and seeds. With clean hands, form small balls about 1 inch in diameter. If the mixture feels too sticky, chill it in the fridge for 15-20 minutes before shaping. Place the shaped bites on a parchment-lined tray. Chill them in the fridge for at least 1 hour to set. After they firm up, transfer the bites to an airtight container. Store them in the fridge for up to one week. Enjoy these easy Cherry Tahini Energy Bites as a healthy snack anytime! For the full recipe, check above. To get the perfect texture, start with the right balance. Use rolled oats and almond flour together. These ingredients give a nice chewiness. If your mixture feels too sticky, chill it for 15-20 minutes in the fridge. This helps firm it up. You can also use chia seeds for extra texture. They add a fun crunch and boost nutrition. Adding spices can elevate your energy bites. Cinnamon or nutmeg pairs well with the cherry flavor. Just a pinch goes a long way. If you like heat, try a bit of cayenne. It adds a kick that complements the sweet cherries. Experiment with your favorite spices. This makes each batch unique and exciting. Serving these energy bites is easy. Arrange them on a bright platter for a fun look. Sprinkle extra pumpkin seeds on top for crunch. You can also drizzle more tahini over them for a tasty touch. These bites work well as a snack or a light dessert. They’re great for sharing at gatherings or enjoying solo. Try pairing them with a cup of tea or coffee for a perfect pick-me-up. For more details, check the Full Recipe. {{image_2}} You can switch up the nuts and seeds for your energy bites. Instead of pumpkin seeds, try sunflower seeds for a nut-free option. Walnuts or pecans add a rich, earthy flavor. If you love crunch, add chopped almonds or hazelnuts. Each nut brings its own taste and texture, making your bites unique. Change the dried fruits for new tastes in your energy bites. Swap dried cherries for dried cranberries or apricots. Raisins can also work well if you enjoy their sweetness. Each fruit adds its special flavor, so feel free to mix and match. You might just find a new favorite! You can adjust the sweetness in these bites too. If you want less sugar, use less maple syrup. Honey or agave syrup can be great alternatives. For a low-calorie option, try stevia or monk fruit sweetener. Just remember to balance the flavors to keep your energy bites delicious. For the full recipe, check out the Cherry Tahini Energy Bites recipe above! To keep your Cherry Tahini Energy Bites fresh, store them in an airtight container. Place the container in the refrigerator. This helps maintain their texture and flavor. You can enjoy them for up to one week. If you want to keep them longer, freezing is a great option. To freeze the energy bites, first, let them set in the fridge. After one hour, place them in a single layer on a baking sheet. Freeze them for about two hours. Once frozen, transfer them to a freezer-safe bag or container. You can keep them in the freezer for up to three months. Just thaw them in the fridge before enjoying. Always check the energy bites before eating. Look for any signs of spoilage, like an off smell or unusual texture. If they look dry or hard, they may not taste good anymore. Fresh bites should feel firm yet soft. If you follow these tips, you will always have tasty snacks ready to go! For the complete recipe, see the Full Recipe section. Cherry Tahini Energy Bites are small snacks made from oats, tahini, and dried cherries. They are sweet, nutty, and chewy. Each bite packs a burst of flavor and energy. I love them for a quick pick-me-up. The combination of ingredients makes them healthy and satisfying. You can enjoy them anytime, whether at work or home. Yes, you can make these energy bites vegan! The main ingredients are already plant-based. Just use maple syrup instead of honey, and you’re good to go. This makes the bites perfect for a vegan diet. Enjoy the same great taste without any animal products! Cherry Tahini Energy Bites last up to one week in the fridge. Keep them in an airtight container for freshness. If you want to store them longer, you can freeze them. They will stay tasty for about three months in the freezer. Just thaw before eating! Absolutely! These bites offer several health benefits. They contain oats, which are great for heart health. Tahini adds healthy fats and protein. Dried cherries provide vitamins and antioxidants. The combination of these ingredients can boost your energy and keep you full. Enjoy these bites as a nutritious snack! Cherry Tahini Energy Bites are easy to make and full of flavor. You learned about the main ingredients, optional add-ins, and their nutrition. I shared the steps to prepare, mix, and store your energy bites. Also, tips helped you with texture, flavor, and serving. Each variation offers fun ways to customize, while storage tips ensure freshness. Enjoy these bites as a tasty treat that fuels your day. Experiment with different ingredients and find your favorite blend!

Cherry Tahini Energy Bites Healthy Snack Recipe

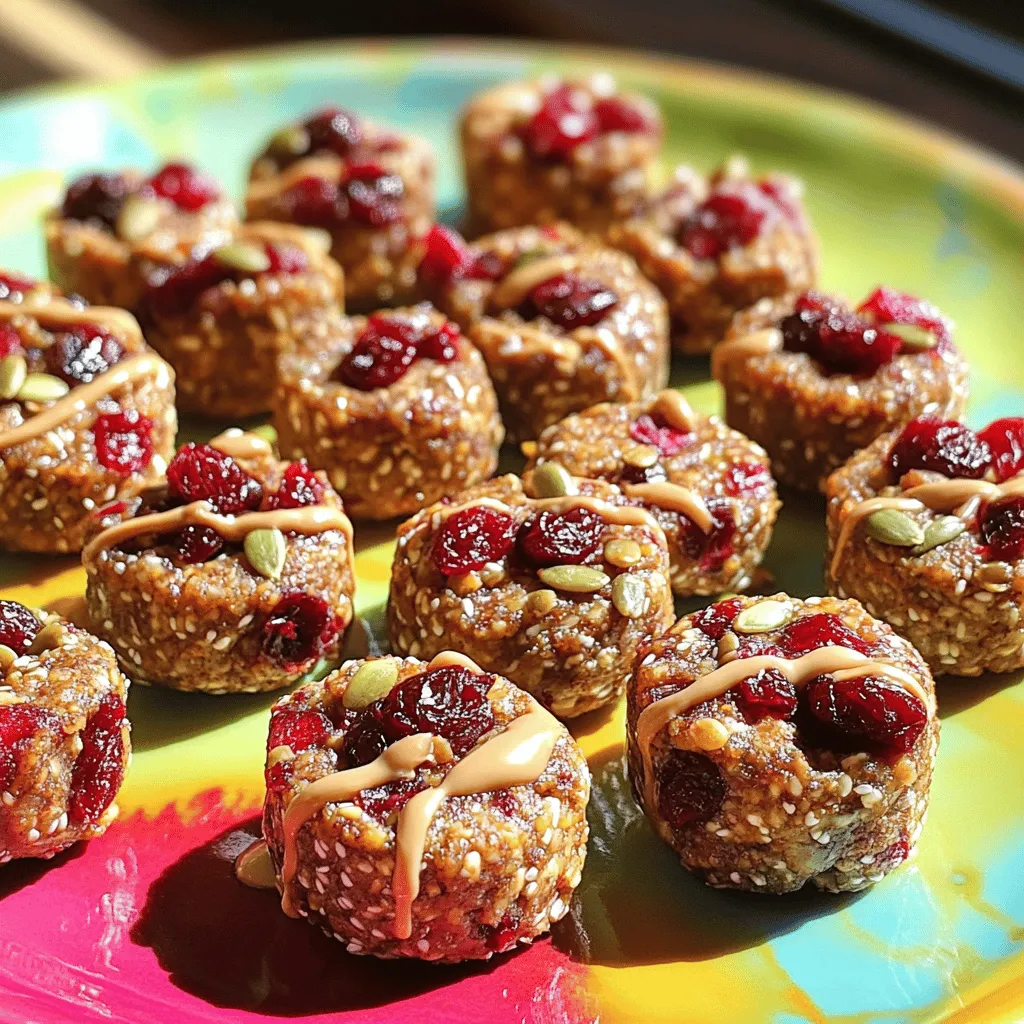
Looking for a quick, healthy snack? Let me introduce you to Cherry Tahini Energy Bites! Packed with flavor and nutrition,

To make root beer cream bars, gather these key items: - 2 cups root beer (soda) - 1 1/2 cups heavy cream - 1 cup powdered sugar - 1 teaspoon vanilla extract - 3 tablespoons gelatin powder (unflavored) - 1/4 cup cold water - 1 cup graham cracker crumbs - 1/4 cup unsalted butter, melted - Pinch of salt These ingredients create a tasty and creamy dessert that you will love. You can add a few fun touches to make your bars even better: - Scoop of vanilla ice cream - Drizzle of extra root beer - Cherry on top - Whipped cream These options enhance the flavor and make the treat look great. Each root beer cream bar has about: - Calories: 200 - Fat: 10g - Carbohydrates: 28g - Protein: 2g Keep the nutritional values in mind as you enjoy this sweet dessert. For the full recipe, refer to the earlier section. Start by making the crust. In a bowl, mix the graham cracker crumbs, melted butter, and a pinch of salt. Stir until all the crumbs are coated. Press this mixture into the bottom of a greased 9x9 inch baking dish. Make it firm and even. Now, place it in the refrigerator while you work on the filling. This step keeps the crust crisp. Next, you will bloom the gelatin. In a small bowl, pour cold water over the gelatin powder. Let it sit for about 5 minutes. You will see it turn thick and jelly-like. This blooming step makes the gelatin easier to mix later. Now, let’s make the root beer filling. In a saucepan, heat 1 cup of root beer over medium heat until it simmers. Take it off the heat and stir in the bloomed gelatin. Mix it well until the gelatin dissolves completely. Add the rest of the root beer and 1 teaspoon of vanilla. Allow this mixture to cool slightly before moving on. In another bowl, whip 1 1/2 cups of heavy cream with 1 cup of powdered sugar until soft peaks form. This step makes the filling light and fluffy. Gently fold the cooled root beer mixture into the whipped cream. Be careful not to over-mix; you want it smooth and creamy. Now, pour this root beer cream over the chilled graham cracker crust. Use a spatula to spread it evenly. Cover the dish with plastic wrap and put it in the refrigerator. Let it chill for 4 to 6 hours. This time helps the filling set completely. When it's ready, cut the bars into squares and serve them cold. Enjoy these simple and tasty treats! For the full recipe, check below. Whipping cream can be tricky, but I have some tips. Start with cold cream. Cold cream whips better and faster. Use a chilled bowl, too. This keeps the cream cold. Whisk in one direction. This helps build air and volume. Stop when you see soft peaks. Overwhipping makes butter, which we don’t want. For a smooth and creamy texture, fold gently. Use a spatula to mix the root beer into the whipped cream. Don’t stir too hard. This keeps the air in the cream. If you want it sweeter, add a bit more powdered sugar. Always taste as you go! Make your bars look great! Cut them into even squares. Place them on a nice plate. Add a scoop of vanilla ice cream next to each bar. Drizzle a bit of root beer on top. A cherry on each bar adds a fun touch. These small details impress your guests. For the full recipe, check out the detailed steps above. {{image_2}} You can switch things up with different flavors. Instead of root beer, try orange soda for a fun twist. You can also use cream soda for a sweeter taste. Cherry soda works well too, giving a fruity kick to the bars. Each flavor brings a new vibe, making it a fun treat for any occasion. For a gluten-free version, choose gluten-free graham crackers. They are easy to find in stores. Just replace regular graham cracker crumbs with these. This change keeps the tasty crust while making it safe for those with gluten issues. Enjoy the same great taste without worry. If you want a dairy-free option, use coconut cream instead of heavy cream. This adds a nice coconut flavor and keeps the bars creamy. Make sure to choose a dairy-free butter for the crust. These swaps allow everyone to enjoy the bars without dairy. For more details on making these delicious treats, check out the Full Recipe. To keep your Root Beer Cream Bars fresh, store them in the fridge. Use an airtight container to prevent them from absorbing other smells. If you cut them into squares, place parchment paper between layers. This stops them from sticking together. When stored properly, Root Beer Cream Bars can last up to a week in the fridge. They taste best when chilled. If you notice any changes in color or smell, it’s best to toss them. Always check before enjoying. You can freeze Root Beer Cream Bars for longer storage. Cut them into squares and wrap each piece in plastic wrap. Then, place them in a freezer-safe bag or container. They can last for up to two months in the freezer. When ready to eat, thaw them in the fridge overnight for the best texture. Enjoy your sweet treat! For the complete recipe, check out the Full Recipe section. To make Root Beer Cream Bars, start with the crust. Mix graham cracker crumbs, melted butter, and a pinch of salt in a bowl. Press this mix into a greased 9x9 inch baking dish. Then chill it. Next, bloom the gelatin in cold water for five minutes. Heat one cup of root beer and stir in the bloomed gelatin. Add the remaining root beer and vanilla extract. Cool this mix. In another bowl, whip heavy cream with powdered sugar until soft peaks form. Fold the root beer mix into the whipped cream. Pour it over the crust and chill for at least four hours until set. Yes, you can use diet root beer. It will still give a delicious flavor. The texture may change slightly due to less sugar, but the bars will still be creamy and tasty. You might find pre-made Root Beer Cream Bars at local bakeries or specialty dessert shops. Some grocery stores with a good bakery section may also carry them. Check the frozen dessert aisle, too, as you might find similar treats there. To cut the bars, use a sharp knife. First, dip the knife in warm water for easy slicing. Wipe the knife clean between cuts for neat squares. This helps keep the bars looking nice and tidy. Yes, you can use other types of crusts. For example, try crushed cookies like Oreos or vanilla wafers. You can also use a nut crust for a gluten-free option. Just make sure it holds together well! Root beer cream bars are a fun treat to make. We covered the main ingredients, optional toppings, and nutritional facts. I shared step-by-step instructions to ensure your bars turn out great. Tips like using cold cream help with the texture. Don’t forget about variations, storage, and those common questions! These bars are easy to customize and serve well at parties. I hope you enjoy making and sharing them!

Root Beer Cream Bars Irresistible and Simple Treat

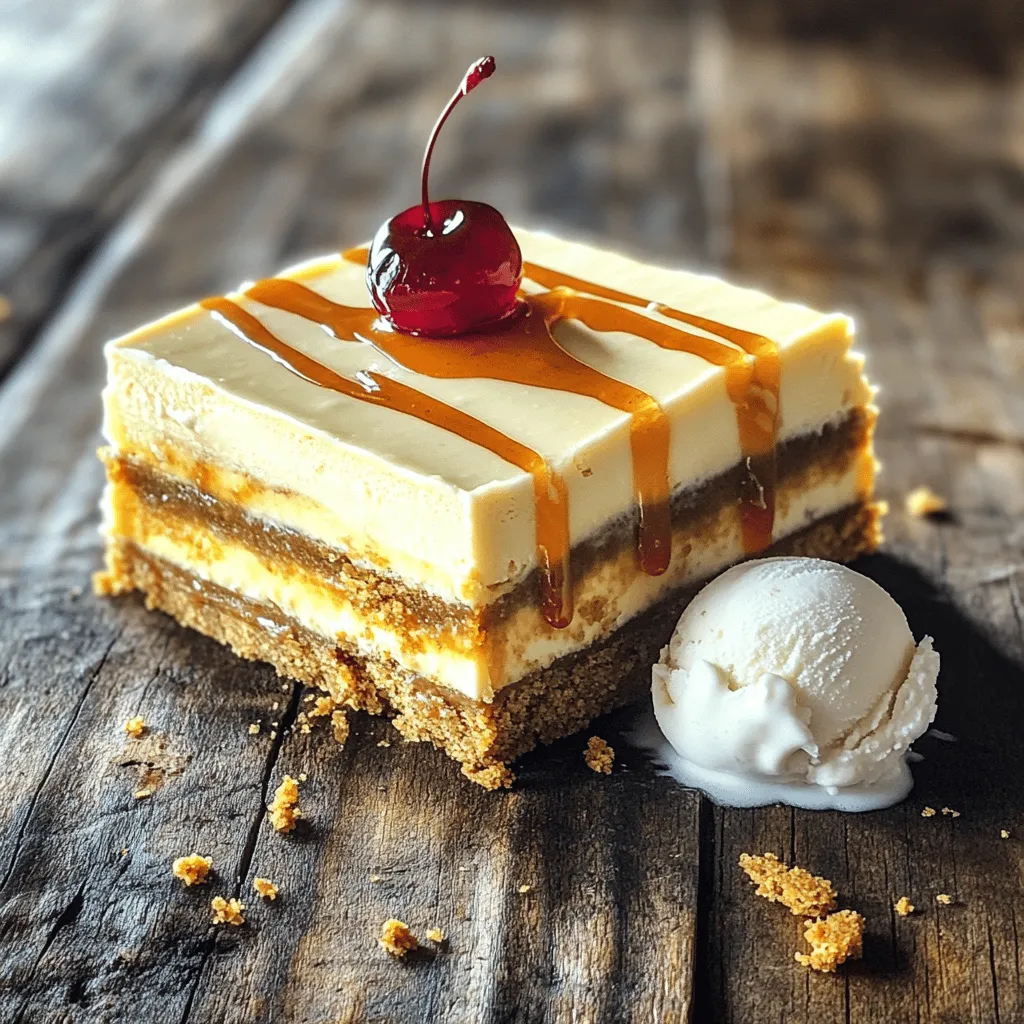
If you love the sweet nostalgia of root beer, you’re in for a treat! Root Beer Cream Bars combine creamy

To make Dill Pickle Deviled Eggs, you need a few simple items: - 6 large eggs - 3 tablespoons mayonnaise - 2 tablespoons dill pickle relish - 1 teaspoon Dijon mustard - 1 teaspoon apple cider vinegar - 1/4 teaspoon garlic powder - Salt and black pepper to taste These ingredients work together to create a creamy, tangy filling that really shines. You can add a few fun toppings to make your eggs prettier: - Fresh dill - Paprika These garnishes not only add color but also give a nice flavor boost. If you don’t have some items, don’t worry! Here are some swaps: - Use Greek yogurt instead of mayonnaise for a lighter taste. - Swap Dijon mustard with yellow mustard if that's what you have. - You can use white vinegar in place of apple cider vinegar. These changes will still keep your deviled eggs delicious and fun to eat! For the complete recipe, check out the [Full Recipe]. Start by placing the six large eggs in a pot. Cover them with cold water. Turn the heat to medium-high and bring the water to a boil. When it starts boiling, cover the pot with a lid and take it off the heat. Let the eggs sit for 10 to 12 minutes. This simple method works well for perfect hard-boiled eggs. After the time is up, carefully move the eggs to an ice bath. This will cool them down quickly. Leave them in the ice bath for about five minutes. Once cooled, gently tap each egg to crack the shell. Peel the eggs under running water for easier shell removal. Now, it’s time to make the filling. Slice each peeled egg in half lengthwise. Carefully scoop out the yolks and place them in a mixing bowl. Add the following ingredients to the yolks: - 3 tablespoons mayonnaise - 2 tablespoons dill pickle relish - 1 teaspoon Dijon mustard - 1 teaspoon apple cider vinegar - 1/4 teaspoon garlic powder - Salt and black pepper to taste Mash the yolks and ingredients together with a fork until creamy and smooth. Taste your mixture and adjust the seasoning as needed. This filling is what gives the deviled eggs their unique flavor. Next, we will fill the egg whites with the yolk mixture. You can use a piping bag for a fancy look or a spoon for simplicity. Fill each egg white half until it’s heaping. For a lovely finish, sprinkle some paprika on top. You can also add fresh dill for a touch of color. The deviled eggs are now ready to serve. Enjoy your Dill Pickle Deviled Eggs as a tasty and easy appetizer! For the Full Recipe, be sure to check the details above. To make the best hard-boiled eggs, start with fresh eggs. Place them in a pot and cover them with cold water. Bring the water to a boil over medium-high heat. Once it boils, cover the pot and remove it from the heat. Let the eggs sit for 10 to 12 minutes. This method helps you avoid overcooking and makes for tender yolks. After that, cool the eggs in an ice bath for five minutes. This step makes peeling easy. Remember, peeling under running water helps to remove any stubborn bits of shell. Dill Pickle Deviled Eggs are tasty, but you can spice them up! Try adding different ingredients. A bit of hot sauce can give a nice kick. For a creamier filling, swap half of the mayonnaise with Greek yogurt. If you love herbs, add fresh chives or cilantro. You can also mix in crumbled bacon for a savory twist. Experimenting with flavors makes the dish fun and personal. How you serve these eggs matters. A simple way is to use a nice platter. Arrange the filled eggs in a circle for a pretty look. You can sprinkle paprika on top for color. Fresh dill adds a nice touch too. For a creative twist, try using mini mason jars. Layer the egg filling with some greens for a rustic vibe. This makes your dish stand out at parties. Remember, we eat with our eyes first! {{image_2}} Want to spice things up? Add some heat to your deviled eggs! Mix in chopped jalapeños or a dash of hot sauce. You can also try adding cayenne pepper to the yolk mix. This twist brings a fiery kick to the creamy filling. Your guests will love the extra flavor! If you enjoy avocados, this version is for you. Simply replace half of the mayonnaise with ripe avocado. This swap gives the filling a creamy texture and a fresh taste. The dill pickle relish still shines through, making it a perfect blend. You’ll create a tasty, healthy treat that everyone will enjoy! Who doesn’t love bacon? For this variation, add crispy bacon bits to the yolk mixture. Chop the bacon finely and fold it in before filling the egg whites. The salty, smoky flavor pairs well with dill pickles. This version is sure to impress bacon lovers at your next gathering! For the full recipe, check out the details above! You can store leftover Dill Pickle Deviled Eggs in an airtight container. Place them in the fridge right away. They will stay fresh for up to three days. Make sure to cover them well. This keeps them from drying out. To keep your deviled eggs tasting great, do not add any toppings until serving. Toppings like paprika or fresh dill can get soggy. If you want to keep the filling smooth, cover it with plastic wrap before sealing the container. This helps keep the air out. I do not recommend freezing deviled eggs. The texture changes when they freeze, and they may become watery. If you want to make a big batch, just prepare the filling. Store the filling in the fridge. You can assemble the eggs when you are ready to serve. This keeps them fresh and tasty. For the full recipe, check the earlier section. Dill Pickle Deviled Eggs can last up to three days in the fridge. Make sure to store them in an airtight container. This keeps them fresh and tasty. Always check for changes in smell or texture before serving. If they look or smell off, it’s best to toss them. Yes, you can make Dill Pickle Deviled Eggs in advance. Prepare them a day before your event for convenience. Just store them in the fridge until serving time. This makes your party prep easier. The flavors will also develop more over time, enhancing the taste. Dill Pickle Deviled Eggs are great on a platter at parties. You can also serve them with fresh veggies. They pair well with crackers for a crunchy bite. For a fun twist, try serving them with a side of spicy mustard. You can find the full recipe for these delightful bites above, allowing you to explore more serving options! You now have all you need to make delicious Dill Pickle Deviled Eggs. We covered the ingredients, step-by-step instructions, and tips to boost flavor and presentation. Remember, you can customize these eggs with spicy or bacon flavors. Store leftovers properly to keep them fresh. Deviled eggs are great for any gathering. Use these ideas to impress your friends and family. Enjoy your tasty creation!

Dill Pickle Deviled Eggs Tasty and Easy Appetizer

Looking for a snack that’s both simple and full of flavor? You’ve landed at the right place! Dill Pickle Deviled

- 2 cups all-purpose flour - 1 cup warm water (about 110°F) - 1 packet (2 1/4 teaspoons) active dry yeast - 1 teaspoon sugar - 1 teaspoon salt - 2 tablespoons olive oil (plus more for drizzling) - 1 cup fresh cherries, pitted and halved - 2 tablespoons fresh rosemary, finely chopped - Coarse sea salt for topping - Mixing bowls - Baking sheet or rectangular baking dish - Damp cloth - Wire rack - Extra olive oil - Fresh rosemary sprigs To make Cherry Rosemary Focaccia Art, you need simple yet fresh ingredients. The main stars are flour, yeast, cherries, and rosemary. Each ingredient plays a role in flavor and texture. All-purpose flour gives the bread its body. Warm water helps activate the yeast. The active dry yeast is crucial for that fluffy rise. Sugar feeds the yeast, making it work even better. Salt adds depth and flavor. Olive oil is key for a rich taste and helps with texture. The cherries bring sweetness and a lovely pop of color. Rosemary adds an earthy aroma that pairs well with the cherries. Finally, a sprinkle of coarse sea salt on top enhances every bite. In addition, you’ll find tools like mixing bowls and a baking sheet helpful. A damp cloth keeps the dough warm while it rises. A wire rack allows the bread to cool and stay crisp. For a finishing touch, extra olive oil and fresh rosemary sprigs make the focaccia look and taste great. Each part of this recipe combines to create a delightful experience. You can find the full recipe to guide you through the process. To start, combine warm water, sugar, and yeast in a bowl. Stir gently. Let it sit for about 5-10 minutes. You want it to become frothy. This means the yeast is active and ready. Next, mix the flour and salt in a large bowl. Create a well in the center. Pour in your yeast mixture and add olive oil. Stir until everything comes together. Knead the dough on a floured surface for about 5-7 minutes. You should feel it become smooth and elastic. Now, place the dough in a lightly oiled bowl. Cover it with a damp cloth and let it rise. Find a warm spot and let it grow for about 1 hour. It should double in size. While waiting, prepare your pan with some olive oil. After the rise, punch the dough down gently. Turn it out onto the pan and stretch it to fit, about 1/2 inch thick. Use your fingers to make dimples all over the dough. Scatter the halved cherries and chopped rosemary on top. Drizzle a little olive oil and sprinkle coarse sea salt. Cover the dough with a cloth again and let it rise for another 20-30 minutes. Preheat your oven to 425°F (220°C). Once ready, bake the focaccia for 20-25 minutes. It should turn golden brown and smell amazing. When it’s done, take it out and let it cool slightly on a wire rack before slicing. For the full recipe, check out the details above! To make great focaccia, kneading is key. - Kneading Techniques: Use your palms to push the dough down and away. Fold it back. Repeat this for about 5-7 minutes. The dough should feel smooth and elastic. - Creating Dimples: After you shape the dough, press your fingers gently all over. This creates little pockets for the toppings. Don’t worry about making them perfect; they add character. Adding herbs or spices can boost the taste of your focaccia. - Herbs and Spices: Try adding garlic powder or crushed red pepper for a kick. You can also mix in some thyme or basil for an extra layer of flavor. - Olives or Fruits: Instead of cherries, try using olives like Kalamata or green olives. Sliced figs or peaches also work wonderfully in summer. How you serve your focaccia can make it shine. - Artistic Presentation: Place the focaccia on a wooden board. This gives a rustic look. You can also slice it into squares or strips for easy sharing. - Serving and Garnishing: Drizzle a bit of olive oil on top before serving for shine. Add rosemary sprigs or a sprinkle of coarse sea salt for a beautiful finish. Serve it warm for the best experience. For the full recipe, check out the Cherry Rosemary Focaccia Art. Enjoy making this tasty bread! {{image_2}} You can mix and match flavors to make your focaccia unique. Try different fruits, like figs or peaches, with rosemary. Each fruit brings its own sweet or tart note. Adding cheese can create a lovely creaminess. Goat cheese or mozzarella works well. Nuts, like walnuts or pistachios, add crunch and depth. This mix of flavors makes every bite exciting. If you need a gluten-free focaccia, use almond or rice flour. These flours can make a great base. Just make sure to add a binding agent like xanthan gum. For vegan options, replace olive oil with avocado oil. You can also use yeast alternatives like baking soda or apple cider vinegar. These swaps keep the recipe plant-based and still delicious. You can make focaccia for any season. In spring, add fresh peas and mint. Summer is perfect for tomatoes and basil. In fall, try apples and sage. Winter can feature hearty root veggies like sweet potatoes. Use fruits and herbs that are in season for the best taste. This approach helps you celebrate each season’s flavors. To keep focaccia fresh for a few days, store it in a bread box or a sealed bag. This keeps air out, which helps maintain its soft texture. Make sure the focaccia cools completely before storing. If you leave it out, it may go stale quickly. Freezing focaccia is a great option if you want to enjoy it later. Wrap it tightly in plastic wrap and then place it in a freezer-safe bag. This protects it from freezer burn. When you want to eat it, remove the focaccia from the freezer and let it thaw in the fridge overnight. To maintain texture and flavor, reheat focaccia in an oven or air fryer. Preheat your oven to 350°F (175°C). Place the focaccia directly on the oven rack for about 10 minutes. This method keeps the bread crispy. If you use an air fryer, set it at 300°F (150°C) for 5-7 minutes. Both methods keep the focaccia delicious and warm. You can tell focaccia is done by its color and texture. Look for a golden brown top. The edges should also be crisp. You can use a food thermometer. The internal temperature should reach about 200°F. If you tap it, it should sound hollow. Yes, you can make focaccia ahead of time. Prepare the dough and let it rise. After the first rise, you can cover it and store it in the fridge for up to 24 hours. When you’re ready, shape it and let it rise again. Then bake as usual. To boost the rise of your focaccia dough, ensure your yeast is fresh. Use warm water, not hot, when activating the yeast. Kneading the dough well adds air. You can also let it rise in a warm place. Cover it with a damp cloth to keep moisture in. Serve Cherry Rosemary Focaccia warm for the best taste. Drizzle extra olive oil on top for richness. Pair it with a light salad or cheese for balance. It also goes well with a glass of crisp white wine. You can use dried herbs, but the flavor will change. Dried herbs are stronger, so use less. About one-third of the amount is a good start. The freshness of the recipe comes from using fresh rosemary. If you can, stick with fresh for the best taste. You learned how to make Cherry Rosemary Focaccia step-by-step. We explored key ingredients, tools, and techniques. Perfecting your focaccia takes practice but brings big rewards. Don't hesitate to add your twist with flavors or presentation ideas. Store and reheat it well for lasting freshness. Enjoy your homemade focaccia warm, and share it with friends or family. With these tips, you can create a delicious treat anytime. Baking is fun, so keep trying new ideas!

Cherry Rosemary Focaccia Art Flavorful Bread Delight

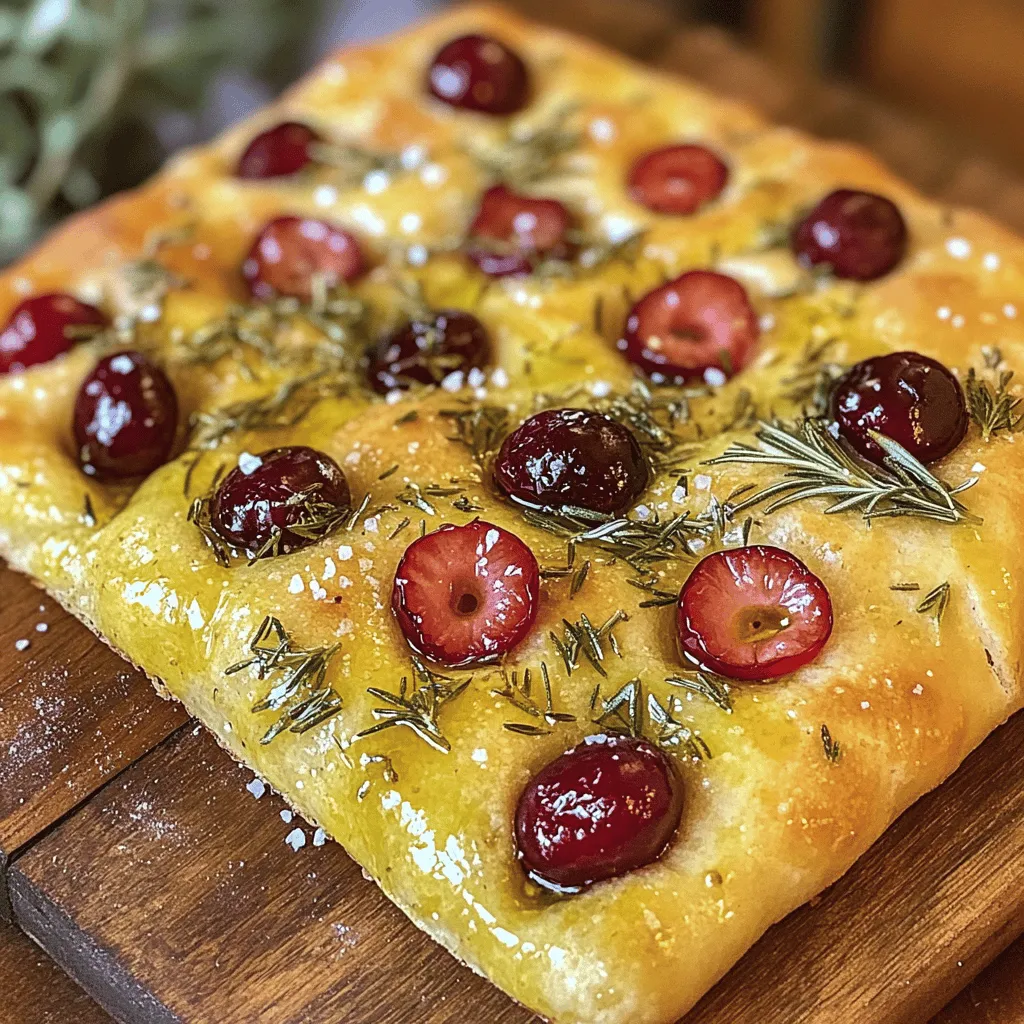
Are you ready to elevate your baking game? Cherry Rosemary Focaccia Art combines vibrant flavors and beautiful designs in one

- 1 can (5 oz) tuna, drained - 3 tablespoons dill pickle relish - 1 tablespoon mayonnaise - 1 tablespoon Greek yogurt - 1 teaspoon Dijon mustard - 1 celery stalk, finely chopped - 1 green onion, sliced - Salt and pepper to taste In the heart of this recipe is canned tuna. It gives you a tasty protein base. I love using tuna packed in water for a lighter option. Next, we add dill pickle relish. This brings a tangy crunch that wakes up the dish. Mayonnaise and Greek yogurt come together to create a creamy texture. If you want a lighter feel, you can adjust the mayo and yogurt mix. Chop one celery stalk finely. This adds a nice crunch. The green onion offers a fresh bite. Don’t skip the salt and pepper! They enhance all the flavors. - 8 large lettuce leaves (such as butter or romaine) - Other leafy greens For wrapping, I enjoy using butter lettuce. It’s soft, and easy to fold. Romaine is another great choice. It holds up well and adds crunch. You can also try other leafy greens like Swiss chard or collard greens if you want something different. - Fresh dill - Additional toppings (avocado, tomatoes) To make this dish even better, top your wraps with fresh dill. It adds an herbaceous note that pairs well with the tuna. You can also add avocado for creaminess or sliced tomatoes for a juicy bite. These extras brighten the dish and make it more filling. For the full recipe, check out Pickle Tuna Salad Lettuce Wraps. Enjoy this fresh and tasty meal! To start, gather your main ingredients. In a medium mixing bowl, combine: - 1 can (5 oz) tuna, drained - 3 tablespoons dill pickle relish - 1 tablespoon mayonnaise - 1 tablespoon Greek yogurt - 1 teaspoon Dijon mustard Mix these until they blend well. The tuna needs to be creamy and smooth. Next, it's time to add some crunch. Chop one celery stalk finely and slice one green onion. Add these to the bowl. Stir well so every bite has the nice crunch of veggies. Now, season your mixture. Add salt and pepper to taste. If you want it tangy, add more relish or mustard. You can always adjust the flavors to fit your taste. Now we get to the fun part: making the wraps. Choose large lettuce leaves, like butter or romaine. Take one leaf and lay it flat on your plate. Spoon about 2-3 tablespoons of the tuna salad in the center. This is where it gets interesting. Fold the lettuce leaf around the salad. It should look like a little package. Repeat this for all the leaves and the salad mixture. If you want, you can add fresh dill on top for a burst of flavor. It makes the wraps look pretty too! For presentation, I like to arrange the wraps on a colorful plate. You can add some sliced tomatoes or cucumber on the side. This makes the meal pop with color. Pair these wraps with a light salad or some crunchy veggies. They are great with a cool drink, like iced tea or lemonade. Enjoy your meal with family and friends! For the complete recipe, check out the Full Recipe section. To make your tuna salad taste just right, start with the tartness. If you want more zing, add extra dill pickle relish. You can also swap in some lemon juice for a fresh twist. For creaminess, increase the mayonnaise or Greek yogurt. Each change can shift the flavor, so taste as you go and adjust as needed. Experiment with seasonings to find your favorite mix. Try adding garlic powder or a dash of hot sauce for heat. Fresh herbs like dill or parsley can also brighten the dish. Mixing in different spices lets you create a unique flavor each time. Making the tuna salad in advance saves time. You can mix it up to two days before serving. This gives the flavors time to meld. Just keep it in the fridge in a tightly sealed container. When it comes to storage, keep the lettuce leaves separate. This helps them stay crisp until you’re ready to eat. Store the tuna salad in one container and the lettuce in another. After enjoying your wraps, you may have some leftover components. To keep everything fresh, store them separately. Place the leftover tuna salad in an airtight container. For the lettuce, wrap it in a damp paper towel and place it in a bag. This helps it stay crunchy. When you’re ready for a snack, just assemble a fresh wrap. Enjoy your meal anytime with these easy storage tips! {{image_2}} You can switch up your tuna salad in fun ways. Try using chicken instead of tuna. It gives a nice twist. If you want a plant-based option, chickpeas work well too. Just mash them gently. You can also play with flavors. Add spices like garlic powder or paprika. Fresh herbs like parsley or cilantro add brightness. The key is to taste as you go. Make sure it’s just how you like it. Lettuce is great, but you can wrap your salad in other greens too. Collard greens make sturdy wraps. They add a bit of a crunch. If you want something lighter, try cucumber boats. Just slice a cucumber in half and scoop out the seeds. Fill them with the tuna salad. It’s refreshing and low-carb, perfect for a hot day. If you follow a vegan or vegetarian diet, you can still enjoy this dish. Use chickpeas or tofu instead of tuna. For the creamy element, swap mayonnaise with avocado or a vegan spread. This gives a rich texture without dairy. If you need gluten-free options, just check labels on your ingredients. Most of them are naturally gluten-free. Always read to make sure. Each variation lets you enjoy the dish while fitting your needs. For the full recipe, check the details above. To keep your pickle tuna salad fresh, use an airtight container. Glass or plastic containers both work well. Make sure the lid seals tightly. This helps prevent any odors from your fridge from getting in. You can store it in the fridge for up to three days. Always check for any off smells or changes in texture before eating leftovers. When you make your lettuce wraps, store the ingredients separately. This keeps the lettuce crisp and fresh. Wraps can get soggy if you store them together. Keep the tuna salad in one container and the lettuce in another. Use it within a day for the best taste. If you have leftover assembled wraps, eat them within a few hours. You usually eat tuna salad cold, so reheating may not apply. If you want to warm it up, use the microwave. Heat it for about 15-20 seconds. Stir it well and check the temperature. Avoid overheating, as it can dry out the salad. For wrap freshness, always eat them cold. Adding cold tuna salad to fresh lettuce keeps it refreshing. Yes, you can use fresh tuna. Start by cooking it. You can grill, bake, or pan-sear it until it is just cooked through. Make sure to let it cool before mixing it into the salad. Chop it into small pieces for the best texture. Fresh tuna adds a nice flavor, but canned tuna is easier and quicker to use. The tuna salad lasts about three to four days in the fridge. Store it in an airtight container to keep it fresh. If you notice any off smells or changes in texture, it’s best to throw it away. Always check the salad before eating it after a few days. You can serve these wraps with many sides. Consider crunchy carrot sticks or cucumber slices for a fresh bite. Potato chips or a simple green salad also pair well. For a heartier meal, try serving it with quinoa or brown rice. These sides add more texture and flavor to your meal. Yes, this recipe is great for meal prep. You can make the tuna salad ahead of time and store it in the fridge. Just prepare the lettuce wraps when you are ready to eat. This keeps the lettuce crisp and fresh. Store the wraps separately from the salad to avoid sogginess. In this article, we explored how to make delicious pickle tuna salad wraps. We discussed key ingredients like canned tuna, dill pickle relish, and the best types of lettuce for wrapping. You learned step-by-step instructions for preparing the salad and assembling the wraps. Tips for enhancing flavor and managing leftovers were also provided. Pickle tuna salad wraps are tasty, easy to make, and great for meal prep. Try it out and enjoy a fresh, healthy meal!

Pickle Tuna Salad Lettuce Wraps That Refresh Your Meal

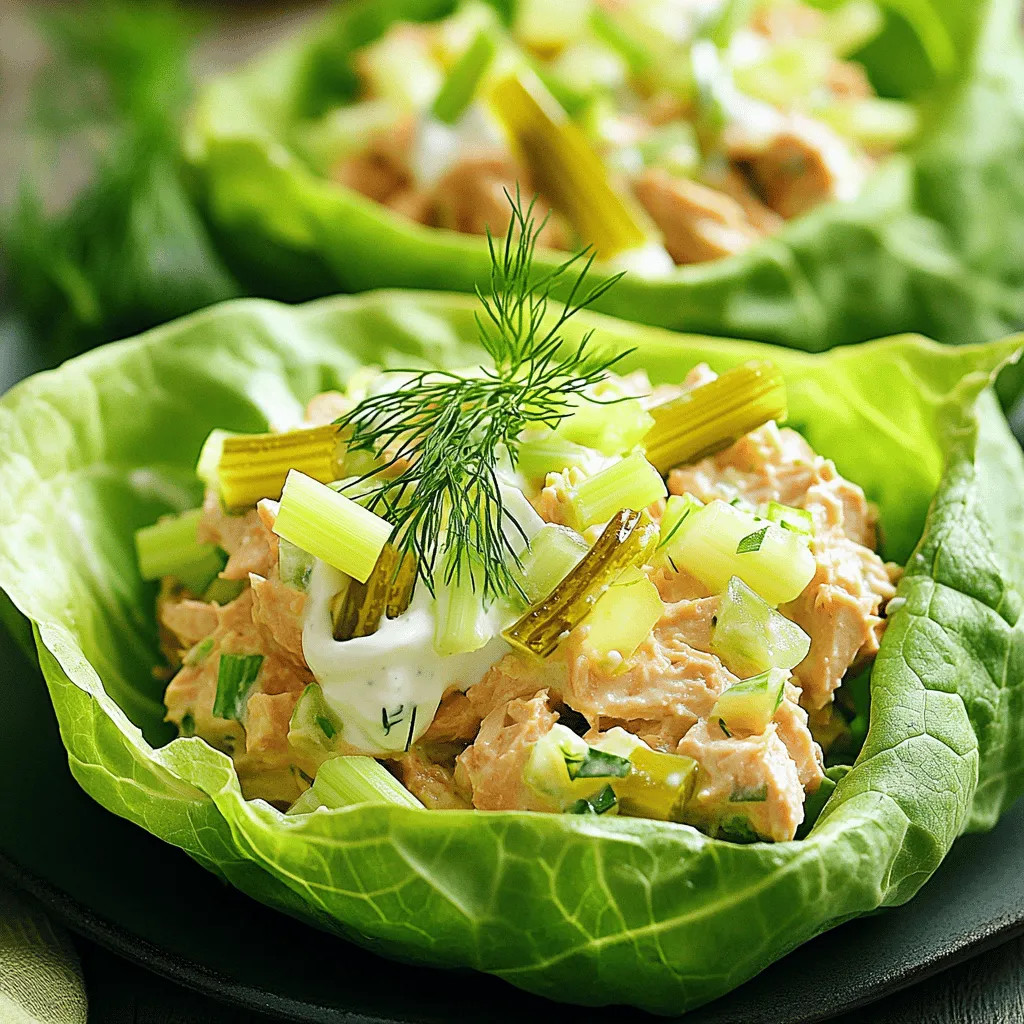
Are you looking for a meal that is both fresh and simple? I’ll show you how to make Pickle Tuna

- 2 ripe peaches, pitted and sliced - 1 cup peach sorbet - 2 cups sparkling water (or lemon-lime soda for sweetness) - 1 tablespoon lemon juice - 1 tablespoon fresh mint leaves, chopped (for garnish) - Ice cubes When making Peach Fizz Floats, you want to use ripe peaches. They add great flavor and sweetness. I always choose peaches that feel heavy and have a sweet scent. The peach sorbet gives a creamy texture and coldness. You can use sparkling water for a light drink or lemon-lime soda for extra sweetness. The lemon juice brightens the flavors. It balances the sweetness from the peaches and sorbet. Don't skip the mint garnish. It adds a fresh touch and makes the drink look pretty. - Blender - Serving glasses - Measuring spoons You'll need a blender to make the smooth peach puree. It helps mix the peaches and lemon juice well. A set of measuring spoons ensures you get the right amounts. Use tall serving glasses to show off your float layers. These tools make the process easy and fun. Enjoy the process as much as the drink! For the complete recipe, check the [Full Recipe]. First, slice the ripe peaches and remove the pits. Place the peach slices in a blender. Add one tablespoon of lemon juice to the blender. Blend the mixture until it becomes smooth and creamy. This peach puree will give your floats their fruity flavor. Grab your serving glasses and scoop one cup of peach sorbet into each glass. Make sure to pack the sorbet well. Pour the peach puree over the sorbet until each glass is about halfway full. The sorbet should start to melt slightly, mixing with the puree. Now, slowly pour sparkling water or lemon-lime soda into each glass. Watch the fizz rise as it combines with the puree. If you want an extra chill, add ice cubes to the glasses. Lastly, sprinkle chopped mint leaves on top for a fresh touch. Enjoy your Peach Fizz Floats! You can find the full recipe above. - Choosing ripe peaches: Look for peaches that have a slight give when you press them. They should smell sweet and fruity. Avoid peaches that are too hard or too soft. - Adjusting sweetness levels: Taste your peach puree before adding the sparkling water. If it’s not sweet enough, mix in a little sugar or honey. You can also use lemon-lime soda instead of sparkling water for a sweeter touch. - Best glassware for presentation: Use tall, clear glasses to show off the layers. It makes your floats look attractive and fun. You can also use mason jars for a rustic feel. - Ideal garnishes for enhancing visuals: Fresh mint leaves add a lovely pop of green. You can also add a slice of peach on the rim or a sprinkle of edible flowers for color. - Best time to serve for freshness: Serve your Peach Fizz Floats right after making them. They taste best when the fizz is fresh and bubbly. - Pre-preparation and storage ideas: You can prepare the peach puree ahead of time. Store it in the fridge for up to two days. Just mix it with the sorbet and sparkling water before serving. {{image_2}} You can make Peach Fizz Floats even more exciting with alcohol. Try adding peach schnapps for a sweet kick. Just mix a splash into your glass of peach puree before you add the sparkling water. This adds a fun twist to your drink. Another option is to use wine. A sparkling white wine works well. Just replace the sparkling water with wine for a bubbly treat. This gives a more mature flavor, perfect for summer parties. If you want a refreshing drink without alcohol, there are great non-alcoholic options. Using flavored sparkling water is a fantastic choice. Try peach or raspberry sparkling water. This adds a fruity flavor without extra sugar. You can also swap out the sparkling water for fruit juice. Orange juice or cranberry juice can add a sweet and tangy taste. Mix it with your peach puree for a fruity delight. You don’t have to stick with peach sorbet. You can try other fruit sorbets to mix things up. Mango or raspberry sorbet can add a fun twist to your floats. Each flavor brings a new taste to the drink. If you need dairy-free options, look for dairy-free sorbets. These are made from fruit and water. They provide the same creamy texture without using dairy. This way, everyone can enjoy a Peach Fizz Float! For the full recipe, check out the details above. To keep peaches fresh, store them at room temperature. Once they ripen, place them in the fridge. This slows down spoilage. Eat them within a few days for the best taste. For peach sorbet, store it in the freezer. Make sure it’s in a sealed container. This helps prevent freezer burn. Yes, you can store leftovers! Keep the floats in the fridge for up to a day. However, the fizz will fade. To keep some sparkle, store the sorbet and peach puree separately. Mix them again when ready to serve. This way, you can enjoy the fizz again. You can freeze peach puree easily. Pour the puree into ice cube trays. Once frozen, transfer the cubes to a bag. This method saves space and keeps the flavor. To make ahead, prepare the peach puree and sorbet. Store them in the freezer until you are ready to make your floats. This lets you whip up a refreshing drink anytime! To prepare peaches, first, wash them under cold water. Next, cut the peaches in half. Twist the halves gently to separate them. Use a small knife to remove the pit. Slice the peach into thin pieces for easy blending. This will help create a smooth puree. Fresh peaches add a sweet and juicy flavor to your drink. Yes, you can use frozen peaches! They work well and still taste great. Just let them thaw for a bit before blending. You may need to add a touch more lemon juice to brighten the flavor. Adjust the sweetness by using a little extra sorbet if needed. This way, you can enjoy Peach Fizz Floats any time of year. You can get creative with your garnishes! Try using fruit slices, like lemon or lime, for a pop of color. Berries, such as raspberries or blueberries, also make great additions. You can even add a sprig of rosemary for an herbal touch. These options will make your drink look even more inviting and fun. This blog post shared how to make refreshing Peach Fizz Floats. You learned about the needed ingredients, like ripe peaches and peach sorbet. I explained how to blend the peach puree and assemble your floats. Pro tips helped you select the best peaches and serve them nicely. You can customize with variations, like adding alcohol or different sorbets. Now you can create delightful floats for any occasion. Enjoy making this tasty treat!

Peach Fizz Floats Refreshing Summer Drink Recipe

Get ready to elevate your summer sipping with my Peach Fizz Floats! This refreshing drink combines ripe peaches and sparkling

For this delightful mug cake, you will need: - 4 tablespoons all-purpose flour - 2 tablespoons unsweetened cocoa powder - 4 tablespoons sugar - 1/8 teaspoon baking powder - 1/4 cup milk - 2 tablespoons vegetable oil - 1/4 teaspoon vanilla extract - 1/4 cup dark chocolate chips - 2 tablespoons cherry pie filling (or fresh cherries, pitted and chopped) - A pinch of salt This mix of ingredients creates a rich, gooey center that bursts with flavor. You can swap some ingredients if needed. Here are a few ideas: - Flour: Use gluten-free flour for a gluten-free option. - Cocoa powder: Carob powder works if you want a different taste. - Sugar: Coconut sugar or honey can replace regular sugar. - Milk: Almond milk or oat milk is a good dairy-free choice. - Oil: You can use melted butter instead of vegetable oil. These swaps can still give you a great mug cake. When it comes to cherries and chocolate, quality matters: - Cherries: Look for firm, plump cherries. If using fresh, they should be bright red. For canned or pie filling, choose brands with real cherries and less sugar. - Chocolate: Choose dark chocolate chips with at least 60% cocoa. This gives a rich flavor without being too sweet. Fresh, high-quality ingredients make your mug cake even better. For the full recipe, check out the detailed steps to create this tasty treat! First, grab a large microwave-safe mug. In the mug, mix these dry ingredients: - 4 tablespoons all-purpose flour - 2 tablespoons unsweetened cocoa powder - 4 tablespoons sugar - 1/8 teaspoon baking powder - A pinch of salt Whisk these together until they are well blended. Next, add the wet ingredients: - 1/4 cup milk - 2 tablespoons vegetable oil - 1/4 teaspoon vanilla extract Stir until the batter is smooth and free of lumps. Now, fold in: - 1/4 cup dark chocolate chips - 2 tablespoons cherry pie filling (or fresh cherries, pitted and chopped) Make sure to mix them in evenly throughout the batter. Place the mug in the microwave and cook on high for 40-60 seconds. Watch closely as it cooks. The cake should rise and look set on the outside. However, the center must stay soft and gooey. If it overflows, stop the microwave and let it settle before continuing. After cooking, let the mug cake cool for one minute. This helps the lava center form perfectly. Serve the mug cake directly in the mug for a fun look. For an extra treat, top it with a scoop of vanilla ice cream or a dollop of whipped cream. You can also add some extra cherries or a sprinkle of powdered sugar for a gourmet touch. Enjoy your Cherry Chocolate Lava Mug Cake delight! For the full recipe, check the previous section. To get that perfect lava texture, timing is key. Microwave the mug cake for 40 to 60 seconds. Start checking at 40 seconds. The outer part should look set. The center should be soft and slightly wobbly. If you overcook it, the gooey center will disappear. Trust me; undercooked is better than overcooked here! One common mistake is using the wrong mug size. A small mug may overflow. Choose a large mug that can hold at least 12 ounces. Another mistake is not mixing well. Make sure to blend the dry and wet ingredients completely. Lumps can lead to an uneven texture. Lastly, don’t forget to watch the time closely while microwaving. You can boost flavor in many ways. Add a sprinkle of sea salt on top for contrast. You could also mix in some almond extract for a nutty twist. For presentation, serve your mug cake with fresh cherries or whipped cream. A dusting of powdered sugar can give it a fancy touch. Don’t hesitate to get creative! For the full recipe, check out the details above. {{image_2}} You can change the flavor of the Cherry Chocolate Lava Mug Cake. Try using raspberries or strawberries instead of cherries. Both fruits give a nice tartness that pairs well with chocolate. You can use raspberry preserves or fresh berries. Just replace the cherry filling with your chosen fruit. This small swap can make a big difference. If you want a healthier mug cake, swap regular sugar for a sugar substitute. You can use honey, maple syrup, or stevia. These options can cut down on calories while still tasting sweet. You might also try whole wheat flour for more fiber. These changes keep the cake tasty but a bit lighter. You can easily make a larger batch of this mug cake. Instead of one mug, use a microwave-safe bowl. Just multiply the ingredients by the number of servings you want. For example, if you want to serve four, use four times the ingredients. Adjust cooking time as needed, but check it every minute. This way, you can enjoy the cake with friends or family! If you have any leftover Cherry Chocolate Lava Mug Cake, you can store it easily. First, let it cool down fully. Then, cover the mug with plastic wrap or transfer it to an airtight container. This keeps moisture in and prevents drying. Store it in the fridge for up to two days. If you want to keep it longer, consider freezing it. To enjoy your mug cake again, reheating is key. If it's in the fridge, take it out and let it sit for a few minutes. This helps it warm evenly. Microwave it on low power for about 15-20 seconds. Check if it's warm enough; if not, heat it in short bursts. Avoid overheating, or the cake may become dry. Meal prep can make your week easier. You can mix the dry ingredients in advance. Store them in a jar for quick access. When you want a mug cake, just add the wet ingredients and microwave. This method saves time and keeps your dessert fresh. Plus, you can have a delicious treat ready in just minutes! For the full recipe, check back for all the details. Yes, you can bake this mug cake in an oven. Use a small oven-safe dish instead of a mug. Preheat your oven to 350°F (175°C). Pour the batter into the dish and bake for about 10-12 minutes. Check for doneness with a toothpick. The center should be soft but not wet. You can use applesauce as an egg replacement. Use 1/4 cup of unsweetened applesauce for each egg. It adds moisture and a hint of sweetness. Another option is mashed banana. Use the same amount, 1/4 cup, for a fun flavor twist. Look for a firm outer edge and a slightly soft center. The cake should rise and not jiggle too much when you shake it. If it is still wet in the middle, microwave for 10 seconds more. Keep a close watch to avoid overcooking. Enjoy your Cherry Chocolate Lava Mug Cake with gooey goodness! For the full recipe, check out the earlier section. You learned how to make a Cherry Chocolate Lava Mug Cake using simple steps. We explored essential ingredients, substitutions, and tips for choosing cherries and chocolate. I shared how to achieve that perfect gooey texture and served ideas to make your dessert shine. Remember, you can tweak flavors, use healthier options, or even make a bigger batch. With proper storage and reheating tips, your mug cake can stay fresh. Enjoy your baking adventure and create a treat that tastes amazing every time.

Cherry Chocolate Lava Mug Cake Delightful Recipe

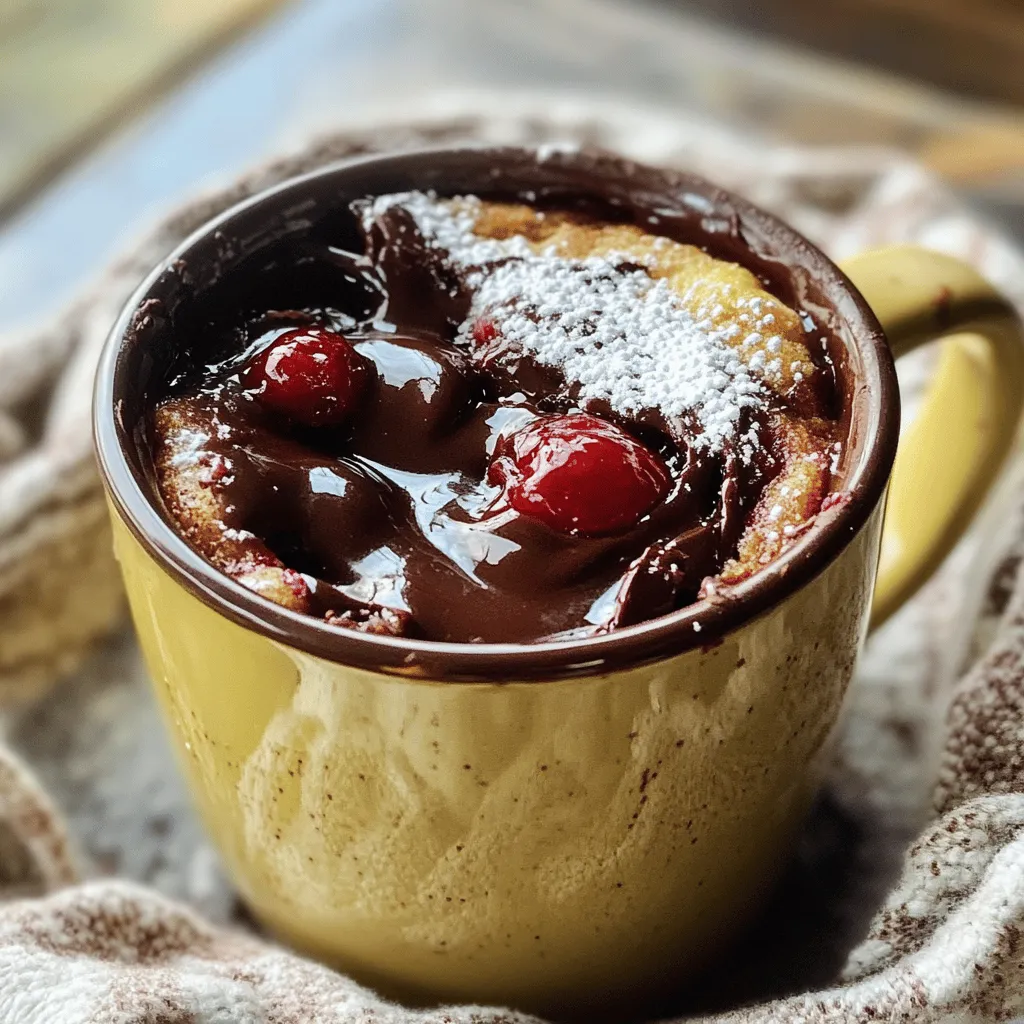
Craving something sweet and quick? You’re in for a treat with my Cherry Chocolate Lava Mug Cake! This recipe packs

Mint Pickle Cucumber Cups combine fresh flavors in a simple snack. This easy recipe features crunchy cucumbers filled with a mint and yogurt blend. You can prepare this dish in about 35 minutes, making it perfect for gatherings or a quick treat. - 2 large cucumbers - 1 cup mint leaves, finely chopped - 1/2 cup plain yogurt - 2 tablespoons lemon juice - 1 tablespoon olive oil - 1 teaspoon cumin powder - 1 teaspoon chili powder - 1/2 teaspoon salt - Black pepper to taste - 1/4 cup roasted peanuts, crushed (for garnish) You can swap cucumbers with zucchini for a different taste. If you prefer, use Greek yogurt instead of plain yogurt for more creaminess. Fresh herbs like dill or cilantro can replace mint if you want a new flavor. You can also use apple cider vinegar instead of lemon juice for a tangy kick. Start with two large cucumbers. Slice them in half lengthwise. Use a small spoon to scoop out the seeds. This creates little boats or cups. Set these cucumber cups aside for later. In a mixing bowl, chop one cup of fresh mint leaves. Then, add half a cup of plain yogurt. Next, squeeze in two tablespoons of lemon juice. Drizzle in one tablespoon of olive oil. Sprinkle in one teaspoon of cumin powder and one teaspoon of chili powder. Add half a teaspoon of salt and black pepper to taste. Mix all these ingredients well. You want a creamy, green filling that smells fresh and inviting. Now, take a spoon and fill each cucumber cup with the mint yogurt mixture. Pack it gently to make it look nice. Once filled, sprinkle crushed roasted peanuts on top. This adds a great crunch and flavor contrast. For even better taste, chill the cucumber cups for at least 20 minutes. This allows the flavors to blend. When you’re ready to serve, place them on a platter. Enjoy this refreshing snack that’s easy to make and fun to eat! You can find the full details in the Full Recipe. Choose firm cucumbers with smooth skin. Look for bright green color, too. Avoid cucumbers that feel soft or have blemishes. If you can, pick organic cucumbers for the best taste. Fresh cucumbers are key to making your Mint Pickle Cucumber Cups shine. Want to add more flavor? Try mixing in some diced tomatoes or red onion. A sprinkle of feta cheese can also add a nice touch. You can swap the cumin for smoked paprika for a different twist. Each of these will give the cups a unique flavor. To save time, prepare the mint filling in advance. You can make it the night before and store it in the fridge. Just fill the cucumber cups when ready to serve. For quicker prep, use a melon baller to scoop out the seeds. This makes it easy and fun to create your cups. Check out the Full Recipe for more detailed steps! {{image_2}} If you want to switch up the filling, consider using cream cheese. You can mix in herbs like dill for a fresh taste. Another option is to use hummus. Hummus adds a rich, creamy texture without dairy. You can even try a spicy bean dip for a bold flavor. Each of these options brings a unique twist to your cucumber cups. To enhance flavor, think about adding garlic or onion powder to the mint filling. A pinch of smoked paprika can add warmth. For a tangy kick, add a splash of hot sauce. You can also mix in diced tomatoes or bell peppers for extra crunch. These small changes can make your snack even more exciting. Mint Pickle Cucumber Cups pair well with many dishes. Try serving them alongside grilled meats or fish for a fresh contrast. They also work great as a side with spicy curries. For a light lunch, serve them with a crisp salad. You can even add them to a platter with other appetizers. This makes your meal colorful and fun. For the full recipe, check out the Mint Pickle Cucumber Cups section above. To keep your Mint Pickle Cucumber Cups fresh, place them in an airtight container. If you have extra filling, store it separately. This way, your cucumbers stay crisp and do not get soggy. Cover the container with plastic wrap for added protection. When stored properly in the fridge, these cucumber cups last up to two days. After that, the cucumbers may lose their crunch. The filling should stay good for about three days. Always check for off smells or changes in texture before eating. You can prepare the filling a day in advance. This saves time and allows flavors to mix well. Just keep it in the fridge until you are ready to fill the cucumber cups. Slice the cucumbers just before serving to keep them firm. This method ensures your Mint Pickle Cucumber Cups stay refreshing and delightful. For the full recipe, refer to the section above. Yes, you can make Mint Pickle Cucumber Cups ahead of time. Prepare the cucumber cups and the mint filling separately. Store the filling in the fridge. When you’re ready to serve, fill the cucumber cups. This keeps them fresh and crunchy. The flavors blend nicely if you chill them for a while before serving. I recommend making them a few hours ahead for the best taste. These cucumber cups pair well with many dishes. You can serve them with grilled meats or fish. They also go great with flatbreads or rice dishes. For a light meal, add some salad or hummus. If you want something fun, serve them at a party with other snacks. They are a great palate cleanser. You can also serve them with a refreshing drink like lemonade or iced tea. Yes, cucumbers and mint offer many health benefits. Cucumbers are low in calories and high in water. They keep you hydrated and help with digestion. Mint adds flavor without extra calories. It can help soothe your stomach. Mint also has antioxidants, which fight free radicals. Together, they make a tasty snack that is good for you. Enjoy your Mint Pickle Cucumber Cups as a healthy treat! This blog post covered how to make fresh Mint Pickle Cucumber Cups. We went over the full recipe, ingredient substitutions, and step-by-step instructions. I shared tips for choosing the best cucumbers, quick prep ideas, and ways to enhance flavor. You can try different fillings and serving ideas to mix it up. Lastly, we discussed how to store leftovers and answered common questions. Enjoying these tasty cups can lead to healthy snacks for everyone. I hope you enjoy making them!

Mint Pickle Cucumber Cups Refreshing and Simple Snack

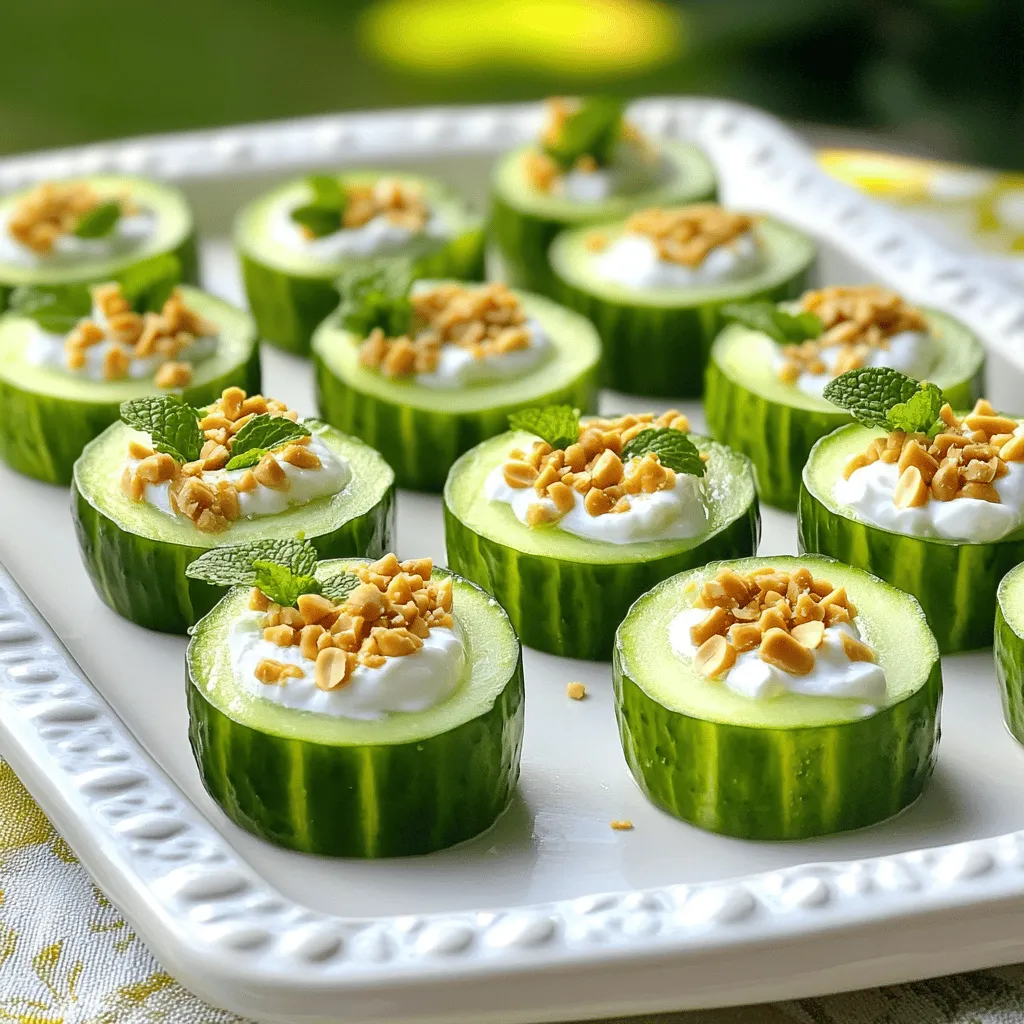
Looking for a quick, tasty snack that’s both refreshing and simple? Try these Mint Pickle Cucumber Cups! With their cool

To make Caprese stuffed cupcakes, you'll need a mix of simple, fresh ingredients for a tasty treat. Here’s the complete list of ingredients: - 1 ½ cups all-purpose flour - 1 teaspoon baking powder - ½ teaspoon baking soda - ¼ teaspoon salt - ½ cup unsalted butter, softened - 1 cup granulated sugar - 2 large eggs - 1 teaspoon vanilla extract - ½ cup buttermilk - 1 cup cherry tomatoes, halved - 1 cup fresh mozzarella balls, halved - ½ cup fresh basil leaves, chopped - 2 tablespoons balsamic glaze - Salt and pepper to taste These ingredients create a lovely balance of flavors. The cherry tomatoes and mozzarella mix with the fresh basil, making each bite bright and full of zest. I love using good-quality ingredients. They make a big difference in taste. The balsamic glaze adds a sweet and tangy touch that complements the other flavors. For the full recipe, you can check out the notes above. This recipe is not just fun; it’s a great way to impress your friends and family with something unique! First, preheat your oven to 350°F (175°C). Line a 12-cup muffin tin with cupcake liners. This step ensures your cupcakes do not stick. Next, in a medium bowl, mix together 1 ½ cups of all-purpose flour, 1 teaspoon of baking powder, ½ teaspoon of baking soda, and ¼ teaspoon of salt. Set this bowl aside for later. In a large mixing bowl, cream together ½ cup of softened unsalted butter and 1 cup of granulated sugar. Mix until it becomes light and fluffy. This process adds air to your batter, making it soft. Now, add 2 large eggs, one at a time, into the butter and sugar mixture. Make sure to mix well after each addition. Stir in 1 teaspoon of vanilla extract for flavor. Next, gradually mix in your dry ingredients with ½ cup of buttermilk. Start and end with the flour mixture. This helps keep the batter smooth and creamy. For the Caprese filling, take a separate bowl. Toss together 1 cup of halved cherry tomatoes, 1 cup of halved mozzarella balls, ½ cup of chopped fresh basil, 2 tablespoons of balsamic glaze, and some salt and pepper to taste. Mix well to combine. Now, fill each cupcake liner halfway with the batter. Spoon a generous tablespoon of the Caprese mixture into the center of each cupcake. Then, cover with more batter until the liners are about ¾ full. Bake your cupcakes in the preheated oven for 18-20 minutes. Check for doneness by inserting a toothpick into the center. If it comes out clean, they are ready. Let the cupcakes cool in the tin for 5 minutes. Then, transfer them to a wire rack to cool completely. For a special touch, you can drizzle extra balsamic glaze over the cooled cupcakes before serving. Enjoy your unique Caprese stuffed cupcakes! For the complete recipe, check out the Full Recipe. To bake perfect Caprese stuffed cupcakes, follow a few key tips. First, ensure even baking by placing your muffin tin in the center of the oven. This helps hot air circulate around the cupcakes. Next, test for doneness by inserting a toothpick in the center. If it comes out clean, your cupcakes are ready. If not, bake them a few more minutes. You can easily enhance the flavors in your cupcakes. Adjust the seasoning in the filling by adding a pinch more salt or pepper. This brings out the freshness of the tomatoes and basil. For a richer taste, use homemade balsamic glaze instead of store-bought. It adds depth and makes your cupcakes pop with flavor. Presentation matters when serving these unique treats. Serve the cupcakes on a rustic wooden board for a warm look. Garnish with extra basil leaves for a fresh touch. Drizzle some balsamic glaze over the cupcakes before serving. This not only looks great but adds a burst of flavor. These small details make your Caprese stuffed cupcakes stand out. {{image_2}} You can easily change the cheese in these cupcakes. Feta or goat cheese adds a nice twist. They both bring rich flavors that pair well with tomatoes and basil. Another option is to mix in other veggies. Zucchini or bell peppers can add color and taste. Just remember to chop them small so they fit well in the cupcakes. Spices and herbs can change the flavor of your cupcakes. Try adding garlic powder or crushed red pepper for a kick. You can also mix in fresh oregano or thyme to enhance the taste. If you want to switch up the sauce, consider using pesto instead of balsamic glaze. This will give a fresh and vibrant flavor to each bite. You can make these cupcakes gluten-free. Just use a gluten-free flour mix instead of all-purpose flour. For a dairy-free version, swap out the butter and cheese for plant-based options. Use coconut oil and almond cheese. These simple changes let everyone enjoy these tasty cupcakes, no matter their diet. For the full recipe, check out the Caprese Stuffed Cupcakes section. To keep your Caprese stuffed cupcakes fresh, store them in a sealed container. You can refrigerate them for longer freshness. If you want to keep them even longer, freeze the cupcakes. Just wrap them tightly in plastic wrap, then place them in a freezer bag. This method protects them from freezer burn. When you're ready to enjoy your cupcakes again, reheating is easy. Place them in the microwave for about 10 to 15 seconds. This warms them nicely without drying them out. If you prefer, you can also warm them in the oven. Set it to 350°F (175°C) and heat them for about 5 to 10 minutes. At room temperature, these cupcakes last about 2 to 3 days. Make sure to store them in a cool, dry place. In the fridge, they can last up to a week. For the best taste, try to eat them within a few days. Yes, you can prepare these cupcakes ahead of time. Here are some tips: - Bake the cupcakes: Let them cool completely after baking. - Store properly: Place them in an airtight container. They last for 2 days at room temperature. - Freeze for longer storage: Wrap each cupcake tightly in plastic wrap and place in a freezer bag. They can freeze for up to 3 months. - Add toppings later: Drizzle balsamic glaze and add fresh basil just before serving for the best taste. If you don’t have buttermilk, here are some simple alternatives: - Milk and vinegar: Add 1 tablespoon of vinegar to ½ cup of regular milk. Let it sit for 5 minutes. - Milk and yogurt: Mix ¼ cup of plain yogurt with ¼ cup of water to thin it out. - Sour cream: Use ½ cup of sour cream as a direct swap. These substitutes work well and keep your cupcakes moist. To check if your cupcakes are done, follow these signs: - Toothpick test: Insert a toothpick in the center; it should come out clean. - Spring back: Gently press the top; it should spring back without leaving a dent. - Golden edges: Look for a light golden color around the edges. These tips help ensure perfect cupcakes every time. You learned the key steps to make tasty Caprese cupcakes. From mixing the right ingredients to perfecting your baking process, each step matters. Adjust flavors with spices and try different cheeses to keep it fun. Storing and reheating cupcakes properly helps you enjoy them longer. Whether for a party or a treat, these tips will help you succeed. I hope you feel ready to get baking and impress your friends with these unique cupcakes. Enjoy exploring this delicious recipe!

Caprese Stuffed Cupcakes Flavorful and Unique Treat

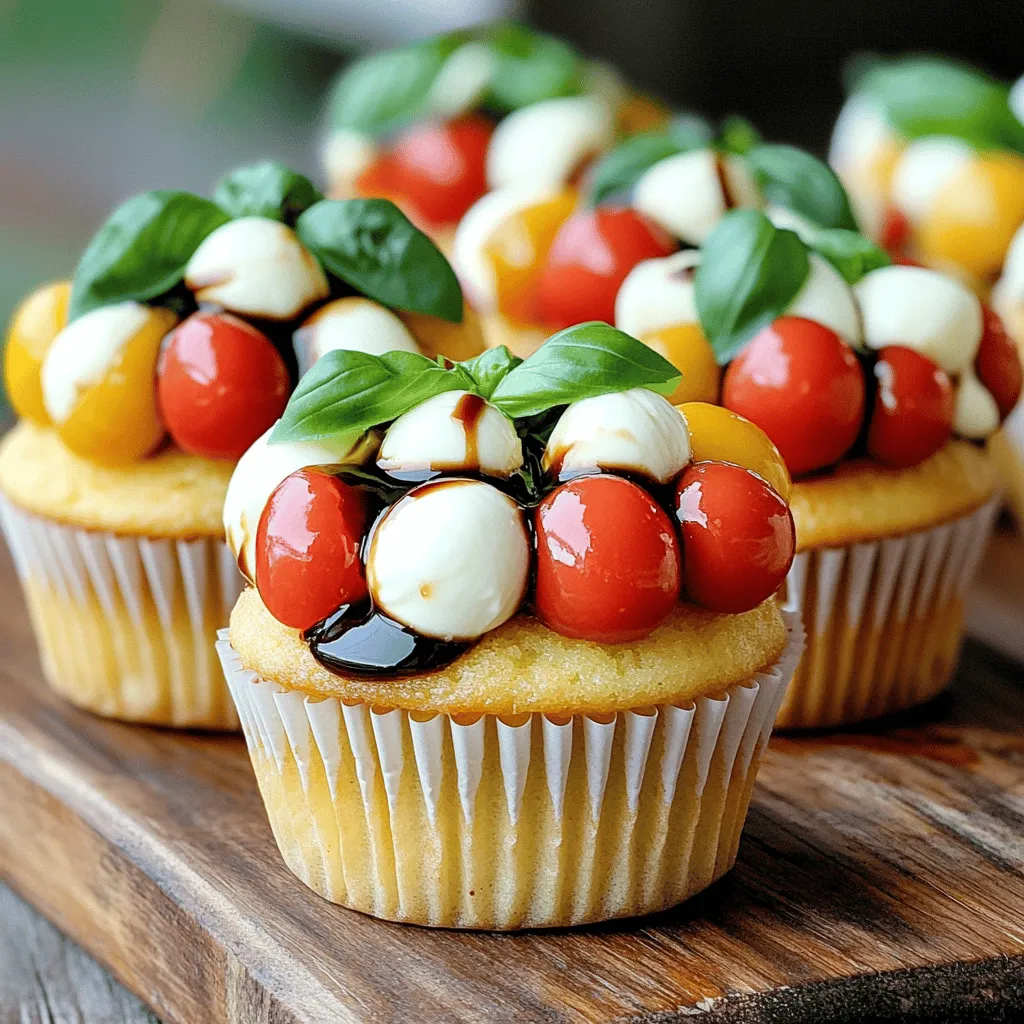
Are you ready to treat your taste buds to something new? Caprese Stuffed Cupcakes mix fresh flavors and fun in

To make Mango Tajin Cake Pops, gather these ingredients: - 1 cup mango cake mix - 1/2 cup water - 1/4 cup vegetable oil - 2 eggs - 1/2 cup mango puree (fresh or canned) - 1/4 teaspoon vanilla extract - 1/4 cup Tajin seasoning (plus extra for coating) - 1 cup white chocolate chips - 1 tablespoon coconut oil - Lollipop sticks Use precise measurements for the best results. If you use too much cake mix, the pops may be dry. Fresh mango puree gives a bright flavor. If using canned puree, check for added sugars. Always store ingredients in a cool, dry place to keep them fresh. You can switch out the mango cake mix for vanilla or lemon cake mix for a new twist. For a lower-fat option, replace the vegetable oil with applesauce. You may use dark chocolate chips instead of white for a richer taste. If you can’t find Tajin, mix chili powder and lime zest for a similar flavor. Start by gathering all your ingredients for Mango Tajin Cake Pops. You will need: - 1 cup mango cake mix - 1/2 cup water - 1/4 cup vegetable oil - 2 eggs - 1/2 cup mango puree (fresh or canned) - 1/4 teaspoon vanilla extract - 1/4 cup Tajin seasoning (plus extra for coating) - 1 cup white chocolate chips - 1 tablespoon coconut oil - Lollipop sticks Preheat your oven to 350°F (175°C). Grease a cake pan or line it with parchment paper. In a large bowl, mix the mango cake mix, water, vegetable oil, eggs, mango puree, and vanilla extract. Whisk until smooth. Pour your batter into the prepared cake pan. Bake for 25-30 minutes. Check with a toothpick; it should come out clean. Let the cake cool completely in the pan. This step is key for easy crumbling later. Once cool, crumble the cake into a large bowl. Use your hands or a fork to break it down. Add 1/4 cup of Tajin seasoning to the crumbled cake. Mix well to ensure the flavor is spread evenly. Now, it's time to form the cake pops. Take small amounts of the cake mixture and roll them into balls, about 1 inch wide. Place them on a baking sheet lined with parchment paper. Once you have formed all the balls, refrigerate them for about 30 minutes to firm up. Next, melt the white chocolate chips and coconut oil in a microwave-safe bowl. Heat in 30-second intervals, stirring in between, until smooth. Dip one end of each lollipop stick into the melted chocolate. Insert the stick into the center of each cake ball. This helps the stick stay in the cake pop. Now, dip each cake pop into the melted chocolate. Allow any excess chocolate to drip off. Immediately sprinkle with extra Tajin for a zesty finish. Place the coated pops back on the baking sheet to set. Finally, refrigerate the cake pops for another 15-20 minutes until the chocolate is firm. Enjoy your delicious Mango Tajin Cake Pops! You can find the full recipe in the article. Using Tajin adds a unique twist to your cake pops. Here are some best practices: - Balanced Flavor: Start with a small amount of Tajin. You can always add more. - Mix Well: Combine it evenly with your cake crumbs for a consistent taste. - Taste Test: Before forming the pops, taste a little of the mixture. Adjust if needed. Coating your cake pops can be tricky. Here’s how to get it right: - Melt Properly: Heat your chocolate slowly in intervals. Stir to avoid burning. - Thick Coating: Use enough chocolate for a thick coat. This helps hold the pops together. - Tap Off Excess: Gently tap the stick after dipping to remove excess chocolate. To make your cake pops even better, consider these tips: - Add Zest: Incorporate lime or lemon zest into the cake mix for extra brightness. - Use Fresh Mango: Fresh mango puree enhances the flavor and adds moisture. - Texture Contrast: Sprinkle crushed nuts or coconut on top for a fun crunch. Follow these tips for amazing Mango Tajin Cake Pops! You’ll impress your friends and family with these tasty treats. For more detailed instructions, check the Full Recipe. {{image_2}} You can switch things up with different flavors. Try adding lime zest for a tangy kick. For a tropical twist, use pineapple cake mix instead of mango. Adding coconut flakes can also enhance the tropical vibe. You can even swap Tajin for chili powder for more heat. Each change brings a new taste to your cake pops. Want a lighter version? Use a sugar-free cake mix to cut calories. You can also replace vegetable oil with applesauce. This keeps the cake moist while reducing fat. If you want fewer carbs, consider using almond flour instead of cake mix. These swaps help keep the fun while making it a bit healthier. Seasonal themes can make these treats even more special. In summer, add fresh berries or peaches to the mix. For fall, try pumpkin spice cake mix with a pinch of nutmeg. During winter, you can dip them in dark chocolate and sprinkle with sea salt. These seasonal changes keep the cake pops exciting all year round. To keep your Mango Tajin Cake Pops fresh, store them in an airtight container. This helps maintain their softness and flavor. You can keep them at room temperature for one day. If you want them to last longer, place them in the fridge. Mango Tajin Cake Pops stay fresh in the fridge for up to one week. If you freeze them, they can last for up to three months. To freeze, place the cake pops on a baking sheet. Once frozen, transfer them to a zip-top bag or airtight container. This prevents them from sticking together. If your cake pops are chilled or frozen, let them sit at room temperature for a few minutes before serving. This will help them regain their soft texture. Avoid reheating them in the microwave, as this can ruin the chocolate coating. Enjoy your tasty treat! For the full recipe, check out the earlier sections. Tajin is a spice mix from Mexico. It blends chili powder, lime, and salt. You can use it to add flavor to many dishes. For Mango Tajin Cake Pops, it enhances the sweet mango flavor. Just mix Tajin into the cake crumbs and sprinkle it on top for a zesty finish. Yes, you can use other cake mixes. Try vanilla or even lemon cake mix. Each will change the flavor but still pair well with mango and Tajin. Just make sure to adjust the amount of Tajin if you change the cake flavor. To coat your cake pops perfectly, melt the chocolate carefully. Use short bursts in the microwave to avoid burning. Dip each pop quickly, allowing excess chocolate to drip off. Sprinkle Tajin on the wet chocolate right away for the best flavor. You can buy Mango Tajin Cake Pops at local bakeries or specialty shops. Some grocery stores may sell them too. However, making them at home is easy and fun! For the full recipe, check the section above. This blog post covered how to make delicious cake pops with Tajin. We reviewed the key ingredients, offered step-by-step instructions, and shared helpful tips. You learned about flavor variations, storage methods, and answered common questions. These cake pops are not just fun; they are tasty and easy to customize. Take these ideas and create your own amazing treats. Enjoy baking and sharing these flavorful snacks with friends and family!

Mango Tajin Cake Pops Tasty and Fun Treats

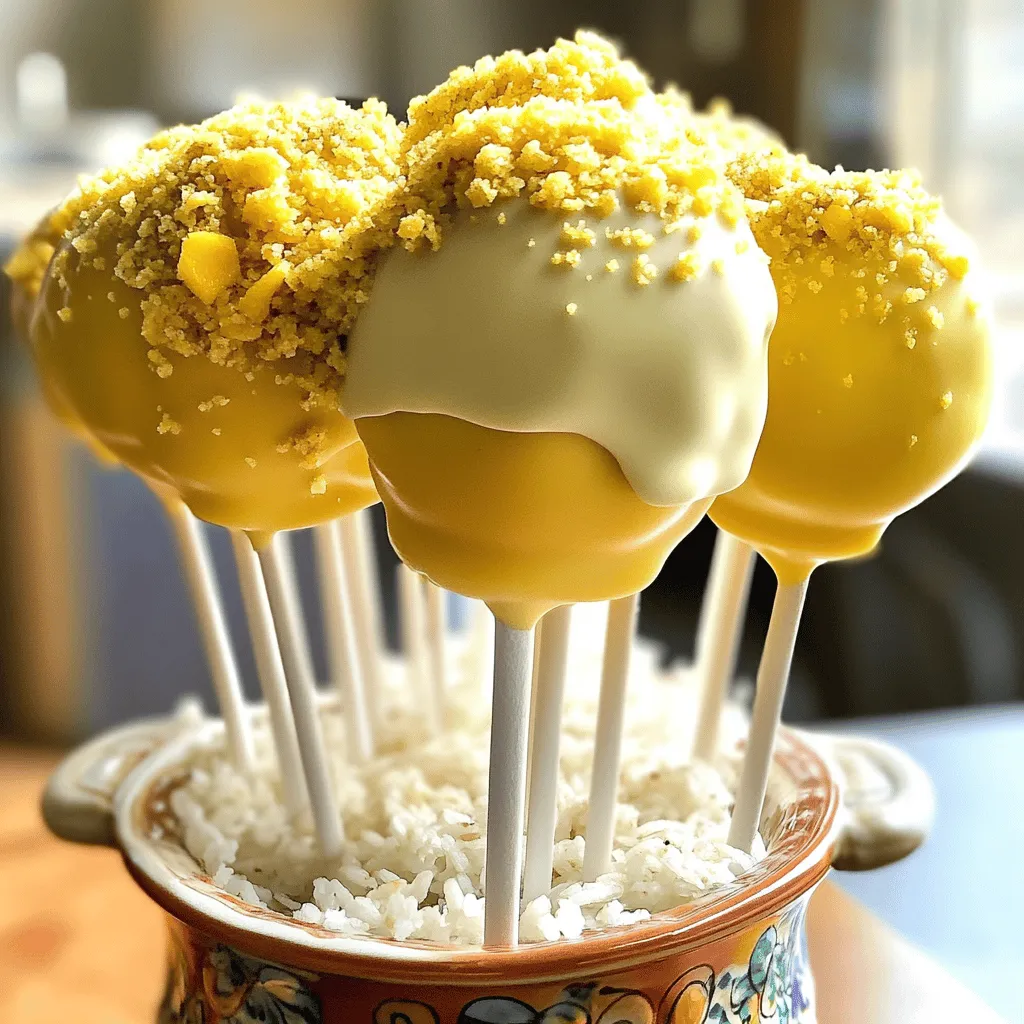
Craving a unique treat? Try my Mango Tajin Cake Pops! These fun bites blend sweet mango with the zesty kick

Older posts
Newer posts
← Previous Page1 … Page53 Page54 Page55 … Page84 Next →

dsad

© 2026 Foodish Talk • Built with GeneratePress

Our Policies

  • Copyright Policy
  • Cookie Policy
  • GDPR Policy
  • Privacy Policy
  • Disclaimer
  • Terms Of Use

More Information

  • Home
  • About
  • Contact
  • Appetizers
  • Dessert
  • Dinner
  • Drinks
©2026, Foodish Talk About Back To Top