Skip to content
DisclaimerTerms Of UseGDPR PolicyCookie Policy

Foodish Talk

  • Home
  • Drinks
  • Appetizers
  • Dinner
  • Dessert
  • About
  • Contact
  • Privacy Policy
DisclaimerTerms Of UseGDPR PolicyCookie Policy

NO-ING-IMG

- 1 pound ground beef - 1/2 cup breadcrumbs - 1/4 cup finely chopped onion - 1 egg, beaten - 1 teaspoon garlic powder - 1 teaspoon salt - 1/2 teaspoon black pepper - 1 cup pineapple chunks (fresh or canned) - 1 red bell pepper, chopped - 1 green bell pepper, chopped - 1 cup sweet and sour sauce (store-bought or homemade) - 2 tablespoons soy sauce - 1 tablespoon cornstarch (optional, for thicker sauce) - Fresh parsley or cilantro for garnish You can switch things up with a few fun options: - Add diced carrots or snap peas for extra crunch. - Use ground turkey or chicken instead of beef for a lighter option. - Toss in some chopped green onions for added flavor and color. If you need to swap any ingredients, consider these ideas: - Use panko breadcrumbs for a lighter texture. - Replace pineapple with mango chunks for a tropical twist. - Try low-sodium soy sauce if watching your salt intake. These ingredients are the heart of the dish. The mix of sweet and sour flavors, along with the meatballs, creates a tasty meal. Play around with these options to make the recipe your own! To start, gather your ingredients. You need ground beef, breadcrumbs, onion, egg, garlic powder, salt, and black pepper. In a large mixing bowl, combine these ingredients. Mix them well with your hands. Shape the mixture into small balls, about 1 inch wide. Set these meatballs aside while you prepare the slow cooker. In your slow cooker, add the sweet and sour sauce, soy sauce, pineapple chunks, and chopped bell peppers. Give it a good stir to mix everything together. Carefully place the meatballs into the sauce. Make sure each meatball gets coated in the sauce. This will help them taste great as they cook. Cover the slow cooker with its lid. Cook the meatballs on low for 6 to 8 hours. If you’re in a hurry, you can cook them on high for 3 to 4 hours. They are done when they are cooked through and tender. If you want a thicker sauce, mix cornstarch with water. Stir it into the sauce in the last 30 minutes of cooking. Once finished, gently stir the meatballs and sauce before serving. To keep your meatballs intact, use fresh ingredients. Make sure your breadcrumbs are not too dry. If they are, soak them in a bit of milk before mixing. The egg acts as a binder, so don’t skip it. Shape your meatballs gently. Pressing too hard can cause them to break. You can boost the sauce flavor with a few simple tweaks. Add more garlic powder for depth. A splash of rice vinegar can give it a tangy kick. You might also try adding a bit of ginger. For a spicy touch, toss in some red pepper flakes. Don’t forget to taste as you go! Serve the meatballs over a bed of fluffy rice or noodles. This helps soak up the delicious sauce. Garnish with fresh parsley or cilantro for color and taste. If you want a little crunch, add chopped nuts. Offer extra sauce on the side for those who want more. {{image_2}} You can switch up the protein in this dish. Ground turkey works well for a leaner option. Ground chicken also gives a nice taste. If you're vegan or vegetarian, use lentils or chickpeas. They make a great meatball substitute. Just mash them well and add breadcrumbs. This way, you can enjoy sweet and sour flavors without the meat. While sweet and sour sauce is a classic choice, feel free to explore. A teriyaki sauce adds a sweet touch with a savory twist. For a spicy kick, try a sriracha-based sauce. You could even mix in barbecue sauce for a smoky flavor. Each sauce brings a new vibe to the meatballs. Serve these meatballs with different sides to mix it up. Steamed rice is a classic but try quinoa for a nutty flavor. Noodles, like egg or rice noodles, also pair nicely. For a lighter meal, serve them over a salad. This gives a fresh crunch that balances the dish. Don't forget to add veggies for color and nutrition! To store your sweet and sour meatballs, let them cool first. Place them in an airtight container. Keep the container in your fridge. Your meatballs stay fresh for about 3 to 4 days. If you have sauce left, store it with the meatballs. This keeps the flavors together. You can freeze your meatballs for later use. First, cool them completely. Then, place them in a freezer-safe bag. Try to remove as much air as possible. This helps to prevent freezer burn. They can last up to 3 months in the freezer. When ready to eat, just thaw and reheat. Reheating sweet and sour meatballs is easy. You can use the microwave or stovetop. If using the microwave, place them in a bowl and cover it. Heat for 1 to 2 minutes or until hot. If using the stovetop, heat on low in a pan. Stir gently until heated through. Make sure to check that they are hot in the center before serving. Yes, you can prepare the meatballs ahead of time. Mix the meatball ingredients and shape them. Place the raw meatballs in the fridge for up to 24 hours. You can also cook them in the slow cooker and store the finished dish. Just let it cool, then store it in the fridge. Reheat when you are ready to serve. Sweet and sour meatballs pair well with many sides. Here are some great options: - Steamed rice - Noodles - Quinoa - A fresh salad - Steamed vegetables These sides balance the flavors and make your meal filling. Yes, you can use frozen meatballs. Just add them directly to the slow cooker. You may need to increase the cooking time. Cook on high for about 4-5 hours or low for 8-9 hours. The sweet and sour sauce will still coat the meatballs well. In this post, we covered the key ingredients, preparation, and variations for making delicious meatballs. We discussed step-by-step instructions, tips to keep meatballs intact, and storage options for leftovers. You can customize this dish with different proteins and sauces. Remember, you can always make it ahead or use frozen meatballs. Enjoy experimenting and serving this dish your way! With these tips, your meatballs will impress everyone at your table.

Savory Slow Cooker Sweet & Sour Meatballs Recipe

Are you ready to whip up a dish that’s both easy and delicious? My Savory Slow Cooker Sweet & Sour

- 2 large carrots, peeled and sliced - 2 parsnips, peeled and sliced - 1 medium sweet potato, cubed - 1 beetroot, peeled and cubed - 2 tablespoons olive oil - 3 tablespoons pure maple syrup - 1 teaspoon ground cinnamon - 1 teaspoon sea salt - 1/2 teaspoon black pepper - Fresh thyme leaves for garnish - Servings: 4 - Nutritional Benefits of Ingredients: - Carrots provide beta-carotene, which helps with vision. - Parsnips offer fiber and vitamins that support digestion. - Sweet potatoes are rich in antioxidants and help boost immunity. - Beetroot is great for heart health and can improve blood flow. - Olive oil adds healthy fats and supports heart function. - Maple syrup gives a natural sweet taste with minerals like manganese. - Cinnamon has anti-inflammatory properties and can help regulate blood sugar. - Sea salt and black pepper enhance the flavor without excess sodium. - Fresh thyme adds aroma and can aid in digestion. Start by peeling the carrots, parsnips, and beetroot. Use a sharp peeler for clean cuts. Slice the carrots and parsnips into even rounds. Cut the sweet potato into cubes. Aim for similar sizes to ensure even cooking. In a large bowl, combine all the sliced and cubed vegetables. Drizzle in the olive oil and maple syrup. Mix gently to coat all pieces. This adds great flavor. Then, sprinkle in the ground cinnamon, sea salt, and black pepper. Toss again to blend the spices well. First, preheat your oven to 400°F (200°C). This helps the veggies roast perfectly. Spread the coated vegetables in a single layer on a lined baking sheet. Roast them for 30 to 35 minutes. Stir them halfway through. This ensures they cook evenly and get caramelized. When done, they should be tender and golden. Let them cool slightly before serving. Ideal Oven Settings Set your oven to 400°F (200°C). This heat helps the veggies cook evenly. The high temperature makes them tender and caramelized. Checking for Tenderness After 30 to 35 minutes, use a fork to check the veggies. They should be soft and easy to pierce. If they need more time, roast them a bit longer. Stir halfway through to ensure all sides cook well. Alternative Sweeteners vs. Maple Syrup If you want to try different sweeteners, honey or agave syrup work well. These options add a unique taste but may change the dish's flavor profile. Maple syrup gives a rich, warm flavor that many love. Adding Additional Herbs and Spices Feel free to experiment with herbs! Rosemary and sage pair nicely with root veggies. You can also try adding a pinch of chili powder for heat. Mix and match to find your favorite flavor combination. Using Garnishes Effectively Garnish your roasted veggies with fresh thyme leaves. This adds a pop of color and a fresh taste. You can also sprinkle some chopped parsley for extra flair. Serving Suggestions for Meals Serve these veggies alongside roasted chicken or fish. They make a great side dish for any meal. You can also toss them in a salad for added flavor and texture. {{image_2}} You can change up the root veggies in this dish. Here are some ideas: - Turnips: They add a mild flavor and good texture. - Rutabaga: This veggie brings a sweet, earthy taste. - Radishes: They add a bit of crunch when roasted. - Potatoes: Use white or red potatoes for a classic touch. For seasonal options, think about what’s fresh at your local market. In fall, try squash. In spring, use baby carrots for a sweeter taste. This dish is easy to make gluten-free. All the ingredients are naturally gluten-free. Just make sure to check any labels on sauces. If you want a vegan option, this recipe is already vegan! Just use pure maple syrup. It’s a great sweetener that fits well in plant-based diets. You can spice up your roasted veggies easily. - Adding Heat: If you like heat, sprinkle in some chili powder or cayenne pepper. Start with a little and add more if you like it spicy. - Sweetness Level Adjustments: If you prefer less sweetness, you can cut the maple syrup in half. The veggies will still taste great with less sugar. You can also try adding a touch of balsamic vinegar for a tangy twist. These variations make the dish exciting and personal. You can play with flavors to match your taste. After you cook your maple roasted root veggies, let them cool. Place them in an airtight container. This keeps them fresh in the fridge. They stay good for about 3 to 5 days. When you store leftovers, layer them gently. This helps keep the veggies intact and tasty. If you want to keep your veggies longer, freezing is a great option. First, let them cool completely. Then, spread them on a baking sheet. Freeze them for about 1 to 2 hours. This prevents them from sticking together. After freezing, transfer the veggies to a freezer-safe bag. They can last for about 3 months in the freezer. Just remember to label the bag with the date. To enjoy your maple roasted root veggies again, reheat them properly. The best way is in the oven. Preheat your oven to 350°F (175°C). Spread the veggies on a baking sheet. Heat them for about 10-15 minutes, until warm. You can also use a microwave. Just heat in short bursts, stirring often. This keeps the flavor and texture nice. Enjoy your delicious veggies! Yes, you can use other sweeteners. Honey, agave, and brown sugar are good options. - Honey: It adds a floral taste, but may be too sweet. - Agave: This has a mild flavor, but it's high in fructose. - Brown Sugar: It gives a caramel flavor but lacks the maple's unique taste. Maple syrup adds depth and richness. I suggest sticking with it for the best results. Check for tenderness and caramelization. - Tenderness: Insert a fork into the veggies. They should be soft. - Caramelization: Look for a golden-brown color. This shows they are roasted well. Stirring halfway through helps with even cooking. Keep an eye on them to avoid burning. These veggies pair well with many dishes. - Roast Chicken: The savory flavor balances the sweetness. - Grilled Fish: The freshness complements the roasted taste. - Quinoa Salad: It adds protein and makes a filling meal. Feel free to mix and match for a balanced plate! In this post, we explored how to make delicious maple roasted root vegetables. We covered the right ingredients, from carrots to fresh thyme, ensuring great taste. You learned preparation tips, roasting techniques, and storage methods. For the best results, try different veggies and flavors. Don’t forget to pair these roasted delights with your favorite dishes. Enjoy the benefits of nutrition and flavor, all in one recipe. Happy cooking!

Maple Roasted Root Veggies Flavorful and Simple Dish

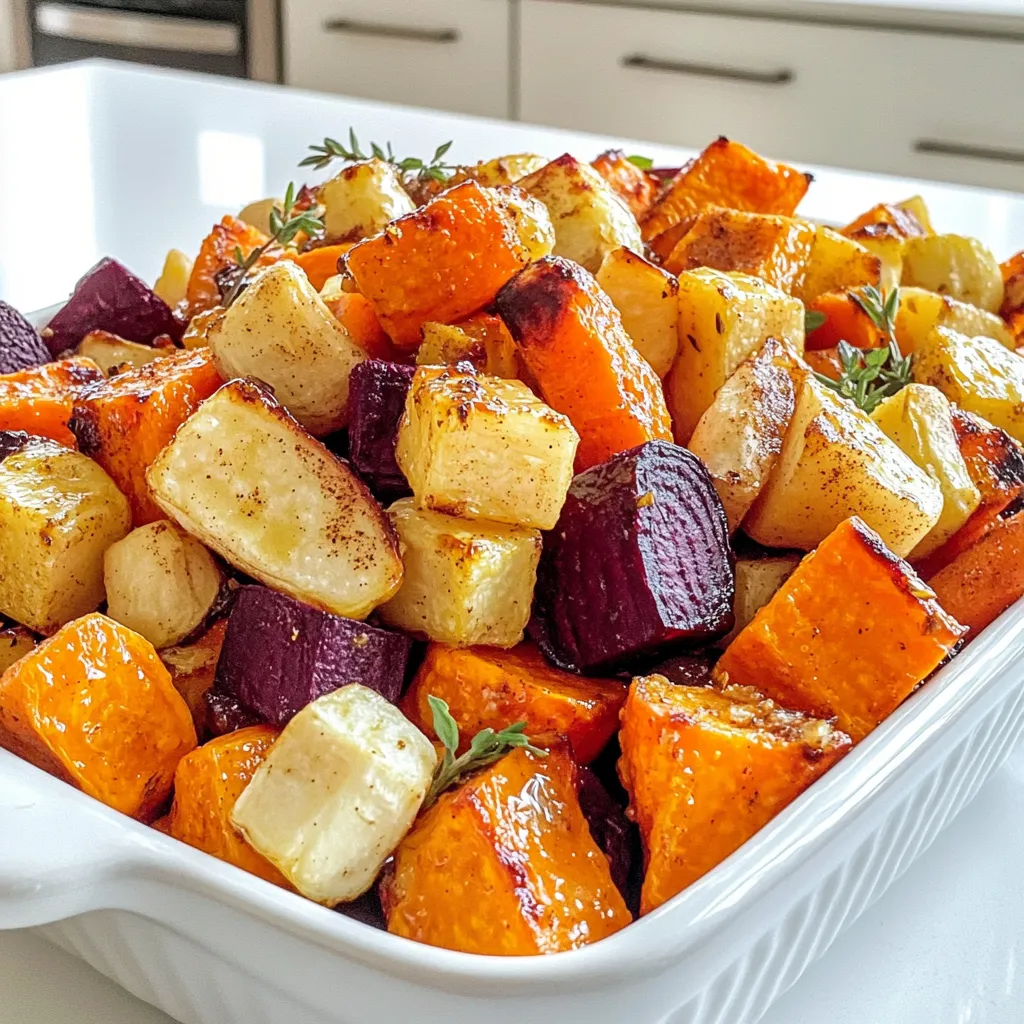
Looking for a dish that’s both simple and bursting with flavor? My Maple Roasted Root Veggies recipe is your answer!

To make No Bake Pumpkin Spice Truffles, you will need: - 1 cup pumpkin puree - 1 cup almond flour - 1/2 cup maple syrup - 1 teaspoon pumpkin spice - 1/4 teaspoon sea salt - 1/2 teaspoon vanilla extract - 1/2 cup dark chocolate chips (dairy-free if desired) - 1/4 cup finely chopped pecans (for coating) - 1/4 cup shredded coconut (for coating) If you need some swaps, I have you covered. Use any nut flour instead of almond flour. You can also try honey or agave syrup in place of maple syrup. For a different flavor, you can add cinnamon or nutmeg. If you want a nut-free option, use sunflower seed flour. Want to skip the chocolate? Try a yogurt coating instead. Each truffle has about 100 calories. They are a good source of healthy fats and fiber. The pumpkin adds vitamins A and C. For a treat, these truffles are a smart choice! To start, grab a medium bowl and add the pumpkin puree, almond flour, maple syrup, pumpkin spice, sea salt, and vanilla extract. Mix these ingredients until they blend well. You want a smooth dough that holds together. This step is fast, but it sets the stage for your tasty truffles. After mixing, cover the bowl with plastic wrap. Place it in the fridge for about 30 minutes. This chilling time helps the dough firm up. It makes it easier to shape the truffles later. Patience is key here; your effort will pay off in the end. Once the mixture has chilled, it’s time to form the truffles. Use a small scoop or your hands to shape the dough into 1-inch balls. Next, melt the dark chocolate chips in a microwave-safe bowl. Do this in 30-second bursts, stirring until smooth. Dip each truffle in the melted chocolate, ensuring full coverage. Lift them with a fork and let excess chocolate drip off. While the chocolate is still wet, roll each truffle in either chopped pecans or shredded coconut. Finally, place the coated truffles on a parchment-lined baking sheet. Chill them again for 15-20 minutes to set the chocolate. Enjoy the fun and tasty process! When you mix the truffle ingredients, make sure to blend them well. This helps the flavors combine nicely. Use a sturdy spoon or spatula. If the dough feels too sticky, add a bit more almond flour. Once mixed, cover it with plastic wrap. Chilling is key! Put the bowl in the fridge for about 30 minutes. This will firm up the dough, making it easier to shape. To melt chocolate chips, use a microwave-safe bowl. Heat the chocolate in 30-second bursts. Stir after each interval to avoid burning. This method keeps the chocolate smooth and silky. If you don’t have a microwave, use a double boiler. Just place a bowl over simmering water and stir until melted. When forming the truffles, use your hands or a small scoop. Aim for balls about one inch wide. This size is perfect for a sweet bite. After dipping in chocolate, let the excess drip off. Roll the truffles in chopped pecans or coconut while the chocolate is still wet. This adds a nice crunch and flavor. Place the coated truffles on parchment paper. They will set well in the fridge. {{image_2}} You can get creative with flavors in these pumpkin spice truffles. Try adding a pinch of cinnamon or nutmeg for more warmth. If you love chocolate, mix in cocoa powder for a richer taste. Want a little heat? A dash of cayenne pepper can spice things up. You can also use flavored extracts like almond or orange for a twist. Coating options let you add fun textures to your truffles. After dipping in chocolate, roll them in crushed nuts, like walnuts or almonds. For a sweeter touch, use sprinkles or crushed cookies. You can also try to roll them in cocoa powder or powdered sugar for a different look. Each coating gives a unique flavor and feel. Making these truffles fit your diet is simple. For a vegan option, use dairy-free chocolate chips and maple syrup. To make them gluten-free, stick with the almond flour. You can also substitute the almond flour with oat flour or coconut flour for a different texture. Adjusting these ingredients allows everyone to enjoy these tasty treats. To store your no bake pumpkin spice truffles, use an airtight container. Line the bottom with parchment paper to avoid sticking. Place the truffles in a single layer, if possible. If you need to stack them, add more parchment paper between layers. This keeps them fresh and safe. These truffles last about a week in the fridge. If you want to keep them longer, freeze them. They stay fresh for up to three months in the freezer. To freeze, use a baking sheet to freeze the truffles first. Once they are solid, move them to a freezer-safe bag. This way, they won’t stick together. Serve your truffles chilled for the best taste. You can put them on a nice platter for guests. They make a great treat for parties and holidays. Pair them with a warm drink for a cozy treat. You can also sprinkle some extra pumpkin spice on top for a fun touch. No Bake Pumpkin Spice Truffles can last up to one week in the fridge. Store them in an airtight container. This keeps them fresh and tasty. Yes, you can make these truffles ahead of time. I often make them a day or two before a party. Just make sure to store them in the fridge. If you need a substitute, you can use honey or agave syrup. Both work well in this recipe. They keep the truffles sweet and moist. Yes, these truffles are gluten-free. The almond flour is a great choice for a gluten-free base. Always check labels on ingredients to ensure they are certified gluten-free. You can make these truffles without chocolate. Just skip the coating step. Instead, roll them in chopped nuts or coconut for a fun twist. In this post, we covered how to make delicious No Bake Pumpkin Spice Truffles. We explored the key ingredients and their substitutes. I provided detailed steps on preparing, chilling, and coating the truffles. You learned tips for mixing and rolling smoothly, plus various flavor and coating options. Lastly, I shared storage methods to keep your truffles fresh. Enjoy experimenting with this treat! You can easily customize these truffles to fit your taste and needs.

No Bake Pumpkin Spice Truffles Tasty and Simple Treat

If you love fall flavors, you’ll adore my No Bake Pumpkin Spice Truffles. These tasty treats are easy to make

- 1 ½ cups all-purpose flour - ½ cup granulated sugar - ½ cup unsalted butter, melted - 1 teaspoon vanilla extract - ¼ teaspoon salt - 1 cup chopped pecans - 1 cup brown sugar, packed - ½ cup corn syrup - 2 large eggs - 2 teaspoons vanilla extract - ½ teaspoon sea salt - ½ cup homemade or store-bought caramel sauce To make salted caramel pecan pie bars, you need simple yet tasty ingredients. First, you will use flour as the base for the crust. Granulated sugar adds sweetness, while melted butter gives it a rich flavor. Vanilla extract brings warmth to the mix, and salt enhances all the tastes. Pecans are the star of the filling. They add crunch and flavor. Brown sugar and corn syrup create that gooey, sweet filling we love in pecan pie. Eggs help bind everything together. Finally, a sprinkle of sea salt and caramel sauce gives these bars their signature salted caramel taste. You can swap some items if needed. For example, you can choose a gluten-free flour for a different diet. Also, if you want a twist, try using other nuts instead of pecans. All these choices can make your bars unique! 1. Preheat your oven to 350°F (175°C). Grease a 9x9-inch baking dish or line it with parchment paper. This helps with easy removal later. 2. In a mixing bowl, combine 1 ½ cups of all-purpose flour, ½ cup of granulated sugar, and ½ cup of melted unsalted butter. Add 1 teaspoon of vanilla extract and ¼ teaspoon of salt. 3. Stir until the mixture looks crumbly. 4. Press the dough evenly into the bottom of the prepared baking dish to form a crust. Bake this for 15 minutes until it turns lightly golden. 1. While the crust bakes, prepare the pecan filling. In a large bowl, whisk together 1 cup of packed brown sugar, ½ cup of corn syrup, and 2 large eggs. 2. Add 2 teaspoons of vanilla extract and ½ teaspoon of sea salt. Mix until smooth and well combined. 3. Fold in 1 cup of chopped pecans for even distribution. This adds crunch and flavor. 1. Once the crust is ready, remove it from the oven. Pour the pecan filling over the warm crust. Spread it evenly. 2. Return the baking dish to the oven. Bake for an additional 25-30 minutes, or until the filling is set and slightly puffed. 3. Remove from the oven and let it cool completely in the dish. Once cooled, drizzle ½ cup of caramel sauce over the top. Sprinkle a little extra sea salt to enhance the flavor. 4. Cut into bars and serve. Enjoy the sweet and salty delight! - Achieving the right crust texture: To get a great crust, mix flour, sugar, melted butter, and salt. Your dough should look crumbly but hold together. Press it firmly into the pan. Bake until it's light golden. This gives a nice base for your filling. - Ensuring the filling is set properly: For the filling, mix brown sugar, corn syrup, eggs, and vanilla well. It should be smooth. Bake until it’s slightly puffed and set. This means it will hold its shape when cut. - Preventing over-baking: Keep an eye on your bars as they bake. Over-baking can dry them out. Look for a slight jiggle in the center. This shows they’re done but still moist. - How to plate and present the bars: For a beautiful presentation, cut your bars into squares. Place them on a decorative platter. Drizzle with extra caramel and add whole pecans on top for flair. - Pairing with ice cream or whipped cream: These bars taste amazing with vanilla ice cream or a dollop of whipped cream. The cold creaminess balances the warm caramel and nuts. - Ideal occasions for serving: Serve these bars at parties, holidays, or family gatherings. They are a hit at bake sales too. Everyone loves a sweet treat! {{image_2}} - Alternatives to pecans: You can use walnuts or almonds if you want a different nut. They add a nice crunch and flavor, too. - Gluten-free options for flour: For a gluten-free version, try almond flour or a gluten-free blend. Both work well in this recipe. - Sweetener swaps for lower sugar: You can replace granulated sugar with coconut sugar or use a sugar substitute like stevia. This keeps the sweetness without the extra calories. - Adding chocolate or butterscotch chips: Toss in some chocolate or butterscotch chips for a rich twist. They melt nicely and add great flavor. - Infusing flavors with spices like cinnamon: A sprinkle of cinnamon can warm up the flavors. Just a bit can make a big difference. - Incorporating fruit like cranberries: Dried cranberries add a tart bite. They balance out the sweetness and add a pop of color. These variations help you customize your salted caramel pecan pie bars. Feel free to mix and match! To keep your salted caramel pecan pie bars fresh, store them in an airtight container. This helps lock in moisture and flavor. If you want, you can layer parchment paper between the bars. This prevents them from sticking together. For longer preservation, you can freeze the bars. First, cut them into pieces. Wrap each piece in plastic wrap, then place them in a freezer bag. They will stay fresh for up to three months in the freezer. If you want to enjoy them warm again, reheat the bars in the oven. Set the oven to 350°F (175°C) and warm them for about 10 minutes. You can also microwave them for about 15-20 seconds. When stored properly at room temperature, the bars stay fresh for about five days. If you keep them in the fridge, they can last up to two weeks. To know if the bars have gone bad, check for a change in smell or color. If they feel dry or hard, it’s best to toss them. Trust your senses; if they seem off, they probably are. You can replace corn syrup with maple syrup or honey. Both of these add sweetness and flavor. You may need to adjust the amount slightly, as they can be more or less sweet. Yes, you can make these bars a day or two ahead. Just store them in an airtight container. This way, they stay fresh and tasty until you’re ready to enjoy them. The filling is done when it looks set and slightly puffed. It should not jiggle in the center. You can also insert a toothpick to check; it should come out clean. No, using store-bought caramel sauce is fine. However, homemade sauce can add a richer flavor. If you have time, I recommend making your own for that special touch. These bars go well with coffee, tea, or sweet dessert wines. A glass of milk also complements the rich flavors nicely. Choose what you enjoy most! In this blog post, we explored how to make delicious salted caramel pecan pie bars. We covered every step, from prepping the crust to baking the filling. I shared tips for the perfect texture and ways to serve these treats. You can even experiment with different ingredients for added flavor. Remember, proper storage keeps your bars fresh longer. With these tips, you can impress at any gathering. Use your creativity, and enjoy making these tasty bars for yourself and loved ones.

Salted Caramel Pecan Pie Bars Tasty Dessert Delight

Get ready for a sweet treat that’s simple and delicious! Salted Caramel Pecan Pie Bars are the perfect dessert for

- 1 cup unsweetened almond milk - 1/2 cup canned pumpkin puree - 1 frozen banana - 1 scoop vanilla protein powder - 1 tablespoon maple syrup - 1 teaspoon pumpkin spice - 1/2 teaspoon vanilla extract - Ice cubes (optional) - Whipped coconut cream (optional) - Ground cinnamon (for garnish) To make this smoothie, start with 1 cup of unsweetened almond milk. This adds creaminess without dairy. Next, use 1/2 cup of canned pumpkin puree for that rich pumpkin taste. Add 1 frozen banana to give your drink a nice, smooth texture. One scoop of vanilla protein powder boosts the protein and flavor. Adjust the sweetness with 1 tablespoon of maple syrup. For warmth, add 1 teaspoon of pumpkin spice. A touch of 1/2 teaspoon vanilla extract enhances the overall taste. If you want it thicker, toss in some ice cubes. If you like, top with whipped coconut cream and a sprinkle of ground cinnamon. If you need a dairy-free option, almond milk works great. You can also swap the vanilla protein powder for plant-based protein. For a sugar-free version, use a sugar substitute instead of maple syrup. If you're avoiding bananas, try using half an avocado for creaminess. You can replace pumpkin spice with a mix of cinnamon, nutmeg, and ginger if you prefer. To start, gather all your ingredients. You will need: - 1 cup unsweetened almond milk - 1/2 cup canned pumpkin puree - 1 frozen banana - 1 scoop vanilla protein powder - 1 tablespoon maple syrup - 1 teaspoon pumpkin spice - 1/2 teaspoon vanilla extract - Ice cubes (optional) 1. Pour the almond milk into your blender. 2. Add the pumpkin puree next. 3. Toss in the frozen banana for creaminess. 4. Add the protein powder to boost nutrition. 5. Drizzle in the maple syrup for sweetness. 6. Sprinkle in the pumpkin spice and vanilla extract. Blend everything on high until smooth and creamy. If your smoothie is too thin, add ice cubes. Blend again to reach your desired thickness. For a creamier finish, use more frozen banana or less almond milk. Taste your blend. If you want it sweeter, add more maple syrup. Pour your smoothie into a tall glass. For a special touch, top it with whipped coconut cream. Finish with a sprinkle of ground cinnamon. This adds a nice aroma and extra flavor. Enjoy your Pumpkin Spice Latte Protein Smoothie immediately for the best taste! To boost the taste of your Pumpkin Spice Latte Protein Smoothie, use high-quality spices. Fresh pumpkin spice gives a bolder flavor than older blends. You can even mix your own using cinnamon, nutmeg, and ginger for a personalized touch. Adding a pinch of salt can also enhance sweetness. Don’t forget to taste as you mix. Adjust the maple syrup for the perfect sweetness. Choose unsweetened almond milk for a creamy base without added sugar. Canned pumpkin puree works best for its rich flavor and smooth texture. Use ripe, frozen bananas for natural sweetness. They add creaminess and chill the smoothie. When picking protein powder, look for one with clean ingredients and no added sugars. Always check the labels for allergens before selecting. For a thicker smoothie, add more frozen bananas or ice cubes. The frozen banana adds creaminess without extra calories. You can also freeze your almond milk in advance for a super thick texture. If you prefer, use Greek yogurt for a protein boost and creaminess. Just blend well to get the smooth texture you want. {{image_2}} You can easily turn this recipe dairy-free and vegan. Simply use unsweetened almond milk, which I already included. You can also skip the whipped coconut cream or use a plant-based version. Look for brands that use coconut or soy. This way, you keep the creamy texture without any dairy. If you want to switch the protein powder, that's simple too. You can try plant-based protein powders like pea or rice. These work well. You might also like hemp protein for a nutty taste. Each powder has a unique flavor and texture, so pick one you enjoy. You can adjust the spice level and sweetness to your liking. If you love spices, add more pumpkin spice or even a dash of cayenne. For sweetness, maple syrup is great, but you can use honey or agave. Start with a little and taste as you go. This way, you get the perfect blend for your taste buds. Store any leftover smoothie in the fridge. Use a sealed container. It stays fresh for about one day. Before drinking, shake or stir it well. The ingredients may separate, but that's normal. Freezing is a great option for meal prep. Pour your smoothie into ice cube trays. Once frozen, pop the cubes into a bag. When you're ready, blend the cubes with a little almond milk for a quick treat. Use glass jars or BPA-free plastic containers. They keep the smoothie fresh and safe. A mason jar works well, and it’s easy to carry. Choose containers with tight lids to avoid spills. This smoothie is packed with nutrients. It has protein from the protein powder and healthy fats from almond milk. The canned pumpkin provides fiber, which aids digestion. Bananas add potassium, great for heart health. Maple syrup gives natural sweetness, while pumpkin spice has antioxidants. This mix supports energy and keeps you full longer. Yes, you can skip the protein powder. Try adding Greek yogurt or silken tofu instead. Both will give you a creamy texture and some protein. You can also use more pumpkin or banana for body. This keeps the flavor rich and tasty without losing nutrition. To cut calories, use less maple syrup or skip it. The banana adds sweetness, so you may not need it. Choose unsweetened almond milk to lower calories. You can also skip the whipped coconut cream on top. These small changes make the smoothie lighter while keeping it delicious. This blog post covered everything you need for a great smoothie. We looked at the ingredients, measurements, and substitutions for your diet. I shared easy steps for blending and tips to get the best texture. We explored ways to enhance flavor and different variations, like dairy-free options. Plus, helpful storage tips keep leftovers fresh. In the end, smooth and tasty smoothies can fit anyone's needs. Grab your favorite ingredients and enjoy a nutritious drink that works for you!

Pumpkin Spice Latte Protein Smoothie Delightful Recipe

If you love fall flavors, then you’ll adore my Pumpkin Spice Latte Protein Smoothie! This delightful recipe combines creamy pumpkin,

- 4 boneless, skinless chicken breasts - 2 cups broccoli florets - 4 tablespoons unsalted butter, melted - 5 cloves garlic, minced - 1 teaspoon dried thyme - 1 teaspoon paprika - Salt and pepper to taste - 1 lemon, zested and juiced - 1 tablespoon olive oil - Fresh parsley, for garnish Gathering the right ingredients is key for this dish. Start with four boneless, skinless chicken breasts. They cook evenly and stay juicy. Next, grab two cups of fresh broccoli florets. They add color and nutrients. Melt four tablespoons of unsalted butter. This will create a rich garlic butter that flavors the chicken and broccoli. You’ll need five cloves of garlic, finely minced. The garlic gives a strong flavor that pairs well with the chicken. Add one teaspoon of dried thyme and one teaspoon of paprika for depth. These herbs create a nice balance. Remember to season with salt and pepper to taste. For a bright kick, use one lemon. Zest it and juice it into your garlic butter. Finally, you’ll need one tablespoon of olive oil. This helps the broccoli roast perfectly. Don’t forget fresh parsley for garnish. It adds a nice touch of green and freshness to your dish. Now you have all the ingredients ready to create a flavorful meal! - Preheat the oven to 400°F (200°C). - Line a large baking sheet with parchment paper or foil. - In a small bowl, mix melted butter, minced garlic, thyme, paprika, lemon zest, lemon juice, salt, and pepper. This mix creates a tasty garlic butter marinade. - Place the chicken breasts on one side of the baking sheet. Brush half of the garlic butter over the chicken. Make sure to coat it well. - On the other side, toss the broccoli florets with olive oil, salt, and pepper. Spread the broccoli out in a single layer. - Drizzle the rest of the garlic butter over the broccoli for added flavor. - Bake in the preheated oven for about 20-25 minutes. Check the chicken's internal temperature. It should reach 165°F (75°C) and the broccoli should be tender and slightly crispy. - After baking, remove the sheet from the oven. Let it rest for a few minutes to keep the juices in the chicken. To make this dish pop, adjust your salt and pepper. Start with a pinch of salt. Taste and add more if needed. For pepper, a light sprinkle works well. You can also add red pepper flakes for heat. This brings a nice kick to the chicken and broccoli. If you want more flavor, try adding herbs like oregano or rosemary. Cook the chicken for 20 to 25 minutes. Check if it reaches 165°F (75°C). Use a meat thermometer for accuracy. Broccoli should be tender yet crisp. If the chicken is done, it is best to let it rest. This keeps it juicy and flavorful. Let it sit for about five minutes before serving. Serving directly on the sheet pan gives a rustic look. It’s easy and fun for a family meal. For a fancier touch, transfer to plates. Garnish with fresh parsley for color. Squeeze some lemon juice on top for extra zing. This adds brightness and enhances the flavors, making the dish even more delightful. {{image_2}} You can switch out broccoli for green beans or asparagus. Both add a nice crunch and flavor. For a splash of color, add bell peppers or carrots. They roast well and taste great with garlic butter. If you prefer dark meat, use chicken thighs instead of breasts. They stay moist and flavorful. For a vegetarian option, try tofu or chickpeas. Both soak up the garlic butter nicely and make a filling meal. To change the flavor, mix in different herbs and spices. Rosemary or oregano can give a fresh taste. You can also add a tangy sauce or sprinkle cheese on top. This creates a rich layer of flavor that will surprise your taste buds. After you enjoy your Sheet Pan Garlic Butter Chicken Broccoli, store any leftovers in the fridge. Use an airtight container to keep the dish fresh. It will last about three to four days. If you want to extend the life, use glass containers. They keep flavors better than plastic. To reheat, you have a few good options. The oven works best. Preheat it to 350°F (175°C). Place the chicken and broccoli on a baking sheet. Heat for about 10-15 minutes. This method keeps the chicken juicy and the broccoli crisp. You can also use a microwave. Just cover the dish to avoid drying out the food. Heat in short bursts, checking every minute. Want to freeze it? You can! Let it cool completely first. Then, place the chicken and broccoli in a freezer-safe bag. Squeeze out all the air before sealing. It’s best to eat it within three months. When ready to eat, thaw it in the fridge overnight. Reheat in the oven for best results. This way, you’ll keep that delicious flavor. Yes, you can prepare the garlic butter marinade a day before. Mix the melted butter, garlic, thyme, paprika, lemon juice, zest, salt, and pepper. Store it in the fridge. You can also marinate the chicken in advance. Just cover it and keep it cool until you are ready to cook. This dish pairs well with many sides. Here are some ideas: - Rice or quinoa for a filling base - Mashed potatoes for a creamy touch - A fresh garden salad for crunch - Crusty bread to soak up the butter sauce Absolutely! You can make a few easy swaps: - Use olive oil instead of butter for a dairy-free option. - Swap chicken for tofu or chickpeas for a vegetarian dish. - Change broccoli to other veggies like green beans or carrots. Check the chicken's internal temperature. Use a food thermometer if you have one. It should reach 165°F (75°C). The juices should run clear, not pink. If you cut into it, the meat should look opaque and firm. Yes, you can double it easily! Just make sure your baking sheet is big enough. If not, use two sheets. Keep the same cooking time, but check the chicken’s temperature to ensure it cooks evenly. This blog post covered a simple garlic butter chicken and broccoli recipe. We explored the key ingredients, step-by-step instructions, and tips for perfect results. I shared ways to adjust the flavors and substitute ingredients to suit your taste. Remember, you can store leftovers or freeze the dish for later. With these guidelines, you can enjoy a tasty, healthy meal with ease. Cooking doesn’t have to be hard. Enjoy your delicious creation!

Sheet Pan Garlic Butter Chicken Broccoli Delight

Looking for a quick, tasty dinner idea? My Sheet Pan Garlic Butter Chicken Broccoli Delight is the answer! This one-pan

- 4 cups cranberry juice - 2 cups apple juice - 1 cup water - 1 orange, sliced - 1 lemon, sliced - 1 tablespoon fresh ginger, grated - 4 cinnamon sticks - 5 whole cloves - 5 star anise pods - 2 tablespoons honey (adjustable) - Fresh cranberries and apple slices for garnish To make this warm and cozy drink, you'll need a mix of juices, spices, and fresh fruit. Start with cranberry juice and apple juice as your base. This combination gives a sweet and tart flavor. Adding water makes it lighter and refreshing. Fresh ginger adds a warm kick, while cinnamon, cloves, and star anise bring warmth and depth. Slicing an orange and a lemon adds bright notes. These fruits not only taste great but also look festive. Honey sweetens the punch, and you can adjust it based on your taste. Fresh cranberries and apple slices make the drink visually appealing when served. Each ingredient works together to create a delightful experience. You will find the balance of sweet, tart, and spicy flavors makes this punch perfect for gatherings. Enjoy the aromas and flavors as they fill your kitchen while you prepare this delightful drink. 1. First, combine the cranberry juice, apple juice, and water in a large pot. 2. Next, add the sliced orange, sliced lemon, grated ginger, cinnamon sticks, whole cloves, and star anise. 3. Place the pot over medium heat and bring the mix to a gentle simmer. - You can strain out the spices and fruit or leave them in for a rustic look. - Garnish your punch with fresh cranberries and apple slices for a festive touch. - If you want a sweeter punch, adjust the sweetness with honey to fit your taste. - Let it simmer for 20 to 30 minutes. This will give the flavors time to blend perfectly. Using fresh ingredients makes a big difference. Fresh fruits, like oranges and lemons, give your punch brightness. Fresh ginger adds warmth and spice. If you want to change the sweetness, try different sweeteners. Maple syrup or agave can be fun options. Adjust honey to suit your taste. To get the best flavor, steep the mix just right. A simmer of 20-30 minutes allows the spices to blend well. Keep the punch warm in a slow cooker or over low heat while serving. This keeps the flavors alive and the drink enjoyable for everyone. Choose a sturdy pot for mulling. A large pot helps all the flavors mix well. For garnishing, use a sharp knife and cutting board. A fine mesh sieve is handy for straining if you want a clear punch. These tools make the process smooth and easy. {{image_2}} You can make Mulled Cranberry Apple Punch even more fun by adding alcohol. Rum or whiskey are both great choices. Start with one cup of rum or whiskey for a warm twist. This will add depth and warmth to the punch. If you want a sweeter taste, choose spiced rum. If you prefer a stronger kick, whiskey works well. Just add it after you finish simmering the punch. Always taste before serving to make sure it’s just right. One great way to switch things up is to use different fruit juices. Instead of cranberry and apple, try pear or pomegranate for a new flavor. These juices bring their own sweetness and a unique taste to the punch. For summer, consider using berries like strawberries or blueberries. They add freshness and a pop of color. You can mash the berries before adding them to release more juice and flavor. If you want to save time, use pre-mixed mulling spices. This option gives you a quick way to infuse rich flavors. You can find these spices at most grocery stores. If you want to get creative, swap out spices to match your taste. For example, use nutmeg instead of star anise. Or try cardamom for a different aroma. The key is to adjust the spices so you enjoy every sip. To keep your mulled cranberry apple punch fresh, store any leftovers in the fridge. Use an airtight container to avoid spills and keep flavors intact. Make sure to cool the punch to room temperature before sealing it. The punch will stay good for up to five days. If you notice any change in smell or color, it’s best to toss it. When reheating your punch, do it slowly on the stove. Pour the punch into a pot and heat it over low heat. Avoid boiling, as high heat can change the flavors and make it taste different. Stir it gently while warming. You can also microwave it in a heat-safe container. Heat in short intervals and stir between to ensure even warmth. You can freeze your punch if you have lots left over. Pour the cooled punch into freezer-safe containers, leaving some space at the top. Liquids expand when frozen, so this step is important. It can last up to three months in the freezer. To thaw, place the container in the fridge overnight. Once thawed, heat it gently and stir well before serving. Mulled Cranberry Apple Punch is a warm, spiced drink. It combines cranberry juice and apple juice, creating a sweet and tangy flavor. The drink often includes spices like cinnamon and cloves, which add warmth. This drink traces its roots to holiday traditions where people mull wine and cider. It’s perfect for gatherings, warming hearts and hands during chilly seasons. You can store Mulled Cranberry Apple Punch in the fridge for about three days. Make sure to keep it in an airtight container to keep it fresh. If you want to save it longer, consider freezing it. Just remember to leave some space in the container for expansion. When you want to drink it again, thaw it in the fridge overnight and reheat gently. Yes, you can make this punch ahead of time. Prepare the drink and let it cool before storing it. When you're ready to serve, just reheat it on the stove until warm. This way, you save time and still enjoy all the cozy flavors. If you want the best taste, try to consume it within two days after making it. This blog post shows you how to create a delicious mulled cranberry apple punch. We covered the key ingredients, step-by-step instructions, and tasty tips to enhance your drink. You now know how to serve it, store leftovers, and even add variations. Crafting this punch allows you to impress guests and enjoy festive flavors. Remember, using fresh ingredients will always give you the best taste. Now, grab your pot and start making your winter drink!

Mulled Cranberry Apple Punch Festive Flavor Idea

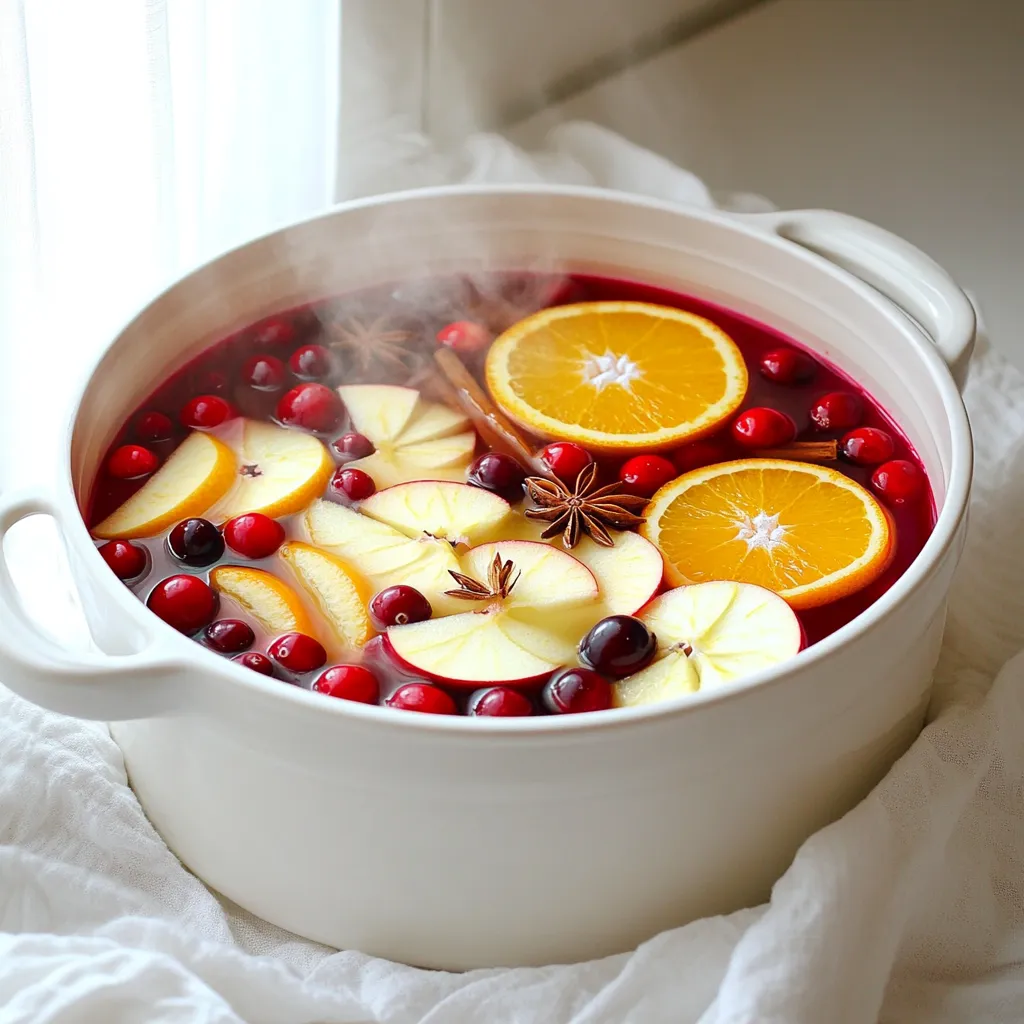
Ready to wow your guests this season? Mulled Cranberry Apple Punch offers a festive burst of flavor that’s perfect for

To make crispy air fryer eggplant parmesan, gather these key ingredients: - 2 medium eggplants, sliced into 1/4-inch rounds - 1 teaspoon salt - 1 cup all-purpose flour - 2 large eggs, beaten - 1 cup breadcrumbs (preferably panko for extra crunch) - 1 teaspoon dried oregano - 1 teaspoon garlic powder - 1/2 teaspoon black pepper - 2 cups marinara sauce - 2 cups shredded mozzarella cheese - 1/2 cup grated Parmesan cheese - Fresh basil leaves for garnish If you don't have some ingredients, here are good swaps: - Use chickpea flour instead of all-purpose flour for gluten-free options. - Egg replacements like flaxseed meal or applesauce work well for vegan diets. - For breadcrumbs, crushed cornflakes give a nice crunch. - Swap mozzarella for provolone or gouda for a different taste. You can change up the flavor with these extras: - Add red pepper flakes for a spicy kick. - Try fresh herbs like basil or thyme for more aroma. - Include cooked spinach or mushrooms in the layers for extra veggies. These ingredients set the stage for a crispy, flavorful dish that will impress anyone! Start by slicing the eggplants into 1/4-inch rounds. This size helps them cook evenly. Sprinkle 1 teaspoon of salt over the slices. Let them sit for about 30 minutes. The salt draws out moisture and bitterness. After 30 minutes, rinse the slices under cold water. Pat them dry with paper towels. This step is key for a crispy texture. Next, set up your breading station. You need three shallow bowls. In the first bowl, place 1 cup of all-purpose flour. In the second bowl, add 2 beaten eggs. In the third bowl, mix 1 cup of breadcrumbs, 1 teaspoon of dried oregano, 1 teaspoon of garlic powder, and 1/2 teaspoon of black pepper. This mix adds great flavor. Take each eggplant slice, dip it first in the flour, shaking off the excess. Then, coat it in the egg. Finally, press it into the breadcrumb mixture. Make sure each slice gets a good cover. Repeat this for all slices. Preheat your air fryer to 375°F (190°C). Place the breaded eggplant slices in the basket. Make sure they are in a single layer. Avoid overcrowding for the best results. Spray them lightly with cooking spray for extra crispiness. Cook for 12-15 minutes, flipping halfway through. They should turn golden brown and crispy. Now, it’s time to assemble. Spread a thin layer of marinara sauce in a baking dish. Layer half of the crispy eggplant slices on top. Add half of the remaining marinara sauce. Then, sprinkle half of the shredded mozzarella cheese and half of the grated Parmesan cheese. Repeat these layers with the rest of the ingredients. Finally, bake the dish in your oven at 375°F (190°C) for 20-25 minutes. You want the cheese to be bubbly and golden. After baking, let it cool for a few minutes. Then, garnish with fresh basil leaves before serving. Enjoy your crispy air fryer eggplant Parmesan! To get that perfect crisp on your eggplant, start by salting the slices. The salt pulls out moisture and bitterness. After 30 minutes, rinse the slices and pat them dry. This step is key. Use panko breadcrumbs for extra crunch. They make a big difference. When you bread the slices, press the breadcrumbs firmly. This helps them stick better. One common mistake is overcrowding the air fryer. If the eggplant slices touch, they won’t crisp up well. Always cook them in a single layer. Another mistake is not preheating the air fryer. This step ensures even cooking from the start. Finally, don’t skip the cooking spray. A light spray helps the coating get golden and crunchy. Here are some tools that make this recipe easier: - Air fryer - Three shallow bowls for breading - Baking dish for assembly - Cooking spray for added crispiness - Paper towels for drying eggplant Using the right tools can make your cooking experience smoother and more fun. Enjoy your crispy eggplant parmesan! {{image_2}} You can make a vegan version of this dish easily. Instead of eggs, use unsweetened plant milk. Flaxseed meal mixed with water also works as a great egg substitute. For the cheese, use vegan mozzarella or cashew cheese. This gives the dish a creamy texture while keeping it plant-based. To make this recipe gluten-free, swap regular flour and breadcrumbs for gluten-free versions. Use gluten-free all-purpose flour and gluten-free panko. This way, you can enjoy the same crispy texture without any gluten. Add more flavors to your eggplant parmesan by mixing spices and herbs. Try adding smoked paprika for a touch of warmth. You can also include fresh herbs like thyme or parsley for added taste. If you love heat, sprinkle in some red pepper flakes. These small changes can elevate the dish and make it unique to your taste. To keep your crispy air fryer eggplant Parmesan fresh, place it in an airtight container. Layer the eggplant with parchment paper to prevent sticking. Store it in the fridge for up to three days. Make sure it cools completely before sealing it to avoid moisture buildup. For the best taste, reheat your eggplant Parmesan in the oven. Preheat the oven to 350°F (175°C). Place the leftovers on a baking sheet and cover them with foil. Heat for about 15-20 minutes or until hot. This method helps to keep the eggplant crispy. If you want to freeze your eggplant Parmesan, let it cool first. Cut it into portions and wrap each piece tightly in plastic wrap. Then, place the wrapped pieces in a freezer-safe bag. You can freeze it for up to three months. To enjoy, thaw it in the fridge overnight before reheating. Yes, fresh eggplant works great. In fact, I recommend using fresh eggplant. It tastes better and has a firmer texture. Just make sure to slice it evenly. To reduce bitterness, sprinkle salt on the slices and let them sit. This draws out moisture and bitterness. After 30 minutes, rinse the slices with cold water. Pat them dry with paper towels. This step is key for a tasty dish. You can customize this dish in many ways. Try different cheeses, like provolone or goat cheese. Add spices like crushed red pepper for heat. You can also use a different sauce, like pesto or a white sauce. If you want a veggie boost, layer in some spinach or mushrooms. This blog post covered everything you need to make a great eggplant dish. We discussed essential ingredients and tasty alternatives. You learned the steps for prepping, breading, and cooking the eggplant. I shared tips for achieving that perfect crisp and how to avoid mistakes. We also explored fun variations, storage tips, and some common questions. Now, you have the tools to make this meal shine. Enjoy cooking and get creative!

Crispy Air Fryer Eggplant Parmesan Simple and Tasty

Ready for a delicious twist on a classic dish? My Crispy Air Fryer Eggplant Parmesan is simple and packed with

To make these yummy Cottage Cheese Cheesecake Cups, you will need: - 2 cups cottage cheese, blended until smooth - 1/2 cup Greek yogurt - 1/2 cup honey or maple syrup - 1 teaspoon vanilla extract - 1 tablespoon lemon juice - 1 teaspoon cornstarch - 1/4 teaspoon salt - 1 cup graham cracker crumbs - 4 tablespoons unsalted butter, melted These ingredients create a rich, creamy filling and a tasty crust. Blending the cottage cheese makes it smooth. This step is key for a nice texture. You can add a few fun toppings to make your cups even better: - Fresh berries like strawberries, blueberries, or raspberries - Mint leaves for a pop of color and freshness Adding berries gives a nice sweet touch. Mint leaves add a nice look and taste. To make these cheesecake cups, grab these tools: - Blender or food processor (for the filling) - Medium bowl (for mixing the crust) - Clear dessert cups or small glasses (for serving) - Spoon (for layering the mixture) Having the right tools makes your work easier. A blender helps you get the filling super smooth. Clear cups show off your beautiful dessert! First, gather your ingredients. You need cottage cheese, Greek yogurt, honey or maple syrup, vanilla extract, lemon juice, cornstarch, and salt. Put the cottage cheese in a blender. Add Greek yogurt, honey or maple syrup, vanilla extract, lemon juice, cornstarch, and salt. Blend these until smooth and creamy. This step is key for a rich cheesecake flavor. Set this mixture aside while you make the crust. Next, take a medium bowl. In it, add graham cracker crumbs and melted unsalted butter. Mix well until the crumbs look like wet sand. This helps the crust hold together. It should not be too dry or too wet. Press the mixture into the bottom of your dessert cups. This creates a nice base for your cheesecake. Now, grab your clear dessert cups or small glasses. Add about two tablespoons of the graham cracker crust to each cup. Press down gently to form a solid layer. Then, spoon the cottage cheese mixture onto the crust. Fill each cup about two-thirds full. Tap the cups lightly on the counter to remove air bubbles. This ensures a smooth finish. Finally, place the cups in the refrigerator. Let them chill for at least two hours. This helps the cheesecake set well. The longer they chill, the better the flavor will be. After chilling, they are ready to serve. Top with fresh berries and mint leaves if you like. Enjoy this creamy and simple treat! To get that smooth, creamy texture, blend the cottage cheese well. I use a high-speed blender. It helps break down any lumps. Add Greek yogurt for extra creaminess. The yogurt also adds a subtle tang. Make sure to mix in the honey or maple syrup well. This adds sweetness and helps the cheesecake cups stay creamy. One mistake is not blending enough. If you see lumps, it will not be smooth. Another issue is skipping the chilling step. Chilling helps set the cups. If you don't chill them long enough, they won't hold shape. Lastly, don't forget to press the crust down firmly. A loose crust will crumble when you serve. If you want to switch sweeteners, try agave syrup or stevia. Agave has a mild taste. Stevia is much sweeter, so use less. You can also adjust the amount of honey or maple syrup to your taste. If you like it sweeter, add more. If you prefer less, cut back. Just be sure to keep the balance right for the best flavor. {{image_2}} You can change the flavor of your cheesecake cups easily. Try adding 1/4 cup of cocoa powder for a chocolate twist. You can also mix in fruit purees like strawberry or blueberry. A bit of almond extract gives a nice nutty flavor. For a fun twist, add a dash of pumpkin spice in the fall. While graham cracker crumbs make a great base, you can try other options. Use crushed cookies like Oreos for a chocolatey crust. You can also use nuts and dates for a gluten-free option. Just blend them together, press them in the cups, and you are set. Toppings can take your cheesecake cups to the next level. Use fresh berries for a burst of color. Drizzle some chocolate or caramel sauce on top for extra sweetness. Add crushed nuts for a crunchy texture. For a fun idea, serve them in mason jars for a picnic or party. To keep your cheesecake cups fresh, place them in the fridge. Use airtight containers or cover them tightly with plastic wrap. This prevents moisture loss and keeps them from absorbing odors. If you have leftover cups, eat them within a few days for the best taste. These cheesecake cups stay good in the fridge for about 3 to 5 days. If you want to freeze them, do so before adding any toppings. Wrap each cup with plastic wrap and foil. This helps prevent freezer burn. They can last up to 2 months in the freezer. When ready to eat, thaw them in the fridge overnight. You don’t need to reheat these cheesecake cups. They taste best chilled. If you prefer a slightly warmer dessert, let them sit at room temperature for about 10 minutes before eating. Enjoy them fresh, creamy, and delicious! Yes, you can use low-fat or fat-free cottage cheese. The texture may change, but it will still taste good. Low-fat versions can make the cheesecake cups lighter. They may not be as creamy as full-fat options, but they work well. These cheesecake cups need to chill for at least 2 hours. Chilling helps the cups set and firm up. If you can wait longer, chilling overnight enhances the flavor and texture even more. Absolutely! You can make these cups a day in advance. Just store them in the fridge until you're ready to serve. This makes them a great option for parties or meal prep. You can use sour cream or regular yogurt as a substitute for Greek yogurt. Both options will keep the cups creamy. If you want a thicker texture, use sour cream. Regular yogurt works well if you prefer a lighter taste. To make these cheesecake cups dairy-free, use dairy-free cottage cheese and yogurt. You can find plant-based options in stores. For sweetening, use maple syrup or agave nectar. This way, everyone can enjoy the treat! In this article, we explored how to make delicious cottage cheese cheesecake cups. We covered essential ingredients, step-by-step instructions, and tips for the best results. You learned about storage and common questions, too. Embrace your creativity with flavor variations and unique toppings. These cheesecake cups are fun and easy for anyone to make. Enjoy sharing them with friends and family or as a sweet treat for yourself. Happy baking!

Cottage Cheese Cheesecake Cups Creamy and Simple Treat

Craving a sweet treat that’s creamy and easy to make? You’re in the right place! My Cottage Cheese Cheesecake Cups

To make this savory slow cooker Moroccan chickpea stew, you’ll need a few simple ingredients. Each one adds flavor and nutrition to the dish. Here’s what you should gather: - 2 cans (15 oz each) chickpeas, drained and rinsed - 1 medium onion, chopped - 2 cloves garlic, minced - 1 medium sweet potato, peeled and diced - 1 bell pepper (any color), chopped - 1 zucchini, chopped - 1 can (14 oz) diced tomatoes, with juices - 2 cups vegetable broth - 1 tablespoon olive oil - 2 teaspoons ground cumin - 1 teaspoon ground coriander - 1 teaspoon smoked paprika - 1/2 teaspoon ground cinnamon - 1/2 teaspoon turmeric - Salt and pepper to taste - Fresh cilantro or parsley for garnish - Juice of 1 lemon These ingredients work together to create a warm and hearty stew. Chickpeas provide protein and fiber, while the vegetables add color and texture. The spices bring that Moroccan flair, giving the dish its unique taste. Each bite is a journey through rich flavors and aromas. Sautéing Aromatics Start by adding olive oil, onion, and garlic to the slow cooker. If your slow cooker has a sauté feature, set it to high. Sauté these for 2-3 minutes. You want the onion to turn translucent. If not, just layer the ingredients directly. Layering the Vegetables Next, add your diced sweet potato, chopped bell pepper, and zucchini. Make sure they are in a single layer. This helps them cook evenly. The sweet potato adds a nice sweetness, while the bell pepper and zucchini bring freshness. Mixing in the Spices In a small bowl, mix the spices: ground cumin, ground coriander, smoked paprika, ground cinnamon, and turmeric. Add a pinch of salt and pepper. Once mixed, pour this spice blend over the vegetables and chickpeas. Stir everything together so the spices coat the veggies well. Setting the Slow Cooker Cover the slow cooker. Set it to low for 6-8 hours or high for 3-4 hours. The low setting brings out the deep flavors. The high setting is great if you’re in a hurry. Cooking Times and Temperatures Check the stew at the end of the cooking time. The vegetables should be tender. If you can easily pierce them with a fork, it’s ready. Adding Lemon Juice When the cooking time is up, stir in the juice of one lemon. This adds brightness to the stew. Taste it and see if you want more lemon juice. Adjusting Seasoning Finally, taste your stew. Add more salt and pepper if needed. This step makes sure your flavors shine. - Sauté Function vs. Layering Directly If your slow cooker has a sauté function, use it. Sautéing the onion and garlic first boosts flavor. This step adds depth to the stew. If you don’t have this option, just layer the ingredients. It still tastes great! - Achieving Optimal Flavor To really bring out the spices, mix them well with the other ingredients. Adding the spices directly to the stew helps them bloom. Letting the stew cook low and slow allows all the flavors to meld beautifully. You’ll want to taste it before serving. This way, you can adjust the seasoning to your liking. - Serving Suggestions Serve the stew in deep bowls. This makes for a comforting and hearty meal. Pair it with warm crusty bread or fluffy couscous. They soak up the rich flavors of the stew perfectly. - Garnishes to Enhance Visual Appeal Add a sprinkle of fresh cilantro or parsley on top. This adds a pop of color and freshness. You can also squeeze a bit of lemon juice over each bowl. It brightens the dish and enhances the taste. {{image_2}} You can change the stew’s taste by swapping vegetables. Here are some ideas: - Carrots: Use sliced carrots for added sweetness. - Spinach: Add fresh spinach near the end for color and nutrients. - Cauliflower: Swap in cauliflower for a hearty texture. Feel free to switch chickpeas with other legumes. Options include: - Lentils: Use green or brown lentils for a different flavor. - Black beans: Try black beans for a richer taste. To make your stew unique, consider adding heat. Here are a few spices to try: - Cayenne pepper: A pinch of cayenne gives a spicy kick. - Red pepper flakes: Sprinkle some flakes for a milder heat. Adjusting sweetness and acidity can also change the stew’s profile: - Honey or maple syrup: Add a touch of sweetness with these. - Vinegar or lime juice: A splash can brighten the stew's flavor. Experiment with these swaps and enhancements to find your perfect blend! To keep your Slow Cooker Moroccan Chickpea Stew fresh, follow these tips: - Cool the Stew: Let the stew cool to room temperature. - Use Airtight Containers: Place it in clean, airtight containers. - Label: Write the date on each container. In the fridge, this stew lasts about 4-5 days. If you want it to last longer, freezing is a great choice. To freeze the stew, here’s what you should do: - Portion It Out: Divide the stew into smaller portions. - Use Freezer Bags or Containers: Pour portions into freezer-safe bags or containers. - Remove Air: Squeeze out as much air as possible to prevent freezer burn. When you want to eat it again, follow these steps: - Thaw in the Fridge: Move the stew to the fridge for 8-12 hours. - Reheat: Heat it on the stove or in the microwave until hot. This stew freezes well for about 3 months. Enjoy your meal anytime! Yes, you can cook this stew on the stove. Start by heating a pot over medium heat. Sauté the onion and garlic in olive oil for about two minutes. Then, add the sweet potato, bell pepper, and zucchini. Stir for a few minutes. Next, add the chickpeas, diced tomatoes, and vegetable broth. Mix in your spices and let it simmer for about 30 minutes. Stir occasionally until veggies are tender. You can serve this stew with various sides. Here are some great options: - Warm crusty bread - Fluffy couscous - Steamed rice - Quinoa - A fresh green salad These sides soak up the stew's rich flavors and add texture. To change the heat level, you have a few good options. If you want it milder, skip the smoked paprika. For a bit more heat, add some cayenne pepper or red pepper flakes. Start with a pinch, taste, and adjust as needed. Always remember, you can add more spice, but it's hard to take it out! In this blog post, we explored how to make a Slow Cooker Moroccan Chickpea Stew. We covered the essential ingredients and the step-by-step process for preparation and cooking. I shared tips for perfecting the dish and creative ways to present it. We also discussed variations, storage options, and answered common questions. Now, as you try this recipe, remember to have fun. Use what you like, and make it your own! Enjoy your cooking adventure.

Savory Slow Cooker Moroccan Chickpea Stew Recipe

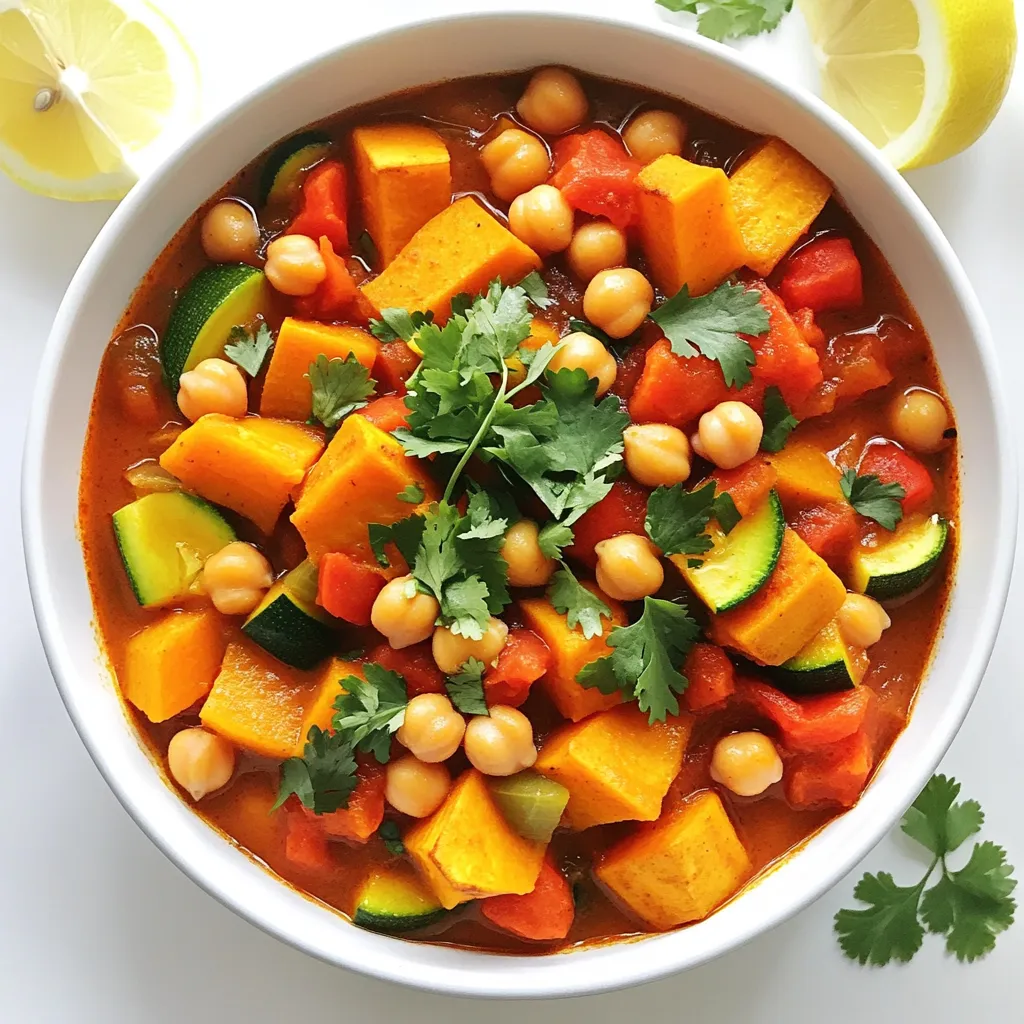
Get ready to savor a warm bowl of Slow Cooker Moroccan Chickpea Stew. This recipe is perfect for busy nights

Older posts
Newer posts
← Previous Page1 … Page4 Page5 Page6 … Page84 Next →

dsad

© 2026 Foodish Talk • Built with GeneratePress

Our Policies

  • Copyright Policy
  • Cookie Policy
  • GDPR Policy
  • Privacy Policy
  • Disclaimer
  • Terms Of Use

More Information

  • Home
  • About
  • Contact
  • Appetizers
  • Dessert
  • Dinner
  • Drinks
©2026, Foodish Talk About Back To Top