Skip to content
DisclaimerTerms Of UseGDPR PolicyCookie Policy

Foodish Talk

  • Home
  • Drinks
  • Appetizers
  • Dinner
  • Dessert
  • About
  • Contact
  • Privacy Policy
DisclaimerTerms Of UseGDPR PolicyCookie Policy

NO-ING-IMG

To make easy cheesy pizza pockets, gather these essential items: - 1 package (1 lb) refrigerated crescent roll dough - 1 cup shredded mozzarella cheese - 1/2 cup pepperoni slices (or any favorite pizza toppings) - 1/4 cup pizza sauce - 1 teaspoon dried oregano - 1/2 teaspoon garlic powder - 1 egg (for egg wash) You can personalize your pizza pockets with these fun options: - Add chopped bell peppers or onions for crunch. - Swap mozzarella for cheddar or provolone cheese. - Use cooked sausage or mushrooms as toppings. - Include fresh basil or spinach for a fresh twist. If you don’t have a few ingredients, here are easy swaps: - Use puff pastry instead of crescent roll dough. - Try different sauces like pesto or marinara. - Replace pepperoni with cooked chicken or veggies for a lighter option. - Use egg substitute or milk for the egg wash. For the complete guide, check out the Full Recipe. Start by preheating your oven to 375°F (190°C). Line a baking sheet with parchment paper. Unroll the crescent roll dough and separate it into triangles. Pinch the seams together. This step is key to keep the filling inside. In a bowl, mix the shredded mozzarella cheese, pepperoni, dried oregano, and garlic powder. Take one triangle of dough and place about 1 tablespoon of the cheese mixture at the wide end. Spoon about 1 teaspoon of pizza sauce over the cheese. Carefully roll the dough from the wide end to the pointed end. Pinch the edges to seal them tight. Repeat this for all triangles. Lay the filled pockets on the baking sheet. In another bowl, whisk the egg. Brush the egg wash over the tops of the pizza pockets. This gives them a nice golden finish. Optionally, spray them lightly with olive oil for extra crispness. Bake in the oven for 12-15 minutes. Look for a golden brown color and puffed appearance. Let them cool for a few minutes before enjoying. You can find the full recipe to guide you through every step. To stop the dough from leaking, pinch the seams tightly. This seals the filling inside. Use a little extra dough if you need to cover any gaps. Avoid overfilling the pockets, as this can cause them to burst. Keep about a tablespoon of filling per pocket. This way, the dough stays closed while baking. For even cooking, place the pizza pockets apart on the baking sheet. This allows hot air to circulate around each pocket. Make sure to preheat your oven to 375°F (190°C). If you have multiple trays, rotate them halfway through baking. This helps every pocket cook evenly and get that lovely golden brown color. Serve the pizza pockets warm for the best taste. I like to pair them with a side of pizza sauce for dipping. You can also add some fresh herbs on top for color. Arrange them nicely on a platter to impress your guests. Serve them as a snack, appetizer, or party food. You can find the full recipe above to make your own delicious pizza pockets! {{image_2}} Cheese is the star of pizza pockets. You can switch up the cheese for fun. Try using cheddar for a sharp taste. Provolone adds a nice stretch. Cream cheese gives a rich creaminess. Mix different cheeses for a flavor boost. The goal is to find what you love. You don’t have to stick with pepperoni. Think outside the box! Load your pockets with veggies like bell peppers, mushrooms, or olives. Cooked chicken or sausage makes a hearty filling. Want something unique? Try BBQ sauce and chicken for a twist. Personalize it to fit your taste. Want a lighter option? Use whole wheat dough for more fiber. You can also add more veggies and less cheese. Instead of oil, use a light egg wash for less fat. Greek yogurt can replace some cheese for creaminess without the calories. Enjoy tasty pizza pockets without the guilt! To keep your pizza pockets fresh, store them in an airtight container. Place a paper towel in the container to absorb moisture. This helps prevent sogginess. You can keep them in the fridge for up to four days. Make sure they cool down before sealing them. To reheat the pizza pockets, you can use an oven or a microwave. For the oven, preheat it to 350°F (175°C). Place the pizza pockets on a baking sheet and heat for about 10 minutes. This keeps them crisp. If you use a microwave, heat for about 30 seconds. Check if they are warm enough. If not, add more time in short bursts. Freezing is a great option if you want to save some pizza pockets. First, let them cool completely. Wrap each pocket in plastic wrap. Then, place them in a freezer-safe bag. They can last up to three months in the freezer. To enjoy later, thaw in the fridge overnight and reheat as mentioned above. For the full recipe, refer back to the sections we've covered. Yes, you can use many types of dough. Crescent roll dough is easy and quick. You can also try pizza dough or puff pastry. Each type will give a different texture. Pizza dough will be chewier, while puff pastry gives a flaky bite. Experimenting with dough can lead to fun new flavors! Pizza pockets last about 3 to 4 days in the fridge. Make sure to store them in an airtight container. This keeps them fresh and tasty. If you want them to last longer, consider freezing them instead. Just reheat them when you're ready to eat! Absolutely, you can make pizza pockets ahead of time. Prepare them, then place them in the fridge before baking. You can also freeze them. Just freeze the filled, unbaked pockets. When you're ready, bake them straight from the freezer. This way, you have a quick snack ready to go! For the full recipe, you can check the detailed steps above. In this article, we covered how to make delicious pizza pockets from scratch. We discussed the key ingredients needed and options for customization. You learned step-by-step instructions for preparing the dough and filling them. I shared tips to avoid leaks and ensure even cooking. We explored variations for flavors and healthier choices. Lastly, I explained how to store and reheat pizza pockets. Now, you can enjoy making these tasty treats at home! Happy cooking!

Easy Cheesy Pizza Pockets Quick and Tasty Snack

Are you ready for a quick and tasty snack? Easy Cheesy Pizza Pockets are just what you need! These fun

To make this jam, gather these key ingredients: - 4 cups ripe peaches, peeled and diced - 2 cups granulated sugar - 1 tablespoon lemon juice - 1/4 teaspoon almond extract - 1 teaspoon ground cinnamon - 1 packet (1.75 oz) fruit pectin (like Sure-Jell) - 1/2 teaspoon vanilla extract (optional) These main ingredients create a sweet and tangy flavor. The peaches give the jam its fresh taste. The sugar helps preserve it and adds sweetness. The lemon juice brightens the flavors and balances the sweetness. Almond extract adds a lovely hint of nuttiness, while cinnamon offers warmth. You can enhance your peach jam with these optional ingredients: - Fresh herbs like basil or mint - A splash of brandy or bourbon for depth - Other spices, such as ginger or nutmeg Adding fresh herbs brings a unique twist to the jam. A splash of alcohol can add richness. Experiment with spices to find your favorite flavor notes. These enhancements allow for creativity and personalization. To make your jam, ensure you have these tools: - Large heavy-bottomed pot - Potato masher or fork - Measuring cups and spoons - Sterilized jars with lids - A clean kitchen towel These tools help you create your jam more easily. A heavy pot ensures even cooking. The potato masher is great for breaking down the peaches. Sterilized jars keep your jam safe for storage. Having the right tools makes the process smooth and enjoyable. For the complete recipe, check out the Full Recipe. Start with ripe peaches. Wash them well and peel off the skin. This step is key for a smooth jam. Next, dice the peaches into small pieces. You can use a knife or your hands. Place the diced peaches in a large bowl. This bowl is where all the magic begins. If you like a chunkier jam, mash them slightly. A potato masher works well for this. In a big pot, combine the mashed peaches, sugar, lemon juice, almond extract, and cinnamon. Stir this mixture well until the sugar dissolves. Set the pot over medium heat. Bring the mixture to a gentle boil. Stir constantly to avoid burning. Boil for about ten minutes. After that, add the fruit pectin and mix it in. Bring it back to a rolling boil for another 2-3 minutes. This is where you create that perfect jam texture. Once your jam reaches the right consistency, remove the pot from the heat. Use a ladle to fill sterilized jars. Leave about 1/4 inch at the top. Clean the rims with a cloth to ensure a good seal. Place the lids on the jars and screw on the bands. Process the jars in a boiling water bath for 5-10 minutes. This helps seal them for long-term storage. After that, cool the jars on a kitchen towel. Check the seals; they should be firm. Store your jam in a cool, dark place. Enjoy your homemade French Country Peach Jam anytime! For the complete recipe, check out the Full Recipe section. To get the right jam texture, check the mixture while cooking. After boiling for ten minutes, test a spoonful on a plate. Wait a minute, then drag your finger through it. If it holds a line, you’re good! If not, boil for another minute. Remember, overcooking can make your jam too thick, while undercooking will leave it runny. One common mistake is not using ripe peaches. Choose peaches that are soft and fragrant. If they are hard, your jam may lack flavor. Also, don't skip the pectin; it helps the jam set properly. Lastly, ensure you sterilize your jars. This keeps your jam safe and tasty. You can make your peach jam even better! Adding a splash of lemon juice brightens the flavor. Almond extract adds a nice nutty touch. If you want something special, try adding a little vanilla extract. Ground cinnamon gives warmth and depth. Mix and match these flavors to find your favorite. {{image_2}} You can mix in other fruits for new flavors. Try adding blueberries or strawberries. These fruits pair well with peaches. You can also use mango for a tropical twist. Just keep the ratio of peaches to other fruits similar. This way, your jam stays peachy and delicious. Spices can change the taste of your jam. Consider adding a pinch of nutmeg or ginger. Both spices bring warmth and depth. You could also try adding a little cardamom for a floral note. Experiment with these spices to find your favorite blend. If you want a healthier jam, consider sugar substitutes. You can use honey or agave syrup. Both add sweetness without refined sugar. Remember, using these may alter the flavor slightly. Always taste your jam as you go to get it just right. For a lower-calorie option, try stevia or monk fruit sweetener. To keep your peach jam fresh, store it in a cool, dark place. A pantry or cupboard works well. Make sure to use clean, sterilized jars to avoid spoilage. Once opened, keep it in the fridge. This helps maintain the taste and texture. Homemade peach jam lasts about one year when sealed and stored properly. After opening, it stays good for 2 to 3 weeks in the fridge. Always check for signs of spoilage, like off smells or mold. If you see any, toss it out. Freezing is a great way to keep your peach jam longer. To freeze, first, let the jam cool completely. Then, pour it into freezer-safe containers, leaving space for expansion. Seal tightly and label with the date. You can freeze jam for up to a year. When ready to use, thaw it in the fridge overnight. For the complete recipe, check the Full Recipe section! To make French Country Peach Jam, start with ripe peaches. Peel and dice about 4 cups. In a big pot, mash the peaches. Combine them with 2 cups of sugar, 1 tablespoon of lemon juice, 1/4 teaspoon of almond extract, and 1 teaspoon of ground cinnamon. Heat this mix until it boils. Add 1 packet of fruit pectin, then boil for a few more minutes. Pour it into jars and seal. This simple method gives you sweet, tasty jam. The best peaches for jam are ripe and sweet. Look for yellow or white peaches. They should be soft to the touch but not mushy. Freestone peaches are easy to work with since the pit comes out cleanly. Local peaches in season often have the best flavor. If you can, choose organic peaches for a cleaner taste. You can find French Country Peach Jam at local farmers' markets or specialty stores. Many shops sell homemade jams made by local artisans. Online stores also offer various brands. If you want a specific flavor, check gourmet shops or websites that focus on preserves. You might even find some unique versions with added spices or other fruits. Yes, you can substitute some ingredients. For instance, if you don't have almond extract, vanilla extract works well too. You can also use honey or agave syrup instead of sugar, but this may change the jam's texture. If you want a lower sugar option, use less sugar and increase the pectin. Just keep in mind that substitutions can affect flavor and consistency. You’ve learned how to make French Country Peach Jam with fresh peaches, tools, and tips. From preparing the fruit to perfecting the jarred jam, each step matters. Avoid common mistakes and explore flavor variations to make it your own. Remember to store your jam correctly for the best taste. Enjoy your homemade treat and the fun of sharing it with others. Making jam isn't just cooking; it’s creating memories.

French Country Peach Jam Simple and Flavorful Recipe

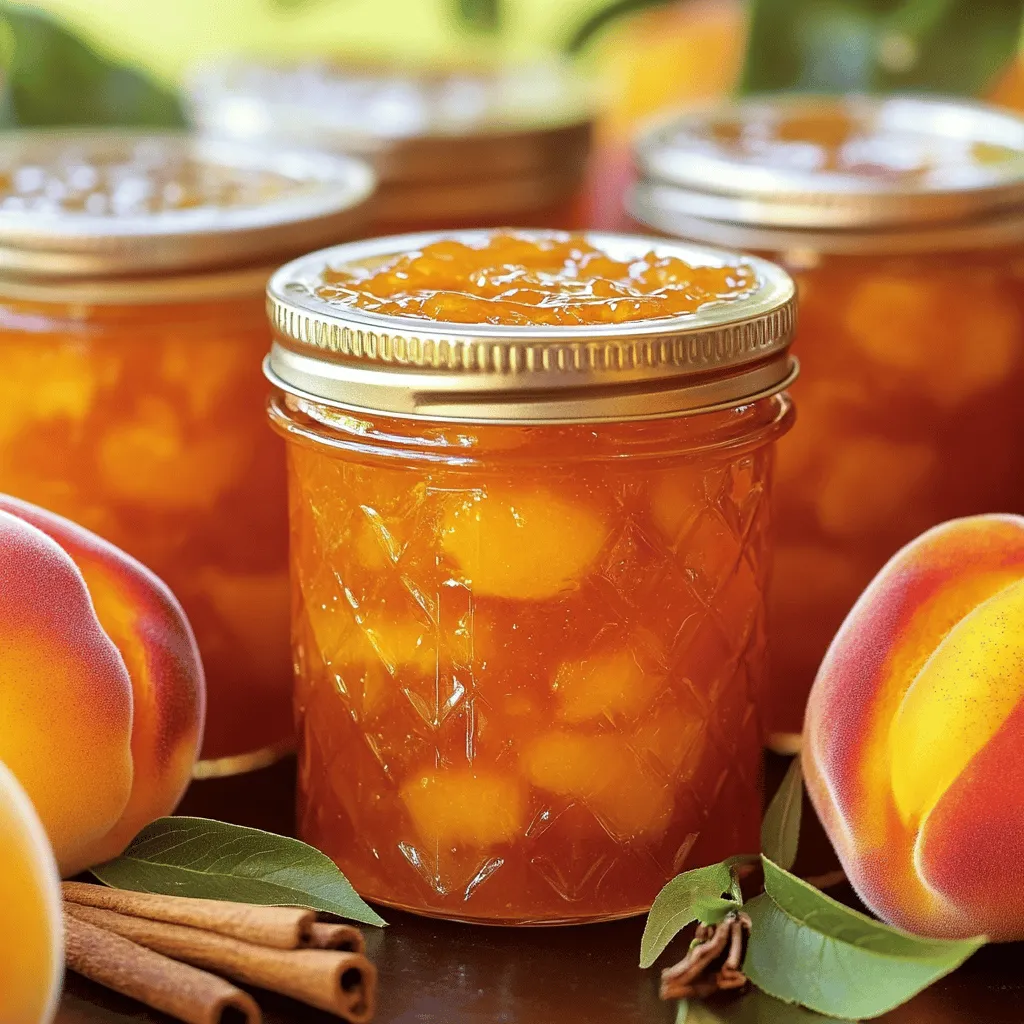
Ready to savor the taste of summer all year round? In this simple and flavorful recipe for French Country Peach

To whip up this tasty dish, you need just a few key items. Here’s what you’ll need: - 2 packs of instant ramen noodles (discard the flavor packets) - 1 cup cooked chicken, shredded - 1 cup mixed bell peppers, sliced (red, yellow, green) - 1 carrot, julienned - 1 cup broccoli florets - 2 green onions, sliced - 3 cloves garlic, minced - 1 tablespoon fresh ginger, grated - 3 tablespoons low-sodium soy sauce - 1 tablespoon sesame oil - 1 tablespoon vegetable oil - 1 tablespoon honey - Salt and pepper to taste - Sesame seeds for garnish These ingredients create a balanced and colorful stir-fry. The noodles provide a hearty base. The chicken adds protein, while the veggies bring color and crunch. You can boost the taste with some fun additions. Consider these: - Sliced mushrooms for umami flavor - Snap peas for extra crunch - Chili flakes for heat - A squeeze of lime for zest These optional ingredients can change the whole vibe of the dish. You can mix and match based on what you like! If you’re missing something, don’t worry! Here are some easy swaps: - Use tofu instead of chicken for a vegetarian option. - Swap soy sauce with tamari for a gluten-free choice. - Replace sesame oil with olive oil if you don’t have it. These substitutions will keep your stir-fry tasty and adaptable. Feel free to get creative based on what you have at home! For the full recipe, check out the details above. First, boil a pot of water. Add the instant ramen noodles. Cook them for about 3 minutes. Drain the noodles and set them aside. You want them firm, not mushy. This step adds a great base for your meal. Next, grab a large skillet or wok. Heat the vegetable oil over medium-high heat. Add minced garlic and grated ginger. Sauté for about 30 seconds until you smell their great aroma. This step adds depth to your dish and makes it more flavorful. Now, toss in the sliced bell peppers, julienned carrots, and broccoli florets. Stir-fry these veggies for 4 to 5 minutes. They should be tender but still crisp. This keeps them colorful and tasty. Then, add the shredded chicken. Stir until it's warm. This makes sure all the flavors mix well. In a small bowl, mix soy sauce, sesame oil, honey, salt, and pepper. Pour this sauce over the chicken and veggies. Stir well to coat everything. Finally, add the cooked ramen noodles. Mix everything together until the noodles heat up. It should all look and smell amazing. Don’t forget to garnish with green onions and sesame seeds before serving. This adds a nice touch to your dish. For the full recipe, check the earlier section. To make your stir-fry shine, focus on high heat. Use a large skillet or wok to give food space. This helps your ingredients cook evenly. Have all your ingredients prepped before you start cooking. This keeps the flow smooth and fast. Keep an eye on your veggies. Stir-fry them for only 4-5 minutes. This keeps them crisp and colorful. If they turn dull or mushy, you’ve cooked them too long. Make sure to cut them into even sizes. This helps them cook at the same rate. Spices can jazz up your dish. Try adding red pepper flakes for heat. A dash of sesame seeds can bring a nutty flavor. You can also use fresh herbs like cilantro or basil. Just sprinkle them on top before serving. For the best taste, mix and match these spices to find your favorite combination. For the full recipe, check the recipe section above. {{image_2}} You can make this dish vegetarian or vegan with a few simple swaps. Use tofu instead of chicken. It adds protein and absorbs flavor well. For a vegan sauce, replace honey with maple syrup or agave. You can also add extra veggies like mushrooms or snap peas for more texture. This keeps the dish vibrant and delicious. If you want more protein options, try shrimp or beef. Shrimp cooks quickly and adds a nice seafood twist. Beef strips give a hearty flavor. You can also mix in edamame for a plant-based boost. This way, you can customize the dish to your taste and needs. Switching up the sauce can change everything. For a spicy kick, add sriracha or chili paste. If you love peanut flavor, mix in peanut butter for creaminess. For a tangy taste, add lime juice and zest. This keeps your ramen stir-fry exciting and fresh each time. After you enjoy your Minute Chicken Ramen Stir-Fry, save the extras. Place leftovers in an airtight container. It helps keep the flavors fresh. Store them in the fridge for up to three days. When you’re ready to eat, it’s quick to reheat. Want to save some for later? You can freeze the stir-fry! Use a freezer-safe container. Make sure to leave some space at the top. The noodles may expand when frozen. This dish stays good for up to three months. Just remember to label the container with the date. To reheat, you can use the microwave or stovetop. If using the microwave, heat in short bursts. Stir often to avoid hot spots. If using the stovetop, add a splash of water. This adds moisture as you warm it up. Cook over low heat until it’s hot throughout. Enjoy your tasty meal again! For the full recipe, check out the details above. Minute Chicken Ramen Stir-Fry takes about 20 minutes to make. You can prep the ingredients in just 10 minutes. Cooking the noodles and stir-frying will take another 10 minutes. This quick meal is perfect for busy nights. Yes, you can use other types of noodles. Soba noodles, udon, or even rice noodles work great. Just adjust the cooking time based on the noodle type. Make sure they are cooked al dente for the best texture. Many veggies are great for stir-frying. I love using bell peppers, carrots, and broccoli. You can also add snap peas, mushrooms, or bok choy. Choose what you enjoy or have on hand for tasty results. Absolutely! This recipe is perfect for meal prep. You can make a big batch and store it in the fridge. It holds well for up to four days. Just reheat it in the microwave or on the stove before serving. Check out the Full Recipe for tips on storage! In this post, we explored how to make a quick Minute Chicken Ramen Stir-Fry. We discussed essential ingredients, step-by-step cooking instructions, and helpful tips. You learned about storage options and variations to suit your taste. Stir-fry is fun and easy to make. You can customize it based on what you have. So, get creative and enjoy your cooking!

Minute Chicken Ramen Stir-Fry Quick and Tasty Meal

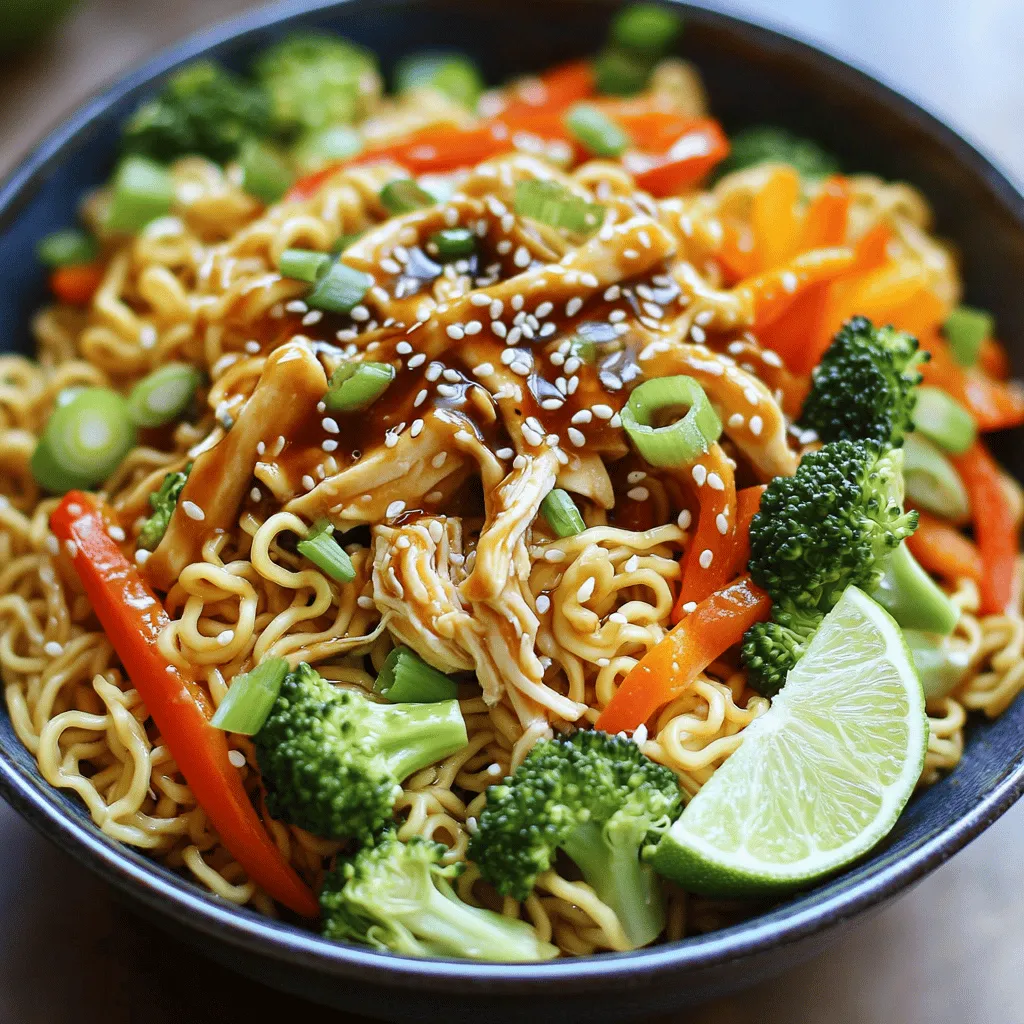
If you’re hungry and short on time, I’ve got the perfect solution for you: Minute Chicken Ramen Stir-Fry! This quick

- 2 pounds beef chuck roast - 1 onion, sliced - 4 cloves garlic, minced For the heart of this dish, you need the beef chuck roast. This cut is rich and tender. It breaks down beautifully during cooking. The onion adds sweetness and depth. Garlic brings in that punchy flavor we all love. - 1 cup beef broth - 2 tablespoons Worcestershire sauce - 2 teaspoons dried thyme Beef broth adds moisture and richness. Worcestershire sauce gives a savory kick. Thyme adds an earthy note. Together, these ingredients create a flavorful base that enhances the beef. - 8 ounces sharp cheddar cheese, shredded - 8 hoagie rolls - Fresh parsley, chopped (for garnish) Sharp cheddar cheese melts perfectly over the beef. It adds creaminess and richness to the sandwich. Hoagie rolls hold all the goodness together. Fresh parsley gives a nice, bright finish. You can also use the Full Recipe for more details. Start by patting the beef chuck roast dry with paper towels. This helps the seasoning stick. Next, season the beef well with salt and pepper on all sides. This step adds a lot of flavor. Now, heat a large skillet over medium-high heat. Sear the beef roast for about 4-5 minutes on each side until it gets a nice brown color. This browning locks in the taste and makes the beef even better. Once the beef is seared, it’s time to move it to the slow cooker. Place the beef in the cooker and add the sliced onion, minced garlic, and beef broth. Next, pour in the Worcestershire sauce and sprinkle the dried thyme and smoked paprika on top. Mix everything gently. Cover the slow cooker. You can choose to cook on low for 8 hours or on high for 4 hours. The beef will become very tender and easy to shred. After cooking, take the beef out of the slow cooker. Use two forks to shred the beef into bite-sized pieces. Return the shredded beef to the cooker and mix it with the juices for more flavor. To make the sandwiches, split the hoagie rolls. Fill them generously with the shredded beef mixture. Top each sandwich with a handful of shredded cheddar cheese. For a special touch, place the sandwiches under a broiler for 2-3 minutes. This melts the cheese and makes it bubbly. Don't forget, you can find the full recipe for these tasty sandwiches above. Enjoy crafting your savory slow cooker beef and cheddar sandwiches! Using fresh herbs makes a big difference in taste. Try adding fresh thyme or parsley to brighten your dish. Fresh herbs add a nice pop of flavor that dried herbs can’t match. Searing your beef is key for rich flavor. When you brown the beef, it caramelizes the outside. This process creates a deep, savory base for your sandwich. It’s a simple step that makes a big impact. You can use different cuts of beef for this recipe. Chuck roast works well, but brisket or round can also shine. Just remember that cooking times may change with different cuts. Always check for tenderness. Feel free to add veggies or spices to the slow cooker. Carrots, bell peppers, or mushrooms can boost flavor and nutrition. Spices like cumin or chili powder can also add a twist. For a great presentation, serve your sandwiches on a wooden board. Line the board with parchment paper for easy cleanup. Add pickles and chips on the side for extra crunch. Pair these sandwiches with a light salad or coleslaw. A cold drink, like iced tea or lemonade, complements the rich flavors well. For more ideas, check the Full Recipe for different serving options! {{image_2}} You can switch up the cheese in this recipe. Swiss cheese adds a mild flavor. Provolone is another great choice. For those who want a dairy-free option, consider vegan cheese. There are many brands that melt well. Look for one that suits your taste. If you need gluten-free options, choose gluten-free hoagie rolls. Many stores offer these. They taste great and hold up well. For those watching sodium, use low-sodium beef broth. This keeps your dish tasty without too much salt. To add a new twist, try BBQ sauce. It gives a sweet and tangy kick. You can mix it with the beef before serving. Another idea is to add Italian seasonings. Think about oregano, basil, or even some red pepper flakes. This adds depth and a unique flair to your sandwich. For the full recipe, check out the details above and get cooking! To store leftovers in the refrigerator, let the beef cool first. Place the beef in an airtight container. It stays fresh for about 3 to 4 days. For freezing assembled sandwiches, wrap each sandwich tightly in plastic wrap. Then, place them in a freezer bag. This way, they will keep well for about 2 to 3 months. You can reheat the beef in the oven or microwave. For the oven, preheat to 350°F. Place the beef in an oven-safe dish, cover it with foil, and heat for 15-20 minutes. In the microwave, use medium heat for about 2-3 minutes. To avoid sogginess, add a paper towel over the beef. This helps absorb excess moisture. Leftovers can be safely stored in the fridge for 3 to 4 days. If you freeze them, they last for 2 to 3 months. Signs that the beef has gone bad include a sour smell or a change in color. If you see any mold, discard it right away. For more details, check the Full Recipe. Yes, you can use frozen beef. Just make sure to thaw it before cooking. If you cook from frozen, increase the cooking time. For best results, place the frozen beef in the fridge a day before cooking. This way, it thaws evenly and stays safe. To check if the beef is done, look for tenderness. The beef should shred easily with a fork. You can also use a meat thermometer. Aim for an internal temperature of around 190°F for perfect results. If it’s not tender yet, let it cook longer. Many sides pair well with these sandwiches. Here are some great ideas: - Coleslaw: Adds a crunchy, fresh bite. - Potato Chips: For a classic, salty crunch. - Pickles: Their tanginess balances the rich beef. - French Fries: Always a hit with sandwiches. - Garden Salad: Lightens up the meal with fresh veggies. These sides will make your meal even more delightful! This blog post offered a clear guide to making delicious Slow Cooker Beef and Cheddar Sandwiches. We covered main ingredients like beef chuck roast and key flavorings. You learned step-by-step cooking methods and helpful tips to boost flavor. We also discussed variations to fit dietary needs and how to store leftovers properly. In conclusion, this recipe is simple yet satisfying. Enjoy creating your own tasty sandwiches with family or friends. You'll impress everyone with your cooking skills. Happy cooking!

Savory Slow Cooker Beef and Cheddar Sandwiches Delight

Get ready to savor the rich flavors of Savory Slow Cooker Beef and Cheddar Sandwiches! This mouthwatering recipe transforms tender

To can tomatoes, you will need these simple ingredients: - 10-12 ripe tomatoes (any variety) - 1 tablespoon lemon juice (per quart) - 1 teaspoon salt (optional, per quart) - Water (for processing) Using fresh, ripe tomatoes makes a big difference. Choose tomatoes that are firm and free from blemishes. Any type can work, but meaty varieties like Roma hold up well. Always add lemon juice for safety. The acidity helps prevent bacteria from growing. Salt is optional but adds flavor. If you don't have lemon juice, you can use citric acid instead. Just use 1/4 teaspoon per quart. For salt, feel free to skip it if you're watching your sodium. If you want a hint of spice, consider adding crushed red pepper flakes. This can give your canned tomatoes a little kick. Start by getting your jars ready. You need to sterilize your canning jars, lids, and rings. To do this, boil them in a large pot of water for at least 10 minutes. After that, let them dry on a clean towel. This step helps keep your canned tomatoes safe from germs. Next, wash the tomatoes well. This removes dirt and any debris. To make peeling easier, score a small X on the bottom of each tomato. Blanch them in boiling water for 1-2 minutes. You will see the skins start to crack. Quickly move them to an ice bath to cool down. Once cooled, peel off the skins. You can chop the tomatoes into quarters or leave them whole, based on what you like. Now it’s time to fill the jars. In each sterilized jar, add 1 tablespoon of lemon juice and 1 teaspoon of salt if you want. Start packing the tomatoes into the jar. Leave about 1/2 inch of space at the top. Wipe the rims of the jars with a clean cloth to help ensure a good seal. Place the sterilized lids on top and screw on the rings until they are fingertip-tight. Next, place the jars in a boiling water canner. Make sure they are fully submerged. Process the jars for 40-45 minutes, adjusting for your altitude if needed. After processing, carefully remove the jars with jar tongs. Place them on a clean towel or rack to cool completely. You should hear a popping sound as the jars seal. To check the seal, press down in the center of the lid. If it does not pop back, the jar is sealed. If it does pop back, refrigerate and use it in a few days. This process is part of the full recipe for canning tomatoes, and it’s simple once you get the hang of it! Safety is key in home canning. Always use clean, sterilized jars. This keeps out germs. Use a boiling water bath for canning tomatoes. This method helps kill harmful bacteria. Always check your jars after cooling. Press the lid's center. If it pops back, the jar didn’t seal. Store any unsealed jars in the fridge and use them soon. Avoid using damaged jars or lids. They can cause leaks. Don’t skip the lemon juice. It adds acidity and helps preserve the tomatoes. Make sure to leave enough headspace in the jars. This prevents overflow during processing. Lastly, don’t rush the cooling process. Let jars cool slowly to ensure a good seal. To seal jars well, wipe the rim before sealing. This removes any food particles that may block the seal. Tighten the rings just until they are snug. Too loose, and air may enter; too tight, and they may break. After processing, let your jars sit undisturbed. You will hear the popping sound as they seal. This sound means your hard work has paid off! You can find the full recipe above to get started. {{image_2}} You can make your canned tomatoes extra tasty by adding some simple ingredients. You might try: - Fresh basil leaves - Oregano - Garlic cloves - Red pepper flakes - Bay leaves Just add these items to the jars before sealing them. Each of these add-ins gives your tomatoes a unique flavor. Experiment to find your favorite mix! You can use two main methods for canning tomatoes: water bath canning and pressure canning. - Water Bath Canning: This method is simple and works well for high-acid foods. It uses boiling water to seal jars. The tomatoes get heated enough to kill germs. This method is great for plain canned tomatoes and works well with the full recipe. - Pressure Canning: This method uses steam and high pressure. It is best for low-acid foods. It heats jars at a higher temperature. This helps keep your food safe and fresh longer. Choose the method that suits your tomatoes best! Canned tomatoes are super versatile! You can use them in many recipes. Here are some ideas: - Soups: Add them to your favorite soup for a rich base. - Sauces: Use them for pasta sauce or pizza sauce. - Stews: Toss them into stews for added flavor. - Salsas: Blend them with onions, peppers, and spices for salsa. - Casseroles: Layer them into your casseroles for moisture and taste. Canned tomatoes make cooking quick and easy. Enjoy your homemade flavor! Store your canned tomatoes in a cool, dark place. A pantry or cupboard works well. Keep them away from heat and light. This helps keep the flavors fresh. Make sure they are upright. If they fall over, they may leak. Canned tomatoes can last for up to a year. If stored well, they may last even longer. Check the canning date to track freshness. Always use the oldest jars first. This keeps the flavors at their best. Inspect your jars before use. Look for any dents, rust, or leaks. If you see any of these, do not use the jar. Check the lid too. If it bulges or pops when you press it, throw it away. If the tomatoes smell bad or look off, discard them. Always prioritize safety over taste. Canned tomatoes can last for a year or more. Store them in a cool, dark place. This helps keep their taste fresh. After opening, use them within five days. Always check for signs of spoilage before use. You can use overripe tomatoes, but they may not taste as good. They can be softer and more watery. If you choose them, make sure they are still safe to eat. Look for any bad spots and cut them away. If your jars didn't seal, don't worry. First, check the lid. If it pops back when pressed, it didn't seal. You can reprocess the jar or refrigerate it. Use the contents within a few days. Always keep an eye on your jars. If you see any signs of spoilage, throw them away. In this post, we covered all you need for successful canning. You learned about required ingredients, tips for preparation, and step-by-step instructions. We discussed safety guidelines and common mistakes too. Plus, I shared ways to store canned tomatoes and their shelf life. Remember to keep an eye on your jars for spoilage signs. Home canning can be fun and rewarding. Now you can create tasty meals with your own home-canned tomatoes. Enjoy the process, and let your creativity shine!

Beginner’s Guide to Canning Tomatoes Made Easy

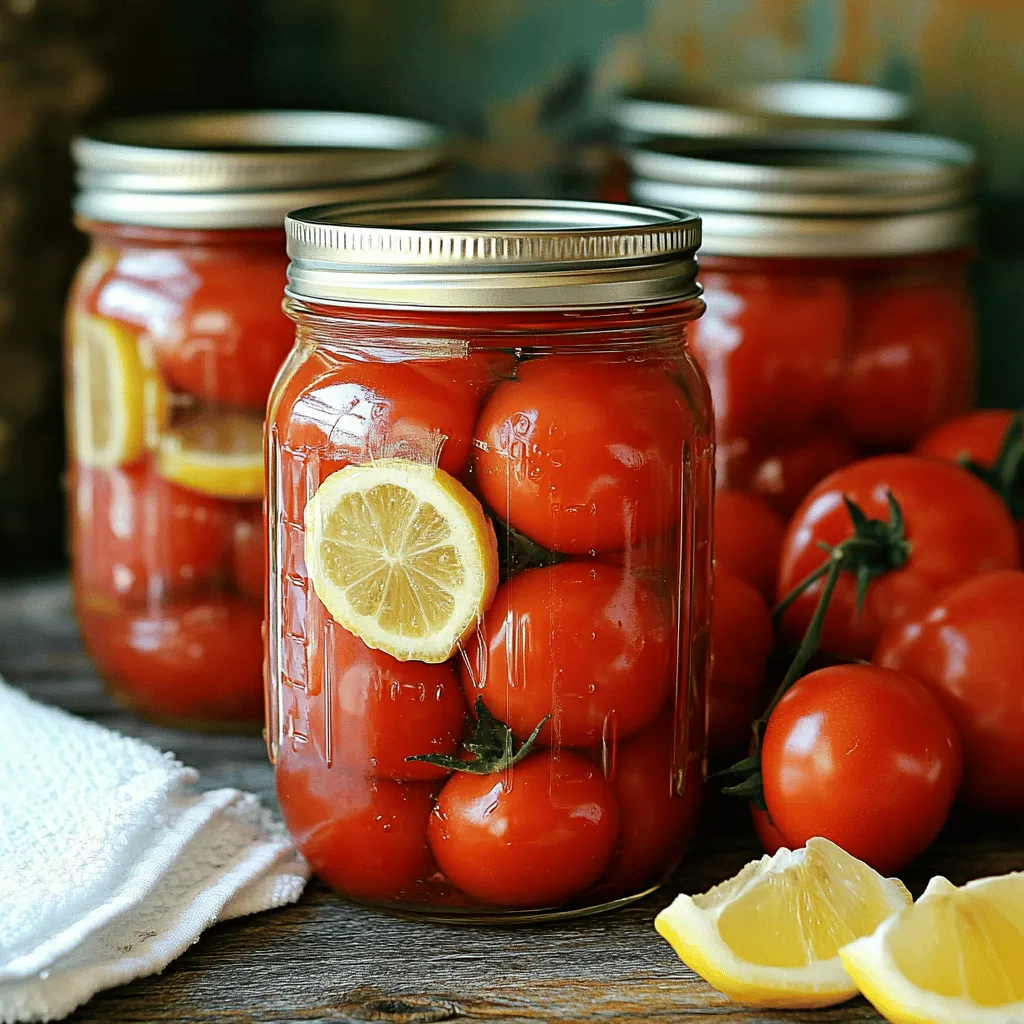
Are you ready to dive into the art of canning tomatoes? In this beginner’s guide, I’ll share easy steps to

- 4 chicken thighs (boneless and skinless) - 1/4 cup soy sauce - 2 tablespoons honey - 3 cloves garlic, minced - 1 tablespoon fresh ginger, grated - 2 cups chicken broth - 1 cup water - Salt and pepper to taste To make Caramelized Soy Chicken with Ginger Broth, you need key ingredients. First, choose chicken thighs. They cook well and stay juicy. Next, grab soy sauce and honey. These two add rich flavor and sweetness. The garlic and ginger bring warmth and zest to the dish. For the broth, use chicken broth as the base. It adds depth. Mix it with water to balance flavors. Don’t forget to season with salt and pepper to taste. These simple ingredients work together to create a comforting meal. You can find the Full Recipe at the end of this article. First, prepare the marinade. In a mixing bowl, whisk together: - 1/4 cup soy sauce - 2 tablespoons honey - 1 tablespoon sesame oil - 3 cloves garlic, minced - 1 tablespoon fresh ginger, grated This mix creates a rich flavor. Next, place the chicken thighs in a resealable plastic bag. Pour the marinade over the chicken. Seal the bag and massage it gently. Let it marinate in the fridge. Aim for at least 30 minutes. For best results, marinate for up to 2 hours. This allows the flavors to soak in. Now, let's cook the chicken. Heat a bit of oil in a large skillet over medium-high heat. Remove the chicken from the marinade, but save the marinade for later. Place the chicken in the hot skillet. Cook for about 5-6 minutes on each side until golden brown. Make sure it's cooked through. Once done, take the chicken out and let it rest. To make the ginger broth, use the same skillet. Add back the reserved marinade along with: - 2 cups chicken broth - 1 cup water Bring this mixture to a boil. Then, reduce the heat to a simmer for about 5 minutes. This helps meld the flavors. Adjust the broth's taste with salt and pepper as needed. Slice the rested chicken and return it to the skillet. Let it simmer for another 2-3 minutes. This step helps the chicken absorb the broth’s taste. Serve the chicken in bowls and ladle the ginger broth over it. Garnish with sliced green onions and chopped cilantro. Enjoy! For a complete guide, check the Full Recipe. To make a great marinade, time is key. Marinate your chicken for at least 30 minutes. For the best flavor, aim for 2 hours. This gives the chicken time to soak in all the delicious tastes. To enhance flavor, add a pinch of salt or a splash of rice vinegar. This will balance the sweetness of the honey and the saltiness of the soy sauce. Searing chicken thighs is vital for great taste. Heat your skillet over medium-high heat before adding the chicken. This step creates a nice golden crust. Cook each side for 5-6 minutes. To check if chicken is done, use a meat thermometer. The internal temperature should reach 165°F. Presentation makes a meal pop. Serve the chicken sliced in bowls. Pour the ginger broth over it for a cozy feel. Garnish with green onions and cilantro for color. For sides, steamed rice or sautéed vegetables pair well. They soak up the broth and add texture. {{image_2}} To change things up, try using different proteins. You can use chicken breast instead of thighs. Pork or tofu are great swaps too. They work well with the marinade. For a vegan option, use tempeh or seitan. Both soak up flavors nicely. You can also use chickpeas for a hearty choice. They pair well with the broth. Want to add spice or heat? Try adding red pepper flakes or sriracha. A pinch can make a big difference. If you prefer a milder flavor, skip the heat. Incorporating vegetables is a smart choice too. Carrots, bell peppers, or snap peas add color and crunch. You can sauté them in the same skillet. This makes for a tasty and balanced meal. When it comes to serving, consider presentation. Bowls are great for family-style meals. They hold the broth and chicken nicely. If you want something fancy, plate the chicken with a drizzle of broth. This looks elegant and is fun to eat. For a refreshing option, serve it cold. Chill the broth and chicken. This can be a tasty summer dish. It’s light and packed with flavor. For the full recipe, check out the Caramelized Soy Chicken with Ginger Broth. To store leftovers, place the chicken and broth in an airtight container. Make sure it cools down first. This helps keep the flavors fresh. In the fridge, your leftovers last up to three days. Always check for any signs of spoilage before eating. If you want to freeze this dish, let it cool completely. Next, put the chicken and broth in a freezer-safe bag. Squeeze out as much air as possible before sealing. You can freeze it for up to three months. When you’re ready to enjoy it, thaw it in the fridge overnight. For reheating, warm it on the stove over low heat. Stir gently to keep the chicken tender. You can make this meal in advance for busy days. Marinate the chicken the night before for deeper flavors. Cook it and store it in the fridge. Portion it out for easy lunches or dinners. This way, you can enjoy a warm, tasty meal whenever you want. Yes, you can use chicken breasts instead of thighs. Chicken breasts are leaner but may dry out faster when cooking. If you opt for bone-in cuts, they stay juicy and flavorful. Just add a few extra minutes to the cooking time. If you need a soy sauce alternative, try coconut aminos. It's a bit sweeter and less salty. Another option is tamari, which is gluten-free. You can even use liquid aminos for a similar taste. To add heat, mix in some red pepper flakes or sriracha. You can also add fresh sliced chili peppers for a bold kick. Adjust the amount based on your heat preference. This post covered the key ingredients, steps, and tips for making a delicious chicken dish. You learned about marinating chicken thighs, enhancing flavors, and perfect cooking techniques. With variations and storage tips, you can adapt this recipe to suit your needs. Remember, cooking is all about experimenting. Adjust flavors and ingredients to create your own version. Enjoy the process, share your dish with friends, and make it memorable!

Caramelized Soy Chicken with Ginger Broth Delight

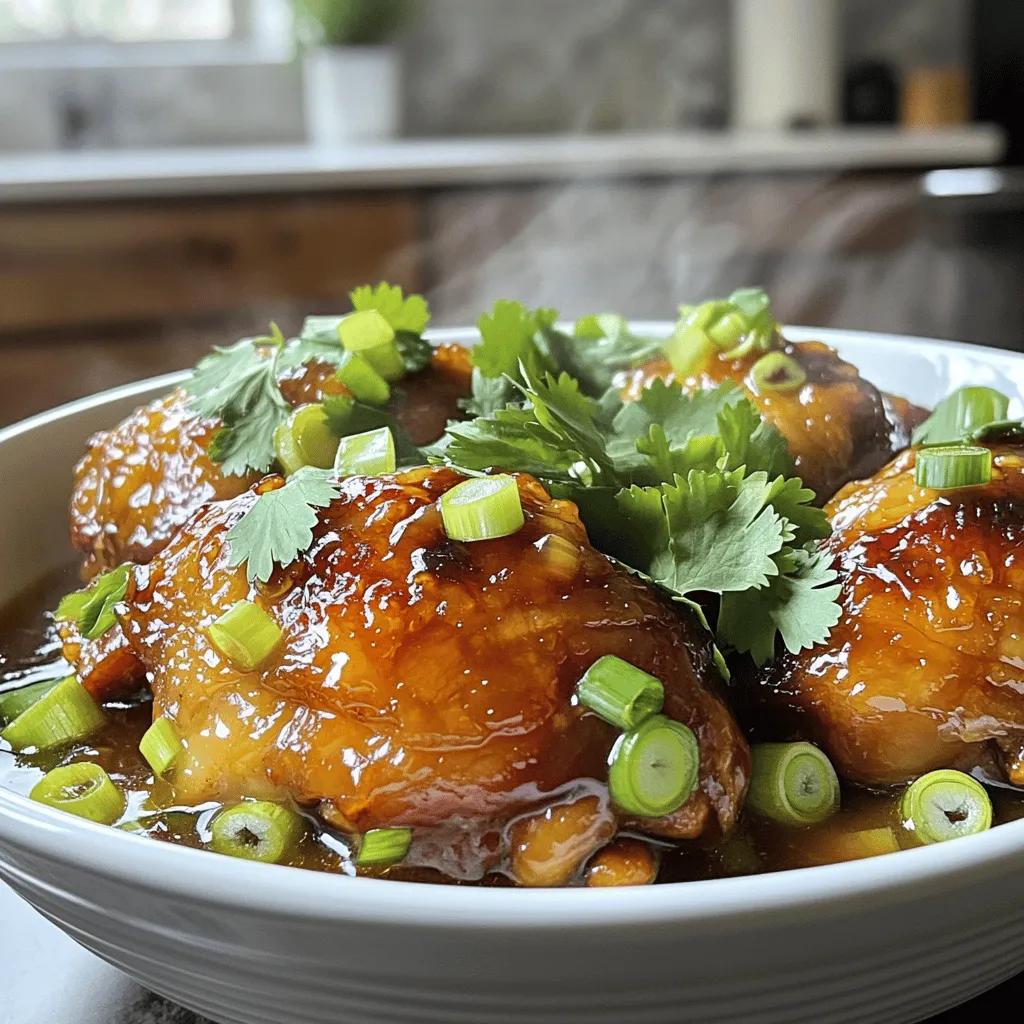
Get ready to savor a burst of flavor with my Caramelized Soy Chicken with Ginger Broth Delight! This dish pairs

- 1.5 pounds boneless, skinless chicken thighs - 1 can (10 oz) diced tomatoes with green chilies - 1 cup chicken broth - 1 bell pepper (red or green), sliced - 1 medium onion, diced - 3 cloves garlic, minced - 2 tablespoons Cajun seasoning - 1 teaspoon smoked paprika - 1 teaspoon dried thyme - 8 ounces penne pasta - 1 cup heavy cream - Salt and pepper to taste - 1/4 cup fresh parsley, chopped (for garnish) - Grated Parmesan cheese (for serving) When I make Crockpot Cajun Chicken Pasta, I love to focus on the ingredients. I start with 1.5 pounds of boneless, skinless chicken thighs. These thighs are tender and juicy, perfect for slow cooking. I add a can of diced tomatoes with green chilies for a burst of flavor. The tomatoes bring moisture and a little heat. Next, I pour in 1 cup of chicken broth. This adds depth to the dish. I slice one bell pepper, either red or green, and dice one medium onion. Both vegetables add sweetness and texture. I also use three cloves of minced garlic for a fragrant kick. The spices are key. I measure out two tablespoons of Cajun seasoning, one teaspoon of smoked paprika, and one teaspoon of dried thyme. These spices give the dish its unique Cajun flair. For the pasta, I choose 8 ounces of penne. It holds the sauce well and makes every bite satisfying. I finish with 1 cup of heavy cream for a rich, creamy texture. Finally, I season with salt and pepper to taste. To garnish, I chop 1/4 cup of fresh parsley and have grated Parmesan cheese ready for serving. - Additional spices and seasonings - Other vegetables (e.g., zucchini or spinach) Sometimes, I like to mix in other spices. You can add cayenne for more heat or some Italian herbs for a twist. Adding vegetables like zucchini or spinach boosts nutrition and color. - Chicken alternatives (e.g., turkey or tofu) - Dairy-free options for heavy cream If you want to switch things up, use turkey instead of chicken. Tofu works well for a meat-free option. For a dairy-free version, coconut cream can replace heavy cream. To start, you will layer the chicken and vegetables in the crockpot. First, place the boneless chicken thighs at the bottom. Make sure they fit snugly. Next, add the sliced bell pepper, diced onion, and minced garlic on top. This layering helps all the flavors mix well as they cook. Now, let’s mix the liquids and seasonings. In a small bowl, combine the diced tomatoes with juices, chicken broth, Cajun seasoning, smoked paprika, and thyme. Stir until everything is blended. Pour this mix over the chicken and veggies in the crockpot. For cooking, set your crockpot to low for 6-7 hours or high for 3-4 hours. If you want to check the chicken, it should be fully cooked and tender when done. Cooking times may change based on your crockpot model. About 30 minutes before serving, carefully remove the chicken. Use two forks to shred it into bite-sized pieces. Set it aside for a moment while you cook the pasta. To cook the pasta in the crockpot, stir in the penne pasta. Cover the crockpot and let it cook for 15-20 minutes. This will help the pasta soak up all the flavors. Once the pasta is tender, add the heavy cream. Mix well to combine everything. Finally, return the shredded chicken to the crockpot. Season with salt and pepper to taste. Your delicious meal is almost ready! For the full recipe, check the earlier section. To make shredding chicken easy, use two forks. Hold one fork in each hand. Pinch the chicken with one fork and pull it apart with the other. This method works best when the chicken is hot. For pasta, cook it just until firm. Al dente pasta has a slight bite, which makes it perfect for this dish. Stir it gently into the sauce to avoid mushiness. Adjust cooking times based on the thickness of your chicken. If your chicken is thicker, add 30 minutes to the cooking time. For thin pieces, check for doneness sooner. Meal prep is key with this dish. You can chop the veggies ahead of time. Store them in the fridge for quick assembly later. Pair your Cajun chicken pasta with a simple side salad. A fresh green salad adds crunch and balance. For a wine pairing, try a chilled Sauvignon Blanc. It complements the spice and creaminess of the pasta. If you want a red, a light Pinot Noir works well too. For the full recipe, check out the details above! {{image_2}} You can easily adjust this recipe to fit different diets. For a gluten-free option, swap the penne pasta with gluten-free pasta. Many brands offer great alternatives that taste good. You can find these at most grocery stores. For low-carb options, consider using zucchini noodles or spaghetti squash. These choices keep the dish light and flavorful. To add a smoky flavor, try using smoked sausage or extra smoked paprika. You can also mix in some cayenne pepper for heat. If you love cheese, feel free to get creative. Adding different cheeses, like pepper jack or gouda, can change the taste. A blend of cheeses gives a rich texture and taste. Serving your dish with crusty bread makes it perfect for soaking up the sauce. A fresh baguette or garlic bread pairs well with this meal. If you want to turn it into a casserole, bake it in the oven. Just layer the pasta and chicken in a baking dish, top with cheese, and bake until bubbly. This makes for a hearty and comforting meal. Check out the Full Recipe to explore more ideas! To store leftovers, place them in an airtight container. This keeps the dish fresh. Let the pasta cool before sealing. In the fridge, it stays good for about 3 to 4 days. For longer storage, freezing is a great option. Simply use freezer-safe containers or bags. Make sure to label them with the date. This way, you know when to use them. When reheating, avoid the microwave if you can. It can make the pasta mushy. Instead, use a pot on the stove. Add a splash of water or broth to keep it moist. Heat over low to medium heat, stirring gently. You can also use the oven. Place the pasta in a baking dish, cover it with foil, and heat at 350°F until warm. This method helps keep the flavors intact. In the fridge, expect leftovers to last about 3 to 4 days. After that, they may spoil. Look for signs like off smells or mold. If it smells bad or looks odd, it’s best to toss it. Always trust your senses when it comes to food safety. It takes about 15 minutes to prep. After that, you cook it for 6 to 7 hours on low. If you set it to high, it only takes about 3 to 4 hours. You can easily set it and forget it while you go about your day. Yes, you can! If you don’t have a crockpot, you can use a large pot on the stove. Start by cooking the chicken in the pot until it’s browned. Then, add your veggies and liquids. Let it simmer for about 30 minutes. Add the pasta and cook until it’s soft. This method takes less time but still gives you a tasty meal. This dish pairs well with a simple green salad or garlic bread. You can also serve it with roasted vegetables or a side of steamed broccoli. These options help balance the rich flavors of the pasta and make your meal complete. Yes, it can be! The spice level can be adjusted. If your kids prefer milder food, you can use less Cajun seasoning. You can also omit any spicy ingredients. Serve it with a side of cheese, which kids usually love, to enhance the flavor without the heat. In this blog post, we explored a tasty crockpot Cajun chicken pasta recipe. We covered the full list of ingredients, preparation steps, and cooking instructions. You also learned useful tips, variations, and storage info. Remember, cooking should be fun and easy. Experiment with flavors and make the dish your own. Enjoy the process and share this recipe with family and friends for a delicious meal!

Crockpot Cajun Chicken Pasta Flavorful Family Meal

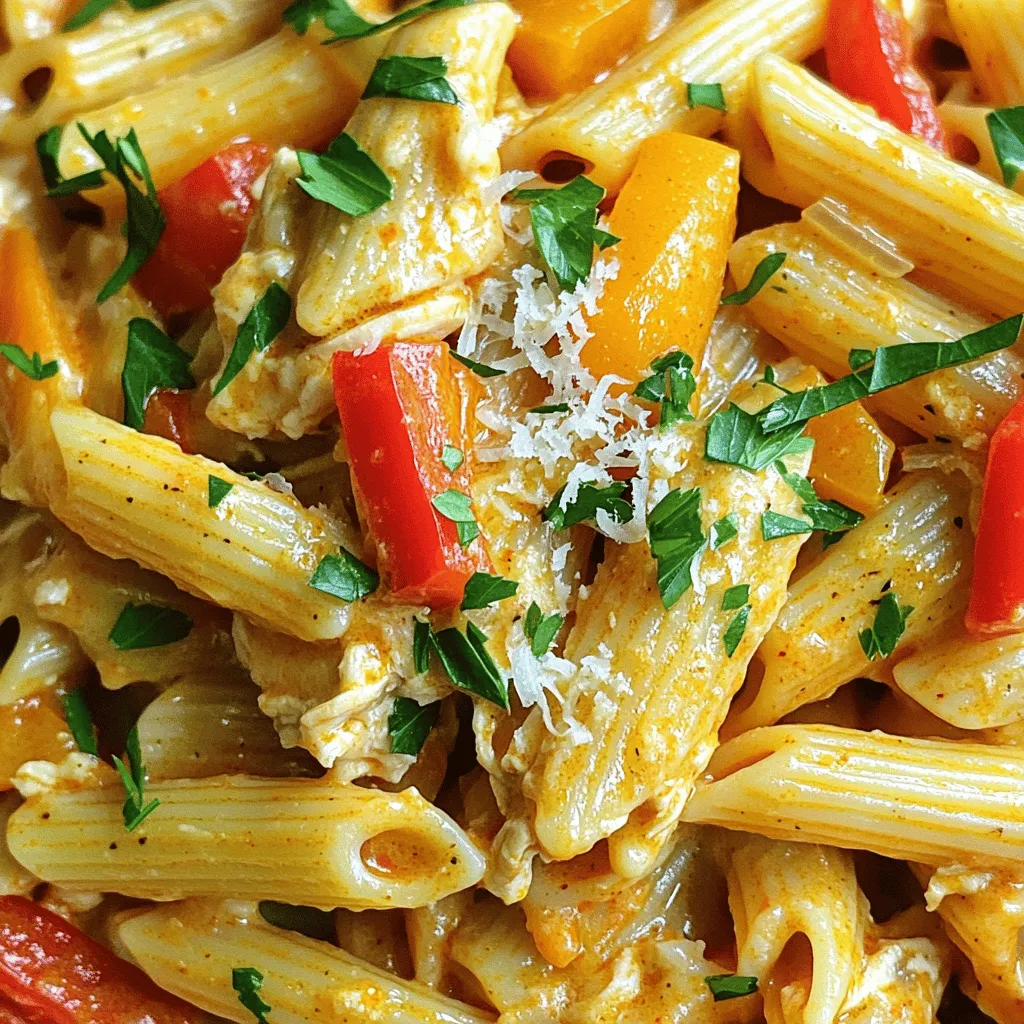
Are you ready to impress your family with a delicious and easy meal? This Crockpot Cajun Chicken Pasta is packed

To make soft holiday thumbprint cookies, you need simple, tasty ingredients. Here’s what you’ll need: - 2 cups all-purpose flour - 1/2 teaspoon baking powder - 1/4 teaspoon salt - 1/2 cup unsalted butter, softened - 1/2 cup granulated sugar - 1/4 cup powdered sugar - 1 large egg yolk - 1 teaspoon vanilla extract - 1/2 cup colorful sprinkles (or chopped nuts) - 1/2 cup your favorite jam (raspberry, apricot, or strawberry) Each ingredient plays a role. Flour gives structure. Butter adds richness. Sugars bring sweetness. The egg yolk helps bind the dough. Vanilla adds a warm flavor that brightens each bite. You can swap some ingredients if needed. Here are a few ideas: - For a dairy-free version, use vegan butter or coconut oil. - If you have no granulated sugar, brown sugar works well for a deeper taste. - You can replace all-purpose flour with almond flour for a gluten-free option. - Different jams can also work. Try chocolate spread or lemon curd for a fun twist. Be creative! These swaps can change the flavor and texture. You’ll need a few basic tools to make these cookies: - Mixing bowls (one large, one medium) - Whisk or electric mixer - Baking sheet lined with parchment paper - Measuring cups and spoons - A small spoon or your thumb for making the indents - A wire rack for cooling Having the right tools makes baking easier. Gather everything before starting. This way, you can enjoy the process! First, preheat your oven to 350°F (175°C). This step is key to getting soft cookies. While the oven heats, line a baking sheet with parchment paper. This paper helps the cookies not stick and makes cleanup easy. Next, grab two bowls. In a medium bowl, whisk together the flour, baking powder, and salt. Set this bowl aside. In a large bowl, cream the softened butter with granulated sugar and powdered sugar. Mix until it looks light and fluffy. Then, add the egg yolk and vanilla extract. Stir until it is well combined. Gradually add the flour mixture. Mix just until combined to keep the cookies soft. Now it’s time to shape the cookies. Use your hands to form small balls of dough, about 1 inch wide. Roll each ball in colorful sprinkles or chopped nuts for a fun touch. Place the balls on your baking sheet, leaving about 2 inches between them. Use your thumb or a small spoon to press down in the center of each cookie. This creates a little well for jam. Spoon a small amount of your favorite jam into each well. Be careful not to overfill. Bake the cookies for 10-12 minutes or until the edges turn lightly golden. Once baked, let them cool on the sheet for about 5 minutes. After that, transfer them to a wire rack to cool completely. To get soft holiday thumbprint cookies, focus on the butter. Use room temperature butter. This helps it cream well with sugar. Cream until the mix is light and fluffy. This step adds air and makes cookies soft. Don’t overmix the dough once you add flour. Just mix until combined. For the filling, choose your favorite jam. Raspberry, apricot, and strawberry all work well. When you press your thumb into the cookie, make a deep enough well. This helps hold the jam. Use a small spoon to add the jam. Avoid overfilling to prevent spilling during baking. One mistake is baking too long. Check your cookies at 10 minutes. They should be lightly golden on the edges. Another error is not using enough flour. If the dough feels sticky, add a bit more flour. Lastly, don’t skip the chilling step if your dough is warm. Chilling helps the cookies hold their shape. For more details, see the Full Recipe. {{image_2}} You can use many types of jam for your thumbprint cookies. Raspberry, apricot, and strawberry are classic choices. Each flavor adds a unique twist to the cookie. For a fun change, try orange marmalade or blueberry jam. Mixing different jams can also create a burst of flavor. Just remember to use your favorites! Coating your cookies can change their look and taste. Colorful sprinkles are a fun way to add cheer. They make the cookies festive and bright. If you prefer a crunch, use chopped nuts like almonds or walnuts. You can even mix both! This gives your cookies a unique texture and flavor. You can easily make these cookies gluten-free. Swap all-purpose flour with a gluten-free blend. Be sure to check the label for a one-to-one substitute. This way, everyone can enjoy them. The texture may be a bit different, but the taste will still shine. You can find gluten-free jams to match, too. Enjoy a festive treat that fits your needs! For the complete recipe, check out the Full Recipe. To keep your soft holiday thumbprint cookies fresh, use an airtight container. Line the container with parchment paper to prevent sticking. Place the cookies in a single layer when possible. If you stack them, add parchment between the layers. This keeps their shape and taste intact. Stored properly, these cookies will last for about one week at room temperature. If you want to enjoy them longer, consider freezing them. The cookies may dry out after a week, so avoid leaving them out too long. To freeze the cookies, first, let them cool completely. Then, place them in a single layer on a baking sheet. Freeze them for about an hour to firm up. After that, transfer the cookies to a freezer-safe bag or container. Be sure to label the bag with the date. They can stay in the freezer for up to three months. When you want to enjoy a cookie, just thaw it at room temperature. For a treat, you can also warm them in the oven for a few minutes. To make your thumbprint cookies softer, use room temperature butter. This helps create a light texture. Make sure not to overmix the dough. Overmixing can make the cookies tough. Also, bake them for the right time. If you bake them too long, they will harden. Finally, let them cool on a wire rack. This step helps keep them soft. Yes, you can use different types of jam! Raspberry, apricot, and strawberry are great options. You can even try orange marmalade or blueberry jam. Each jam adds its own flavor and color. Think about what you like best. I love mixing flavors for fun surprises! The best sprinkles for decoration are colorful and festive! You can use nonpareils, jimmies, or sugar sprinkles. Choose sprinkles that match your holiday theme. For a classic look, use red and green. For a unique twist, try gold or silver. Sprinkles add fun and joy to the cookies. - Where can I find the Full Recipe? You can find the Full Recipe in the introductory section of this article. It has all the details you need to make these tasty cookies. In this blog post, we explored key ingredients for thumbprint cookies and how to make them. We discussed oven prep, mixing dough, and shaping cookies. I shared tips for texture and avoiding common mistakes. You learned about flavor variations and the best ways to store cookies. Now, you’re ready to create tasty thumbprint cookies that everyone will love. Enjoy baking and let your creativity shine!

Soft Holiday Thumbprint Cookies Festive and Flavorful

Get ready to fill your kitchen with joy this holiday season! Soft Holiday Thumbprint Cookies are the perfect festive treat

- 4 boneless, skinless chicken breasts - Zest and juice of limes - 1 cup chicken broth - Fresh cilantro, chopped - Ground cumin - Smoked paprika - Garlic powder - Onion powder - Salt and pepper - Diced jalapeño for heat This dish is all about fresh flavors that shine. The chicken provides a blank slate. Lime adds brightness. Cilantro gives a fresh kick. You want to use fresh ingredients for the best taste. For the main ingredients, start with the chicken. I love using boneless, skinless breasts. They cook evenly and stay juicy. The lime zest and juice are key. They infuse the chicken with tang. The chicken broth keeps it moist and adds depth. Now, let’s talk spices. Ground cumin adds warmth. Smoked paprika brings a subtle smokiness. Garlic and onion powders give a savory base. Salt and pepper are essential for balance. If you like heat, add diced jalapeño. It brings a nice kick to the dish. For the full recipe, check the section above. You will see how these ingredients come together. - Combine spices in a small bowl. - Mix 1 teaspoon of ground cumin, smoked paprika, garlic powder, onion powder, lime zest, salt, and pepper. - Rub the spice mixture evenly over the chicken breasts. Make sure each piece is well coated for the best flavor. - Place the seasoned chicken in the crock pot. - Pour 1 cup of chicken broth and the juice of 3 limes over the chicken. Ensure the chicken is mostly submerged in the liquid. - If you like heat, add the diced jalapeño on top. - After cooking, shred the chicken right in the crock pot using two forks. This helps mix the chicken with the tasty cooking liquid. - Stir in 1/4 cup of freshly chopped cilantro just before serving. This adds a fresh burst of flavor to your dish. You can find the complete recipe for this dish [Full Recipe]. When using a crock pot, choose between low and high heat. Cooking on low gives you tender chicken. It takes about 6-7 hours. High heat cooks faster, around 3-4 hours, but may not be as juicy. Always check the chicken’s doneness. Use a meat thermometer to ensure it reaches 165°F. If you don’t have one, look for the chicken to shred easily with a fork. To boost the flavor, add extra lime juice or zest. You can also toss in fresh herbs like oregano or parsley. If you want a kick, add diced jalapeños or red pepper flakes. Mixing in some diced tomatoes or corn can create a fresh twist. These additions make your dish even more vibrant and tasty. Presentation matters! Serve the chicken in bowls over rice or quinoa. Add lime wedges and extra cilantro for a pop of color. Black beans and avocado make great sides. You can also wrap the chicken in tortillas for tasty tacos. These ideas will impress your family and friends. For the full recipe, check out the detailed instructions above. {{image_2}} You can switch up the proteins in this dish. Try using turkey or pork instead of chicken. Both options work well with the same spices. You can also swap out the herbs. Parsley or oregano can give a new twist. They add a different flavor while keeping it fresh. Want a kick? Add more peppers! You can use jalapeños or even serranos for heat. If you prefer sweet, think about adding fruits. Pineapple or mango can add a lovely sweetness. Just toss them in during cooking for a tasty twist. Get creative with how you serve the chicken. Tacos or burrito bowls are fun options. You can also make a bright salad with it. Change up the base, too! Try serving it on quinoa or leafy greens. Each choice offers a new flavor and texture. For the full recipe, be sure to check out the details! To keep your leftovers fresh, store them in an airtight container. Make sure to let the chicken cool before sealing it. This helps prevent moisture build-up. In the fridge, your Crock Pot cilantro lime chicken lasts about 3 to 4 days. Always check for freshness before eating. You can freeze this dish for later use, which is great for meal prep. Allow the chicken to cool before placing it in a freezer-safe bag. Remove as much air as possible to prevent freezer burn. When you’re ready to eat, thaw the chicken in the fridge overnight. For reheating, warm it gently on the stove or in the microwave until heated through. This keeps the flavors intact. Look for signs of spoilage to know when to toss the chicken. If you see any mold or if it smells off, throw it away. If the texture feels slimy or sticky, it's also a sign to discard it. Always trust your senses when it comes to food safety. It takes about 6-7 hours on low or 3-4 hours on high. The cooking time depends on your crock pot's heat settings. Always check the chicken to ensure it's fully cooked. Yes, you can use frozen chicken breasts. Just adjust the cooking time as necessary. Frozen chicken may need extra time to cook through. Always ensure the internal temperature reaches 165°F for safety. You can serve this dish with rice, quinoa, tortillas, or any preferred sides. It pairs well with fresh veggies or a salad for a complete meal. Consider adding black beans or avocado for extra flavor and nutrition. Check out the Full Recipe for more serving ideas! This blog post covered how to make delicious Crock Pot Cilantro Lime Chicken. You learned the necessary ingredients, step-by-step cooking instructions, and helpful tips. We discussed storage methods and how to tweak the recipe for your taste. Remember, cooking should be fun! Don't hesitate to experiment with flavors or serve it in different styles. Enjoy your meal, and share it with others! Your kitchen adventures can inspire flavorful meals again and again.

Crock Pot Cilantro Lime Chicken Simple Flavor Boost

If you crave a meal that’s easy to make and bursting with flavor, you’re in the right place. Crock Pot

For this Frito Corn Salad, fresh corn is best. You can use two cups of corn kernels. If fresh corn is not available, a can of corn works too. Just make sure to drain it well. Fresh corn gives a sweet and crunchy taste. It adds a pop of color and nutrition. This salad needs some bright veggies. Use one cup of cherry tomatoes, halved. They add sweetness and color. Choose a bell pepper of any color and dice it. You will need half a red onion, finely chopped. This gives a nice bite to the salad. Don't forget the cheese! Add one cup of shredded cheddar cheese. It melts in your mouth and gives a rich flavor. The dressing is key for this dish. You will need half a cup of mayonnaise. This makes the salad creamy. Add one tablespoon of lime juice for a tangy kick. One teaspoon of chili powder brings in some spice. Finally, use salt and pepper to taste. Mix all these ingredients well for a smooth dressing. It ties all the flavors together perfectly. You can check out the Full Recipe for more details. Start by gathering your fresh corn. You can use two cups of corn kernels or one can of corn. If using fresh corn, cut the kernels from the cob. Next, take one cup of cherry tomatoes and slice them in half. Then, grab one bell pepper of any color and dice it. Finally, chop half a red onion finely. Place all these veggies in a large mixing bowl. This colorful mix gives your salad a fresh taste. In a separate bowl, add half a cup of mayonnaise. Then, mix in one tablespoon of lime juice and one teaspoon of chili powder. Next, sprinkle in salt and pepper to taste. Whisk these ingredients together until the dressing is smooth. This creamy dressing adds flavor and ties the salad together perfectly. Now, pour the dressing over the bowl of vegetables. Stir gently to combine everything. Be careful not to mash the veggies. Just before serving, fold in one and a half cups of Fritos corn chips and one cup of shredded cheddar cheese. This adds a great crunch. Taste the salad and adjust the seasoning if needed. Transfer it to a serving bowl and garnish with fresh cilantro. For extra flair, serve with lime wedges on the side. For the full recipe, check out the details above. I love to serve Frito Corn Salad at parties and picnics. It looks colorful and tastes great. You can serve it in a big bowl or on a platter. Add extra Fritos on top for a fun crunch. A few lime wedges on the side also add a nice touch. This salad pairs well with grilled meats and sandwiches. You can swap ingredients based on what you have. If you can’t find fresh corn, use canned corn. You can also try black beans instead of corn for a different flavor. If you want a lighter option, Greek yogurt works well in place of mayonnaise. Use mozzarella cheese instead of cheddar for a milder taste. To make Frito Corn Salad even better, add a pinch of cayenne pepper for heat. Fresh herbs like parsley or dill can brighten the dish. You can also toss in avocado for creaminess. A splash of vinegar can balance the flavors too. These small changes can make your salad pop! For the full recipe, visit the link above. {{image_2}} You can switch up the Frito Corn Salad ingredients for fun flavors. Try adding black beans for protein. You can use sweet bell peppers or even spicy jalapeños for heat. Swap the cheddar cheese with pepper jack for a kick. If you like crunch, add diced cucumbers or radishes. You can also use Greek yogurt instead of mayonnaise for a lighter touch. Make this salad fit your event theme. For a barbecue, add grilled corn or smoked paprika. If it’s a fiesta, mix in diced avocados and serve with tortilla chips. For a picnic, use mini Fritos bags as fun serving options. You can even serve the salad in a watermelon bowl for summer parties. This salad can meet many dietary needs. For a vegan option, skip the cheese and mayo. Use avocado or a vegan dressing instead. If you want it gluten-free, choose gluten-free Fritos or corn chips. You can also make it low-carb by omitting the chips and using cauliflower rice. This makes it flexible for all your guests. After enjoying your Frito corn salad, store any leftovers in an airtight container. Keep it in the fridge for up to three days. Make sure to separate the Fritos if you want them crispy. If you mix them in, they may get soft. You don’t need to reheat this salad. Frito corn salad is best served cold. If you must warm it, do so gently in a pan over low heat. Avoid a microwave to keep the texture nice. To keep your Frito corn salad fresh, add the Fritos right before serving. This helps them stay crunchy. If you store the salad, you can also add extra lime juice to keep the corn and veggies zesty. Always check for freshness before eating. Yes, you can make Frito Corn Salad ahead of time. I suggest mixing the corn, veggies, and dressing. Keep the Fritos separate until you serve. This way, they stay crispy. If you mix them too early, the chips will get soggy. You can store the salad in the fridge for up to a day. Just remember to add the Fritos just before serving. To spice up Frito Corn Salad, consider adding jalapeños. Fresh or pickled jalapeños both work well. You can also use a spicier chili powder or hot sauce. Another great option is to mix in some diced green chiles. These additions give the salad a nice kick. Just be careful not to add too much spice at once. You want to keep the balance of flavors. Yes, you can make a gluten-free version of Frito Corn Salad. Look for gluten-free corn chips as a substitute for regular Fritos. Many brands offer gluten-free options that taste great. Always check the label to be sure. The rest of the salad is naturally gluten-free. Fresh corn, veggies, and cheese are all safe. Enjoy the same great taste without the gluten! For the full recipe, check out the [Full Recipe]. This blog post covers all you need for a tasty Frito Corn Salad. We explored fresh ingredients, easy steps, and great tips. You learned how to prepare veggies, make a simple dressing, and mix it all together. You also found useful advice on serving, substituting ingredients, and flavor boosts. Remember, you can customize this salad with various options to fit your needs. Enjoy your creation, and don’t forget to store leftovers properly for the best taste. Now, get cooking and have fun with your Frito Corn Salad!

Frito Corn Salad Tasty Dish for Any Occasion

Looking for a fun, tasty dish to spice up your next gathering? Frito Corn Salad is the perfect choice! With

Older posts
Newer posts
← Previous Page1 … Page44 Page45 Page46 … Page84 Next →

dsad

© 2026 Foodish Talk • Built with GeneratePress

Our Policies

  • Copyright Policy
  • Cookie Policy
  • GDPR Policy
  • Privacy Policy
  • Disclaimer
  • Terms Of Use

More Information

  • Home
  • About
  • Contact
  • Appetizers
  • Dessert
  • Dinner
  • Drinks
©2026, Foodish Talk About Back To Top