Skip to content
DisclaimerTerms Of UseGDPR PolicyCookie Policy

Foodish Talk

  • Home
  • Drinks
  • Appetizers
  • Dinner
  • Dessert
  • About
  • Contact
  • Privacy Policy
DisclaimerTerms Of UseGDPR PolicyCookie Policy

NO-ING-IMG

To make lemon brownies, you need these simple ingredients: - 1 cup unsalted butter, melted - 2 cups granulated sugar - 4 large eggs - 2 teaspoons vanilla extract - 1 cup all-purpose flour - 1/2 teaspoon baking powder - 1/4 teaspoon salt - Zest of 2 large lemons - 1/2 cup lemon juice (freshly squeezed) - Powdered sugar for dusting (optional) Using the right measurements is key to great lemon brownies. If you need to substitute, here are some options: - Use coconut oil instead of butter for a dairy-free option. - Swap granulated sugar with coconut sugar for a healthier choice. - You can use egg substitutes like flaxseed meal or applesauce for vegan brownies. - For gluten-free brownies, use a gluten-free flour blend. Fresh lemon juice gives the best flavor. It has a bright, tangy taste that makes brownies pop. Bottled lemon juice lacks this fresh zest. It may also have preservatives or additives. I recommend using fresh lemons for the zest and juice. This will enhance the overall taste of your brownies. If you must use bottled juice, select one without added ingredients for the best outcome. For this recipe, I suggest sticking to fresh ingredients whenever possible. For the full recipe, check the recipe card above. Start by preheating your oven to 350°F (175°C). This step warms the oven for even baking. Next, grab a 9x13-inch baking pan. Grease the pan well using butter or non-stick spray. This helps the brownies come out easily after baking. In a large mixing bowl, combine 1 cup of melted butter and 2 cups of granulated sugar. Stir them well until they look smooth. Then, add 4 large eggs, one at a time. Make sure to beat well after each egg. This adds air to the mix and helps the brownies rise. Now, mix in 2 teaspoons of vanilla extract for flavor. In another bowl, whisk together 1 cup of all-purpose flour, 1/2 teaspoon of baking powder, and 1/4 teaspoon of salt. Slowly add this dry mix to your wet ingredients. Stir just until combined; don’t overmix. Next, gently fold in the zest of 2 lemons and 1/2 cup of freshly squeezed lemon juice. This gives the brownies their fresh zing! Pour the batter into your prepared pan and spread it out evenly. Bake for 25-30 minutes. Check with a toothpick; it should come out with a few moist crumbs. Let the brownies cool completely before cutting them into squares. Enjoy your Lemon Brownies! For more details, refer to the Full Recipe. To get the ideal texture, make sure to measure your flour correctly. Too much flour can make your brownies dry. Use a spoon to scoop flour into your measuring cup and level it off. This method keeps your brownies soft and chewy. Also, do not over mix the batter. Mix just until you see no dry spots. This keeps the brownies light and fluffy. Want to make your lemon brownies even better? Try adding a touch of lime zest. It adds a nice twist to the lemon flavor. You can also mix in some white chocolate chips. They melt and create creamy pockets in your brownies. If you like nuts, chopped walnuts or almonds can give a nice crunch. Consider adding a pinch of sea salt on top for a sweet and salty contrast. If your brownies turn out too dense, it might be due to over mixing. Remember, mix just until combined. If they are too dry, check your oven temperature. Ovens can vary, so a thermometer can help. If they are too sticky, they may need a bit more baking time. Always let them cool fully before cutting. This helps them set and makes them easier to slice. For the full recipe, refer back to the beginning of the article. {{image_2}} You can make gluten-free lemon brownies with ease. Replace all-purpose flour with gluten-free flour. Look for a blend that works well for baking. This swap keeps your brownies soft and tasty. The texture may differ slightly, but the fresh lemon flavor shines through. To create vegan lemon brownies, swap the eggs for flax eggs. Mix one tablespoon of ground flaxseed with three tablespoons of water for each egg. Let it sit for five minutes to thicken. Use a non-dairy butter or coconut oil instead of regular butter. This keeps the moisture and flavor intact. Want to mix it up? Add chocolate chips to the batter for a sweet twist. Dark or white chocolate pairs nicely with lemon. You can also add berries like blueberries or raspberries. They add a fruity burst that complements the lemon well. Try adding nuts for crunch or a hint of vanilla for warmth. For the full recipe, follow the instructions to create your perfect lemon brownies! After baking your lemon brownies, you might have some left. To keep them fresh, let them cool completely. Use an airtight container to store them. They will stay good at room temperature for up to three days. If you want them to last longer, refrigeration is a great option. Just remember to wrap them tightly in plastic wrap before placing them in the fridge. If you want to keep your lemon brownies for a longer time, freezing is the way to go. First, make sure they are completely cool. Cut them into squares. Place each square in a freezer-safe bag or container. You can stack them, but make sure you separate layers with parchment paper. Your brownies will stay fresh in the freezer for up to three months. When you want to enjoy them, just thaw them at room temperature. To keep your lemon brownies tasting great, avoid exposing them to air. Always store them in an airtight container. If you have a lot left, consider slicing only what you plan to eat soon. This way, the whole batch stays fresh longer. If you add powdered sugar on top, wait until just before serving. This keeps the sugar from getting wet and clumpy. Follow these tips, and your lemon brownies will be a refreshing treat whenever you want! For detailed steps on making these brownies, check out the Full Recipe. Yes, you can use bottled lemon juice. However, fresh lemon juice tastes better. It has a bright, vibrant flavor. Fresh lemons also add zest, which enhances the flavor. If you have fresh lemons, use them for the best results. To add more tartness, use extra lemon juice or zest. You can also add a bit of lemon extract. Start with a teaspoon of lemon extract and taste as you go. A touch of cream of tartar can also boost the tangy flavor. To cut brownies neatly, use a sharp knife. Dip the knife in hot water, then wipe it dry. This makes clean cuts and avoids sticky edges. Cut the brownies while they are cool for the best results. Lemon brownies stay fresh for about 3-4 days at room temperature. Store them in an airtight container to keep them moist. If you want them to last longer, refrigerate for up to a week. You can also freeze them for up to three months. Just wrap them tightly to avoid freezer burn. Enjoy every bite! You learned about the key ingredients needed for lemon brownies, how to mix them, and the best baking methods. I shared tips for a perfect bake, along with ways to make these brownies gluten-free or vegan. Plus, I included storage tips to keep leftovers fresh. As you bake, remember to adjust flavors to your liking. Enjoy your delicious lemon brownies, and don’t hesitate to experiment with variations! Happy baking!

Lemon Brownies Fresh and Tangy Dessert Delight

Are you ready for a dessert that packs a zesty punch? Lemon brownies are the perfect mix of sweet and

Choose your apples wisely. I like to use firm apples. Granny Smith or Honeycrisp are great options. They add a nice tartness. Make sure they are fresh and crisp. This makes your fritters tasty and juicy. Here’s what you need for the batter: - 2 large apples, peeled and diced - 1 cup all-purpose flour - 1/2 cup granulated sugar - 1 teaspoon baking powder - 1/2 teaspoon baking soda - 1/2 teaspoon cinnamon - 1/4 teaspoon nutmeg - 1/4 teaspoon salt - 1 large egg - 1/2 cup buttermilk - 1 teaspoon vanilla extract - Oil for frying These ingredients work together to create a fluffy texture. The spices add warmth and depth to each bite. For the sweet glaze, you will need: - 1 cup powdered sugar - 2 tablespoons milk - 1 teaspoon vanilla extract This glaze is simple yet rich. It gives your fritters a shiny finish. You can adjust the thickness by adding more milk or sugar. A perfect glaze makes your fritters even more tempting. For the full recipe, check out the details above. To start, grab a mixing bowl. Add your diced apples, flour, sugar, baking powder, baking soda, cinnamon, nutmeg, and salt. Mix them well. This blend gives your fritters great flavor. Next, in another bowl, whisk the egg, buttermilk, and vanilla extract. Pour this wet mix into your dry ingredients. Stir gently until just combined. It’s okay if some lumps remain; they help keep the fritters light. Now it’s time to fry. Heat oil in a deep fryer or a heavy pot to 350°F (175°C). Use a thermometer for accuracy. Take a spoon and drop heaping tablespoons of the batter into the hot oil. Make sure to leave space between each fritter. Fry them in batches to prevent overcrowding. Cook each fritter for 2-3 minutes on each side. They should turn golden brown and look delicious. Use a slotted spoon to remove them from the oil. Let them drain on paper towels to remove excess oil. For the glaze, whisk together powdered sugar, milk, and vanilla extract in a small bowl. Mix until smooth. If the glaze is too thick, add a splash more milk. If too thin, add more powdered sugar. Take each warm fritter and dip it into the glaze. Allow any excess glaze to drip off. Place the glazed fritters on a wire rack to set. This step makes the glaze firm up nicely. For the best experience, serve your fritters warm. You can even dust them with a sprinkle of cinnamon sugar for extra flavor. Enjoy your homemade glazed apple fritters! For the full recipe, refer to the detailed instructions above. To get the best glaze, use powdered sugar. Mix it with milk and vanilla extract. Aim for a smooth and shiny finish. If the glaze is too thick, add more milk. If it's too runny, add more sugar. Dip each warm fritter into the glaze. Let the glaze drip off before setting them down. Heat oil to 350°F (175°C). This is the best temperature for frying. If the oil is too cool, the fritters soak up oil. If it’s too hot, they burn on the outside. Use a deep fryer or a heavy pot for best results. Drop fritters carefully into the hot oil. Fry in batches to avoid crowding. This helps them cook evenly. For a light and fluffy fritter, do not overmix the batter. Some lumps are okay. Adding spices like nutmeg and cinnamon enhances the flavor. You can also try other fruits or nuts for variety. For extra crunch, add chopped nuts to the batter. The recipe is versatile, so feel free to explore! {{image_2}} You can swap apples for other fruits. Try pears, peaches, or berries. Each fruit gives a unique flavor. Pear fritters are sweet and juicy. Peach fritters add a nice tang. Berries can make your fritters colorful and fun. Just chop the fruit into small pieces, just like the apples. This keeps the fritters light and fluffy. You can make these fritters gluten-free. Use a gluten-free flour blend instead of all-purpose flour. For vegan fritters, replace the egg with a flax egg. Mix one tablespoon of flaxseed meal with two and a half tablespoons of water. Let it sit for five minutes until it thickens. Use plant-based milk instead of buttermilk for a tasty vegan option. Add extra flavors to your fritters! Mix in chocolate chips for a sweet twist. Nuts like walnuts or pecans add crunch and richness. You could also add spices like ginger or cardamom for more warmth. Each addition changes the taste and makes it fun to experiment. Get creative and try your favorite flavors! For the full recipe, check the main section. To keep your glazed apple fritters fresh, store them in an airtight container. This helps lock in moisture and flavor. Place parchment paper between layers to prevent sticking. Keep them at room temperature for up to two days. If you need to store them longer, refrigeration is okay, but they may lose some crispness. When you’re ready to enjoy your fritters again, reheating is key. You can use an air fryer for the best results. Heat them at 350°F (175°C) for about 5 minutes. This helps regain some of their crunch. You can also use a microwave, but the fritters may get soft. If using a microwave, heat in short bursts of 15-20 seconds. For longer storage, freeze your fritters. Let them cool completely, then wrap each fritter tightly in plastic wrap. Place the wrapped fritters in a freezer bag. They can last up to three months in the freezer. To thaw, move them to the fridge overnight. Reheat as mentioned above for the best taste. Enjoy your homemade treats anytime! For the full recipe, check out the Glazed Apple Fritters details. To keep glazed apple fritters crispy, store them in a single layer. Use a wire rack to let air circulate. Avoid stacking them. If they sit too long, they may get soggy. Reheat them in an oven at 350°F for a few minutes. This helps restore that delightful crunch. Yes, you can make apple fritters without buttermilk. Just use regular milk instead. To mimic buttermilk, add a teaspoon of vinegar to the milk. Let it sit for five minutes. This will make your batter just as good. You can also use yogurt or sour cream as a substitute. The best apples for fritters are sweet and firm. I recommend using Honeycrisp, Fuji, or Granny Smith. Honeycrisp adds sweetness, while Granny Smith gives a nice tartness. The key is to choose apples that hold their shape when cooked. This way, you get a great bite in each fritter. For a complete guide, check the Full Recipe section. You learned how to make delicious apple fritters in this article. We covered choosing fresh apples and the key baking ingredients. I shared steps for preparing the batter, frying, and glazing. You also got helpful tips for texture and flavor, plus fun variations using different fruits. Finally, we explored proper storage and reheating to keep your fritters fresh. Enjoy experimenting, and make these fritters your own! Happy baking!

Glazed Apple Fritters Irresistible Sweet Treat Recipe

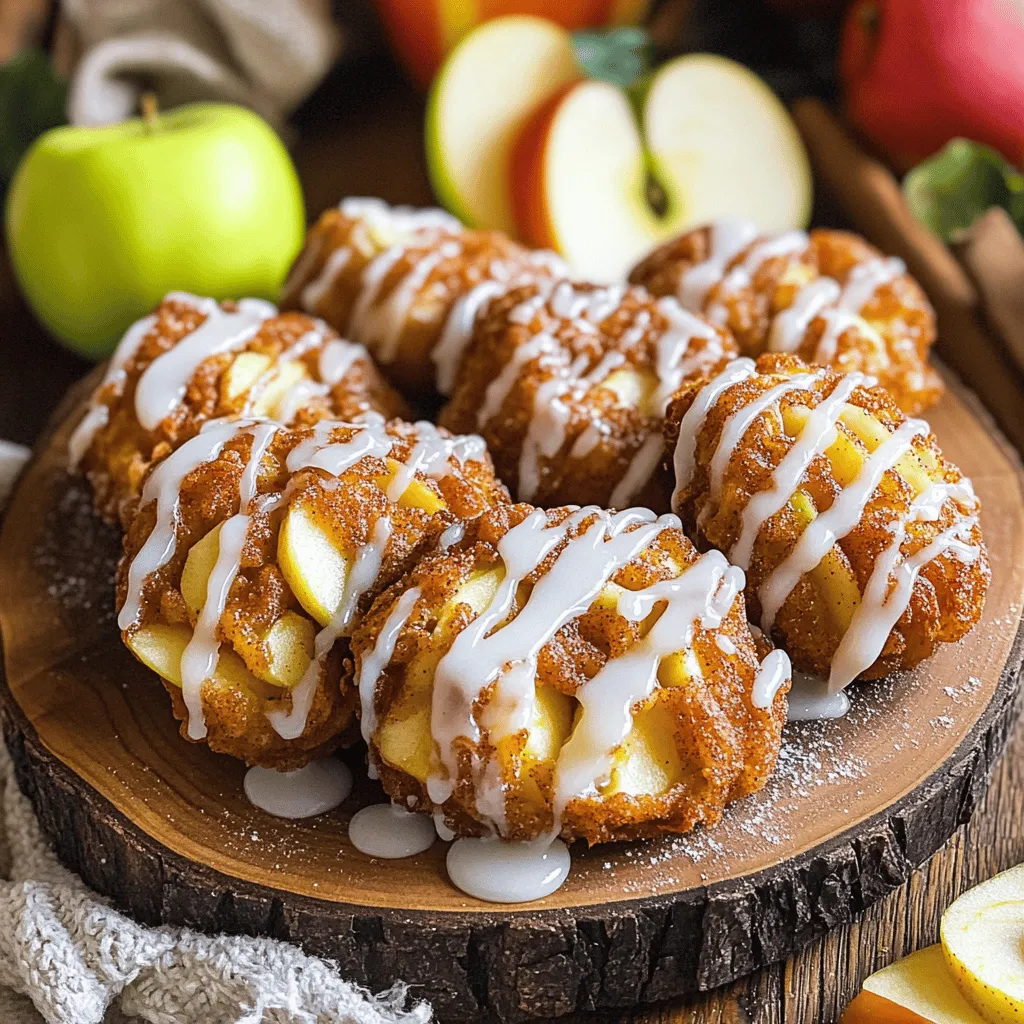
Craving a sweet treat that makes your mouth water? Let me introduce you to my glazed apple fritters! These fluffy

To make a tasty no-bake cookie lasagna, you need a few simple ingredients. Gather these items before you start: - 24 chocolate sandwich cookies (like Oreos) - 2 cups heavy cream - 1 cup cream cheese, softened - 1/2 cup powdered sugar - 1 teaspoon vanilla extract - 1 cup mini chocolate chips - 1 cup crushed cookies for topping - 1/4 cup chocolate syrup (for drizzling) These ingredients work together to create layers of flavor. The chocolate cookies give a nice crunch. The cream mixture adds a smooth texture. The mini chocolate chips bring extra sweetness. You can also customize with optional toppings for more fun! Enjoy mixing these ingredients for a delightful dessert. {{ingredient_image_1}} 1. Whipping heavy cream: Start by pouring 2 cups of heavy cream into a large bowl. Use an electric mixer to whip the cream. Mix until you see stiff peaks form. This makes your cream nice and fluffy. 2. Combining cream cheese and powdered sugar: In another bowl, beat 1 cup of softened cream cheese with 1/2 cup of powdered sugar. Add 1 teaspoon of vanilla extract. Mix until it is smooth and creamy. 3. Folding mixtures together: Now, gently fold the whipped cream into the cream cheese mixture. Use a spatula and be careful not to deflate the cream. Once mixed, stir in 1 cup of mini chocolate chips for extra sweetness. 1. Layering chocolate cookies: Grab a 9x13 inch dish. Start with a layer of 24 chocolate sandwich cookies. You can leave them whole or break them in half. This helps fit them better in the dish. 2. Spreading cream mixture: Take half of your cream mixture and spread it over the cookies. Use a spatula to smooth it out evenly. 3. Repeating layers for desired thickness: Next, add another layer of cookies on top of the cream. Spread the remaining cream mixture over this layer. Finally, top with one last layer of cookies. 1. Chilling time recommendations: Cover the dish with plastic wrap. Place it in the fridge for at least 4 hours. For the best taste, chill it overnight. This lets the cookies soften and the flavors mix. 2. Adding toppings before serving: Before you serve, sprinkle crushed chocolate cookies on top. Drizzle chocolate syrup over the lasagna for a sweet finish. Enjoy your dessert! To get the best cream, you need to know about peaks. Stiff peaks stand tall and hold their shape. Soft peaks bend over and are fluffier. For this recipe, stiff peaks work best. They create a light texture in your dessert. Make sure your cream cheese is at room temperature. Cold cream cheese can clump and mix poorly. Soft cream cheese blends better with the whipped cream. This helps you achieve that smooth and creamy texture we all love. When layering, aim for even spreads. Start with a cookie layer at the bottom. You can use whole cookies or break them in half. This way, they fit nicely in the dish. Spread half of the cream mixture gently. Use a spatula to smooth it out evenly. This ensures every bite is delicious. You can also mix in toppings like nuts or fruits for variety. Try different flavors to make it your own! One major mistake is overmixing the cream. If you mix too much, the cream can lose its lightness. It may turn grainy or too thick. Mix just until you see stiff peaks, and then stop. Another mistake is skipping the chilling time. Chilling lets the flavors blend and the cookies soften. If you don’t chill, your dessert will be too crunchy. Aim for at least 4 hours in the fridge for the best taste and texture. Pro Tips Use Cold Ingredients: Ensure your heavy cream and cream cheese are cold before whipping. This helps in achieving better volume and stability in your cream mixture. Layering Technique: For a more uniform look, break the cookies into halves or quarters. This can help create an even layer and better distribution of flavors. Chill Time: Allow the lasagna to chill overnight if possible. This not only enhances the flavors but also ensures the layers meld together beautifully. Serving Suggestions: Serve with extra chocolate syrup and whipped cream on the side for an indulgent treat that guests will love! {{image_2}} You can switch up the cookies in this recipe. Try using gluten-free cookies if you need a gluten-free option. They work just as well and taste great. You can also experiment with flavored cookies. Think about cookies like mint or peanut butter. These flavors can add a fun twist to your cookie lasagna. Enhancing the flavor is easy with extracts. You can add almond or mint extracts for a new taste. Just use a small amount, about half a teaspoon. You can also incorporate fruit layers or purees. Berries or bananas add freshness and a fruity zing. Layer these fruits between the cookies and cream for added flavor. If you're looking for a lighter option, try low-fat cream cheese. It still gives you that creamy texture without all the fat. You can also use coconut cream instead of heavy cream. This gives a tropical flavor and is dairy-free. Both options keep your dessert delicious but a bit healthier. To keep your cookie lasagna fresh, use an airtight container. A 9x13 inch dish works great for storage. Make sure to cover it tightly with plastic wrap. This will help keep moisture in and air out. For best results, refrigerate the lasagna. It stays fresh for days. Avoid leaving it out at room temperature for too long. Yes, you can freeze the lasagna! Place it in a freezer-safe container. Make sure to wrap it well in plastic wrap and foil. This keeps it from getting freezer burn. To thaw, move the lasagna to the fridge overnight. This gives it time to soften. You can also let it sit at room temperature for a few hours. Just be sure not to rush the thawing process. In the fridge, your cookie lasagna can last about 5 days. Keep an eye on it for freshness. Watch for signs of spoilage. If you see any mold or an off smell, it's best to toss it. Always trust your senses when it comes to food safety. Yes, you can make this dessert ahead of time. In fact, it tastes better if you let it chill longer. I suggest making it the day before you serve it. This gives the cookies time to soften and the flavors to mix well. After you finish layering, cover the dish with plastic wrap. Place it in the fridge for at least 4 hours, or overnight for best results. If you don’t have heavy cream, you can use milk and butter. Mix 1/4 cup of melted butter with 3/4 cup of milk. This will give you a similar fat content. Another option is to use a non-dairy milk like almond or soy milk with coconut cream. This can work well for the whipped cream. Just make sure to chill the cream beforehand for better results. To make this dessert dairy-free, swap the cream cheese with a vegan cream cheese. Use coconut cream instead of heavy cream. You can also use dairy-free powdered sugar, which is usually safe. Check the labels to ensure there are no dairy ingredients. With these swaps, you can enjoy a tasty no-bake cookie lasagna that fits your dietary needs. This blog post covered the ingredients, instructions, tips, and storage for cookie lasagna. You learned how to whip up a tasty dessert with ease. Remember to layer carefully and chill for the best results. Don’t hesitate to explore variations that fit your taste. Whether you’re using gluten-free cookies or adding fruit, the possibilities are endless. Enjoy making this fun treat and share it with family and friends. Happy cooking!

No-Bake Cookie Lasagna Decadent and Easy Dessert

Are you ready for a dessert that’s both indulgent and super simple? My No-Bake Cookie Lasagna is packed with rich

- Rustic bread cubes - Diced vegetables - Herbs and spices - Broth and seasonings You can swap the rustic bread with other types. Use sourdough or whole grain bread for a twist. If you want a gluten-free option, try gluten-free bread. For vegetables, celery and onion are classic, but feel free to use leeks or carrots. You can also add bell peppers for sweetness. If you don't have vegetable broth, chicken broth works well too. Water can be a last resort, but it lacks flavor. Using fresh herbs makes a big difference in flavor. Fresh parsley, for example, adds brightness. Dried herbs can still work, but they lose some potency. Rehydrating dried herbs in hot water first can help. This way, they release their flavor better. Fresh herbs should be added at the end to keep their taste vibrant. To start, you need dry bread cubes. I recommend using rustic bread for the best taste. First, preheat your oven to 350°F (175°C). Spread the cubed bread on a baking sheet. Toast it in the oven for about 15 minutes. You want the bread to be slightly golden. This toasting process helps the bread hold up when you add the broth. Dry cubes soak up the flavors but stay firm. Avoid using soft bread; it can make the stuffing mushy. Next, let’s sauté the vegetables. In a large skillet, melt 1/2 cup of unsalted butter over medium heat. Add 1 cup each of diced celery and onion. Cook them for about 5 minutes until they soften. Then, stir in 1 cup of diced mushrooms and 2-3 minced garlic cloves. Cook these for another 3-4 minutes. This timing helps develop the flavors. Make sure the mushrooms are tender before moving on. The aroma will fill your kitchen! Now it's time to bring everything together. In a large mixing bowl, combine the toasted bread and your sautéed vegetables. Gradually pour in 2-3 cups of vegetable broth. Start with 2 cups and add more if needed. You want the bread to be moist but not soggy. Mix gently to coat all the bread cubes evenly. This step ensures that every bite is full of flavor. Finally, fold in 1/4 cup of chopped fresh parsley for a pop of color and taste. This is crucial for a fresh finish, making your stuffing stand out. For the complete recipe, please refer to the Full Recipe section. To boost the taste of your stuffing, try adding nuts or dried fruits. Walnuts, pecans, or dried cranberries add a nice crunch and sweetness. Just chop them up and mix them in with the bread. Adjusting seasoning can also make a big difference. Always taste your mix and add more salt, pepper, or herbs as needed. You can prepare stuffing early for a stress-free cooking day. Start by following the recipe up to mixing in the broth. Then, cover your bowl and store it in the fridge for up to two days. Make sure to keep it safe by using an airtight container. When you’re ready to bake, just add broth and follow the baking steps. To get a golden and crispy top, bake your stuffing uncovered for the last 10-15 minutes. This lets the heat circulate and creates that perfect crunch. To avoid sogginess, don’t add too much broth. Start with two cups and add more only if needed. The bread should soak up the liquid but not drown in it. For the complete recipe, check out the Full Recipe. {{image_2}} You can use different types of bread for stuffing. Cornbread adds a sweet touch. It gives a nice texture and flavor. Bagels can also work well. They create a chewy, hearty stuffing. Both options change how the stuffing tastes and feels. Using rustic bread is classic, but getting creative is fun. Try using a mix of breads. This can add depth to your dish. Each type brings its own flavor and texture. You can play with what you like best. Regional styles of stuffing are diverse and tasty. Southern-style stuffing often includes sausage and spices. This adds richness and warmth to the dish. In contrast, some people prefer vegetarian or vegan stuffing. You can use mushrooms, nuts, or beans as protein sources. Adding seasonal vegetables boosts flavor and nutrition. This way, you can make stuffing that fits your diet and tastes. Everyone can enjoy a version that suits their needs. Think outside the box when adding unique ingredients. Sausage can add a savory kick. It pairs well with herbs to enhance flavor. Seafood is another option. Shrimp or crab can create a coastal twist. When using unique ingredients, consider your flavor profiles. Balance rich flavors with fresh herbs. This keeps the stuffing light and exciting. Don’t hesitate to experiment. You might find a new favorite recipe. For a full recipe, check out the Full Recipe section. Cooked stuffing lasts for about three to four days in the fridge. To keep it fresh, store it in an airtight container. When ready to eat, reheat it in the oven or microwave. If using the oven, cover it with foil to keep moisture in. Heat until it's warm all the way through. This method helps preserve its flavor and texture. You can freeze stuffing either before or after baking. To freeze before baking, assemble the stuffing and place it in a freezer-safe dish. Cover it tightly, then freeze. To freeze after baking, let it cool completely before wrapping it. Use freezer wrap or a zip-top bag. When ready to use, thaw it in the fridge overnight. Bake it at 350°F (175°C) until heated through. Check for signs of spoilage before eating. Look for mold, bad smells, or a slimy texture. These signs mean it’s time to throw it away. Always practice good food safety. If you are not sure about the stuffing, it is better to be safe than sorry. Enjoy your stuffing while it’s fresh to savor that homemade flavor! You can use water if you need a quick option. Homemade stock adds great flavor too. Just simmer bones, veggies, and herbs in water to create your stock. This option brings extra taste to your stuffing. Yes, you can make stuffing without bread. Try using cooked rice or quinoa as a base. Cauliflower rice also works well for a gluten-free version. These options provide a different texture but still hold the flavors. To keep your stuffing moist, adjust the liquid amounts carefully. Start with two cups of broth. Add more if the mix feels too dry. You want it damp but not soggy. Mixing well helps distribute moisture evenly. Stuffing your turkey can be safe, but you must follow some rules. First, cook your stuffing to at least 165°F (73.9°C). This temperature kills any harmful bacteria. If you stuff the turkey, cook it right after stuffing. Never leave it sitting. Always check the center of the stuffing for doneness. This ensures a safe and tasty meal. Making stuffing is simple and fun. You learned about key ingredients like bread, veggies, and broth. We covered ways to swap ingredients and tips for using fresh versus dried herbs. The step-by-step instructions helped you prepare and bake your stuffing just right. Remember, you can add unique ingredients or try different bread types for variety. Store leftovers properly to enjoy later. With these tips in mind, you’re now ready to make stuffing that will impress everyone. Enjoy your cooking!

Classic Homemade Stuffing Simple and Flavorful Recipe

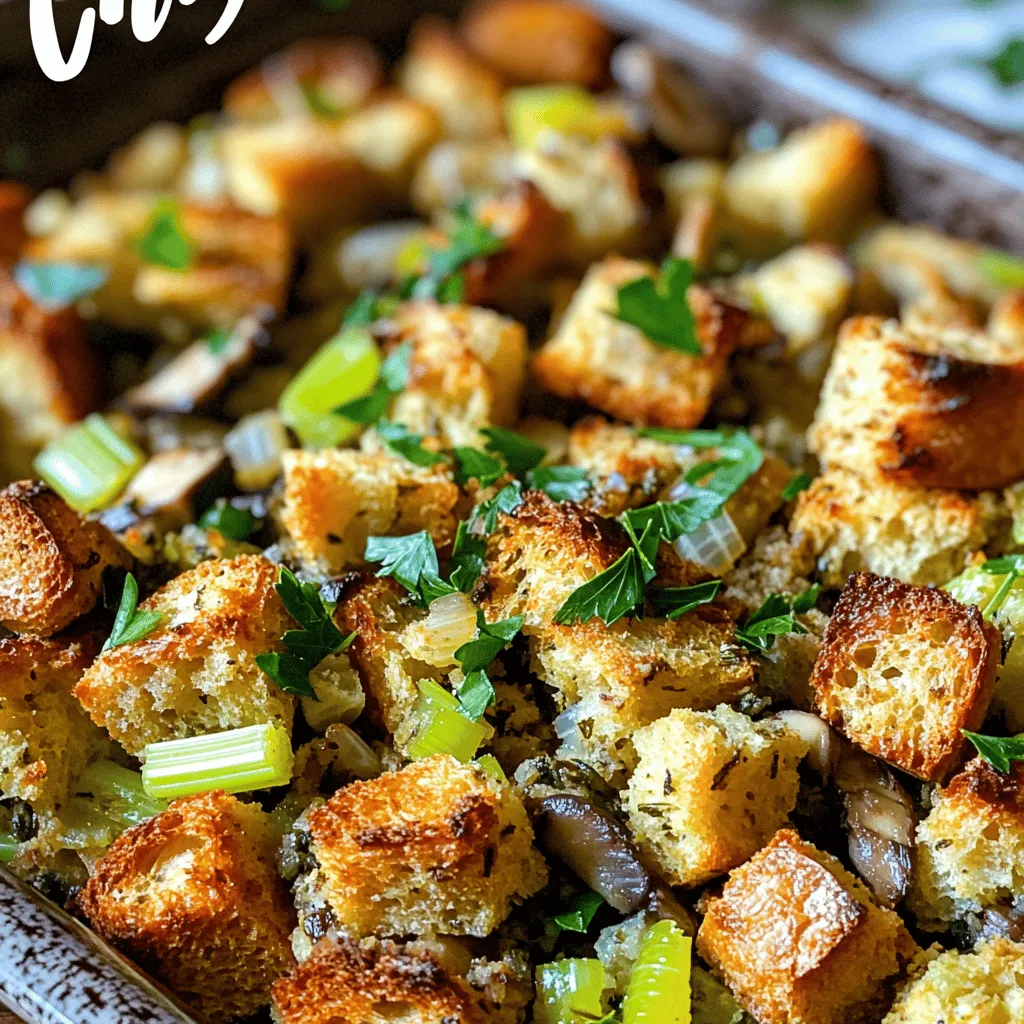
There’s nothing like the taste of classic homemade stuffing, especially during the holidays! In this easy recipe, I’ll guide you

- 2 medium apples, peeled and diced - 1 cup all-purpose flour - 1/2 cup granulated sugar - 1 tablespoon baking powder - 1/2 teaspoon cinnamon - 1/4 teaspoon nutmeg - 1/4 teaspoon salt - 1 large egg - 1/2 cup milk - 1 teaspoon vanilla extract - 1 tablespoon lemon juice - Cooking spray - Powdered sugar for dusting - Additional spices like allspice or cloves - Air fryer - Mixing bowls - Whisk - Spoon or ice cream scoop To make air fryer apple fritters, you need fresh apples. I love using sweet varieties like Honeycrisp or Fuji. They add great taste and texture. Make sure to peel and dice them well. You also need all-purpose flour, sugar, baking powder, and spices like cinnamon and nutmeg. These ingredients bring out the apple flavor. The egg and milk bind the fritters. Vanilla extract adds a lovely aroma. Lemon juice keeps the apples from browning and adds a hint of tang. For cooking, a good spray of cooking oil helps them crisp up in the air fryer. If you want a sweeter treat, dust the fritters with powdered sugar after frying. You can also add spices like allspice or cloves for a fun twist. Gather these ingredients and tools, and you’re ready to make a delightful batch of air fryer apple fritters. For the full recipe, check the detailed instructions above. First, peel and dice two medium apples. Toss the diced apples with one tablespoon of lemon juice. This step helps keep the apples from browning. Set them aside while you prepare the other ingredients. In a separate bowl, combine one cup of all-purpose flour, half a cup of granulated sugar, one tablespoon of baking powder, half a teaspoon of cinnamon, a quarter teaspoon of nutmeg, and a quarter teaspoon of salt. Mix these dry ingredients well. This blend gives your fritters great flavor. Now, in another bowl, whisk together one large egg, half a cup of milk, and one teaspoon of vanilla extract. Once mixed, pour this wet mixture into your dry ingredients. Gently fold in the diced apples. Be careful not to overmix, as this can make the fritters tough. Before cooking, preheat your air fryer to 350°F (175°C) for about five minutes. This step ensures that the fritters cook evenly and get crispy. Lightly spray the air fryer basket with cooking spray. Using a spoon or small ice cream scoop, drop spoonfuls of the batter into the basket. Make sure to leave space between each fritter. Air fry them at 350°F (175°C) for 10 to 12 minutes. Flip them halfway through for even cooking. They should turn golden brown and look delicious. For the full recipe, refer to the detailed instructions above. To get the best texture in your fritters, avoid overmixing the batter. Overmixing can lead to tough fritters. Mix just until the dry ingredients combine. Next, use apples that are medium-sized. They cook evenly and give you a nice bite. Cooking time may vary based on your air fryer model. Some fryers cook faster than others. Adjust the time as needed. During the last few minutes, keep an eye on the fritters. This way, you can catch them before they burn. Serve your fritters warm for the best taste. A sprinkle of powdered sugar adds a sweet touch. You can also pair them with sauces like caramel or maple syrup. These add extra flavor and make your fritters even more enjoyable. For the full recipe, check out the earlier sections. {{image_2}} You can make these fritters gluten-free! Just swap the all-purpose flour for a gluten-free flour blend. This change keeps the fritters tasty and light. Always check the blend for the best results. Want to jazz up your fritters? You can add raisins or chopped nuts to the batter. Nuts give a nice crunch, while raisins add a sweet touch. For a twist, try using different spices like cardamom. It adds a warm flavor that pairs well with apples. You can change the fruit for a fun twist. Try using pears or peaches instead of apples. This gives you a new taste and keeps the recipe fresh. Each fruit brings its own unique flavor to the fritters. Enjoy experimenting with these seasonal choices! Store your air fryer apple fritters in an airtight container. They will stay fresh for up to 2 days at room temperature. This keeps them soft and tasty. If you want to keep them longer, refrigerate the fritters. They can last up to 1 week in the fridge. For even longer storage, freeze them. They will be good for up to 3 months in the freezer. Just make sure to use a freezer-safe container. To enjoy your fritters again, reheat them in the air fryer. This helps them stay crispy. You can also use the microwave for a quick warm-up, but they won't be as crunchy. For the best taste, I recommend using the air fryer. For the full recipe, check the earlier section on ingredients. Yes, you can use pears or peaches as alternatives. Both fruits add a nice twist. Just follow the same steps in the recipe for a different flavor. The fritters should be golden brown and cooked through. You can check by inserting a toothpick; it should come out clean. This ensures the inside is just as good as the outside. Yes, you can make these fritters ahead of time. Store them in an airtight container. For the best results, eat them within two days. If you need to keep them longer, follow the storage guidelines. To reheat leftover fritters, use the air fryer for the best texture. Set it to 350°F (175°C) for about 3-5 minutes. If you are in a hurry, you can microwave them for quicker reheating, but they won’t be as crispy. I recommend caramel, maple syrup, or a simple vanilla glaze as dipping sauces. Each adds a lovely taste that pairs well with the fritters. You can even mix and match to find your favorite! This blog post covered everything you need for tasty apple fritters. We discussed necessary and optional ingredients, tools, and step-by-step instructions. You learned tips for perfect texture and serving ideas. I included variations and storage suggestions so you can customize and keep your fritters fresh. Now, you can make these treats confidently. Enjoy the flavors and fun of cooking!

Air Fryer Apple Fritters Crispy and Flavorful Treat

Craving a sweet treat that’s crispy, fluffy, and packed with apple goodness? Look no further! In this guide, I’ll show

To create a delicious sweet potato casserole, you'll need the following key ingredients: - 4 medium sweet potatoes, peeled and cubed - 1/2 cup brown sugar - 1/4 cup unsalted butter, melted - 1/2 cup milk - 1 teaspoon vanilla extract - 1/2 teaspoon ground cinnamon - 1/4 teaspoon nutmeg - 1 cup mini marshmallows - 1/2 cup chopped pecans (optional) These ingredients form the base of your casserole. The sweet potatoes provide a creamy texture. The brown sugar adds sweetness, while the butter makes everything rich and smooth. Cinnamon and nutmeg give it that warm, cozy flavor we love. If you want to add your twist, consider these optional ingredients: - Use maple syrup instead of brown sugar for a deeper flavor. - Substitute almond milk for a dairy-free version. - Add crushed ginger snaps or graham crackers on top for crunch. - Mix in some diced apples or pears for extra sweetness. These variations can give your casserole a unique touch and make it your own. To make this casserole, you need a few handy tools: - A large pot for boiling the sweet potatoes - A mixing bowl for combining ingredients - A potato masher or fork to mash the sweet potatoes - A 9x13-inch baking dish for baking - An oven for cooking Having the right tools makes cooking easier. They help you stay organized and keep your kitchen tidy. Make sure you have everything ready before you start. This way, you can enjoy making your Easy Sweet Potato Casserole. For the full recipe, check out Sweet Potato Delight Casserole. Start by peeling and cubing four medium sweet potatoes. You want them to be about the same size. This helps them cook evenly. Next, place the cubes in a large pot and cover them with water. Bring the water to a boil. Once boiling, let the sweet potatoes cook for 15 to 20 minutes. They should be tender when you poke them with a fork. After boiling, drain the sweet potatoes and let them cool for a few minutes. Now, take the cooled sweet potatoes and mash them in a mixing bowl. You want them smooth and creamy. Add in half a cup of brown sugar, a quarter cup of melted unsalted butter, and half a cup of milk. Next, mix in one teaspoon of vanilla extract, half a teaspoon of ground cinnamon, and a quarter teaspoon of nutmeg. Stir everything together until it is well combined. This mixture should be rich and flavorful. Spread the sweet potato mixture evenly in a greased 9x13-inch baking dish. Then, sprinkle one cup of mini marshmallows on top. If you like, you can add half a cup of chopped pecans for some crunch. Preheat your oven to 350°F (175°C). Bake the casserole for 25 to 30 minutes. Look for the marshmallows to turn golden brown. This indicates that it’s heated through. Once done, take it out of the oven and let it cool for a few minutes before serving. Enjoy your delicious sweet potato delight! For the complete instructions, check the Full Recipe. To make your sweet potato casserole great, watch out for a few things. First, don’t overcook the sweet potatoes. If they are too soft, they will become watery. You want them tender but firm enough to mash. Next, measure your ingredients carefully. Too much sugar can make it overly sweet, while too little can leave it bland. Lastly, don’t skip greasing the baking dish. This helps with easy serving later. Choosing the right sweet potatoes is key to success. Look for firm, smooth skin without any bruises or soft spots. The color can vary from orange to purple, but I prefer the classic orange for its sweetness. When choosing, pick medium-sized potatoes. They cook evenly and blend well in the casserole. Spices can really elevate your casserole. Ground cinnamon and nutmeg add warmth and depth. I like to add a pinch of salt, too. It brings out the natural sweetness of the potatoes. You might also try adding a bit of ginger for a spicy kick. If you want to go a step further, consider mixing in some maple syrup. It adds a rich flavor that pairs well with sweet potatoes. For the best results, start with the Full Recipe and adjust to your taste! {{image_2}} You can make a vegan sweet potato casserole by swapping a few ingredients. Instead of milk, use almond or coconut milk. Replace butter with coconut oil or vegan butter. For sweetness, maple syrup works well in place of brown sugar. These options keep the dish rich and creamy while being plant-based. To make this casserole gluten-free, simply check your labels. Most sweet potatoes are gluten-free. Use gluten-free butter or oil for the same effect. You can also choose gluten-free marshmallows. These small changes help you enjoy this dish without worry. Experimenting with toppings can take your casserole to a new level. You might try crushed graham crackers for a crunchy layer. Another fun option is adding a sprinkle of cacao nibs for a chocolate kick. If you want something savory, consider adding crumbled feta or goat cheese. Each topping brings its own flair, making your casserole special. For the complete recipe, see the Full Recipe. To keep your sweet potato casserole fresh, store it in an airtight container. Let it cool before covering. If you leave it out, it can spoil quickly. It’s best to store leftovers in the fridge for up to four days. When you're ready to enjoy leftovers, preheat your oven to 350°F (175°C). Place the casserole in an oven-safe dish. Cover it with foil to keep it moist. Heat for about 20 minutes or until it’s warm throughout. If you're in a hurry, you can use the microwave. Just heat it in short bursts, stirring in between. You can freeze sweet potato casserole for future meals. First, let it cool completely. Then, place it in a freezer-safe container. It should last for about three months. When you're ready to eat it, thaw it overnight in the fridge. After that, follow the reheating instructions. This way, you can enjoy this simple and flavorful dish anytime! For the full recipe, check out Sweet Potato Delight Casserole. Yes, you can make Sweet Potato Casserole ahead of time. Prepare the dish and cover it tightly. Store it in the fridge for up to two days. Just remember to bake it before serving. This makes meal prep easy, especially for holidays or family gatherings. You know the casserole is done when the marshmallows are golden brown. The edges should also bubble a bit. If you poke a fork into the center, it should feel hot and soft. This usually takes about 25 to 30 minutes of baking. If you want to skip marshmallows, try using chopped nuts. Pecans or walnuts give a nice crunch. You can also use coconut flakes for a sweet flavor. Another option is to add a drizzle of maple syrup on top before serving. These swaps keep the dish tasty and fun! For the full recipe, check out the Sweet Potato Delight Casserole. You’ve learned how to make an easy sweet potato casserole. We explored key ingredients, tools, and step-by-step instructions. I shared tips to avoid common mistakes and enhance flavors. You can also try vegan or gluten-free options and creative toppings. Lastly, I covered storage techniques and answered your FAQs. With this knowledge, you can prepare a delicious casserole that everyone will love. Enjoy making this dish for your next meal!

Easy Sweet Potato Casserole Simple and Flavorful Dish

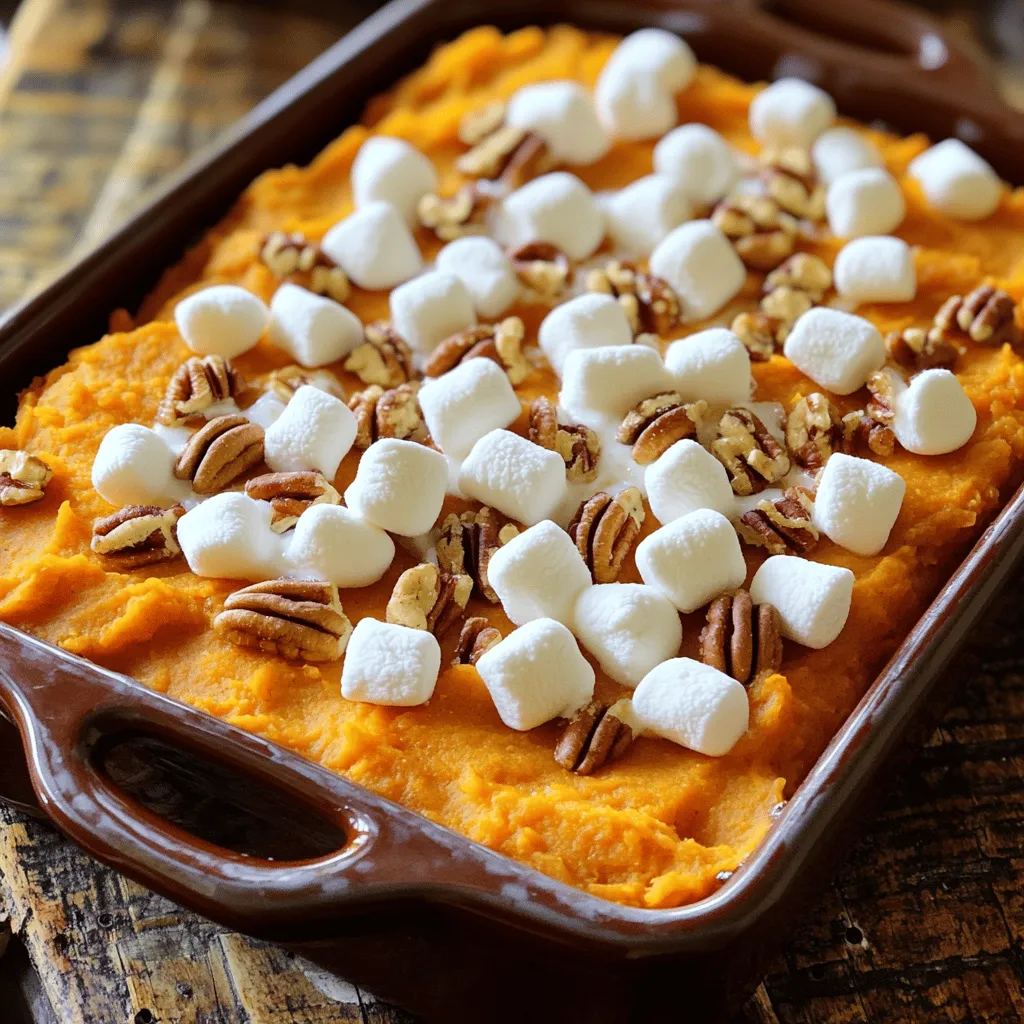
Are you ready to impress your family with a dish that’s both simple and tasty? This Easy Sweet Potato Casserole

The main ingredients for ultimate pumpkin muffins are key to their rich flavor and moist texture. Here’s what you need: - 1 cup canned pumpkin puree - 1/2 cup vegetable oil - 3/4 cup brown sugar - 1/2 cup granulated sugar Canned pumpkin puree gives the muffins a deep, earthy taste. Vegetable oil keeps them moist and fluffy. The sugars add sweetness and help with browning. For extra flavor and crunch, consider these optional add-ins: - 1 cup chopped walnuts or pecans - 1/2 cup chocolate chips Adding nuts gives a nice texture contrast, while chocolate chips add a fun sweetness. You can mix and match based on your taste. If you need substitutes, here are some ideas: - Instead of vegetable oil, use melted coconut oil or applesauce. - For the sugars, you can try using honey or maple syrup. These alternatives can change the flavor profile a bit, so experiment to find what you enjoy most. Remember, using different ingredients can make your muffins unique! 1. Preheat your oven to 350°F (175°C). 2. Line a muffin tin with paper liners or grease it lightly. 3. In a large bowl, mix together the pumpkin puree, vegetable oil, eggs, brown sugar, granulated sugar, and vanilla extract. Whisk until smooth. 1. In another bowl, sift the flour, baking soda, baking powder, ground cinnamon, ground nutmeg, ground ginger, and salt. 2. Gradually mix the dry ingredients into the pumpkin mixture. Stir gently until just combined. It’s fine if some lumps remain. 3. If you want extra flavor, fold in the optional chopped nuts or chocolate chips. 1. Fill each muffin cup about 2/3 full with the batter. 2. Bake in the oven for 18-20 minutes. Check doneness by inserting a toothpick into the center. It should come out clean. 3. Once baked, let the muffins cool in the tin for about 5 minutes. Then, transfer them to a wire rack to cool completely. For the full recipe, refer to the earlier sections. Enjoy the process of making these tasty muffins! To make the best pumpkin muffins, avoid overmixing your batter. When you mix, stop as soon as you see no dry flour. Some lumps are just fine. Overmixing makes your muffins tough. To check if your muffins are done, use a toothpick. Insert it into the center of a muffin. If it comes out clean, they are ready. If it has wet batter, bake a few more minutes. You can add extra spices for a flavor boost. Consider using more cinnamon or nutmeg. A hint of cloves can also work well. Each spice adds warmth and depth. Mixing in seasonal ingredients can give your muffins a twist. Try adding dried cranberries or chopped apples. These will bring in new textures and tastes. Serve your muffins warm for the best experience. Dust them with powdered sugar or drizzle maple glaze on top. A sprig of mint or a sprinkle of cinnamon adds flair. For storing muffins, keep them in an airtight container. This helps maintain freshness. Enjoy them within a few days for the best taste. {{image_2}} For gluten-free muffins, you can use gluten-free flour. Look for a blend that works well in baking. This change keeps the texture light and fluffy. You can also add a bit of xanthan gum for better binding. If you want to go vegan, replace the eggs with flaxseed meal. Mix one tablespoon of flaxseed with three tablespoons of water. Let it sit for five minutes to thicken. You can also swap the vegetable oil for coconut oil or unsweetened applesauce. Both options keep the muffins moist. To change the flavor, add spices or extracts. Try pumpkin pie spice for a warm taste. You can also add vanilla or almond extract for a sweet twist. Fruits can boost flavor too. Mixing in cranberries adds a zingy taste. Diced apples bring a crisp texture. Both options pair well with pumpkin. You can choose between mini muffins and regular muffins. Mini muffins are perfect for snacks. They bake faster, so check them at 12-15 minutes. Regular muffins take about 18-20 minutes. Adjusting the size lets you serve different portions. Kids may love mini muffins, while adults enjoy the larger ones. Each size has its charm and makes sharing fun. Check the baking times carefully to avoid overbaking. To keep your ultimate pumpkin muffins fresh, store them in a cool place. Use an airtight container. This helps keep moisture in and prevents them from drying out. You can also wrap them in plastic wrap. If you want to keep them warm, place them in a bread box or a covered dish. For long-term storage, freezing is your best option. To freeze muffins, wait until they cool completely. Then, wrap each muffin in plastic wrap. Place the wrapped muffins in a freezer-safe bag. Make sure to squeeze out as much air as you can. This prevents freezer burn. When you want to eat them, thaw them in the fridge overnight. To reheat, pop them in the microwave for 15-30 seconds or warm them in the oven at 350°F (175°C) for about 10 minutes. You can store your pumpkin muffins at room temperature for about 3 days. If you keep them in the fridge, they last about a week. Always check for signs of spoilage, such as mold or an off smell. If they feel hard or dry, it’s time to toss them. Enjoy your muffins fresh for the best taste! For more details, check out the Full Recipe. How to make pumpkin muffins from scratch? To make pumpkin muffins from scratch, gather your ingredients. You need canned pumpkin puree, sugar, oil, eggs, flour, and spices. Mix the wet ingredients first, then add the dry ones. Be careful not to overmix. Bake the muffins for about 18-20 minutes. For the full recipe, see above. What if I don’t have canned pumpkin? If you don’t have canned pumpkin, you can use fresh pumpkin. Cook and puree the pumpkin until smooth. You can also use butternut squash puree as a substitute. This will give a nice flavor too. Can I reduce the sugar? Yes, you can reduce the sugar in this recipe. Cut the brown and granulated sugar by 1/4 cup each. You may want to add more spices for flavor. This keeps the muffins tasty and reduces sweetness. How do I make them healthier? To make the muffins healthier, use whole wheat flour instead of all-purpose flour. You can also swap some sugar for applesauce. Adding nuts boosts nutrition too. These changes keep the muffins moist and delicious. Why are my muffins too dense? If your muffins are too dense, you may have overmixed the batter. Stir just until combined. Also, check your baking powder and baking soda. If they are old or expired, they may not work well. What should I do if they overflow? If your muffins overflow, you probably filled the cups too much. Next time, fill them about 2/3 full. If they overflowed, let them cool a bit, then trim the tops. They will still taste great! In this guide, we explored key ingredients, preparation steps, and helpful tips for baking pumpkin muffins. You now know how to add flavor and make variations. Remember, using the right ingredients and techniques is key to great muffins. Don’t hesitate to try different flavors or sizes. Keep your muffins fresh by storing them properly. With practice, you will bake delicious muffins every time. Enjoy experimenting and sharing your tasty results!

Ultimate Pumpkin Muffins Tasty and Easy Recipe

Get ready to bake the ultimate pumpkin muffins! This easy recipe is packed with warm flavors that perfect for fall.

You need some key items for your pumpkin pie overnight oats. Here's what you'll need: - 1 cup rolled oats - 1 cup almond milk (or any milk of your choice) - 1/2 cup canned pumpkin puree - 2 tablespoons chia seeds - 1 tablespoon maple syrup (adjust to taste) - 1 teaspoon pumpkin pie spice - 1/2 teaspoon vanilla extract - Pinch of salt These ingredients come together to create a creamy and flavorful base. The oats soak up the milk and flavors overnight. Canned pumpkin adds warmth and nutrition, while chia seeds give a nice texture. Toppings can take your oats to the next level. Here are some great options to consider: - Chopped nuts - Whipped coconut cream - Cinnamon These toppings add crunch, creaminess, and extra flavor. You can mix and match them based on your mood or what you have at home. You can change up the milk for different tastes. Here are some ideas: - Almond milk - Oat milk - Coconut milk - Soy milk Each type of milk will give your oats a unique flavor. Choose what you like best or what you have on hand. The Full Recipe will guide you through making this delicious breakfast. Start by gathering all your ingredients. You will need: - 1 cup rolled oats - 1 cup almond milk (or any milk of your choice) - 1/2 cup canned pumpkin puree - 2 tablespoons chia seeds - 1 tablespoon maple syrup (adjust to taste) - 1 teaspoon pumpkin pie spice - 1/2 teaspoon vanilla extract - Pinch of salt In a medium bowl, mix the rolled oats, almond milk, and pumpkin puree. Add the chia seeds, maple syrup, pumpkin pie spice, vanilla extract, and salt. Use a whisk to blend everything well. Make sure there are no lumps. This step is key for a smooth texture. Once you have mixed everything, it’s time to store it. Divide the mixture into two mason jars or airtight containers. Seal them tightly. Place the jars in the fridge for at least 4 hours. For the best flavor and texture, let them sit overnight. The oats will absorb the liquid and the chia seeds will expand, creating a creamy base. When you are ready to eat, take the jars out of the fridge. Stir the oats well. If they seem too thick, add a splash of almond milk to get your desired consistency. Now comes the fun part: toppings! You can add chopped nuts, a dollop of whipped coconut cream, or a sprinkle of cinnamon. These toppings not only add flavor but also make your dish look beautiful. Enjoy your pumpkin pie overnight oats as a nourishing breakfast or snack! To get the best creamy texture in your Pumpkin Pie Overnight Oats, use rolled oats. They soak up the liquid well. This helps them become soft and creamy. Mix the oats with enough liquid. You should use one part oats to one part milk. For extra creaminess, add more almond milk in the morning if needed. This way, you can adjust the thickness to your liking. You can make your oats sweeter by adding more maple syrup. Start with one tablespoon, then taste. If you want it sweeter, add a little more. For spice, pumpkin pie spice is key. If you like it spicier, add a bit more than the recipe calls for. You can also mix in a pinch of nutmeg or ginger for a fun twist. If you have extra oats, store them in an airtight container. They last well in the fridge for up to three days. When you are ready to eat, just stir them well. If they seem thick, add a splash of milk. This keeps them creamy and delicious. Enjoy your pumpkin pie oats any time! You can find the full recipe to make this dish perfect. {{image_2}} If you want to make this recipe dairy-free, you have great options. Almond milk works well, but you can also use oat milk or coconut milk. Both choices add a nice flavor. Just avoid sweetened versions. Unsweetened keeps your oats healthy and tasty. You can boost the protein in your oats easily. Try adding a scoop of protein powder. You can also mix in Greek yogurt if you don’t mind some dairy. Both options make your meal more filling and nutritious. Feel free to swap ingredients based on the season. In winter, you might add warm spices like nutmeg or ginger. In summer, fresh fruit like berries can bring a fun twist. Try using sweet potatoes instead of pumpkin for a different taste. Each change keeps the recipe exciting and fresh. To keep your pumpkin pie overnight oats fresh, store them in airtight containers. Mason jars work great for this. Make sure the lids are tight to prevent air from getting in. Always keep the oats in the fridge. This keeps them safe to eat and maintains their flavor. If you want to store your oats for a longer time, freezing is an option. Just make sure you use freezer-safe containers. Fill them only ¾ full. This allows space for the oats to expand as they freeze. To eat, thaw them overnight in the fridge before enjoying. In the fridge, your pumpkin pie overnight oats will stay good for about 3 days. If they start to smell sour or change color, it’s best to toss them out. If frozen, they can last up to 3 months. Always check for freshness before eating. For the full recipe, follow the steps carefully to ensure the best results. Yes, you can use quick oats. Quick oats cook faster and absorb liquid quickly. This means your overnight oats may be softer. If you prefer a chewier texture, stick with rolled oats. They give you that hearty bite, which I love. Overnight oats can last up to five days in the fridge. Store them in airtight containers. Just make sure to check for any signs of spoilage before you eat. To keep them fresh, add toppings just before serving. Of course! You can skip the chia seeds. They add a nice texture and some nutrition, but they are not a must. If you leave them out, just make sure to eat the oats sooner. Enjoy them for breakfast or a snack! For the full recipe, check out the linked recipe above. In this post, we explored pumpkin pie overnight oats, from main ingredients to optional toppings. I shared step-by-step instructions for mixing and serving, along with tips for a creamy texture. You learned how to make dairy-free versions and boost protein. Remember to store leftovers right to keep them fresh. Overnight oats offer great flexibility, making them easy to adapt for your taste. Enjoy your tasty, nutritious breakfast!

Pumpkin Pie Overnight Oats Nourishing Easy Recipe

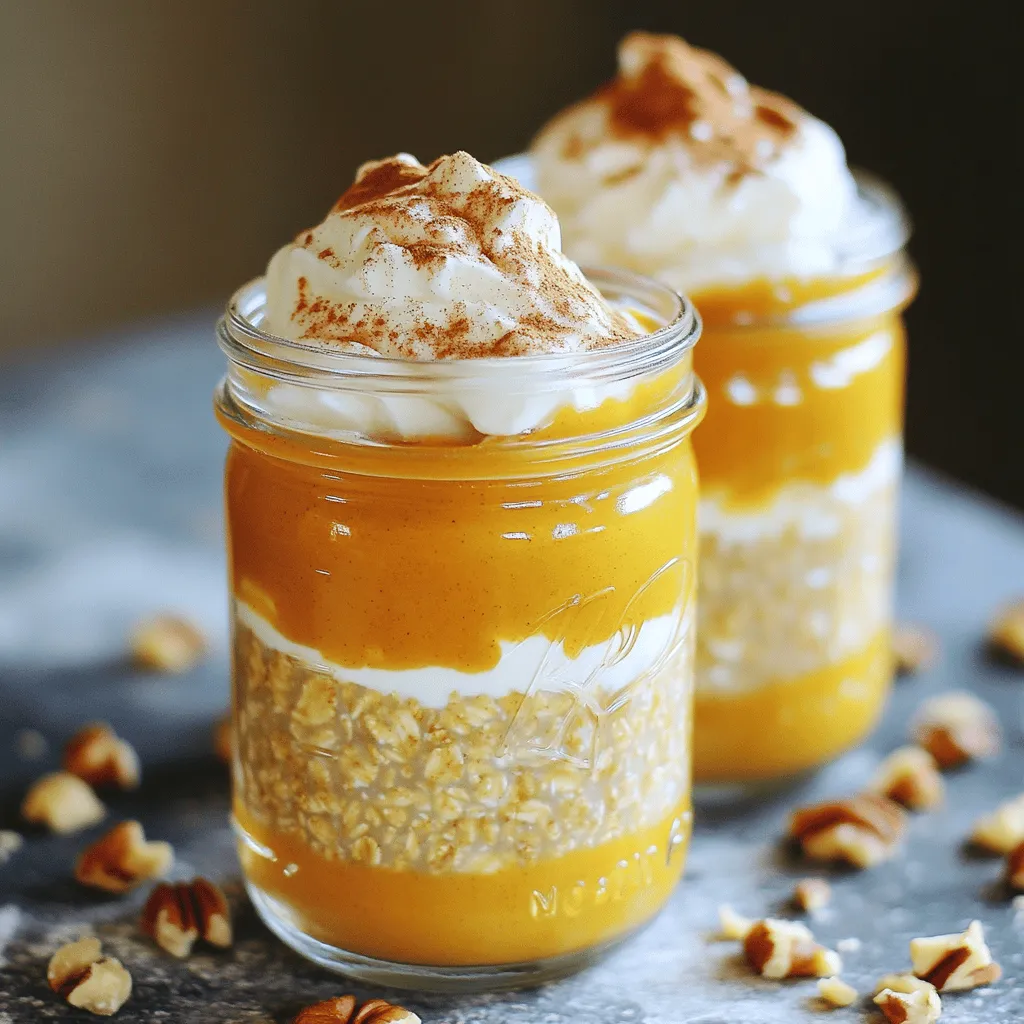
If you love fall flavors, you’ll adore Pumpkin Pie Overnight Oats. This easy recipe combines the best of pumpkin pie

Here is what you need for the easy sautéed cabbage: - 1 small head of green cabbage, shredded - 1 tablespoon olive oil - 1 tablespoon unsalted butter - 1 large onion, thinly sliced - 2 cloves garlic, minced - 1 teaspoon caraway seeds (optional for extra flavor) - Salt and pepper to taste - 1 tablespoon apple cider vinegar This recipe serves 4 people. Using fresh ingredients makes a big difference in taste. The cabbage is crunchy and sweet, while the onion adds a nice depth. Don't skip the garlic; it brings a warm flavor. If you want to try something special, the caraway seeds can add a nice twist. When you combine all these ingredients, you have a quick and tasty meal. You can use this dish as a side or even a main course. For the full recipe, check the earlier section. Start by heating 1 tablespoon of olive oil and 1 tablespoon of butter in a large skillet. Use medium heat to melt the butter. This heat level helps the food cook evenly without burning. You want the butter to bubble but not smoke. This step sets the stage for great flavor. Next, add the thinly sliced onion to the skillet. Cook it for about 5 minutes. You want the onion to turn translucent. This change shows it’s ready for the next step. The sweet smell of cooked onions fills the kitchen, making it hard to resist. After the onions are soft, stir in 2 minced cloves of garlic and optional caraway seeds. Cook this mixture for another minute. Adding garlic now gives the best flavor. Then, toss in the shredded cabbage. Mix it well with the onions and garlic. This blend is where the magic happens. Cover the skillet to trap the heat. Cook the cabbage for about 10-12 minutes. Stir occasionally to prevent sticking. The cabbage will shrink in size as it cooks. You want it soft but not mushy. The cover helps steam the cabbage, making it tender. Once the cabbage is soft, remove the lid. Drizzle in 1 tablespoon of apple cider vinegar. Stir for an additional 2-3 minutes. This step helps remove extra moisture. Taste the dish and adjust the salt and pepper if you need to. This final touch brings all the flavors together. For the full recipe, check out the [Full Recipe]. To make your sautéed cabbage shine, use simple spices and herbs. Salt and pepper are key. You can also add: - Caraway seeds for a warm flavor - Red pepper flakes for a little heat - Thyme or dill for a fresh taste These spices enhance the natural flavors. You can play with the amounts to find what you love. A splash of apple cider vinegar adds brightness. Stirring the cabbage helps it cook evenly. Make sure to stir every few minutes. If you want crispy cabbage, cook it uncovered. For a tender texture, keep it covered. Cooking times will vary: - For crispy, aim for 5-8 minutes. - For tender, let it cook for 10-12 minutes. Adjust the heat if it browns too fast. To serve your sautéed cabbage, use a large bowl or platter. This makes it look inviting. Add fresh herbs like parsley or chives on top. They add color and freshness. You can also serve it with roasted meats or grains. This makes a full meal. For the full recipe, check the details in the main article. {{image_2}} You can add proteins like bacon or sausage to your sautéed cabbage. Just chop them up and cook them first in the skillet. This adds a smoky flavor that pairs nicely with the cabbage. You can also use vegetable or chicken broth instead of water when cooking. This choice gives a richer flavor and helps the cabbage stay moist. Try using different vinegars to change the taste. Balsamic or red wine vinegar can add a sweet or tangy kick. You can also mix in other vegetables. Carrots bring sweetness, and bell peppers add crunch and color. This makes your dish more exciting and nutritious. For an Asian twist, add soy sauce to your sautéed cabbage. It gives a savory depth that works well with the cabbage's natural taste. If you want a Mediterranean touch, mix in olives and feta cheese. These ingredients create a fresh and salty flavor that transforms the dish. You can explore these variations to make your Easy Sautéed Cabbage even more delightful. For the full recipe, check out the Easy Sautéed Cabbage section above. To store leftover sautéed cabbage, place it in an airtight container. This keeps it fresh and prevents odors. Leftover sautéed cabbage lasts about 3 to 5 days in the fridge. If you notice any moisture buildup, be sure to dry it off before sealing. When reheating sautéed cabbage, use the stovetop or microwave. For stovetop, add a splash of water or broth to keep it moist. Stir it often over low heat until warmed through. In the microwave, cover the dish with a lid or wrap to trap steam. Heat in short bursts of 30 seconds, stirring in between, to prevent overcooking. This helps keep the texture and flavor intact. Yes, you can freeze sautéed cabbage. To freeze, let it cool completely. Then, transfer it to a freezer-safe bag or container. Remove as much air as possible to avoid freezer burn. It can be stored for up to 3 months. To thaw, place it in the fridge overnight. You can also reheat it directly from frozen, adding a little water to help it steam. Sautéing cabbage takes about 25 minutes total. You need 10 minutes to prep and 15 minutes to cook. Start by heating your oil and butter, then sauté the onions, add garlic, and finally toss in the cabbage. Yes, you can use different types of cabbage. Green cabbage is the most common, but red and savoy cabbage also work well. Red cabbage adds a beautiful color and a slightly sweet taste. Savoy cabbage has crinkly leaves and a tender texture. Sautéed cabbage pairs nicely with many dishes. You can serve it alongside grilled meats like chicken or pork. It also goes well with rice or quinoa for a hearty meal. Try adding it to a sandwich or wrap for extra crunch. Yes, sautéed cabbage is very healthy. Cabbage is low in calories and high in fiber. It is full of vitamins C and K, which are great for your health. To keep it healthy, use less oil and butter. You can also skip the added sugar or salt. For the full recipe, visit the Easy Sautéed Cabbage section. This post shared a simple recipe for sautéed cabbage, complete with key ingredients and step-by-step instructions. It also offered tips for seasoning, cooking, and storage, along with variations to try. Sautéed cabbage is not just tasty but also versatile. You can change flavors and add proteins or veggies. Whether you make it plain or dress it up, this dish is a hit. Enjoy cooking and experimenting with your own variations!

Easy Sautéed Cabbage Quick and Flavorful Meal

Looking for a quick and tasty meal? My easy sautéed cabbage recipe is just what you need! With just a

To make this no-bake pumpkin pie dip, you need a few simple ingredients: - 1 cup pumpkin puree - 1 cup cream cheese, softened - 1/2 cup powdered sugar - 1 teaspoon vanilla extract - 1 teaspoon pumpkin pie spice - 1/4 teaspoon salt - 1 cup cool whip or whipped cream - Graham crackers or sliced apples for dipping You can swap some of these ingredients if needed. For a lighter dip, use low-fat cream cheese. If you want sweetness, add more powdered sugar to taste. You can also use dairy-free cool whip for a vegan option. Just make sure it’s a good match for your flavors. Using fresh pumpkin instead of canned is a fun twist, but it adds cooking time. If you want a richer flavor, try adding a bit of maple syrup. This dip is so flexible, so don’t be afraid to get creative! For the full recipe, check the instructions that follow this section. Enjoy your dip! Mixing the Cream Cheese and Powdered Sugar Start by taking your cream cheese and powdered sugar. Use a medium mixing bowl for this step. Beat them together with an electric mixer. Mix until the mixture is smooth and creamy. This step is key for a rich dip. Incorporating Pumpkin and Spices Next, add the pumpkin puree to the bowl. Don’t forget the pumpkin pie spice, vanilla extract, and salt. Mix everything well until it blends smoothly. This mixture should smell amazing, and the color will be bright orange. Folding in Cool Whip Gently fold in the cool whip or whipped cream. Use a spatula to combine it without deflating the air. This keeps your dip light and fluffy. The cool whip adds a nice sweetness and creaminess. Transferring to Serving Bowl Now, take your dip and transfer it to a serving bowl. Use a spatula to smooth the top. This makes it look nice for your guests. A festive bowl adds a fun touch! Chilling Time It’s time to chill the dip. Place it in the refrigerator for about 30 minutes. This helps the flavors meld together. The wait is worth it, as it makes the dip even tastier. For the full recipe, check the instructions above. Enjoy your delicious no-bake pumpkin pie dip! Achieving the Right Consistency To get a smooth and creamy dip, mix the cream cheese and powdered sugar well. Use an electric mixer for best results. You want it to be light and fluffy. If it seems too thick, add a splash of milk. This tip helps keep the dip easy to scoop. Flavor Enhancements You can boost the flavor in many ways. Try adding a bit more pumpkin pie spice. A pinch of nutmeg or cinnamon can add warmth. For a sweet twist, drizzle in a bit of maple syrup. Taste as you go, and adjust the flavors to your liking. Best Dipping Options For dipping, I love using graham crackers. They give a nice crunch and sweetness. Sliced apples are another great choice, adding freshness. For something fun, try mini pretzels. The salty taste pairs well with the sweet dip. Creative Plating Ideas Presentation matters! Serve the dip in a fun bowl. You can sprinkle extra pumpkin pie spice on top for flair. Add a few crushed graham crackers as a garnish. Arrange your dipping options around the bowl for a festive look. These simple ideas make your dish pop! You can find the full recipe [here](#). {{image_2}} You can make this dip fit your needs with a few swaps. If you want a dairy-free or vegan option, use vegan cream cheese and coconut whipped cream instead of cool whip. This change keeps the dip creamy without dairy. You can also add fun flavors to the dip. Try mixing in some melted chocolate or caramel for a sweet twist. These add-ins make the dip even more exciting. Just make sure not to overpower the pumpkin flavor. This dip is perfect for any holiday. For Halloween, add candy corn on top for a festive look. For Thanksgiving, sprinkle some chopped pecans or walnuts on top to give it a crunchy texture. Kids love this dip too! You can serve it with colorful fruit like strawberries or bananas. You can also use fun-shaped cookies for dipping. This makes the dip fun and tasty for kids at any gathering. After enjoying your No-Bake Pumpkin Pie Dip, store any leftovers in an airtight container. I recommend using a glass or plastic container with a tight lid. This keeps the dip fresh and tasty. In the refrigerator, the dip lasts for about three to five days. Always check for any changes in smell or texture before enjoying it again. You can also freeze this dip if you need to keep it longer. To do this, scoop the dip into a freezer-safe container. Leave some space at the top, as it may expand when frozen. Make sure to seal it well. The dip can stay frozen for about one to two months. When you are ready to eat it, move the container to the fridge. Let it thaw overnight. If you need it faster, you can place the container in cold water. After thawing, stir the dip well before serving. If it seems thick, you can mix in a bit of cream or milk to restore its creamy texture. Can I use fresh pumpkin instead of canned? Yes, you can use fresh pumpkin. First, cook and puree the pumpkin. Make sure it is smooth. Fresh pumpkin has a slightly different taste but is still good. How long can I keep this dip in the fridge? You can store this dip in the fridge for about three to four days. Make sure to keep it in an airtight container. This helps keep it fresh and tasty. Can I make this dip ahead of time? Absolutely! Making this dip ahead of time is a great idea. It tastes even better after chilling for a few hours. Just cover it well and place it in the fridge. What can I serve with this dip? You can serve this dip with many things. Graham crackers, sliced apples, or mini pretzels work well. You can also try it with vanilla wafers for a fun twist. Calorie and nutritional estimates per serving Each serving has about 150 calories. It also includes around 5 grams of fat and 3 grams of protein. Keep in mind that toppings or dippers may change these numbers. Dietary restrictions and considerations This dip contains dairy, so it may not be suitable for those who are lactose intolerant. You can try using dairy-free cream cheese for a suitable alternative. In this blog post, we explored the key ingredients, easy steps, and helpful tips for making a delicious no-bake pumpkin pie dip. You learned about ingredient substitutions, ideal serving options, and ways to store leftovers. Remember, this dip is versatile and can fit any occasion, from casual snacks to festive gatherings. Feel free to experiment with flavors and variations. Enjoy creating a delightful treat that everyone will love!

No-Bake Pumpkin Pie Dip Creamy and Simple Delight

Looking for a tasty treat that combines fall flavors with easy prep? You’ll love this No-Bake Pumpkin Pie Dip. This

Older posts
Newer posts
← Previous Page1 … Page42 Page43 Page44 … Page84 Next →

dsad

© 2026 Foodish Talk • Built with GeneratePress

Our Policies

  • Copyright Policy
  • Cookie Policy
  • GDPR Policy
  • Privacy Policy
  • Disclaimer
  • Terms Of Use

More Information

  • Home
  • About
  • Contact
  • Appetizers
  • Dessert
  • Dinner
  • Drinks
©2026, Foodish Talk About Back To Top