Soft Holiday Thumbprint Cookies Festive and Flavorful

Get ready to fill your kitchen with joy this holiday season! Soft Holiday Thumbprint Cookies are the perfect festive treat that are easy to make and full of flavor. With simple ingredients and fun filling options, you can create a batch that everyone will love. Join me as we explore step-by-step instructions, tips, and unique twists on this classic cookie. Let’s bake some sweet holiday magic together!

Ingredients

Overview of Key Ingredients

To make soft holiday thumbprint cookies, you need simple, tasty ingredients. Here’s what you’ll need:

– 2 cups all-purpose flour

– 1/2 teaspoon baking powder

– 1/4 teaspoon salt

– 1/2 cup unsalted butter, softened

– 1/2 cup granulated sugar

– 1/4 cup powdered sugar

– 1 large egg yolk

– 1 teaspoon vanilla extract

– 1/2 cup colorful sprinkles (or chopped nuts)

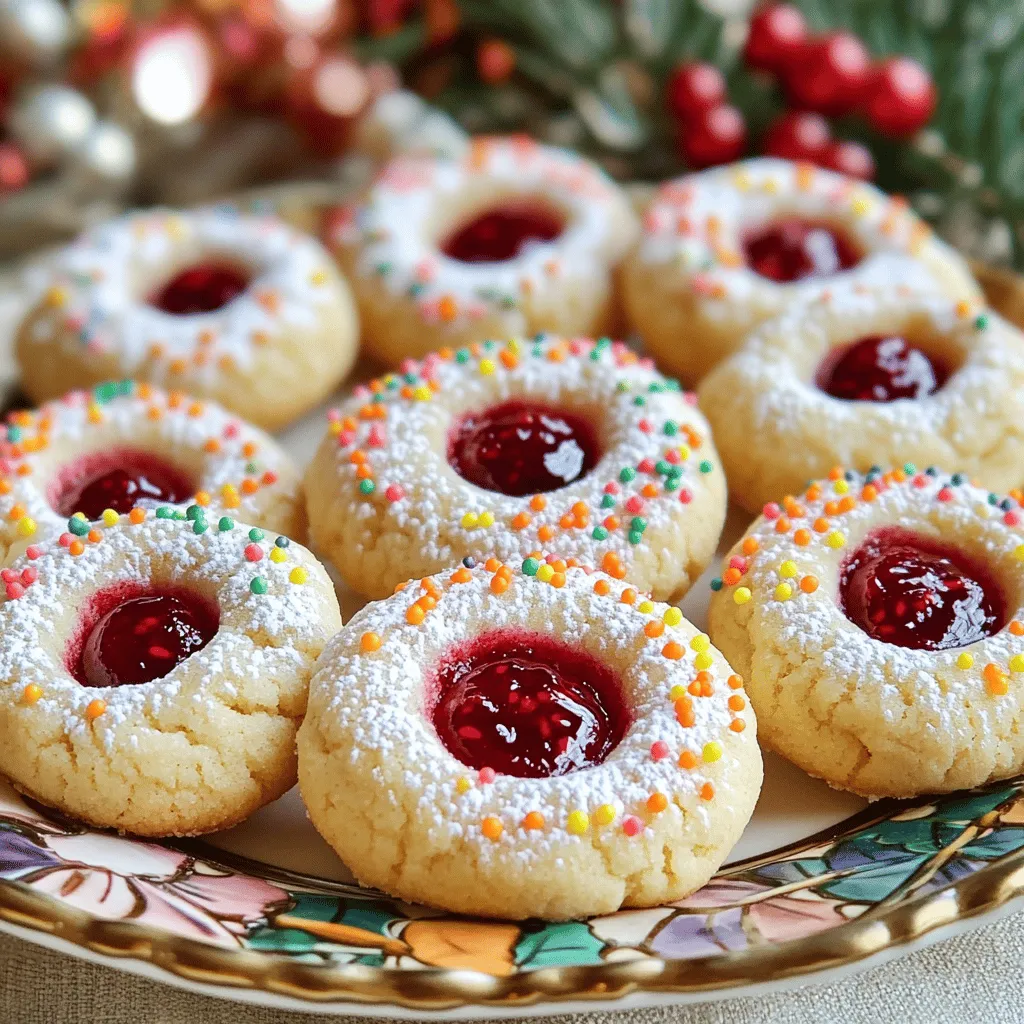
– 1/2 cup your favorite jam (raspberry, apricot, or strawberry)

Each ingredient plays a role. Flour gives structure. Butter adds richness. Sugars bring sweetness. The egg yolk helps bind the dough. Vanilla adds a warm flavor that brightens each bite.

Ingredient Substitutions

You can swap some ingredients if needed. Here are a few ideas:

– For a dairy-free version, use vegan butter or coconut oil.

– If you have no granulated sugar, brown sugar works well for a deeper taste.

– You can replace all-purpose flour with almond flour for a gluten-free option.

– Different jams can also work. Try chocolate spread or lemon curd for a fun twist.

Be creative! These swaps can change the flavor and texture.

Tools Needed for Preparation

You’ll need a few basic tools to make these cookies:

– Mixing bowls (one large, one medium)

– Whisk or electric mixer

– Baking sheet lined with parchment paper

– Measuring cups and spoons

– A small spoon or your thumb for making the indents

– A wire rack for cooling

Having the right tools makes baking easier. Gather everything before starting. This way, you can enjoy the process!

Step-by-Step Instructions

Prepping the Oven and Baking Sheet

First, preheat your oven to 350°F (175°C). This step is key to getting soft cookies. While the oven heats, line a baking sheet with parchment paper. This paper helps the cookies not stick and makes cleanup easy.

Mixing the Dough

Next, grab two bowls. In a medium bowl, whisk together the flour, baking powder, and salt. Set this bowl aside. In a large bowl, cream the softened butter with granulated sugar and powdered sugar. Mix until it looks light and fluffy. Then, add the egg yolk and vanilla extract. Stir until it is well combined. Gradually add the flour mixture. Mix just until combined to keep the cookies soft.

Shaping and Baking the Cookies

Now it’s time to shape the cookies. Use your hands to form small balls of dough, about 1 inch wide. Roll each ball in colorful sprinkles or chopped nuts for a fun touch. Place the balls on your baking sheet, leaving about 2 inches between them. Use your thumb or a small spoon to press down in the center of each cookie. This creates a little well for jam. Spoon a small amount of your favorite jam into each well. Be careful not to overfill. Bake the cookies for 10-12 minutes or until the edges turn lightly golden. Once baked, let them cool on the sheet for about 5 minutes. After that, transfer them to a wire rack to cool completely.

Tips & Tricks

Achieving the Perfect Texture

To get soft holiday thumbprint cookies, focus on the butter. Use room temperature butter. This helps it cream well with sugar. Cream until the mix is light and fluffy. This step adds air and makes cookies soft. Don’t overmix the dough once you add flour. Just mix until combined.

Tips for Filling the Thumbprint

For the filling, choose your favorite jam. Raspberry, apricot, and strawberry all work well. When you press your thumb into the cookie, make a deep enough well. This helps hold the jam. Use a small spoon to add the jam. Avoid overfilling to prevent spilling during baking.

Common Mistakes to Avoid

One mistake is baking too long. Check your cookies at 10 minutes. They should be lightly golden on the edges. Another error is not using enough flour. If the dough feels sticky, add a bit more flour. Lastly, don’t skip the chilling step if your dough is warm. Chilling helps the cookies hold their shape. For more details, see the Full Recipe.

Variations

Flavor Options for Jam Filling

You can use many types of jam for your thumbprint cookies. Raspberry, apricot, and strawberry are classic choices. Each flavor adds a unique twist to the cookie. For a fun change, try orange marmalade or blueberry jam. Mixing different jams can also create a burst of flavor. Just remember to use your favorites!

Different Coating Choices (Sprinkles, Nuts)

Coating your cookies can change their look and taste. Colorful sprinkles are a fun way to add cheer. They make the cookies festive and bright. If you prefer a crunch, use chopped nuts like almonds or walnuts. You can even mix both! This gives your cookies a unique texture and flavor.

Gluten-Free Adaptations

You can easily make these cookies gluten-free. Swap all-purpose flour with a gluten-free blend. Be sure to check the label for a one-to-one substitute. This way, everyone can enjoy them. The texture may be a bit different, but the taste will still shine. You can find gluten-free jams to match, too. Enjoy a festive treat that fits your needs!

For the complete recipe, check out the Full Recipe.

Storage Info

Best Ways to Store Cookies

To keep your soft holiday thumbprint cookies fresh, use an airtight container. Line the container with parchment paper to prevent sticking. Place the cookies in a single layer when possible. If you stack them, add parchment between the layers. This keeps their shape and taste intact.

How Long They Will Last

Stored properly, these cookies will last for about one week at room temperature. If you want to enjoy them longer, consider freezing them. The cookies may dry out after a week, so avoid leaving them out too long.

Freezing Instructions

To freeze the cookies, first, let them cool completely. Then, place them in a single layer on a baking sheet. Freeze them for about an hour to firm up. After that, transfer the cookies to a freezer-safe bag or container. Be sure to label the bag with the date. They can stay in the freezer for up to three months. When you want to enjoy a cookie, just thaw it at room temperature. For a treat, you can also warm them in the oven for a few minutes.

FAQs

How do I make my thumbprint cookies softer?

To make your thumbprint cookies softer, use room temperature butter. This helps create a light texture. Make sure not to overmix the dough. Overmixing can make the cookies tough. Also, bake them for the right time. If you bake them too long, they will harden. Finally, let them cool on a wire rack. This step helps keep them soft.

Can I use different types of jam?

Yes, you can use different types of jam! Raspberry, apricot, and strawberry are great options. You can even try orange marmalade or blueberry jam. Each jam adds its own flavor and color. Think about what you like best. I love mixing flavors for fun surprises!

What are the best sprinkles for decoration?

The best sprinkles for decoration are colorful and festive! You can use nonpareils, jimmies, or sugar sprinkles. Choose sprinkles that match your holiday theme. For a classic look, use red and green. For a unique twist, try gold or silver. Sprinkles add fun and joy to the cookies.

– Where can I find the Full Recipe?

You can find the Full Recipe in the introductory section of this article. It has all the details you need to make these tasty cookies.

In this blog post, we explored key ingredients for thumbprint cookies and how to make them. We discussed oven prep, mixing dough, and shaping cookies. I shared tips for texture and avoiding common mistakes. You learned about flavor variations and the best ways to store cookies.

Now, you’re ready to create tasty thumbprint cookies that everyone will love. Enjoy baking and let your creativity shine!

To make soft holiday thumbprint cookies, you need simple, tasty ingredients. Here’s what you’ll need: - 2 cups all-purpose flour - 1/2 teaspoon baking powder - 1/4 teaspoon salt - 1/2 cup unsalted butter, softened - 1/2 cup granulated sugar - 1/4 cup powdered sugar - 1 large egg yolk - 1 teaspoon vanilla extract - 1/2 cup colorful sprinkles (or chopped nuts) - 1/2 cup your favorite jam (raspberry, apricot, or strawberry) Each ingredient plays a role. Flour gives structure. Butter adds richness. Sugars bring sweetness. The egg yolk helps bind the dough. Vanilla adds a warm flavor that brightens each bite. You can swap some ingredients if needed. Here are a few ideas: - For a dairy-free version, use vegan butter or coconut oil. - If you have no granulated sugar, brown sugar works well for a deeper taste. - You can replace all-purpose flour with almond flour for a gluten-free option. - Different jams can also work. Try chocolate spread or lemon curd for a fun twist. Be creative! These swaps can change the flavor and texture. You’ll need a few basic tools to make these cookies: - Mixing bowls (one large, one medium) - Whisk or electric mixer - Baking sheet lined with parchment paper - Measuring cups and spoons - A small spoon or your thumb for making the indents - A wire rack for cooling Having the right tools makes baking easier. Gather everything before starting. This way, you can enjoy the process! First, preheat your oven to 350°F (175°C). This step is key to getting soft cookies. While the oven heats, line a baking sheet with parchment paper. This paper helps the cookies not stick and makes cleanup easy. Next, grab two bowls. In a medium bowl, whisk together the flour, baking powder, and salt. Set this bowl aside. In a large bowl, cream the softened butter with granulated sugar and powdered sugar. Mix until it looks light and fluffy. Then, add the egg yolk and vanilla extract. Stir until it is well combined. Gradually add the flour mixture. Mix just until combined to keep the cookies soft. Now it’s time to shape the cookies. Use your hands to form small balls of dough, about 1 inch wide. Roll each ball in colorful sprinkles or chopped nuts for a fun touch. Place the balls on your baking sheet, leaving about 2 inches between them. Use your thumb or a small spoon to press down in the center of each cookie. This creates a little well for jam. Spoon a small amount of your favorite jam into each well. Be careful not to overfill. Bake the cookies for 10-12 minutes or until the edges turn lightly golden. Once baked, let them cool on the sheet for about 5 minutes. After that, transfer them to a wire rack to cool completely. To get soft holiday thumbprint cookies, focus on the butter. Use room temperature butter. This helps it cream well with sugar. Cream until the mix is light and fluffy. This step adds air and makes cookies soft. Don’t overmix the dough once you add flour. Just mix until combined. For the filling, choose your favorite jam. Raspberry, apricot, and strawberry all work well. When you press your thumb into the cookie, make a deep enough well. This helps hold the jam. Use a small spoon to add the jam. Avoid overfilling to prevent spilling during baking. One mistake is baking too long. Check your cookies at 10 minutes. They should be lightly golden on the edges. Another error is not using enough flour. If the dough feels sticky, add a bit more flour. Lastly, don’t skip the chilling step if your dough is warm. Chilling helps the cookies hold their shape. For more details, see the Full Recipe. {{image_2}} You can use many types of jam for your thumbprint cookies. Raspberry, apricot, and strawberry are classic choices. Each flavor adds a unique twist to the cookie. For a fun change, try orange marmalade or blueberry jam. Mixing different jams can also create a burst of flavor. Just remember to use your favorites! Coating your cookies can change their look and taste. Colorful sprinkles are a fun way to add cheer. They make the cookies festive and bright. If you prefer a crunch, use chopped nuts like almonds or walnuts. You can even mix both! This gives your cookies a unique texture and flavor. You can easily make these cookies gluten-free. Swap all-purpose flour with a gluten-free blend. Be sure to check the label for a one-to-one substitute. This way, everyone can enjoy them. The texture may be a bit different, but the taste will still shine. You can find gluten-free jams to match, too. Enjoy a festive treat that fits your needs! For the complete recipe, check out the Full Recipe. To keep your soft holiday thumbprint cookies fresh, use an airtight container. Line the container with parchment paper to prevent sticking. Place the cookies in a single layer when possible. If you stack them, add parchment between the layers. This keeps their shape and taste intact. Stored properly, these cookies will last for about one week at room temperature. If you want to enjoy them longer, consider freezing them. The cookies may dry out after a week, so avoid leaving them out too long. To freeze the cookies, first, let them cool completely. Then, place them in a single layer on a baking sheet. Freeze them for about an hour to firm up. After that, transfer the cookies to a freezer-safe bag or container. Be sure to label the bag with the date. They can stay in the freezer for up to three months. When you want to enjoy a cookie, just thaw it at room temperature. For a treat, you can also warm them in the oven for a few minutes. To make your thumbprint cookies softer, use room temperature butter. This helps create a light texture. Make sure not to overmix the dough. Overmixing can make the cookies tough. Also, bake them for the right time. If you bake them too long, they will harden. Finally, let them cool on a wire rack. This step helps keep them soft. Yes, you can use different types of jam! Raspberry, apricot, and strawberry are great options. You can even try orange marmalade or blueberry jam. Each jam adds its own flavor and color. Think about what you like best. I love mixing flavors for fun surprises! The best sprinkles for decoration are colorful and festive! You can use nonpareils, jimmies, or sugar sprinkles. Choose sprinkles that match your holiday theme. For a classic look, use red and green. For a unique twist, try gold or silver. Sprinkles add fun and joy to the cookies. - Where can I find the Full Recipe? You can find the Full Recipe in the introductory section of this article. It has all the details you need to make these tasty cookies. In this blog post, we explored key ingredients for thumbprint cookies and how to make them. We discussed oven prep, mixing dough, and shaping cookies. I shared tips for texture and avoiding common mistakes. You learned about flavor variations and the best ways to store cookies. Now, you’re ready to create tasty thumbprint cookies that everyone will love. Enjoy baking and let your creativity shine!

Soft Holiday Thumbprint Cookies

Indulge in the magic of the season with these soft holiday thumbprint cookies! This delightful recipe combines buttery dough with your favorite jam and colorful sprinkles, making them a festive treat everyone will love. Perfect for cookie exchanges or cozy gatherings, these cookies are easy to bake and sure to impress. Click through to explore the full recipe and make this holiday season sweeter!

Ingredients
  

2 cups all-purpose flour

1/2 teaspoon baking powder

1/4 teaspoon salt

1/2 cup unsalted butter, softened

1/2 cup granulated sugar

1/4 cup powdered sugar

1 large egg yolk

1 teaspoon vanilla extract

1/2 cup colorful sprinkles (or chopped nuts)

1/2 cup your favorite jam (raspberry, apricot, or strawberry)

Instructions
 

Preheat your oven to 350°F (175°C) and line a baking sheet with parchment paper.

    In a medium bowl, whisk together the flour, baking powder, and salt; set aside.

      In a large mixing bowl, cream together the softened butter, granulated sugar, and powdered sugar until light and fluffy.

        Add the egg yolk and vanilla extract to the butter mixture and mix until well combined.

          Gradually add the flour mixture into the wet ingredients, mixing until just combined.

            Using your hands, form the dough into small balls (about 1 inch in diameter) and roll them in the colorful sprinkles or chopped nuts to coat the outside.

              Place the balls on the prepared baking sheet, spaced about 2 inches apart.

                Using your thumb (or a small spoon), gently press down in the center of each cookie to create a small indentation.

                  Spoon a small amount of jam into each indentation, being careful not to overfill.

                    Bake the cookies in the preheated oven for 10-12 minutes or until the edges are lightly golden.

                      Remove from the oven and let them cool on the baking sheet for about 5 minutes before transferring them to a wire rack to cool completely.

                        Prep Time: 15 minutes | Total Time: 30 minutes | Servings: 24 cookies

                          - Presentation Tips: Arrange the thumbprint cookies on a decorative plate and dust lightly with powdered sugar for a festive touch. You can also serve them alongside a selection of holiday teas.

                            Leave a Comment

                            Recipe Rating