Ready to treat yourself to something amazing? These Salted Caramel Chocolate Chip Bars are a sweet dream come true. I’ll share simple steps and tips to make these irresistible goodies. With a perfect blend of sweet and salty, they’re sure to please everyone. Get ready to impress your friends and family with your baking skills! Let’s dive into the delicious world of salted caramel chocolate chip bars!
Ingredients
List of Ingredients
– 1 cup unsalted butter, softened
– 1 cup brown sugar, packed
– 1/2 cup granulated sugar
– 2 large eggs
– 2 teaspoons vanilla extract
– 3 cups all-purpose flour
– 1 teaspoon baking soda
– 1/2 teaspoon salt
– 1 cup chocolate chips (semi-sweet or dark)
– 1 cup salted caramel sauce (store-bought or homemade)
– Flaky sea salt for topping
Measurements and Substitutions
In this recipe, I use common ingredients. If you want to swap some, here are ideas:
– Use coconut oil instead of butter.
– For sugar, try coconut sugar for a different taste.
– You can use egg replacers if you want a vegan option.
– Use gluten-free flour if you need a gluten-free version.
What You Need for Homemade Salted Caramel
To make your own salted caramel, gather these items:
– 1 cup granulated sugar
– 6 tablespoons unsalted butter
– 1/2 cup heavy cream
– 1 teaspoon flaky sea salt
To make the caramel:
1. In a pan, heat sugar on medium.
2. Stir until it melts and turns amber.
3. Add butter and stir until melted.
4. Slowly pour in heavy cream and mix well.
5. Add salt and let it cool.
This caramel is sweet, rich, and adds the perfect touch to your bars!
Step-by-Step Instructions
Preparing the Baking Pan
To start, preheat your oven to 350°F (175°C). This ensures even baking. Next, grab a 9×13-inch baking pan. Grease it lightly with butter. Then, line it with parchment paper. Leave some paper hanging over the edges. This makes it easy to lift the bars out later.
Mixing the Wet Ingredients
In a large bowl, add 1 cup of softened butter. Then, add 1 cup of packed brown sugar and 1/2 cup of granulated sugar. Use an electric mixer to cream them together. Mix until fluffy, about 2-3 minutes. Next, add 2 large eggs one by one. Mix well after each egg. Finally, stir in 2 teaspoons of vanilla extract.
Combining Dry Ingredients and Forming Dough
In another bowl, whisk together 3 cups of all-purpose flour, 1 teaspoon of baking soda, and 1/2 teaspoon of salt. Gradually add this mix to the wet ingredients. Stir until just combined. Don’t overmix! Gently fold in 1 cup of chocolate chips, making sure they spread evenly through the dough.
Assembling the Bars
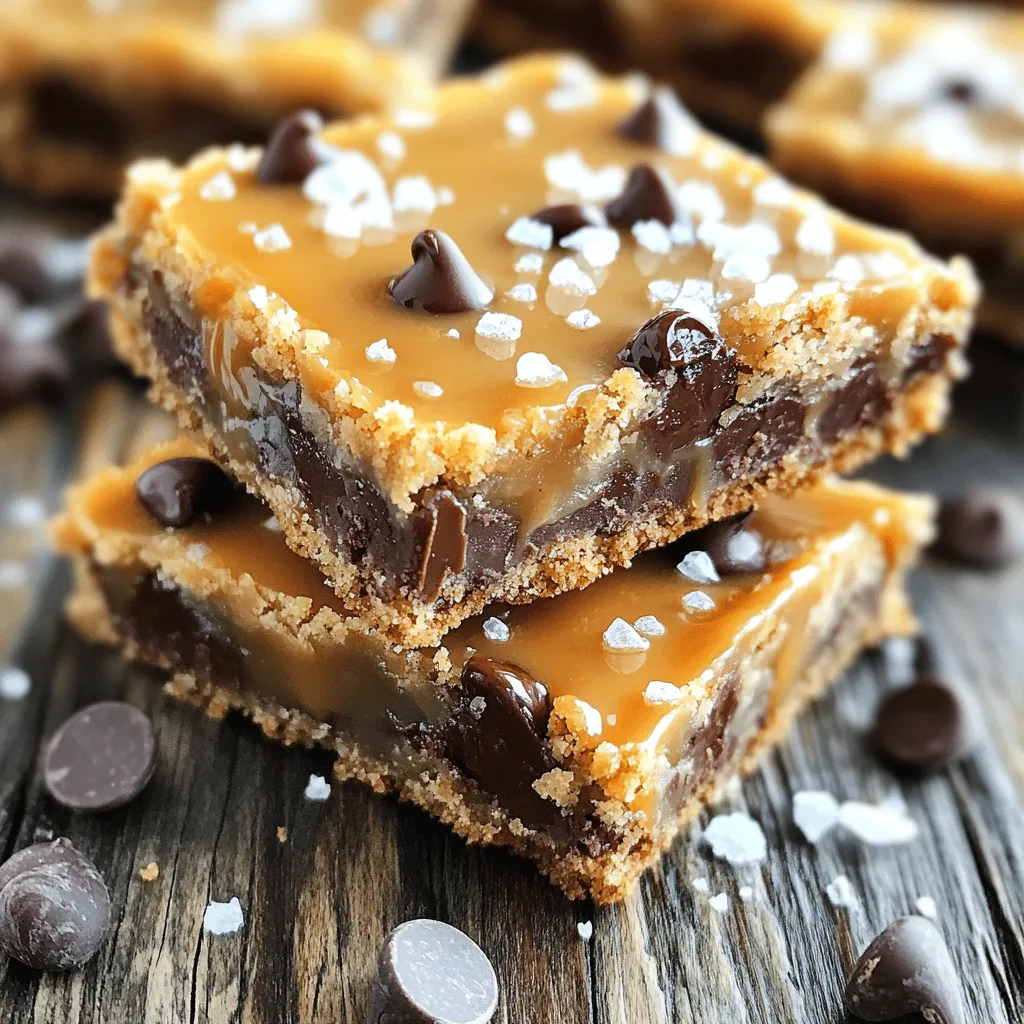
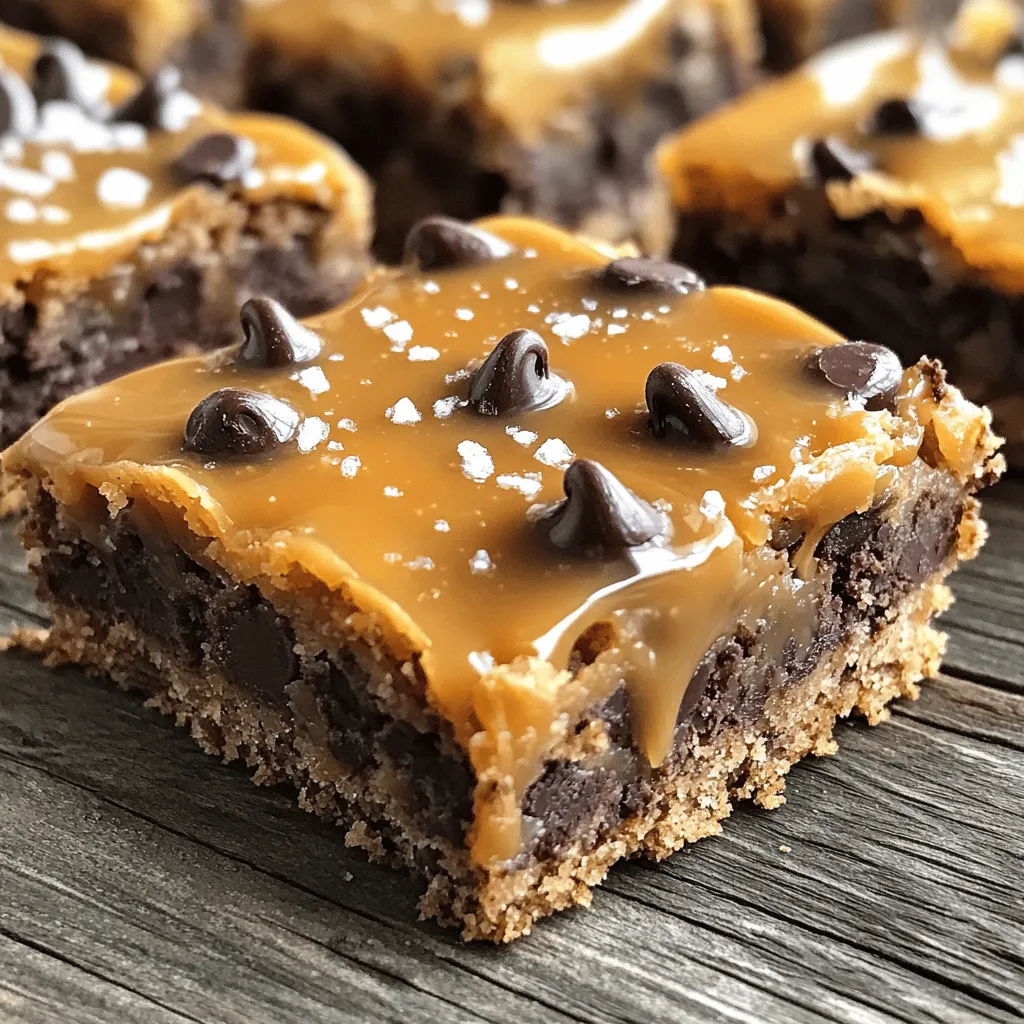
Take half of the dough and spread it into your prepared pan. Press it down evenly. Next, drizzle half of your salted caramel sauce over the dough. Spoon dollops of the remaining dough over the caramel layer. Use a spatula to spread it gently. It’s okay if some caramel shows through. Finally, drizzle the rest of the salted caramel on top and sprinkle with flaky sea salt.
Baking the Bars
Place the pan in your preheated oven. Bake for 25-30 minutes. Look for golden brown edges. When done, a toothpick should come out with a few moist crumbs.
Cooling and Cutting
Allow the bars to cool in the pan for about 15 minutes. Carefully lift them out using the parchment paper overhang. Place them on a wire rack to cool completely. Once cool, cut into squares and enjoy!
Tips & Tricks
Achieving the Perfect Texture
To get soft and chewy bars, use room temperature butter. Cream the butter and sugars well. This helps make the bars light. Do not overmix the dough after adding the flour. Just mix until combined. The dough should stay thick and slightly sticky. Baking time matters, too. Keep an eye on the edges. They should look golden. The center may seem underbaked, but it firms up as it cools.
How to Store Leftover Bars
If you have extra bars, store them in an airtight container. This keeps them fresh and soft. You can layer parchment paper between the bars to avoid sticking. Keep them at room temperature for up to three days. If you want to save them longer, place them in the fridge. They’ll stay good for about a week. Just let them come to room temp before eating for the best taste.
Make-Ahead and Freezing Tips
You can make the dough ahead of time. Just wrap it tightly in plastic wrap and freeze. When ready, thaw it overnight in the fridge. You can also bake the bars, then freeze them. Cut them into squares and place them in freezer bags. They can last for up to three months. To enjoy, thaw them in the fridge or at room temperature. Reheat them in the microwave for a few seconds if you like them warm.
Variations
Ingredient Swaps for Dietary Preferences
You can easily adjust this recipe. If you need it dairy-free, swap the butter for a plant-based option. Use coconut oil or vegan butter. You can also use a dairy-free chocolate chip. For gluten-free bars, replace all-purpose flour with a gluten-free blend. Make sure it has xanthan gum for the right texture. If you’re watching your sugar, try coconut sugar instead of brown and granulated sugar.
Flavor Additions and Enhancements
Want to mix things up? Add nuts like walnuts or pecans for a nice crunch. You can also sprinkle in some cinnamon or espresso powder for a warm flavor boost. If you love fruit, try adding dried cherries or cranberries. Swap out the chocolate chips for white chocolate or butterscotch chips. Think about adding a hint of orange zest for a fresh twist.
Serving Suggestions and Pairings
These bars are great on their own, but they shine with some extra touches. Serve them warm with a scoop of vanilla ice cream. Drizzle extra salted caramel sauce on top for a real treat. You can also pair these bars with a cup of coffee or tea. For a fun twist, serve them with a glass of cold milk. They make a great snack or dessert for any gathering.
Storage Info
Best Practices for Keeping Bars Fresh
To keep your salted caramel chocolate chip bars fresh, store them in an airtight container. This keeps moisture in and prevents them from drying out. You can also place parchment paper between layers to avoid sticking. If you want extra protection, wrap the container in plastic wrap.
How Long Do They Last?
These delicious bars can last up to one week at room temperature. For longer storage, place them in the fridge. They stay good for about two weeks when chilled. Frozen bars can last for about three months. Just make sure to wrap them tightly to avoid freezer burn.
Reheating Instructions
To enjoy these bars warm, preheat your oven to 350°F (175°C). Place the bars on a baking sheet and heat for about 5-7 minutes. You can also use a microwave. Heat them for about 10-15 seconds. If you want that gooey caramel to shine, cover them with a damp paper towel while microwaving. Enjoy the soft, warm treat!
FAQs
Can I make these bars without chocolate chips?
Yes, you can skip the chocolate chips. The bars will still taste great. You might add dried fruit or coconut instead. These swaps will keep the texture nice. You could also use white chocolate for a different flavor. Just remember, the bars may taste sweeter without dark chocolate.
How can I make homemade salted caramel?
To make salted caramel, start with sugar. Heat 1 cup of sugar in a pot over medium heat. Stir until it melts and turns golden. Then add 1/2 cup of heavy cream slowly. Be careful, as it can bubble up. Stir in a pinch of sea salt after removing from heat. Let it cool before using.
What is the best way to cut the bars?
To cut the bars nicely, let them cool completely. Use a sharp knife for clean edges. If you want, you can lightly score the top before cutting. This helps guide your cuts. Also, wipe the knife with a damp cloth between slices. This keeps the cuts neat.
Can I use different types of nuts in the recipe?
Yes, you can use different nuts! Pecans or walnuts work well in these bars. Chop them coarsely and fold them into the dough. You can even skip the nuts if you prefer. Just keep in mind, the bars will be softer without them.
This blog post covered how to make delicious homemade salted caramel bars. You learned about all the ingredients and how to mix, bake, and cut them. Our tips helped you achieve the best texture and store your treats. You also discovered fun variations to suit different tastes.
Enjoying these bars is easy. You can share them with friends or keep them for yourself. With these steps, you can create a tasty treat that everyone will love. Happy baking!


