
Latest & Greatest
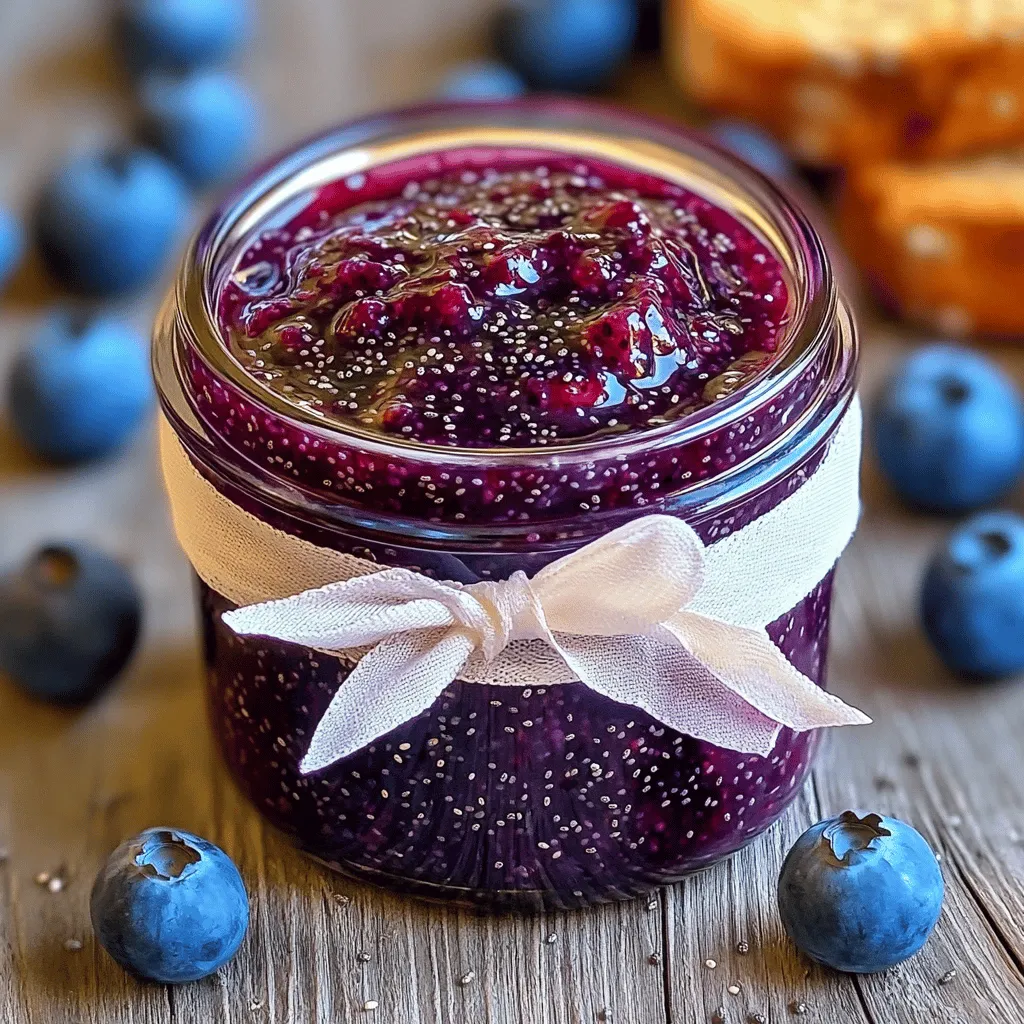
Blueberry Chia Seed Jam Easy and Healthy Recipe
Looking for a healthy and easy jam recipe? You’ve found it! This Blueberry Chia Seed Jam is not only delicious
Read more…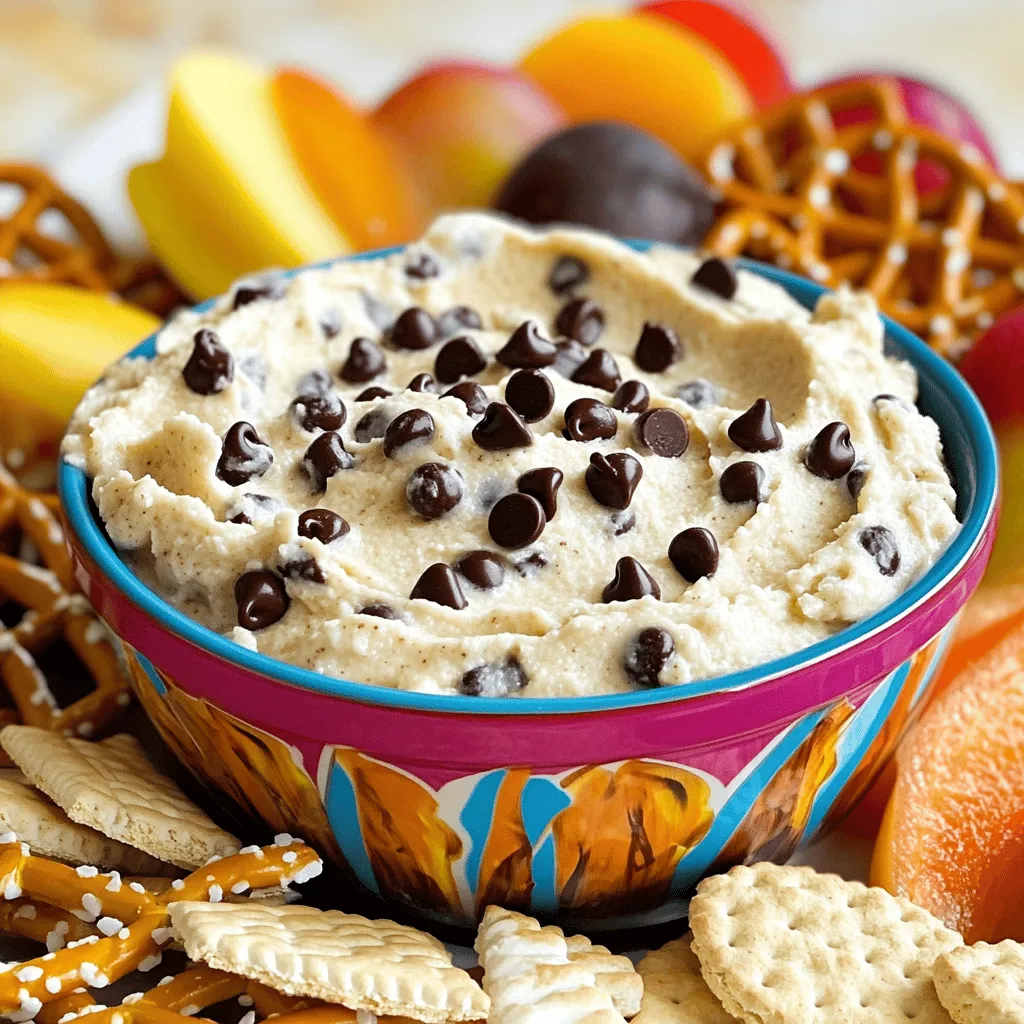
Chocolate Chip Cookie Dough Dip Simple and Sweet Treat
Are you ready for a sweet treat that will wow your friends and family? This Chocolate Chip Cookie Dough Dip
Read more…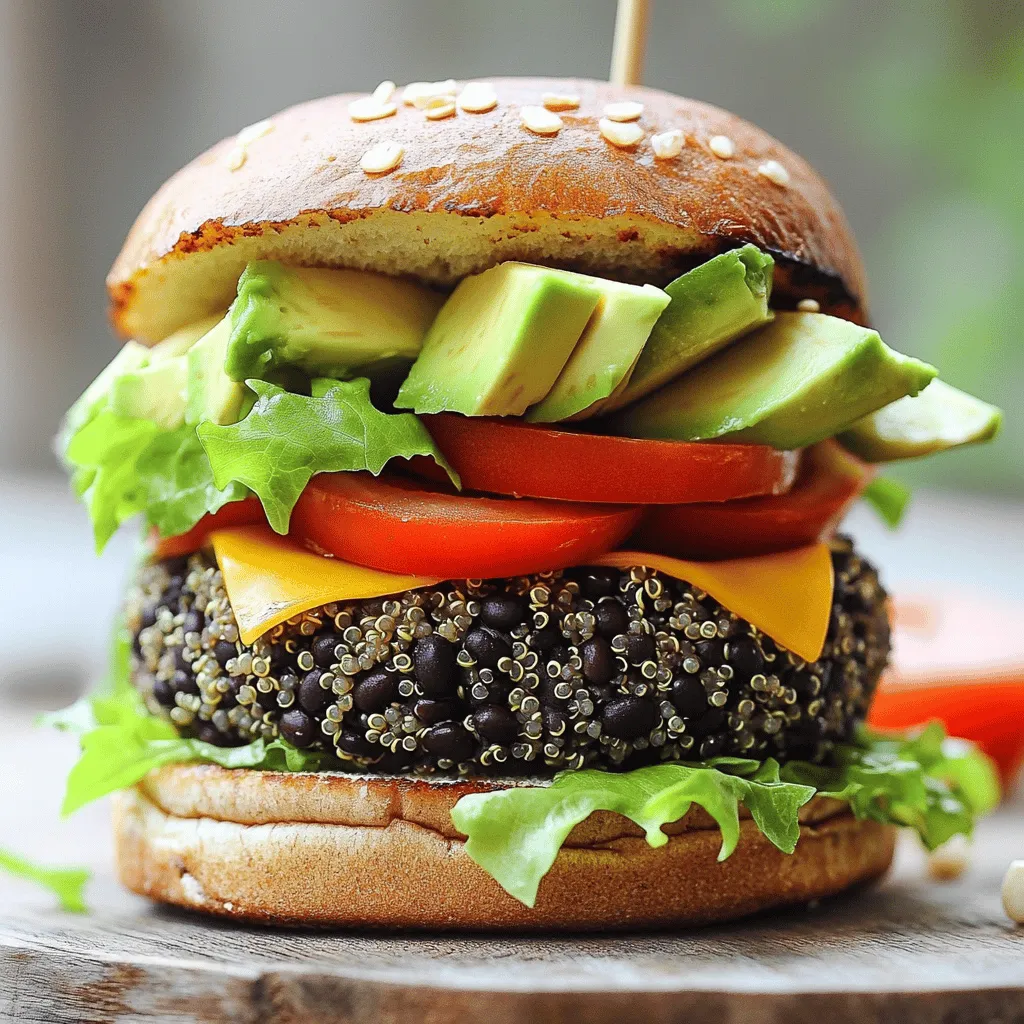
Homemade Veggie Burger Flavorful and Simple Recipe
Are you ready to enjoy a tasty homemade veggie burger? This simple recipe is packed with flavor and healthy ingredients.
Read more…
Carrot Cake Energy Bites Tasty and Nutritious Snack
Looking for a tasty snack that fuels your day? Try these Carrot Cake Energy Bites! They blend sweet, wholesome ingredients
Read more…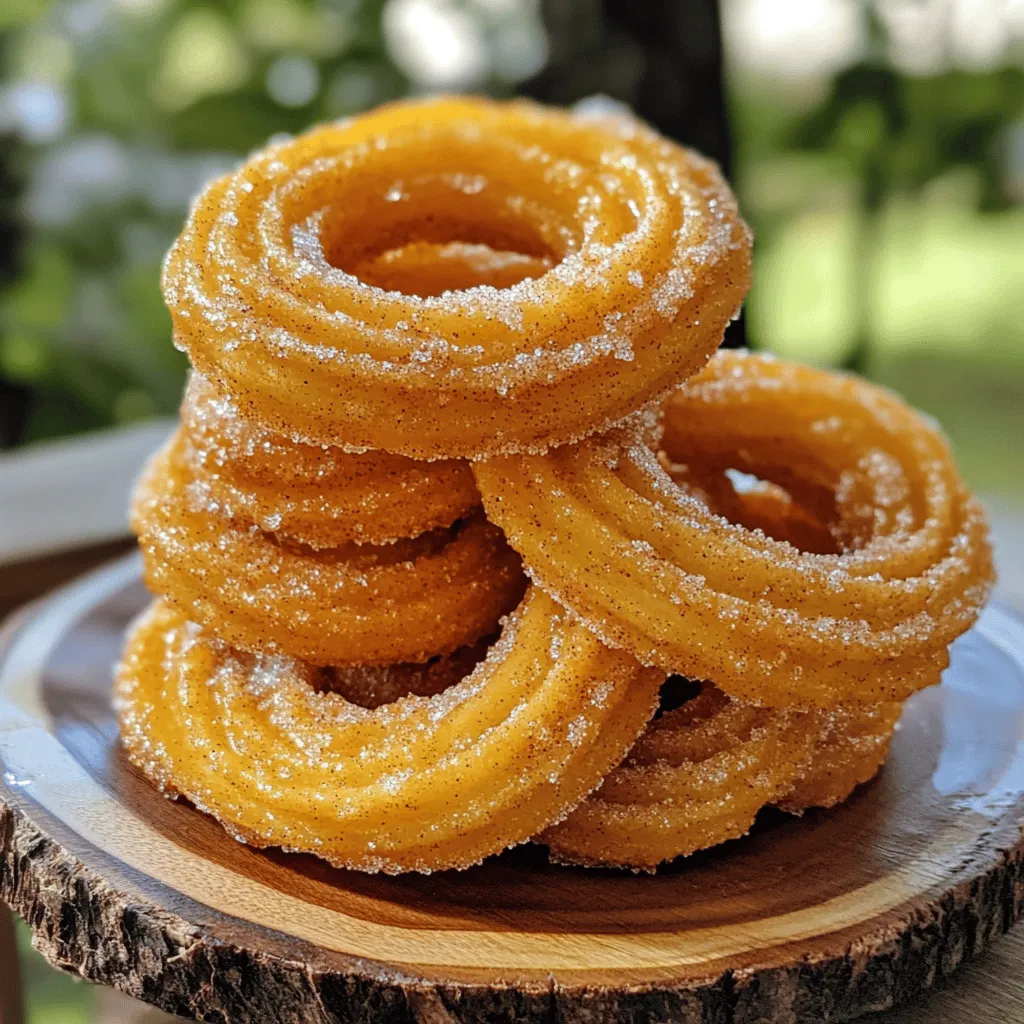
Cinnamon Sugar Churros Irresistible Dessert Recipe
Are you ready to indulge in the sweet, crispy world of cinnamon sugar churros? In this easy-to-follow recipe, I’ll show
Read more…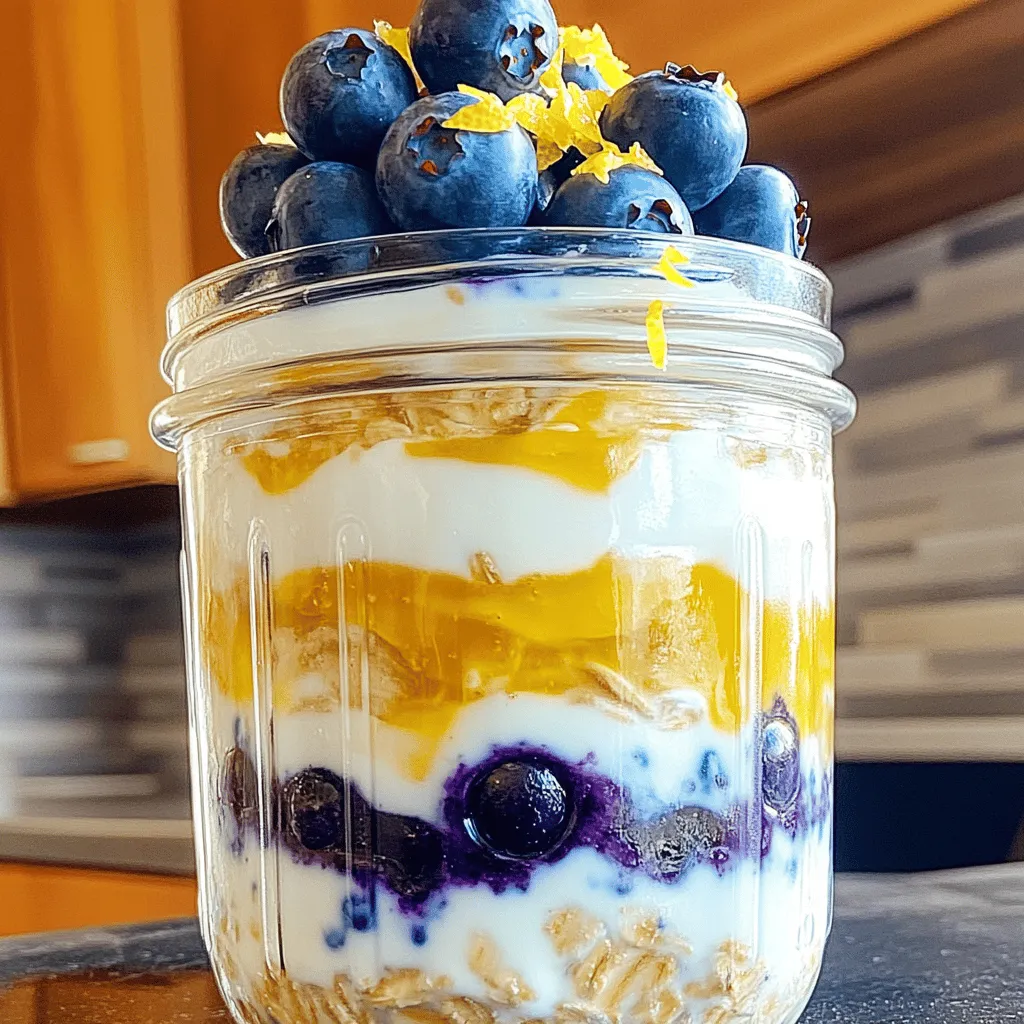
Lemon Blueberry Overnight Oats Easy and Tasty Recipe
Start your day off right with Lemon Blueberry Overnight Oats! This tasty and easy recipe offers a fresh twist on
Read more…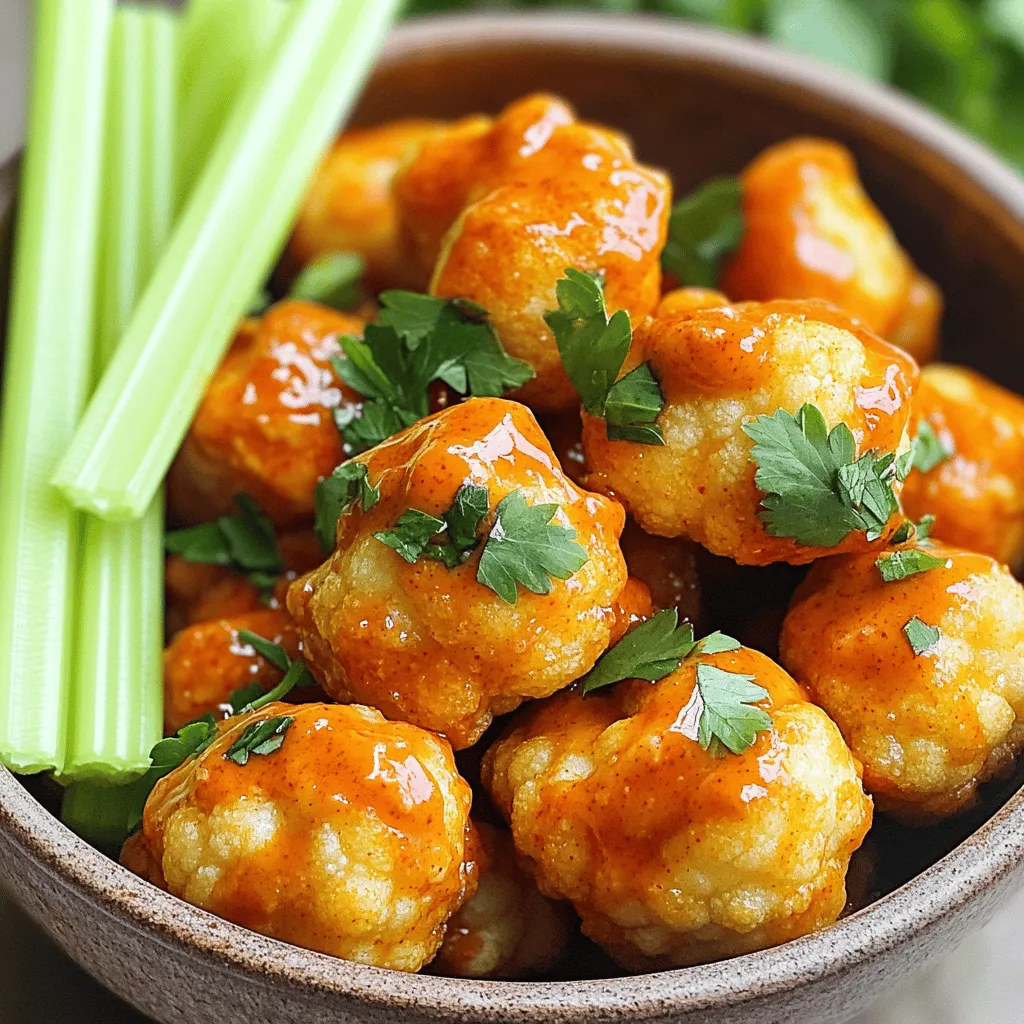
Air Fryer Cauliflower Buffalo Bites Flavorful Snack
If you’re hunting for a tasty snack that’s also good for you, look no further. Air Fryer Cauliflower Buffalo Bites
Read more…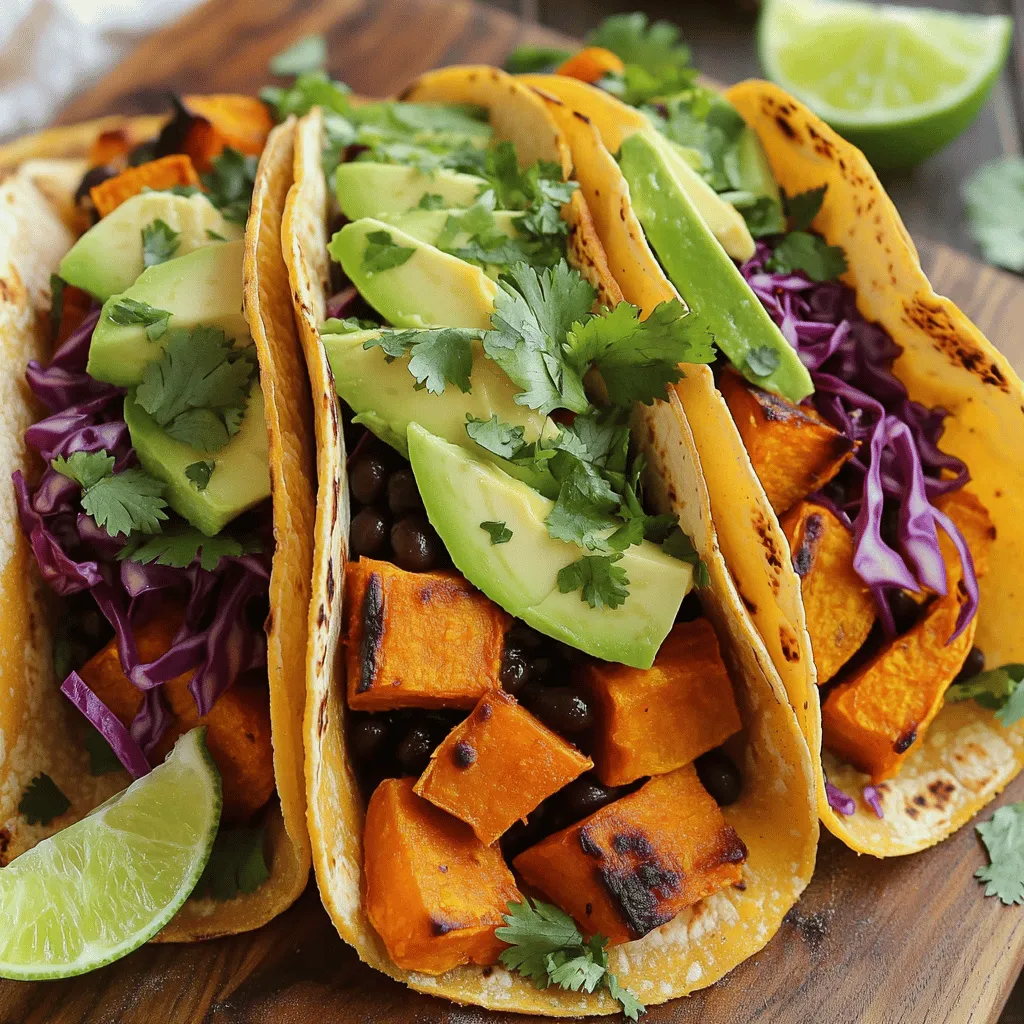
Savory Sweet Potato Black Bean Tacos for Dinner
Are you ready to spice up your dinner routine? Savory Sweet Potato Black Bean Tacos are here to save the
Read more…browse recipes


Cheddar Bay Ground Beef Cobbler Flavorful and Easy Meal
If you’re searching for a simple, tasty meal that delights your taste buds, you’ll love Cheddar Bay Ground Beef Cobbler. This dish combines savory…
My Latest Desserts

Healthy Banana Oat Muffins Nutrient-Packed Recipe
Looking for a tasty snack that’s packed with nutrients? You’re in the right place! My Healthy Banana Oat Muffins recipe Read Full Recipe-
No-Bake Chocolate Oat Bars Simple and Tasty Treat
Looking for a quick, tasty treat? You’re in the right place! My No-Bake Chocolate Oat Bars are simple to make Read Full Recipe -
No-Bake Chocolate Oatmeal Bars Simple and Tasty Treat
Looking for a simple and tasty treat that’s also healthy? You’ve found it! My No-Bake Chocolate Oatmeal Bars are a Read Full Recipe -
Peach Pie Cruffins Delightful and Simple Recipe
Are you ready to dive into a sweet and flaky treat? Peach Pie Cruffins are a delightful twist on classic Read Full Recipe -
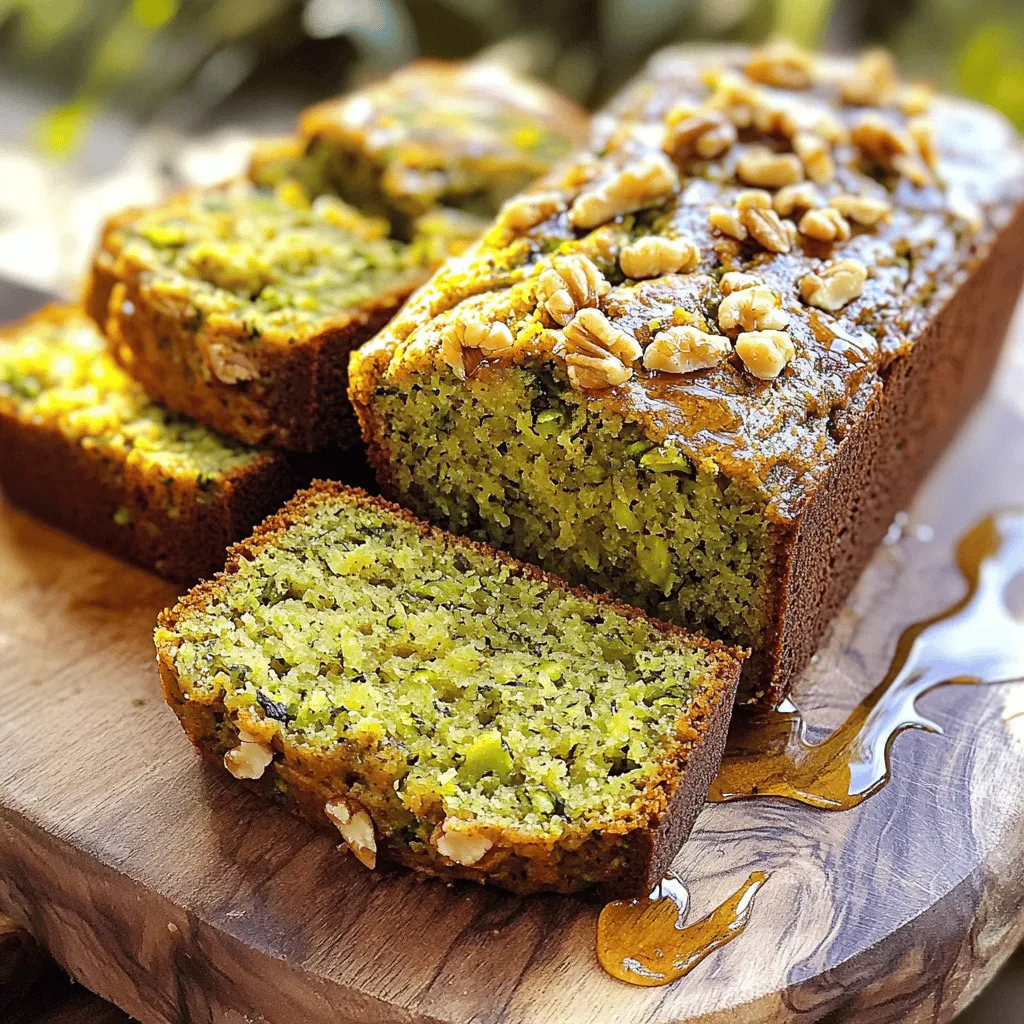
Retro Zucchini Bread Healthy and Flavorful Delight
Are you ready to bake a delicious, healthy treat? Retro Zucchini Bread is packed with flavor and goodness. This simple Read Full Recipe -
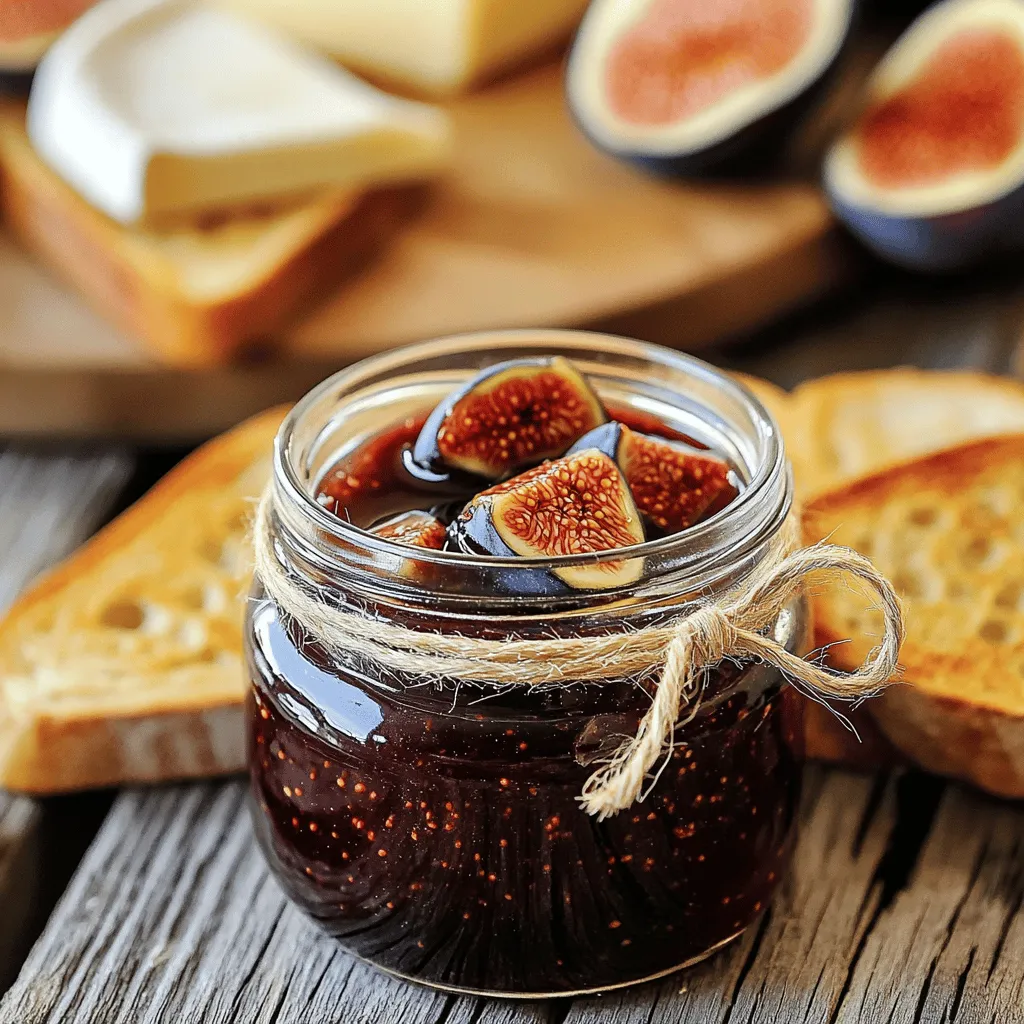
Classic Fig Jam Simple and Delicious Recipe
Are you ready to savor the sweet taste of summer year-round? Making classic fig jam is simple and rewarding. With Read Full Recipe -
Fresh Peach Cobbler Flavorful and Easy Recipe Guide
Craving a sweet treat that showcases the juicy goodness of fresh peaches? You’re in the right place! In this guide, Read Full Recipe -
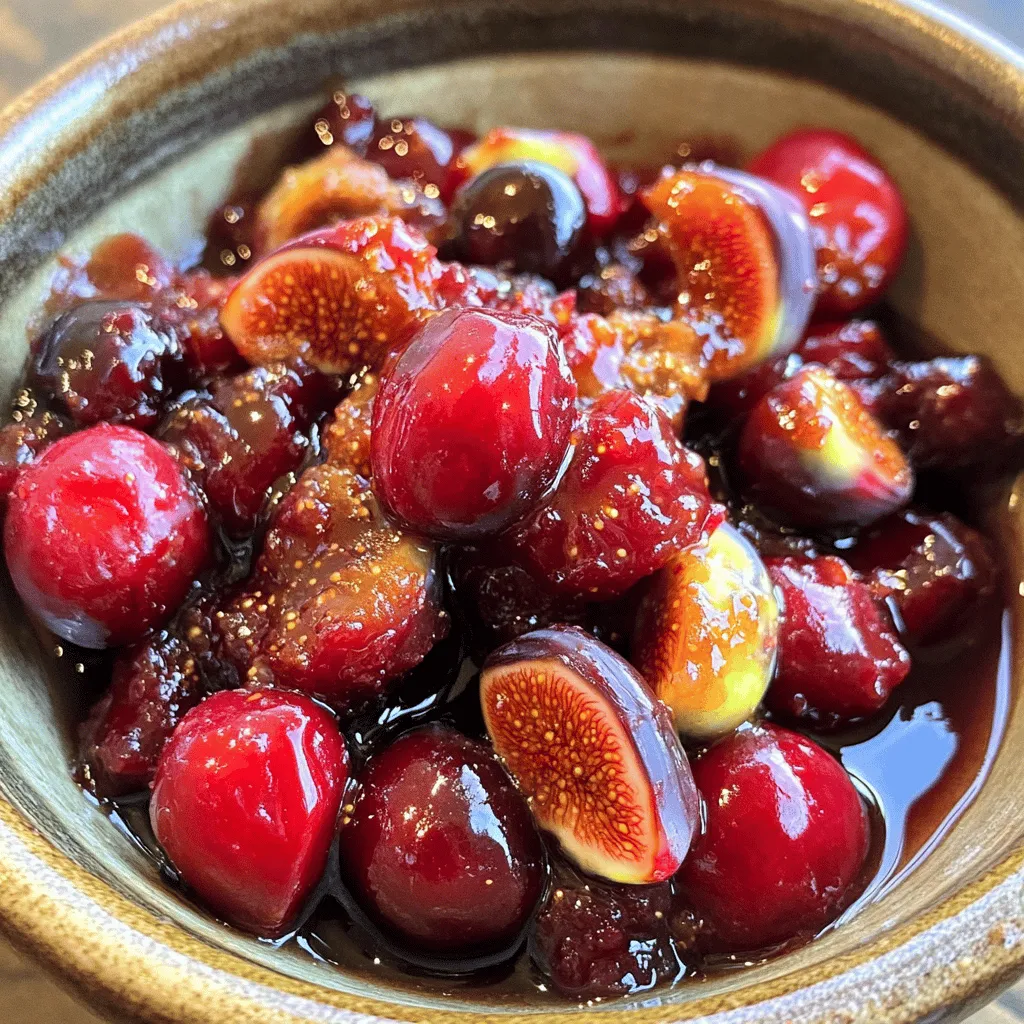
Ginger Fig Cherry Compote Flavorful and Easy Recipe
Are you ready to explore a dish that bursts with flavor? This Ginger Fig Cherry Compote is not only easy Read Full Recipe -
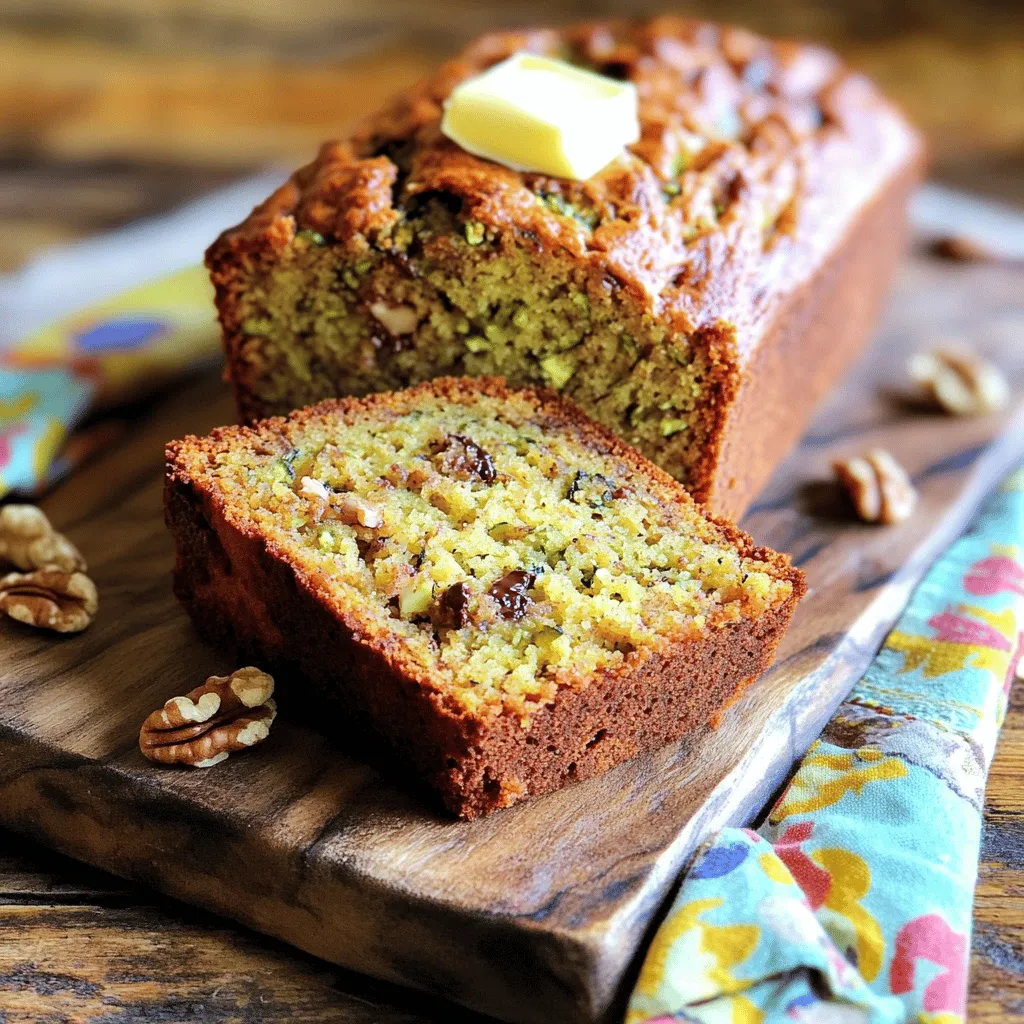
Zucchini Banana Bread Flavorful and Moist Recipe
Do you love warm, fresh bread that bursts with flavor? You’re in the right spot! This Zucchini Banana Bread recipe Read Full Recipe -
Fig Cake with Almond and Honey Delight Recipe
Are you ready to indulge in a delightful treat? My Fig Cake with Almond and Honey recipe combines rich flavors Read Full Recipe


hey,
i’m !
I’m so happy you’re here!
I pour heart and skill into every recipe I create. I know you’ll taste the difference now let’s enjoy this flavorful adventure together.
![- 1 lb boneless, skinless chicken breasts, cubed - 2 cans (15 oz each) white beans, drained and rinsed - 2 cups chicken broth - 1 cup sour cream - 1 cup Monterey Jack cheese, shredded - 1 tablespoon olive oil - 1 medium onion, chopped - 3 cloves garlic, minced - 1 can (4 oz) diced green chilies, drained - 1 teaspoon ground cumin - 1 teaspoon paprika - 1 teaspoon chili powder - Salt and pepper, to taste In this creamy white chicken chili, the main ingredients shine. The chicken breasts provide lean protein. The white beans add creaminess and fiber. Chicken broth gives it a solid base of flavor. Sour cream and cheese create a rich texture. Each spice adds warmth and depth to the dish. - Fresh cilantro - Lime wedges Garnishing with fresh cilantro adds brightness. Lime wedges give a nice zing. Both enhance the chili's flavor and make it pop. - Large pot or Dutch oven - Cutting board and knife - Measuring cups and spoons For this recipe, you need a large pot or Dutch oven. It helps cook everything evenly. A cutting board and knife make prep easy. Measuring cups and spoons ensure you get the right amounts. You can find the full recipe to guide you through each step. 1. Sautéing onions and garlic: First, take a large pot or Dutch oven. Pour in one tablespoon of olive oil and heat it over medium heat. Next, add one medium onion, chopped. Cook it for about 5 minutes. You want the onion to be soft and clear. Then, add three cloves of minced garlic. Stir it around for one minute. This will bring out the lovely garlic flavor. 2. Browning chicken: Now, add one pound of cubed, boneless, skinless chicken breasts to the pot. Cook the chicken for about 5 to 7 minutes. Make sure to stir often, so all sides get brown. This step adds a nice depth of flavor to your chili. 3. Adding the main ingredients: Once the chicken is browned, it’s time to add the fun stuff! Stir in two cans of drained and rinsed white beans. Then, pour in two cups of chicken broth and one can of diced green chilies. Add one teaspoon each of ground cumin, paprika, and chili powder. Don’t forget to season with salt and pepper! 4. Simmering process: Bring the pot to a boil. Once it bubbles, turn down the heat to low. Cover the pot and let it simmer for about 20 minutes. This helps all the flavors meld together and cook the chicken fully. 5. Stirring in sour cream and cheese: After simmering, take the pot off the heat. Let it cool for a couple of minutes. Now, stir in one cup of sour cream and one cup of shredded Monterey Jack cheese. Mix it well until the chili is creamy and dreamy. 6. Adjusting seasonings: Taste your chili. This is the time to tweak the flavors. Add more salt, pepper, or spices if needed. If it needs a bit more creaminess, feel free to add extra sour cream or cheese. This creamy white chicken chili is rich, hearty, and perfect for a cozy day at home. For the full recipe with ingredients and timings, check out the [Full Recipe]. Enjoy! To make your creamy white chicken chili pop, focus on the spices. I recommend using: - 1 teaspoon ground cumin - 1 teaspoon paprika - 1 teaspoon chili powder These spices add depth and warmth. They create a cozy taste that makes each bite special. For extra creaminess, mix in sour cream and Monterey Jack cheese at the end. This step makes the chili rich and smooth. The cheese melts into the pot, giving a comforting texture. The right cooking methods help you achieve tender chicken. Start by browning the chicken in olive oil. This step locks in the juices and gives flavor. Make sure to cook it until it turns golden brown. After that, simmer the pot on low heat. This slow cooking allows flavors to blend and the chicken to soften. Let it simmer for about 20 minutes for the best results. When it comes to serving, pair your chili with fun sides. You can offer tortilla chips or cornbread for a nice crunch. Add toppings like fresh cilantro or lime wedges for extra zing. Presentation matters too! Serve the chili in bright bowls and sprinkle with herbs. This makes it look as good as it tastes. You can find the full recipe to guide you through this delicious process. {{image_2}} You can change a few ingredients to create new flavors. For beans, try black beans or pinto beans instead of white beans. Each type offers a unique taste and texture. If you like heat, swap the diced green chilies for jalapeños or even chipotle peppers. These spicy options will give your chili a kick. If you need gluten-free options, just check your broth and spices. Most are gluten-free, but always read the labels. For a vegetarian version, skip the chicken and use vegetable broth. Add more beans or some corn for heartiness. You can also include tofu for protein. You can enhance the flavor by adding fruits or vegetables. Try corn, bell peppers, or even zucchini to your chili. These add color and nutrition. If you want a smoky version, add smoked paprika or some bacon. This gives a rich, deep flavor that pairs well with the creaminess of the chili. For the full recipe, check the Creamy White Chicken Chili section. To keep your creamy white chicken chili fresh, store it in an airtight container. Let it cool completely before sealing it up. This helps avoid moisture build-up. In the fridge, it lasts about 3 to 4 days. If you want it to stay fresh longer, consider freezing it. Freezing is a great option for leftovers. First, let the chili cool completely. Then, pour it into a freezer-safe container, leaving space for expansion. You can also use freezer bags for easy storage. Label the bags with the date. It stays good for up to 3 months. To thaw, move it to the fridge overnight. When ready to reheat, warm it on low heat on the stove until hot. Stir often to keep it creamy. You can repurpose leftover chili in many fun ways. Consider using it as a filling for burritos or quesadillas. You can also serve it over rice or pasta for a quick meal. Another idea is to add it to a baked potato for a hearty twist. If you want a new recipe, try making a creamy chili dip. Just mix it with some cream cheese and bake until bubbly. Enjoy your chili in different meals! You can add more heat in a few ways: - Mix in diced jalapeños. - Use spicy green chilies instead. - Add a pinch of cayenne pepper or red pepper flakes. - Stir in hot sauce to taste. These options let you control the heat level. Start with a small amount and taste as you go. This way, you won't overpower the lovely flavors of the chili. Yes, you can use a slow cooker for this chili. Here’s how: - Sauté the onion and garlic first, then add to the slow cooker. - Add all remaining ingredients to the pot, except for the sour cream and cheese. - Cook on low for 6-8 hours or on high for 3-4 hours. - Stir in the sour cream and cheese about 30 minutes before serving. Using a slow cooker gives the flavors time to blend. It also makes cooking easy and hands-free. This chili pairs well with several tasty sides: - Warm cornbread or crusty bread. - A fresh green salad with a light dressing. - Tortilla chips for crunch. - Sliced avocado for creaminess. These sides add variety and balance to your meal. Enjoy experimenting with different combinations! This blog post shared a simple recipe for Creamy White Chicken Chili. We covered key ingredients and highlighted kitchen tools to make cooking easy. I explained each preparation step and how to create a rich flavor. You learned tips for customizing the dish and storing leftovers. In closing, this chili is versatile and tasty. With the right ingredients, you can make it your own. Enjoy trying out these ideas and making this dish your favorite!](https://foodishtalk.com/wp-content/uploads/2025/06/549e24e9-75de-454b-92bd-5ad25db761d0-300x300.webp)
![To make chewy chocolate chip cookies, you will need: - 1 cup (226g) unsalted butter, softened - 3/4 cup (150g) brown sugar, packed - 1/2 cup (100g) granulated sugar - 2 large eggs - 1 teaspoon vanilla extract - 2 1/4 cups (285g) all-purpose flour - 1/2 teaspoon baking soda - 1/2 teaspoon salt - 1 1/2 cups (270g) semi-sweet chocolate chips - 1/2 cup (90g) chopped nuts (optional - walnuts or pecans recommended) You can add different flavors or textures to your cookies. Some options include: - Milk chocolate chips for a sweeter taste - Dark chocolate chips for a richer flavor - Chopped nuts like walnuts or pecans for crunch - Sea salt on top for a flavor boost Using high-quality ingredients matters. Fresh butter gives a rich taste. Good chocolate enhances the cookie's flavor. Fresh eggs create a better texture. Quality flour helps the cookies rise properly. Avoid old or stale ingredients to ensure your cookies turn out delicious. For the full method to create these tasty treats, check the full recipe. To make the dough, start by preheating your oven to 350°F (175°C). Line two baking sheets with parchment paper. In a large bowl, cream together the softened butter, brown sugar, and granulated sugar. Mix until it's smooth and fluffy, which takes about 3 to 5 minutes. Next, add the eggs one at a time. Make sure to mix well after each egg. Then, stir in the vanilla extract. In another bowl, whisk together the all-purpose flour, baking soda, and salt. Slowly add this dry mix to your wet ingredients. Mix until just combined; avoid overmixing. Finally, gently fold in the chocolate chips and nuts, if you choose to add them. Now it's time to bake! Use a cookie scoop or a tablespoon to drop rounded balls of dough onto your prepared baking sheets. Leave some space between each cookie. Bake in the preheated oven for 10 to 12 minutes. The edges should be golden brown, while the centers remain soft. This is key to getting that chewy texture. After baking, take out the cookies and let them cool on the baking sheets for about 5 minutes. This helps them set. Then, transfer the cookies to wire racks to cool completely. For storage, keep the cookies in an airtight container. This keeps them fresh and chewy. If you want to save cookie dough for later, you can freeze it. Just scoop the dough onto a baking sheet and freeze until solid. Then, store the dough balls in a freezer bag. To get chewy chocolate chip cookies, focus on the butter. Use softened unsalted butter. Cream it with sugars for 3-5 minutes. This adds air, making your cookies light. Next, use brown sugar as it holds moisture. A mix of white and brown sugar works too. Also, don't overmix when adding flour. It makes the cookies tough. Lastly, remove them from the oven when they are still soft in the middle. They will continue to cook on the baking sheet. Common mistakes can ruin your cookies. First, don’t skip the chilling step. Chilling the dough for at least 30 minutes helps the flavors blend and prevents spreading. Another mistake is measuring flour poorly. Use the scoop and level method, not packing it down. Also, avoid opening the oven door too often. Each time you do, heat escapes, affecting baking time. Finally, resist the urge to bake on a hot baking sheet. It can cause uneven baking. Good equipment makes a big difference. Use a heavy baking sheet for even heat. Parchment paper helps prevent sticking and makes cleanup easy. A cookie scoop ensures uniform size for even baking. A stand mixer or hand mixer saves time and effort for creaming butter. Lastly, invest in an oven thermometer. It helps you know if your oven runs hot or cold, leading to perfect cookies every time. For the full recipe, check out the details above. {{image_2}} You can change up your chewy chocolate chip cookies easily. Try adding white chocolate chips for a sweet twist. You might even like to mix in some peanut butter chips for a rich flavor. Matcha powder brings a unique green hue and earthy taste. Dried fruit, like cranberries or cherries, adds a nice chew and tartness. You can also use a mix of semisweet and dark chocolate chips for depth. The options are endless, so feel free to get creative! If you need a gluten-free option, swap all-purpose flour for a gluten-free blend. Ensure the blend contains xanthan gum for the right texture. For a vegan version, use coconut oil instead of butter and flax eggs as a binder. To make a flax egg, mix one tablespoon of ground flaxseed with three tablespoons of water. Let it sit for five minutes until it thickens. Use dairy-free chocolate chips to keep it vegan-friendly. These swaps let everyone enjoy these cookies! Seasonal flavors can make your cookies even more fun. For fall, add pumpkin spice to the dough. You can also mix in chopped nuts for a crunchy texture. During the holidays, sprinkle festive colored sugar on top before baking. For Valentine's Day, use heart-shaped cookie cutters and add pink or red sprinkles. Themed designs can really make your cookies stand out at parties. These variations keep your chewy chocolate chip cookies exciting and fresh! To keep your chewy chocolate chip cookies fresh, store them in an airtight container. This will help keep moisture inside and prevent them from drying out. You can place a piece of bread in the container. The bread will absorb excess moisture and keep the cookies soft. Avoid stacking cookies on top of each other. This can cause them to stick together or lose their shape. You can freeze both cookie dough and baked cookies. For dough, scoop rounded balls and place them on a baking sheet. Freeze them for about 1 hour, then transfer them to a freezer bag. This way, you can bake fresh cookies anytime! For baked cookies, let them cool completely. Place them in an airtight container or a freezer bag. They will last up to 3 months in the freezer. In an airtight container at room temperature, your cookies will stay fresh for about 1 week. If you keep them in the fridge, they can last about 2 weeks. However, refrigeration may change the texture, making them less chewy. Frozen cookies can last up to 3 months, keeping their taste and texture intact. Enjoy your cookies at their best by following these storage tips! For the full recipe of these delicious cookies, check out [Full Recipe]. Chewy cookies have a soft, warm texture. This happens when you use more brown sugar than white sugar. Brown sugar holds moisture well. Also, adding an extra egg yolk helps keep the cookie soft. Another key point is not to overbake. Bake just until the edges turn golden. The centers should look soft. This method creates that perfect chewy bite. Yes, you can use different flours! All-purpose flour works great, but you can try others. For a nuttier taste, use whole wheat flour. Almond flour adds a gluten-free option. If you experiment, adjust the amount of flour. Too much flour may lead to dryness. Always remember to keep the right balance for the best results. If your cookies spread too much, try chilling the dough first. Place it in the fridge for 30 minutes before baking. Another fix is to add a bit more flour to the dough. This helps it hold its shape better. Also, check your oven temperature. An oven that’s too hot can cause spreading. Make sure to follow the Full Recipe for best results. This blog post covered everything you need for chewy chocolate chip cookies. We reviewed key ingredients and why they matter. I shared easy steps to make cookie dough, bake, and store your cookies. You learned tips for that perfect chewy texture and how to avoid common mistakes. Plus, I included fun variations for all diets. Keep these tips in mind to create delicious cookies each time. With quality ingredients and careful steps, you can impress anyone with your baking skills. Enjoy making and sharing your cookies!](https://foodishtalk.com/wp-content/uploads/2025/06/543f97ba-3f81-4cbe-a36c-4733960876f3-300x300.webp)
![- 400g spaghetti - 6 cloves garlic, thinly sliced - 1/2 cup extra virgin olive oil - 1 teaspoon red pepper flakes - Zest and juice of 1 lemon - 1/4 cup fresh parsley, finely chopped - Salt, to taste - Parmesan cheese shavings for serving Spaghetti Aglio e Olio is a simple dish that shines with few ingredients. Each ingredient plays a key role in the flavor. I love how the garlic brings warmth, while olive oil adds richness. The red pepper flakes give a gentle heat. When you add lemon zest and juice, it brightens the dish, making it refreshing. Fresh parsley not only adds color but also a nice herbal touch. Parmesan cheese is optional, but it gives a creamy finish. You can adjust the salt to your taste, which makes this dish even better. For the full recipe, you can find all the steps to create this savory delight! - Bring salted water to a boil - Cook spaghetti until al dente Start by filling a large pot with water. Add a generous amount of salt. Bring the water to a boil. This step is key for flavor. Once boiling, add 400g of spaghetti. Stir the pasta to prevent it from sticking. Follow the package instructions for cooking time. You want it al dente—firm but not hard. Before draining, reserve 1 cup of that starchy pasta water. It will help the sauce later. - Heat olive oil over medium heat - Add garlic and sauté until golden brown In a large skillet, pour in 1/2 cup of extra virgin olive oil. Heat it over medium heat. Wait until the oil shimmers but does not smoke. Now, add 6 cloves of thinly sliced garlic. Sauté the garlic, stirring often for about 2-3 minutes. Keep an eye on it; we want it golden brown, not burnt. This garlic will be the heart of your dish. - Stir in red pepper flakes - Toss in the cooked spaghetti with the garlic oil mixture After the garlic is golden, stir in 1 teaspoon of red pepper flakes. This adds a nice kick. Sauté for another 30 seconds to release the flavor. Now, add the drained spaghetti to the skillet. Toss it well in the garlic oil mixture. If it looks dry, add some reserved pasta water a little at a time. Incorporate lemon zest and juice to brighten the dish. Finally, season with salt and toss in 1/4 cup of fresh chopped parsley. Your Spaghetti Aglio e Olio is ready to serve! For the full recipe, check out the complete guide. To make perfect spaghetti, cook it for about 8-10 minutes. This timing can vary by brand, so always check the package. You want it firm but not hard. To test for doneness, take a strand and bite it. It should be tender but still have a slight bite. Garlic can burn easily, which makes it bitter. To avoid this, sauté it on medium heat. Stir it often and watch for a golden color. This takes about 2-3 minutes. If it turns too dark, start over. Burnt garlic ruins the flavor. Lemon adds brightness to Spaghetti Aglio e Olio. Use both zest and juice for a fresh taste. Start with half a lemon, then taste. You can always add more! For spice, red pepper flakes give a nice kick. Adjust the amount to your heat preference. A little goes a long way. {{image_2}} You can make Spaghetti Aglio e Olio even heartier by adding proteins. Grilled chicken or shrimp works great. Simply cook them separately and toss them in with the pasta. You can also add sautéed vegetables. Spinach, zucchini, or bell peppers add color and nutrition. Just sauté them in the garlic oil before mixing them with the spaghetti. To switch things up, try different herbs. Fresh basil or thyme can add a new taste. Just chop them and mix them in at the end. You can also use various cheeses for extra flavor. A sprinkle of feta or a bit of goat cheese can change the whole dish. Experiment with what you like! If you need gluten-free options, there are great pasta choices. Look for gluten-free spaghetti made from rice or corn. Other shapes like penne or fusilli also work well with this recipe. They will still soak up the garlic oil and flavors nicely. Remember, the key is to enjoy your meal in a way that works for you. To keep your Spaghetti Aglio e Olio fresh, follow these steps: - Let the spaghetti cool down. - Place it in an airtight container. - Store it in the fridge for up to three days. Use clear containers so you can see what’s inside. When it's time to enjoy leftovers, you want to keep that great taste. Here’s how: - Use a skillet on low heat. - Add a splash of olive oil or pasta water. This helps keep the spaghetti moist. Stir gently to warm it through. Can you freeze Spaghetti Aglio e Olio? Yes, you can! Here’s how: - Cool it completely first. - Place it in a freezer-safe bag. - Squeeze out as much air as you can. To thaw, move it to the fridge overnight. Reheat gently in a skillet for the best results. Enjoy your meal again! Aglio e Olio means "garlic and oil" in Italian. This dish comes from Naples, Italy. It is simple yet full of flavor. The dish uses just a few key ingredients: spaghetti, garlic, olive oil, and red pepper flakes. This style of cooking shows how basic items can create magic. Yes, you can prepare this dish ahead of time. Cook the spaghetti and toss it with oil and garlic. Store it in an airtight container in the fridge. When you want to eat, simply reheat it on low heat. Add a splash of olive oil and a bit of pasta water to keep it moist. You can serve this dish with many sides. A fresh salad with greens and a light vinaigrette works well. Garlic bread is a classic choice too. For drinks, pair it with white wine or sparkling water. These flavors balance the dish nicely. Yes, this recipe is vegetarian. It contains no meat or animal products, making it a great choice for vegetarians. If you want to make it vegan, skip the Parmesan cheese. You can also add roasted vegetables for extra texture and taste. For the full recipe, check out [Full Recipe]. In this blog post, I covered how to make Spaghetti Aglio e Olio. We discussed the key ingredients like spaghetti, garlic, and olive oil. I shared step-by-step cooking instructions and tips for perfect texture and flavor. Variations included adding proteins and experimenting with herbs. Lastly, we looked at proper storage and reheating methods. This dish shines with simplicity. With a few tweaks, it can fit any taste. Give it a try and enjoy!](https://foodishtalk.com/wp-content/uploads/2025/05/5e0e473c-4389-4105-aba1-c254e8021b91-300x300.webp)
![To make this easy orange chicken, you need just three main items: - 1 pound boneless chicken thighs, cut into bite-sized pieces - 1 cup orange marmalade - 2 tablespoons soy sauce These ingredients work together to create a tasty dish. The chicken thighs give a tender bite, while the orange marmalade adds sweetness. Soy sauce brings a nice saltiness to balance the flavors. To make your dish look even better, consider adding these garnishes: - Thinly sliced green onions - Sesame seeds These garnishes add color and a fresh taste. You can sprinkle them on right before serving. You will need a few tools to make this dish: - Large mixing bowl - Separate bowl for the sauce - Large skillet or pan - Cooking spoon With these tools, you’ll find it easy to prepare and cook the orange chicken. Enjoy making this simple yet delicious meal! First, gather your chicken thighs. Cut them into bite-sized pieces. This helps them cook evenly. Place the chicken in a large bowl. You want enough space to mix well. In a different bowl, combine one cup of orange marmalade with two tablespoons of soy sauce. Stir until smooth. This sauce adds a sweet and tangy flavor. It will coat the chicken nicely. Pour the orange sauce over the chicken pieces. Mix well to cover each piece. Let the chicken marinate for 15 to 20 minutes. This step is key for great flavor. Heat a large skillet over medium-high heat. Add the marinated chicken and all of the sauce to the pan. Cook for 8 to 10 minutes. Stir occasionally to make sure it cooks evenly. The chicken should reach an internal temperature of 165°F (75°C). Once it’s done, remove it from the heat. Serve your orange chicken over steamed white rice. Add thinly sliced green onions and sesame seeds on top for a nice touch. For the full recipe, check out the [Full Recipe]. To get the best flavor in your orange chicken, focus on the marinade. The orange marmalade gives a sweet and tangy taste. Soy sauce adds a nice salty touch. Mix these two well before adding chicken. Let the chicken sit in this mix for at least 15 minutes. This allows the flavors to soak in. If you can, marinate longer for a stronger taste. Cook the chicken over medium-high heat. This helps it brown nicely. Stir the chicken often. This ensures even cooking. You want the chicken to reach 165°F (75°C) inside. Use a meat thermometer to check. This keeps the chicken juicy and safe to eat. If you want a bit of crunch, let it sizzle a little longer in the pan. Look for a bright plate to serve your orange chicken. Place a bed of steamed white rice on the plate. This adds color and makes the meal more filling. Top the chicken with thinly sliced green onions. Add sesame seeds for a nice touch. This makes your dish pop and look gourmet. Serve it hot for the best experience. If you want more details, check the Full Recipe. {{image_2}} You can switch up the protein in this dish. If you want, try using shrimp or tofu. Both options cook quickly and soak up the orange flavor well. For shrimp, use large, peeled shrimp. Make sure to cook them for just a few minutes until they turn pink. If you choose tofu, press it first to remove excess water. Cut it into cubes and cook until golden brown. Want to add more zest? Try adding fresh ginger or garlic to the sauce. Just a little bit can boost the flavor. You can also swap orange marmalade for apricot or peach jam. This change will give you a new twist on the taste. If you like heat, add some red pepper flakes to the sauce. It brings a nice kick to the dish. Serving styles can change your meal’s look and feel. Serve your orange chicken over steamed rice for a classic touch. You can also use quinoa or cauliflower rice for a healthier option. If you want to make it a full meal, add steamed vegetables on the side. Broccoli or snap peas work great. For a fun twist, try making lettuce wraps. Just spoon the chicken into large lettuce leaves and roll them up. For the full recipe, check out the complete guide! To keep your leftover orange chicken fresh, place it in an airtight container. Make sure to let it cool down first. This helps avoid steam build-up, which can make the chicken soggy. Store it in the fridge for up to three days. If you want to keep it longer, freezing is a good option. When you are ready to eat the leftovers, reheating is easy. You can use the microwave or a skillet. For the microwave, place the chicken in a safe bowl. Heat it for one to two minutes, stirring halfway through. If using a skillet, add a little water to it. Heat over medium until hot. Stir often to prevent burning. If you want to freeze the orange chicken, use a freezer-safe bag. Squeeze out as much air as you can before sealing. This helps to avoid freezer burn. You can freeze it for up to three months. When you are ready to eat it, thaw it in the fridge overnight. Reheat as mentioned above for best results. For the full recipe, check out the previous sections. Yes, you can use frozen chicken for this recipe. Just make sure to thaw it first. Thawing allows the chicken to cook evenly. You can thaw the chicken in the fridge overnight or use the microwave. After thawing, cut the chicken into bite-sized pieces as usual. This will help the chicken absorb the flavors better. If you do not have orange marmalade, use a different fruit jam. Apricot or peach jam works well. You can also mix orange juice with sugar. This blend gives a similar sweet and tangy flavor. For a more complex taste, try adding a splash of vinegar. This adds brightness to the dish. To spice up this recipe, add red pepper flakes. Start with a pinch and taste as you go. You can also use spicy sauce, like Sriracha or chili paste. Mix this into the orange marmalade and soy sauce. Another option is to add fresh ginger or garlic for a kick. These ingredients enhance the flavor and heat. This blog post showed you how to make easy, tasty orange chicken. You learned about the main ingredients and kitchen tools you need. I shared step-by-step instructions for cooking and serving. I also included helpful tips for flavor and presentation. You discovered variations and storage tips to keep your dish fresh. Remember, cooking is fun and creative. Enjoy making this dish your own!](https://foodishtalk.com/wp-content/uploads/2025/04/88bd4900-b477-4a4b-bfc7-0268e2bfe666-300x300.webp)
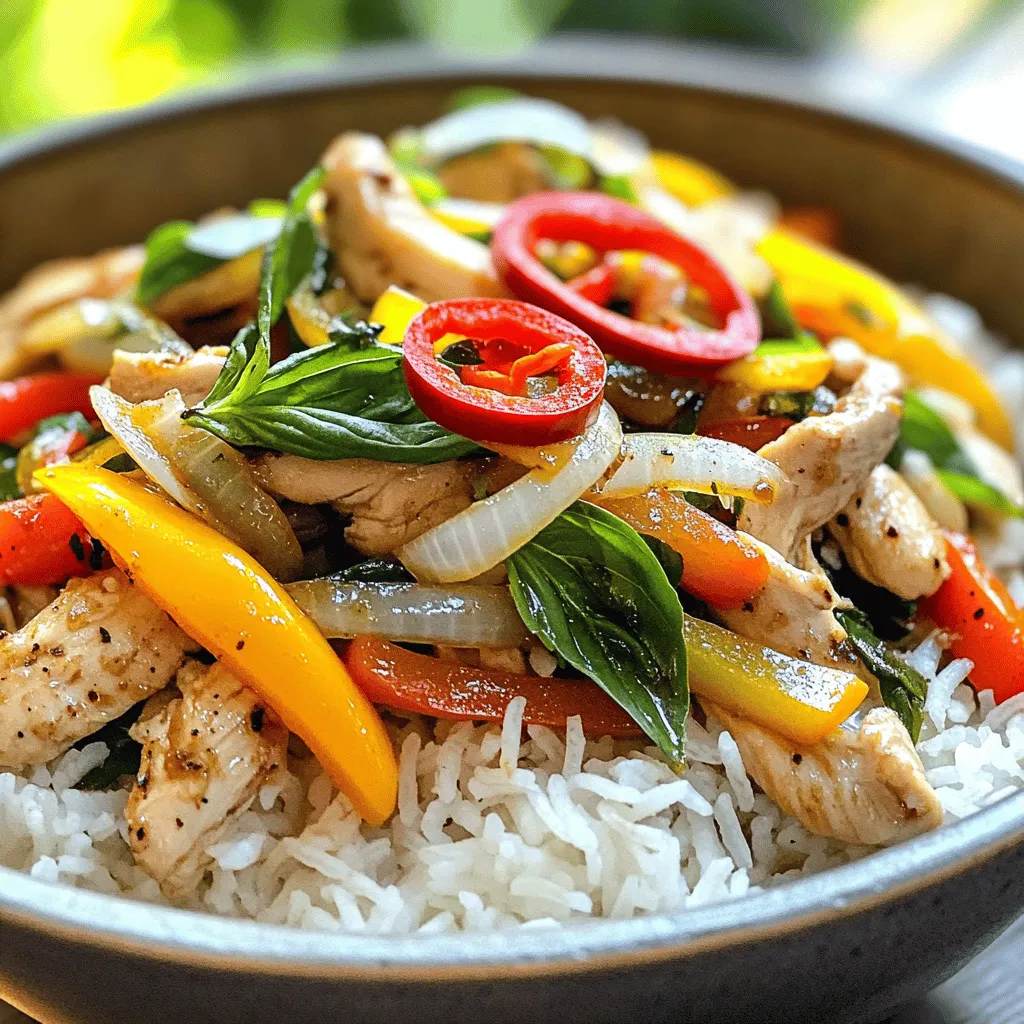
Thai Basil Chicken Stir-Fry Flavorful Dinner Delight
If you’re craving a burst of flavor in your dinner, Thai Basil Chicken Stir-Fry is the answer. This dish is quick, easy, and incredibly…