


Latest & Greatest

Buffalo Chicken Dip Irresistible Party Favorite Recipe
Are you ready to impress your guests with a dish everyone loves? Buffalo Chicken Dip is the ultimate party favorite
Read more…
Creamy White Chicken Chili Easy Comfort Food Recipe
If you’re craving a warm bowl of comfort, look no further than this Creamy White Chicken Chili. Packed with tender
Read more…
Homemade Cinnamon Rolls Irresistible Warm Delight
There’s nothing like the smell of homemade cinnamon rolls baking in your kitchen. This easy recipe will guide you to
Read more…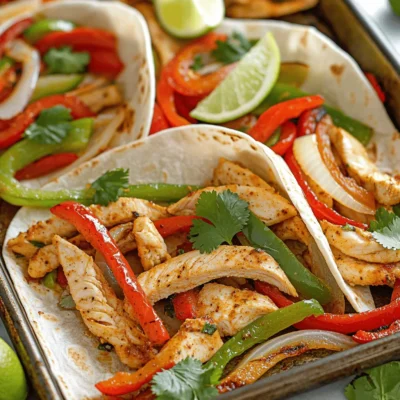
Easy Sheet Pan Fajitas Simple and Delicious Meal
Looking for a quick and tasty dinner? You’re in the right place! My Easy Sheet Pan Fajitas are simple to
Read more…
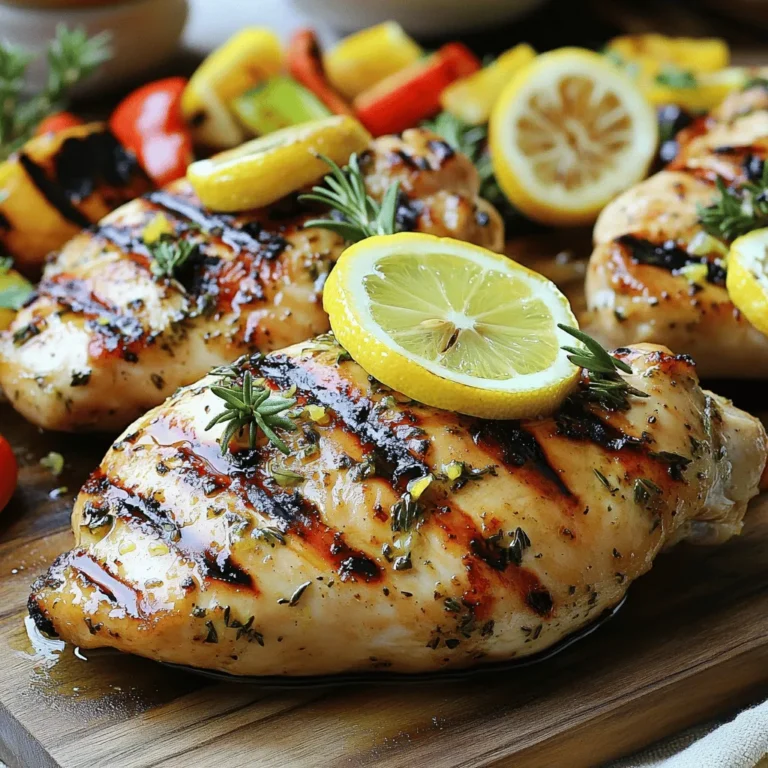
Southern Fried Chicken Crispy and Flavorful Recipe
Get ready to elevate your cookout with my crispy and flavorful Southern Fried Chicken recipe! I’m excited to share my
Read more…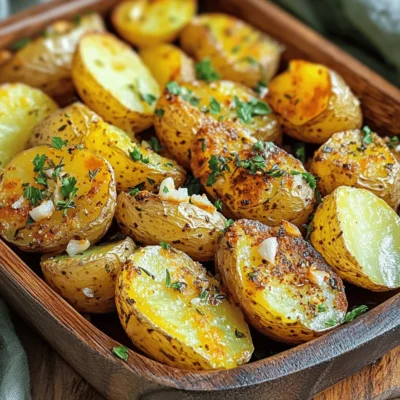
Garlic Herb Roasted Potatoes Crunchy and Flavorful Dish
Looking for a side dish that’s both crunchy and bursting with flavor? Look no further! My Garlic Herb Roasted Potatoes
Read more…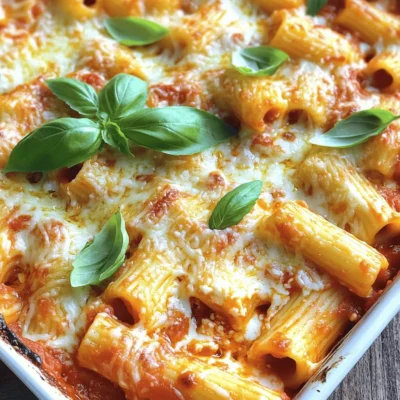
Easy Cheesy Baked Ziti Simple and Filling Recipe
Are you ready to enjoy a warm, comforting dish that’s both easy to make and oh-so-cheesy? In this blog post,
Read more…
Spicy Honey Garlic Chicken Wings Crispy and Flavorful
Get ready to elevate your game day with my Spicy Honey Garlic Chicken Wings! These wings are crispy, flavorful, and
Read more…browse recipes


Mediterranean Quesadilla Flavorful and Simple Recipe
Are you ready to take your taste buds on a trip? This Mediterranean Quesadilla recipe packs bold flavors in a simple dish you’ll love.…
My Latest Desserts

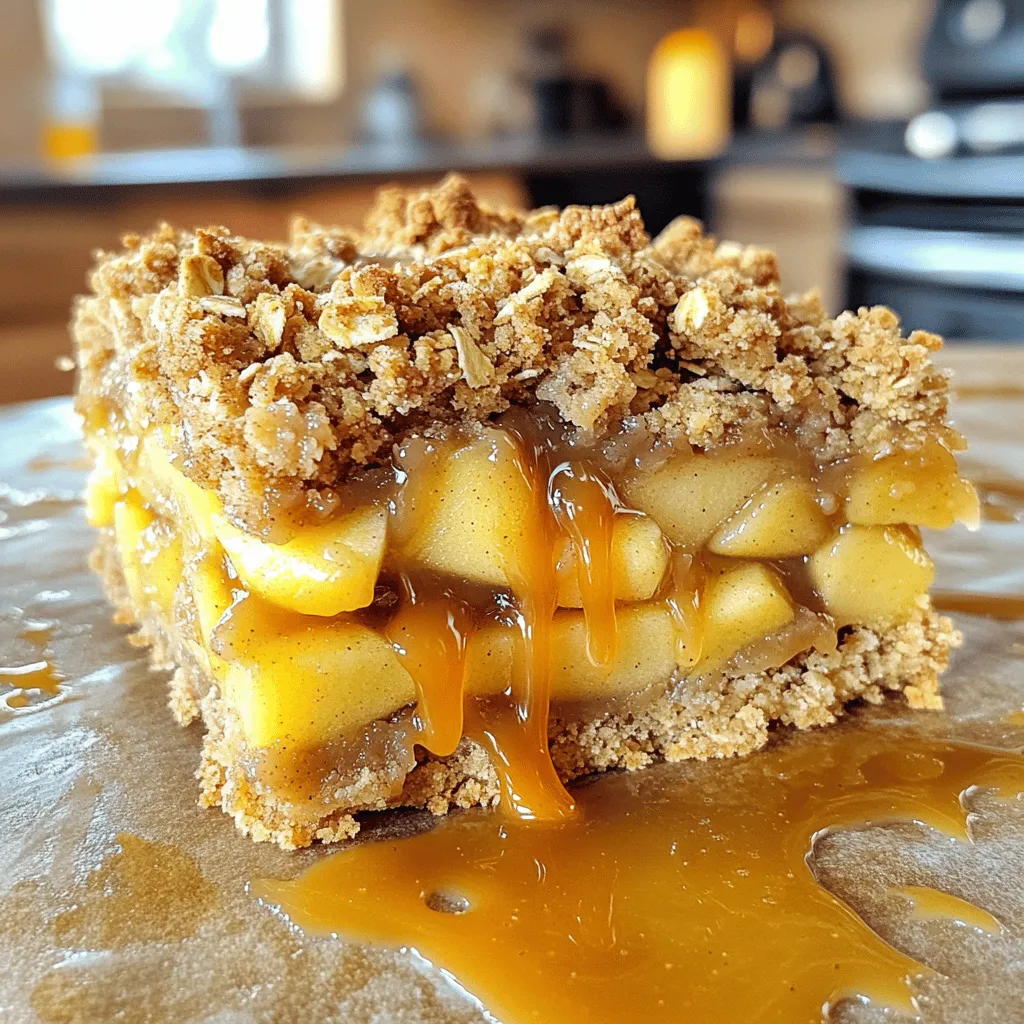
Miso Caramel Apple Crumble Bars Irresistible Treat
Are you ready to discover a dessert that combines sweet and savory in the best way? Miso Caramel Apple Crumble Read Full Recipe-
Pumpkin Cheesecake Swirl Brownies Rich and Creamy Treat
If you love rich and creamy desserts, you’re in for a treat! Pumpkin Cheesecake Swirl Brownies combine fudgy brownies with Read Full Recipe -
Miso Caramel Apple Crumble Bars Easy and Delicious Treat
If you’re looking for a treat that combines sweet apples, rich miso caramel, and a crunchy crumble, you’ve found it! Read Full Recipe -
Pumpkin Cheesecake Swirl Brownies Irresistible Delight
Get ready to savor the magic of fall with my Pumpkin Cheesecake Swirl Brownies! These decadent treats combine rich brownie Read Full Recipe -
Cherry Tahini Energy Bites Healthy Snack Recipe
Looking for a quick, healthy snack? Let me introduce you to Cherry Tahini Energy Bites! Packed with flavor and nutrition, Read Full Recipe -
Root Beer Cream Bars Irresistible and Simple Treat
If you love the sweet nostalgia of root beer, you’re in for a treat! Root Beer Cream Bars combine creamy Read Full Recipe -
Cherry Chocolate Lava Mug Cake Delightful Recipe
Craving something sweet and quick? You’re in for a treat with my Cherry Chocolate Lava Mug Cake! This recipe packs Read Full Recipe -
Caprese Stuffed Cupcakes Flavorful and Unique Treat
Are you ready to treat your taste buds to something new? Caprese Stuffed Cupcakes mix fresh flavors and fun in Read Full Recipe -
Mango Tajin Cake Pops Tasty and Fun Treats
Craving a unique treat? Try my Mango Tajin Cake Pops! These fun bites blend sweet mango with the zesty kick Read Full Recipe -
Matcha Pistachio Energy Bites Nourishing Snack Option
Looking for a tasty and healthy snack? Let me introduce you to Matcha Pistachio Energy Bites! Packed with oats, nuts, Read Full Recipe


hey,
i’m !
I’m so happy you’re here!
I pour heart and skill into every recipe I create. I know you’ll taste the difference now let’s enjoy this flavorful adventure together.
![- 4 cups fresh broccoli florets - 2 cups cooked white rice - 1 cup sharp cheddar cheese, grated - 1 cup cream of mushroom soup (canned or homemade) - ½ cup milk - 1 small onion, finely chopped - 2 cloves garlic, minced - ½ teaspoon black pepper - ½ teaspoon salt - ½ teaspoon paprika - 1 cup panko bread crumbs - 2 tablespoons butter, melted These ingredients create a warm, cheesy hug in a dish. First, the fresh broccoli gives a nice crunch and bright color. The cooked rice makes it hearty and filling. Sharp cheddar cheese adds flavor and creaminess, while the cream of mushroom soup brings moisture. The milk helps smooth everything out, making it rich. Onions and garlic give a lovely aroma and depth. Simple spices like salt, pepper, and paprika enhance the dish without overpowering it. The panko bread crumbs add a crispy top, making each bite delightful. Finally, melted butter coats the crumbs for extra flavor. - Baking dish (9x13 inch) - Large mixing bowl - Pot for blanching broccoli - Measuring cups and spoons Using the right tools is key. A 9x13 inch baking dish holds all the goodness. A large mixing bowl gives you space to combine all the ingredients well. A pot for blanching the broccoli ensures it cooks quickly and evenly. Lastly, measuring cups and spoons help you get the amounts just right. For the full recipe, check out the detailed instructions that guide you through each step. - Preheat your oven to 350°F (175°C). - Blanch the broccoli florets in boiling water. Blanching helps keep the broccoli bright green and slightly tender. Place the florets in boiling water for about three minutes. Afterward, drain them and set them aside to cool. - Combine all ingredients in a mixing bowl. - Ensure everything is well mixed to ensure even distribution. In a large bowl, mix together the cooked rice, blanched broccoli, grated cheddar cheese, cream of mushroom soup, milk, chopped onion, minced garlic, black pepper, salt, and paprika. Stir until everything is well coated and evenly mixed. - Transfer mixture into a greased baking dish. - Top with panko and bake for 25-30 minutes. Pour the mixture into a greased 9x13 inch baking dish. Spread it out evenly. In a separate bowl, mix panko bread crumbs with melted butter. Sprinkle this on top of the casserole. Bake it in the oven for 25 to 30 minutes. Look for a golden brown top that bubbles slightly. To make the panko topping crunchy, mix it with melted butter. This helps it brown nicely. Spread the panko evenly over the top. It should cover the whole dish for great texture. When you bake it, the topping will get golden and crisp. When choosing broccoli, look for bright green florets. They should be firm, not soft or yellow. Fresh broccoli has a nice, strong smell. You want to avoid any limp or wilted stems. Always check for small dark spots, as they can signal age. If you want to switch the rice, try quinoa or cauliflower rice. Both options add unique flavors and textures. Quinoa has a nutty taste, while cauliflower rice is light and fluffy. They also lower carbs, which can be a bonus. For a dairy-free version, use plant-based cheese. You can also swap cream of mushroom soup for a homemade version made with nuts or coconut milk. This keeps the creaminess without dairy. You can add proteins for extra heartiness. Chicken or turkey work well. For a vegetarian option, add tofu or chickpeas. They soak up flavor and make the dish filling. Trying different cheeses can change the taste, too. Mozzarella gives a stretchy, gooey texture. Gouda adds a rich, smoky flavor. Feel free to mix and match your favorites! {{image_2}} To serve cheesy broccoli casserole, use a large spoon to scoop out portions. Place each serving on a plate. This dish is best served warm and straight from the baking dish. For a beautiful touch, sprinkle fresh parsley on top. The green color adds brightness and flavor. You can also use chives or thyme for added flair. Arrange the plates neatly for gatherings, making each serving look inviting. Cheesy broccoli casserole pairs well with a simple salad. A fresh green salad with a light vinaigrette works great. You can also serve it with crusty bread to soak up the rich flavors. For drinks, white wine like Sauvignon Blanc is a nice choice. If you prefer non-alcoholic options, lemonade or sparkling water complements the dish well. These sides and drinks bring out the best in your casserole. For the complete recipe, check out the [Full Recipe]. To store leftovers in the fridge, place the casserole in an airtight container. Make sure the container is sealed well to keep out air. Leftovers stay fresh for about 3 to 5 days. To enjoy the best taste, eat them within this time frame. To freeze the casserole, let it cool completely first. Then, wrap it tightly in plastic wrap and aluminum foil. This helps prevent freezer burn. You can keep it in the freezer for up to 3 months. When you're ready to eat, thaw the casserole in the fridge overnight. For reheating, place it in the oven at 350°F (175°C) until hot throughout. This method keeps the texture nice and creamy. Enjoy your cheesy broccoli casserole later with that same great taste! For the full recipe, check out the details above. Making cheesy broccoli casserole takes about 45 minutes in total. You will spend 15 minutes prepping and about 30 minutes cooking. Yes, you can make this casserole ahead of time. Prepare it up to the baking step. Cover it tightly and store it in the fridge for up to two days. When you are ready to bake, just pop it in the oven. It may need a few extra minutes to cook through. This casserole pairs well with many side dishes. Here are a few ideas: - A crisp green salad - Roasted chicken or turkey - Garlic bread - Steamed carrots or green beans For drinks, try a light white wine or a refreshing iced tea. You can now create a delicious cheesy broccoli casserole with ease. We covered the key ingredients, tools, and steps for preparation and baking. Don’t forget the tips for perfecting texture and making your dish unique with various proteins or cheeses. This meal is not just tasty; it’s also versatile. You can enjoy it fresh or save it for later. Get started on this comforting dish and impress your family and friends!](https://foodishtalk.com/wp-content/uploads/2025/06/f81e3deb-3e75-4a1b-b4f3-ab8dc131085d-300x300.webp)
![- 2 cups green cabbage, thinly sliced - 1 cup purple cabbage, thinly sliced - 1 cup carrots, grated - 1 red bell pepper, thinly sliced - 1 cup sugar snap peas, halved - 1/2 cup green onions, chopped - 1/4 cup cilantro, chopped - 1/4 cup toasted sesame seeds - 1/4 cup almonds, slivered - 1/4 cup rice vinegar - 2 tablespoons soy sauce (or tamari for gluten-free) - 1 tablespoon sesame oil - 1 tablespoon honey or maple syrup - 1 teaspoon fresh ginger, grated - 1 garlic clove, minced - Salt and pepper to taste The key to a great Crunchy Asian Slaw lies in the fresh ingredients. I love using a mix of green and purple cabbage for color and crunch. Both types of cabbage add a nice bite. Grated carrots bring sweetness, while the red bell pepper adds a crisp texture. Sugar snap peas give the slaw a fun snap, and green onions add a mild onion flavor. Cilantro is a must for its fresh taste. I also like to sprinkle in toasted sesame seeds and slivered almonds for added crunch and richness. For the dressing, I use rice vinegar for a tangy kick. Soy sauce or tamari gives it depth. Adding sesame oil brings a nutty flavor that enhances the dish. Honey or maple syrup adds a touch of sweetness. Grated ginger and minced garlic create a flavorful base. Finally, remember to season with salt and pepper to taste. You can find the full guide to this recipe in the [Full Recipe]. Enjoy making your slaw with these fresh and vibrant ingredients! Start by gathering all your fresh veggies. You will need: - 2 cups green cabbage, thinly sliced - 1 cup purple cabbage, thinly sliced - 1 cup carrots, grated - 1 red bell pepper, thinly sliced - 1 cup sugar snap peas, halved - 1/2 cup green onions, chopped - 1/4 cup cilantro, chopped In a large bowl, combine the green and purple cabbage, grated carrots, red bell pepper, sugar snap peas, green onions, and cilantro. Toss them well. This mix adds color and crunch. Next, let’s whip up a tasty dressing. You will need: - 1/4 cup rice vinegar - 2 tablespoons soy sauce (or tamari for gluten-free) - 1 tablespoon sesame oil - 1 tablespoon honey or maple syrup - 1 teaspoon fresh ginger, grated - 1 garlic clove, minced - Salt and pepper to taste In a small bowl, whisk together the rice vinegar, soy sauce, sesame oil, honey (or maple syrup), grated ginger, and minced garlic until smooth. Don’t forget to season with salt and pepper to taste. This dressing packs a punch! Now, pour the dressing over your slaw mixture. Toss it all well so every veggie is coated. Let it sit for about 15 minutes. This resting time helps the flavors meld and softens the veggies a bit. Just before serving, you can sprinkle on some toasted sesame seeds and slivered almonds for extra crunch. You can check out the full recipe for more details. Enjoy your colorful and crunchy Asian slaw! Using fresh vegetables makes a big difference. They add crunch and bright flavor. Look for vibrant colors and firm textures. Avoid wilted or brown parts. Fresh veggies elevate your Crunchy Asian Slaw. Making the slaw a few hours ahead helps the flavors blend. This wait allows the veggies to soak in the dressing. The taste becomes richer and more intense. Just store it in the fridge until you're ready to serve. You can easily adjust this recipe for different diets. For gluten-free, swap soy sauce with tamari. Use maple syrup instead of honey for a vegan option. If you want a low-sugar version, reduce the sweetener or skip it altogether. Play with these choices to fit your needs! {{image_2}} You can mix in more veggies for extra crunch. Broccoli slaw adds a nice bite. Radishes give a peppery flavor, while bell peppers add sweetness. You can also use shredded carrots for more color. Choose what you love and get creative! Want to make your slaw a meal? Add grilled chicken for a hearty touch. Shrimp works great too; it cooks fast and tastes amazing. For a plant-based option, try tofu. Just grill or sauté it first. These proteins will make your slaw filling and tasty. Not a fan of the original dressing? Try a peanut sauce for a nutty twist. A sesame ginger dressing can give it a fresh flavor. You can also use a spicy sriracha vinaigrette if you like heat. Each dressing adds a new layer of taste to your Crunchy Asian Slaw! To keep your crunchy Asian slaw fresh, store it in an airtight container. Make sure to add the dressing only when you’re ready to eat. This way, the vegetables stay crisp and bright. If you have leftover dressing, keep it in a separate jar. It will last for about a week in the fridge. When stored properly, the slaw will last up to three days in the refrigerator. After that, the veggies may lose their crunch. Always check for any signs of spoilage, like an off smell or slimy texture, before eating. I do not recommend freezing the slaw. Freezing can change the texture of the vegetables. If you must freeze it, do so without the dressing. To thaw, place it in the fridge overnight. After thawing, enjoy it as soon as possible for the best taste. For more details, refer to the Full Recipe. To make this Crunchy Asian Slaw vegan, simply swap honey for maple syrup. Maple syrup gives a sweet touch without using animal products. This change keeps the flavors intact while making the dish plant-based. This slaw pairs well with many dishes. Try it with grilled chicken or shrimp for a tasty meal. It also goes great with rice bowls or tacos. The crunch of the slaw contrasts nicely with tender meats. Yes, you can make the slaw a few hours in advance. If you do this, the flavors blend well and taste even better. However, the veggies might soften a bit. For extra crunch, add nuts and seeds just before serving. Each serving of this slaw has about 120 calories. It contains 8 grams of fat, mostly from sesame oil and nuts. This dish is also rich in vitamin C and fiber, thanks to the fresh veggies. For the full recipe, check out the details above. In this article, we explored the ingredients and steps to make Crunchy Asian Slaw. We detailed each fresh vegetable, dressing components, and shared helpful tips. You learned how to store leftovers and variations to try. Crunchy Asian Slaw is fun to make and full of flavor. It pairs well with many dishes. Enjoy this healthy, crunchy slaw in your meals and make it your own! Experiment with different veggies and proteins for added taste. Thanks for reading about this tasty recipe!](https://foodishtalk.com/wp-content/uploads/2025/06/e02f2d90-e6f7-4c2a-a562-9ac7797f3800-300x300.webp)


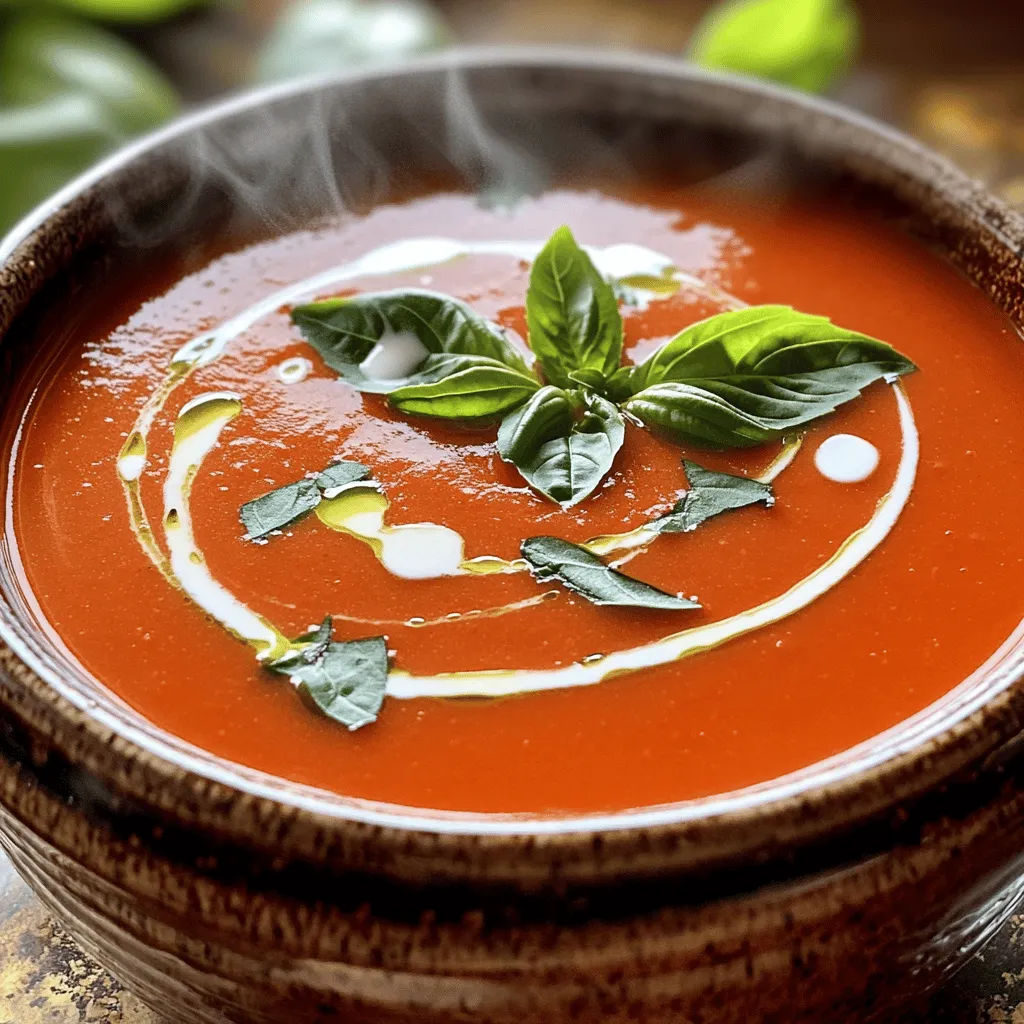
Creamy Tomato Basil Soup Rich and Flavorful Recipe
Warm, comforting, and full of flavor, Creamy Tomato Basil Soup is a must-try! In this recipe, I’ll walk you through simple steps to create…