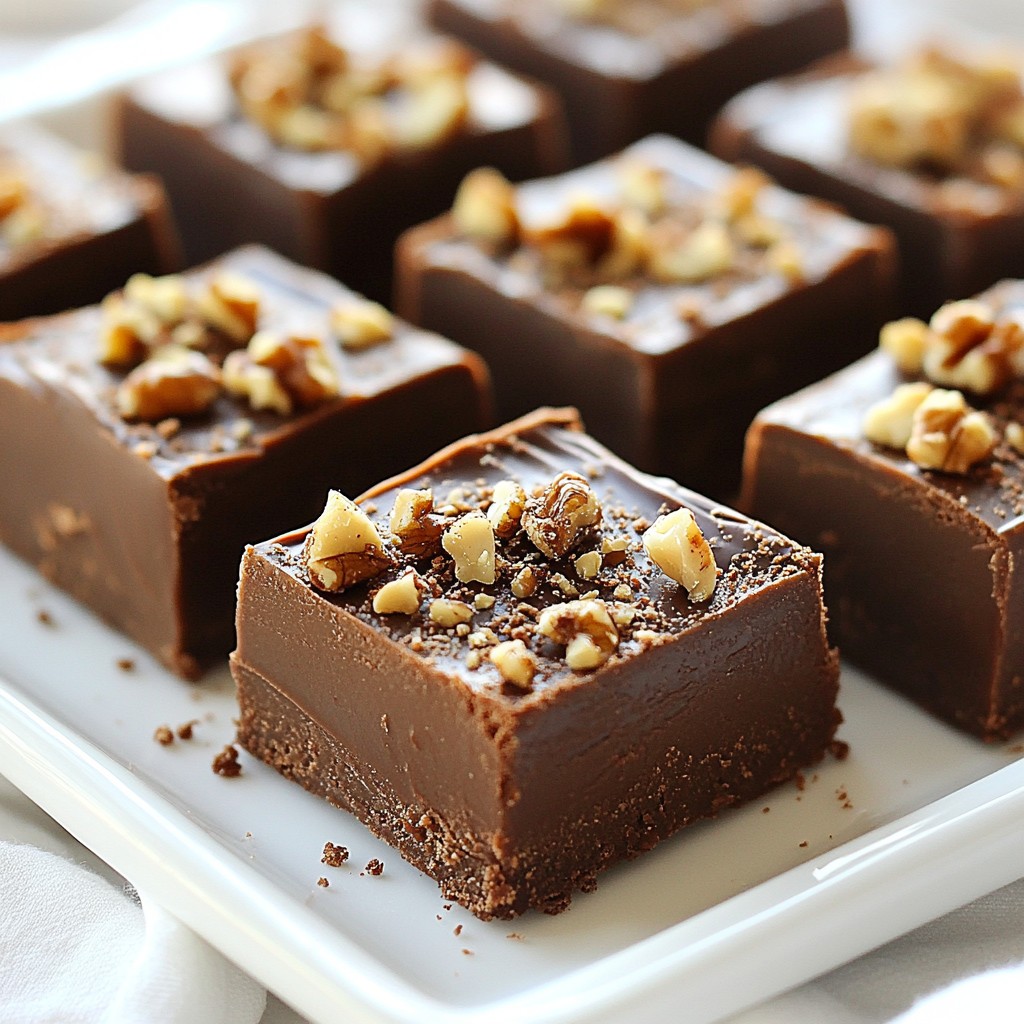
If you love chocolate and easy recipes, you’ll adore these Nutella Fudge Squares. With just a few simple ingredients, like Nutella and sweetened condensed milk, you can whip up a treat that melts in your mouth. No baking means you can enjoy them swiftly. Follow my easy step-by-step guide to make this no-bake dessert that will impress friends and family alike. Let’s dive in!
Why I Love This Recipe
- Quick and Easy: This recipe takes only 15 minutes of prep time, making it perfect for last-minute cravings or gatherings.
- Decadent Flavor: The combination of Nutella and cocoa powder creates a rich, chocolatey taste that is irresistible.
- Customizable: You can easily add your favorite nuts or toppings, such as chocolate chips, to make it your own.
- Perfect for Sharing: Cut into squares, these fudge treats are great for parties, potlucks, or simply sharing with friends and family.
Ingredients
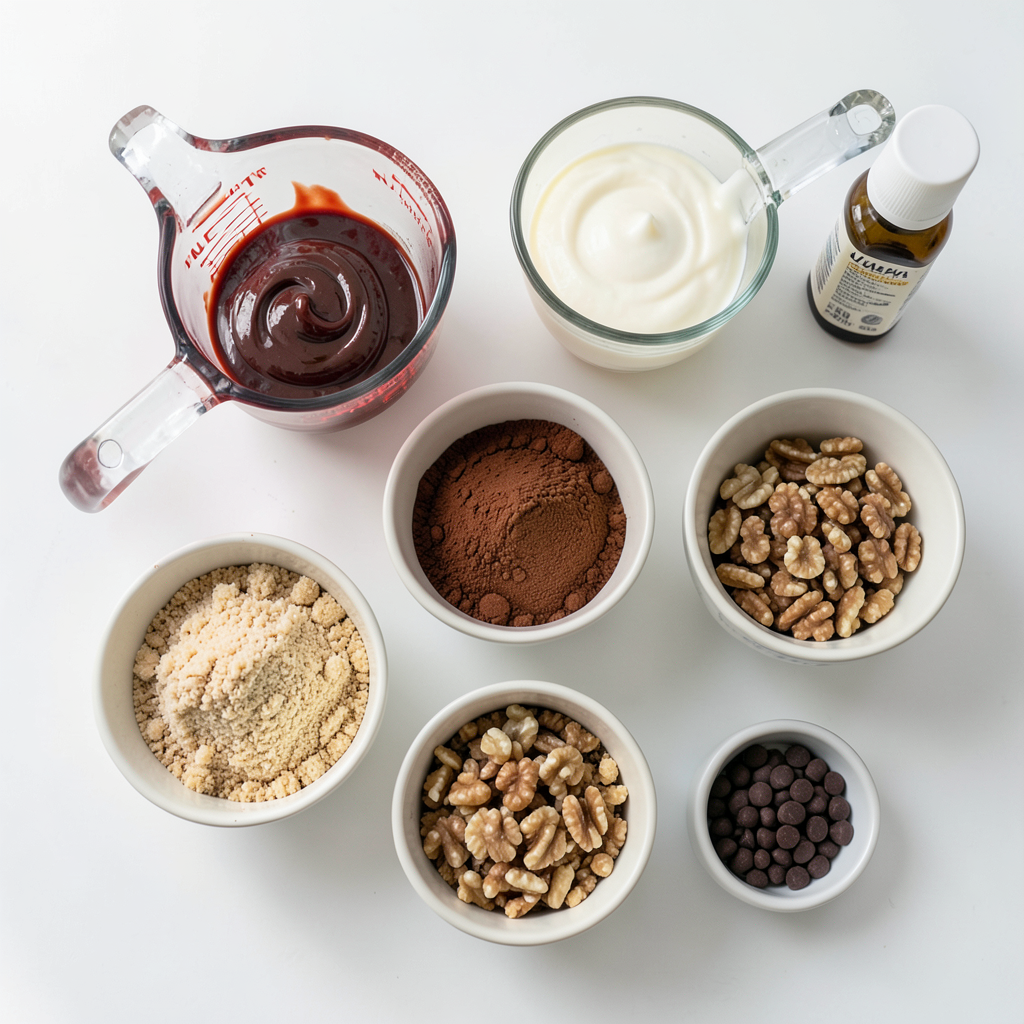
To make Nutella Fudge Squares, you need a few simple ingredients. Each one adds to the rich taste. Here’s what you will need:
- 1 cup Nutella
- 1 cup sweetened condensed milk
- ½ cup unsweetened cocoa powder
- 1 cup graham cracker crumbs
- ½ cup chopped nuts (walnuts or hazelnuts)
- ½ teaspoon vanilla extract
- 1 pinch of salt
- Optional: chocolate chips for topping
Nutella is the star here. Its smoothness gives the fudge a creamy texture. Sweetened condensed milk adds sweetness and helps bind the fudge together. Cocoa powder deepens the chocolate flavor. Graham cracker crumbs add a nice crunch.
You can choose walnuts or hazelnuts for a nutty flavor. The vanilla extract enhances all the tastes. A pinch of salt balances the sweetness. If you like, you can add chocolate chips on top for extra chocolatey goodness.
Make sure you have everything ready before you start. This will make the process smoother and more fun!
Step-by-Step Instructions
Preparation of the Baking Pan
Start by lining an 8-inch square baking pan with parchment paper. Leave some paper hanging over the edges. This overhang helps you lift the fudge out later. Make sure the paper fits snugly in the corners.
Mixing the Fudge Ingredients
In a big bowl, mix 1 cup of Nutella with 1 cup of sweetened condensed milk. Stir until it becomes smooth and creamy. Next, sift in ½ cup of unsweetened cocoa powder. Add 1 cup of graham cracker crumbs and mix well. The mixture should be thick and rich.
Adding Nuts and Final Touches
Now, stir in ½ cup of chopped nuts. You can use walnuts or hazelnuts. Then, add ½ teaspoon of vanilla extract and a pinch of salt. Mix until all the nuts and flavors are evenly spread throughout the fudge.
Setting the Fudge in the Refrigerator
Pour the fudge into the prepared pan. Spread it evenly using a spatula. If you want, sprinkle some chocolate chips on top and press them down lightly. Place the pan in the fridge for at least 2 hours. This helps the fudge set firmly. Once set, lift the fudge out using the parchment. Cut it into squares with a sharp knife. Enjoy your delicious Nutella fudge squares!
Tips & Tricks
Tips for a Perfect Fudge Texture
To get the best fudge texture, use room temperature ingredients. This helps them mix well. Sift the cocoa powder to avoid lumps. The graham cracker crumbs should be fine for a smooth texture. If you want a creamier fudge, add a bit more sweetened condensed milk. Lastly, let the fudge chill until firm. This ensures it cuts nicely into squares.
How to Avoid Common Mistakes
One common mistake is not measuring the ingredients correctly. Always use measuring cups for accuracy. Another mistake is mixing too fast, which can cause air bubbles. Be gentle when mixing. If your fudge is too soft, it may not set right. Make sure to refrigerate it long enough. Lastly, don’t skip the pinch of salt; it enhances the flavor.
Presentation Tips and Serving Suggestions
For a beautiful presentation, arrange the fudge squares on a decorative platter. You can dust them with cocoa powder for a nice look. Add chopped nuts or drizzle melted chocolate on top for flair. Serve with a scoop of vanilla ice cream for a fun twist. These treats are perfect for parties or as a sweet gift.
Pro Tips
- Chill Time is Key: Allow the fudge to chill for the full 2 hours to ensure it sets properly. Cutting it too soon may result in a gooey texture.
- Nut Variations: Experiment with different nuts such as almonds or pecans for a unique flavor twist. Just make sure to chop them finely for even distribution.
- Storage Savvy: Store the fudge in an airtight container in the refrigerator for up to two weeks. You can also freeze it for longer storage, just be sure to thaw in the fridge before serving.
- Mix It Up: For a fun variation, try adding a pinch of sea salt on top before serving to enhance the chocolate flavor and add a touch of sophistication.
Variations
Nut-Free Variations
To make nut-free Nutella fudge squares, skip the chopped nuts. You can replace them with seeds like pumpkin or sunflower seeds. These seeds add a nice crunch. You can also use coconut flakes for extra texture. This keeps the treat safe for those with nut allergies.
Flavor Enhancements (Mint, Coffee, etc.)
Adding flavors can make your fudge squares even better. Try mixing in a few drops of mint extract for a fresh twist. Coffee lovers can add instant coffee granules to the mix. This will give a rich coffee flavor. You can also use a bit of orange zest for a citrus kick. Experiment with different flavors to find your favorite!
Alternative Toppings and Mix-Ins
Topping your fudge squares can change the game. Instead of chocolate chips, try mini marshmallows or crushed candy. Drizzle some caramel or melted white chocolate over the top for a sweet touch. For a fun crunch, add crushed graham crackers or pretzels. These toppings can make your fudge squares unique and exciting!
Storage Info
How to Store Nutella Fudge Squares
Store your Nutella fudge squares in an airtight container. Use parchment paper to separate layers. This helps keep them fresh and prevents sticking. You can store them at room temperature for up to three days. However, if you want them to last longer, keep them in the fridge. The cool air helps maintain their rich, creamy texture.
Freezing and Thawing Instructions
You can freeze Nutella fudge squares for up to three months. Cut them into squares before freezing. Place the squares in a single layer in a freezer-safe container. Make sure to use parchment paper between layers. To thaw, move them to the fridge overnight. This keeps them soft and delicious. You can also let them sit at room temperature for about 30 minutes.
Shelf Life and Best Practices
Nutella fudge squares have a good shelf life. When stored properly, they can last about one week in the fridge. For the best taste, eat them within three days. Always check for any signs of spoilage, like changes in color or smell. Enjoy the sweet, chocolatey goodness while it’s fresh!
FAQs
Can I use other types of chocolate?
Yes, you can use other chocolates. Dark or milk chocolate works well. Just melt it first and mix it with the other ingredients. You can also try white chocolate. It adds a sweet twist to your fudge.
How long does the fudge take to set?
The fudge takes about 2 hours to set. It needs this time in the fridge to firm up. A longer wait will make it even better. You can also let it sit overnight for a perfect texture.
What can I substitute for sweetened condensed milk?
You can use coconut milk mixed with sugar. Another option is evaporated milk with added sugar. Both can mimic the sweet and creamy taste of sweetened condensed milk. Adjust the sugar to match your taste.
Is it necessary to refrigerate the fudge squares?
Yes, refrigerating is important. It helps the fudge firm up nicely. If you leave it out, the fudge may not hold its shape. Always store leftovers in the fridge to keep them fresh and tasty.
This blog post gave you a clear guide to making Nutella fudge. We covered the key ingredients, easy steps for preparation, and tips for perfecting your fudge. You also learned about variations and how to store your sweet treat. Remember, with simple adjustments, you can customize this fudge to your taste. Enjoy your fudge-making journey, and share your creations with family and friends!


