Craving a sweet treat that screams fall? You’re in the right place! This No-Bake Pumpkin Cheesecake is super easy to make and packed with flavor. I’ll guide you through every step, from the crust to the creamy filling. With simple ingredients and no oven required, you’ll impress everyone at your next gathering. Ready to create a dessert that’s both delicious and fun? Let’s dive into this delightful recipe!
Ingredients
List of Ingredients for No-Bake Pumpkin Cheesecake
To make the best no-bake pumpkin cheesecake, gather these simple ingredients:
– 1 ½ cups graham cracker crumbs
– ½ cup unsalted butter, melted
– 2 cups cream cheese, softened
– 1 cup canned pumpkin puree
– 1 cup powdered sugar
– 1 teaspoon vanilla extract
– 1 teaspoon pumpkin pie spice
– 1 cup heavy whipping cream
Optional Topping Ingredients
If you want to dress it up, consider these toppings:
– Whipped cream
– Ground cinnamon
Suggested Tools for Preparation
You will need a few basic tools:
– A medium mixing bowl
– A large mixing bowl
– An electric mixer
– A 9-inch springform pan
– A spatula
These tools help make the process smooth. Having everything ready makes cooking more fun. The ingredient list is easy to follow, and you can find these items at any store. This dish is perfect for fall or any time you crave something sweet!
Step-by-Step Instructions
Preparing the Graham Cracker Crust
To start, gather your ingredients. You will need graham cracker crumbs and melted butter. In a medium bowl, mix 1 ½ cups of crumbs with ½ cup of melted butter. Stir until the mix looks crumbly. This mix will be your crust. Press it firmly into the bottom of a 9-inch springform pan. Make sure it is even. Once done, place the pan in the fridge to chill. This helps the crust hold together.
Making the Creamy Pumpkin Filling
Next, we make the filling. In a large mixing bowl, add 2 cups of softened cream cheese. Beat it with an electric mixer until smooth. Then, add 1 cup of canned pumpkin puree, 1 cup of powdered sugar, 1 teaspoon of vanilla extract, and 1 teaspoon of pumpkin pie spice. Mix everything until well combined. In another bowl, whip 1 cup of heavy cream until stiff peaks form. Gently fold this whipped cream into your pumpkin mix. Be careful not to deflate it; you want it light and fluffy.
Assembling and Chilling the Cheesecake
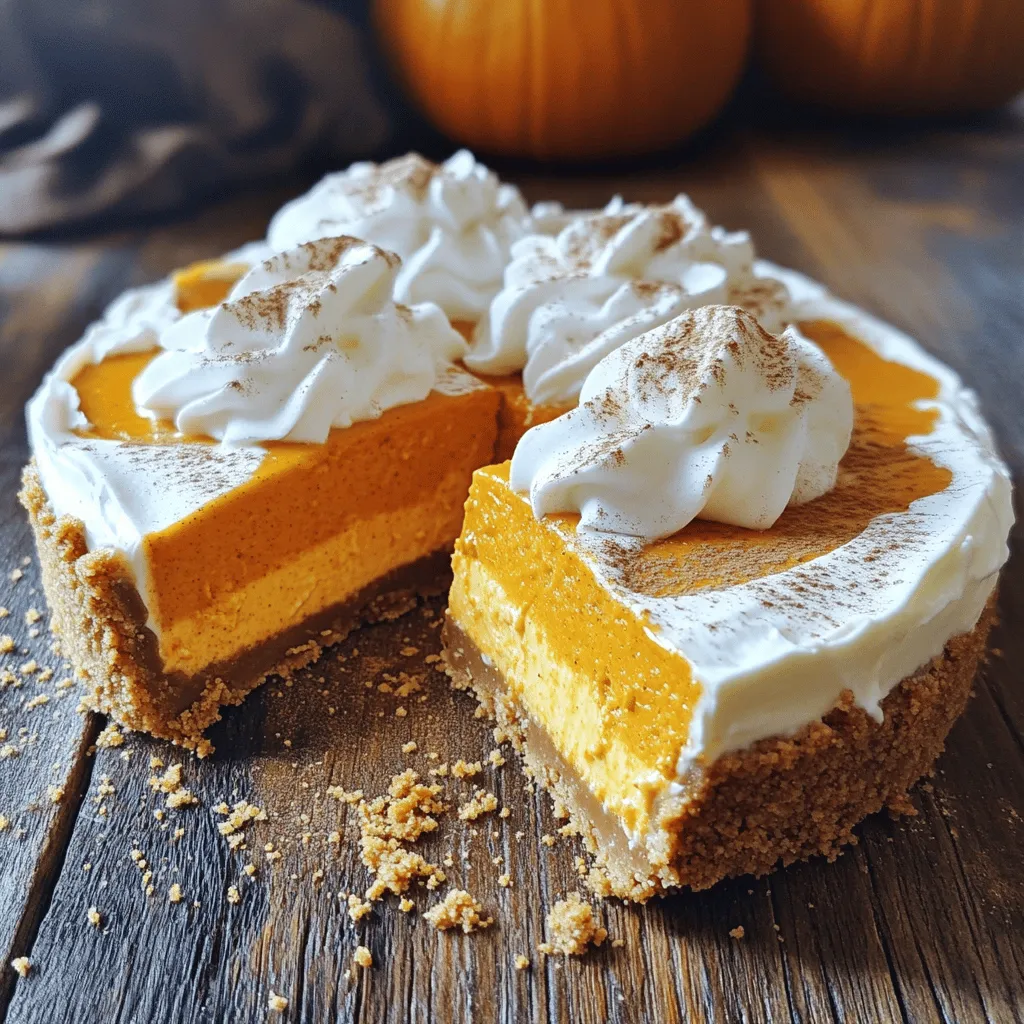
Now it’s time to assemble. Take the chilled crust from the fridge. Spoon the pumpkin filling over the crust. Spread it evenly with a spatula. Cover the cheesecake with plastic wrap. Place it back in the fridge for at least 4 to 6 hours, or overnight if you can wait. This helps it set well. When ready, remove the cheesecake from the pan. Top it with whipped cream and a sprinkle of cinnamon for a special touch. Enjoy your delicious no-bake pumpkin cheesecake!
Tips & Tricks
How to Achieve the Perfect Consistency
To get the best texture for your cheesecake, use softened cream cheese. Cold cream cheese makes lumps. Beat it well until it’s smooth. When adding pumpkin puree, mix it in slowly. This helps keep the cream cheese from getting too airy. Gently fold in the whipped cream last. This keeps the filling light and fluffy.
Suggestions for Whipping Cream
Use cold heavy cream for the best results. This helps it whip faster. Beat it until stiff peaks form. It should hold its shape well. Don’t overbeat, or it can turn into butter. If you want sweetened whipped cream, add a bit of powdered sugar while whipping. This adds flavor and sweetness.
Presentation and Serving Tips
For a lovely presentation, slice the cheesecake into wedges. Add a dollop of whipped cream on each piece. A sprinkle of cinnamon on top gives it a nice touch. Use a warm knife to cut clean slices. This makes serving easier. You can also decorate the edges of the cheesecake with extra whipped cream. This looks beautiful and inviting.

Variations
Gluten-Free Options
You can make this no-bake pumpkin cheesecake gluten-free. Swap graham crackers for gluten-free crumbs. Look for brands that use rice or almond flour. They work well for the crust. Just mix them with melted butter like usual. This keeps the taste and texture great.
Dairy-Free Alternatives
For a dairy-free version, use vegan cream cheese. Look for brands made from nuts or soy. You can also replace heavy cream with coconut cream. Chill a can of coconut milk overnight. Scoop out the thick part to whip. These swaps keep the cheesecake creamy and tasty without dairy.
Flavor Enhancements and Add-Ins
Feel free to get creative with flavors! You can add chocolate chips or nuts into the filling. A swirl of caramel or peanut butter gives it a fun twist. Try mixing in a bit of maple syrup for extra sweetness. These small changes can really elevate your cheesecake. For the spice lovers, add extra pumpkin pie spice or a hint of nutmeg. Each variation offers something new and exciting.
Storage Info
How to Store Leftover Cheesecake
Store leftover cheesecake in the fridge. Use an airtight container to keep it fresh. If you have a springform pan, cover it tightly with plastic wrap. This keeps the cheesecake moist and prevents it from absorbing odors.
Best Practices for Freezing
You can freeze the cheesecake for later. First, let it chill in the fridge. Once set, slice it into portions. Wrap each slice in plastic wrap, then put them in a freezer bag. This helps keep the cheesecake from getting freezer burn. It can last up to three months in the freezer.
Reheating Tips
No need to heat this cheesecake. It tastes great cold. If you want it softer, take it out of the fridge 15 minutes before serving. This makes it easier to slice and adds to the creamy texture. Enjoy each bite of your no-bake pumpkin cheesecake!
FAQs
Can I use fresh pumpkin instead of canned?
Yes, you can use fresh pumpkin. First, cook and puree the pumpkin. Make sure it is smooth and thick. Canned pumpkin is more convenient and often has a richer flavor. If you use fresh, watch for extra moisture. This can change the texture of your cheesecake.
How long does No-Bake Pumpkin Cheesecake last in the fridge?
No-Bake Pumpkin Cheesecake lasts about 5 to 7 days in the fridge. Keep it in an airtight container to prevent drying out. Make sure to keep it cold. This keeps it fresh and tasty for longer.
Can I make this cheesecake ahead of time?
Yes, you can make this cheesecake ahead of time. It is perfect for gatherings or holidays. Prepare it a day or two in advance. Just remember to chill it properly. The flavors will blend nicely as it sits. For the best taste, serve it cold.
This guide showed how to make a no-bake pumpkin cheesecake. You learned about the ingredients, steps, tips, and storage. Remember, you can mix flavors and adjust for dietary needs. Enjoy this treat at any gathering or as a simple dessert. It’s easy, tasty, and fun to make. Try it out, and share your creations! You’ll impress friends and family with your skills. Happy baking!


