
Looking for a simple and tasty treat that requires no baking? You’re in the right place! These No-Bake Peanut Butter Bars are packed with flavor and healthy ingredients. With just a few easy steps, you can whip up a delightful snack that everyone will love. Whether you prefer smooth or crunchy peanut butter, I'll guide you through every step to make these bars a hit in your kitchen!
Why I Love This Recipe
- Quick and Easy: This recipe takes just 15 minutes of prep time, making it an ideal choice for a last-minute treat!
- No-Bake Convenience: No need to turn on the oven! These bars are perfect for hot days or when you want to avoid extra heat in the kitchen.
- Healthy Ingredients: Made with wholesome ingredients like oats, peanut butter, and honey, they are a guilt-free snack option.
- Customizable: Feel free to switch out the chocolate chips for dried fruits or nuts to suit your taste preferences.
Ingredients
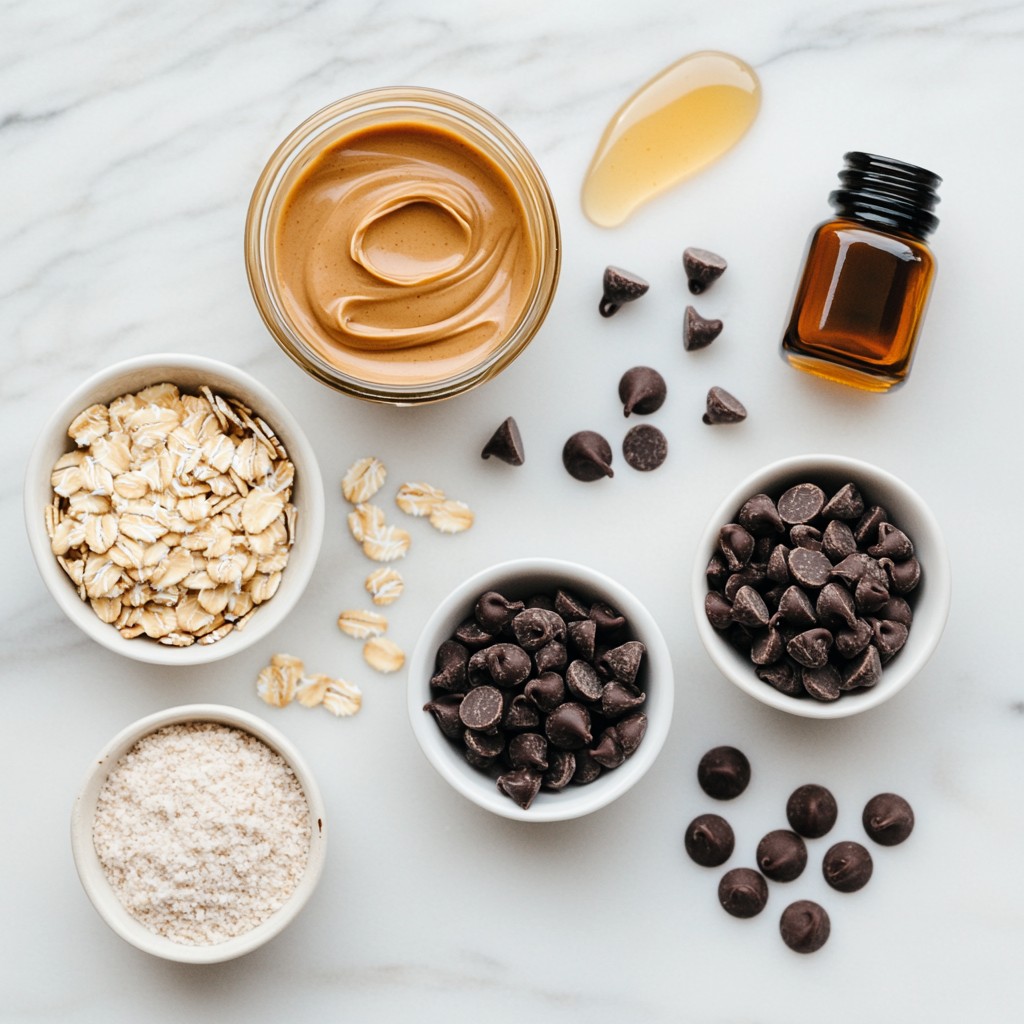
When making no-bake peanut butter bars, you need a few simple ingredients. Here’s what I use:
- 1 cup peanut butter (smooth or crunchy)
- 1/2 cup honey or maple syrup
- 2 cups rolled oats
- 1/2 cup dark chocolate chips (or dairy-free chocolate chips)
- 1/4 cup coconut flour
- 1 tsp vanilla extract
- A pinch of salt
These ingredients come together to create a tasty treat. The peanut butter gives a rich flavor and creamy texture. Honey or maple syrup adds sweetness and helps bind everything. Rolled oats provide a chewy base, while dark chocolate chips add a lovely sweetness. Coconut flour thickens the mix. Vanilla extract enhances the flavor, and just a pinch of salt balances the sweetness.
Using the right ingredients is key to making these bars delicious. You can also tweak them to fit your taste. For example, try using almond butter for a different flavor. Enjoy your cooking adventure!
Step-by-Step Instructions
Preparation and Mixing
To start, grab a medium bowl. Here, you will combine the peanut butter and sweetener. I like to use honey, but maple syrup works too. Mix these together well until the mix is smooth and creamy. This step is key because it creates a tasty base.
Next, add the vanilla extract and a pinch of salt. Stir this in until you can’t see any salt. The vanilla adds great flavor, while the salt brings out the sweetness.
Adding Dry Ingredients
Now, it’s time to fold in the dry ingredients. First, add the rolled oats and coconut flour. Gently mix until everything is fully combined. You want a sticky mixture that holds together well. This helps the bars stay firm once set.
After that, fold in the dark chocolate chips. Make sure they are evenly mixed throughout. The chocolate adds a nice touch of sweetness and richness to the bars.
Setting the Bars
Before you set the mixture, prepare your baking pan. Line an 8x8 inch pan with parchment paper. Leave some overhang on the sides. This makes it easy to lift the bars out later.
Now, pour the peanut butter mix into the pan. Use the back of a spatula or your hands to press it down firmly. Make sure the mixture is evenly spread and compacted. This helps the bars hold their shape as they set.
Place the pan in the refrigerator for at least 30 minutes. This step is crucial for the bars to firm up. Once set, lift the bars out using the parchment overhang. Cut them into your desired size, and enjoy these tasty treats!
Tips & Tricks
Successful No-Bake Bars
Measuring ingredients is key to getting the right taste and texture. Use dry measuring cups for oats and flour. This ensures even mixing and a good set. Too much or too little can change how the bars turn out.
To prevent sticking, line your pan with parchment paper. Let it hang over the edges for easy removal. Press the mixture down firmly. This helps the bars stay together. If they stick, use a butter knife to gently ease them out.
Serving Suggestions
For presentation, place the bars on a wooden board. Drizzle melted chocolate on top for a nice touch. You can sprinkle sea salt or chopped nuts for crunch. This makes them look fancy and taste great.
Pair your no-bake bars with milk or coffee. They also go well with tea. This combo makes a perfect snack for any time. Enjoy your delicious creation!
Pro Tips
- Use Natural Peanut Butter: Opt for natural peanut butter without added sugars or oils for a healthier option and more authentic flavor.
- Chill for Best Results: Allow the bars to chill for a full hour if possible to ensure they set properly and hold their shape when cut.
- Customize Add-Ins: Feel free to mix in nuts, seeds, or dried fruits to add extra flavor and texture to your bars.
- Portion Control: Cut the bars into smaller pieces for a perfect snack size, making them ideal for on-the-go or lunchbox treats.
Variations
Flavor Variations
You can change the flavors in your no-bake peanut butter bars. Try using different nut butters. Almond butter or cashew butter works well. Each nut butter adds its own unique taste. You can also add dried fruits like raisins or cranberries. They bring a sweet twist and chewy texture. Nuts like almonds or walnuts add crunch. Mixing these options makes your bars fun and tasty.
Dietary Adjustments
If you want a gluten-free version, just swap the rolled oats. Look for gluten-free oats in stores. They taste just as good! For vegan or dairy-free diets, use maple syrup instead of honey. Choose dairy-free chocolate chips too. These simple swaps keep the bars delicious for everyone. Enjoy making them fit your needs!
Storage Info
Best Practices for Storing Bars
To keep your no-bake peanut butter bars fresh, use an airtight container. This helps to prevent moisture from getting in. You should place the container in the refrigerator. The cool temperature keeps the bars firm and tasty. Avoid stacking the bars on top of each other. This can cause them to stick together. Instead, layer them with parchment paper. This way, they stay neat and easy to grab.
Shelf Life and Freshness
These bars can last up to a week in the fridge. After this time, they may lose their great taste and texture. If you notice any changes in smell or color, it’s best to discard them. For the best flavor, eat them within the first few days. If you want to keep them longer, you can freeze the bars. Wrap them tightly in plastic wrap before placing them in a freezer bag. They can last up to three months in the freezer. Just thaw them in the fridge when you're ready to enjoy!
FAQs
Common Questions
Can I freeze the no-bake peanut butter bars? Yes, you can freeze these bars. First, cut them into pieces. Then, wrap each piece in plastic wrap. Place them in a freezer-safe bag or container. They can last for up to three months in the freezer. When you want to eat one, just take it out and let it thaw in the fridge for a few hours.
What can I substitute for honey or maple syrup? You can use agave syrup or brown rice syrup. These options work well and will keep the bars sweet. You can also use a sugar substitute, like stevia, if you want a low-sugar treat. Just make sure to adjust the amount based on the product's sweetness level.
How do I know when the bars are set properly? The bars need at least 30 minutes in the fridge to set. They should feel firm to the touch. When you press on them lightly, they should not stick to your fingers. If they still feel soft, give them more time in the fridge. Once set, they will hold their shape when cut.
These no-bake peanut butter bars are easy to make and fun to enjoy. You need just a few simple ingredients and some quick steps. Remember to measure well and keep them stored properly. You can also try fun variations, like combining different nut butters or adding fruits. I hope you feel inspired to make these tasty bars at home. Enjoy your snack time!


