Are you ready to dive into the world of delicious Japanese katsu bowls? This guide will help you create these crunchy, flavorful meals with ease. I’ll share the key ingredients and essential cooking tools you need. Plus, you’ll find step-by-step instructions to whip up the perfect katsu bowl at home. Let’s transform your kitchen into a Japanese eatery and enjoy tasty meals together!
Why I Love This Recipe
- Crunchy Texture: The panko breadcrumbs create a delightful crunch that enhances the overall eating experience.
- Versatile Ingredients: This recipe allows for customization with different vegetables or sauces based on your preference.
- Quick and Easy: With a total time of just 40 minutes, this dish is perfect for a weeknight dinner.
- Flavorful Combination: The contrast of crunchy chicken katsu with fresh vegetables and rice creates a satisfying meal.
Ingredients
Main Ingredients for Crunchy Chicken Katsu Bowl
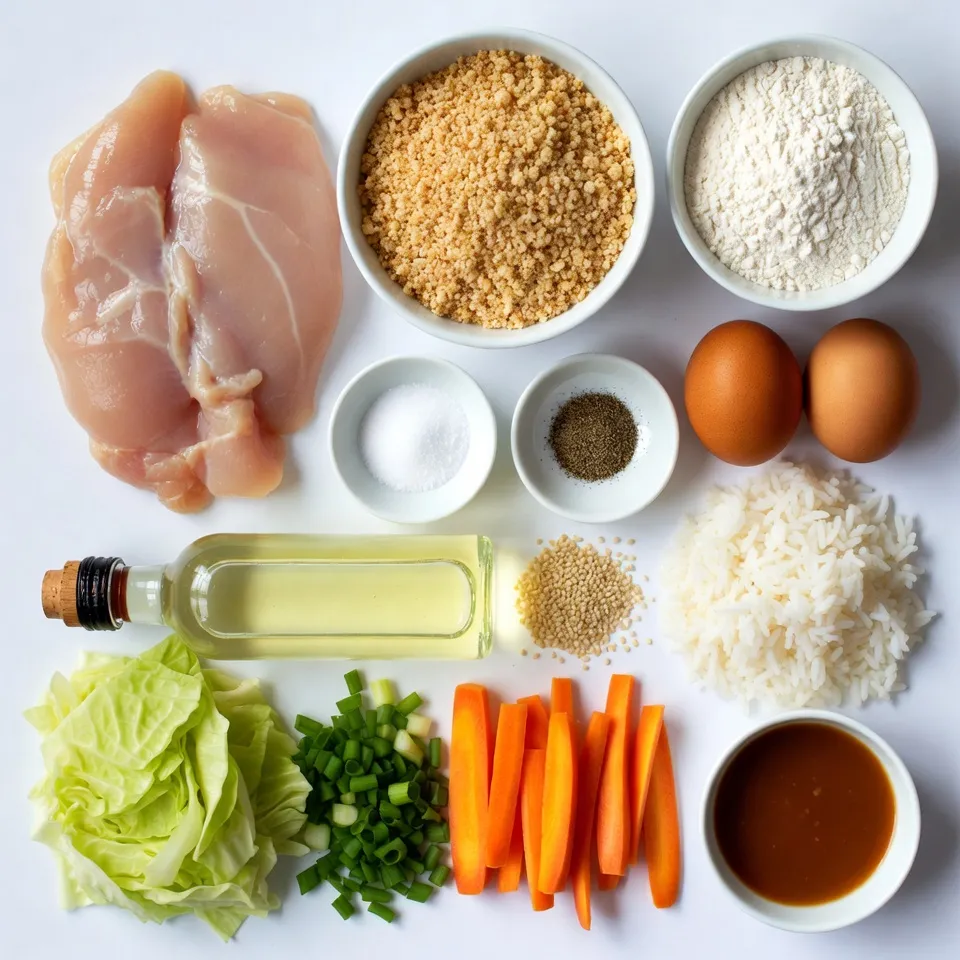
To make a tasty chicken katsu bowl, gather these items:
– 2 boneless, skinless chicken breasts
– 1 cup panko breadcrumbs
– ½ cup all-purpose flour
– 2 large eggs
– 1 teaspoon salt
– ½ teaspoon black pepper
– Oil for frying (vegetable or canola)
– 2 cups cooked white rice
– 1 cup shredded cabbage
– ½ cup sliced carrots
– ¼ cup sliced green onions
– 2 tablespoons Katsu sauce (store-bought or homemade)
– Sesame seeds for garnish
These ingredients come together to create a crunchy and satisfying meal. The chicken provides protein, while the rice and veggies add balance.
Essential Cooking Equipment
You will need some tools to make this dish:
– Large skillet
– Meat mallet or rolling pin
– Three shallow dishes
– Tongs
– Paper towels
– Serving bowls
Having the right equipment makes cooking easier. It also helps you achieve that perfect crunch on your katsu.
Ingredients for Homemade Katsu Sauce (Optional)
If you want to make your katsu sauce, use these ingredients:
– ¼ cup ketchup
– 2 tablespoons soy sauce
– 1 tablespoon sugar
– 1 tablespoon Worcestershire sauce
– 1 teaspoon Dijon mustard
Mix these together for a sweet and tangy sauce. It pairs perfectly with the crunchy chicken and fresh veggies. Making your sauce adds a personal touch to your katsu bowl.
Step-by-Step Instructions
Preparing the Chicken Breasts
Start by tenderizing the chicken breasts. Place each breast in a plastic bag. Use a meat mallet to pound them to an even thickness of about 1/2 inch. This helps the chicken cook evenly and stay juicy.
Setting Up Your Breading Station
Next, set up your breading station. Use three shallow dishes for this. In the first dish, add ½ cup of all-purpose flour. In the second dish, whisk 2 large eggs. In the third dish, place 1 cup of panko breadcrumbs. Season the flour with 1 teaspoon of salt and ½ teaspoon of black pepper. This adds flavor to your katsu.
Cooking the Katsu to Perfection
Now, it’s time to cook the chicken. First, dredge each chicken breast in the seasoned flour. Make sure to coat it evenly. Then, dip the floured chicken into the beaten eggs. Let any excess egg drip off. Finally, coat the chicken in panko breadcrumbs. Press gently to make sure the crumbs stick.
Heat about 1/2 inch of oil in a large skillet over medium-high heat. You want the oil to be hot, around 350°F. Carefully add the breaded chicken to the skillet. Fry for about 4-5 minutes on each side. Look for a golden brown color. Check that the internal temperature reaches 165°F to ensure it’s cooked through. Once done, remove the chicken and let it drain on paper towels.
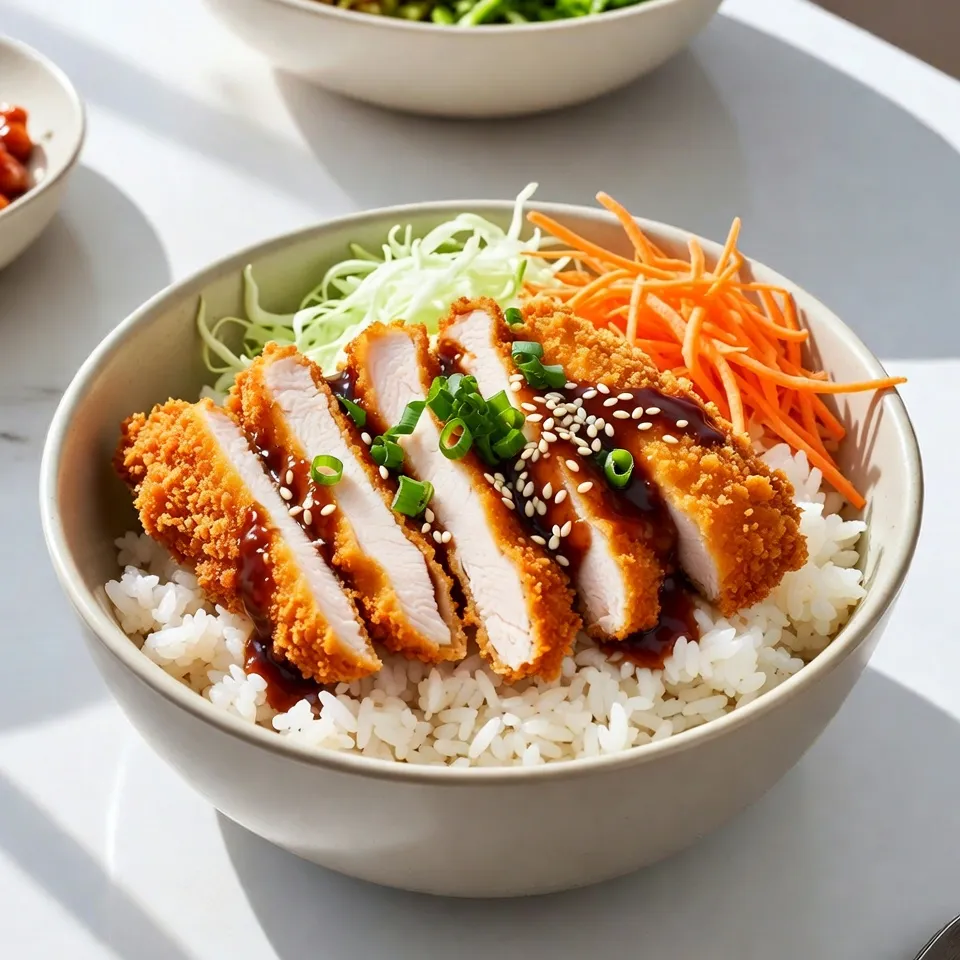
Assembling the Katsu Bowl
While the chicken cooks, prepare your serving bowl. Start with a scoop of cooked white rice at the bottom. On one side of the bowl, add shredded cabbage and sliced carrots. Slice the cooked chicken katsu into strips. Arrange these strips on top of the rice. Drizzle 2 tablespoons of Katsu sauce over the chicken. Finish with sliced green onions and a sprinkle of sesame seeds. Enjoy the mix of crunchy katsu, fresh veggies, and warm rice!
Tips & Tricks
Achieving the Perfect Crunchy Texture
To get that crispy crust, use panko breadcrumbs. They are light and airy, giving your katsu a great crunch. Make sure to press the breadcrumbs onto the chicken. This step helps them stick better. Fry the chicken in hot oil, about 350°F. Hot oil seals the crust quickly, keeping moisture inside. Fry each piece for 4-5 minutes on both sides. Look for a golden brown color. This color signals perfect crunchiness.
Best Oils for Frying Katsu
For frying katsu, I recommend vegetable or canola oil. Both oils have a high smoke point. This means they can handle the heat without burning. They also have a mild flavor. This lets the taste of the katsu shine through. Fill your skillet with about half an inch of oil. This depth allows the chicken to fry evenly on all sides.
Tips for Serving and Presentation
Presentation is key to a great meal. Start by adding a scoop of white rice at the bottom of your bowl. Place the shredded cabbage and sliced carrots on one side. This adds color and freshness. Slice the cooked chicken katsu into strips and place them on top. Drizzle Katsu sauce over the chicken for a nice finish. Finally, sprinkle sesame seeds and sliced green onions for a pop of flavor. Serve it right away to enjoy the hot and crunchy katsu!
Pro Tips
- Use a Meat Thermometer: To ensure the chicken is perfectly cooked, use a meat thermometer to check that the internal temperature reaches 165°F (74°C).
- Double-Dip for Extra Crunch: For an even crunchier coating, consider dipping the chicken in the egg mixture a second time after the first panko coating.
- Rest the Chicken: Allow the fried chicken to rest on paper towels for a few minutes before slicing to help retain moisture.
- Customize Your Bowl: Feel free to add other toppings like avocado, pickled ginger, or radishes for extra flavor and nutrition.
Variations
Pork Katsu Bowl Recipe
To make a pork katsu bowl, swap chicken for pork. Use boneless pork chops instead of chicken breasts. Follow the same steps to bread and fry the pork. The flavor will be richer, and the texture will still be crunchy. Serve it with cooked white rice, shredded cabbage, and katsu sauce. This version is just as delicious and filling.
Tofu Katsu Bowl Recipe
For a tofu katsu bowl, use firm or extra-firm tofu. Start by pressing the tofu to remove excess moisture. Slice the tofu into thick pieces. Use the same breading steps: flour, egg, and panko. Fry the tofu until golden brown. This option is perfect for those who prefer plant-based meals. Serve it with rice, veggies, and katsu sauce for a tasty meal.
Vegetarian & Vegan Options for Katsu Bowls
You can make katsu bowls vegetarian or vegan by using various ingredients. Instead of chicken or pork, try eggplant or zucchini. Cut these vegetables into thick slices. Breading and frying them follow the same steps. For a completely vegan option, use plant-based milk instead of eggs. These variations keep the crunch and flavor while being friendly for different diets. Enjoy the same vibrant rice and veggie mix with these katsu bowls.
Storage Information
How to Store Leftover Katsu
To store leftover katsu, first let it cool down. Place the chicken in an airtight container. If you have extra rice or veggies, store them in separate containers. This keeps everything fresh. Make sure to use the leftovers within three days for the best taste.
Reheating Tips for Optimal Crispiness
To reheat katsu and keep it crispy, use an oven. Preheat your oven to 375°F (190°C). Place the katsu on a baking sheet. Heat for about 10-12 minutes. This method helps restore the crunch. You can also use an air fryer for about 5-7 minutes at 350°F (175°C) for a quick option.
Shelf Life of Prepared Ingredients
Cooked chicken katsu lasts about three days in the fridge. Cooked rice can last up to four days. Fresh veggies, like cabbage and carrots, stay good for about five days. Always check for spoilage before eating. Proper storage keeps your meals tasty and safe.
FAQs
What is Katsu Sauce Made From?
Katsu sauce is a sweet and tangy sauce. It usually has these main ingredients:
– Worcestershire sauce
– Ketchup
– Soy sauce
– Sugar
– Mirin (sweet rice wine)
– Ground ginger
Mix these ingredients to create a rich flavor. You can also find store-bought options for convenience.
Can I Make Katsu Bowls Ahead of Time?
Yes, you can prepare many parts of the katsu bowl in advance. Cook the chicken and rice ahead of time. Store them in the fridge. When you are ready to eat, just reheat everything. This makes an easy meal on busy days.
What Side Dishes Pair Well with Katsu Bowls?
Katsu bowls go great with many side dishes. Here are some tasty options:
– Miso soup
– Edamame
– Pickled vegetables
– Seaweed salad
These sides add freshness and balance to your meal.
How to Make Katsu Bowls Healthier?
You can make katsu bowls healthier with a few simple swaps. Try these tips:
– Use whole wheat panko for more fiber.
– Bake the chicken instead of frying it.
– Add more veggies like broccoli or snap peas.
– Use brown rice instead of white rice.
These changes keep the flavors while boosting nutrition.
We’ve covered how to make a crunchy chicken katsu bowl, from choosing the right ingredients to cooking techniques. I shared key tips for perfecting the crunch and presented tasty variations. Don’t forget about storage tips to keep leftovers fresh. Experimenting with different proteins or sauces can create exciting new flavors. Enjoy making your katsu bowls at home. It’s a fun way to impress anyone at your table. Happy cookin