Summer is the perfect time for Otter Pops! These frozen treats are easy to make and super fun. In this blog post, I’ll show you how to create your own delicious versions. You’ll learn about the best ingredients, step-by-step directions, and cool tips for flavor. Get ready to impress your friends and family with tasty, homemade Otter Pops that will keep everyone refreshed all summer long!
Ingredients
Essential Ingredients for Homemade Otter Pops
To make homemade otter pops, you need a few key items. Here are the essentials:
– 2 cups fruit juice (like orange, grape, or mixed berry)
– 1 cup coconut water (for extra hydration)
– 1 tablespoon honey or agave syrup (optional, for sweetness)
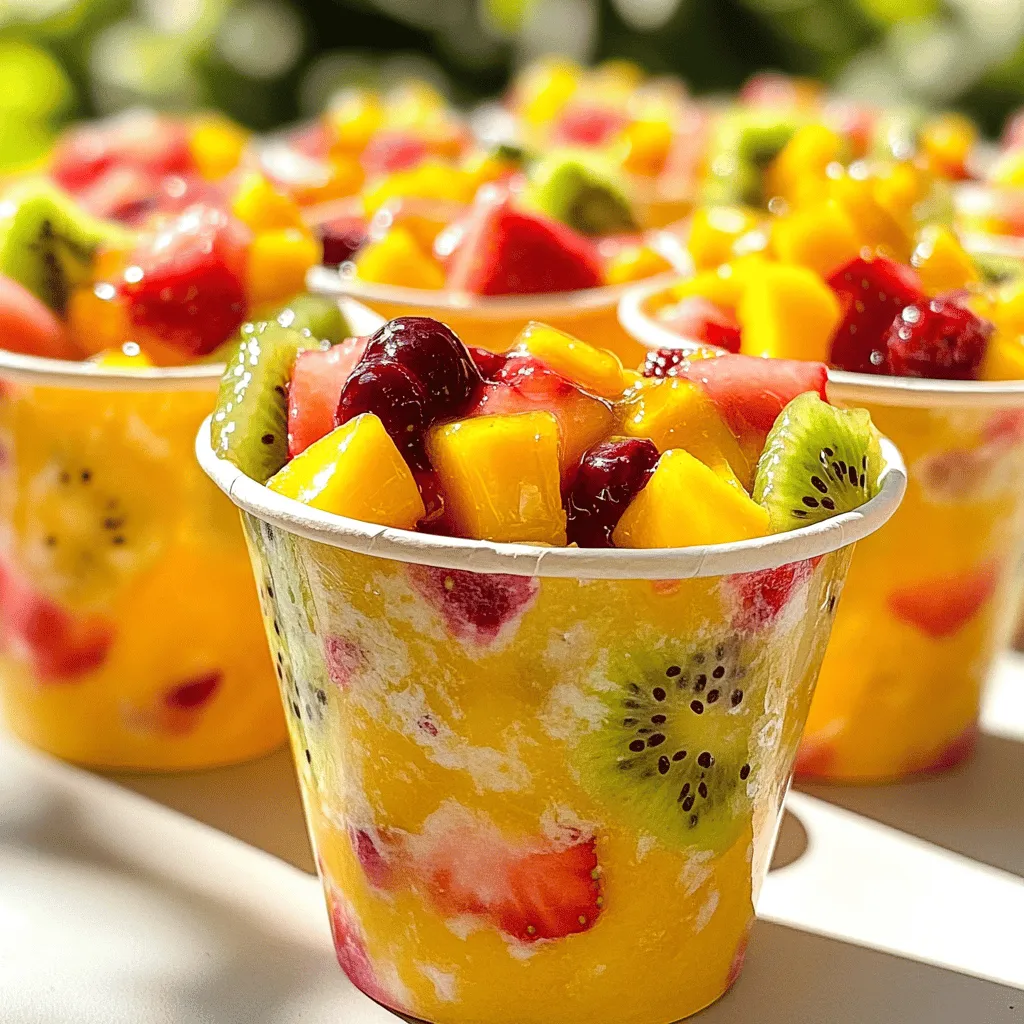
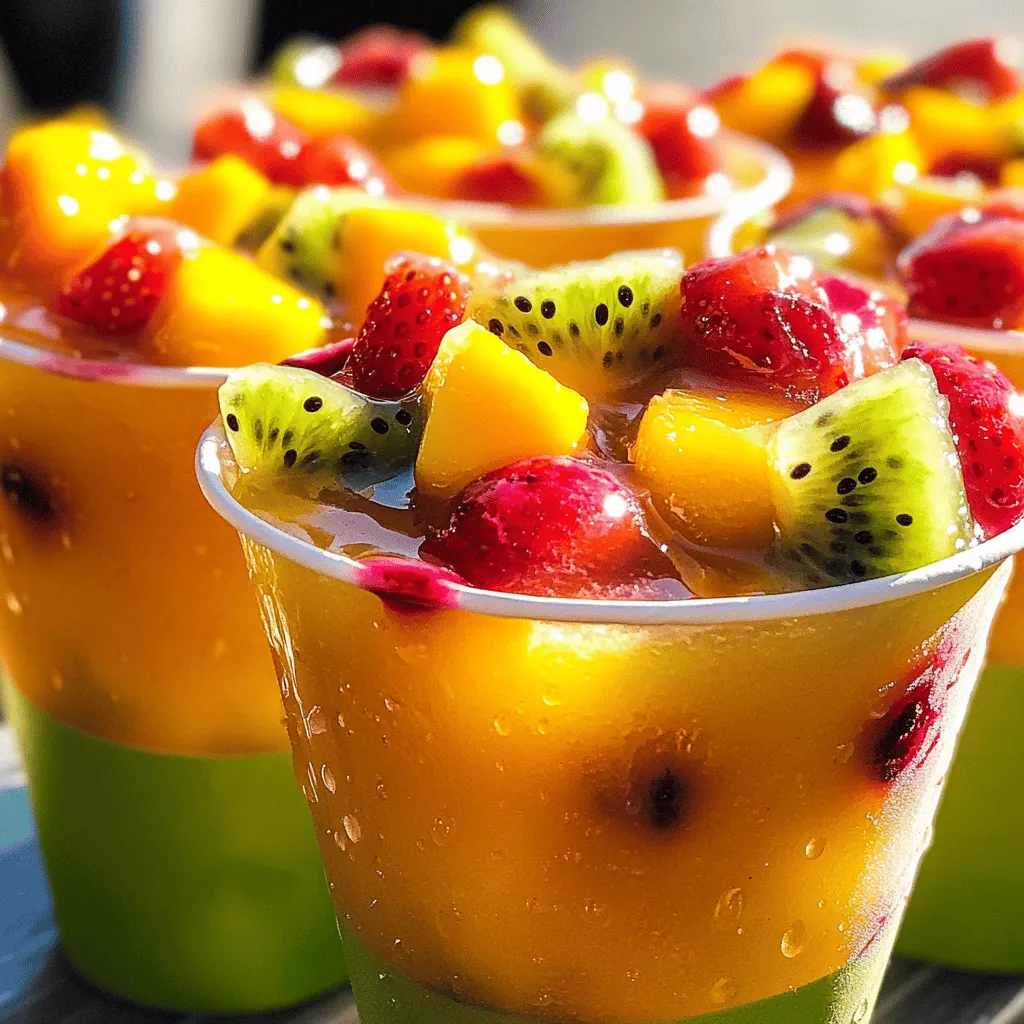
– 1 cup diced fresh fruit (strawberries, kiwi, or mango)
– Small paper cups or reusable ice pop molds
These ingredients create a tasty and refreshing treat perfect for hot days.
Optional Ingredients for Customization
Get creative! You can add fun twists to your otter pops. Consider these options:
– Yogurt for creaminess
– Mint leaves for a fresh taste
– A splash of lemon or lime juice for zing
– Other fruits like pineapple or blueberries
Mix and match to find your favorite flavor!
Tips for Selecting Quality Fruit Juice
Choosing the right fruit juice is key. Here’s how to pick the best:
– Look for 100% juice without added sugars.
– Check for natural sources like fresh-squeezed juice.
– Choose organic options when possible to avoid pesticides.
High-quality juice makes your otter pops taste great!
Step-by-Step Instructions
Overview of the Preparation Process
Making homemade otter pops is easy and fun. You will mix juice, coconut water, and fruit. Then, pour the mix into cups or molds. After freezing, you will have tasty pops ready to enjoy.
Detailed Steps to Make Homemade Otter Pops
1. In a large bowl, mix 2 cups of your favorite fruit juice with 1 cup of coconut water.
2. Add 1 tablespoon of honey or agave syrup if you want it sweeter. Stir well.
3. Taste the mix. If it’s not sweet enough, add more honey to adjust.
4. Pour the mixture into small paper cups or ice pop molds. Fill them about three-quarters full.
5. Cut up 1 cup of fresh fruit like strawberries or mango. Add a few pieces to each cup. Push them down gently with a spoon.
6. If using molds, insert popsicle sticks into the center of each.
7. Freeze for 4 to 6 hours until the pops are solid.
8. When ready to eat, run the cups under warm water for a few seconds. This will help loosen the pops.
Tips for Freezing and Unmolding
– Make sure your pops freeze completely. This usually takes at least 6 hours.
– If you have trouble removing the pops, run warm water along the outside of the mold.
– For easy removal, use silicone molds. They bend and make it easier to pop out your treats.
Enjoy your homemade otter pops as a refreshing treat on a hot day!
Tips & Tricks
Common Mistakes to Avoid
When making homemade otter pops, there are some mistakes to watch out for. First, don’t skip the coconut water. It adds nice flavor and hydration. Second, avoid overfilling the molds. Leave some space for the juice to expand as it freezes. Lastly, don’t forget to taste your juice mix. Adjust the sweetness before pouring it into molds.
How to Enhance Flavor Profiles
To make your otter pops even better, try mixing different juices. Combine orange juice with pineapple for a tropical taste. You can also add herbs like mint for a fresh twist. If you want a creamy pop, blend in some yogurt or coconut milk. This adds a rich texture and flavor.
Best Practices for Using Fruit in Pops
Using fresh fruit in your otter pops makes them fun. Choose ripe fruit for the best taste. Diced strawberries, kiwis, or mangoes work great. Make sure to push the fruit down into the juice. This helps it freeze evenly. You can also blend some fruit into the juice for added flavor. Just remember to enjoy your homemade otter pops!
Variations
Fruit Juice Combinations for Unique Flavors
Mixing different fruit juices can create fun flavors. You can try orange and pineapple for a tropical taste. Strawberry and lemonade make a sweet and tart combo. Experiment with grape and watermelon for a refreshing twist. The more you mix, the more unique pops you will have.
Healthy Alternatives to Traditional Ingredients
If you want to make your otter pops healthier, swap fruit juice with pureed fruit. This gives you a thicker texture and keeps the fiber. You can also use unsweetened coconut water instead of regular water. It adds nutrients without extra sugar. For sweetness, try mashed bananas or applesauce. They work great and add natural flavor.
Ideas for Themed Otter Pops
Make your otter pops fun for parties with themes. For a beach theme, use blue raspberry juice for the ocean. Add small gummy fish inside for a fun surprise. For a holiday, create red and green pops with cherry and lime juices. You can even make spooky Halloween pops with black cherry juice and gummy worms. Themed otter pops are great for kids and adults alike.
Storage Info
How to Store Homemade Otter Pops
To store your homemade otter pops, keep them in the freezer. Use an airtight container or a resealable plastic bag. This keeps them safe from freezer burn. If you used paper cups, place them upright in the freezer. If you used molds, leave them in until you’re ready to eat.
Best Practices for Keeping Pops Fresh
To keep your pops fresh, avoid leaving them out too long. When it’s time to enjoy, take out only what you need. If you have extras, put them back in the freezer quickly. Using quality containers also helps maintain their flavor and texture. Always ensure the lid is tight to lock in freshness.
Shelf Life and Freezing Tips
Homemade otter pops can last for about two months. After this time, they may lose some taste. If you want to keep them longer, consider vacuum sealing. This method removes air and extends shelf life. Make sure to label your containers with the date. This way, you’ll know when to enjoy your treats!
FAQs
How can I make sugar-free Otter Pops?
To make sugar-free Otter Pops, choose unsweetened fruit juice. You can also use fresh fruits that are naturally sweet. For added sweetness, try using ripe bananas or apples. They blend well and taste great. You don’t need added sugar to enjoy these pops. The natural flavors shine through.
Can I use canned juice for this recipe?
Yes, you can use canned juice for Otter Pops. Just check the label for added sugars. Choose juice that is 100% fruit juice for the best taste. If you want more fun, mix different canned juices. This can create unique flavors. Just remember to keep the juice cold before mixing.
What are the best molds for making Otter Pops?
The best molds are flexible and easy to use. Silicone molds work well, as they help pop out the treats easily. You can also use small paper cups if you don’t have molds. Just make sure to insert popsicle sticks before freezing. This helps you enjoy them without a mess!
In this post, we covered how to make your own Otter Pops. We explored essential and optional ingredients. I shared step-by-step instructions and tips for freezing. We also discussed common mistakes to avoid and how to enhance flavors. You learned about fun variations and how to store your pops.
Making homemade Otter Pops is easy and fun. You can customize them to fit your taste. Enjoy creating delicious treats that everyone will love!


