If you're craving a snack that combines rich flavors and easy preparation, you've found it! Garlic Parmesan Cheeseburger Bombs are a tasty twist on a classic burger. With juicy beef, melted cheese, and a hint of garlic, these bites will wow your taste buds. You'll learn to make perfect bombs, from gathering ingredients to baking them golden brown. Ready to dive into this savory delight? Let's get cooking!
Why I Love This Recipe
- Flavor Explosion: The combination of garlic, Parmesan, and juicy beef creates a mouthwatering experience in every bite.
- Easy to Make: This recipe is simple and quick, perfect for busy weeknights or entertaining guests.
- Fun to Eat: These bombs are not only delicious but also a fun, hands-on way to enjoy a classic cheeseburger flavor.
- Customizable: You can easily mix and match the cheeses or add your favorite toppings to suit your taste.
Ingredients
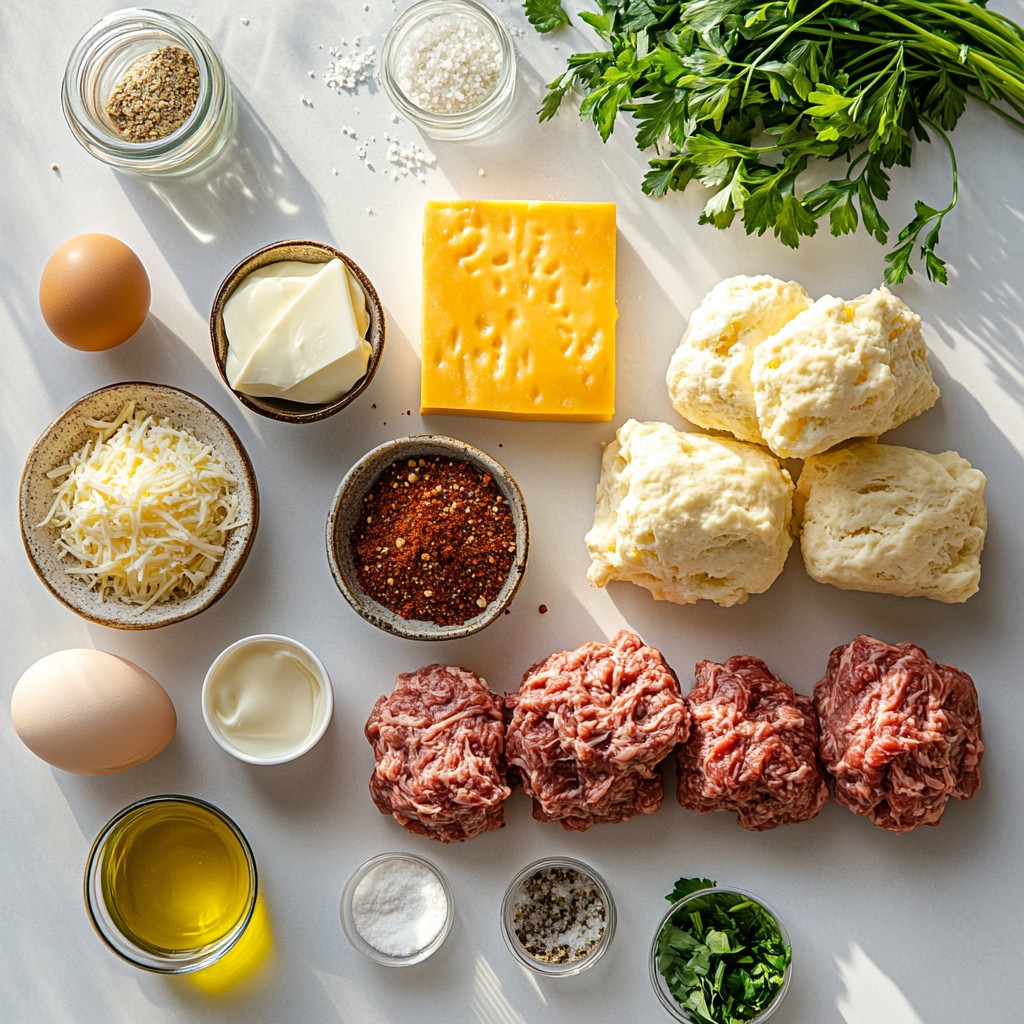
Complete List of Ingredients
- Ground beef, cheese, and dairy components
- 1 lb ground beef
- 1 cup shredded cheese (cheddar or mozzarella)
- 4 oz cream cheese, softened
- Seasonings and herbs
- 1 teaspoon garlic powder
- 1 teaspoon onion powder
- Salt and pepper to taste
- 2 tablespoons fresh parsley, chopped
- Biscuit dough and egg wash details
- 1 package refrigerated biscuit dough (8 biscuits)
- 1/4 cup grated Parmesan cheese
- 1 tablespoon olive oil
- 1 egg, beaten (for egg wash)
Gathering these ingredients is simple. The ground beef gives a rich flavor. Cream cheese adds creaminess. Garlic and onion powder boost the taste. Fresh parsley adds a nice touch. The biscuit dough wraps everything in a warm hug. Grated Parmesan on top makes it special.
Make sure to use quality ingredients. Fresh herbs and good cheese make a big difference. These details ensure your Garlic Parmesan Cheeseburger Bombs shine.
Step-by-Step Instructions
Preparation Steps
1. First, preheat your oven to 375°F (190°C). This helps the bombs cook evenly.
2. Line a baking sheet with parchment paper. This makes cleaning easy later.
3. In a large bowl, combine the ground beef, garlic powder, onion powder, salt, and pepper. Mix well until all ingredients blend together.
4. Next, divide the beef mixture into 8 equal parts. Press each part into a flat patty.
Creating Cheeseburger Bombs
1. In another bowl, mix the shredded cheese and softened cream cheese until smooth. This creates a creamy filling.
2. Take one beef patty and place a tablespoon of the cheese mixture in the center.
3. Fold the edges of the patty over the cheese. Pinch the edges tightly to seal them well.
4. Open the biscuit dough and separate the biscuits. Flatten each biscuit into a round shape.
5. Put the stuffed meatball in the center of the flattened biscuit. Gather the edges and seal it tightly.
6. Roll the wrapped bomb in your hands to smooth out its shape. Place it seam-side down on the baking sheet.
Baking Instructions
1. Brush the tops of the bombs with the beaten egg. This gives them a nice golden color.
2. In a small bowl, mix the grated Parmesan cheese, chopped parsley, and olive oil together.
3. Sprinkle this mixture generously on top of each bomb.
4. Bake in the preheated oven for 20-25 minutes. Look for a golden brown color to know they are done.
5. Remove the bombs from the oven and let them cool for a few minutes. Enjoy!
Tips & Tricks
Success Tips
- Ensuring cheese stays intact while cooking: To keep cheese from leaking, seal the edges tightly. After stuffing the meat, press the edges firmly. This helps keep all that cheesy goodness inside.
- How to seal the bombs properly: Use wet fingers to moisten the edges of the biscuit dough. This makes it easier to stick together. Gather the dough around the meatball and pinch the seams well. Roll it gently in your hands to ensure a tight seal.
Presentation Tips
- Serving suggestions for visual appeal: Place the Garlic Parmesan Cheeseburger Bombs on a large, colorful platter. Scatter some fresh parsley around them for a touch of green. It makes the dish look fresh and inviting.
- Dipping sauce recommendations: Serve with your favorite dipping sauces like ketchup or ranch dressing. A spicy mustard can also add a great kick. These sauces enhance the flavor and make the meal more fun!
Pro Tips
- Keep the Cheese Cold: Make sure your cream cheese and shredded cheese are cold before mixing. This helps them hold their shape when placed in the meatballs.
- Seal Well: When wrapping the meatballs in biscuit dough, ensure the edges are sealed tight to prevent any leakage during baking.
- Customize the Fillings: Feel free to get creative with the cheese fillings! Add some cooked bacon, jalapeños, or your favorite herbs for an extra flavor kick.
- Let Rest Before Serving: Allow the cheeseburger bombs to rest for a few minutes after baking. This helps the cheese set slightly and makes them easier to handle.
Variations
Ingredient Swaps
You can easily swap ground beef for turkey or a veggie mix. Ground turkey gives a lighter taste while keeping it juicy. For a veggie option, use black beans or lentils. These swaps will still give you tasty bites.
Cheese is another place to play. While cheddar and mozzarella are great, consider using pepper jack for some heat or gouda for a smoky twist. Each type adds a unique flavor to your bombs.
Flavor Enhancements
To boost flavor, think about herbs and spices. Adding a pinch of smoked paprika or Italian seasoning can bring depth. Fresh herbs, like basil or oregano, can also enhance the taste. Just a little extra can go a long way.
You can also try different biscuit doughs. Instead of regular dough, use garlic or herb biscuits. This adds another layer of flavor. You might even explore crescent roll dough for a flakier texture. These small changes can create a whole new eating experience.
Storage Info
Storing Leftovers
To keep your Garlic Parmesan Cheeseburger Bombs fresh, you should store them properly. First, let the bombs cool completely. Then, place them in an airtight container. You can keep them in the fridge for up to three days. When you want to enjoy them again, reheat them in the oven. Set your oven to 350°F (175°C) and bake for about 10-15 minutes. This method helps keep the bombs crisp. You can also use the microwave, but they may become soft.
Freezing Options
If you want to save some for later, freezing is a great option. To freeze, follow these steps: First, cool the bombs completely. Next, wrap each bomb in plastic wrap. Then, put them in a freezer-safe bag or container. They can last in the freezer for up to three months. When you're ready to eat them, defrost in the fridge overnight. To reheat, bake them in the oven at 350°F (175°C) for about 20-25 minutes. This keeps the flavor and texture nice.
FAQs
Common Questions
Can I make these ahead of time? Yes, you can prepare these bombs ahead. Make and stuff them, then cover and chill. Bake them on the day you want to serve. This saves time and keeps them fresh.
How do I know when they are fully cooked? The bombs are done when they are golden brown. You can check the beef's internal temperature. It should reach 160°F (71°C) to be safe to eat.
Dietary Considerations
Gluten-free and dairy-free adaptations To make these gluten-free, use gluten-free biscuit dough. For dairy-free, swap cream cheese with a dairy-free option. Use dairy-free cheese for the filling.
Can these be made in an air fryer? Yes, you can use an air fryer. Set it to 375°F (190°C) and cook for 10-15 minutes. Check for a golden brown finish. Avoid overcrowding the basket for even cooking.
Serving Suggestions
What to serve with Garlic Parmesan Cheeseburger Bombs? Serve these bombs with ketchup, ranch, or any dipping sauce you like. A fresh salad or veggies can add a nice touch. You can also pair them with crispy fries for a fun meal.
In this article, we explored how to make tasty Cheeseburger Bombs. We covered all the key ingredients, from ground beef to seasonings and biscuit dough. Step-by-step instructions ensured you can create these bites easily. Tips helped you avoid common mistakes, while variations allowed for personal touches. Finally, we discussed smart storage and answered your burning questions.
These cheeseburger delights are fun to make and share. Try them out and impress your friends!