Looking for a tasty snack that’s easy to make? You’re in the right place! In this recipe, I’ll show you how to whip up crispy chickpea bites using your air fryer. These bites are crunchy, packed with flavor, and perfect for any occasion. Plus, I’ll share tips on making them even better and ways to customize them. Let’s get cooking and enjoy a healthy treat together!
Why I Love This Recipe
- Easy to Make: This recipe requires minimal ingredients and simple steps, making it perfect for busy weeknights or quick snacks.
- Healthy Alternative: Using chickpeas provides a great source of protein and fiber, making these taco bites a nutritious choice.
- Customizable Toppings: You can top these crispy chickpeas with your favorite ingredients, allowing for endless variations to suit your taste.
- Great for Gatherings: These taco bites are perfect for sharing at parties or gatherings, and they are sure to impress your guests!
Ingredients
Main Ingredients
- Chickpeas and their benefits
Chickpeas are the star of this dish. They are packed with protein and fiber. This makes them great for your health. They help you feel full and satisfied. Plus, they have a nice nutty flavor that adds depth to any meal.
- Olive oil and seasoning details
We use just a tablespoon of olive oil. This helps the chickpeas crisp up nicely. For flavor, we add one teaspoon of taco seasoning, half a teaspoon of garlic powder, and half a teaspoon of smoked paprika. You can adjust the spices based on your taste. Don't forget to add salt and pepper to make it pop!
- Toppings and alternatives
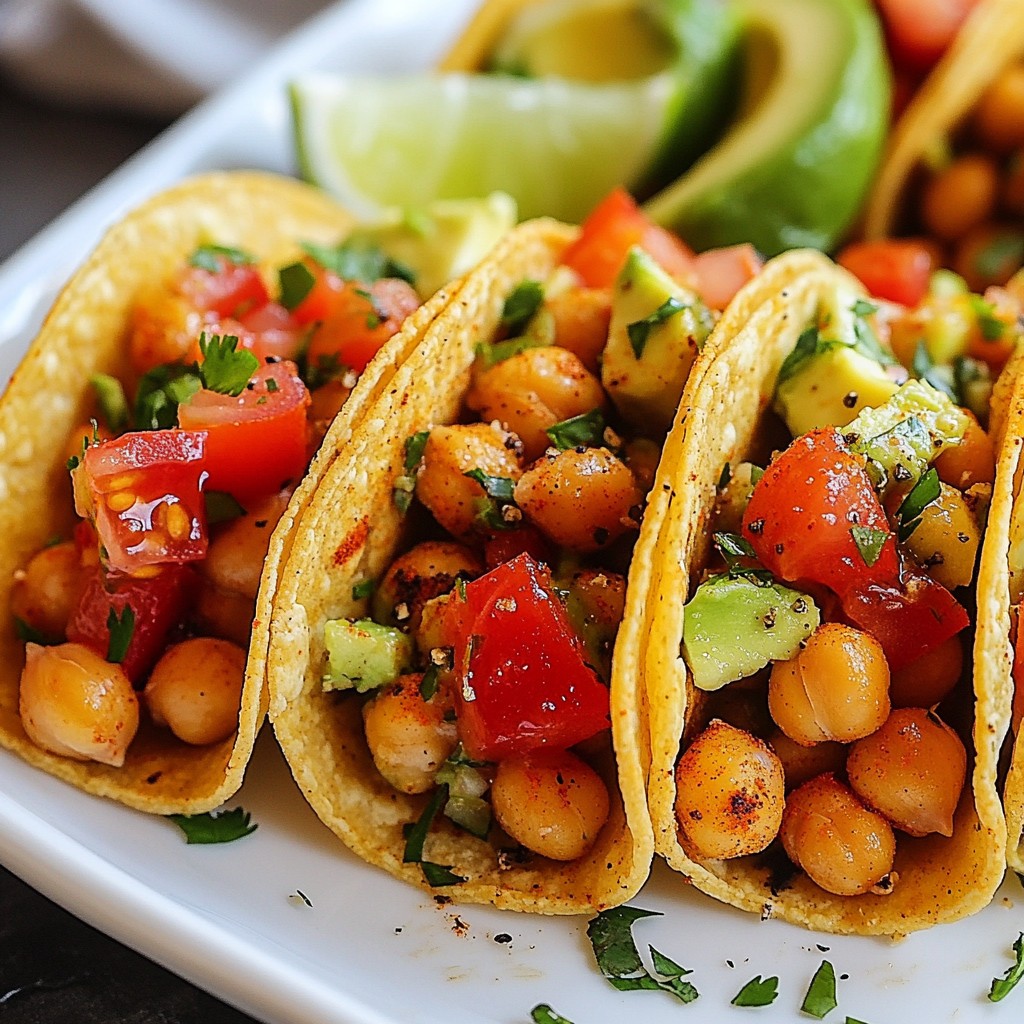
For serving, you can use mini taco shells or crisp lettuce leaves. They make a great base for the chickpeas. You can also add toppings like diced tomatoes, chopped cilantro, avocado, and lime wedges. These add fresh flavors and make your dish look colorful. Feel free to mix and match toppings based on what you like!

Step-by-Step Instructions
Preparation Steps
1. Preheating the air fryer: First, set your air fryer to 400°F (200°C). Let it preheat for about 5 minutes. This step helps the chickpeas cook evenly and achieve a crispy texture.
2. Preparing chickpeas: Open a can of chickpeas (15 oz), and drain them well. Rinse the chickpeas under cold water. Then, pat them dry with a paper towel. Drying them removes extra moisture and helps them crisp up.
3. Combining ingredients: In a mixing bowl, combine the dry chickpeas with 1 tablespoon olive oil, 1 teaspoon taco seasoning, 1/2 teaspoon garlic powder, and 1/2 teaspoon smoked paprika. Add salt and pepper to taste. Toss everything together until the chickpeas are well coated.
Cooking Steps
1. Air frying process: Place the seasoned chickpeas in the air fryer basket. Be sure to spread them in a single layer. Cook them at 400°F for 15-20 minutes. Shake the basket halfway through to ensure even cooking. The chickpeas should turn golden brown and crispy.
2. Time management tips: While the chickpeas cook, prepare mini taco shells or lettuce leaves on a serving platter. This way, when the chickpeas are ready, you can serve them right away. Once cooked, let the chickpeas cool for a few minutes before filling your taco shells or leaves. Enjoy your crispy chickpea bites!
Tips & Tricks
Air Fryer Tips
- Best practices for air frying chickpeas: Start by preheating your air fryer to 400°F (200°C). This step helps the chickpeas cook evenly. After draining and rinsing, pat them dry with a paper towel. Removing moisture is key to crispiness. Toss them with olive oil and seasonings until every chickpea is coated. This will give you that nice crunch.
- How to achieve maximum crispiness: Spread the chickpeas in a single layer in the air fryer basket. Avoid overcrowding; this allows hot air to circulate around each chickpea. Shake the basket halfway through cooking to ensure an even crisp. Cook for 15 to 20 minutes until they turn golden brown.
Flavor Enhancements
- Adjusting seasoning levels: Taste is personal. If you love spice, add more taco seasoning or even some cayenne pepper. You can mix in other spices like cumin or chili powder for more depth.
- Additional optional toppings: Get creative with toppings! Diced tomatoes, chopped cilantro, and avocado add freshness. A squeeze of lime brings brightness. You can even drizzle a bit of hot sauce for extra kick. Use mini taco shells or lettuce leaves to serve, making this snack fun and healthy.
Pro Tips
- Dry Chickpeas for Extra Crispiness: Make sure to pat the chickpeas dry before tossing them in oil and spices. Removing excess moisture is key to achieving that perfect crispy texture.
- Customize Your Seasoning: Feel free to adjust the amount of taco seasoning and spices according to your taste preferences. Experimenting with additional spices can lead to unique flavor profiles!
- Don’t Overcrowd the Air Fryer: To ensure even cooking, arrange the chickpeas in a single layer in the air fryer basket. Overcrowding can lead to uneven crispiness.
- Let Them Cool: After air frying, let the chickpeas cool slightly before assembling your tacos. This helps them maintain their crunch and prevents sogginess from the toppings.
Variations
Recipe Modifications
You can easily change the spice level of these chickpea bites. If you like heat, add cayenne pepper or chili powder. For milder flavors, use less taco seasoning. You can also try different seasonings like curry powder or Italian herbs for a new twist.
If you want, you can swap chickpeas for other proteins or veggies. Black beans work great for a different taste. Try using diced zucchini or bell peppers for a veggie option. These changes keep the recipe fun and fresh.
Serving Suggestions
You have many options for serving these crispy bites. You can use mini taco shells for a fun presentation. Lettuce leaves are a great low-carb choice. Both options let you fill them with your favorite toppings.
For a complete meal, pair these bites with a side salad or rice. You can also add salsa or guacamole for extra flavor. Other great pairings include corn salad or roasted veggies. These ideas make your meal balanced and tasty.
Storage Info
Leftover Storage
To keep your crispy chickpea bites fresh, store them in an airtight container. Place them in the fridge for up to 3 days. If you want to keep them longer, try to avoid stacking them. This helps them stay crunchy.
To reheat, use the air fryer. Set it to 350°F (175°C) and heat for about 5 minutes. This method helps regain their crispiness. You can also use an oven if you don’t have an air fryer. Set it to 350°F and bake for about 10 minutes.
Freezing Instructions
Yes, you can freeze cooked chickpeas. To do this, let them cool completely. Then, place them in a freezer-safe bag or container. Label the bag with the date. Frozen chickpeas stay good for up to 3 months.
When you are ready to use them, thaw the chickpeas in the fridge overnight. You can also warm them in the microwave for a quick thaw. After thawing, heat them in the air fryer or oven to get them crispy again. Enjoy your tasty bites!
FAQs
How do I make crispy chickpeas in the air fryer?
To make crispy chickpeas, start with a can of chickpeas. Drain and rinse them well. Pat them dry with a paper towel. This helps them crisp up. In a bowl, mix the chickpeas with olive oil and your spices. I like taco seasoning, garlic powder, and smoked paprika. Toss until they are all coated. Place them in the air fryer basket in one layer. Air fry at 400°F for about 15 to 20 minutes. Shake the basket halfway through for even cooking. When they are golden brown, they are ready.
Can I use dried chickpeas instead of canned?
You can use dried chickpeas, but they need more prep. First, soak them overnight in water. After soaking, cook them until tender. This can take a while. Once cooked, drain and dry them. Use them just like canned chickpeas in the recipe.
What can I serve with crispy chickpea taco bites?
Crispy chickpeas are great in mini taco shells or lettuce leaves. You can add toppings like diced tomatoes, chopped cilantro, or avocado. Lime wedges add a nice touch too. These bites are fun for parties or snacks.
How long do air-fried chickpeas last?
Air-fried chickpeas are best enjoyed fresh. If you have leftovers, store them in an airtight container. They can last for about 2 to 3 days. Just keep in mind they may lose some crispiness. To enjoy them again, reheat in the air fryer for a few minutes.
We covered how to make tasty, crispy chickpeas in the air fryer. First, we looked at the key ingredients, like chickpeas and olive oil. Then, we went through each step to prepare and cook them. I shared tips to get maximum crispiness and offered recipe variations. Lastly, we talked about storing leftovers and answered common questions. Now you have the tools to make this yummy snack. Enjoy experimenting with flavors and serving ideas!