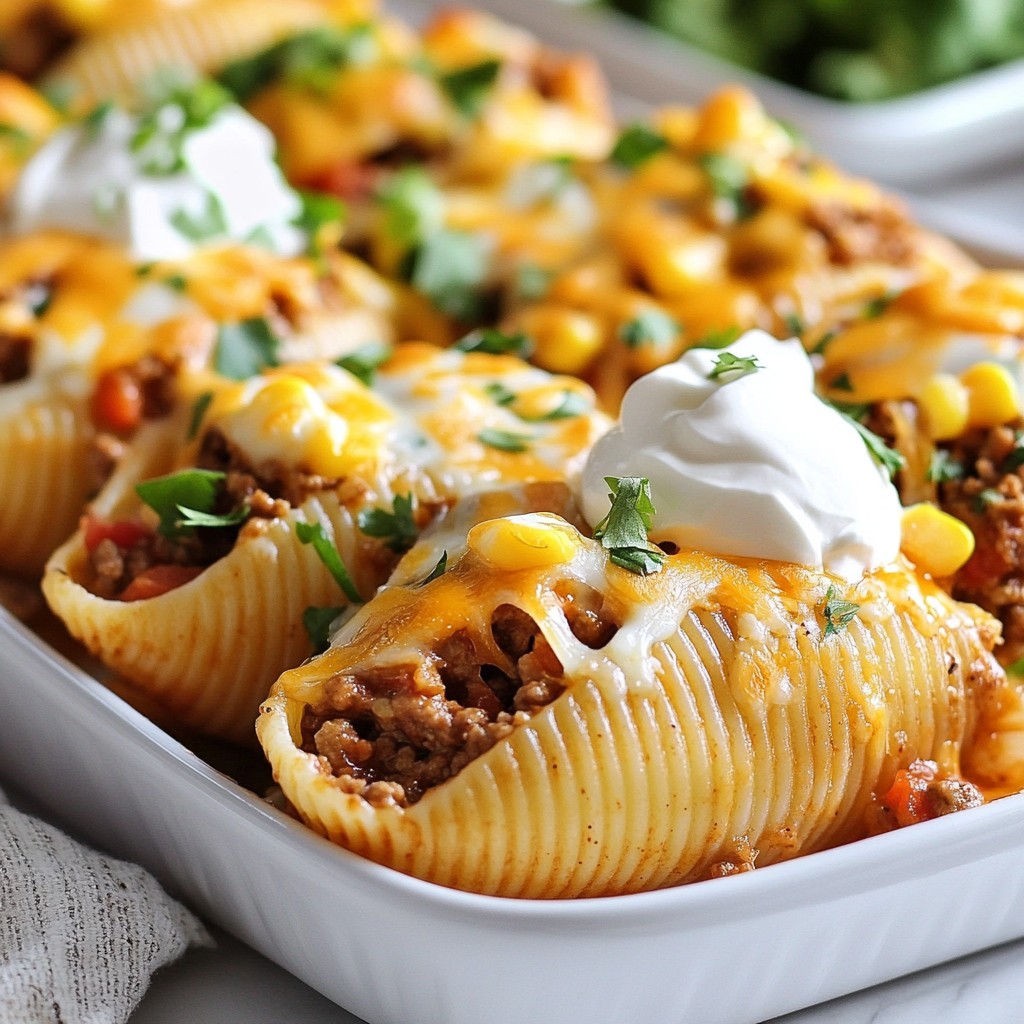
Craving a fun twist on taco night? You’ve landed in the right place! Cheesy Taco Stuffed Shells are a tasty and simple meal that both kids and adults will love. In this blog post, I’ll share the best ingredients, easy step-by-step instructions, and helpful tips to make your dish a hit. So, grab your apron and let’s dive into the cheesy goodness that will delight your taste buds!
Why I Love This Recipe
- Delicious Flavor Combination: The blend of taco seasoning, cheese, and hearty ingredients creates a mouthwatering taste that everyone loves.
- Easy to Prepare: With straightforward steps and simple ingredients, this dish is perfect for weeknight dinners without the fuss.
- Customizable: You can easily swap out ingredients, like using chicken instead of beef or adding extra veggies, to suit your preferences.
- Great for Meal Prep: This recipe makes enough to feed a family or have leftovers, making it ideal for meal planning.
Ingredients
Main Ingredients
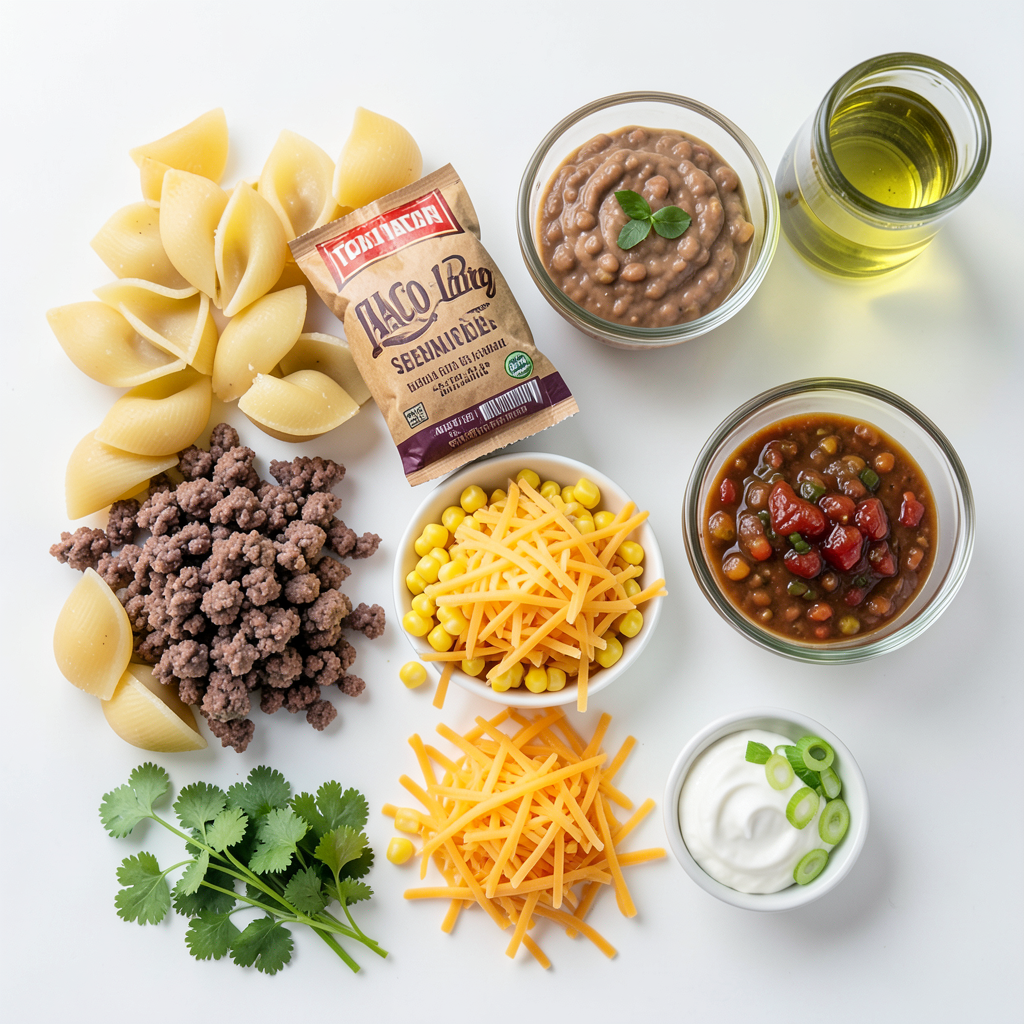
To make cheesy taco stuffed shells, you need:
- 20 jumbo pasta shells
- 1 lb ground beef or turkey
- 1 packet taco seasoning
- 1 cup refried beans
- 1 cup corn kernels (canned or frozen)
- 1 cup shredded cheddar cheese
- 1 cup shredded Monterey Jack cheese
- 1 cup salsa
- 1/2 cup sour cream
- 1 tablespoon olive oil
These ingredients work together to create a hearty dish. The meat provides protein, while the beans add texture. The cheeses melt to form a gooey layer that binds everything.
Optional Garnishes
Garnishes add fresh flavor and bright colors. Consider using:
- Fresh cilantro
- Sliced green onions
These toppings make the dish look inviting. They also enhance the taste with a fresh crunch.
Ingredient Substitutes
You can easily swap ingredients based on what you have:
- Use ground chicken or plant-based meat for a lighter option.
- Substitute black beans for refried beans for a different flavor.
- Try using a spicy salsa if you want more heat.
- Swap cheeses for whatever you prefer or have on hand.
Using substitutes can make the recipe your own. Experimenting keeps meals exciting and fun.
Step-by-Step Instructions
Preparing the Pasta Shells
First, preheat your oven to 375°F (190°C). This helps the dish cook evenly. Next, cook 20 jumbo pasta shells according to the package instructions. Aim for al dente, which means firm to the bite. Once cooked, drain them and set them aside. Make sure they do not stick together.
Cooking the Filling
In a large skillet, heat 1 tablespoon of olive oil over medium heat. Add 1 pound of ground beef or turkey. Cook until browned, breaking it apart with a spoon. This step is key for a good texture. Next, stir in 1 packet of taco seasoning. Follow the packet's instructions for the best flavor. Then, mix in 1 cup of refried beans and 1 cup of corn. Make sure everything is well combined and heated through.
Assembling and Baking
In a large baking dish, spread half of 1 cup of salsa evenly on the bottom. This adds flavor and moisture. Now, take each cooked pasta shell and stuff it with the meat mixture. Arrange them in the baking dish on top of the salsa. Pour the rest of the salsa over the shells. Sprinkle 1 cup each of shredded cheddar and Monterey Jack cheese on top. Cover the dish with aluminum foil and bake for 20 minutes. After that, remove the foil and bake for another 10-15 minutes. Look for bubbly and golden cheese. Let it cool for a few minutes before serving. Top with sour cream, fresh cilantro, and sliced green onions. Enjoy this tasty meal!
Tips & Tricks
Perfecting the Cheese Melt
To get that perfect cheese melt, use a mix of cheeses. I love using cheddar and Monterey Jack together. They melt well and add great flavor. Make sure to sprinkle the cheese on top of the shells right before the last baking time. This gives it a nice, bubbly look. Also, cover the dish with foil initially to help the cheese melt evenly.
How to Avoid Overcooked Shells
To keep your shells from turning mushy, cook them just until al dente. This means they should still have a little bite. Follow the package instructions closely. Drain them and rinse under cold water to stop the cooking. This simple step makes a big difference in texture.
Making Ahead and Freezing
You can prepare cheesy taco stuffed shells in advance. Just follow the recipe up to the baking step. Cover the dish tightly and store it in the fridge for up to two days. If you want to freeze them, wrap the dish well in plastic wrap and foil. They can last up to three months in the freezer. When you're ready to eat, thaw them in the fridge overnight and bake as directed.
Pro Tips
- Cook Shells Al Dente: Make sure to cook the jumbo pasta shells just until they are al dente. This helps prevent them from becoming too soft during baking.
- Customize Your Protein: Feel free to substitute the ground beef or turkey with shredded chicken or a plant-based alternative for a different flavor profile.
- Layering Salsa: Layering salsa both under and over the stuffed shells adds depth of flavor and keeps the pasta moist while baking.
- Cheese Variations: Experiment with different cheese types like pepper jack for a spicy kick or mozzarella for a milder taste.
Variations
Vegetarian Cheesy Taco Stuffed Shells
You can make a tasty vegetarian version of cheesy taco stuffed shells. Start by swapping meat for beans. Use black beans or pinto beans for great flavor. Add extra veggies like bell peppers, zucchini, or mushrooms. Mix these with taco seasoning for a delicious filling. You can still use refried beans and corn for more texture. Top it off with the same cheeses for that cheesy goodness.
Spicy Versions
If you love heat, try making spicy cheesy taco stuffed shells. Add jalapeños or diced green chiles to the meat mixture. You can also use spicy taco seasoning for more kick. For a fun twist, mix in pepper jack cheese. This will give your dish both spice and creaminess. Drizzle some hot sauce over the top before serving for extra flavor.
Alternative Proteins
Want to change things up? Use different proteins in your cheesy taco stuffed shells. Ground chicken or pork work well in place of beef or turkey. If you prefer seafood, try shrimp or fish. Just season them with taco spices and follow the same steps. This way, you can enjoy all sorts of tasty flavors while keeping the dish exciting.
Storage Info
Refrigerator Storage
You can store leftover cheesy taco stuffed shells in the fridge. Place them in an airtight container. They will stay fresh for up to 3 days. Before eating, make sure to check for any signs of spoilage.
Freezing Instructions
To freeze the stuffed shells, let them cool first. Place them in a freezer-safe container. You can also use plastic wrap and then foil. They will last in the freezer for up to 2 months. When you are ready to eat, thaw them in the fridge overnight.
Reheating Tips
Reheat the shells in the oven for the best results. Preheat your oven to 350°F (175°C). Place the shells in a baking dish and cover with foil. Heat for about 20 minutes or until warm. You can also use the microwave. Heat in 30-second intervals until warm.
FAQs
Can I use different types of cheese?
Yes, you can use different cheeses. Try using pepper jack for a spicy kick. You can also mix in mozzarella for a milder taste. Just keep the total cheese amount the same. Cheese adds creaminess and flavor to the dish. Experiment with your favorites for a unique twist.
How can I make this recipe gluten-free?
To make this recipe gluten-free, use gluten-free pasta shells. Many brands offer great options. Check the taco seasoning packet for gluten-free labels. You can also make your own seasoning mix using cumin, paprika, and chili powder. This way, you enjoy tasty stuffed shells without gluten.
What sides pair well with cheesy taco stuffed shells?
Cheesy taco stuffed shells go well with many sides. A fresh green salad adds a nice crunch. You can serve it with Mexican rice for a filling meal. Chips and salsa are perfect for dipping. For a zesty touch, try guacamole on the side.
This article covered cheesy taco stuffed shells in detail. We explored main ingredients, optional garnishes, and substitutes. I provided step-by-step instructions for cooking and baking. You learned tips for the perfect cheese melt and how to freeze meals. We even discussed tasty variations and storage info.
In the end, you have the tools to make this dish your own. Enjoy cooking and creating something special!