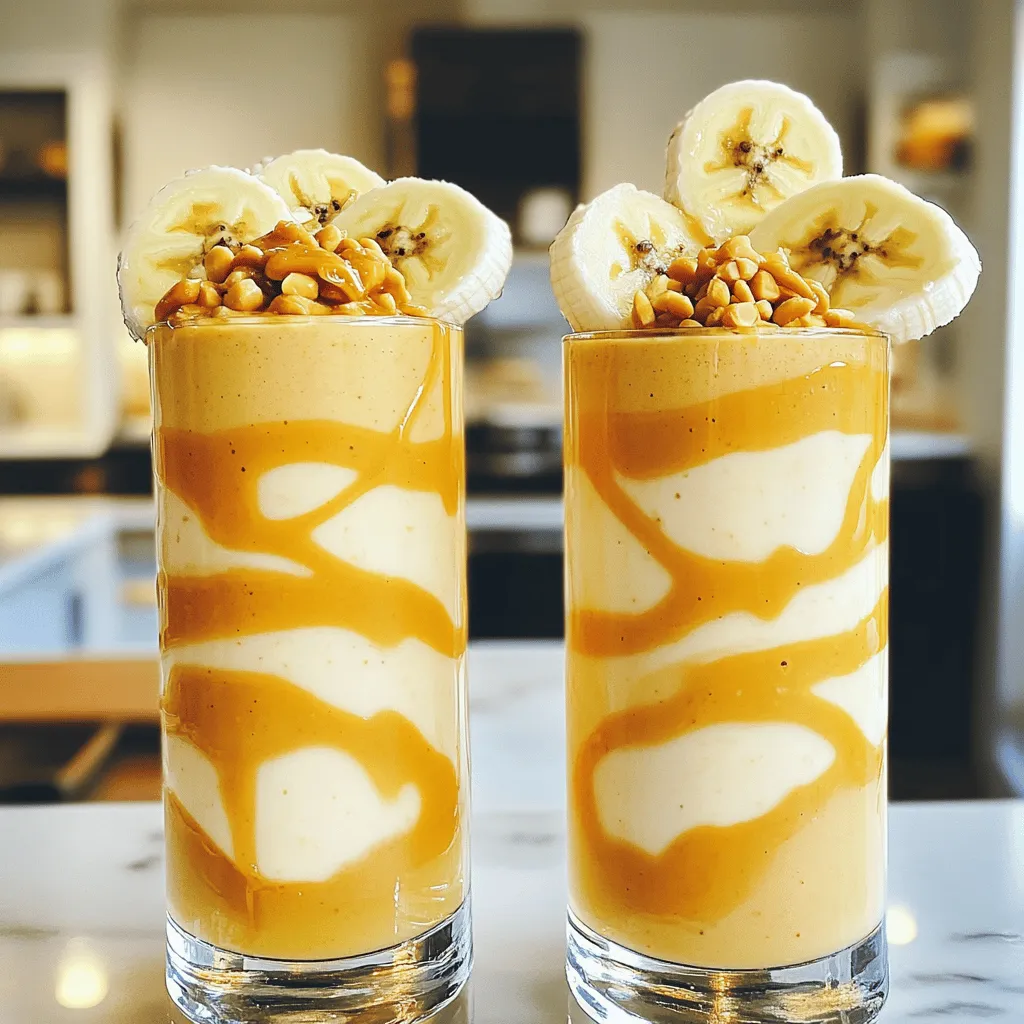
Peanut Butter Banana Smoothie Creamy and Healthy Treat
Are you ready to whip up a tasty and healthy treat? The Peanut Butter Banana Smoothie is both creamy and
Are you ready to whip up a tasty and healthy treat? The Peanut Butter Banana Smoothie is both creamy and
![For zesty grilled vegetable skewers, gather these fresh items: - 1 zucchini, sliced into thick rounds - 1 red bell pepper, cut into chunks - 1 yellow bell pepper, cut into chunks - 1 red onion, cut into wedges - 8 oz cherry tomatoes - 8 oz baby portobello mushrooms - 3 tablespoons olive oil - 2 tablespoons balsamic vinegar - 2 cloves garlic, minced - 1 teaspoon dried oregano - 1 teaspoon smoked paprika - Salt and pepper to taste - Fresh basil leaves for garnish Fresh ingredients make a big difference in flavor. They add brightness and crunch to your dish. Using seasonal veggies ensures you get the best taste and nutrients. For the best skewers, pick colorful, firm vegetables. A mix of textures and flavors makes the dish fun to eat. Choose organic when possible. It helps support local farmers and is often better for the planet. I love using high-quality olive oil, like California Olive Ranch. It has a rich flavor that enhances the dish. For balsamic vinegar, I recommend Colavita. It’s smooth and sweet. When it comes to spices, McCormick is reliable and easy to find. Always check labels for freshness. The better the ingredients, the better your skewers will taste. You can find everything you need for these skewers in the full recipe. Start by washing all your vegetables. Clean zucchini, bell peppers, onions, and mushrooms. Slice the zucchini into thick rounds. Cut the red and yellow bell peppers into big chunks. Cut the red onion into wedges. The cherry tomatoes can stay whole. This shapes the textures on your skewers. In a large bowl, mix olive oil, balsamic vinegar, minced garlic, oregano, smoked paprika, salt, and pepper. Stir well until combined. This marinade adds flavor and moisture to the veggies. Once mixed, add all your prepared vegetables. Toss them gently until each piece gets coated. Let them sit for at least 30 minutes. This waiting time enhances the veggie flavors. Preheat your grill to medium-high heat. While it heats, thread the marinated vegetables onto the skewers. Alternate colors to make them look pretty. Once the grill is ready, place the skewers on it. Cook for 10-15 minutes, turning them every few minutes. The veggies should get some nice grill marks and become tender. When done, take them off the grill and let them cool for a few minutes. Garnish with fresh basil before serving for a pop of color and flavor. I find that medium-high heat works best for grilling vegetables. This temperature lets the veggies cook through while still getting those nice grill marks. Aim for around 400°F (200°C). If your grill has a built-in thermometer, use it to check the heat. If not, you can hold your hand above the grill. If you can keep it there for about 4 seconds, you’re at the right heat. To stop your skewers from sticking, oil your grill grates before cooking. You can use a paper towel soaked in oil and tongs to apply it. Another tip is to brush a little oil on your vegetables too. This will add flavor and help them slide off easily after grilling. For a beautiful finish, I like to add fresh basil leaves right before serving. You can also drizzle some of the leftover marinade on top for extra flavor. Arrange the skewers on a large plate for a stunning look. For a fun twist, serve them with tzatziki or hummus on the side. These dips add creaminess and make the meal feel special. For more details, check out the Full Recipe. {{image_2}} You can make your grilled vegetable skewers even better by adding proteins. Tofu is a great choice for a plant-based option. Cut firm tofu into cubes and marinate it in the same mix as your veggies. For chicken, use boneless pieces cut into cubes. Marinate it too, and then skewer it with the vegetables. This adds flavor and makes your meal heartier. Do you like a little heat? You can easily spice up your skewers. Add red pepper flakes to your marinade for a kick. For a milder option, try sweet paprika instead of smoked paprika. Adjust the spice to fit your taste. Remember, it’s all about what you enjoy. Using seasonal vegetables can make your skewers fresh and tasty. In the summer, try adding eggplant or corn. In the fall, consider butternut squash or Brussels sprouts. Seasonal veggies not only taste better but also help you support local farmers. Feel free to mix and match based on what you find at your market. For the full experience, check out the Full Recipe. To store leftover skewers, allow them to cool completely. Place them in an airtight container. You can keep them in the fridge for up to three days. If you want to keep them longer, consider freezing them. Just make sure they are well-sealed to avoid freezer burn. Reheat your grilled vegetable skewers in the oven or on the grill. For the oven, preheat to 350°F (175°C). Place the skewers on a baking sheet and heat for about 10 minutes. On the grill, heat them for around 5 minutes over medium heat. Watch closely to prevent burning. You can freeze leftover skewers for up to three months. Wrap them tightly in plastic wrap, then place them in a freezer bag. When you're ready to eat, let them thaw in the fridge overnight. Reheat them as mentioned above for the best taste. For the full recipe, check out [Full Recipe]. Yes, you can use wooden skewers. Just soak them in water for 30 minutes before grilling. This helps prevent burning. Wooden skewers work well and are easy to find. They hold the veggies nicely. To make grilled vegetable skewers vegan, focus on the ingredients. The recipe is already plant-based. Use only vegetables, olive oil, and vinegar. Avoid any animal products like butter or cheese. You can add more spices or herbs for flavor. This keeps the dish tasty and vegan-friendly. Grilled vegetable skewers pair well with many sides. Here are some tasty options: - Quinoa salad - Couscous with herbs - Pita bread with hummus - A fresh green salad - Rice pilaf These sides will balance the flavors and make a complete meal. If you want a fun twist, try serving with tzatziki or a yogurt dip. For the full recipe, check out the main section. This blog covered the key ingredients for grilled vegetable skewers, showing you the best brands and fresh options. I shared steps for prep, marinade, and grilling. You learned tips to achieve the ideal grill temp and prevent sticking. I also offered ways to vary your skewers and how to store leftovers. Grilling is fun and delicious! Using fresh ingredients and smart techniques makes a big difference. Enjoy experimenting and making your perfect skewers!](https://foodishtalk.com/wp-content/uploads/2025/05/ff69e3c9-bd70-4309-afa2-6dc3249a501c.webp)
Wow, are you ready to elevate your BBQ game? Grilled vegetable skewers are not only colorful and tasty, but they’re
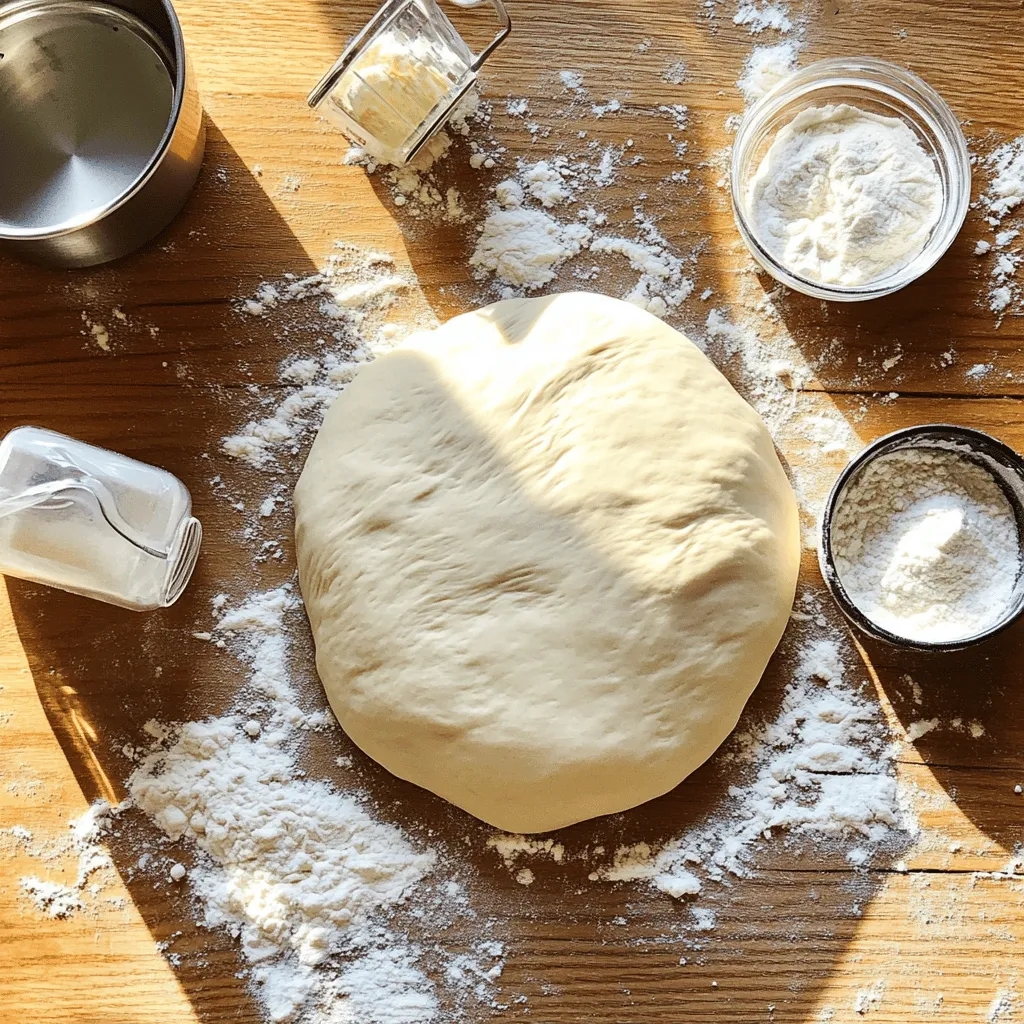
Are you ready to impress friends and family with your own homemade pizza? This easy pizza dough recipe is quick

Are you ready to indulge in a sweet treat? Mini cheesecake bites are easy to make and perfect for any
![- 2 pounds baby potatoes, halved - 4 tablespoons olive oil - 4 cloves garlic, minced - Zest and juice of 1 lemon - 1 tablespoon fresh rosemary, chopped - 1 tablespoon fresh thyme, chopped - Salt and pepper to taste - 1 teaspoon paprika (optional for a smoky flavor) When making Lemon Garlic Herb Roasted Potatoes, I focus on fresh, high-quality ingredients. Baby potatoes are perfect because they are tender and hold flavor well. Halving them allows for even cooking and crispiness. Next, I use olive oil to coat the potatoes. It adds richness and helps the garlic and herbs stick. Minced garlic gives a strong flavor, while the zest and juice of lemon brighten the dish. The fresh rosemary and thyme not only add aroma but also a flavorful punch. For seasoning, I always add salt and pepper to enhance the taste. The optional paprika can bring a slight smoky taste, which is delightful. These ingredients come together to create a side dish that is flavorful and satisfying. You can find the complete instructions in the Full Recipe. First, preheat your oven to 425°F (220°C). This step is key to getting the potatoes crispy. Next, take your baby potatoes and cut them in half. This helps them cook evenly and soak up all the flavors. In a large mixing bowl, combine the halved potatoes with 4 tablespoons of olive oil, 4 cloves of minced garlic, the zest of 1 lemon, and the juice of that same lemon. Add in 1 tablespoon of fresh rosemary and 1 tablespoon of fresh thyme. Don't forget a pinch of salt, pepper, and paprika if you like a smoky taste. Toss everything together until the potatoes are evenly coated. This helps every bite burst with flavor. Spread the potatoes out on a baking sheet in a single layer. Make sure they aren’t crowded. Crowding can lead to steaming instead of roasting. Roast them in the preheated oven for 25 to 30 minutes. Remember to turn them halfway through cooking. This way, they brown nicely on all sides. Check for doneness by piercing a potato with a fork; it should feel tender and look golden brown. These steps will guide you to a perfect Lemon Garlic Herb Roasted Potatoes dish. For the full recipe, refer to the section above. Enjoy your cooking! To get those potatoes just right, I have a couple of tips. First, I always use parchment paper. It makes clean-up easy and helps the potatoes crisp up nicely. Second, don’t overcrowd the baking sheet. If the potatoes touch, they won’t roast well. Give them space to breathe and become golden. Adjust the garlic and lemon to fit your taste. If you love garlic, add more! If you prefer a lighter touch, use less. Also, feel free to experiment with herbs. Fresh parsley or oregano can add a new twist. The choice is yours, and it makes cooking more fun! How you serve your dish matters. I like to top my roasted potatoes with extra chopped herbs. It gives a fresh look and taste. Lemon wedges on the side add a splash of color and flavor too. Using a rustic bowl adds a homely touch. It makes the dish feel warm and inviting. For the full recipe, check out the details above! {{image_2}} You can switch up the potatoes you use. Try Yukon Gold or red potatoes for variety. These types add different textures and flavors. You can also change the herbs. Instead of rosemary and thyme, try dill or basil. Each herb brings a new twist to the dish. Want to boost the flavor? Add colorful veggies like bell peppers or onions. They roast well and add a tasty crunch. For a cheesy touch, sprinkle cheese on top in the last five minutes of roasting. It melts beautifully and gives extra richness. If you want to change the texture, try steaming or grilling the potatoes. These methods create a different taste and feel. You can also use an Instant Pot for a quicker option. It cooks fast and keeps the flavors intact. For more details, check out the Full Recipe for Lemon Garlic Herb Roasted Potatoes. Store your Lemon Garlic Herb Roasted Potatoes in an airtight container. They stay fresh for up to 4 days in the fridge. Make sure to cool them completely first. This helps keep their texture nice and firm. To reheat, I suggest using the oven. It takes about 10 minutes at 350°F (175°C) for crispy potatoes. If you need a quicker option, the microwave works too. Just know they might not stay crispy this way. You can freeze these potatoes for up to 3 months. For the best taste, freeze them before roasting. When you're ready to eat them, just thaw before roasting. This gives you the best results. Want the full recipe? Check out the [Full Recipe]. To get your potatoes crispy, start with high heat. Preheat your oven to 425°F (220°C). Use baby potatoes and cut them in half. Make sure they are not crowded on the baking sheet. This helps them roast, not steam. Toss the potatoes in olive oil, garlic, and herbs. The oil is key; it helps with crisping. Turn the potatoes halfway through cooking. This ensures all sides get golden brown. Yes, you can use dried herbs! If you have no fresh herbs, dried ones work just fine. Use about one-third of the amount. Dried herbs are stronger in flavor. So, for one tablespoon of fresh, use about one teaspoon of dried. Mix them well with the potatoes. The taste will still be delicious, just a bit different! These roasted potatoes pair well with many dishes. Try them with grilled chicken or fish for a tasty meal. They also go great with a fresh salad. If you want a hearty option, serve them with steak. For a vegetarian meal, add roasted veggies or a grain dish. The lemon flavor adds zing to any plate! Lemon garlic herb roasted potatoes are simple and tasty. We covered the key ingredients, such as baby potatoes, olive oil, and fresh herbs. I shared step-by-step instructions for preparing and roasting them perfectly. Tips helped enhance flavors and improve presentation. You can vary the recipe with different potatoes or add veggies. Store leftovers properly to keep them fresh. Enjoy this dish as a delightful side that suits many meals. Try these methods and enjoy the delicious results. Happy cooking!](https://foodishtalk.com/wp-content/uploads/2025/05/ca6d7c04-d546-41c1-b5c5-86293cbfe5b0.webp)
Looking for a side dish that bursts with flavor? My Lemon Garlic Herb Roasted Potatoes are just what you need.
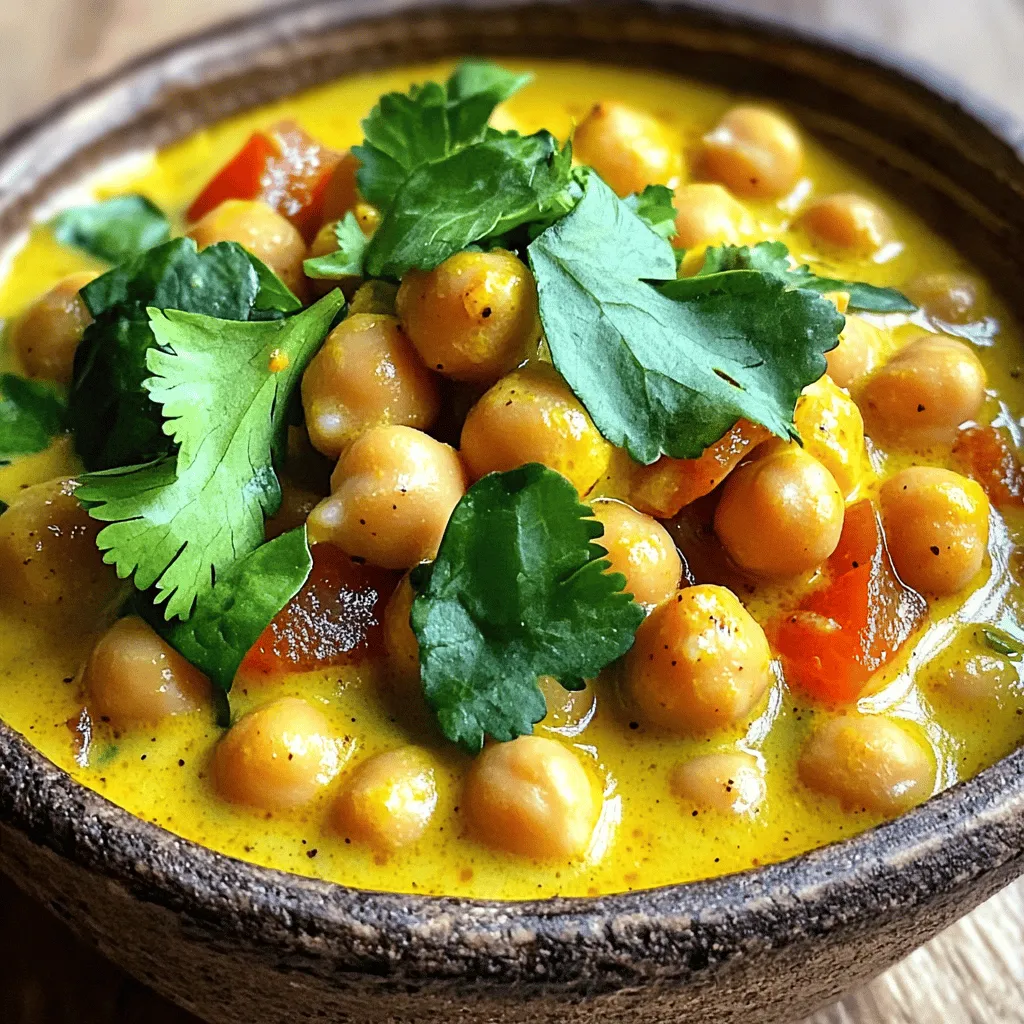
Are you ready to dive into a world of bold flavors? This Chickpea Curry in Coconut Milk is a tasty
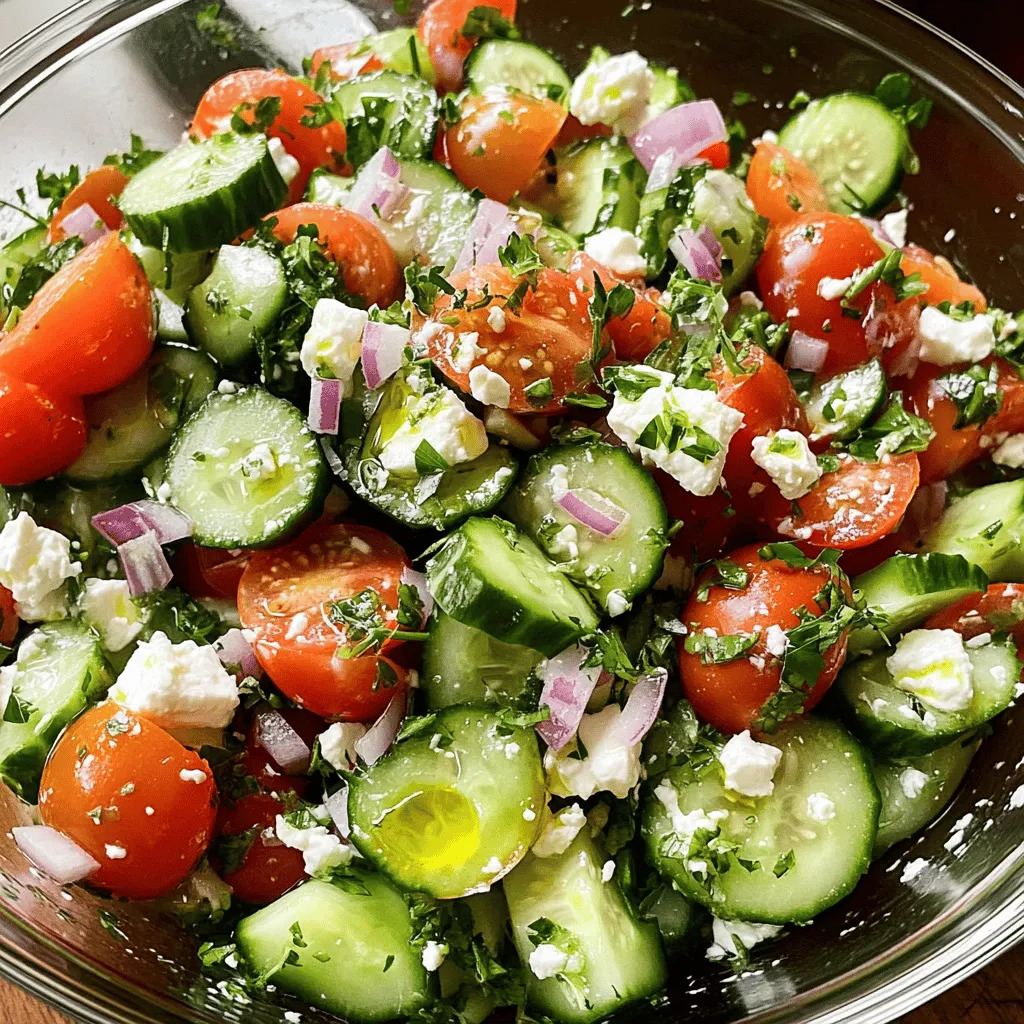
If you crave a fresh, easy dish that shines with flavor, you’ll love this Cucumber Tomato Salad with Feta. Perfect
. To store leftovers safely, let the dish cool down first. Place the shrimp and asparagus in a shallow container. This helps cool them faster. Cover the container with a tight lid. You can keep it in the fridge for up to three days. Use clear containers if you want to see what's inside. The best way to reheat this dish is on the stovetop. Heat a skillet on low. Add a splash of water or a bit of butter to keep it moist. Stir gently until heated through. This helps keep the shrimp and asparagus from becoming tough. If you want to refresh the dish, squeeze a little fresh lemon juice on top. It adds brightness and flavor. Enjoy your garlic butter shrimp and asparagus from the fridge just like the first time! For the full recipe, check the section above. How to tell when shrimp are fully cooked? You can tell shrimp are cooked when they turn pink and opaque. They should curl into a C shape. If they are still gray or have a straight shape, they need more time. Cooking shrimp usually takes about 2-3 minutes per side. Can you use frozen shrimp for this recipe? Yes, you can use frozen shrimp. Just make sure to thaw them first. Place the shrimp in cold water for about 15-20 minutes. This will help them cook evenly and keep them tender. How many servings does this recipe yield? This recipe yields 4 servings. It is perfect for a family meal or a small gathering. Suggestions for side dishes to complement the meal I recommend serving this dish with rice or quinoa. A fresh green salad also pairs well. You can even add some crusty bread to soak up the delicious garlic butter sauce. This blog post guided you through a tasty shrimp and asparagus dish. You learned about key ingredients and easy steps to prepare the meal. We also covered tips for perfect cooking, variations, and smart storage. In the end, this dish is not just delicious but also quick to make. Feel free to explore your creativity with flavors and ingredients. Enjoy each bite of this delightful meal!](https://foodishtalk.com/wp-content/uploads/2025/05/32dd321f-403f-4d76-b41b-cad975833cad.webp)
Craving a quick and tasty meal? Garlic Butter Shrimp and Asparagus is a true delight! This dish combines succulent shrimp
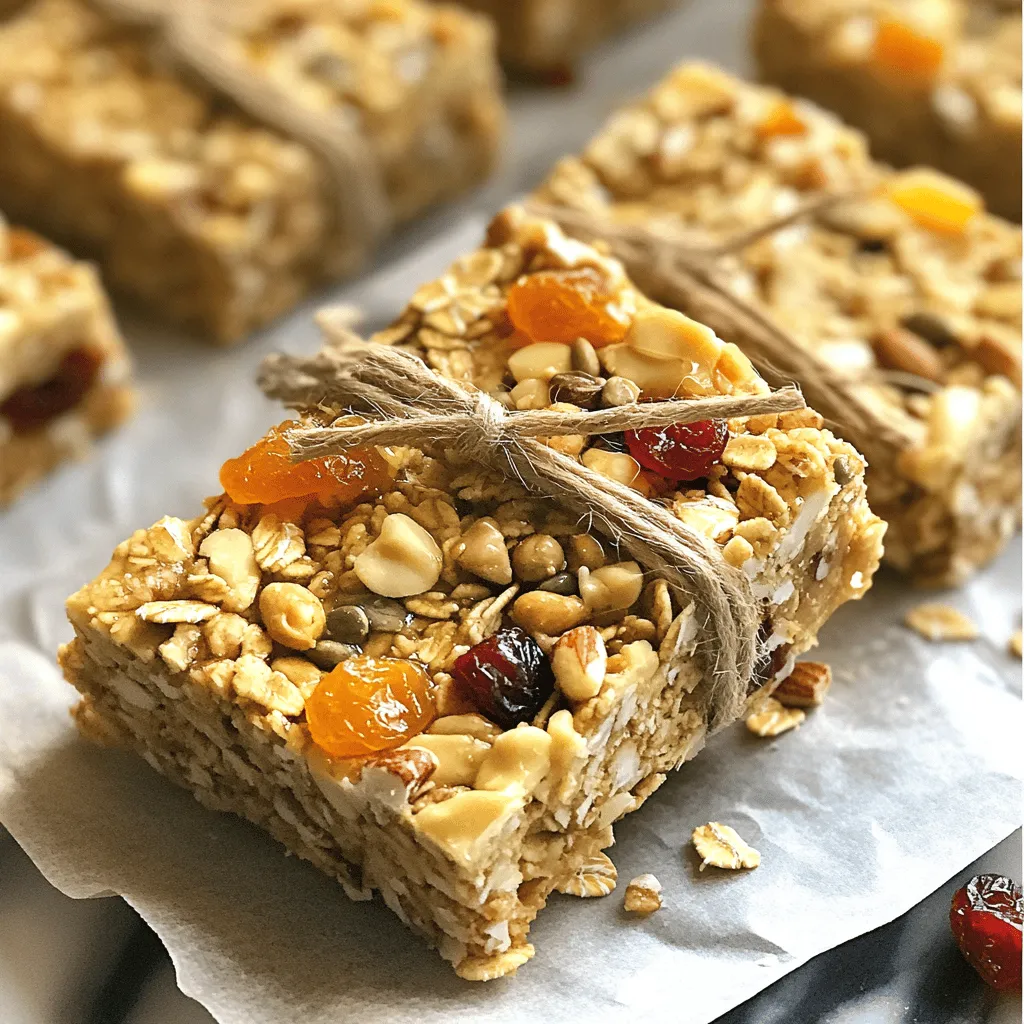
Looking for a quick, tasty, and healthy snack? Homemade granola bars are your answer! I’ll guide you through an easy
![- 1 cup unsalted butter, softened - 1 cup brown sugar, packed - 1/2 cup granulated sugar - 1 large egg - 2 teaspoons vanilla extract To start, use soft unsalted butter. It blends well with sugars. Brown sugar adds moisture and sweetness. Granulated sugar gives a nice crunch. One egg helps bind everything. Vanilla extract boosts the flavor. - 2 cups all-purpose flour - 1/2 cup cocoa powder - 1 teaspoon baking soda - 1/2 teaspoon salt - 1 tablespoon instant coffee granules (or espresso powder) Next, we need dry ingredients. All-purpose flour gives structure. Cocoa powder adds rich chocolate flavor. Baking soda helps cookies rise. Salt balances the sweetness. Instant coffee granules enhance the mocha taste. - 1 cup semi-sweet chocolate chips - 1/2 cup chopped walnuts (optional) For added flavor, you can use chocolate chips. They create pockets of melted goodness. Chopped walnuts add a crunchy texture. If you like nuts, throw them in! For the full recipe, check out the complete guide. You will love these cookies! 1. Preheating your oven Start by preheating your oven to 350°F (175°C). This step is crucial. A hot oven helps your cookies rise and bake evenly. 2. Lining the baking sheet Next, line a baking sheet with parchment paper. This keeps the cookies from sticking. It also makes cleanup much easier. 1. Creaming the butters and sugars In a large bowl, cream together 1 cup of softened unsalted butter, 1 cup of brown sugar, and 1/2 cup of granulated sugar. Mix until the mixture is light and fluffy. This usually takes about 3 minutes. 2. Adding the egg and vanilla Beat in 1 large egg and 2 teaspoons of vanilla extract. This adds flavor and moisture to your batter. Mix until everything is well combined. 1. Whisking the dry ingredients In another bowl, whisk together 2 cups of all-purpose flour, 1/2 cup of cocoa powder, 1 teaspoon of baking soda, 1/2 teaspoon of salt, and 1 tablespoon of instant coffee granules. This blend gives your cookies that rich mocha flavor. 2. Folding in chocolate chips and nuts Gradually add the dry ingredients to the wet mixture. Mix just until combined. Then, fold in 1 cup of semi-sweet chocolate chips and 1/2 cup of chopped walnuts, if you like nuts. This adds texture and flavor. 1. Scooping the dough and spacing Using a cookie scoop or spoon, drop rounded balls of dough onto the prepared baking sheet. Space them about 2 inches apart. This allows room for spreading. 2. Baking time and cooling instructions Bake the cookies for 10-12 minutes. The edges should be set, but the centers can be soft. After baking, let them cool on the sheet for 5 minutes. Then, move the cookies to a wire rack to cool completely. For the full recipe and more tips, check out the [Full Recipe]. To get the right cookie texture, start by adjusting your baking time. If you want soft cookies, bake them just until the edges are set. This usually takes about 10 to 12 minutes. If you prefer a firmer cookie, add a minute or two. Always watch the cookies closely. Using room temperature ingredients is key too. Softened butter mixes better with sugar. It gives your cookies a nice rise and keeps them soft. Let your butter sit out for about 30 minutes before baking. This small step makes a big difference. Want to jazz up your mocha chocolate chip cookies? Try adding spices like cinnamon or nutmeg. A dash of sea salt can also boost the sweet and coffee flavors. You can also use different types of chocolate. Dark chocolate gives a rich taste. Milk chocolate adds sweetness. You can mix and match to find your favorite combo. Don’t forget about extracts. A splash of almond or hazelnut extract can elevate the cookies. These small additions make your cookies truly special. Using the right tools makes baking easier. I recommend a sturdy mixing bowl and a good spatula for mixing. Silicone spatulas work well, as they scrape down the bowl nicely. For lining your baking sheet, parchment paper is my go-to. It helps cookies bake evenly and prevents sticking. Silicone mats are great too; they are reusable and keep cookies from burning. Choose what works best for you! For the full recipe, check out the detailed instructions above. Enjoy your baking adventure! {{image_2}} You can make mocha chocolate chip cookies gluten-free. To do this, swap the all-purpose flour with gluten-free flour blends. Look for blends made with rice flour, almond flour, or coconut flour. These options give a nice texture without gluten. Make sure the blend you choose has xanthan gum, as it helps bind the ingredients together. Want to make these cookies vegan? It’s easy! Replace the butter with coconut oil or a vegan butter. For the egg, use one tablespoon of ground flaxseed mixed with three tablespoons of water. Let it sit for a few minutes to thicken. This mixture acts as a great egg substitute. Your cookies will still taste rich and delicious. Add a twist to your mocha chocolate chip cookies with flavor infusions. For a refreshing touch, mix in peppermint extract or a bit of orange zest. Just a teaspoon of either will brighten the flavor. These small changes can boost your mood and make the cookies feel special. Experiment and find your favorite flavor blend! For the full recipe, check out the Mocha Delight Chocolate Chip Cookies. To keep your mocha chocolate chip cookies fresh, use airtight containers. Glass or plastic containers work well. Make sure they seal tightly. You can also use zip-top bags. Press out the air before sealing. Store the cookies at room temperature for the best taste. If you live in a humid area, put them in the fridge. This keeps them from getting too soft. However, refrigeration can change the texture. Freezing is a great way to save cookies for later. You can freeze dough or baked cookies. For dough, scoop the balls onto a baking sheet. Freeze until solid, then transfer to a container. This method keeps the shape. If you're freezing baked cookies, let them cool first. Layer them in an airtight container with parchment paper in between. For thawing, leave them at room temperature for about an hour. You can also warm them up in the oven for a few minutes. Fresh mocha chocolate chip cookies last about one week at room temperature. In the fridge, they can last up to two weeks. Watch for signs of spoilage. If they smell off or look dry, toss them out. Stale cookies can be revived with a quick warm-up. Enjoy them while they are fresh! For the full recipe, check back to the ingredients section. Yes, you can! If you skip cocoa powder, your cookies will have less chocolate taste. You can add extra chocolate chips or use dark chocolate for more flavor. Other options include using carob powder or even melted chocolate. This keeps the cookie rich and tasty. To get chewy cookies, you can try these tips: - Use more brown sugar than white sugar. Brown sugar adds moisture. - Chill your dough for 30 minutes before baking. This helps keep the shape. - Bake for a shorter time. Take them out while they are still soft. You can, but it may change the cookie's texture and flavor. Regular coffee has more water, which can make the dough too wet. Instant coffee granules dissolve well, giving a stronger coffee flavor without adding extra liquid. If you use brewed coffee, reduce the other liquids in the recipe. Look for these signs: - The edges should be set and slightly brown. - The center will look soft and puffy. - When you touch the top, it should not leave a dent. Let them cool for a few minutes on the baking sheet before moving them. This helps them firm up nicely. For the full recipe, check out the Mocha Delight Chocolate Chip Cookies section above! You now have all the key details to bake perfect Mocha Chocolate Chip Cookies. Start with essential and dry ingredients, then follow the step-by-step guide to mix, bake, and enjoy. Remember to try the tips for better texture and flavor. Explore the variations for gluten-free or vegan options as well. Store your cookies properly to keep them fresh. With these insights, you can create delicious treats that everyone will love. Enjoy your baking journey!](https://foodishtalk.com/wp-content/uploads/2025/05/b61eb293-eeab-48ff-99d3-f9e160cfc330.webp)
Craving a sweet treat that packs a flavor punch? These Mocha Chocolate Chip Cookies are just what you need! With
