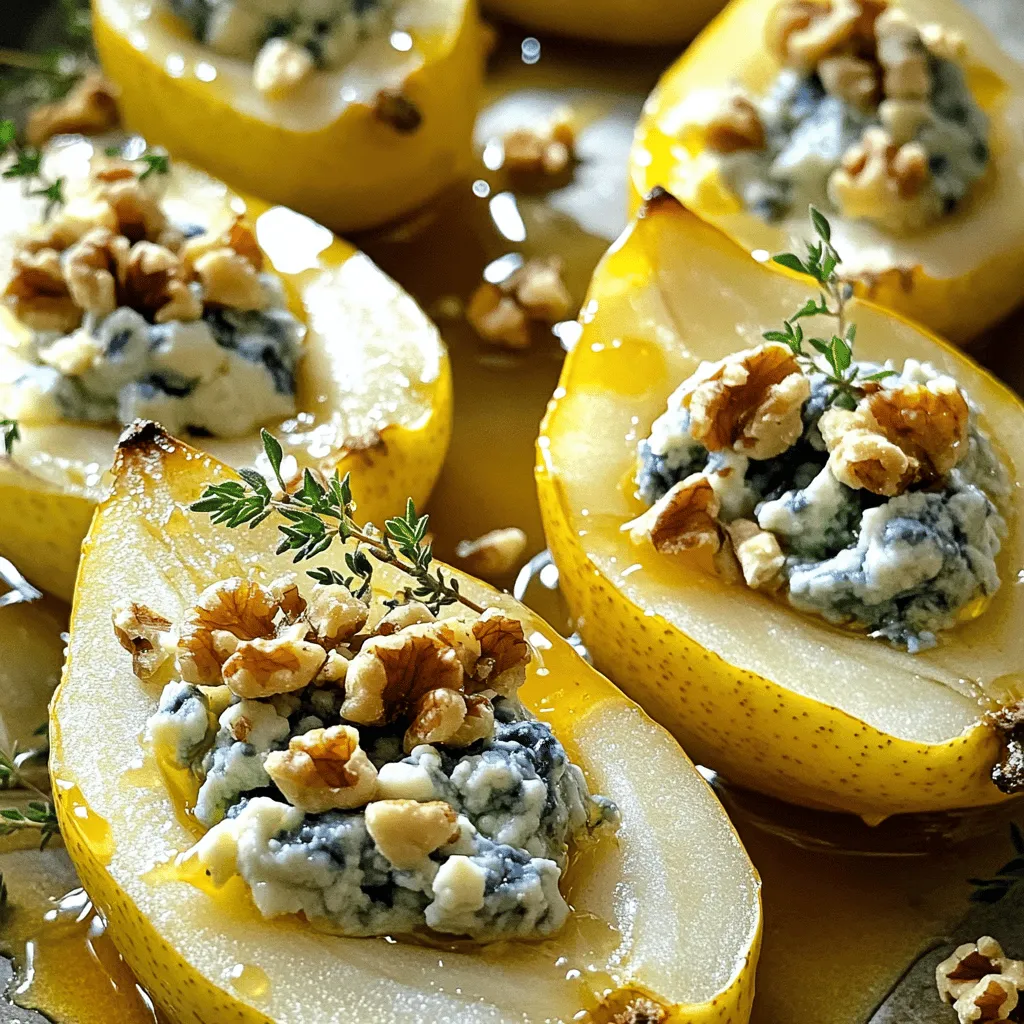
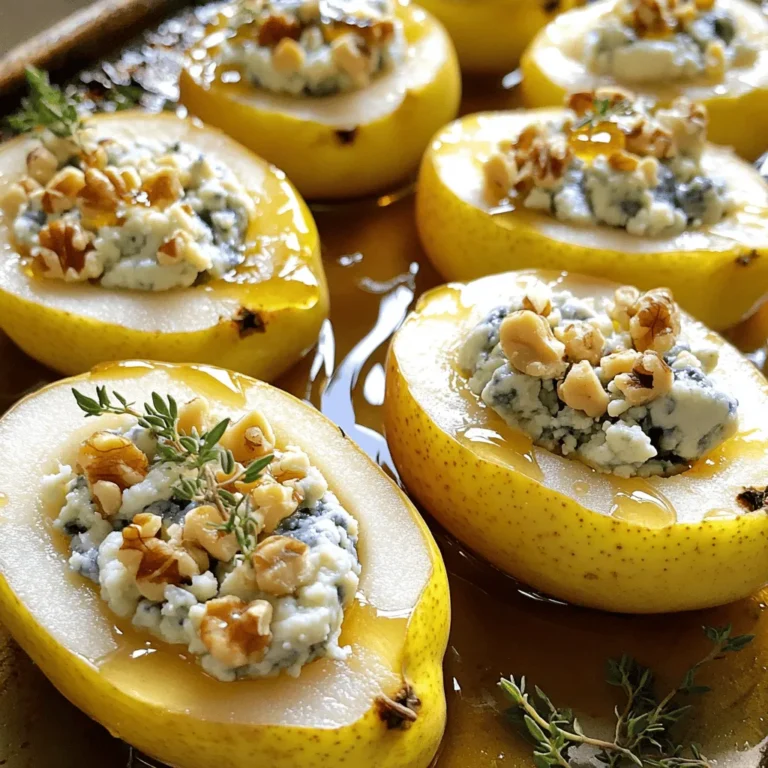
Looking for a delicious appetizer that impresses? Try my Blue Cheese Stuffed Pears! This simple recipe combines the sweet taste of pears with rich blue cheese, creating a flavor explosion. Whether you’re hosting a gathering or enjoying a quiet night in, this dish will leave everyone wanting more. Let’s dive into the ingredients, steps, and tips for making this flavorful delight your new favorite treat!
Ingredients
List of Ingredients
– 4 ripe pears, halved and cored
– 100g blue cheese, crumbled
– 50g cream cheese, softened
– 2 tablespoons honey
– 1 tablespoon walnuts, finely chopped
– Fresh thyme leaves, for garnish
– Salt and pepper to taste
Ingredient Variations
You can change the type of cheese if you want. Try goat cheese for a milder taste. You could also use feta for a crumbly texture. For a sweeter touch, use maple syrup instead of honey. This makes a nice change. If you don’t like walnuts, try pecans or almonds. Both add a nice crunch.
Step-by-Step Instructions
Preparation Steps
– Preheat your oven to 350°F (175°C). This step ensures even cooking for your pears.
– In a small mixing bowl, combine the crumbled blue cheese, softened cream cheese, honey, and chopped walnuts. Mix well until creamy. This mixture will be the star of your dish!
– Add a pinch of salt and pepper to taste. This will enhance the flavors of the cheese.
Baking Instructions
– Take each pear half and spoon a generous amount of the cheese filling into the hollowed center. Ensure each pear is well-stuffed for maximum flavor.
– Place the stuffed pears in a baking dish with the cut side facing up. This allows the cheese to melt beautifully.
– Bake in the preheated oven for 20-25 minutes. Check for tenderness in the pears and bubbly cheese.
Final Touches
– Remove the pears from the oven and let them cool slightly. This makes them safe to touch and enhances the taste.
– Garnish with fresh thyme leaves on top. This adds a lovely aroma and visual appeal to your dish.
Tips & Tricks
Perfecting the Recipe
Choosing the right pear type is key. I recommend using ripe Bartlett or Anjou pears. These pears are sweet and soft when cooked. They hold their shape well, giving you a perfect bite. Other pear types may be too hard or not as sweet.
For the cheese filling, you want a creamy texture. Mix the blue cheese and cream cheese until smooth. Add honey for a touch of sweetness. Make sure to blend well. This makes the filling easy to scoop and stuff into the pears.
Serving Suggestions
Pair your stuffed pears with a sweet white wine, like Riesling. The wine’s sweetness balances the blue cheese’s strong flavor. You can also serve them with a light salad for extra crunch.
For presentation, place the pears on a beautiful platter. Drizzle some honey on top for shine. Add a few sprigs of fresh thyme around the pears. This makes your dish look extra special.
Common Mistakes to Avoid
Be careful not to overbake the pears. Keep an eye on them after 20 minutes. You want them tender, not mushy. Overbaking can ruin their texture.
Also, pay attention to filling proportions. If you add too much filling, it can spill out during baking. Use just enough to fill each pear half without overflowing. This keeps your dish neat and tasty.

Variations
Flavor Profile Adjustments
You can make blue cheese stuffed pears even more exciting. Adding spices or herbs can change the flavor. Try mixing in a pinch of nutmeg or a dash of cayenne pepper for warmth. Fresh herbs like rosemary or basil can also add a lovely aroma.
You might want to sweeten the dish too. Introducing fruit preserves or compotes can give a nice twist. A dollop of fig jam or a spoonful of cranberry sauce can balance the cheese’s saltiness. These additions make the dish pop with flavor.
Dietary Modifications
If you need a gluten-free version, this dish is easy to adapt. All the ingredients are naturally gluten-free. Just be sure to check the labels on your cheese and any preserves you use.
For a vegan alternative, swap the blue cheese and cream cheese for plant-based options. Use cashew cheese or a creamy tofu blend. You can also replace honey with maple syrup or agave nectar. This way, you keep the sweet and savory mix, but in a vegan-friendly way.
Storage Info
Refrigeration Guidelines
To store leftovers, place the stuffed pears in an airtight container. Make sure they cool first. Store them in the fridge for up to three days. After that, the pears may lose their flavor and texture. If you want to enjoy them longer, consider freezing.
Freezing Tips
You can freeze blue cheese stuffed pears, but it’s best to do this before baking. Wrap each pear half in plastic wrap, then place them in a freezer bag. Remove as much air as possible. They will keep well for up to three months. When ready to cook, thaw them in the fridge overnight. Then, bake them following the original recipe instructions. Enjoy your tasty treat!
FAQs
How do I know when the pears are done baking?
You can tell the pears are done when they are soft. Stick a fork in them; if it goes in easily, they are ready. Also, look for the cheese filling to be slightly bubbly. This means the flavors meld well together.
Can I prepare blue cheese stuffed pears in advance?
Yes, you can prepare these pears ahead of time. Stuff the pears and cover them. Place them in the fridge for up to 24 hours before baking. This saves time when you are ready to serve. Just remember to bake them when you need them.
What wines pair well with blue cheese and pear dishes?
A sweet white wine works best with blue cheese and pears. Try a late-harvest Riesling or a Sauternes. These wines balance the blue cheese’s strong flavor and the pear’s sweetness. A light red, like Pinot Noir, can also be a good choice.
Can I make this recipe without blue cheese?
Absolutely! You can use goat cheese or feta as a substitute. Both cheeses have unique flavors that still work well with pears. Cream cheese alone can also be used for a milder taste. Experiment to find your favorite version!
This blog post showed how to make delicious blue cheese stuffed pears. We covered the key ingredients and their tasty alternatives. I provided step-by-step instructions to help you bake these treats. With tips on perfecting your dish, I shared ways to avoid common mistakes. Lastly, we discussed storage and answered your FAQs.
Try this recipe to impress friends at your next dinner. Enjoy the flavors and get creative with your own touches!


