Skip to content
DisclaimerTerms Of UseGDPR PolicyCookie Policy

Foodish Talk

  • Home
  • Drinks
  • Appetizers
  • Dinner
  • Dessert
  • About
  • Contact
  • Privacy Policy
DisclaimerTerms Of UseGDPR PolicyCookie Policy

NO-ING-IMG

To make Old-Fashioned Squash and Onions, gather these items: - 2 medium yellow squash, sliced - 2 medium zucchini, sliced - 1 large onion, thinly sliced - 2 tablespoons olive oil - 1 teaspoon garlic powder - 1 teaspoon dried thyme - Salt and pepper to taste - ½ cup vegetable broth - 1 tablespoon balsamic vinegar - Fresh parsley, chopped Choose fresh squash and zucchini for the best taste. Look for bright colors and firm skin. Use a sweet onion, like Vidalia, for a nice contrast with the squash. Olive oil adds richness. For a deeper flavor, try using high-quality balsamic vinegar. This will really elevate the dish. Always taste as you go to adjust seasoning. If you need to change any ingredients, here are some ideas: - Replace olive oil with avocado oil for a different flavor. - For a low-sodium option, use low-sodium vegetable broth. - If you prefer fresh herbs, swap dried thyme for fresh thyme. - You can skip the balsamic vinegar if you want a lighter dish. To make this dish, start by heating olive oil in a large skillet over medium heat. Add the thinly sliced onions. Sauté them for about five minutes until they are soft. Next, add the sliced yellow squash and zucchini. Stir well to mix. Cook these for another six to eight minutes. The veggies should start to soften. Now, sprinkle in the garlic powder, dried thyme, salt, and pepper. Mix everything well to coat the vegetables with these spices. This step adds flavor. Pour in the vegetable broth and balsamic vinegar. Reduce the heat to low and cover the skillet. Let it simmer for about ten to twelve minutes. The squash should be tender and soak up the flavors. Taste your dish and adjust the seasoning if needed. Finally, remove the skillet from the heat. Transfer the squash and onions to a serving dish. Garnish with fresh chopped parsley. This adds a nice touch and some color. When cooking squash and onions, remember to keep the heat moderate. This helps the vegetables cook evenly. Stir often to prevent sticking. If you like a bit of crispiness, you can cook them uncovered for a few extra minutes. Using a lid traps steam, which helps soften the squash. If you want a deeper flavor, let it cook a little longer. Just keep an eye on it so it doesn't burn. You can also try roasting the veggies in the oven. Toss them with oil and spices, then roast at 400°F for about twenty minutes. Presentation can make your dish stand out. Use a colorful plate for serving. Place the squash and onions in the center, making a nice mound. Sprinkle the fresh parsley on top for a pop of green. You can also add a drizzle of balsamic vinegar around the plate for flair. This gives a nice visual and enhances the taste. Serve this dish warm as a side or a main. It pairs well with grilled meats or crusty bread. Enjoy your cozy squash and onion medley! For the full recipe, check out the detailed instructions above. To cook squash and onions just right, start with fresh veggies. I love using medium yellow squash and zucchini. Slice them evenly for uniform cooking. Heat olive oil in a skillet over medium heat. Add the onions first to soften. This takes about five minutes. Then, mix in the squash and zucchini. Stir them well and cook for six to eight minutes. This helps all the flavors blend. Use garlic powder and thyme to season. They add great taste without much effort. Pour in vegetable broth for moisture, then let it simmer. Cover the skillet to trap the heat. This method keeps the squash tender and flavorful. One mistake many people make is overcrowding the pan. This traps steam, making the veggies soggy. Give them space to cook. Another mistake is not seasoning early. Adding herbs at the start helps the flavors soak in. Also, don’t skip the vegetable broth. It adds depth and keeps the squash from drying out. Lastly, don’t rush the simmering process. Allowing the dish to cook longer helps the veggies absorb all those great flavors. To take this dish up a notch, consider adding some zest. A squeeze of lemon juice brightens the flavors. You can also use fresh herbs, like basil or oregano, for a twist. If you like a bit of heat, add red pepper flakes. For a sweeter taste, try a dash of maple syrup or honey. Don’t forget to taste and adjust your seasonings! Fresh parsley makes for a lovely garnish and adds a pop of color. For full details, check out the Full Recipe. {{image_2}} You can switch up this dish in many ways. Try using different types of squash, like butternut or acorn squash. You can also mix in sweet potatoes for a unique twist. Some love to add bell peppers for color and taste. Experiment with spices too! Try cumin or paprika for a smoky flavor. Want to make this dish heartier? Add proteins like chicken, sausage, or even beans. Simply cook the protein first, then add the squash and onions. You can also toss in other veggies like spinach or carrots. They add great texture and nutrients. Just remember to adjust cooking times as needed. This dish fits well as a side or a main meal. Serve it next to grilled meats or fish for a nice balance. If you want it as a main course, pair it with rice or quinoa. You can also top it with cheese or nuts for extra flavor. For more details on how to prepare this dish, check the Full Recipe. After you cook your old-fashioned squash and onions, let them cool down. Place the leftovers in an airtight container. This keeps them fresh and tasty. Store them in the fridge. They will last for about three to five days. If you want to keep them longer, consider freezing. To reheat, you can use the microwave or the stove. For the microwave, place the squash and onions in a bowl. Cover it with a lid or a paper towel. Heat for one to two minutes. Stir halfway through to ensure even heating. If you use the stove, heat a pan over low heat. Add a splash of vegetable broth to help steam and warm them up. Cook until warm, stirring often. Freezing is a great way to save your squash and onions. First, cool them completely. Next, use a freezer-safe container or bag. Remove as much air as you can from the bag. Label it with the date. When stored this way, they can last for up to three months. When you are ready to enjoy, thaw them in the fridge overnight. You can then reheat them as needed. For more details, you can check the Full Recipe. I recommend using yellow squash and zucchini for this dish. They both cook well and provide great flavor. Yellow squash has a mild taste, while zucchini adds a nice texture. Together, they create a lovely medley. You can also use acorn squash or butternut squash if you want a sweeter flavor. Yes, you can easily make this dish vegan. The recipe is already plant-based since it uses vegetable broth and no animal products. Just ensure your balsamic vinegar is vegan-friendly. This dish is both tasty and healthy, making it perfect for everyone. To adjust the recipe, simply double or triple the ingredients. For example, use 4 medium yellow squash and 4 medium zucchini for a larger batch. You can also increase the onion and spices to match. Just make sure your skillet is big enough to hold everything. Many cultures have their own twists on squash and onions. In Italy, they may add tomatoes and herbs like basil. In India, spices like turmeric and cumin can create a whole new dish. In other regions, you might find recipes with cheese or different types of broth. These variations show how versatile squash and onions can be. For more inspiration, check out the Full Recipe. You now know how to make delicious squash and onions. We covered ingredients, cooking steps, and tips for perfect flavor. I shared how to store leftovers and answered common questions. Use the tips for great results every time. Try new variations to keep things fresh. Cooking should be fun, so experiment and enjoy your meals!

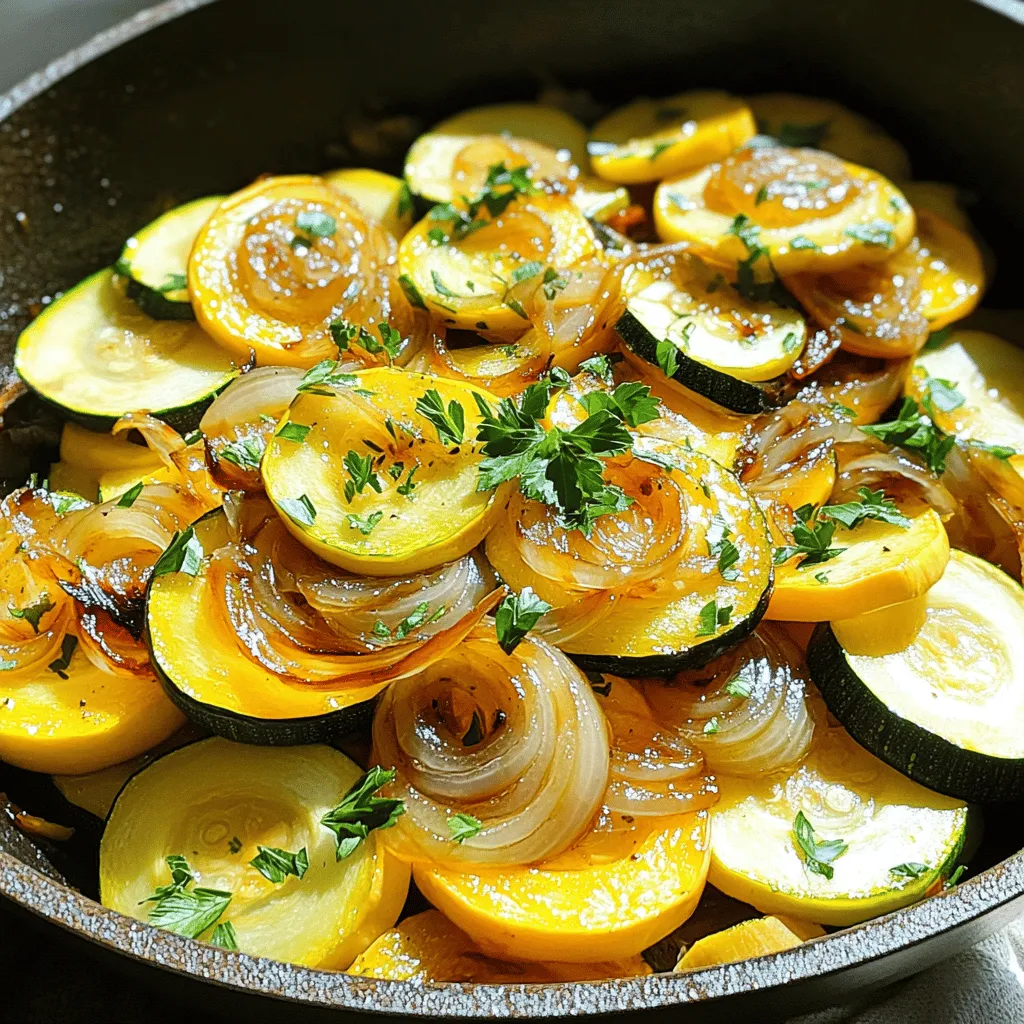
Old-Fashioned Squash and Onions Easy Cooking Guide

Are you ready to bring back a classic dish that warms the heart? In this easy cooking guide, I’ll show

- Medium head of cauliflower - All-purpose flour (or chickpea flour) - Hot sauce options For Buffalo Cauliflower Bites, you start with a fresh cauliflower. Choose a medium head. Cutting it into bite-sized florets makes them easy to eat. Next, you need flour for the batter. All-purpose flour works great, but chickpea flour is a good gluten-free option. The last main ingredient is hot sauce. Options like Frank's RedHot give your bites the classic buffalo flavor. - Garlic powder - Onion powder - Smoked paprika Seasonings add depth to your dish. Garlic powder brings a savory taste. Onion powder adds sweetness and depth. Smoked paprika gives a hint of smokiness that balances the spice. These three together create a great flavor base for your bites. - Vegan butter (or regular butter) - Celery sticks for serving - Dipping sauce options: blue cheese or ranch dressing For the sauce, melting vegan butter or regular butter helps mix with the hot sauce. This mix makes the bites juicy and flavorful. Celery sticks are a perfect side. They add crunch and freshness. For dipping, blue cheese and ranch dressing are classic choices. They cool the heat and add creaminess. For the full recipe, check out the complete guide. - Preheat oven to 450°F (230°C). - Line a baking sheet with parchment paper. Start by preheating your oven. This step is crucial for achieving that perfect crispiness on your cauliflower bites. While the oven warms up, prepare your baking sheet. Parchment paper helps the bites not stick and makes cleanup easy. - Combine flour and seasonings in a bowl. - Whisk in water to create a smooth batter. In a large bowl, mix all-purpose flour, garlic powder, onion powder, smoked paprika, salt, and black pepper. This mix gives your bites a great flavor. Next, slowly add water while whisking. You want a smooth batter that coats the cauliflower well. - Dip cauliflower florets in batter. - Bake for 20 minutes until crispy. Take your cauliflower florets and dip them into the batter. Make sure each piece is fully coated, but shake off any extra. Place them on the prepared baking sheet in a single layer. Bake them for 20 minutes. You’ll know they’re ready when they look golden-brown and crispy. - Mix hot sauce with melted butter. - Toss baked cauliflower in buffalo sauce and return to oven. In a separate bowl, combine your hot sauce with melted butter. This mix adds that classic buffalo flavor. Once your cauliflower bites are baked, take them out of the oven. Toss the crispy bites in the buffalo sauce until they are well-coated. Finally, return them to the oven for another 10-15 minutes to get them even crispier. Now you have a delicious snack ready to enjoy! For the full recipe, check out the detailed instructions above. To make your Buffalo cauliflower bites crispy, ensure an even coating in the batter. Dip each floret fully, making sure it’s covered on all sides. Shake off any excess batter. This step is key for that delightful crunch. Baking times matter too. I find that 20 minutes at 450°F gives a nice start. After tossing in the buffalo sauce, return them to the oven for another 10 to 15 minutes. This final bake locks in the crispiness. When it comes to hot sauce, I love Frank's RedHot for its flavor. It strikes the right balance of heat and tang. You can also try other brands like Crystal or Cholula for a twist on the classic taste. If you want a milder bite, mix in some butter with the sauce. For a spicier kick, add a dash of cayenne. Adjust the spice level to suit your taste buds. Buffalo cauliflower bites shine when paired with crunchy celery sticks. They help cool down the spice and add a nice crunch. For dipping, blue cheese or ranch dressing works wonders. You can also serve them on a platter, garnished with fresh parsley for a pop of color. Place everything together for a fun presentation that impresses your guests. Enjoy the flavor and the fun! For the full recipe, check out the detailed instructions above. {{image_2}} You can make this dish fit your diet easily. For a gluten-free option, swap all-purpose flour for chickpea flour. This flour works well and keeps the bites crispy. If you're vegan, use plant-based butter instead of regular butter. This keeps the recipe tasty while sticking to a vegan diet. Want to spice things up? Add more heat by mixing in cayenne pepper or extra hot sauce. This will give your bites a real kick. You can also think outside the box with other seasonings. Try adding cumin for a warm flavor or even a bit of lemon zest for brightness. Each change gives you a unique twist on the classic taste. Buffalo cauliflower bites can be more than a snack. You can wrap them in tortillas with fresh veggies for a tasty lunch. They also work great as part of a larger appetizer spread. Pair them with dips and other snacks. This makes for a fun gathering. Check out the Full Recipe for more ideas! To keep your buffalo cauliflower bites fresh, store them in an airtight container. Place parchment paper between layers to avoid sticking. They stay good in the fridge for about 3 to 5 days. If you want a longer shelf life, consider freezing them. To keep them crispy, reheat your buffalo cauliflower bites in an oven or air fryer. Heat at 350°F (175°C) for about 10 minutes. Avoid the microwave; it makes them soggy. If you freeze them, let them thaw in the fridge overnight before reheating. Enjoy your tasty snack just like the first time! Buffalo Cauliflower Bites are a tasty snack made from cauliflower florets. This dish became popular because it’s a fun and healthy twist on classic buffalo wings. The cauliflower gets coated in a flavorful batter and baked until crispy. Then, it's tossed in spicy buffalo sauce. People love them for their crunch and bold flavor. Yes, you can make Buffalo Cauliflower Bites in an air fryer. First, follow the recipe up to coating the cauliflower. Preheat your air fryer to 400°F (200°C). Place the coated florets in a single layer in the basket. Air fry for about 12-15 minutes, flipping halfway through. This method gives you a great crunch with less oil. Buffalo Cauliflower Bites can be a healthy snack. They are low in calories and high in fiber. A serving typically has around 150 calories, depending on the sauce used. Cauliflower is rich in vitamins C and K, which helps support your immune system. To make Buffalo Cauliflower Bites spicier, choose a hotter hot sauce. You can add cayenne pepper or crushed red pepper flakes to the sauce. Another option is to mix in minced jalapeños or other hot peppers before tossing the cauliflower. This will add heat and flavor to your bites. Buffalo cauliflower bites are a tasty, simple dish to make. You mix the batter, coat the cauliflower, and bake until crispy. Adding your favorite hot sauce makes them even better. Remember to try different seasonings and sauces for unique flavors. Store any leftovers properly so you can enjoy them later. These bites are fun as snacks or appetizers. With easy swaps, they can fit many diets. Enjoy your cooking adventure and impress your friends with these flavors!

Buffalo Cauliflower Bites Crispy and Flavorful Snack

Looking for a tasty snack that packs a punch? Buffalo Cauliflower Bites are crispy, flavorful, and easy to make! This

To make this tasty No-Bake Oreo Cheesecake, you need a few key items: - 24 Oreo cookies, crushed - 1/4 cup unsalted butter, melted - 16 oz cream cheese, softened - 1 cup powdered sugar - 1 teaspoon vanilla extract - 1 cup heavy whipping cream - 8 Oreo cookies, chopped (for filling) - Additional crushed Oreos for topping These ingredients work together to create a rich and creamy treat. The crushed Oreos form the crust, while the cream cheese adds the smooth texture. You can change this recipe to suit your taste. Here are some ideas: - Use different types of cookies for the crust, such as chocolate wafers. - Add a swirl of peanut butter or chocolate sauce to the filling for extra flavor. - Top with fresh berries for a fruity twist. These options keep the dessert fresh and exciting. Feel free to mix and match based on your favorites! To prepare this cheesecake, you will need some simple tools: - 9-inch springform pan - Medium bowl - Large mixing bowl - Electric mixer - Spatula - Plastic wrap Having these items ready makes the process smooth. You can focus more on creating your delicious cheesecake without any stress. Enjoy the fun of cooking! To start, gather your ingredients. You need 24 crushed Oreo cookies and 1/4 cup melted butter. Mix the crushed cookies and melted butter in a medium bowl. The mixture should feel like wet sand. Next, take a 9-inch springform pan. Press the cookie mixture evenly into the bottom of the pan. Use a measuring cup to pack it tightly. Set the crust aside while you prepare the filling. Now, let’s make the filling. In a large bowl, add 16 ounces of softened cream cheese. Beat it with an electric mixer until it’s smooth. Gradually add in 1 cup of powdered sugar and 1 teaspoon of vanilla extract. Mix until everything is smooth and well combined. In another bowl, whip 1 cup of heavy cream until stiff peaks form. Gently fold the whipped cream into the cream cheese mixture. Be careful to keep the air in the whipped cream. Finally, fold in 8 chopped Oreo cookies. This adds nice bits of cookie to your cheesecake. Pour the cream cheese filling over your prepared crust in the springform pan. Use a spatula to spread it out evenly. Cover the pan with plastic wrap. Place it in the fridge for at least 4 hours, or overnight if you can wait. Once it’s set, carefully remove the sides of the springform pan. For a tasty finish, top the cheesecake with extra crushed Oreos. Enjoy your delicious no-bake Oreo cheesecake! For the full recipe, check the details above. For the best texture, follow these simple tips: - Use room temperature cream cheese. Cold cream cheese will not blend well. - Whip the heavy cream until it forms stiff peaks. This gives the cheesecake a light feel. - Fold the whipped cream in gently. This keeps the mixture airy and fluffy. Many errors can spoil your cheesecake. Here are some to watch out for: - Don’t skip the chilling time. Letting it set is key for the right firmness. - Avoid overmixing the cream cheese. This can add air and cause cracks. - Make sure your crust is tightly packed. A loose crust can crumble when sliced. Serving your cheesecake right can make it even better: - Chill the cake well before serving. Cold cheesecake tastes great. - Top with whipped cream for a creamy finish. Add extra crushed Oreos for crunch. - Serve with a drizzle of chocolate sauce. It adds a rich flavor that pairs well. For the complete recipe, check out the Full Recipe section. Enjoy creating your dessert masterpiece! {{image_2}} You can change this Oreo cheesecake to fit your taste. Try adding mint extract for a fresh twist. You can mix in peanut butter for a nutty flavor. Crushed chocolate cookies make a fun addition too. If you love fruit, add berries or even banana slices. Each add-in gives the cheesecake a new vibe. Don't forget to adjust sugar to match your add-ins! If you need a gluten-free version, use gluten-free Oreo cookies. They taste just as good! The rest of the recipe stays the same. Use the same amount of melted butter for the crust. You still get that creamy filling and crunchy base everyone loves. This way, you can enjoy cheesecake without worry. To make a vegan version, swap cream cheese for a dairy-free alternative. Use coconut cream or cashew cream instead. For the crust, use vegan butter and gluten-free Oreos. Replace heavy cream with coconut milk whipped until fluffy. This recipe still offers all the rich flavors of the classic. You can serve it just like the original and impress your friends! For more detailed steps, check out the Full Recipe. To store leftover cheesecake, cover it tightly with plastic wrap. You can also use an airtight container. This keeps it fresh and prevents it from absorbing other flavors. Store it in the fridge for up to five days. Make sure to keep it chilled until you are ready to enjoy a slice. You can freeze this cheesecake for longer storage. First, let it chill in the fridge for at least four hours. Then, wrap it in plastic wrap and foil to prevent freezer burn. Place it in the freezer for up to three months. This way, you can enjoy a sweet treat anytime! When you’re ready to eat your frozen cheesecake, transfer it to the fridge. Let it thaw overnight for the best texture. Avoid thawing at room temperature, as this can make it too soft. Once thawed, enjoy your cheesecake within two days for the best taste. Yes, you can try different cookies! Chocolate sandwich cookies work well. You might also like using cookies like graham crackers for a different taste. Just remember that the flavor will change. Experimenting can lead to fun and tasty results. This cheesecake lasts about 5 days in the fridge. Make sure to keep it covered. Use plastic wrap or a lid to keep it fresh. After a few days, the flavors blend, making it even more delicious! Absolutely! You can make it a day or two before you need it. This cheesecake tastes best when it chills overnight. Making it ahead gives the flavors time to mix. Plus, you’ll save time on the day of your event. To cut your cheesecake, use a warm knife. Dip it in hot water, then dry it off. This helps make clean slices. Start from the center and cut outwards. If it’s sticky, rinse and warm the knife again for smooth cuts. For a detailed recipe, check the Full Recipe section. You’ve learned how to make a delightful No-Bake Oreo Cheesecake. We covered the easy ingredients, step-by-step instructions, and helpful tips. Remember, you can customize this treat with flavors and variations. Always store it properly to keep it fresh. With these insights, you can make this cheesecake like a pro. Enjoy sharing this sweet dessert with friends and family!

No-Bake Oreo Cheesecake Easy and Delicious Dessert

Looking for a dessert that’s easy to make and oh-so-delicious? You’re in the right place! This No-Bake Oreo Cheesecake is

- 2 boneless, skinless chicken breasts - 8 ounces fettuccine pasta - 1 cup heavy cream - 1 cup grated Parmesan cheese - 3 cups chicken broth - 2 cloves garlic - 1 tablespoon olive oil - 1 teaspoon Italian seasoning - Salt and pepper to taste - Fresh parsley for garnish For a twist on the dish, try adding some extras. You can include spinach or mushrooms for more flavor. If you need dietary swaps, gluten-free pasta works well. You can also use non-dairy cream for a dairy-free version. This makes it easy for anyone to enjoy a creamy delight! You can find the Full Recipe to guide you through each step of this tasty meal. First, cut the chicken breasts into bite-sized pieces. This helps them cook evenly. Season the pieces with salt and pepper. This adds flavor right from the start. Next, mince the garlic. You need just two cloves for this dish. Measure out all the ingredients beforehand. This makes cooking smooth and easy. Heat a large pot over medium heat. Add one tablespoon of olive oil. Once hot, add the chicken pieces. Sauté until golden brown, about 5-7 minutes. Then remove the chicken from the pot and set it aside. In the same pot, add the minced garlic. Sauté for about 30 seconds until it smells great. Pour in 3 cups of chicken broth. Bring it to a simmer. Now, add the 8 ounces of fettuccine pasta and one teaspoon of Italian seasoning. Cook the pasta for about 8-10 minutes. Stir it occasionally until it is al dente. Once the pasta is cooked, lower the heat. Stir in one cup of heavy cream and one cup of grated Parmesan cheese. Mix until everything is creamy and well combined. Now, add the cooked chicken back into the pot. Stir it all together. Taste and adjust the seasoning with salt and pepper. Let it sit for a couple of minutes. This helps the sauce thicken up nicely. Serve your One-Pot Chicken Alfredo in deep bowls for a comforting meal. For extra flair, garnish with fresh parsley and a sprinkle of Parmesan. One-pot cooking is a real time-saver. It cuts down on mess and cleanup. You only need one pot for cooking everything. This makes cooking simple and fun. To save time, prep all your ingredients before you start cooking. Cut the chicken and measure the pasta first. This way, you can focus on cooking without stopping. To make your Alfredo sauce creamier, use more heavy cream. You can also stir in some cream cheese for extra richness. If you want to boost flavor, try adding grated nutmeg. It adds a lovely warmth. Adding veggies is a great way to make this dish healthier. Spinach and peas work well in this recipe. Just toss them in when you add the pasta. They will cook quickly and add great color. Serving matters, especially with a dish like this. Use deep bowls to hold the creamy pasta. It looks more inviting this way. Garnish with fresh parsley and extra Parmesan cheese. This not only adds flavor but also makes the dish pop. A sprinkle of black pepper can add a nice touch too. {{image_2}} You can add fun flavors to your One-Pot Chicken Alfredo. For a fresh twist, try adding spinach and mushrooms. Just toss them in with the chicken. They cook quickly and add great taste. You can also give it a spicy kick with red pepper flakes. Just sprinkle some in when you add the cream. This will warm things up! If you want a vegan version, swap the chicken for chickpeas or tofu. Use vegetable broth instead of chicken broth. For creamy texture, try coconut milk or cashew cream. For those on a low-carb or keto diet, use zucchini noodles or cauliflower rice. These options keep the dish light yet satisfying. You can switch up the pasta too. Gluten-free pasta works well if needed. It cooks just like regular pasta. For a creamy cheese alternative, use nutritional yeast or cashew cheese. These options will keep your dish rich and tasty without dairy. Check out the Full Recipe for more ideas! To keep your One-Pot Chicken Alfredo fresh, follow these steps: - Allow the dish to cool fully before storing. - Use airtight containers to prevent moisture loss. - Store in the fridge for up to three days. - Label the container with the date for easy tracking. To reheat and keep it creamy: - Use a stovetop for even heating. - Add a splash of chicken broth or cream to restore moisture. - Heat on low, stirring gently, until warm. - Avoid high heat to prevent overcooking. Yes, you can freeze One-Pot Chicken Alfredo! - Portion it into freezer-safe bags or containers. - Leave some space for expansion as it freezes. To thaw and reheat: - Place it in the fridge overnight before reheating. - Reheat on the stovetop, adding a bit of cream to maintain creaminess. - Stir often to ensure even warming. For the full recipe, check out the details above! How long does it take to make One-Pot Chicken Alfredo? It takes about 30 minutes to make One-Pot Chicken Alfredo. You spend 10 minutes prepping and 20 minutes cooking. This makes it great for a quick weeknight meal. Why is my Alfredo sauce not creamy? If your Alfredo sauce is not creamy, it may be due to not using enough cream or cheese. Make sure to stir in the heavy cream and Parmesan cheese until they melt. The right heat level is key too—keep it low to avoid separation. Can I make this recipe ahead of time? You can make One-Pot Chicken Alfredo ahead of time. Cook it, then store it in the fridge. Just remember that it may thicken when cold. You can reheat it gently on the stove, adding a splash of broth or cream for creaminess. What to serve with One-Pot Chicken Alfredo? You can serve One-Pot Chicken Alfredo with a side salad or garlic bread. A light, crisp salad adds freshness. Garlic bread is perfect for soaking up the creamy sauce. Pairing wine with the dish A nice white wine pairs well with this dish. Try a Chardonnay or Pinot Grigio. These wines enhance the creamy flavors without overpowering them. Can I use other types of pasta? Yes, you can use other types of pasta. Penne or rotini work well too. Just adjust the cooking time based on the pasta you choose. What can I add for additional protein? You can add shrimp, sausage, or even tofu for extra protein. Cook them separately and mix them in at the end. This adds flavor and makes the dish heartier. One-Pot Chicken Alfredo is simple and delicious. We covered the key ingredients, from chicken to creamy sauce. You learned cooking steps and helpful tips to make this dish shine. With various ways to customize, there’s something for everyone. Store leftovers well and always reheat carefully. This meal is also perfect for gatherings or cozy nights in. Enjoy making your unique version, and share it with friends and family. This dish is sure to please!

One-Pot Chicken Alfredo Creamy Pasta Delight

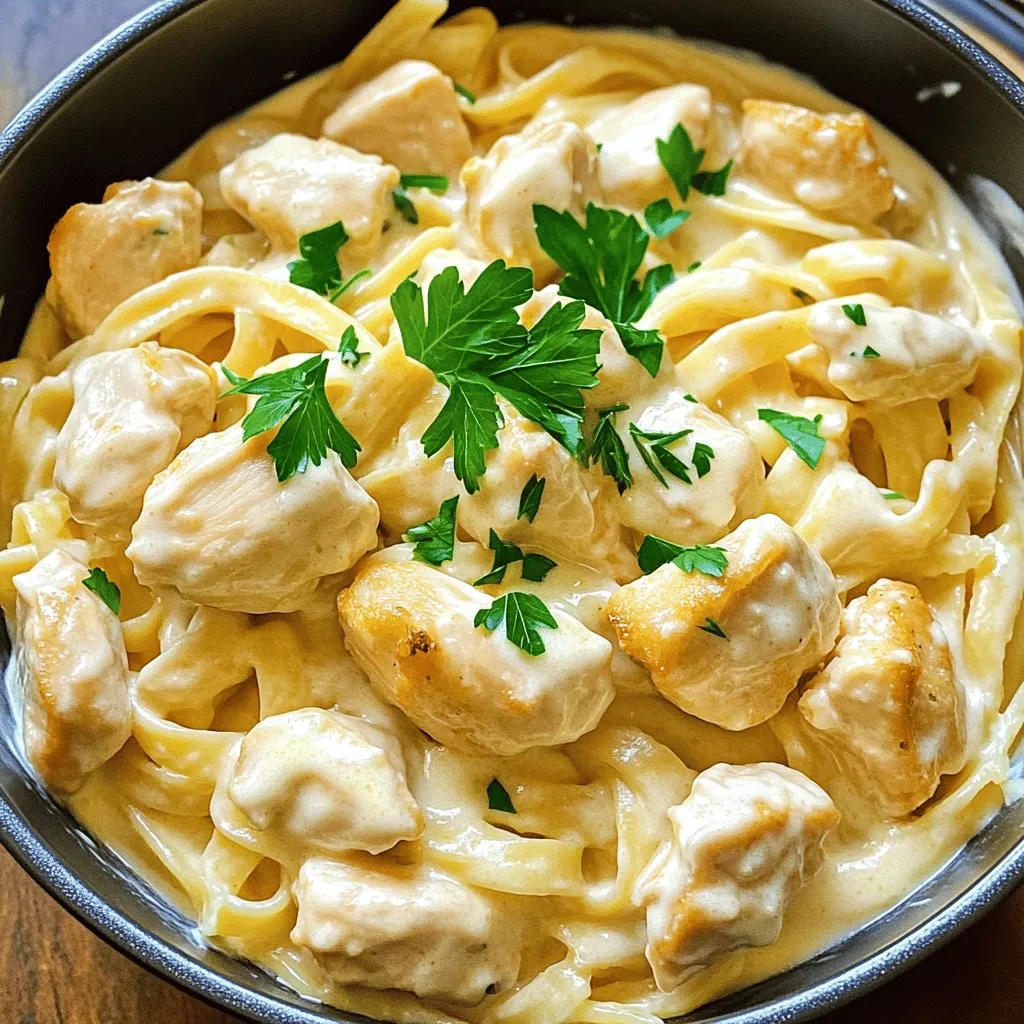
If you crave a creamy, comforting meal that’s quick and easy, you’re in the right place! This One-Pot Chicken Alfredo

- 1 pound baby carrots, washed and trimmed - 4 tablespoons unsalted butter, melted - 4 cloves garlic, minced - 1 teaspoon fresh thyme leaves (or ½ teaspoon dried thyme) - 1 tablespoon honey - Salt and pepper to taste - Fresh parsley, chopped (for garnish) These ingredients blend together to create a rich flavor. The sweet carrots pair well with the garlic and butter. Fresh thyme adds a nice touch. The honey gives a hint of sweetness that balances the dish. If you want to switch things up, try these options: - Alternative vegetables for roasting: You can use parsnips or Brussels sprouts. Each adds a unique taste. - Dairy-free butter options: Look for vegan butter or coconut oil. They work great in this recipe. - Honey substitutes: Maple syrup or agave nectar can replace honey. They will change the flavor slightly. This dish not only tastes good but is good for you too! - Nutritional value of carrots: Carrots are full of vitamin A. They help with vision and skin health. - Health benefits of garlic: Garlic can boost your immune system. It also has anti-inflammatory properties. - Advantages of using fresh herbs: Fresh thyme adds flavor without extra calories. Herbs also have antioxidants that can help your health. You can find the full recipe for Garlic Butter Roasted Carrots [here](#). First, preheat your oven to 400°F (200°C). This temperature helps the carrots roast well and get that nice caramelization. While the oven heats up, wash and trim your baby carrots. If you can’t find baby carrots, you can cut regular carrots into sticks. Aim for pieces that are similar in size. This way, they cook evenly. In a large bowl, mix 4 tablespoons of melted unsalted butter with 4 minced garlic cloves, 1 teaspoon of fresh thyme leaves, 1 tablespoon of honey, salt, and pepper. Stir it well until everything combines. For extra flavor, you can try adding a pinch of red pepper flakes or a splash of lemon juice. These small changes can make a big difference. Now, it’s time to roast. Add the carrots to your garlic butter mixture. Toss them until they are fully coated. Next, spread the carrots in a single layer on a baking sheet lined with parchment paper. Make sure not to crowd them; this ensures they roast evenly. Halfway through cooking, about 15 minutes in, give the carrots a good stir. This helps them cook and brown on all sides. You can find the full recipe for garlic butter roasted carrots to follow along easily. Enjoy your cooking! To get the best roast, choose baby carrots. They cook quickly and turn soft inside. When you coat them with the garlic butter mix, make sure every carrot gets a good layer. This helps with flavor and color. Roast them at 400°F for 25 to 30 minutes. Stir halfway to ensure even cooking. You want them tender and slightly caramelized. If you like more flavor, taste the carrots before serving. Add more salt or pepper if needed. For a beautiful look, serve your garlic butter roasted carrots on a big platter. Drizzle any leftover garlic butter from the baking sheet on top. It adds flavor and shine. You can also sprinkle some fresh parsley on them for color. Pair these carrots with roasted chicken or fish. They make a great side dish and add a pop of color to your meal. One common mistake is overcrowding the baking sheet. If you pile too many carrots together, they won’t roast well. They need space for the hot air to circulate. Another mistake is using the wrong size carrots. Try to use baby carrots for the best texture. If you use larger ones, cut them into smaller pieces. This way, they cook evenly and don’t take too long. Following these tips will help you make perfect garlic butter roasted carrots every time. You can find the Full Recipe for more details. {{image_2}} You can change the flavor of garlic butter roasted carrots in fun ways. Try adding spices like paprika or cumin. Paprika gives a mild heat and a lovely color. Cumin adds a warm, earthy tone that pairs well with the sweetness of carrots. You can also incorporate citrus zest for freshness. Lemon or orange zest brightens the dish and adds a nice zing. Just a little zest goes a long way, so use about a teaspoon for great flavor. Want a quicker way to make these carrots? Try the air fryer! Set your air fryer to 375°F (190°C) and cook for about 15-20 minutes. Toss the carrots halfway through for even cooking. They will be crispy and full of flavor. You can also grill the carrots for a smoky flavor. Toss them in the garlic butter mixture, then place them on a hot grill. Cook for about 10-15 minutes, turning often. The grill marks add a lovely touch, and the smoky flavor is amazing. These garlic butter roasted carrots pair well with many side dishes. Try them alongside creamy mashed potatoes or a light salad. They are also great with grains like quinoa or farro for a healthy option. For protein pairings, consider serving them with grilled chicken or baked salmon. Both proteins complement the sweetness of the carrots well. You can also try them with a hearty lentil dish for a vegetarian meal. For the complete recipe, check out the Full Recipe section. To keep your garlic butter roasted carrots fresh, follow these tips: - Refrigeration: Allow the carrots to cool completely. Then, store them in an airtight container. They will stay fresh in the fridge for about 4 to 5 days. - Freezing: If you want to save some for later, freeze the roasted carrots. First, let them cool. Then, place them in a freezer bag, removing as much air as possible. They can last for up to 3 months in the freezer. When it's time to enjoy your leftover roasted carrots, use these methods for the best taste: - Oven: Preheat your oven to 350°F (175°C). Spread the carrots on a baking sheet. Heat for about 10 to 15 minutes until warm. This method helps keep their texture. - Microwave: Place the carrots in a microwave-safe dish. Cover with a damp paper towel. Heat for about 1 to 2 minutes, checking every 30 seconds. This method is faster, but it may make them softer. Knowing how long your roasted carrots last helps avoid waste: - In the fridge: Roasted carrots last for about 4 to 5 days. Keep an eye on them to enjoy their best flavor. - Signs of spoilage: Check for sliminess or an off smell. If you notice any of these signs, it’s best to toss them. Enjoying fresh food is key! For more details, check out the Full Recipe for garlic butter roasted carrots. Garlic butter roasted carrots need about 25 to 30 minutes to cook. Preheat your oven to 400°F (200°C). This temperature helps the carrots caramelize nicely. Stir the carrots halfway through. This ensures they roast evenly. You want them tender but not mushy. Check them with a fork for the right texture. Yes, you can swap carrots for other veggies. Try using baby potatoes or zucchini. They roast well with garlic butter. You may need to adjust cooking times. For example, potatoes may need longer than carrots. Broccoli or bell peppers are great too. Just cut them into similar sizes for even cooking. Garlic butter roasted carrots pair well with many dishes. Serve them with grilled chicken or fish. They also go great with steak or pork. For a vegetarian meal, add quinoa or a grain salad. A glass of white wine, like Sauvignon Blanc, complements the flavors. This makes for a complete meal experience. For the full recipe, check the recipe section above. Garlic butter roasted carrots are easy to make and delicious. We covered ingredients, steps, and tips for success. You learned about variations, storage options, and common mistakes to avoid. This recipe adds flavor and nutrition to meals. Feel free to experiment with other vegetables or spices to customize your dish. Enjoy the vibrant taste of roasted carrots, and don't be afraid to share your cooking adventures. Cooking simple dishes like this builds confidence in the kitchen.

Garlic Butter Roasted Carrots Tasty and Simple Side

Looking for a simple yet delicious side dish? Garlic Butter Roasted Carrots are your answer! This recipe combines sweet baby

- 4 cups fresh broccoli florets - 2 cups cooked white rice - 1 cup sharp cheddar cheese, grated - 1 cup cream of mushroom soup (canned or homemade) - ½ cup milk - 1 small onion, finely chopped - 2 cloves garlic, minced - ½ teaspoon black pepper - ½ teaspoon salt - ½ teaspoon paprika - 1 cup panko bread crumbs - 2 tablespoons butter, melted These ingredients create a warm, cheesy hug in a dish. First, the fresh broccoli gives a nice crunch and bright color. The cooked rice makes it hearty and filling. Sharp cheddar cheese adds flavor and creaminess, while the cream of mushroom soup brings moisture. The milk helps smooth everything out, making it rich. Onions and garlic give a lovely aroma and depth. Simple spices like salt, pepper, and paprika enhance the dish without overpowering it. The panko bread crumbs add a crispy top, making each bite delightful. Finally, melted butter coats the crumbs for extra flavor. - Baking dish (9x13 inch) - Large mixing bowl - Pot for blanching broccoli - Measuring cups and spoons Using the right tools is key. A 9x13 inch baking dish holds all the goodness. A large mixing bowl gives you space to combine all the ingredients well. A pot for blanching the broccoli ensures it cooks quickly and evenly. Lastly, measuring cups and spoons help you get the amounts just right. For the full recipe, check out the detailed instructions that guide you through each step. - Preheat your oven to 350°F (175°C). - Blanch the broccoli florets in boiling water. Blanching helps keep the broccoli bright green and slightly tender. Place the florets in boiling water for about three minutes. Afterward, drain them and set them aside to cool. - Combine all ingredients in a mixing bowl. - Ensure everything is well mixed to ensure even distribution. In a large bowl, mix together the cooked rice, blanched broccoli, grated cheddar cheese, cream of mushroom soup, milk, chopped onion, minced garlic, black pepper, salt, and paprika. Stir until everything is well coated and evenly mixed. - Transfer mixture into a greased baking dish. - Top with panko and bake for 25-30 minutes. Pour the mixture into a greased 9x13 inch baking dish. Spread it out evenly. In a separate bowl, mix panko bread crumbs with melted butter. Sprinkle this on top of the casserole. Bake it in the oven for 25 to 30 minutes. Look for a golden brown top that bubbles slightly. To make the panko topping crunchy, mix it with melted butter. This helps it brown nicely. Spread the panko evenly over the top. It should cover the whole dish for great texture. When you bake it, the topping will get golden and crisp. When choosing broccoli, look for bright green florets. They should be firm, not soft or yellow. Fresh broccoli has a nice, strong smell. You want to avoid any limp or wilted stems. Always check for small dark spots, as they can signal age. If you want to switch the rice, try quinoa or cauliflower rice. Both options add unique flavors and textures. Quinoa has a nutty taste, while cauliflower rice is light and fluffy. They also lower carbs, which can be a bonus. For a dairy-free version, use plant-based cheese. You can also swap cream of mushroom soup for a homemade version made with nuts or coconut milk. This keeps the creaminess without dairy. You can add proteins for extra heartiness. Chicken or turkey work well. For a vegetarian option, add tofu or chickpeas. They soak up flavor and make the dish filling. Trying different cheeses can change the taste, too. Mozzarella gives a stretchy, gooey texture. Gouda adds a rich, smoky flavor. Feel free to mix and match your favorites! {{image_2}} To serve cheesy broccoli casserole, use a large spoon to scoop out portions. Place each serving on a plate. This dish is best served warm and straight from the baking dish. For a beautiful touch, sprinkle fresh parsley on top. The green color adds brightness and flavor. You can also use chives or thyme for added flair. Arrange the plates neatly for gatherings, making each serving look inviting. Cheesy broccoli casserole pairs well with a simple salad. A fresh green salad with a light vinaigrette works great. You can also serve it with crusty bread to soak up the rich flavors. For drinks, white wine like Sauvignon Blanc is a nice choice. If you prefer non-alcoholic options, lemonade or sparkling water complements the dish well. These sides and drinks bring out the best in your casserole. For the complete recipe, check out the [Full Recipe]. To store leftovers in the fridge, place the casserole in an airtight container. Make sure the container is sealed well to keep out air. Leftovers stay fresh for about 3 to 5 days. To enjoy the best taste, eat them within this time frame. To freeze the casserole, let it cool completely first. Then, wrap it tightly in plastic wrap and aluminum foil. This helps prevent freezer burn. You can keep it in the freezer for up to 3 months. When you're ready to eat, thaw the casserole in the fridge overnight. For reheating, place it in the oven at 350°F (175°C) until hot throughout. This method keeps the texture nice and creamy. Enjoy your cheesy broccoli casserole later with that same great taste! For the full recipe, check out the details above. Making cheesy broccoli casserole takes about 45 minutes in total. You will spend 15 minutes prepping and about 30 minutes cooking. Yes, you can make this casserole ahead of time. Prepare it up to the baking step. Cover it tightly and store it in the fridge for up to two days. When you are ready to bake, just pop it in the oven. It may need a few extra minutes to cook through. This casserole pairs well with many side dishes. Here are a few ideas: - A crisp green salad - Roasted chicken or turkey - Garlic bread - Steamed carrots or green beans For drinks, try a light white wine or a refreshing iced tea. You can now create a delicious cheesy broccoli casserole with ease. We covered the key ingredients, tools, and steps for preparation and baking. Don’t forget the tips for perfecting texture and making your dish unique with various proteins or cheeses. This meal is not just tasty; it’s also versatile. You can enjoy it fresh or save it for later. Get started on this comforting dish and impress your family and friends!

Cheesy Broccoli Casserole Comforting Family Favorite

Are you ready to bring some cheesy goodness to your dinner table? This Cheesy Broccoli Casserole is your family’s new

To make this tasty lemon blueberry bread, you will need: - 1 cup fresh blueberries (or frozen, thawed and drained) - 1 ½ cups all-purpose flour - 1 teaspoon baking powder - ½ teaspoon baking soda - ½ teaspoon salt - ½ cup unsalted butter, softened - 1 cup granulated sugar - 2 large eggs - 1 teaspoon vanilla extract - Zest of 1 lemon - 2 tablespoons fresh lemon juice - ½ cup buttermilk (or substitute with milk and vinegar) - Extra blueberries and lemon zest for topping You can easily swap some ingredients for a different flavor or dietary needs. Here are some ideas: - Gluten-Free Flour: Use a gluten-free blend instead of all-purpose flour. - Dairy-Free: Substitute buttermilk with almond milk mixed with vinegar. - Egg-Free: Replace eggs with flaxseed meal mixed with water (1 tablespoon flaxseed + 2.5 tablespoons water = 1 egg). - Sugar Alternatives: Use coconut sugar or stevia for a healthier option. If you’re outside the U.S., here are some handy conversions: - 1 cup = 240 ml - 1 ½ cups = 360 ml - 1 teaspoon = 5 ml - ½ cup = 115 g (butter) - 1 cup sugar = 200 g These conversions help ensure you get the best results. To start, you need to preheat your oven to 350°F (175°C). Grease a 9x5-inch loaf pan. Line it with parchment paper, leaving some overhang. This helps with easy removal later. Next, in a medium bowl, whisk together 1 ½ cups of all-purpose flour, 1 teaspoon of baking powder, ½ teaspoon of baking soda, and ½ teaspoon of salt. Set this bowl aside. In a large bowl, cream ½ cup of softened unsalted butter with 1 cup of granulated sugar. Use an electric mixer for about 3-4 minutes until the mix is light and fluffy. Now, add 2 large eggs one at a time. Mix well after each egg. Then, stir in 1 teaspoon of vanilla extract, the zest of 1 lemon, and 2 tablespoons of fresh lemon juice. Gradually add the dry mixture to the wet mixture. Do this in three parts, alternating with ½ cup of buttermilk. Start and end with the dry mix. Remember, do not overmix! Gently fold in 1 cup of fresh blueberries. Be careful not to mash them. Pour the batter into the loaf pan and smooth the top. For a pretty look, sprinkle extra blueberries and lemon zest on top. Bake it in the oven for 55-65 minutes. To check if it’s done, insert a toothpick into the center. If it comes out clean, it’s ready. Once baked, cool the bread in the pan for about 10 minutes. Lift it out using the parchment paper. Let it cool completely on a wire rack. Slice and enjoy! 1. Use fresh ingredients: Fresh blueberries and real lemon juice give the best flavor. 2. Don’t overmix: Overmixing can make the bread tough. Mix just until combined. 3. Room temperature ingredients: Ensure your butter and eggs are at room temperature for easier mixing. - Preheat oven: Always preheat your oven to 350°F (175°C) before baking. - Baking time: Bake for 55-65 minutes. Check with a toothpick for doneness. - Cooling time: Let the bread cool in the pan for 10 minutes, then cool on a wire rack. For more details, check the Full Recipe. When you bake Lemon Blueberry Bread, a few mistakes can spoil your fun. First, do not overmix the batter. This makes the bread tough. Mix just until the dry and wet ingredients blend. Second, check your oven temperature. An oven that is too hot can burn the bread. Use an oven thermometer for accuracy. Third, be careful with the blueberries. If you mash them, the bread can turn blue and mushy. Fold them in gently. Lastly, always let the bread cool before slicing. Cutting too soon can make it fall apart. To boost flavor, use fresh, ripe blueberries. They add sweetness and juiciness. You can also add more lemon zest for a stronger lemon flavor. A pinch of cinnamon or nutmeg can give warm notes, too. For better texture, use buttermilk. It makes the bread moist and fluffy. If you want a crunchy top, sprinkle sugar on the batter before baking. This will create a nice crust. Don't forget to try adding nuts or seeds for a unique twist! Having the right tools helps a lot in baking. Here are some must-haves: - Loaf pan: A good non-stick 9x5-inch loaf pan is key. - Mixing bowls: Use both large and medium bowls for mixing ingredients. - Electric mixer: This makes creaming butter and sugar easy. - Whisk: A whisk helps blend dry ingredients well. - Rubber spatula: Perfect for folding in blueberries and scraping the bowl clean. - Oven thermometer: Ensures your oven is at the right temperature. With these tools, you will bake like a pro! For a complete guide to making this delicious bread, check the Full Recipe. {{image_2}} If you want a gluten-free option, it's easy to make. Use a gluten-free flour blend instead of all-purpose flour. Look for blends that contain xanthan gum. This helps give the bread structure. Follow the same recipe steps, and you'll get a tasty loaf that everyone can enjoy. Always check the labels to ensure no hidden gluten. For a vegan twist, swap the eggs with flax eggs. Mix one tablespoon of ground flaxseed with three tablespoons of water. Let it sit for five minutes until it thickens. Replace the buttermilk with almond milk and a splash of vinegar. Use coconut oil instead of butter. These small changes make the bread plant-based without losing flavor. You can play with flavors to make your bread unique. Try adding chopped nuts for crunch. Walnuts or pecans work great. You could also mix in spices like cinnamon or ginger for warmth. If you're feeling adventurous, add a swirl of cream cheese or a layer of lemon curd in the middle. Each variation brings a new taste to your kitchen! For the full recipe, check out the [Full Recipe]. To keep your lemon blueberry bread fresh, wrap it tightly in plastic wrap. This helps seal in moisture and flavor. You can also place it in an airtight container. Store it at room temperature for up to three days. For longer storage, consider refrigeration, but this might change the texture. You can freeze lemon blueberry bread for later enjoyment. First, let it cool completely. Wrap it well in plastic wrap, then in aluminum foil. This keeps out air and prevents freezer burn. When you're ready to eat it, thaw it in the fridge overnight. To warm it up, slice the bread and toast it briefly. You can also reheat slices in the microwave for about 10-15 seconds. Lemon blueberry bread stays fresh for about three days at room temperature. If you keep it in the fridge, it can last about a week. Watch for mold, which shows spoilage. If the bread smells sour or looks dry, it’s time to toss it. Always check your bread before enjoying a slice! To make your lemon blueberry bread moist and fluffy, use fresh ingredients. Start with room temperature eggs and butter. This helps mix them well. Add buttermilk to the batter for extra moisture. Do not overmix the batter; mix until just combined. This keeps your bread light. You can also fold in the blueberries gently. This prevents them from breaking apart. Finally, bake until golden brown. A toothpick should come out clean when it is ready. Yes, you can use frozen blueberries in this recipe. Just make sure to thaw and drain them first. This keeps the batter from getting too wet. Frozen blueberries also work well. They can add a nice chill to your bread. However, be gentle when folding them in. You want to keep them intact for best results. If you like, you can toss them in a bit of flour before adding them to the batter. This helps them stay suspended in the bread. Lemon blueberry bread is best served fresh and warm. You can slice it and enjoy it plain or with a pat of butter. For a fun twist, try adding a drizzle of lemon glaze on top. This adds a sweet and tangy flavor. You can also serve it with a side of fresh berries or yogurt. It makes a great breakfast or snack. Pair it with tea or coffee for a delightful treat. Enjoy sharing it with friends at brunch or family gatherings. For the full recipe, check out the detailed instructions above! Lemon blueberry bread is a delightful treat that anyone can make. We talked about key ingredients, helpful substitutions, and precise measurements. I shared step-by-step instructions and baking tips to ensure your bread comes out perfect. We also covered common mistakes, variations, and storage methods. With these insights, you can enjoy this tasty bread at home. Bake, experiment, and share your creations!

Lemon Blueberry Bread Fresh and Flavorful Delight

Are you ready to bake a treat that bursts with flavor? Lemon Blueberry Bread is fresh, tangy, and oh-so-delicious! In

- 1 ½ cups graham cracker crumbs - ⅓ cup granulated sugar - ½ cup unsalted butter, melted - 2 (8 oz) packages cream cheese, softened - ¾ cup granulated sugar - 2 large eggs - 1 teaspoon vanilla extract - 1 cup sour cream - 1 teaspoon cinnamon - 2 cups fresh peaches, peeled and sliced - ¼ cup brown sugar - 1 tablespoon lemon juice - 2 tablespoons cornstarch In this Peach Cobbler Cheesecake, I focus on fresh peaches and a creamy base. The graham cracker crust gives a nice crunch. I melt the butter to help bind the crust together. The cream cheese makes the filling rich and smooth. I use two types of sugar for balance. The granulated sugar sweetens the cheesecake, while brown sugar adds depth to the peach topping. Fresh peaches shine in this recipe. They bring a juicy, sweet flavor that complements the rich cheesecake. Lemon juice brightens the flavor of the peaches and helps them stay fresh. Cornstarch thickens the peach mixture and prevents it from becoming too runny. This list of ingredients is simple yet effective. Each component works together to create a delightful treat. You can find the Full Recipe to guide you through this peachy journey! - Preheat the oven to 350°F (175°C). - In a medium bowl, mix graham cracker crumbs, ⅓ cup sugar, and melted butter. - Press this mixture into the bottom of a springform pan. Bake for 10 minutes. - In a large bowl, beat 2 packages of cream cheese and ¾ cup sugar until smooth. - Add eggs one at a time, mixing well after each. - Stir in the vanilla extract and sour cream until fully mixed. - Pour the cream cheese mixture over your cooled crust in the springform pan. - In another bowl, toss sliced peaches with brown sugar, lemon juice, and cornstarch. - Layer the peach mixture on top of the cheesecake. - Sprinkle cinnamon over the peaches. - Bake in the preheated oven for 45-50 minutes, until the center is set. For the full recipe, check the earlier section. To get the best texture, start with softened cream cheese. This helps it mix smoothly. Don’t overbeat the eggs. If you overbeat, you might get cracks in your cheesecake. To cool it down slowly, let the cheesecake sit in the oven after baking. This step helps avoid sudden temperature changes that can ruin the top. Garnish your cheesecake with extra peach slices and a swirl of whipped cream. This adds a lovely touch and makes it look special. You can also serve a slice with vanilla ice cream. The warm and cold contrast is always a hit. For more inspiration, check out the Full Recipe for different presentation ideas. {{image_2}} You can switch up the fruit in your cheesecake. Use berries or apples for a fun twist. Strawberries, blueberries, or even cherries bring bright colors and flavors. They mix well with the creamy filling. If you want to get fancy, add a layer of caramel or chocolate. This will make your cheesecake even richer and more indulgent. The crust is just as important as the filling. Instead of a graham cracker crust, try a cookie crust. Oreos or pecan cookies can add a tasty change. If you need a gluten-free option, use gluten-free graham crackers. This makes it easy for everyone to enjoy your peach cobbler cheesecake. The variations keep it fun and exciting! For the full recipe, check out the detailed instructions above. To keep your peach cobbler cheesecake fresh, store it in the fridge. I recommend covering it well with plastic wrap or foil. This keeps the flavors intact and prevents drying out. You can enjoy the cheesecake for up to 5 days. Just make sure your container is airtight. If you want to save some for later, freezing is a great option. Wrap slices tightly in plastic wrap, then in foil. This helps avoid freezer burn. The cheesecake will last for up to 3 months in the freezer. When you're ready to eat it, just thaw in the fridge overnight. This keeps the texture smooth and creamy. For the full recipe, check back to the main section! Yes, you can make it a day in advance for the best flavor. Letting it sit overnight lets the tastes blend. This makes each bite even better when you finally serve it. You can use mascarpone instead of cream cheese. It gives a richer and creamier taste. This change can surprise your guests and add a new twist. The cheesecake is done when the center is set but still slightly jiggly. This means it will firm up as it cools. Too firm means it’s overcooked. Serve it chilled for the best taste. You can garnish with fresh fruit or whipped cream. This adds color and makes the cheesecake look even more appealing. For the full recipe, check the earlier section. This blog post guides you through making a delicious Peach Cobbler Cheesecake. You learned the key ingredients, how to prepare the crust and filling, and how to bake it perfectly. I shared tips for a smooth texture and tasty serving ideas. Remember, you can change up the fruits or crust for your own twist. Store or freeze leftovers easily to enjoy later. With these steps, you can create a dessert that's sure to impress! Enjoy your baking adventure!

Peach Cobbler Cheesecake Irresistible and Simple Delight

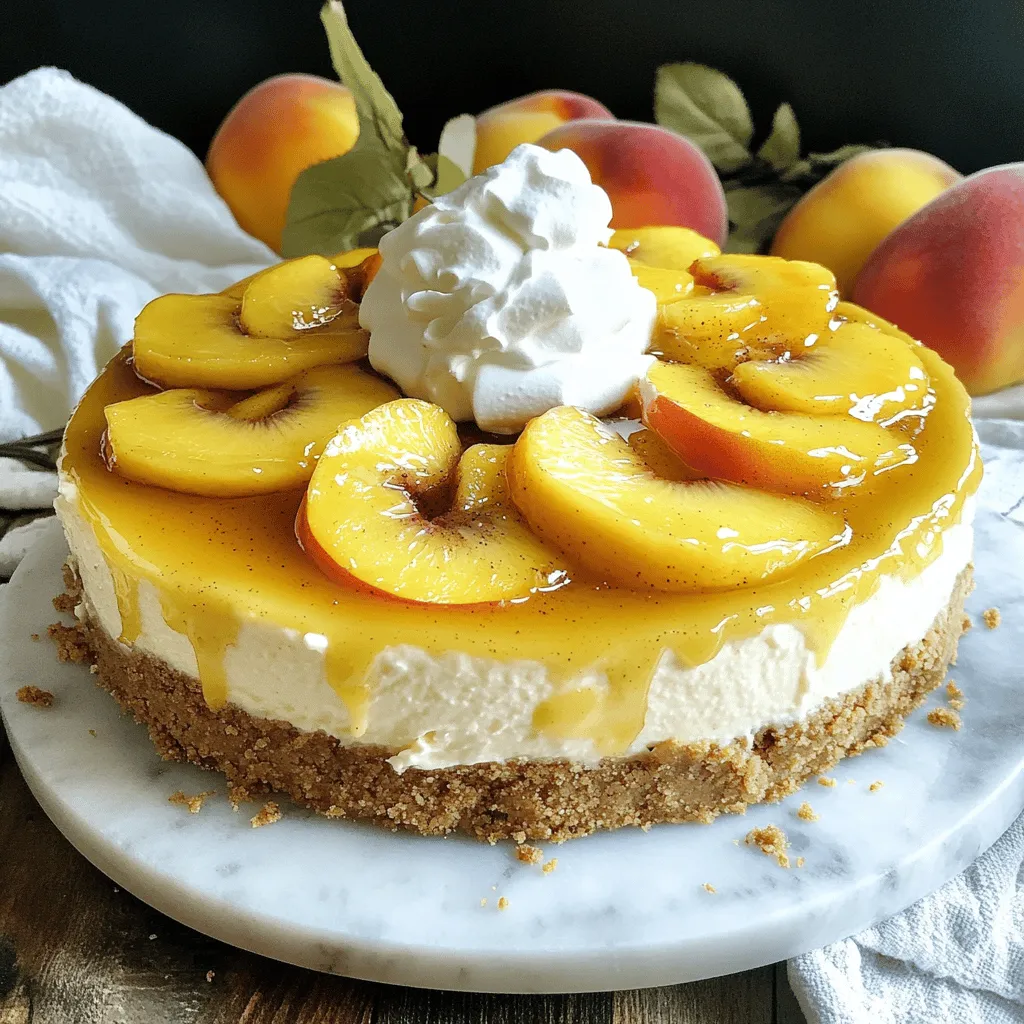
If you love peach cobbler and cheesecake, you’re in for a treat! This Peach Cobbler Cheesecake is a simple delight

To create these healthy zucchini brownies, you need simple and nutritious ingredients. Each one plays a key role in making the brownies moist and tasty. Here is what you will need: - 1 cup grated zucchini (about 1 medium zucchini, squeezed to remove excess moisture) - 1 cup almond flour - ½ cup unsweetened cocoa powder - ½ cup maple syrup or honey - ¼ cup unsweetened applesauce - 2 large eggs - 1 teaspoon vanilla extract - ½ teaspoon baking soda - ½ teaspoon baking powder - ¼ teaspoon salt - ½ cup dark chocolate chips (optional) - ½ cup chopped walnuts (optional) Zucchini adds moisture and nutrients. Almond flour keeps the brownies gluten-free and adds healthy fats. Cocoa powder gives rich chocolate flavor, while maple syrup or honey adds sweetness. Applesauce acts as a natural binder and keeps the brownies soft. Eggs help with structure. Baking soda and baking powder help the brownies rise. Salt balances flavors. Dark chocolate chips and walnuts add extra texture and taste. You can find the full recipe above for all the steps needed to bring these delicious brownies to life. Start by preheating your oven to 350°F (175°C). This step is key. A hot oven helps your brownies bake evenly. Next, grab an 8x8-inch baking pan. You can grease it with oil or line it with parchment paper. Lining makes it easy to lift out the brownies later. Now, let’s get that zucchini ready. Use a box grater to grate one medium zucchini. After grating, you need to remove extra moisture. Take the grated zucchini and place it in a clean kitchen towel. Squeeze the towel tightly to get rid of the water. This helps your brownies stay firm and not soggy. In a large bowl, mix your wet ingredients first. Add the grated zucchini, two large eggs, maple syrup, unsweetened applesauce, and vanilla extract. Whisk them together until everything is well combined. In another bowl, mix your dry ingredients. Combine almond flour, cocoa powder, baking soda, baking powder, and salt. Whisk these until well blended too. Now, pour the dry mix into the wet mix. Stir gently until just combined. Avoid overmixing, as it can make the brownies tough. If you want, fold in dark chocolate chips or walnuts for extra flavor. These steps bring you closer to rich, healthy zucchini brownies. Want the full recipe? Check the section above and enjoy! To make healthy zucchini brownies, you must remove excess moisture from the zucchini. If you skip this step, your brownies will turn out soggy. After grating the zucchini, place it in a clean kitchen towel. Squeeze it tightly to get rid of as much water as you can. This method ensures your brownies stay moist but not wet. Testing brownies for doneness is easy. Insert a toothpick into the center of the brownies. If it comes out clean or with a few moist crumbs, they are ready. If the toothpick has wet batter on it, bake for a few more minutes. Keep an eye on them, as overbaking can lead to dry brownies. For a fun twist, top your brownies with a dollop of Greek yogurt or a scoop of ice cream. This adds creaminess and balances the rich chocolate flavor. You can also sprinkle some chopped nuts or fresh berries on top. These toppings enhance the taste and make your brownies look fancy. Enjoy your delicious treat! For the complete recipe, check out the Full Recipe section. {{image_2}} To make these healthy zucchini brownies vegan, swap out the eggs. You can use flax eggs instead. Mix 1 tablespoon of ground flaxseed with 2.5 tablespoons of water. Let it sit for five minutes until it thickens. This works well as a binder in your batter. You can also replace the honey with agave syrup or maple syrup for a sweeter touch. If you need a gluten-free version, use almond flour as the base. It is naturally gluten-free and keeps the brownies moist. You can also try coconut flour, but use less, as it absorbs more moisture. For the baking powder, ensure it’s labeled gluten-free to avoid cross-contamination. You can easily add fun flavors to your brownies. Try mixing in cinnamon or nutmeg for a warm spice. You can also fold in chopped nuts for crunch or dried fruit for sweetness. If you love chocolate, add extra dark chocolate chips. Each change can give you a new taste to enjoy. For the full recipe, check out the details above. To keep your healthy zucchini brownies fresh, store them in an airtight container. Place parchment paper between layers if stacking. Keep them at room temperature for up to three days. If you live in a humid area, store them in the fridge to avoid spoilage. Always let them cool completely before sealing to prevent moisture buildup. Freezing zucchini brownies is easy. Here’s how to do it: 1. Cool Completely: Ensure the brownies are fully cooled after baking. 2. Cut Into Squares: Slice the brownies into individual squares for easy serving. 3. Wrap: Wrap each square tightly in plastic wrap. 4. Place in a Bag: Put the wrapped brownies into a freezer-safe bag or container. 5. Label and Freeze: Write the date on the bag and freeze for up to three months. To thaw, simply transfer the brownies to the fridge overnight or leave them at room temperature for a few hours. When stored properly, your healthy zucchini brownies can last up to three days at room temperature. In the fridge, they stay fresh for about a week. If you freeze them, they will maintain quality for three months. Remember, always check for any signs of spoilage before enjoying. Yes, you can use other veggies in brownies. Carrots or sweet potatoes work well. They add moisture and natural sweetness. Just make sure to grate them finely. This keeps your brownies tender. You can also try using pumpkin puree for a different flavor. Each vegetable gives a unique taste and texture. Check your brownies after 25 minutes. Insert a toothpick into the center. If it comes out clean or with a few crumbs, they are done. If it has wet batter, bake longer. The edges should look set, while the center may still be soft. Remember, they will firm up as they cool. Zucchini is low in calories and high in vitamins. It adds fiber, helping with digestion. It also keeps the brownies moist without extra fat. Almond flour adds protein and healthy fats. Using maple syrup is a natural sweetener, lowering refined sugar. All these ingredients make a nutritious treat. For the full recipe, check the section above. These brownies use simple, good ingredients like zucchini and almond flour. I shared steps to make them easy and fun. You also learned tips about baking and storage. Remember, you can customize flavors or make them vegan. These options add variety and excitement to your treats. Enjoy baking, and feel free to experiment! Your delicious brownies can be a healthy snack anytime. Try this recipe today, and see how great they turn out!

Healthy Zucchini Brownies Moist and Nutritious Treat

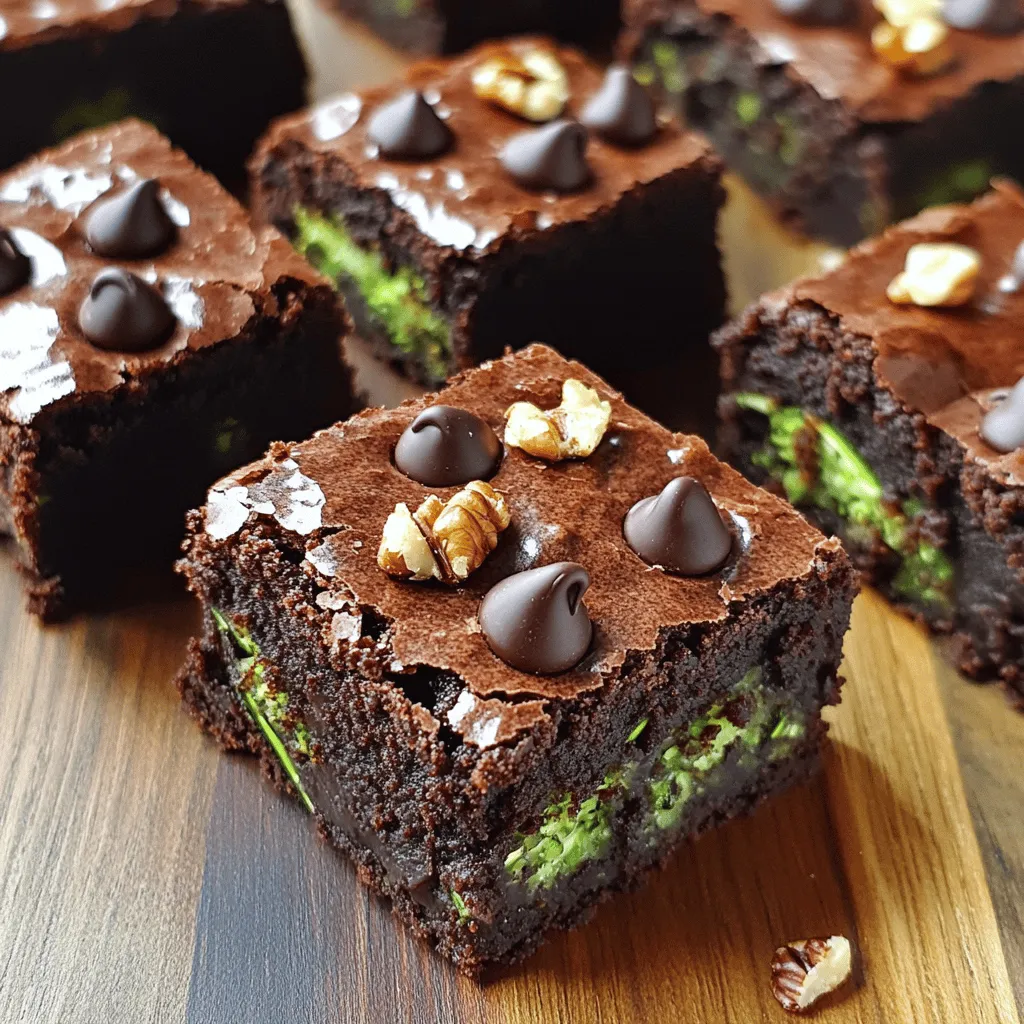
Are you ready to enjoy a treat that’s both delicious and healthy? These Healthy Zucchini Brownies are moist, rich, and

To make this creamy cinnamon pie, you need these simple ingredients: - 1 pre-made pie crust (9-inch) - 1 cup heavy cream - 1 cup sweetened condensed milk - 2 large eggs - 1 teaspoon vanilla extract - 2 teaspoons ground cinnamon - 1/4 teaspoon nutmeg - 1/4 cup granulated sugar - 1 tablespoon cornstarch - Whipped cream, for topping - Ground cinnamon, for garnish These items come together to create a rich and tasty pie. The pie crust holds the creamy filling and adds a nice crunch. Heavy cream and sweetened condensed milk bring a smooth texture. Eggs help set the filling, while vanilla and spices add warmth. Granulated sugar sweetens the mix, and cornstarch thickens it all. Topping with whipped cream and cinnamon gives the pie a lovely finish. Grab your ingredients, and let’s get cooking! {{ingredient_image_1}} First, preheat your oven to 350°F (175°C). This sets the stage for perfect baking. Next, take your pre-made pie crust and place it in a pie dish. Use a fork to prick the bottom. This helps prevent bubbling. Pre-bake the crust for 10 minutes. After that, remove it from the oven and let it cool slightly. In a large bowl, combine 1 cup of heavy cream and 1 cup of sweetened condensed milk. Whisk them together until smooth. Next, add 2 large eggs, 1 teaspoon of vanilla extract, 2 teaspoons of ground cinnamon, 1/4 teaspoon of nutmeg, 1/4 cup of granulated sugar, and 1 tablespoon of cornstarch. Whisk all these ingredients well until the mixture is smooth and creamy. Now, pour the creamy filling into your pre-baked pie crust. Spread it evenly to ensure a good bake. Place the pie in your preheated oven. Bake for 25 to 30 minutes. You’ll know it's done when the filling is set and lightly golden on top. It should jiggle just a bit in the center when you gently shake it. Once baked, take the pie out and let it cool completely at room temperature. Then, refrigerate it for at least 2 hours to chill and firm up. Whisking is key to a smooth pie. When you mix the heavy cream and sweetened condensed milk, whisk until it’s silky. This helps blend the flavors well. If you skip this step, your pie may be lumpy. Avoid overbaking your pie. Keep an eye on it after 25 minutes. The filling should jiggle just a bit in the center. If it looks too firm, you’ve baked it too long. For toppings, whipped cream is a must. It adds lightness and flavor. You can also sprinkle extra ground cinnamon for a nice touch. Pair this pie with a scoop of vanilla ice cream. The cold ice cream mixes well with the warm pie. You can also serve it with fresh fruit for a burst of flavor. Do not overmix the filling. Mixing too much can make the pie dense. Whisk just until everything is combined and smooth. Never skip the cooling period. Letting the pie cool completely helps it set. Once it’s cool, refrigerate for a few hours. This makes slicing easier and improves the flavor. Pro Tips Tip for a Flakier Crust: To achieve a flakier pie crust, consider chilling the pie crust in the refrigerator for about 30 minutes before pre-baking. This helps to keep the fat solid, resulting in a more tender texture. Measurement Accuracy: Ensure all ingredients are measured accurately. Using a kitchen scale for the heavy cream and sweetened condensed milk can yield better results, especially for consistency in baking. Cooling Time: Allow the pie to cool completely at room temperature before refrigerating. This step is crucial as it helps the filling set properly and enhances the overall texture. Garnishing Tip: For an extra touch, consider adding a sprinkle of crushed pecans or walnuts on top of the whipped cream before serving. This adds a delightful crunch and additional flavor. {{image_2}} You can easily change the flavor of your creamy cinnamon pie. Try adding chocolate or caramel to the filling. These sweet treats bring a rich taste that pairs well with cinnamon. Just mix in about half a cup of melted chocolate or caramel sauce while whisking the filling. You can also use different spices. Instead of just cinnamon, add a pinch of cardamom or allspice for a unique twist. These spices will give your pie an exciting flavor that surprises everyone. If you need a gluten-free option, choose a gluten-free pie crust. Many stores sell these ready-made. You can also make your own using almond flour or gluten-free oats. For a dairy-free pie, swap the heavy cream and sweetened condensed milk with coconut cream and almond milk. This change keeps the pie creamy without using dairy. You will still enjoy the same delicious taste, just with different ingredients. Presentation is key when serving your pie. You can add a fun twist by topping it with whipped cream. Use a piping bag for a fancy look. Sprinkle some ground cinnamon on top for an extra touch. Another idea is to serve the pie with fresh fruits. Slices of apples or berries make great additions. You can also drizzle some chocolate or caramel sauce on the plate. This not only looks nice but also adds more flavor to each slice. You can keep your creamy cinnamon pie in the fridge for up to four days. Store it in an airtight container to keep it fresh. If you don’t have a container, cover it tightly with plastic wrap. This helps prevent the pie from drying out. Always place it on a flat surface in the fridge to avoid any spills. Yes, you can freeze this pie! To freeze it, wrap the pie tightly in plastic wrap and then in aluminum foil. This double layer keeps out air and moisture. You can freeze it for up to three months. When you want to eat it, move the pie to the fridge to thaw overnight. This way, it will be ready to enjoy the next day without losing taste or texture. Serve Creamy Cinnamon Pie with a dollop of whipped cream on top. You can also add fresh fruit like berries or sliced bananas for a tasty twist. A warm cup of coffee or tea pairs well with this pie. The best serving temperature is chilled. Let it cool in the fridge for at least two hours before serving. This enhances the flavors and makes it refreshing. Yes, you can use a homemade pie crust! A homemade crust gives a fresh taste. It can be flakier and more flavorful. However, it takes time to make from scratch. A pre-made crust is quick and easy. It saves time and effort, perfect for busy days. Choose what works best for you based on your needs. You can tell the filling is set when it looks slightly golden on top. Gently shake the pie; the center should have a slight jiggle. The edges will look firm and not runny. Baking takes about 25 to 30 minutes. Keep an eye on it, as every oven is different. This blog covered how to make a delicious Creamy Cinnamon Pie. You learned about the key ingredients and how to prepare them. I shared useful tips to achieve the perfect texture and avoid common mistakes. We also explored fun variations and storage methods. Now, you can impress your family and friends with this easy yet tasty pie. Enjoy your baking adventure! Remember, practice makes perfect. Happy pie-making!

Creamy Cinnamon Pie Delightful and Easy Recipe

If you love rich, creamy desserts with a hint of warmth, then you’re in for a treat! This Creamy Cinnamon

Older posts
Newer posts
← Previous Page1 … Page71 Page72 Page73 … Page84 Next →

dsad

© 2026 Foodish Talk • Built with GeneratePress

Our Policies

  • Copyright Policy
  • Cookie Policy
  • GDPR Policy
  • Privacy Policy
  • Disclaimer
  • Terms Of Use

More Information

  • Home
  • About
  • Contact
  • Appetizers
  • Dessert
  • Dinner
  • Drinks
©2026, Foodish Talk About Back To Top