Skip to content
DisclaimerTerms Of UseGDPR PolicyCookie Policy

Foodish Talk

  • Home
  • Drinks
  • Appetizers
  • Dinner
  • Dessert
  • About
  • Contact
  • Privacy Policy
DisclaimerTerms Of UseGDPR PolicyCookie Policy

NO-ING-IMG

To make loaded buffalo chicken fries, gather these tasty ingredients: - 1 pound frozen French fries - 1 cup cooked chicken, shredded - 1/2 cup buffalo sauce (adjust to taste) - 1 cup shredded cheddar cheese - 1/2 cup blue cheese dressing (or ranch, if preferred) - 1/4 cup green onions, sliced - 1/4 cup celery, diced (for garnish) - Salt and pepper to taste - Optional: sliced jalapeños for a spicy kick These ingredients bring together a mix of flavors and textures. The crispy fries, spicy chicken, and creamy cheese make each bite exciting. You can swap some ingredients based on your taste or what you have at home. Here are some ideas: - Use sweet potato fries instead of regular fries for a sweeter flavor. - Try grilled chicken instead of shredded for a smoky twist. - If you don’t like blue cheese, ranch is a great alternative. - For a lighter dish, use Greek yogurt instead of blue cheese dressing. - Add different toppings like diced tomatoes or avocado for an extra punch. These substitutions allow you to get creative while still enjoying loaded buffalo chicken fries. Choosing fresh ingredients makes your dish even better. Here are some tips: - When buying frozen fries, pick a brand without artificial flavors or preservatives. - Look for cooked chicken that is moist and tender. If you cook it yourself, avoid overcooking. - Check the buffalo sauce for a balance of heat and flavor. Taste a little before you use it. - For cheese, select a block and shred it yourself. Freshly shredded cheese melts better. - Choose green onions that are bright and firm, with no wilting. Using fresh ingredients enhances the taste of loaded buffalo chicken fries, making them truly irresistible. To start, preheat your oven. Set it to the temperature listed on your frozen French fries package. You want them crispy and golden. Spread the fries evenly on a baking sheet. Make sure they are not touching each other. This helps them cook evenly. Bake them until they are nice and crispy. This usually takes about 20 minutes. Keep an eye on them so they don’t burn. While the fries bake, it's time to prepare the buffalo chicken. Take your cooked chicken and shred it into small pieces. Place the chicken in a large bowl. Pour the buffalo sauce over the chicken. Mix well until every piece is coated. You can adjust the amount of sauce to your taste. If you love heat, add more sauce! Once the fries are ready, take them out of the oven. Carefully spread the buffalo chicken mixture evenly over the fries. Then, sprinkle a generous amount of shredded cheddar cheese on top. Return the baking sheet to the oven. Bake for an additional 5 to 7 minutes. You want the cheese to melt and bubble. When it's ready, take it out and drizzle blue cheese dressing on top. Finally, add sliced green onions and diced celery for crunch. If you like it spicy, throw on some sliced jalapeños. Serve them hot, and enjoy every bite! For the full recipe, check out the details above. To get fries that are crispy, follow these tips: - Use frozen fries for quick prep. - Preheat your oven to the right temperature. - Spread fries in a single layer on the baking sheet. - Flip fries halfway through cooking for even crispness. These steps help ensure your fries turn out golden brown and crispy. You can boost the taste of your Loaded Buffalo Chicken Fries with these suggestions: - Mix spices into the buffalo sauce. Try garlic powder or smoked paprika. - Add a pinch of salt and pepper to the fries before baking. - Consider using a blend of cheeses for more flavor. Mozzarella and pepper jack work well. These simple tweaks can make a big difference in your dish. When serving your Loaded Buffalo Chicken Fries, think about these ideas: - Offer extra blue cheese dressing on the side. - Add a fresh salad to balance the meal. - Serve with celery sticks for crunch. These options create a fun and tasty eating experience. For the full recipe, check out the details above. {{image_2}} You can make loaded fries in a veggie-friendly way. Use plant-based chicken or tofu instead of shredded chicken. Toss it in buffalo sauce for flavor. For cheese, try vegan cheese or nutritional yeast. These options keep the taste rich and creamy while being kind to the planet. You don’t have to stick to just buffalo sauce. Try barbecue sauce for a smoky twist. You can also mix ranch with the buffalo sauce for a creamy kick. Add toppings like pico de gallo for a fresh burst. Experiment with different sauces to keep things exciting. Add unique ingredients to your loaded fries for fun flavors. Try adding black beans for extra protein. Crumbled feta or goat cheese can add a tangy touch. Roasted corn makes a sweet addition, too. You can even add avocado slices for creaminess. These twists turn a simple dish into something special. For the full recipe, check out the instructions above. To keep your loaded buffalo chicken fries fresh, store them in an airtight container. Make sure they cool completely before sealing. This prevents moisture buildup, which can make the fries soggy. You can store them in the fridge for up to three days. If you notice any sign of spoilage, toss them out. When you're ready to enjoy your fries again, I recommend reheating them in the oven. Preheat the oven to 350°F (175°C). Place the fries on a baking sheet and heat for about 10-15 minutes. This method keeps the fries crispy. You can also use a microwave, but be aware that it may make the fries softer. If you want to save some for later, you can freeze the loaded fries. Spread them in a single layer on a baking sheet and freeze for about an hour. Once frozen, transfer them into a freezer-safe bag. They can stay frozen for up to three months. To reheat, thaw them in the fridge overnight. Then, bake them in the oven as mentioned above. Enjoy your homemade comfort food anytime! Loaded Buffalo Chicken Fries pack a punch! A serving typically has about 500 calories. You get 30 grams of protein, 25 grams of fat, and 50 grams of carbs. This is a great meal for sharing, but keep an eye on the calories if you stick to one serving. You can adjust the cheese and sauce to make it fit your diet better. Yes, you can use fresh chicken! Just cook it first. Grill or bake the chicken until it’s done. Shred it and mix it with buffalo sauce. This way, you get fresh flavors and a juicy texture. Fresh chicken adds a nice touch, especially if you want to control the seasoning. To spice things up, add more buffalo sauce. You can also toss in sliced jalapeños or hot sauce. For a milder flavor, use less buffalo sauce. Swap blue cheese dressing for ranch dressing to tone it down. Adjusting these toppings lets you cater to your taste. Enjoy the process and find your perfect balance! This blog post covered everything you need to make loaded buffalo chicken fries. We reviewed the key ingredients, substitutions, and how to choose fresh items. The step-by-step guide helped you prep the fries and mix the chicken. Tips for crispy fries and fun variations added more options. Don’t forget about storage and reheating to enjoy leftovers. With all of this information, you're set to impress at your next meal! Enjoy your cooking journey and make these fries your own!

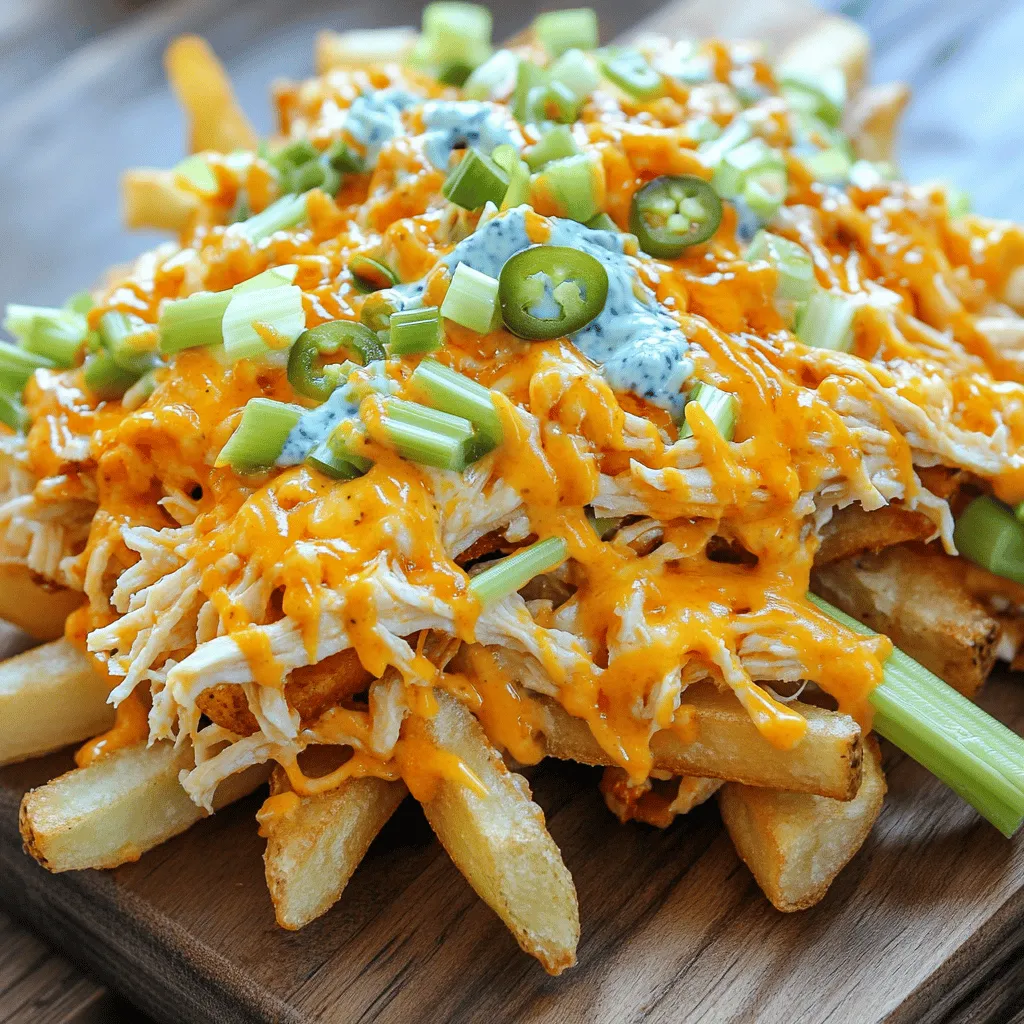
Loaded Buffalo Chicken Fries Irresistible and Flavorful

Get ready to satisfy your cravings with my Loaded Buffalo Chicken Fries! This dish combines crispy fries, spicy buffalo chicken,

- 1 ½ cups warm water (110°F to 115°F) - 2 tablespoons granulated sugar - 2 ¼ teaspoons active dry yeast (1 packet) - 4 cups all-purpose flour - 1 teaspoon salt - ½ cup baking soda - 1 large egg, beaten (for egg wash) - ½ cup unsalted butter, melted - ½ cup granulated sugar (for coating) - 2 teaspoons ground cinnamon Cinnamon sugar pretzel bites need simple ingredients. Each one plays a key role in flavor and texture. First, warm water activates the yeast. This helps the dough rise and gives it a nice chew. The granulated sugar helps feed the yeast, making it more active. Next, we use all-purpose flour. This gives the dough its structure. Adding salt enhances the flavor, making every bite tasty. Baking soda is crucial for that classic pretzel taste. It also gives the bites their golden color. The beaten egg acts as an egg wash. This helps the cinnamon sugar stick and gives a nice shine. Melted butter adds richness. It coats the bites after baking for extra flavor. Finally, cinnamon and sugar create a sweet coating. This is what makes these pretzel bites so delicious! With this list, you can easily gather your ingredients. For the full recipe, check out the instructions to make these tasty treats! First, gather your ingredients. In a small bowl, add 1 ½ cups of warm water. Make sure the water is between 110°F and 115°F. Then, mix in 2 tablespoons of sugar and 2 ¼ teaspoons of active dry yeast. Stir it gently. Let this mixture sit for about 5 minutes. You will see it become frothy. This froth means the yeast is active and ready to use. Next, take a large mixing bowl. Whisk together 4 cups of all-purpose flour and 1 teaspoon of salt. Make a well in the center of the flour mix. Pour in the frothy yeast mixture. Stir it until a dough begins to form. You want it to come together nicely. Now it’s time to knead the dough. Turn it out onto a floured surface. Knead it for about 5 minutes until it feels smooth. Once done, place your dough in a greased bowl. Cover it with a damp cloth. Let it rise in a warm spot for about 1 hour. It should double in size. After it has risen, punch it down. Divide the dough into small pieces, about 1 inch each. Roll each piece into a small ball or knot. While the dough rises, prepare to boil. In a large pot, bring 8 cups of water to a boil. Carefully add ½ cup of baking soda. It might bubble up, so be cautious. Once the dough is ready, drop each pretzel bite into the boiling water. Do this for about 30 seconds. After boiling, use a slotted spoon to remove them. Place the bites on prepared baking sheets. Brush each one with a beaten egg. Mix ½ cup of sugar with 2 teaspoons of ground cinnamon. Sprinkle this mix over the bites. Next, preheat your oven to 425°F (220°C). Bake the pretzel bites for about 10-12 minutes. They should turn golden brown and puffy. Let them cool slightly. Brush with melted butter for a shiny finish. Enjoy your warm, sweet treats! For a complete guide, check the Full Recipe. To get the best texture for your cinnamon sugar pretzel bites, start with the right dough consistency. The dough should feel soft but not sticky. If it sticks to your hands, add a little flour. Knead the dough for about 5 minutes. This helps develop gluten, which gives the pretzels their chewy texture. When you finish kneading, the dough should be smooth and elastic. An egg wash is key for that beautiful golden color. It gives the pretzels a nice shine. Brush the beaten egg on each pretzel bite before baking. This step also helps the cinnamon sugar stick. Keep an eye on the baking time. Bake them for about 10 to 12 minutes. Watch for that golden brown color. If they get too dark, take them out early. After baking, you can add even more flavor. Consider adding toppings like sea salt or extra cinnamon sugar. This gives your bites an extra crunch. You can also brush melted butter on top for a rich taste. For a twist, try using flavored butter, like garlic or herb butter. This will elevate your pretzel bites even more. For the full recipe, check the earlier section. {{image_2}} I love to mix things up with my cinnamon sugar pretzel bites. You can easily make chocolate drizzled pretzel bites. Just melt some chocolate and drizzle it over the warm bites. The sweet chocolate pairs so well with the warm cinnamon. Another fun twist is to try cheese-stuffed variations. Take small pieces of dough and fill them with your favorite cheese before shaping them into bites. The gooey cheese adds a new layer of flavor that everyone will enjoy. If you need gluten-free recipes, use gluten-free all-purpose flour. This swap works well and keeps the same great taste. Your pretzel bites will still be soft and tasty. For vegan substitutes, replace the egg wash with a plant-based milk, like almond or soy. You can also use vegan butter in place of regular butter. These substitutes keep the flavor while making the recipe suitable for a vegan diet. You can find the full recipe above, and I hope you enjoy these variations! Store leftover pretzel bites in an airtight container. This keeps them fresh. They last for about two days at room temperature. You can also refrigerate them for up to a week. If you want to keep them longer, freezing is a great option. Wrap each bite in plastic wrap and place them in a freezer bag. They can stay in the freezer for up to three months. When you're ready to enjoy your pretzel bites again, reheating is key. The oven is best for this. Preheat your oven to 350°F (175°C). Place the bites on a baking sheet and heat for about 5-7 minutes. This helps them regain their crisp texture. If you're in a hurry, the microwave works too. Heat them for about 15-20 seconds, but be careful. The microwave can make them a bit soft. For the best results, use the oven when you can. Enjoy your warm pretzel bites with a tasty dip! For the full recipe, check out the details above. To get the best rise, focus on a few key factors: - Warmth: Yeast loves warm places. A warm kitchen helps the dough rise well. - Time: Let the dough rest for at least one hour. This gives it time to grow. - Yeast Quality: Use fresh active dry yeast. Old yeast may not work well. After mixing your ingredients, knead the dough until it feels smooth. Place it in a bowl, cover it, and let it sit. The dough should double in size. This means it is ready for shaping. Yes, you can freeze the pretzel bites! Here’s how: 1. Cool Completely: Let the baked pretzel bites cool to room temperature. 2. Prepare for Freezing: Place them in a single layer on a baking sheet. This prevents sticking. 3. Wrap and Store: Once frozen, wrap them in plastic wrap or place them in a freezer bag. Press out all the air. 4. Label: Write the date on the bag. This helps you remember when you made them. To use, just take out what you need and thaw them. You can reheat them in the oven for a crispy finish. You can try many tasty dipping sauces! Here are some popular options: - Cream Cheese Icing: Sweet and perfect for those who love a sugary dip. - Caramel Sauce: A sweet treat that pairs well with cinnamon. - Chocolate Sauce: Rich and indulgent for a fun twist. If you want to make your own sauce, here are a couple of simple recipes: - Honey Mustard: Mix equal parts honey and mustard for a sweet and tangy dip. - Spicy Ketchup: Add a pinch of cayenne pepper to ketchup for a spicy kick. These sauces add fun flavors. Feel free to mix and match! You now know how to make tasty pretzel bites from scratch. We covered key ingredients, step-by-step instructions, and helpful tips. You can even explore unique flavors and make them fit special diets. Remember, storage and reheating matter for freshness. With a little practice, you’ll impress everyone with your pretzels. Get in the kitchen and enjoy this fun snack!

Cinnamon Sugar Pretzel Bites Tasty and Simple Snack

Looking for a tasty snack that’s easy to make? Let me introduce you to Cinnamon Sugar Pretzel Bites! These warm,

- 2 cups all-purpose flour: This forms the base of our donuts. It gives them structure. You can swap it with gluten-free flour for a gluten-free version. - 1 cup apple cider: This is the star ingredient. It adds flavor and moisture. You can use unsweetened apple juice if cider is not available. - 1/2 cup granulated sugar: This sweetens the donuts. You can reduce it for less sweetness or use a sugar substitute. - 1/4 cup brown sugar, packed: This adds depth and a hint of caramel flavor. Coconut sugar can be a good substitute. - 2 teaspoons baking powder: This helps the donuts rise. Ensure it’s fresh for best results. - 1 teaspoon baking soda: This works with the acidity of the cider. Don’t skip it! - 1 teaspoon ground cinnamon: This gives a warm, cozy flavor. You can add more for a stronger taste. - 1/2 teaspoon nutmeg: This adds a hint of spice. If you dislike nutmeg, you can leave it out. - 1/2 teaspoon salt: This enhances all the flavors. A pinch of sea salt can work well here. - 1 large egg: This binds the ingredients together. You may use a flax egg for a vegan option. - 1/4 cup unsalted butter, melted: This adds richness. Coconut oil can be a dairy-free substitute. - 1 teaspoon vanilla extract: This adds warmth and depth. You can use almond extract for a twist. - Cinnamon sugar (for coating): Mix 1/4 cup sugar with 1 tablespoon cinnamon. This gives a sweet, crunchy finish to the donuts. Using high-quality ingredients makes a big difference. Fresh spices and pure extracts bring out the best flavors. Stick to organic or local products when possible. It not only boosts taste but also supports sustainable sourcing. Enjoy these delicious treats! To start, we need to reduce the apple cider. Pour one cup of apple cider into a medium saucepan. Bring it to a boil over medium heat. Once it boils, lower the heat and let it simmer. You want to reduce it to about half a cup. This takes about 10 to 15 minutes. Let it cool for a bit after it’s done. Next, we mix the dry ingredients. In a large bowl, whisk together the flour, granulated sugar, brown sugar, baking powder, baking soda, ground cinnamon, nutmeg, and salt. Make sure everything is well combined. This helps to create a nice, even texture in your donuts. Now it's time to combine the wet and dry ingredients. In another bowl, whisk the egg, melted butter, vanilla extract, and the reduced apple cider. Mix until everything is combined. Pour this mixture into the dry ingredients. Stir gently until just mixed. Remember, some lumps are okay; do not overmix! Now, we will preheat the air fryer. Set it to 350°F (175°C) and let it preheat for about five minutes. This step is key to getting those donuts to cook evenly. While it preheats, grease your donut pan or use silicone molds. Spoon the batter into each cavity, filling them about three-quarters full. Be careful not to overfill; this helps the donuts rise properly. Place the filled donut pan in the air fryer basket. Cook the donuts for 6 to 8 minutes. To check for doneness, gently touch the tops. They should spring back when done and have a light golden color. You may need to cook in batches, depending on your air fryer's size. After cooking, carefully remove the donuts from the pan. Let them cool slightly before rolling them in cinnamon sugar. To coat them, mix 1/4 cup of sugar with one tablespoon of cinnamon in a bowl. Roll each donut in the mixture until fully coated. For cooling, place the donuts on a wire rack. This lets air circulate around them, keeping them from getting soggy. Let them cool completely before serving. Enjoy your delicious Air Fryer Apple Cider Donuts! If you want the full recipe, check out [Full Recipe]. When making air fryer apple cider donuts, there are a few mistakes to watch out for: - Overmixing the batter: Mixing too much makes donuts tough. Stir until just combined. - Incorrect frying temperature: If your air fryer is too hot or too cool, it affects cooking. Aim for 350°F (175°C). - Ingredient measuring errors: Always use measuring cups and spoons for accuracy. This ensures consistent results. To boost the flavor of your donuts, try these ideas: - Adding spices or extracts: Cinnamon and nutmeg are great. For an extra twist, add a dash of vanilla or almond extract. - Using different sugars for coating: Instead of plain sugar, mix brown sugar with cinnamon. It adds a richer taste. Make your donuts look as good as they taste with these tips: - Decorating suggestions for serving: Drizzle melted chocolate or caramel over the top. It adds a fun touch. - Creative serving suggestions: Serve donuts with fresh apple slices and a side of warm caramel sauce for dipping. This makes for a delightful treat. For the complete process and ingredients, check the Full Recipe. {{image_2}} You can spice up your air fryer apple cider donuts in fun ways. Here are two tasty ideas: - Pumpkin spice donuts: To make these, add 1 teaspoon of pumpkin pie spice to your dry mix. This will give your donuts a warm, cozy flavor perfect for fall. - Maple syrup drizzle alternative: Instead of rolling your donuts in cinnamon sugar, try drizzling them with maple syrup. This adds a sweet touch and pairs well with the apple flavor. Want to make your donuts fit your diet? Here are some options: - Gluten-free options: Use a gluten-free flour blend in place of all-purpose flour. This keeps the texture light and fluffy while being safe for those with gluten issues. - Vegan substitutions: Replace the egg with a flax egg (1 tablespoon flaxseed meal + 2.5 tablespoons water) and use plant-based butter. This makes your donuts vegan-friendly while keeping them delicious. Looking for more sweet treats? Try these ideas: - Other air fryer donut recipes to try: Experiment with chocolate, vanilla, or even matcha donuts. The air fryer can make many flavors tasty and light. - Pairing suggestions with beverages or toppings: Serve your donuts with warm apple cider or a cup of coffee. You can also top them with whipped cream or a scoop of vanilla ice cream for a fun dessert. For the complete recipe, check out the Full Recipe section above. Enjoy your cooking adventure! To keep your donuts fresh, store them in an airtight container. This helps prevent them from drying out. I recommend using a plastic or glass container with a tight seal. Line the bottom with parchment paper to absorb moisture. This will keep your donuts soft and tasty. You can freeze these donuts for later. First, let them cool completely. Then, wrap each donut in plastic wrap. Place them in a freezer-safe bag or container. This way, they won’t stick together. When you want to enjoy them, take out a donut. Let it thaw at room temperature for about 30 minutes. For a warm treat, you can reheat it in the air fryer for 2-3 minutes at 350°F (175°C). These air fryer apple cider donuts stay fresh for about 2 days at room temperature. If you store them in the fridge, they last up to a week. In the freezer, they can last for about 2-3 months. Make sure to check for any signs of freezer burn if you keep them for a long time. For the best taste, enjoy them fresh! To make air fryer apple cider donuts, start by reducing apple cider to concentrate its flavor. Mix the dry ingredients in one bowl. In another bowl, combine the wet ingredients, including the reduced cider. Then, combine both mixes. Preheat your air fryer and spoon the batter into a greased donut pan. Cook the donuts for 6-8 minutes until golden. Once done, roll them in cinnamon sugar for a sweet finish. You can find the full recipe for detailed steps. Yes, you can make these donuts in the oven. Baking them will give you a slightly different texture. Air frying cooks the donuts quickly and gives them a crisp outside. Baking takes longer and may not create the same level of crispness. Both methods allow for delicious results, but I prefer air frying for its speed. To reheat air fryer donuts, use your air fryer at a low setting. Heat them at about 300°F for 3-4 minutes. This method helps keep them fluffy and prevents them from drying out. Avoid using the microwave, as it can make the donuts tough and chewy. You now have all the tools to make delicious air fryer apple cider donuts. From choosing quality ingredients to perfecting the cooking process, every step matters. Remember to avoid common mistakes like overmixing or incorrect temperatures. Embrace flavor variations and dietary adaptations to enjoy these treats. Store them right for long-lasting freshness or freeze for later. With these tips, your donuts will impress anyone. You can create delightful moments with each bite, so get started!

Air Fryer Apple Cider Donuts Tasty Fall Treat

Fall is the perfect time for warm, sweet treats, and what could be better than Air Fryer Apple Cider Donuts?

- 2 large apples (Granny Smith or Honeycrisp) - 1 cup caramel sauce - 1 cup cream cheese - 1/4 cup powdered sugar - 1 teaspoon vanilla extract - 1/2 teaspoon cinnamon - 1/2 cup chopped nuts - 1/2 cup mini chocolate chips (optional) - 1/4 cup graham cracker crumbs for garnish You can switch up the caramel sauce with chocolate sauce or a fruit dip if you want. For nuts, try pecans, walnuts, or almonds. If you need a cream cheese substitute, Greek yogurt works well and adds some tang. You can also use whipped cream for a lighter dip. These options let you put your spin on the recipe, making it fun and unique. You can adjust the flavors to fit your taste or the season. Don't be afraid to experiment! First, mix the cream cheese and sugar. In a bowl, add 1 cup of softened cream cheese. Then, add 1/4 cup of powdered sugar, 1 teaspoon of vanilla extract, and 1/2 teaspoon of cinnamon. Use an electric mixer to blend these ingredients. Mix until the blend is smooth and creamy. Next, layer the mixture into serving cups. Grab small cups or glasses for this step. Spoon a layer of the cream cheese mix into the bottom of each cup, filling them about one-third full. This layer sets the base for your delicious treat. Now, it’s time to add the caramel sauce and apple wedges. Drizzle about 1 cup of caramel sauce on top of the cream cheese layer in each cup. Place a few apple wedges on top of the caramel. Make sure some wedges stick out for a pretty look. Then, repeat the layers. Add more cream cheese mix, followed by another drizzle of caramel and more apple wedges. Keep layering until each cup is full, creating a beautiful dessert. Top each cup with chopped nuts and mini chocolate chips. Use 1/2 cup of chopped nuts like pecans or walnuts. If you like, sprinkle 1/2 cup of mini chocolate chips on top. This adds a tasty crunch and extra sweetness. Chill the cups in the fridge for at least 30 minutes. This time helps the flavors mix well and makes the dip set slightly. For a great presentation, serve the cups on a platter. Drizzle more caramel sauce around the base for a fancy touch. You can add apple slices on the side as a garnish. You can find the full recipe in the recipe section above. Enjoy this sweet and easy dessert! To make your caramel apple dip even better, consider using flavored cream cheese. You can find options like cinnamon or vanilla cream cheese at the store. These flavors add a fun twist. You can also mix in some spices. A pinch of nutmeg or a dash of allspice can bring warmth. If you want to go bold, try adding a few drops of almond or maple extract. These choices can really boost the taste. When making this dip, you can adjust the sweetness. If your kids prefer less sugar, cut back on the powdered sugar in the cream cheese mix. You can also use a sugar substitute if needed. For kids with nut allergies, feel free to skip the nuts. You can top the cups with extra chocolate chips or even colorful sprinkles instead. This makes it safe and fun for all kids. Pair these dip cups with drinks to make a fun snack time. A cold apple cider or a creamy vanilla milkshake goes great with this treat. For a unique look, try serving the dip in small jars or shot glasses. This adds a fun twist to your presentation. You can also stack the cups for a tower effect, making it a show-stopping dessert! {{image_2}} You can easily change this dessert for the season. For fall, try adding pumpkin spice to the cream cheese mix. Just a pinch or two will give a warm flavor that fits the season. In the summer, swap out the apples for fresh fruits. Strawberries or peaches add a sweet, juicy twist that everyone will love. This recipe works for various diets. For a gluten-free version, use gluten-free graham cracker crumbs. You can also make it vegan. Replace the cream cheese with a plant-based cream cheese. Use a vegan caramel sauce too. These changes keep the dessert tasty and suitable for more eaters. Make your Caramel Apple Dip Cups shine for special events. For Halloween, add spooky decorations. Use black and orange sprinkles or serve in themed cups. For holiday parties, consider using red and green toppings. This adds a festive touch that matches the season's spirit. To keep your caramel apple dip cups fresh, refrigerate them. Place the cups in an airtight container. This helps to lock in moisture and flavor. If you do not have a container, you can cover the cups with plastic wrap. This will also work well. Always store them in the fridge. They stay yummy for about 3 days. If you want to save some for later, you can freeze the dip. First, prepare the cream cheese mixture but skip adding the apples. Place the mixture in a freezer-safe container. Leave some space at the top, as it may expand. To serve later, thaw it in the fridge overnight. Once thawed, mix well and layer with fresh apple wedges. This way, you keep the apples crisp. These dip cups stay fresh for about 3 days in the fridge. Look for signs of spoilage like off smells or changes in texture. If the dip looks watery or has a strange color, it’s best to toss it. Always trust your senses. Keeping an eye on freshness helps you enjoy this treat at its best. To make homemade caramel sauce, you need sugar, butter, and cream. Start by heating 1 cup of sugar in a pot over medium heat. Stir it gently until it melts and turns a golden color. Then, add 6 tablespoons of butter and mix until smooth. Finally, remove it from heat and slowly add 1/2 cup of heavy cream. Stir to combine. Let it cool before using it in your dip cups. This sauce adds a rich flavor and pairs well with apples. Yes, you can make this dip ahead of time. Prepare the cream cheese mixture and layer it in cups. Cover them with plastic wrap and store them in the fridge. You can also cut the apples in advance. Just toss them in a bit of lemon juice to keep them fresh. Assemble the cups a few hours before serving. This way, the flavors will blend nicely. If your cream cheese isn’t blending well, try softening it more. Make sure it is at room temperature. If it's still lumpy, use a whisk or a fork to break it up. You can also add a splash of milk to help it mix. Blend until it reaches a smooth and creamy texture. This step is key for a perfect dip. Yes, you can use other fruits! Pears, strawberries, or bananas work well. Cut them into small pieces or wedges. Each fruit will give a unique taste. If you like berries, try adding raspberries or blueberries. They add a nice color and flavor to the dip cups. Feel free to mix and match fruits based on what you enjoy! This blog post covered a fun and easy apple dip recipe. We explored main ingredients like apples, caramel, and cream cheese. I shared step-by-step instructions for prep and assembly. Tips included ways to make it kid-friendly and seasonal twists. For a tasty dessert, this dip is a great choice. You can customize it with different flavors and dietary needs. Enjoy making it your own.

Caramel Apple Dip Cups Sweet and Easy Dessert Treat

If you’re looking for a sweet and easy dessert that’s sure to please, you’re in the right place! These Caramel

Here’s what you need for Korean BBQ meatballs: - 1 pound ground beef (or ground chicken) - 1/4 cup panko breadcrumbs - 1/4 cup green onions, finely chopped - 2 cloves garlic, minced - 1 tablespoon ginger, grated - 1/4 cup soy sauce - 2 tablespoons brown sugar - 1 tablespoon sesame oil - 1 tablespoon gochujang (Korean chili paste) - 1 egg, beaten - Sesame seeds and extra green onions for garnish You can swap ground beef for ground chicken or turkey. This keeps the meatballs leaner. You can also adjust the soy sauce and gochujang to fit your taste. If you want less spice, use less gochujang. For a sweeter taste, add more brown sugar. You can even try adding minced veggies like carrots for extra crunch. Fresh ingredients make a big difference. When choosing ground meat, look for bright color and firm texture. The fat content should be visible but not overwhelming. For green onions, pick ones with bright green tops and firm white bases. Avoid wilted or yellowed onions. Fresh garlic should feel firm, with no soft spots. Ginger should be smooth and firm too. Always check the expiration dates on sauces and condiments. To start, gather your ingredients. This makes cooking easier. Here’s what you need: - 1 pound ground beef (or ground chicken) - 1/4 cup panko breadcrumbs - 1/4 cup green onions, finely chopped - 2 cloves garlic, minced - 1 tablespoon ginger, grated - 1/4 cup soy sauce - 2 tablespoons brown sugar - 1 tablespoon sesame oil - 1 tablespoon gochujang (Korean chili paste) - 1 egg, beaten - Sesame seeds and extra green onions for garnish In a big bowl, mix the ground meat, breadcrumbs, and green onions. Add the garlic, ginger, soy sauce, brown sugar, sesame oil, gochujang, and the beaten egg. Use your hands or a fork to mix until it’s all combined. Don’t overmix; it should feel just right. Preheat your oven to 400°F (200°C). While the oven heats, shape the meat mixture into small balls, about 1 inch across. Place them on a lined baking sheet. Bake the meatballs for 15-20 minutes. They should look golden brown and be cooked through. If you want a sticky glaze, brush extra soy sauce mixed with honey over the meatballs in the last 5 minutes. When they are done, take them out and let them cool a bit. Garnish with sesame seeds and extra green onions before serving. This recipe takes about 15 minutes to prep and 20 minutes to bake. Start by prepping your ingredients. While you mix, have the oven heat up. This saves time. While the meatballs bake, clean your area. This keeps your kitchen neat. You can also prepare a side dish while the meatballs cook. It makes for a full meal. Enjoy your tasty Korean BBQ meatballs! For the full recipe, check the details above. To get the best texture, you need to mix the meat gently. Overmixing makes the meatballs tough. Use your hands or a fork, and combine until just mixed. The panko breadcrumbs help keep them light. They soak up moisture and add a nice crunch. Try to shape them into small balls, about one inch wide. This size cooks evenly and stays juicy. One common mistake is not measuring ingredients. Each one adds flavor and texture. Too much soy sauce can make them too salty. Also, don’t skip the egg; it helps bind everything together. Another mistake is baking them at the wrong temperature. Ensure your oven is preheated to 400°F (200°C) for the best results. To enhance the flavor, try adding more green onions or garlic. You can also mix in chopped cilantro for a fresh taste. If you want more heat, add extra gochujang. For a sweet twist, brush a mix of soy sauce and honey on the meatballs during baking. This glaze gives a nice shine and extra flavor. For the full recipe, check out the complete details. {{image_2}} You can switch proteins in these meatballs. Ground chicken or turkey works well. They stay juicy and flavor-packed. Pork is another great choice. It adds a nice richness. If you prefer leaner meat, try ground beef. Adjust the cooking time for different meats. Ground lamb can also bring a unique taste. You can make these meatballs vegetarian or vegan. Substitute ground meat with lentils or chickpeas. Use cooked quinoa for texture. Replace the egg with flaxseed meal. Mix one tablespoon of flaxseed with three tablespoons of water. Let it sit until it thickens. Instead of soy sauce, use tamari for a gluten-free option. Add new flavors to the meatballs for fun. Mix in chopped bell peppers for sweetness. Fresh herbs like cilantro or basil can brighten the dish. Try adding sesame seeds into the mixture for crunch. For an extra kick, increase the gochujang. You can even add a splash of lime juice for tang. Explore different flavor profiles to find your favorite. For the complete recipe, check the [Full Recipe]. To keep your Korean BBQ meatballs fresh, let them cool first. Place them in an airtight container. They will stay good in the fridge for up to three days. Make sure to separate layers with parchment paper to avoid sticking. If you have a lot of leftovers, consider portioning them out. This way, you can grab a quick meal later. When you're ready to enjoy the leftovers, reheating is simple. You can use the microwave or oven. For the microwave, place meatballs on a plate and cover them with a damp paper towel. Heat for about 1-2 minutes. If you prefer the oven, preheat it to 350°F (175°C). Bake for 10-15 minutes until heated through. The oven gives the meatballs a nice texture. If you want to save meatballs for later, freeze them! First, let them cool completely. Then, arrange them in a single layer on a baking sheet. Freeze for an hour until firm. After that, transfer them to a freezer bag. Be sure to remove as much air as possible. They will stay fresh for up to three months. When you're ready, just thaw in the fridge overnight before reheating. For the full recipe, check out the Korean BBQ Meatballs section. To make these meatballs spicy, add more gochujang. Start with an extra tablespoon. You can also mix in red pepper flakes. This gives a nice heat. Adjust the spice level to fit your taste. Remember, you can always add spice, but you can't take it away! You can serve these meatballs with rice or noodles. They pair well with steamed veggies too. Kimchi is a great side dish for added flavor. Try making a simple salad with sesame dressing. These options make your meal fun and colorful. Yes, you can make these meatballs a day ahead. Just prepare them and store in the fridge. You can also freeze them before baking. When ready to eat, just bake them straight from the freezer. This saves time and makes dinner easy! Korean BBQ meatballs mix flavors from Korean cooking. They use ingredients like soy sauce and gochujang. Meatballs are popular worldwide, but this twist is unique. It reflects Korea's rich food culture. These meatballs show how traditional recipes can evolve. For the full recipe, check the earlier section. This blog post covers everything you need for delicious Korean BBQ meatballs. We discussed key ingredients, detailed preparation, and cooking steps. I shared tips for the best texture and common mistakes to avoid. You also learned about variations, storage, and frequently asked questions. With these insights, you'll create tasty meatballs every time. Enjoy experimenting with flavors and sharing your results!

Korean BBQ Meatballs Tasty and Easy Dinner Idea

Craving a fun and tasty dinner? Try these Korean BBQ meatballs! They’re easy to make and full of flavor. Whether

To make these delightful pumpkin crinkle cookies, gather the following ingredients: - 1 cup canned pumpkin puree - 1/2 cup vegetable oil - 1 cup brown sugar - 1/2 cup granulated sugar - 2 teaspoons vanilla extract - 2 cups all-purpose flour - 2 teaspoons baking powder - 1 teaspoon baking soda - 1 teaspoon ground cinnamon - 1/2 teaspoon ground ginger - 1/4 teaspoon ground nutmeg - 1/4 teaspoon salt - 1/2 cup powdered sugar (for rolling) These ingredients come together to create soft, chewy cookies with a lovely crinkle effect. Using canned pumpkin puree makes this recipe easy. The spices bring warmth and flavor that scream fall. I love the balance of brown sugar and granulated sugar for sweetness. The vegetable oil keeps the cookies moist. Make sure to measure accurately for the best results. Each ingredient plays a role in the flavor and texture. If you have all these on hand, you will be ready to bake a batch of pumpkin crinkle cookies. For the full recipe, check the earlier section. 1. Preheat oven and prepare baking sheets Start by preheating your oven to 350°F (175°C). This step is crucial for even baking. Line two baking sheets with parchment paper. This keeps the cookies from sticking and makes cleanup easy. 2. Mix wet ingredients together In a large mixing bowl, combine 1 cup of canned pumpkin puree, 1/2 cup of vegetable oil, 1 cup of brown sugar, 1/2 cup of granulated sugar, and 2 teaspoons of vanilla extract. Stir these ingredients until they mix well. The mixture should be smooth and creamy. 3. Combine dry ingredients In a separate bowl, whisk together 2 cups of all-purpose flour, 2 teaspoons of baking powder, 1 teaspoon of baking soda, 1 teaspoon of ground cinnamon, 1/2 teaspoon of ground ginger, 1/4 teaspoon of ground nutmeg, and 1/4 teaspoon of salt. This mix adds flavor and helps the cookies rise. 1. Chill the dough After mixing the wet and dry ingredients together, chill the dough in the fridge for about 30 minutes. Chilling helps the dough firm up, making it easier to roll into balls. 2. Roll dough into balls and coat Once chilled, use a cookie scoop or a spoon to take about 1.5 tablespoons of dough. Roll each piece into a ball. Next, roll each ball in 1/2 cup of powdered sugar until fully coated. This step creates the cookie's signature crinkle effect. 3. Bake and cool Place the powdered dough balls about 2 inches apart on the baking sheets. Bake in your preheated oven for 12-15 minutes. Look for edges that are set and tops that are crinkled. Once done, let the cookies cool on the sheets for 5 minutes. Then, move them to a wire rack to cool completely. Enjoy your delicious Pumpkin Crinkle Cookies! For the full recipe, refer to the previous section. To get the best texture, chilling the dough is key. When you chill the dough, it firms up. This helps the cookies hold their shape while baking. I recommend chilling for at least 30 minutes. If you skip this step, the cookies may spread too much. Avoiding overmixing is also important. When you combine the wet and dry ingredients, mix just until they come together. Overmixing can create tough cookies. Aim for a thick and slightly sticky dough for that perfect crinkle. Pair your pumpkin crinkle cookies with warm drinks. They go well with apple cider or a cozy cup of chai tea. For a twist, try them with a scoop of vanilla ice cream. Presentation matters too! Arrange the cookies on a festive plate. Dust them lightly with more powdered sugar for a touch of elegance. Add some cinnamon sticks or fall leaves for a nice autumn vibe. For the full recipe, check out the details above! {{image_2}} You can easily make these cookies gluten-free. To do this, substitute all-purpose flour with a gluten-free flour blend. Look for one that includes xanthan gum, as this helps bind the dough. The texture will be slightly different, but still delicious. Just ensure that all your ingredients are gluten-free. This option allows everyone to enjoy pumpkin crinkle cookies. If you're looking for a vegan version, replace the eggs and oils. You can use 1/4 cup of unsweetened applesauce instead of an egg. For oil, try using melted coconut oil or a neutral oil like canola. Both work well in this recipe. The cookies will still be moist and flavorful, making them a great treat for all. Want to mix it up? You can easily add chocolate chips or nuts to your cookies. Chocolate chips give a sweet touch and pair well with pumpkin. If you like crunch, chop up some walnuts or pecans. Add about 1/2 cup of your choice to the dough when mixing the dry and wet ingredients. This will give your cookies a fun twist. For the full recipe, check out the details above. Enjoy these tasty variations! To keep your pumpkin crinkle cookies fresh, store them in an airtight container. This helps keep them soft and chewy. You can place a slice of bread in the container. The bread adds moisture and keeps the cookies from drying out. Make sure to store them at room temperature, away from heat and light. Freezing the unbaked dough is a great idea for later. First, scoop the dough into balls and roll them in powdered sugar. Place the dough balls on a baking sheet lined with parchment paper. Freeze them for about two hours. Once frozen, transfer the dough balls to a freezer bag. Seal it tightly and label it with the date. You can freeze the dough for up to three months. When you want cookies, just bake them straight from the freezer. Add a couple of minutes to the baking time for best results. Baked pumpkin crinkle cookies stay fresh for about one week at room temperature. If you store them properly, they can last up to two weeks. For longer storage, keep them in the freezer. The cookies will still taste great for up to three months. Always check for signs of spoilage before eating. Enjoy the full recipe and make the most of your delicious treats! To make Pumpkin Crinkle Cookies from scratch, start by gathering your ingredients. You need canned pumpkin puree, vegetable oil, brown sugar, granulated sugar, vanilla extract, flour, baking powder, baking soda, and spices like cinnamon, ginger, and nutmeg. Mix the wet ingredients in one bowl and the dry in another. Combine them carefully to avoid overmixing. Chill the dough for about 30 minutes, then roll it into balls and coat with powdered sugar. Finally, bake them at 350°F (175°C) for 12-15 minutes. You can find the Full Recipe for detailed steps. Yes, you can use fresh pumpkin. First, you need to cook and puree it. Bake the pumpkin until soft, then scoop out the flesh and blend it until smooth. Make sure to drain any excess water. Canned pumpkin is often thicker, so adjust your recipe as needed. Fresh pumpkin will give a lighter flavor and may add more moisture to the cookies. If you don’t have vegetable oil, you can use melted coconut oil or unsweetened applesauce. Both options work well. Coconut oil adds a hint of flavor, while applesauce keeps the cookies moist. You can also try butter for a richer taste. Just remember to melt the butter before adding it to the mix. To reduce the sweetness, cut down on both sugars. Use only 3/4 cup of brown sugar and 1/4 cup of granulated sugar. You can also try adding a pinch of salt. This helps balance the flavors. Consider using dark chocolate chips instead of regular ones, as they are less sweet. Yes, doubling the recipe is simple. Just multiply all the ingredients by two. Make sure you have enough space on your baking sheets. You may need to bake the cookies in batches. Keep an eye on the baking time, as larger batches might bake differently. You learned how to make tasty pumpkin crinkle cookies. We covered the right ingredients, step-by-step instructions, and helpful tips. You also discovered fun variations and storage ideas. Making these cookies is simple and rewarding. Whether you enjoy them fresh or share them with friends, they are sure to impress. Keep this recipe handy for fall gatherings or any time you want a sweet treat. Enjoy baking!

Pumpkin Crinkle Cookies Irresistible Fall Treat

Fall is here, and it’s time for cozy treats! Pumpkin Crinkle Cookies are an absolute must-try. They’re soft, chewy, and

- 1 ½ cups all-purpose flour - 1 cup canned pumpkin puree - ½ cup brown sugar, packed - ½ cup granulated sugar - 2 large eggs - 1/3 cup vegetable oil - 1 teaspoon vanilla extract - 1 teaspoon baking powder - ½ teaspoon baking soda - ½ teaspoon salt - 1 teaspoon pumpkin pie spice - ½ teaspoon ground cinnamon - ½ cup cream cheese, softened - 2 tablespoons powdered sugar - 1 tablespoon milk Each ingredient plays a key role in making these muffins delightful. The all-purpose flour gives structure. Canned pumpkin puree adds moisture and flavor. Brown sugar and granulated sugar provide sweetness and depth. Eggs bind the batter, while vegetable oil keeps it tender. Baking powder and baking soda help the muffins rise. Salt enhances all the flavors. Pumpkin pie spice and ground cinnamon bring warmth and a cozy fall vibe. The cream cheese swirl mixture adds a rich, tangy contrast that pairs well with the pumpkin. For the cream cheese swirl, you need softened cream cheese, powdered sugar, and milk. This mixture provides a creamy, sweet element that makes each bite special. For the full recipe, I suggest checking out the complete instructions. This ensures you get every detail right for perfect muffins! 1. Preheat your oven to 350°F (175°C). Line a muffin tin with paper liners or lightly grease it. 2. In a large bowl, whisk together the dry ingredients: 1 ½ cups all-purpose flour, 1 teaspoon baking powder, ½ teaspoon baking soda, ½ teaspoon salt, 1 teaspoon pumpkin pie spice, and ½ teaspoon ground cinnamon. Set this mix aside. 3. In another bowl, mix the wet ingredients. Combine 2 large eggs, ½ cup brown sugar, ½ cup granulated sugar, 1/3 cup vegetable oil, 1 teaspoon vanilla extract, and 1 cup canned pumpkin puree. Beat until smooth. 1. Gradually add the dry mix to the wet mix. Stir gently until just combined. Avoid overmixing to keep your muffins light. 2. Now, prepare the cream cheese swirl. In a small bowl, mix ½ cup softened cream cheese, 2 tablespoons powdered sugar, and 1 tablespoon milk until smooth and creamy. 3. Divide half of the muffin batter into the prepared muffin tin, filling each cup halfway. Spoon a dollop of the cream cheese mixture into each cup and top with the remaining batter. 1. Use a toothpick or a butter knife to gently swirl the cream cheese mixture into the batter. Create a marbled effect, but don’t fully cover it. 2. Bake the muffins in your preheated oven for 18-20 minutes. Check for doneness by inserting a toothpick into the center; it should come out clean. 3. Let the muffins cool in the tin for about 5 minutes. Then, transfer them to a wire rack to cool completely. For the Full Recipe, follow the detailed steps I’ve shared here. Enjoy your delightful pumpkin swirl muffins! To make fluffy muffins, avoid overmixing the batter. When you mix, do it gently. Stir just until the dry ingredients blend in. If you see some lumps, that is okay! Lumps help keep your muffins light. Cooling your muffins properly is key. After baking, let them sit in the tin for only 5 minutes. Then, move them to a wire rack. This helps air circulate, keeping the muffins from getting soggy. Serve your pumpkin swirl muffins warm for the best taste. You can dust them with powdered sugar for a sweet look. A dollop of whipped cream on top adds a nice touch. Sprinkle some pumpkin seeds around to make the plate look pretty. If your muffins are too dense, check your mixing. Overmixing leads to tough muffins. Make sure to measure ingredients carefully. Too much flour can also cause this issue. If they sink in the middle, your oven might be too hot. Use an oven thermometer to check the temp. Knowing these tips will make your baking easier and more fun. Enjoy your delicious pumpkin swirl muffins! For the full recipe, check the main article. {{image_2}} You can make your pumpkin swirl muffins even more fun. Adding chocolate chips gives a sweet twist. I love using semi-sweet or dark chocolate for a richer taste. You can also add nuts for crunch. Walnuts or pecans work great. Feel free to adjust the spices too. If you want more warmth, add extra cinnamon or nutmeg. If you love ginger, a pinch can give a nice kick. Play around and find what you enjoy the most. If you need gluten-free muffins, you can swap the all-purpose flour for a gluten-free blend. Many blends work well here, so pick one you like. For vegan muffins, replace the eggs with flax eggs. Mix one tablespoon of ground flaxseed with three tablespoons of water and let it sit. Use a plant-based oil instead of vegetable oil. You can also use a vegan cream cheese for the swirl. You can switch out pumpkin for other purees. Sweet potato or butternut squash are great choices in fall. If you want a fresh taste in spring, try using apple or pear puree. Changing spices can also create new flavors. Cardamom or allspice can give a unique twist to your muffins. These variations let you enjoy pumpkin swirl muffins all year long. Check the Full Recipe for more ideas! Store your pumpkin swirl muffins at room temperature. Use an airtight container to keep them fresh. They taste best within two to three days. The muffins stay soft and moist this way. If you want to enjoy them warm, just pop them in the microwave for a few seconds. To save your muffins for later, freeze them. Wrap each muffin tightly in plastic wrap. Then place them in a freezer bag. This helps prevent freezer burn and keeps them tasty. You can freeze them for up to three months. When you’re ready to eat them, simply thaw at room temperature. For a quick warm-up, heat them in the microwave for about 20-30 seconds. This brings back their soft texture and flavor. Enjoy your delicious pumpkin swirl muffins whenever you crave them! Can I use fresh pumpkin instead of canned? Yes, you can use fresh pumpkin. Cook it until soft, then mash it. Make sure to drain excess water for the best results. Fresh pumpkin gives a great taste! How can I reduce sugar in this recipe? To cut sugar, use less brown and granulated sugar. You can also try applesauce as a substitute. This will keep muffins moist and tasty. What’s the best way to prevent the muffins from sticking? Use paper liners or grease the muffin tin well. You can also sprinkle a little flour on the greased tin. This helps muffins release easily after baking. How to achieve a perfect swirl? To get a perfect swirl, add the cream cheese mixture in the middle of the batter. Use a toothpick or knife to gently swirl it. Don’t mix too much! Tips for achieving the right muffin texture Mix dry and wet ingredients just until combined. Overmixing makes muffins tough. Always check for doneness with a toothpick. It should come out clean when muffins are ready. Caloric content and serving size details Each muffin has about 180 calories. The recipe makes 12 muffins. This is a nice treat that fits well into most diets! Enjoy them as a snack or breakfast. This blog post covered how to make delicious pumpkin muffins with ease. I shared the ingredients you need, step-by-step instructions, and helpful tips for baking success. You now know how to add your own twist with flavors and dietary choices. Remember, baking is fun, so don’t hesitate to experiment! With these detailed steps and tricks, you can create tasty muffins. Enjoy your baking journey and relish your homemade treats. Happy baking!

Pumpkin Swirl Muffins Delightful and Simple Recipe

Welcome to my delightful kitchen! Today, I’m excited to share my simple recipe for Pumpkin Swirl Muffins. These muffins combine

- 4 large russet potatoes - 1 cup shredded cheddar cheese - 1 cup cooked ground beef or turkey - 1/2 cup sour cream - 1/2 cup diced green onions - 1/4 cup sliced jalapeños (fresh or pickled) - 1 teaspoon garlic powder - 1 teaspoon onion powder - Salt and pepper to taste - 2 tablespoons olive oil For Dirty Loaded Fries, you need simple and fresh ingredients. Start with four large russet potatoes. They give the best texture. You'll also need one cup of shredded cheddar cheese. This melts beautifully on top. Next, grab one cup of cooked ground beef or turkey. It adds that meaty flavor we crave. For toppings, sour cream is a must. A half cup will do. You'll also want a half cup of diced green onions for a fresh crunch. If you like spice, add a quarter cup of sliced jalapeños. These can be fresh or pickled, based on your taste. Finally, we have seasonings. You'll need one teaspoon each of garlic powder and onion powder. Don't forget salt and pepper to taste. These bring out the flavors. Use two tablespoons of olive oil to coat the fries before baking. This helps them get crispy and golden. This recipe is fun and easy, making it perfect for gatherings or a cozy night in. You can find the full recipe to make your own delicious Dirty Loaded Fries. - Preheat the oven to 425°F (220°C). - Wash and scrub the russet potatoes. Cut them into fry shapes, about 1/4 inch thick. This size helps them cook evenly. - In a large bowl, toss the cut potatoes with 2 tablespoons of olive oil, 1 teaspoon of garlic powder, 1 teaspoon of onion powder, salt, and pepper. Make sure they are well coated. - Spread the fries in a single layer on a baking sheet lined with parchment paper. Bake for 30-35 minutes, flipping halfway through. This will give you crispy and golden fries. - When the fries are done, take them out of the oven. Immediately add 1 cup of shredded cheddar cheese on top. Return them to the oven for an additional 5 minutes to melt the cheese. - Once the cheese is melted, top the loaded fries with 1 cup of warm cooked ground beef, 1/2 cup of sour cream, 1/2 cup of diced green onions, and 1/4 cup of sliced jalapeños. - If you like some heat, drizzle hot sauce over the top. Enjoy this cheesy, meaty goodness! For the complete recipe, check out the Full Recipe. To make your fries crispy, start with the right cut. Cut the potatoes into even pieces, about 1/4 inch thick. This helps them cook evenly. A sharp knife or a fry cutter works best for uniform fries. For extra crispiness, soak the cut potatoes in cold water for 30 minutes. This removes excess starch. After soaking, dry them well with a towel. Toss the fries in olive oil and seasonings before baking. When baking, spread the fries in a single layer on your baking sheet. This allows hot air to circulate. Flip them halfway through cooking for even browning. Bake at 425°F (220°C) for 30-35 minutes until golden brown. You can add more fun to your dirty loaded fries with toppings. Try crispy bacon bits for a salty crunch. Diced avocado adds creaminess and freshness. For sauces, sour cream is a classic choice. It complements the cheese and beef well. Hot sauce is a great way to add spice. Drizzle it over the top for a kick. Experiment with different flavors to find your favorite combo. Each topping can give your fries a new twist. Enjoy the process of making these loaded fries uniquely yours! {{image_2}} You can switch up the meat on your Dirty Loaded Fries. Instead of ground beef or turkey, try pulled pork or shredded chicken. Both add a juicy and flavorful twist. For a vegetarian option, black beans or chickpeas work great. They offer protein and a hearty texture. Just heat them up and sprinkle them on top. Cheese is key for Dirty Loaded Fries. While cheddar cheese is classic, consider nacho cheese for a creamy texture. Pepper jack cheese adds a spicy kick. If you prefer a dairy-free option, try vegan cheese. Many brands melt well and taste great. This way, everyone can enjoy these loaded fries! You can store leftover dirty loaded fries in the fridge. Use an airtight container for best results. They stay fresh for up to three days. When you want to eat them, reheat in the oven. I recommend setting it to 375°F (190°C). Place the fries on a baking sheet. Bake for about 10-15 minutes. This way, they stay crispy and tasty. You can freeze dirty loaded fries before or after baking them. If you freeze before baking, cut and season the fries first. Spread them on a baking sheet and freeze until solid. Then, transfer the fries to a freezer bag. If you freeze after baking, use a similar method. Just wait until they cool down before packing. When you want to cook frozen fries, add about 5-10 minutes to the baking time. Check for crispiness to make sure they are done. Enjoy your loaded fries anytime! Dirty Loaded Fries are a fun, tasty dish. They start with crispy fries made from large russet potatoes. You add layers of flavor with toppings like: - 1 cup shredded cheddar cheese - 1 cup cooked ground beef or turkey - 1/2 cup sour cream - 1/2 cup diced green onions - 1/4 cup sliced jalapeños (fresh or pickled) You also use seasonings like garlic powder and onion powder. Olive oil helps make the fries crispy. This mix of hot fries and toppings makes each bite full of taste! Yes, you can prep Dirty Loaded Fries in advance. Start by cutting the potatoes into fry shapes. Toss them with olive oil and seasonings. Then, spread them on a baking sheet. Cover the tray with plastic wrap and store it in the fridge. When you are ready to cook, just bake them as directed. This way, you save time and still get crispy fries. Dirty Loaded Fries can be a bit heavy, but there are ways to make them healthier. You can use ground turkey instead of beef. This swaps in less fat. You can also use less cheese or switch to a lighter cheese. Adding veggies like tomatoes or lettuce can boost their nutrition. Enjoy them as an occasional treat, and feel free to make smart swaps! Dirty loaded fries are a fun dish made from four simple russet potatoes. You bake them with tasty seasonings and top them with cheese, ground meat, and your favorite condiments. You can make this dish your own by choosing different meats or cheeses. Storing leftovers and freezing them for later is easy too. Enjoy creating your own version of dirty loaded fries. It's simple and satisfying!

Dirty Loaded Fries Flavorful and Easy Recipe

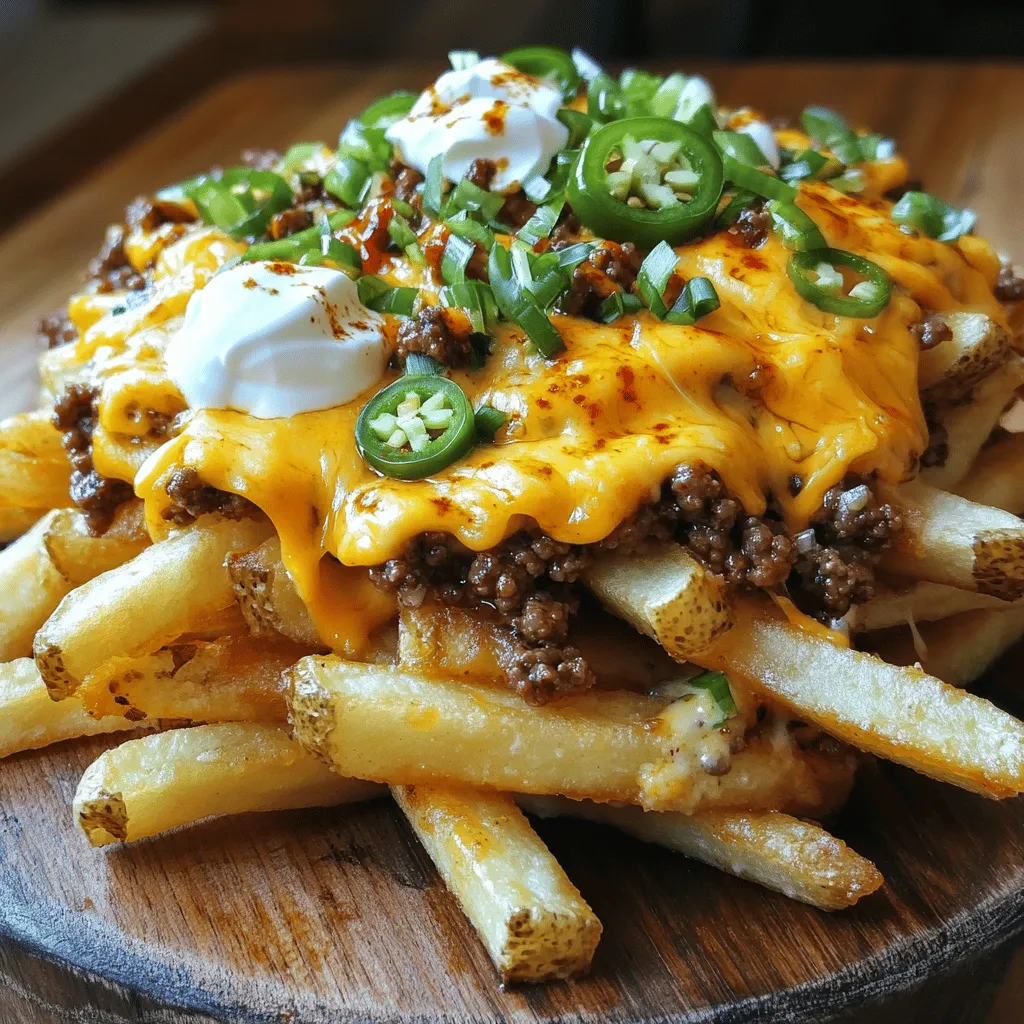
Dirty loaded fries are a fun and tasty treat you can easily make at home! In this post, I’ll share

To make No Bake Christmas Cookie Cups, you need: - 1 cup graham cracker crumbs - 1/2 cup unsweetened cocoa powder - 1/2 cup powdered sugar - 1/2 cup unsalted butter, melted - 1 teaspoon vanilla extract - 1/2 cup creamy peanut butter - 1 cup mini chocolate chips - 1/2 teaspoon cinnamon (optional) - Edible decorations (e.g., colored sprinkles, mini marshmallows) These ingredients combine to create a rich and tasty treat. You can swap some ingredients for a different taste. If you lack graham crackers, use crushed cookies or oats. For cocoa powder, try carob powder for a milder flavor. If you want a lower sugar treat, use a sugar substitute in place of powdered sugar. You can also replace peanut butter with almond or sunflower seed butter for nut-free options. Feel free to enhance your cookie cups with fun add-ins. You can mix in chopped nuts, like walnuts or almonds, for extra crunch. Dried fruits, like cranberries or raisins, can add a sweet and chewy texture. For a burst of flavor, consider adding peppermint extract or spices like nutmeg. The options are endless! First, gather your ingredients. You need graham cracker crumbs, cocoa powder, powdered sugar, melted butter, and vanilla extract. In a medium bowl, mix the graham cracker crumbs, cocoa powder, and powdered sugar. Stir well until it looks even. Now, add the melted butter and vanilla extract. Mix until the dough is moldable. This should feel like wet sand. Next, grab some cupcake liners. Take about one tablespoon of the dough and press it into the bottom and up the sides of each liner. Make the sides a bit thicker for strength. This step is key for holding the filling later. In another bowl, mix creamy peanut butter and mini chocolate chips. Stir until you see no streaks. If you love a warm spice, add cinnamon for more flavor. This step is simple but gives great taste. Spoon the peanut butter mix into each cookie cup. Fill them up generously, but don’t overfill. Leave a little space at the top. This helps when you add decorations later. Now it’s time to chill! Place the filled cookie cups in the fridge for at least 30 minutes. This helps them set properly. When you take them out, they will hold their shape. Once they are set, you can garnish with your favorite edible decorations. Colored sprinkles or mini marshmallows are fun options. You can also check the [Full Recipe] for more tips on serving. To make moldable dough, measure your ingredients carefully. Use a scale for accuracy. When mixing, start with dry ingredients. Combine graham cracker crumbs, cocoa powder, and powdered sugar in a bowl. Then, add melted butter and vanilla. Mix until the dough sticks together. If it feels too dry, add a little more melted butter. Chill the cookie cups for at least 30 minutes. This helps them hold their shape. Use cupcake liners to form the cups. Press the dough firmly in the liners, making the sides thick. This gives them strength. If they crumble, your dough might be too dry. You can fix this with extra butter. Decorating is fun and easy! Use colored sprinkles for a bright touch. Mini marshmallows can add a fluffy look. Drizzle melted chocolate over the top for extra flair. You can also place small candy canes on each cup. This gives a nice holiday feel. Serve the cookie cups on a festive platter. Add extra chocolate chips around them for a great display. For the full recipe, check the earlier section. {{image_2}} You can make these cookie cups even more delightful by adding nuts. Try mixing in chopped walnuts or pecans with the chocolate filling. The crunch adds a nice texture and flavor. A hint of salt from the nuts balances the sweetness of the chocolate. You can also layer the filling, adding a layer of nuts and then chocolate. This creates a fun surprise in each bite. If you want to change up the flavor, think about peppermint or almond. For a peppermint twist, add crushed candy canes to the chocolate mix. This gives a fresh and festive taste. If you prefer almond, swap peanut butter for almond butter. A few drops of almond extract can enhance the flavor too. Each of these variations brings a new festive touch to your cookie cups. For those with dietary restrictions, you can make these cookie cups gluten-free. Use gluten-free graham cracker crumbs instead of regular ones. You can also use almond flour or oats as a base. If you need a nut-free option, replace peanut butter with sunflower seed butter. This keeps the recipe safe for schools and nut-free zones. To keep your no bake Christmas cookie cups fresh, store them in an airtight container. This prevents moisture and keeps them tasty. You can keep them at room temperature for one day. If you want them to last longer, place them in the fridge. They will stay fresh for up to a week this way. Freezing the cookie cups is easy. First, let them chill completely in the fridge. Then, wrap each cookie cup in plastic wrap or aluminum foil. After that, place them in a freezer-safe bag. Make sure to remove as much air as possible. You can freeze them for up to three months. When ready to eat, let them thaw in the fridge or at room temperature. The shelf life of these treats depends on how you store them. At room temp, they last one day. In the fridge, they can stay fresh for about a week. If you freeze them, they last up to three months. To enjoy them at their best, eat them within these time frames. If you notice any changes in smell or texture, it’s best to toss them out. For more details, check the Full Recipe. Yes, you can make these cookie cups ahead of time. They store well in the fridge. I recommend making them a day or two before your event. This way, they have time to chill and set properly. Just keep them covered to avoid drying out. When you’re ready, serve them fresh for your guests. If you need a peanut-free option, try almond butter or sunflower seed butter. Both give a nice flavor. You can also use cashew butter for a creamier texture. Each of these options works well in the filling. Just make sure the substitute is smooth for easy mixing. To make these cookie cups healthier, consider using less sugar. You can reduce the powdered sugar by half. Also, try using whole grain graham cracker crumbs for more fiber. Adding nuts or seeds can boost nutrition too. Finally, swap the chocolate chips for dark chocolate to cut sugar and add antioxidants. In this blog post, we explored the ingredients, steps, tips, and variations for making cookie cups. You learned about optional add-ins and substitutions to fit your taste. We covered how to prepare the base, assemble the filling, and chill the cups for the best results. Remember to store them properly for freshness. With these insights, you can create tasty cookie cups that impress everyone. Enjoy the fun and versatility of your baking adventure!

No Bake Christmas Cookie Cups Festive and Simple Treat

Welcome to a sweet holiday treat that’s both easy and festive! My No Bake Christmas Cookie Cups are perfect for

To make creamy pumpkin pie coffee creamer, you need just a few main ingredients: - 1 cup heavy cream - 1 cup whole milk - 1/2 cup pumpkin puree The heavy cream adds richness, while whole milk keeps the texture smooth. Pumpkin puree gives that warm, fall flavor. Now for the sweeteners and flavorings: - 1/4 cup maple syrup (or to taste) - 1 teaspoon vanilla extract Maple syrup adds a natural sweetness. Vanilla extract gives a lovely aroma and flavor, making the creamer even more delightful. Lastly, we have the spices that bring it all together: - 1 teaspoon ground cinnamon - 1/2 teaspoon ground nutmeg - 1/4 teaspoon ground ginger These spices create that classic pumpkin pie taste. They add warmth and depth, making your coffee feel like a cozy hug. For the full recipe, check the details provided! To start, you need to heat the heavy cream and whole milk. Pour one cup of each into a medium saucepan. Place it over medium heat. Stir gently until the mixture warms up but does not boil. This step is key because it helps blend the flavors. Next, add 1/2 cup of pumpkin puree. Use a whisk to mix it in well. You want the pumpkin to blend smoothly with the cream. This makes your base rich and creamy. Now, it’s time to add some sweetness. Pour in 1/4 cup of maple syrup. This gives your creamer a nice touch of sweetness. Stir it well to combine. Taste it and adjust if you want it sweeter. After that, add 1 teaspoon of vanilla extract. Then, sprinkle in the spices: 1 teaspoon of ground cinnamon, 1/2 teaspoon of ground nutmeg, and 1/4 teaspoon of ground ginger. Don’t forget a pinch of salt! Whisk until all the spices mix in fully. This adds warmth and depth to your creamer. Keep heating the mixture for 3 to 5 minutes. Make sure it’s warm but not boiling. Once it’s ready, take it off the heat. Let it cool for a few minutes. Now, transfer your pumpkin pie coffee creamer to an airtight container. You can store it in the fridge for up to 2 weeks. Before using, give it a good shake. Enjoy it in your coffee for that perfect fall flavor! For the full recipe, check the details above. To get the right creaminess, you can adjust the milk ratio. If you want it richer, add more heavy cream. For a lighter version, increase the whole milk. The key is to find the balance that works for you. Whisking helps ensure a smooth texture. When you mix the ingredients, keep whisking until everything blends well. This step is important to avoid lumps. You can vary the sweetness based on your taste. Start with the 1/4 cup of maple syrup, then add more if you like it sweeter. Taste as you go, and adjust to what you love. Feel free to experiment with extra spices. You could add a pinch of cloves or allspice for a different twist. Each new spice can change the flavor profile and make it uniquely yours. Store your pumpkin coffee creamer in a decorative glass bottle. You can label it with the name and date. This way, it looks great in your fridge. When you serve your coffee, add a sprinkle of cinnamon on top. It makes for a lovely presentation and adds a nice touch. You can also pair this creamer with whipped cream for a festive treat. Enjoy your delicious pumpkin pie coffee creamer! {{image_2}} You can easily make this creamer dairy-free. Use almond milk or oat milk instead of heavy cream and whole milk. Almond milk gives a light nutty taste. Oat milk adds a creamy texture that mimics dairy. You can also use coconut cream. It gives a rich, tropical flavor. Just replace heavy cream with coconut cream for a fun twist. If you want to change the sweetness, try honey or agave syrup. Both add different flavors. Honey gives a floral note, while agave is mild and smooth. You can also use flavored syrups. Pumpkin spice or caramel syrups can add a fun twist. Just mix in a few tablespoons until you reach your desired taste. The holidays are perfect for adding spices. You can mix in nutmeg, cloves, or allspice. These spices bring warmth and depth to your coffee. Another fun idea is flavoring with chocolate or vanilla. A splash of chocolate syrup or a dash of vanilla extract can enhance the richness. Experiment with these additions to create your own unique flavors! Store your creamy pumpkin pie coffee creamer in an airtight container. A glass jar works well. This helps keep it fresh and safe. When stored properly, it lasts up to two weeks in the fridge. Always shake it before use. This ensures the spices mix well after sitting. You can freeze the creamer if you want to keep it longer. Pour it into ice cube trays for easy portions. Once frozen, transfer the cubes to a freezer bag. This way, you can thaw just what you need. To thaw, leave the cubes in the fridge overnight. For best quality, use within three months. Check for changes in smell or color. If it smells sour or looks off, it is best to toss it. Another sign is separation that doesn’t mix back together. Always use your senses to decide. When in doubt, throw it out to stay safe. Yes, you can use non-dairy milk! Almond milk, oat milk, or coconut milk work well. Each option gives a different taste. Almond milk is light, while coconut milk is creamier. You can choose the one you like best for your coffee creamer. The creamer lasts up to two weeks when stored in an airtight container. Keep it in the fridge to maintain freshness. Always check for signs of spoilage. If it smells off or looks strange, it's best to toss it out. Absolutely! This creamer adds great flavor to desserts. Use it in recipes for cakes, cookies, or puddings. It can also be drizzled over pancakes or waffles for a seasonal treat. The options are endless with this creamy pumpkin pie coffee creamer. For the full recipe, check out the section above. This blog post detailed how to create a delicious pumpkin creamer. You learned about essential ingredients, like heavy cream and pumpkin puree. We covered how to add flavors with maple syrup and spices. Then, I shared tips for achieving the perfect texture and customizing your recipe. You discovered variations and best practices for storage. In my opinion, making your own creamer not only adds flavor but also brings joy. Enjoy crafting your unique blend!

Creamy Pumpkin Pie Coffee Creamer Simple Recipe

Get ready to savor fall in a cup with my creamy pumpkin pie coffee creamer! This simple recipe combines rich

Older posts
Newer posts
← Previous Page1 … Page50 Page51 Page52 … Page84 Next →

dsad

© 2026 Foodish Talk • Built with GeneratePress

Our Policies

  • Copyright Policy
  • Cookie Policy
  • GDPR Policy
  • Privacy Policy
  • Disclaimer
  • Terms Of Use

More Information

  • Home
  • About
  • Contact
  • Appetizers
  • Dessert
  • Dinner
  • Drinks
©2026, Foodish Talk About Back To Top