Caramel Apple Dip Simple and Delicious Treat Recipe
Are you craving a sweet and simple treat? This Caramel Apple Dip recipe is perfect for you! It combines smooth
Are you craving a sweet and simple treat? This Caramel Apple Dip recipe is perfect for you! It combines smooth
![- Apples: I love using Fuji or Honeycrisp apples. Both are sweet and crisp. They hold up well during baking and taste great with cinnamon. You can also try Granny Smith for a tart flavor. - Ground Cinnamon and Granulated Sugar: These two ingredients bring warmth and sweetness. Cinnamon adds a cozy taste, while sugar gives a nice crunch. You can adjust the sugar amount to your liking. - Optional Additives: Adding a teaspoon of vanilla extract makes the chips extra special. A pinch of salt helps balance the sweetness. These additions can take your apple chips to the next level. - Mandoline Slicer or Sharp Knife: A mandoline makes slicing apples quick and easy. If you don’t have one, a sharp knife works just fine. Just be careful with your fingers! - Baking Sheet and Parchment Paper: Line your baking sheet with parchment paper. This keeps the chips from sticking and makes cleanup easier. - Key Nutritional Benefits of Apples: Apples are full of vitamins and fiber. They help keep you full and are low in calories. Eating apples can support heart health and digestion. - Health Aspects of Cinnamon: Cinnamon has antioxidants and can help lower blood sugar. It also adds flavor without extra calories. This spice is a great choice for a healthy snack. Preheating the Oven Start by preheating your oven to 225°F (110°C). This low temperature helps the apple slices dry out slowly, which is key for achieving that perfect crunch. Washing and Slicing the Apples Next, wash and dry your apples thoroughly. I love using Fuji or Honeycrisp apples for their sweet taste. Use a mandoline slicer or a sharp knife to cut the apples into thin slices, about 1/8 inch thick. Thin slices bake better and get crispier. Combining Dry Ingredients In a small bowl, mix together 1 teaspoon of ground cinnamon, 2 tablespoons of granulated sugar, and a pinch of salt. This blend will give your apple chips that yummy sweet and spicy flavor. Optional Flavor Enhancements If you want to boost the flavor, you can add 1 teaspoon of vanilla extract. Just mix it in with the apple slices before baking. This little extra step makes a big difference. Arranging Apple Slices Lay the apple slices in a single layer on a baking sheet lined with parchment paper. Make sure they don’t overlap. This helps them dry out evenly. Baking Time and Tips for Crispy Chips Bake the slices for 1.5 to 2 hours. Flip them halfway through for even baking. You know they are done when they are dry and crispy. Let them cool for a few minutes on the baking sheet, then move them to a wire rack to cool completely. For more details, check out the Full Recipe. Achieving Optimal Crispiness For the best crunch, slice your apples thin. Aim for about 1/8 inch thick. A mandoline slicer works great for this task. Lay the slices on your baking sheet in a single layer. This helps air circulate around them. Avoiding Overbaking Keep an eye on your chips as they bake. If they start to brown too much, they may become bitter. Bake them at a low temperature, around 225°F (110°C). This slow drying process keeps them crunchy without burning. Creative Presentation Ideas Serve your apple chips in a cute glass jar. This makes them look fun and inviting. You can add a cinnamon stick for a lovely touch. A small bowl also works well for serving. Pairing with Dips or Other Snacks These chips taste great on their own, but you can pair them with dips. Try almond butter or yogurt. They add a nice creaminess. You can also serve them with cheese for a savory twist. Flavor Variations Want to spice things up? You can add chili powder for a kick. Nutmeg also gives a warm flavor that pairs well with cinnamon. Experiment with different spices to find your favorite blend. Sweetener Alternatives If you want a different sweetness, try brown sugar. It has a richer flavor than white sugar. Honey is another option for a natural sweetener. Just drizzle it on before baking, and you’ll enjoy a tasty twist. For the full recipe, check out the [Full Recipe] section. {{image_2}} You can change the flavor of your cinnamon sugar apple chips in fun ways. Try adding seasonal spices like pumpkin spice or clove for a cozy twist. These spices bring out the warmth of the apples. If you want something different, mix sweet and savory flavors. Drizzle a little maple syrup on the chips or pair them with cheese for a unique snack. Choosing the right apple makes a big difference. Fuji and Honeycrisp are great for sweetness. Granny Smith apples add a nice tang. Each apple type will change the flavor and texture of your chips. Sweeter apples produce a softer chew. Tart apples give a crisp bite. Experiment with different apples to find your favorite. If you want to skip making your own, many brands sell cinnamon sugar apple chips. Look for brands like Bare Snacks or Simply 7. Check the nutritional values listed on the back. Some brands may have added sugars or preservatives. Always read the labels to find the healthiest choice. To keep your cinnamon sugar apple chips fresh, use an airtight container. Glass jars work great. You can also use plastic containers with tight lids. This keeps air out and helps them last longer. Store the chips in a cool, dry place. Avoid leaving them in humid areas. Humidity makes chips soggy and less tasty. You can enjoy your homemade apple chips for about one week. They taste best within the first few days after baking. After that, they may lose some crunch. Look for signs of spoilage. If your chips feel soft or have an off smell, it's time to toss them. If your apple chips lose their crunch, don't worry! You can recrisp them. Place the chips in an oven set at 250°F (120°C) for about 10 minutes. This brings back their crispiness. You can also use a microwave. Heat them in short bursts of 20 seconds. Check often to avoid burning. Enjoy your crispy chips again! For the full recipe, check out the details above. You can tell when apple chips are ready by their texture and color. They should feel dry and crisp. If you gently bend a chip, it should break easily. Look for a light golden color on the edges. If they are still soft or chewy, they need more time in the oven. Yes, you can use other fruits! Pineapple and pear work great. Slice them thinly, just like the apples. Each fruit will bring its own unique taste. Try different spices to match the flavors of other fruits. Absolutely! Here’s how you can do it: 1. Slice the fruit thinly using a mandoline or knife. 2. Mix the cinnamon and sugar in a bowl. 3. Sprinkle the mixture on the fruit slices. 4. Place the slices in a single layer in the dehydrator. 5. Set the dehydrator to 135°F (57°C) and dry for about 6-8 hours. Check the chips every hour until they reach the desired crispness. You can find cinnamon sugar apple chips at stores like Whole Foods or Trader Joe's. They also sell online. Look for brands like Bare or Simply 7. Always check the nutrition label to pick the best option. If you prefer making them at home, check the Full Recipe for a simple guide! In this post, we explored how to make delicious cinnamon sugar apple chips. We discussed key ingredients, including apple types and optional spices. I shared easy steps for preparation, mixing, and baking. You learned tips for crispiness and creative serving ideas. Finally, we covered storage and reheating methods. Now, you're ready to create your own tasty snacks. Enjoy experimenting with flavors and sharing them with friends! These apple chips are a fun and healthy choice for everyone.](https://foodishtalk.com/wp-content/uploads/2025/07/6f196239-0ce9-4d61-80c3-dd13f63abbd6.webp)
Looking for a tasty snack that’s both healthy and satisfying? Try making Cinnamon Sugar Apple Chips! These crunchy treats are
![- 2 cups all-purpose flour - 1 cup apple cider - 1/2 cup granulated sugar - 1/4 cup brown sugar, packed - 1 teaspoon baking powder - 1 teaspoon baking soda - 1 teaspoon ground cinnamon - 1/2 teaspoon ground nutmeg - 1/2 teaspoon salt - 2 large eggs - 1/4 cup vegetable oil - 1 teaspoon vanilla extract - 1/2 cup powdered sugar (for coating) These ingredients come together to make soft, moist donuts. The apple cider gives a sweet and tangy flavor. The combination of cinnamon and nutmeg warms up the taste. Using both granulated and brown sugar adds depth to the sweetness. Each ingredient plays a key role. Flour provides structure, while baking powder and baking soda help the donuts rise. Eggs bind the mix and add richness. The vegetable oil keeps them moist. The powdered sugar coating adds a sweet finish. You can easily customize this list. For a gluten-free option, substitute the flour with a gluten-free blend. You can also try using maple syrup instead of granulated sugar for a different sweetness. If you want to learn more about the full recipe, check out the details in the [Full Recipe]. 1. Preheat your oven to 350°F (175°C). Grease your donut pan with non-stick spray. This helps the donuts pop out easily after baking. 2. In a large bowl, mix the dry ingredients. Combine 2 cups of flour, 1/2 cup of granulated sugar, 1/4 cup of packed brown sugar, 1 teaspoon of baking powder, 1 teaspoon of baking soda, 1 teaspoon of ground cinnamon, 1/2 teaspoon of ground nutmeg, and 1/2 teaspoon of salt. Whisk until everything is well combined. 3. In another bowl, mix the wet ingredients. Combine 1 cup of apple cider, 2 large eggs, 1/4 cup of vegetable oil, and 1 teaspoon of vanilla extract. Stir until the mixture is smooth. 1. Time to fill the donut pan! Use a piping bag or a zip-top bag with a corner cut off. Carefully pipe the batter into the pan, filling each cavity about 2/3 full. This gives the donuts room to rise. 2. Bake the donuts for 12-15 minutes. They are done when a toothpick inserted in the center comes out clean. Keep an eye on them to avoid overbaking! 3. After baking, let the donuts cool in the pan for about 5 minutes. Then, move them to a wire rack to cool completely. Once cool, roll each donut in 1/2 cup of powdered sugar until coated. This adds a sweet touch! For the full recipe, check the detailed instructions above. Enjoy your donuts! - Overmixing batter: When you mix too much, the donuts become tough. You want a light and fluffy texture. Stir gently until just combined. - Not greasing the pan properly: A well-greased pan is key. If the donuts stick, they can break apart. Use non-stick spray or oil to coat the pan evenly. - Measuring ingredients accurately: Use a scale or measuring cups to get the right amounts. Accurate measurements lead to better results. A small change can affect the taste and texture. - Ideal baking time adjustments: Keep an eye on the donuts while they bake. Ovens can vary in temperature. Check for doneness by inserting a toothpick. If it comes out clean, they’re done! {{image_2}} You can easily change your baked apple cider donuts for the season. Adding spices can enhance the flavor. Try adding ginger or cloves for a warm twist. These spices add depth and warmth, perfect for fall. You can also incorporate fruit pieces. Diced apples or pears provide juicy bites. They make the donuts even more interesting and tasty. If you need to make this recipe gluten-free, use gluten-free flours. Almond flour or oat flour works well. These flours keep the donuts moist and tasty. You can also use sugar substitutes. If you want a lower-sugar option, try using stevia or monk fruit. These keep the sweetness without the extra calories. For the full recipe, check out the earlier section. Explore these variations to make your donuts special! To keep your baked apple cider donuts fresh, store them in an airtight container. This method prevents air from making them dry. Line the container with paper towels. Place the donuts in a single layer. If you have many donuts, add another towel and layer more donuts. Keep the container at room temperature. This way, they stay moist and tasty for up to three days. If you want to save your donuts for later, freezing is a great option. To freeze, let the donuts cool completely first. Then, place them in a freezer-safe bag. Remove as much air as you can before sealing. They will stay good for about three months. When you are ready to enjoy them again, take the donuts out of the freezer. Let them thaw in the fridge overnight, or sit at room temperature for a few hours. To warm them up, preheat your oven to 350°F (175°C). Bake the donuts for about 5-10 minutes. This makes them soft and delicious again, just like when they were fresh. For the complete recipe, check the [Full Recipe]. To make Baked Apple Cider Donuts gluten-free, substitute all-purpose flour with gluten-free flour. Use a blend that includes xanthan gum for better texture. Make sure to check the labels on all other ingredients. This way, you ensure no hidden gluten sneaks in. Yes, store-bought apple cider works perfectly! It saves time and adds great flavor. Just make sure it's pure apple cider without added sugars or artificial flavors. This keeps your donuts tasty and true to the recipe. Check the donuts after 12 minutes. Insert a toothpick in the center. If it comes out clean, they are done. If it has batter on it, bake for a few more minutes. The donuts should also feel firm to the touch. You can find Baked Apple Cider Donuts at local bakeries, farmer's markets, or seasonal fairs. Some cafes may also have them when apples are in season. Ask around, and you might discover a hidden gem nearby. To freeze your donuts, let them cool completely first. Place them in a single layer on a baking sheet. Freeze for about an hour, then transfer them to a freezer-safe bag. This prevents them from sticking together. Baked Apple Cider Donuts stay fresh for about three days at room temperature. For longer storage, freeze them. When frozen, they can last for up to three months. Just thaw at room temperature before enjoying. This blog post guides you through making Baked Apple Cider Donuts. We covered ingredients, baking steps, and common mistakes. I shared tips for variations, storage, and answering your questions. Now, you can create your own tasty donuts at home. Enjoy the flavors and share with friends. Happy baking!](https://foodishtalk.com/wp-content/uploads/2025/07/75f62b19-6432-447e-842a-e17d77212468.webp)
If you’re ready to dive into fall flavors, you must try my Baked Apple Cider Donuts! They are moist, flavorful,
![To make these delightful caramel apple donuts, you need fresh ingredients. Here’s what you’ll need: - 2 cups all-purpose flour - 1 cup granulated sugar - 1 tablespoon baking powder - 1 teaspoon ground cinnamon - 1/2 teaspoon salt - 1/2 cup unsalted butter, melted - 1 cup buttermilk - 2 large eggs - 1 teaspoon vanilla extract - 1 medium apple, peeled and finely chopped - 1 cup caramel sauce - Additional cinnamon sugar for coating These ingredients come together to create a sweet and comforting treat. The key is to use a tart apple, like Granny Smith. It balances the sweetness of the caramel and sugar. For the best flavor, I recommend using fresh, high-quality ingredients. This ensures your donuts will taste amazing. You can find the full recipe, including detailed steps, to guide you through the process. Enjoy making these tasty donuts! 1. Preheat your oven to 350°F (175°C). This step gets your oven ready for baking. 2. Grease your donut pan with non-stick spray or butter. This helps the donuts come out easily. 3. In a large mixing bowl, combine 2 cups of flour, 1 cup of sugar, 1 tablespoon of baking powder, 1 teaspoon of cinnamon, and 1/2 teaspoon of salt. Mix these dry ingredients until they are well blended. 4. In a separate bowl, mix 1/2 cup of melted butter, 1 cup of buttermilk, 2 eggs, and 1 teaspoon of vanilla extract. Stir until everything is smooth and mixed well. 1. Pour the wet mix into the dry mix. Stir gently until just combined. Be careful not to overmix; a few lumps are okay. 2. Fold in 1 medium apple, peeled and finely chopped. This adds yummy apple flavor to your donuts. 3. Using a piping bag or a zip-top bag with a cut corner, fill each donut cavity about 2/3 full with batter. This way, they have room to rise. 4. Bake for 10-12 minutes. Check if they are done by inserting a toothpick into the center. It should come out clean. 1. After baking, let the donuts cool in the pan for 5 minutes. Then, move them to a wire rack to cool completely. 2. Once cooled, dip each donut in 1 cup of caramel sauce. Let any extra caramel drip off. 3. Finally, roll the donuts in a mixture of 1/2 cup sugar and 1 teaspoon cinnamon. This gives them a sweet and spicy coating. Enjoy your Caramel Apple Donuts, a delightful fall treat! For the complete recipe, check the [Full Recipe]. How to prevent overmixing When mixing your donut batter, always mix until just combined. Overmixing can make your donuts tough. Use a gentle hand and a spatula to combine wet and dry ingredients. This keeps your donuts light and fluffy. Best type of apple to use I recommend using Granny Smith apples. They add a nice tartness that balances the sweet caramel. Their firm texture holds up well in baking, giving your donuts a great bite. Presentation ideas for serving Arrange the donuts on a fun platter. Drizzle extra caramel sauce on top for a wow factor. You can also add thin apple slices or a sprinkle of chopped nuts for a nice touch. This makes your dish look even more tempting. Ideal accompaniments Serve these donuts with a scoop of vanilla ice cream or a cup of hot cider. The warm flavors of the cider pair perfectly with the sweetness of the donuts. It’s a cozy fall treat that everyone will love. Suggestions for additional toppings Consider adding crushed nuts or chocolate chips on top of your donuts. You can also sprinkle some sea salt for a sweet and salty mix. These little touches can boost the flavor and make your donuts even more special. How to make homemade caramel sauce To make your own caramel sauce, melt 1 cup of sugar in a saucepan over medium heat. Stir until it turns golden brown. Then, add 1/2 cup of heavy cream slowly while stirring. Let it cool before using. Homemade caramel adds a rich, deep flavor to your donuts. For the full recipe, check the [Full Recipe]. {{image_2}} You can make your caramel apple donuts healthier in two simple ways. First, swap all-purpose flour for whole wheat flour. Whole wheat adds fiber and nutrients. This change keeps the taste while making the donuts better for you. Next, consider reducing the sugar content. You can cut the sugar by one-third without losing flavor. This small change still gives that sweet taste, but with fewer calories. Want to add a twist to your donuts? Try adding spices like nutmeg. Just a pinch can enhance the flavor and add warmth. You can also mix in nuts or chocolate chips for extra texture. Chopped pecans or walnuts pair well with apples. If you love chocolate, mini chocolate chips bring a fun surprise in every bite. If you follow a vegan diet, you can still enjoy these donuts. Replace eggs with flaxseed meal and use plant-based milk. Applesauce can also replace butter for a moist texture. For gluten-free options, use a gluten-free flour blend. Ensure the baking powder is also gluten-free. With these swaps, you can savor delicious caramel apple donuts without worry. For the full recipe, check the main article! To keep your caramel apple donuts fresh, store them in an airtight container. This helps prevent them from drying out. Place a piece of parchment paper between layers to avoid sticking. If you have extra donuts, try to consume them within 2-3 days for the best taste. - Use a container that seals well. - Keep them at room temperature. - Avoid placing them in direct sunlight. If you want to save some donuts for later, freezing is a great option. Start by letting the donuts cool completely. Once cool, wrap each donut in plastic wrap. Place them in a freezer-safe bag or container. - Make sure they are tightly wrapped. - Label the bag with the date. To thaw, simply take them out and leave at room temperature for about an hour. If you want to enjoy them warm, pop them in the microwave for 10-15 seconds. This will bring back that fresh taste. How do I make caramel apple donuts from scratch? To make caramel apple donuts, gather your ingredients first. You will need flour, sugar, baking powder, cinnamon, salt, butter, buttermilk, eggs, vanilla extract, an apple, and caramel sauce. Follow the steps in the Full Recipe for detailed guidance. This method ensures your donuts are moist and flavorful. Where can I buy caramel apple donuts? You can find caramel apple donuts at local bakeries or some coffee shops. Check stores that focus on seasonal treats. You might also find them at farmers' markets during fall. If you want a special treat, try making your own at home! What’s the best way to reheat donuts? To reheat donuts, use a microwave for about 10 seconds. If you want them crispy, use an oven at 350°F for about 5 minutes. This method helps maintain the texture and taste of your donuts. Always check if they are warm before serving. Approximate calories per donut Each caramel apple donut contains about 200 calories. This number may vary based on the ingredients you use. Keep it in mind if you are counting calories. Breakdown of key nutrients - Carbohydrates: 30g - Protein: 3g - Fat: 8g - Sugars: 10g - Fiber: 1g This breakdown helps you understand what you’re eating. Enjoying these donuts in moderation is a great way to treat yourself. Why are my donuts dense? Dense donuts often come from overmixing the batter. Mix just until combined to avoid this. Also, be sure your baking powder is fresh and active. If you use too much flour, it can also make them heavy. What if my caramel sauce is too thin? If your caramel sauce is thin, cook it longer on low heat. This helps it thicken. You can also add a little more sugar to help it set. Just be patient and stir often to prevent burning. In this blog post, I covered how to make caramel apple donuts from scratch. We explored essential ingredients, step-by-step instructions, and tips for perfecting your recipe. I shared ideas for serving and offered variations to suit different diets. Remember to store your donuts properly to keep them fresh. With practice, you'll bake delicious treats your loved ones will enjoy. Dive in, experiment, and savor each bite. Enjoy your baking journey!](https://foodishtalk.com/wp-content/uploads/2025/07/ba167cba-6a91-4ee3-8c3f-caaba06a8992.webp)
Fall is the perfect time for a sweet treat, and nothing says autumn like Caramel Apple Donuts! In this delightful
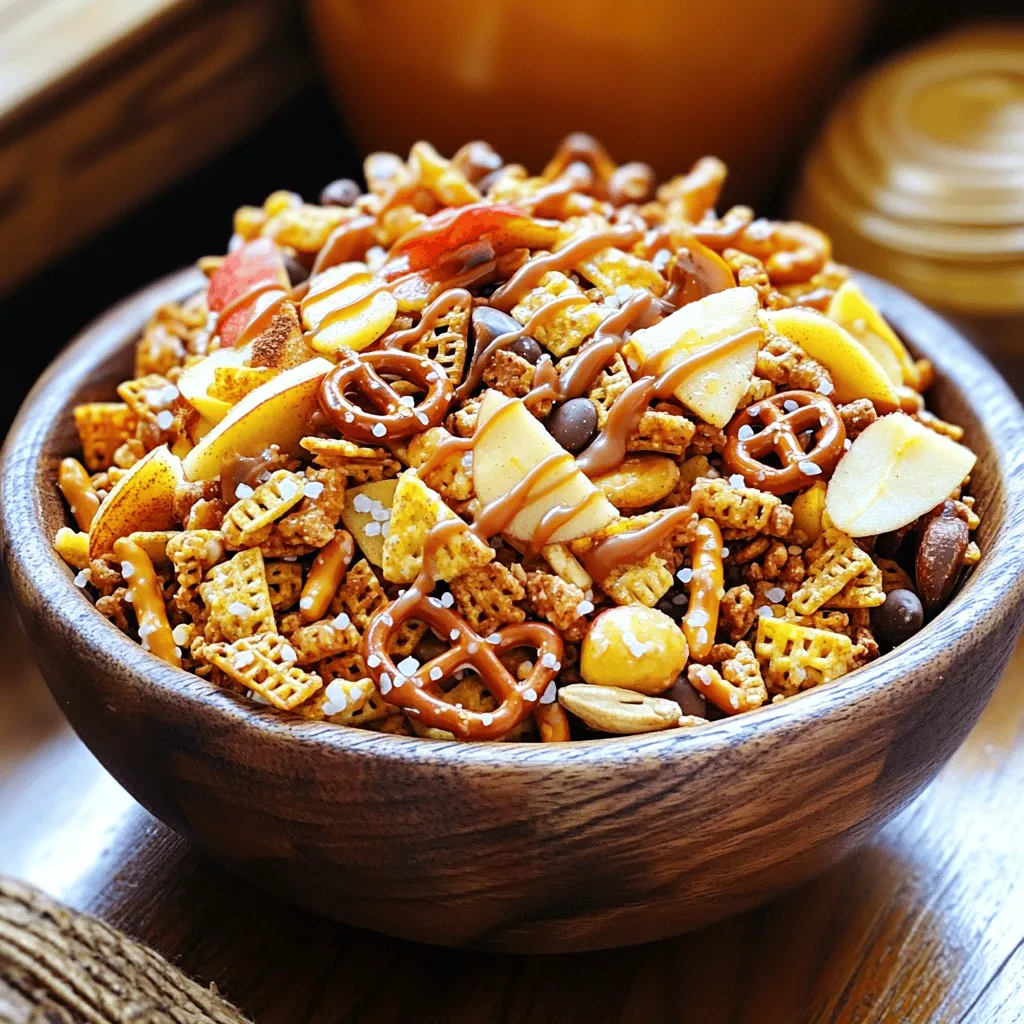
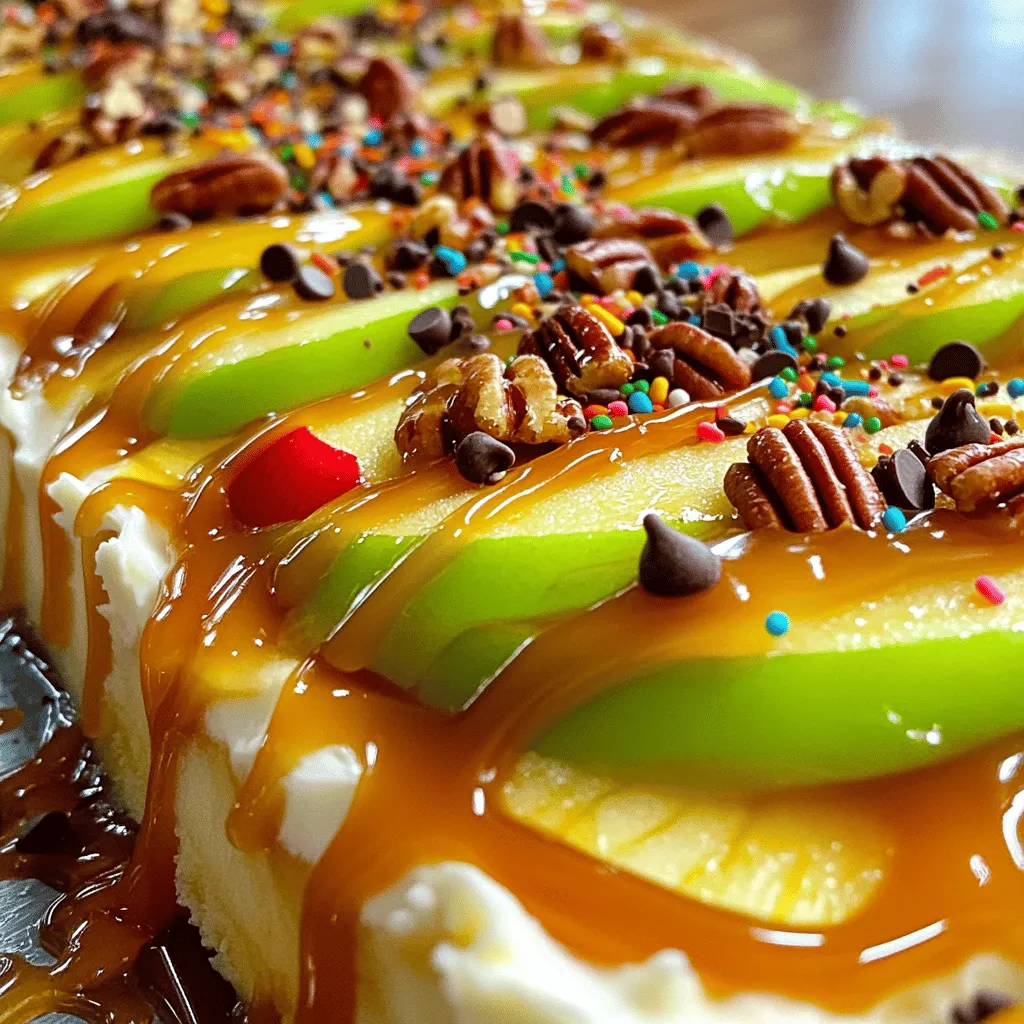
Are you ready to create a treat that’s both sweet and crunchy? My Caramel Apple Snack Mix is the perfect
. Monster Munch Snack Mix is fun and easy to make. We covered all the ingredients, their nutrition, and alternatives. You learned step-by-step instructions for the perfect mix. Remember to avoid common mistakes for the best result. Get creative with variations for holidays or dietary needs. For freshness, store it right and check shelf life. This mix is great for parties or a quick snack. Now go enjoy making your very own Monster Munch Snack Mix!](https://foodishtalk.com/wp-content/uploads/2025/07/7ed62560-f4a5-4c1d-af30-b4a4bf3b2407.webp)
Are you ready for a fun and tasty treat? Monster Munch Snack Mix combines sweet and savory flavors to create
![To make the best Halloween trail mix, you'll need a mix of fun and tasty treats. Here’s what to gather: - 1 cup pumpkin spice granola - 1/2 cup candy corn - 1/2 cup chocolate-covered pretzels - 1/2 cup mini marshmallows - 1/2 cup dried cranberries - 1/2 cup roasted pumpkin seeds - 1/4 cup white chocolate chips - 1/4 cup dark chocolate chunks - 1/2 teaspoon cinnamon - A pinch of sea salt These ingredients create a blend of sweet, salty, and crunchy bites. The pumpkin spice granola gives a festive flavor. Candy corn adds a Halloween touch, while chocolate-covered pretzels give that delightful crunch. You can make your trail mix even more exciting! Here are some fun add-ins: - 1/2 cup sunflower seeds - 1/2 cup yogurt-covered raisins - 1/2 cup caramel bits - A handful of M&M's These extras bring in new textures and flavors. Sunflower seeds add crunch, while caramel bits add a sweet surprise. Feel free to mix and match to find your favorite combo. If you have allergies or want to switch things up, you can easily alter some ingredients: - Swap out candy corn for chocolate chips if you need a nut-free option. - Use gluten-free pretzels if you need a gluten-free mix. - Replace dried cranberries with raisins or other dried fruits if you prefer. Always check for allergens in each ingredient. This way, you can enjoy Halloween treats without worry. You can find the Full Recipe in the main article for all the details! Making Halloween trail mix is easy and fun. You only need about 10 minutes to prep. Gather all your ingredients first. This helps you mix faster and keeps things neat. 1. In a large bowl, combine the following ingredients: - 1 cup pumpkin spice granola - 1/2 cup candy corn - 1/2 cup chocolate-covered pretzels - 1/2 cup mini marshmallows - 1/2 cup dried cranberries - 1/2 cup roasted pumpkin seeds 2. Next, add: - 1/4 cup white chocolate chips - 1/4 cup dark chocolate chunks 3. Sprinkle in: - 1/2 teaspoon cinnamon - A pinch of sea salt 4. Gently toss everything together until well mixed. You want every bite to have a bit of everything. 5. Taste it! If you want more sweetness, add more chocolate. 6. Spread the trail mix on a baking sheet lined with parchment paper. This makes serving easy. 7. Let it sit for 10-15 minutes. This helps the flavors blend. 8. Scoop the trail mix into Halloween-themed bags or jars. Now, you’re ready for treats! Use clear bags to show off the colorful mix. Tie them with orange or black ribbons for fun. You can also serve the trail mix in small bowls at parties. Add some spooky decorations around for a festive touch. This makes your treat table look festive and inviting. Enjoy your tasty Halloween trail mix! Check out the [Full Recipe] for more details. You can make your trail mix unique. Start with the base mix. Use pumpkin spice granola for a festive touch. Add your favorite candy. You might like gummy worms or chocolate bats. For crunch, try adding nuts like almonds or pecans. You can also swap dried cranberries for dried apples or mango. Mix and match until it feels just right. Mixing is key for a great trail mix. Toss all ingredients gently in a large bowl. This way, each bite is balanced. Once mixed, store it in an airtight container. This keeps it fresh longer. You can also portion it into snack bags. This makes it easy to grab on the go. Want to boost the taste? Add a sprinkle of cinnamon for warmth. A little sea salt can enhance sweetness. If you like it sweeter, drizzle some honey or maple syrup. For a spicy kick, try a dash of cayenne pepper. Taste your mix and adjust as you go. This is your creation, after all! Don't forget to check the full recipe for all the delicious details! {{image_2}} You can change your trail mix for each season! For winter, add peppermint patties or cocoa nibs. In spring, use pastel chocolates and dried fruits like apricots. Summer calls for tropical nuts and coconut flakes. Each season brings new flavors to explore. Make your trail mix fun with themed items. For Halloween, use spooky gummies or candy eyes. Add orange or black sprinkles for a festive touch. For a pirate theme, include chocolate coins and sea salt. Themes make the mix exciting and engaging. You can choose sweet or savory for your trail mix. Sweet mixes often include chocolate, candy, and dried fruits. For a savory twist, add cheese crackers, nuts, and pretzels. Mixing sweet and savory gives you the best of both worlds. You can find a balance that fits your taste. For the full recipe, check out the Spooktacular Halloween Trail Mix. Enjoy creating your own mix! To keep your Halloween trail mix fresh, use an airtight container. Glass jars work great. You can also use zip-top bags. Store the mix in a cool, dry place. Avoid heat and sunlight. This keeps the flavors and crunch intact. Properly stored, your trail mix lasts about two weeks. After that, it may lose some taste and texture. If you notice any changes in smell or look, it’s best to toss it. Always check before enjoying! You can freeze your Halloween trail mix for longer storage. Use a freezer-safe bag or container. Remove as much air as possible to prevent freezer burn. When ready to eat, let it thaw in the fridge overnight. This keeps the mix fresh and tasty. The best way to package Halloween trail mix is in clear bags or jars. Use festive Halloween-themed cellophane bags. Tie them with bright ribbons for a fun touch. This makes them easy to grab and enjoy. You can also use small containers or mason jars. These options keep the trail mix fresh and look cute. Yes, you can use different types of cereals! Try using your favorites like Cheerios or Rice Chex. You can mix and match cereals to create a unique flavor. Just keep the total amount the same. This way, you still get that perfect crunchy texture. Absolutely! This trail mix is great for kids and adults. It has sweet and salty flavors that everyone loves. Just watch for allergies, like nuts or gluten. Always check the labels of your ingredients. This ensures a safe and tasty treat for all! This article covers everything you need for Halloween trail mix. You learned about the essential ingredients, plus some fun add-ins. We went step-by-step on how to mix it all. You also found tips for storage and serving. Trail mix is a great way to add fun and flavor to Halloween. With these ideas, you can create your own unique mix for all ages. Enjoy making your tasty trails this Halloween!](https://foodishtalk.com/wp-content/uploads/2025/07/9d71598c-01a6-4bca-971a-eb56c953a1e2.webp)
Get ready to scare up some fun with the best Halloween trail mix! This mix isn’t just tasty; it’s a
![To make the best no-bake pumpkin cheesecake, gather these simple ingredients: - 1 ½ cups graham cracker crumbs - ½ cup unsalted butter, melted - 2 cups cream cheese, softened - 1 cup canned pumpkin puree - 1 cup powdered sugar - 1 teaspoon vanilla extract - 1 teaspoon pumpkin pie spice - 1 cup heavy whipping cream If you want to dress it up, consider these toppings: - Whipped cream - Ground cinnamon You will need a few basic tools: - A medium mixing bowl - A large mixing bowl - An electric mixer - A 9-inch springform pan - A spatula These tools help make the process smooth. Having everything ready makes cooking more fun. The ingredient list is easy to follow, and you can find these items at any store. This dish is perfect for fall or any time you crave something sweet! If you want the full recipe, check it out [Full Recipe]. To start, gather your ingredients. You will need graham cracker crumbs and melted butter. In a medium bowl, mix 1 ½ cups of crumbs with ½ cup of melted butter. Stir until the mix looks crumbly. This mix will be your crust. Press it firmly into the bottom of a 9-inch springform pan. Make sure it is even. Once done, place the pan in the fridge to chill. This helps the crust hold together. Next, we make the filling. In a large mixing bowl, add 2 cups of softened cream cheese. Beat it with an electric mixer until smooth. Then, add 1 cup of canned pumpkin puree, 1 cup of powdered sugar, 1 teaspoon of vanilla extract, and 1 teaspoon of pumpkin pie spice. Mix everything until well combined. In another bowl, whip 1 cup of heavy cream until stiff peaks form. Gently fold this whipped cream into your pumpkin mix. Be careful not to deflate it; you want it light and fluffy. Now it’s time to assemble. Take the chilled crust from the fridge. Spoon the pumpkin filling over the crust. Spread it evenly with a spatula. Cover the cheesecake with plastic wrap. Place it back in the fridge for at least 4 to 6 hours, or overnight if you can wait. This helps it set well. When ready, remove the cheesecake from the pan. Top it with whipped cream and a sprinkle of cinnamon for a special touch. Enjoy your delicious no-bake pumpkin cheesecake! For the full recipe, check the earlier section. To get the best texture for your cheesecake, use softened cream cheese. Cold cream cheese makes lumps. Beat it well until it’s smooth. When adding pumpkin puree, mix it in slowly. This helps keep the cream cheese from getting too airy. Gently fold in the whipped cream last. This keeps the filling light and fluffy. Use cold heavy cream for the best results. This helps it whip faster. Beat it until stiff peaks form. It should hold its shape well. Don’t overbeat, or it can turn into butter. If you want sweetened whipped cream, add a bit of powdered sugar while whipping. This adds flavor and sweetness. For a lovely presentation, slice the cheesecake into wedges. Add a dollop of whipped cream on each piece. A sprinkle of cinnamon on top gives it a nice touch. Use a warm knife to cut clean slices. This makes serving easier. You can also decorate the edges of the cheesecake with extra whipped cream. This looks beautiful and inviting. For more ideas, check out the Full Recipe. {{image_2}} You can make this no-bake pumpkin cheesecake gluten-free. Swap graham crackers for gluten-free crumbs. Look for brands that use rice or almond flour. They work well for the crust. Just mix them with melted butter like usual. This keeps the taste and texture great. For a dairy-free version, use vegan cream cheese. Look for brands made from nuts or soy. You can also replace heavy cream with coconut cream. Chill a can of coconut milk overnight. Scoop out the thick part to whip. These swaps keep the cheesecake creamy and tasty without dairy. Feel free to get creative with flavors! You can add chocolate chips or nuts into the filling. A swirl of caramel or peanut butter gives it a fun twist. Try mixing in a bit of maple syrup for extra sweetness. These small changes can really elevate your cheesecake. For the spice lovers, add extra pumpkin pie spice or a hint of nutmeg. Each variation offers something new and exciting. For the full recipe, check the link above. Store leftover cheesecake in the fridge. Use an airtight container to keep it fresh. If you have a springform pan, cover it tightly with plastic wrap. This keeps the cheesecake moist and prevents it from absorbing odors. You can freeze the cheesecake for later. First, let it chill in the fridge. Once set, slice it into portions. Wrap each slice in plastic wrap, then put them in a freezer bag. This helps keep the cheesecake from getting freezer burn. It can last up to three months in the freezer. No need to heat this cheesecake. It tastes great cold. If you want it softer, take it out of the fridge 15 minutes before serving. This makes it easier to slice and adds to the creamy texture. Enjoy each bite of your no-bake pumpkin cheesecake! For the full recipe, check out the recipe section above. Yes, you can use fresh pumpkin. First, cook and puree the pumpkin. Make sure it is smooth and thick. Canned pumpkin is more convenient and often has a richer flavor. If you use fresh, watch for extra moisture. This can change the texture of your cheesecake. No-Bake Pumpkin Cheesecake lasts about 5 to 7 days in the fridge. Keep it in an airtight container to prevent drying out. Make sure to keep it cold. This keeps it fresh and tasty for longer. Yes, you can make this cheesecake ahead of time. It is perfect for gatherings or holidays. Prepare it a day or two in advance. Just remember to chill it properly. The flavors will blend nicely as it sits. For the best taste, serve it cold. Check out the Full Recipe for more details! This guide showed how to make a no-bake pumpkin cheesecake. You learned about the ingredients, steps, tips, and storage. Remember, you can mix flavors and adjust for dietary needs. Enjoy this treat at any gathering or as a simple dessert. It’s easy, tasty, and fun to make. Try it out, and share your creations! You’ll impress friends and family with your skills. Happy baking!](https://foodishtalk.com/wp-content/uploads/2025/07/7ddb1a1a-e247-4cca-802e-924bc79fb534.webp)
Craving a sweet treat that screams fall? You’re in the right place! This No-Bake Pumpkin Cheesecake is super easy to

If you love pumpkin and cheesecake, you’re in for a treat! These Pumpkin Cheesecake Bars are both simple to make

If you love fall flavors, you’ll adore these Pumpkin Cream Cheese Swirl Brownies! They combine rich brownies with creamy pumpkin
