Skip to content
DisclaimerTerms Of UseGDPR PolicyCookie Policy

Foodish Talk

  • Home
  • Drinks
  • Appetizers
  • Dinner
  • Dessert
  • About
  • Contact
  • Privacy Policy
DisclaimerTerms Of UseGDPR PolicyCookie Policy

NO-ING-IMG

- Cabbage steaks and balsamic vinegar: The star of this dish is the cabbage. I like to use a large head of green cabbage. Slice it into thick steaks, about an inch each. Balsamic vinegar adds a rich tangy flavor that pairs well with the cabbage. - Olive oil and garlic: I use olive oil to help the cabbage roast nicely. It also gives a nice depth of flavor. Fresh minced garlic gives it a strong and bold taste. You need about four cloves for this recipe. - Additional spices and seasoning: I add smoked paprika and dried oregano. They bring warmth and earthiness to the dish. A sprinkle of salt and pepper enhances all the flavors. - Fresh parsley and other herbs: I love to top my cabbage steaks with fresh chopped parsley. It adds a pop of color and freshness. You can also try other herbs, like thyme or basil. - Parmesan cheese or chili flakes for added flavor: If you want to add a little zest, sprinkle some chili flakes. For a rich finish, grated Parmesan cheese works wonderfully too. This simple mix of ingredients creates a flavorful roasted dish that is both satisfying and visually appealing. For the complete recipe, check out the [Full Recipe]. First, preheat your oven to 400°F (200°C). This high heat helps create a nice caramelization. Next, line a baking sheet with parchment paper. This makes cleaning easy later. Now, grab a large head of green cabbage. Remove the outer leaves, as they can be tough. Slice the cabbage into 1-inch thick steaks. You should get about 4 to 6 steaks, depending on the cabbage size. In a small bowl, whisk together the following ingredients: - 4 tablespoons balsamic vinegar - 3 tablespoons olive oil - 4 cloves garlic, minced - 1 teaspoon dried oregano - 1 teaspoon smoked paprika - Salt and pepper to taste This mixture adds a punch of flavor. Make sure it’s well mixed. Take your cabbage steaks and place them on the prepared baking sheet. Use a brush to coat both sides generously with the balsamic-garlic mixture. This will ensure every bite is tasty. Roast the cabbage steaks in the preheated oven for 25 to 30 minutes. Flip them halfway through cooking. They should become tender and caramelized at the edges. Once done, take them out and let them cool for a few minutes. Garnish with fresh chopped parsley before serving. This adds a nice pop of color to your dish. For the full recipe, refer to the earlier section. - Achieving perfect caramelization To get that rich, sweet flavor, you want the edges of your cabbage steaks to caramelize. Brush them well with the balsamic-garlic mixture. The sugar in the balsamic helps form a nice crust. Roast them at 400°F for about 25 to 30 minutes. Flip them halfway through for even browning. - Ensuring even cooking Slice your cabbage steaks about 1-inch thick. If they are too thin, they might burn. If they are too thick, they may not cook through. Use a sharp knife for clean cuts. This helps them cook evenly and become tender. - Best accompaniments for cabbage steaks Cabbage steaks go well with many dishes. Serve them alongside grilled chicken or fish for a hearty meal. They also pair nicely with grains like quinoa or rice. For a complete vegetarian dish, add roasted chickpeas. - Ideal plating and presentation styles To make your dish pop, use a large platter. Place the cabbage steaks in a circle. Drizzle leftover balsamic-garlic mixture on top. Finish with a sprinkle of fresh parsley for color. This makes your plate look bright and fresh. For the detailed method on how to make this dish, check out the Full Recipe. {{image_2}} You can easily adjust the flavor of garlic balsamic cabbage steaks. Try adding extra spices to bring out new tastes. For a smoky kick, add more smoked paprika. If you like heat, sprinkle on some chili flakes. You can also play with herbs. Fresh thyme or rosemary can give a nice twist. Adding other vegetables can enhance your dish too. Think about slicing some carrots or bell peppers. These vegetables roast well and add color. You could even mix in some sliced onions for sweetness. Each variation brings a unique taste to your meal. If you want to swap out oils or vinegars, you have options. Instead of olive oil, try avocado oil for a lighter taste. You can also use apple cider vinegar for a fruity zing. Both of these options work well in this recipe. For garnishes, consider vegan options. Nutritional yeast can add a cheesy flavor without dairy. You can also use sunflower seeds for a nice crunch. This way, you keep the dish plant-based and tasty. Check the [Full Recipe] for all the details to make these variations shine. To keep your Garlic Balsamic Cabbage Steaks fresh, store leftovers properly. First, let the cabbage steaks cool down to room temperature. Then, place them in an airtight container. This helps keep moisture in and prevents them from drying out. I recommend using glass containers or BPA-free plastic ones. These types help with food safety and keep flavors intact. When it's time to enjoy your leftovers, reheating is key. The best methods include using an oven or an air fryer. Both methods keep the cabbage steaks crispy and flavorful. Preheat your oven to 350°F (175°C) and place the steaks on a baking sheet. Heat for about 10-15 minutes. If you use an air fryer, set it to 350°F (175°C) for about 5-7 minutes. This method keeps the texture just right. Avoid the microwave if you can, as it may make the steaks soggy. Can I use other types of cabbage? Yes, you can use other types of cabbage. Napa cabbage or red cabbage works well too. Each type has a different taste and color. Feel free to experiment! Just keep the thickness of the steaks about one inch. How do I know when the cabbage steaks are done? Cabbage steaks are done when they feel tender and have a nice caramel color. You can check them with a fork. If it goes in easily, they are ready. I usually roast them for about 25 to 30 minutes, flipping halfway. Caloric content and nutritional benefits Cabbage is low in calories but high in nutrients. One cup of cooked cabbage has about 33 calories. It is rich in vitamins C and K, which help your immune system. This dish is also high in fiber, good for digestion. Health considerations for using cabbage Cabbage is great for most diets. It is low in carbs, making it good for weight loss. However, some people may have gas or bloating after eating it. Always listen to your body. If you're unsure, try a small amount first. Can this dish be made in advance? Yes, you can make garlic balsamic cabbage steaks in advance. Cook them, let them cool, and store in the fridge. They can last about three to five days. This makes for an easy meal option during busy weeks. Serving ideas for meal prep These cabbage steaks are very versatile. Pair them with grains like quinoa or rice for a filling meal. You can also serve them as a side with grilled chicken or fish. For a fun twist, add some feta cheese or nuts for crunch. Check the Full Recipe for more tips! In this post, we explored how to make delicious cabbage steaks using simple ingredients. We discussed roasting techniques, flavor variations, and even storage tips. Cabbage is healthy, versatile, and perfect for meals. Try different spices and garnishes to suit your taste. With these steps, you can make cabbage steaks a favorite at your table. Enjoy experimenting and sharing with others!

Garlic Balsamic Cabbage Steaks Flavorful Roasted Dish

Looking for a flavorful and simple dish to impress your dinner guests? Garlic Balsamic Cabbage Steaks are the answer! These

- 1 medium butternut squash, peeled, seeded, and diced - 2 tablespoons olive oil - 1 onion, chopped - 2 cloves garlic, minced - 1 carrot, diced - 4 cups vegetable broth - 1 teaspoon ground cumin - 1/2 teaspoon cinnamon - Salt and pepper to taste - 1/2 cup coconut milk (for creaminess) - Fresh parsley or cilantro for garnish The right mix of ingredients makes this roasted butternut squash soup rich and tasty. Butternut squash gives a sweet base. The onion and garlic add depth. Carrots bring more sweetness and color. The spices, like cumin and cinnamon, create warmth. Coconut milk adds creaminess without dairy. Each ingredient plays a role in making this dish comforting and flavorful. This soup is not only delicious but also healthy. Each serving has about 200 calories. It contains 8 grams of fat, mainly from olive oil and coconut milk. The soup offers 3 grams of protein, mostly from vegetables and broth. You also get fiber from the squash and carrots, which is good for digestion. Overall, it's a balanced meal that warms you up on cool days. For the full recipe, check out Cozy Roasted Butternut Squash Soup. - Step 1: Preheat oven to 400°F (200°C). - Step 2: Toss butternut squash with olive oil, salt, and pepper. First, you want to warm up your oven. This helps the squash roast perfectly. Next, cut the butternut squash into small pieces. I like to peel and seed it first. Then, in a large bowl, mix the squash with olive oil, salt, and pepper. This adds flavor and helps with roasting. Spread the squash out on a baking sheet. Make sure the pieces don’t touch. This allows them to roast nicely. - Step 3: Roast the squash for 25-30 minutes. - Step 4: Cook onions, garlic, and carrots in a pot. Now, it’s time to roast the squash! Place the baking sheet in the oven. Roast for 25-30 minutes until golden and soft. Halfway through, give the squash a stir. While it roasts, heat some olive oil in a large pot over medium heat. Add the chopped onion and cook until it turns soft and clear. This takes about five minutes. Then, stir in minced garlic and diced carrots. Cook for another 3-4 minutes until you smell the great aromas. - Step 5: Combine roasted squash with broth and spices. - Step 6: Puree the soup and add coconut milk. Once the squash is done, add it to the pot. Pour in the vegetable broth, cumin, and cinnamon. Stir everything together. Bring it to a boil, then lower the heat and let it simmer for about 10-15 minutes. After that, you’ll want to blend the soup until it’s smooth. You can use an immersion blender or a regular blender. Finally, stir in the coconut milk. This gives the soup a creamy texture. Adjust the seasoning if needed. For more details, check the Full Recipe. To enhance the flavor of your roasted butternut squash soup, try adjusting spices. You can add a pinch of nutmeg for warmth or a dash of cayenne for heat. These spices boost the taste without overpowering it. For garnishes, fresh herbs like parsley or cilantro add a bright touch. A drizzle of coconut milk creates a creamy swirl on top. You can also sprinkle roasted pumpkin seeds for crunch. Roasting vegetables is key to bringing out their natural sweetness. Make sure to cut the butternut squash into even pieces. This ensures they roast evenly. Spread them out in a single layer on the baking sheet to avoid steaming. When blending the soup, an immersion blender is best. It makes things easy and keeps your pot clean. If you use a traditional blender, be careful. Blend in small batches and let steam escape. Pair your soup with crusty bread or a fresh salad. A light green salad with lemon dressing complements the rich soup well. Serve the soup in warm bowls for a cozy feel. For a beautiful presentation, drizzle a little coconut milk on top. Add a few fresh herbs for color. This makes the dish not only tasty but also pleasing to the eye. You can find the full recipe for this delicious soup in the earlier section. {{image_2}} You can change the coconut milk for other options. Heavy cream gives a rich taste. Nut milk adds a different flavor and keeps it light. You can also switch spices to make it unique. Try adding nutmeg for warmth or ginger for a bit of zing. These swaps help you play with flavors and create your perfect dish. This soup is easy to adapt for diets. It is already vegan and gluten-free. For low-carb options, skip the carrot or use fewer potatoes. You can also use broth made from meat for added flavor. These changes help you enjoy the soup while sticking to your diet needs. Want to add more taste? You can mix in other vegetables. Sweet potatoes work well and add sweetness. You might also try carrots or parsnips for a new twist. For toppings, consider croutons for crunch or seeds for a nutty flavor. These extras make your soup fun to eat and full of texture. Check out the Full Recipe for all the details! To keep your Roasted Butternut Squash Soup fresh, store it in an airtight container. This helps prevent air from spoiling the taste. If you plan to eat it within a few days, put the container in the fridge. Make sure the soup cools down first before sealing it. For longer storage, you can freeze the soup. Pour it into freezer-safe bags or containers. Leave some space at the top since liquids expand when frozen. When it’s time to enjoy your soup again, use a pot or microwave. If using a pot, heat it on low to medium. Stir the soup often to keep it from sticking. If you prefer using a microwave, heat in short bursts. This way, you can check the temperature. Both methods help keep the soup creamy and smooth. In the fridge, your soup stays fresh for about 3 to 5 days. If you freeze it, the soup can last for up to 3 months. Remember to label your containers with the date, so you know when to use them. This way, you can enjoy your delicious Roasted Butternut Squash Soup whenever you want! For the full recipe, check the details above. You can store roasted butternut squash soup in the fridge for about four days. Make sure to keep it in an airtight container. If you freeze it, it stays good for up to three months. Yes, you can make this soup ahead of time. I often prepare it a day before serving. Just store it in the fridge and reheat it when ready to enjoy. Absolutely! You can use other squashes like acorn or pumpkin. They will change the flavor slightly but will still be tasty. Just keep the same cooking times in mind. This soup pairs well with crusty bread or a fresh salad. You can also serve it with a dollop of yogurt or a sprinkle of seeds for added crunch. To add some heat, try adding a pinch of cayenne pepper or red pepper flakes. You can also mix in some diced jalapeños or a splash of hot sauce. Adjust the spice level to your taste. For the full recipe, check the details above. In this post, we explored a simple yet delicious butternut squash soup. We discussed the key ingredients and their nutritional benefits. I shared easy steps for making the soup and tips to enhance its flavor. We also covered variations to suit different diets and preferences. Enjoying this soup can warm your day and nourish your body. Try it today and make it your own!

Roasted Butternut Squash Soup Creamy and Flavorful Dish

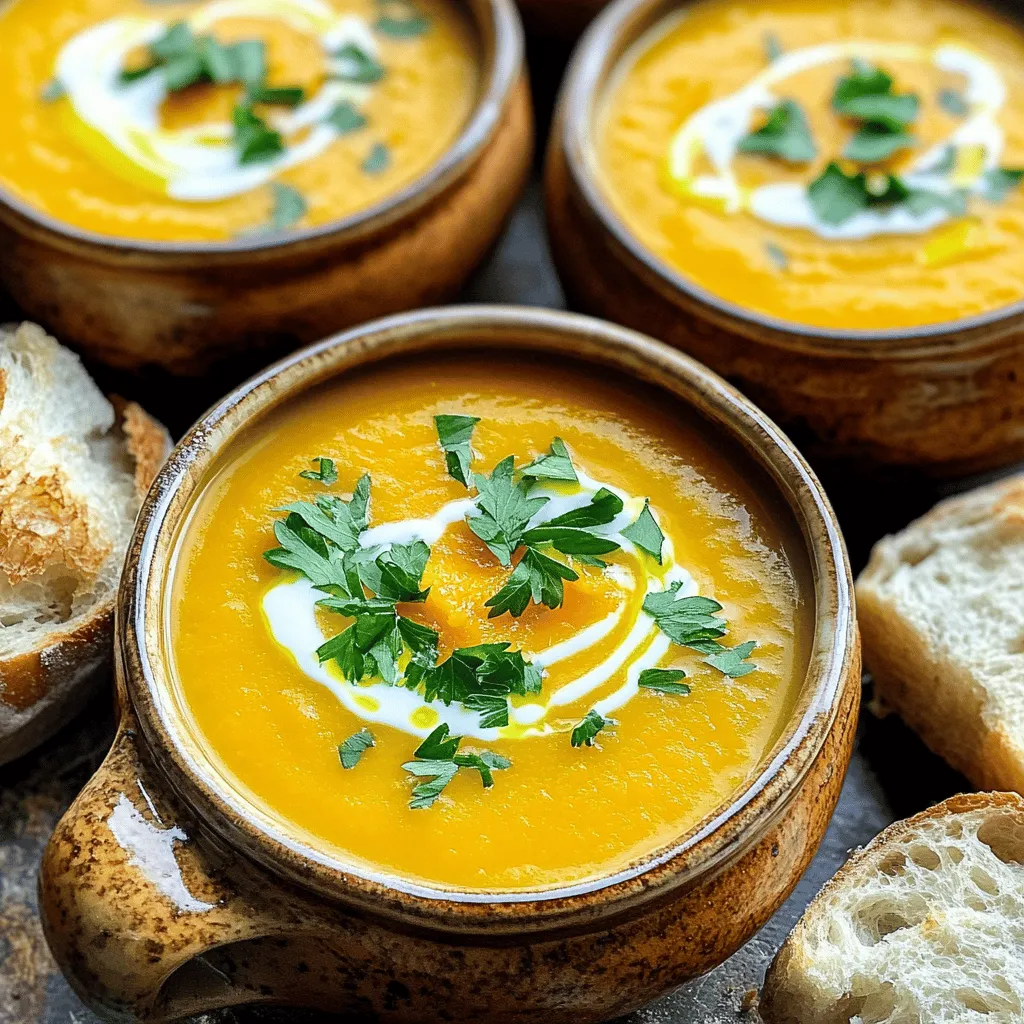
If you’re looking for a warm, creamy soup that bursts with flavor, you’ve found it! This Roasted Butternut Squash Soup

To make delicious Southern deviled eggs, you will need a few simple ingredients. Here’s the list: - 6 large eggs - 3 tablespoons mayonnaise - 1 tablespoon Dijon mustard - 1 teaspoon apple cider vinegar - 1/2 teaspoon smoked paprika - 1/4 teaspoon garlic powder - Salt and pepper to taste - 2 tablespoons sweet pickle relish - Fresh chives, chopped (for garnish) These ingredients work together to create a creamy and flavorful filling. The eggs serve as the perfect base, while mayonnaise adds richness. Dijon mustard gives a nice tang, and apple cider vinegar brightens the flavor. Smoked paprika adds a hint of warmth, while garlic powder gives depth. Sweet pickle relish introduces a bit of sweetness, making each bite delightful. Top it off with fresh chives for a pop of color and fresh taste. For the full recipe, check out the detailed instructions. To start, place the eggs in a saucepan. Cover them with cold water. Make sure the eggs are fully submerged. Next, bring the water to a boil over medium-high heat. Once boiling, cover the saucepan and remove it from heat. Let the eggs sit for 12 minutes. This method helps create a nice, firm egg. After 12 minutes, transfer the eggs to a bowl of ice water. Let them cool for about 5 minutes. The ice bath makes peeling easier. Once cool, gently crack the shells. Peel the eggs under cool running water. This trick helps to remove any stubborn bits of shell. Now, slice each egg in half lengthwise. Carefully remove the yolks and place them in a mixing bowl. Use a fork to mash the yolks until they are crumbly. Then, mix in the mayonnaise, Dijon mustard, apple cider vinegar, smoked paprika, garlic powder, salt, and pepper. Stir until you have a smooth and creamy mixture. Fold in the sweet pickle relish for a nice touch of sweetness. Finally, spoon or pipe the yolk mixture back into the egg whites. For a fun twist, you can use a pastry bag or a zip-top bag with a corner snipped off. To make great Southern deviled eggs, start with perfect boiling. I recommend boiling your eggs for exactly 12 minutes. This time is just right to cook them without overdoing it. After boiling, move them to an ice bath. This bath cools the eggs quickly and helps with peeling. Let them sit in the ice water for about 5 minutes. Southern cooking loves flavor. To give your deviled eggs a special twist, try adding unique spices. Smoked paprika gives a nice smoky taste. You can also add a pinch of cayenne for heat. Fresh herbs like dill or chives can brighten the dish. For a fun look, try garnishing with a slice of olive or a sprig of parsley. Presentation matters when serving deviled eggs. You can arrange them on a colorful platter for a beautiful display. For an added touch, place them in an egg carton. It gives a rustic feel! Serve them as part of a Southern meal. They pair well with fried chicken or barbecue dishes. Enjoy sharing your tasty creation with friends and family! For a detailed recipe, check out the Full Recipe. {{image_2}} Southern deviled eggs can have many fun twists. You can stick to the classic taste or mix things up. Here are some ideas: - Bacon and Cheddar: Add crispy bacon bits and sharp cheddar cheese for a savory kick. - Pickled Jalapeños: Spice things up with diced pickled jalapeños for a zesty flavor. - Cajun Seasoning: A dash of Cajun seasoning adds a unique Southern flair to the mix. Feel free to swap out traditional ingredients too. For example, try using Greek yogurt instead of mayonnaise for a tangy twist. You can even add a spoonful of horseradish for some heat. If you're looking for lighter options, there are easy changes you can make: - Low-Calorie Alternatives: Use low-fat mayonnaise or Greek yogurt. These cuts will keep the taste without the extra calories. - Vegan Adaptations: For a vegan version, use firm tofu or chickpea salad instead of eggs. Blend with vegan mayo and mustard for a creamy filling. These variations let everyone enjoy deviled eggs. You can find the full recipe and explore more delicious ideas to suit your taste! To keep your deviled eggs fresh, follow these tips: - Refrigeration: Always store deviled eggs in the fridge. They taste best cold. Keep them at a temperature of 40°F (4°C) or below. - Storage containers: Use a plastic or glass container with a lid. This prevents them from drying out. You can also cover the eggs with plastic wrap. This keeps the filling fresh and moist. - Can deviled eggs be frozen?: I do not recommend freezing deviled eggs. The texture changes when frozen. The egg whites can become rubbery, and the filling can separate. - How to prepare for freezing leftovers: If you have leftovers, store the filling separately. You can freeze the yolk mixture in an airtight container. When ready to eat, thaw in the fridge. Then, fill the egg whites just before serving. This keeps them fresh and tasty. How long can deviled eggs sit out? Deviled eggs can sit out for about two hours. After that, they may spoil. Keep them cold if they sit longer. What can I use instead of mayonnaise? You can use Greek yogurt or avocado instead of mayonnaise. Both add creaminess and flavor. Why are my deviled eggs watery? Watery deviled eggs can happen if you use too much mayonnaise. Try to add less or drain any excess liquid from your yolk mix. How can I make my yolk mixture creamier? To make your yolk mixture creamier, mix in more mayonnaise or yogurt. You can also blend the yolks longer until smooth. What's the best way to transport deviled eggs to a party? To transport deviled eggs, use a special egg carrier or a shallow dish. Keep them cool with ice packs in a cooler. Can I make deviled eggs in advance? Yes, you can make deviled eggs a day ahead. Just cover them and store them in the fridge. This makes them easy for parties. For the full recipe, check out the Southern Deviled Eggs section. In this post, we explored the key ingredients for deviled eggs and shared step-by-step instructions. I offered tips to perfect your cooking process and discussed fun variations to try. We also covered storage practices and answered common questions about making and serving Southern deviled eggs. Deviled eggs are simple yet delightful. With the right techniques, you can impress anyone at your next gathering. Enjoy experimenting with flavors and sharing your tasty results!

Southern Deviled Eggs Tasty and Simple Recipe Guide

Are you ready to elevate your gatherings with a classic Southern treat? In this guide, I’ll show you how to

To make Parmesan roasted green beans, you need: - 1 pound fresh green beans, trimmed - 2 tablespoons olive oil - 1 teaspoon garlic powder - 1 teaspoon lemon zest - ½ teaspoon red pepper flakes (adjust to taste) - Salt and pepper to taste - ½ cup grated Parmesan cheese - 2 tablespoons fresh parsley, chopped (for garnish) Fresh green beans have a crisp texture and bright flavor. They cook evenly and stay vibrant. I prefer them for this recipe. Frozen green beans can work in a pinch. They often lose some crunch and flavor during freezing. If you use frozen beans, thaw them first. Pat them dry to avoid sogginess. If you need a substitute for Parmesan cheese, try Pecorino Romano. It has a strong flavor and works well. Nutritional yeast is a great vegan option. It adds a cheesy taste without dairy. You can also use a mix of other hard cheeses like Grana Padano or aged Gouda. These cheeses offer different flavors and textures, making your dish unique. For the full recipe, check [Full Recipe]. First, gather your ingredients. You need fresh green beans, olive oil, garlic powder, lemon zest, red pepper flakes, salt, pepper, and Parmesan cheese. Trim the green beans to remove the tough ends. This makes them easier to eat and cook evenly. Next, preheat your oven to 425°F (220°C). This high heat helps the green beans roast perfectly. Line a large baking sheet with parchment paper. This keeps the pan clean and helps with crispiness. In a large bowl, add the green beans, olive oil, garlic powder, lemon zest, red pepper flakes, salt, and pepper. Toss everything together. Make sure all the green beans get coated well. This step is key for flavor. Spread the seasoned green beans onto the prepared baking sheet in a single layer. This allows for even roasting. Place the baking sheet in the preheated oven. Roast the green beans for 15 minutes. After 15 minutes, take the baking sheet out. Sprinkle the grated Parmesan cheese over the beans. This adds a rich flavor. Return the baking sheet to the oven. Roast for an additional 5 to 7 minutes. You want the cheese to turn golden and the green beans to be tender and slightly crispy. The total cooking time is about 20 to 22 minutes. Keep an eye on the cheese. You want it melted but not burnt. Once done, take the baking sheet out and let the beans cool for a moment. Transfer them to a serving platter and garnish with fresh parsley. Enjoy your zesty Parmesan roasted green beans! For the full recipe, check out the details above. To get crispy green beans, start by using fresh beans. Trim the ends for even cooking. Toss the beans in olive oil to coat them well. Place them in a single layer on the baking sheet. This helps hot air circulate and crisp them up. Roast at 425°F for 15 minutes. Then, add Parmesan and roast for 5-7 more minutes. Keep an eye on the cheese; it should turn golden. For more flavor, add lemon zest. It brightens the dish and pairs well with green beans. Garlic powder adds a nice touch, too. If you want heat, adjust the red pepper flakes to your taste. Fresh herbs like parsley add color and freshness as a garnish. You can also try mixing in a bit of balsamic vinegar before roasting for a tangy twist. One common mistake is overcrowding the baking sheet. If the beans overlap, they won't crisp up. Another mistake is not preheating the oven. A hot oven cooks the beans evenly and gives a nice roast. Also, be careful not to burn the cheese. Keep checking after adding it, as it can go from golden to burnt quite fast. Follow these tips for the best zesty Parmesan roasted green beans! {{image_2}} You can switch the Parmesan for other cheeses. Try using Pecorino Romano for a sharper kick. Grated mozzarella gives a creamy texture. You can add spices to change the flavor. For a smoky taste, try smoked paprika. If you love herbs, toss in thyme or oregano for a fresh taste. You can make this dish vegan by skipping the cheese. Use nutritional yeast instead for a cheesy flavor. It adds a nice twist without dairy. For the full recipe, check out Zesty Parmesan Roasted Green Beans. To keep your Parmesan roasted green beans fresh, place them in an airtight container. Make sure they cool down first. Store them in the fridge for up to three days. If you want to keep them longer, freezing is your best option. Remember, the fresher they are, the better they taste! Reheat your green beans in the oven for the best results. Preheat your oven to 350°F (175°C). Spread the leftovers on a baking sheet. Heat them for about 10 minutes or until they are warm. You can also use the microwave. Just heat them in short bursts, stirring in between. This way, they won’t get soggy. Freezing these green beans is simple. First, let them cool completely. Then, place them in a freezer-safe bag or container. Remove as much air as possible to avoid freezer burn. They can last up to three months in the freezer. When you’re ready to eat, thaw them in the fridge overnight. Reheat them as mentioned above before serving. Enjoy your zesty Parmesan roasted green beans even later! For the full recipe, check out the details above. Yes, you can. Many veggies work well. Try broccoli, asparagus, or Brussels sprouts. Just keep the cooking time in mind. Each vegetable may need a different time to roast. Cut them to a similar size as green beans. This helps them cook evenly. To reduce spice, cut back on the red pepper flakes. You can use just a pinch. If you want more flavor without heat, add lemon zest or garlic powder. These will keep the dish tasty without the spice kick. You can also skip the flakes entirely. These green beans are great as a side dish. They pair well with grilled chicken, fish, or steak. You can also add them to a salad for extra crunch. For a full meal, serve them with quinoa or rice. They add color and flavor to any plate. Check out the Full Recipe for more tips! Parmesan Roasted Green Beans are easy and fun to make. We covered the best ingredients, tips, and cooking methods. I shared how to achieve a crispy texture and suggested fun variations. Remember, you can always adjust flavors and ingredients to fit your taste. Whether you go fresh or frozen, this dish can shine on any table. Enjoy your cooking and experiment with these tasty ideas!

Parmesan Roasted Green Beans Crispy and Flavorful Dish

If you want a side dish that’s both crispy and full of flavor, you’ll love Parmesan Roasted Green Beans. This

- 4 boneless, skinless chicken breasts - 1 packet (1 oz) ranch dressing mix - 1 can (10.5 oz) cream of chicken soup - 1 cup chicken broth - 1 cup cream cheese, softened - 1 cup shredded cheddar cheese - 1 cup frozen peas (optional) - Salt and pepper to taste - Fresh chives, chopped (for garnish) To create this dish, start with chicken. I love using boneless, skinless chicken breasts. They cook evenly and stay tender. The ranch dressing mix gives a strong, savory flavor. Cream of chicken soup adds creaminess. Chicken broth adds moisture and depth. Next, cream cheese makes the sauce velvety. I usually pick shredded cheddar because it melts well. Peas are optional, but they add nice color and a bit of sweetness. Don't forget to season with salt and pepper to enhance all the flavors. Finish with fresh chives for a pop of bright taste! - You can use turkey or beef instead of chicken. - For dairy-free, try coconut cream or a vegan spread. - Low-sodium broth and dressing mix are great for less salt. If you want to change things up, you can swap the chicken. Turkey or beef works well in this recipe. For those avoiding dairy, use coconut cream or a vegan cream alternative. You can also choose low-sodium options for the broth and ranch mix to cut back on salt. - Crockpot or slow cooker - Mixing bowl - Measuring cups and spoons - Serving utensils To make this dish, gather your tools. A crockpot or slow cooker is a must. It makes cooking simple and hands-off. You’ll need a mixing bowl to combine the sauce. Measuring cups and spoons ensure accurate amounts. Lastly, have serving utensils ready for easy dish-up when your meal is done. For the full recipe, check the details above. Enjoy cooking! Begin by placing the chicken breasts in the bottom of the crockpot. Lay them flat and close together. This helps the chicken cook evenly. Ensure you season the chicken with salt and pepper. This adds flavor to each bite. Keep the chicken moist by not overcrowding the pot. Now, grab a medium bowl. Combine the ranch dressing mix, cream of chicken soup, and chicken broth. Mix well until the mixture is smooth. A smooth sauce will coat the chicken nicely. If it feels thick, add a splash more broth. This will help with blending. Set the crockpot on low for 6 to 8 hours or high for 4 to 5 hours. Cooking on low gives the best results. The chicken will turn tender and flavorful. Use a meat thermometer to check if it reaches 165°F. This ensures it's safe to eat. About 30 minutes before serving, add the cream cheese, cheddar cheese, and peas. Stir gently to mix them with the chicken. For optimal melting, make sure the cream cheese is softened. This helps it blend into the sauce easily. Let it cook for the last half hour. You want the cheese to melt well and mix into a creamy sauce. To keep your chicken moist, start with good-quality chicken breasts. Place them in the crockpot without overcrowding. This helps them cook evenly. If your chicken is thick, increase the cooking time. For thick breasts, cook on low for 7 to 8 hours. Thin breasts may only need 4 to 5 hours on high. For a flavor boost, consider adding fresh herbs like thyme or rosemary. These herbs pair well with ranch. You can also add garlic powder or onion powder for depth. When you add these spices, use a light hand. You want to enhance the dish, not overpower it. For balance, use salt sparingly. The ranch mix adds a lot of flavor on its own. Garnishing your dish can make it look special. Try topping with fresh chives for a pop of color. You can also sprinkle some paprika for a touch of warmth. When serving, consider plating with a side of rice or mashed potatoes. This helps soak up the creamy sauce. A fresh salad or steamed veggies also makes a nice side. These sides add color and texture to your meal. {{image_2}} You can spice up your Crockpot Creamy Ranch Chicken to suit your taste. Here are some ideas: - Spicy Versions: Add diced jalapeños or a splash of hot sauce. This can bring a nice kick to the dish. - Herb Variations: Try adding fresh herbs like thyme or rosemary. These can make the flavor more complex and delicious. If you have specific dietary needs, you can adjust the recipe easily: - Keto-Friendly Options: Use cauliflower rice instead of traditional rice. You can also swap cream cheese for a low-carb version. - Gluten-Free Substitutions: Look for gluten-free ranch dressing mix. This way, you still enjoy the same flavor without gluten. Enhancing your dish with extra ingredients can make it even better: - Adding Vegetables: Toss in some chopped carrots or bell peppers. They add color and nutrition. - Suggestions for Sides: Serve with mashed potatoes or a simple green salad. These can round out your meal and make it more filling. For the complete recipe, check out the Full Recipe section. To keep your Crockpot Creamy Ranch Chicken fresh, place leftovers in an airtight container. Make sure to seal it well to avoid air exposure. Store it in the fridge for up to three days. If you want to keep it longer, consider freezing it. To reheat, the best method is in the microwave. Use a microwave-safe dish and cover it. Heat in short bursts, stirring in between, until hot. You can also reheat it on the stove over low heat. Add a splash of chicken broth to keep it creamy and flavorful. To freeze the creamy ranch chicken, let it cool completely. Portion it into freezer-safe bags, removing as much air as possible. It can last for up to three months in the freezer. When ready to eat, thaw it overnight in the fridge. Reheat it gently on the stove or in the microwave, adding a little broth to restore creaminess. For details on making this dish, check out the Full Recipe. You can safely cook chicken in the crockpot for 6 to 8 hours on low. If you're short on time, cooking on high takes 4 to 5 hours. It’s best not to leave the chicken in the crockpot for more than 8 hours on low. Doing so can dry it out or make it tough. Always check for doneness by ensuring the internal temperature reaches 165°F. Yes, you can use frozen chicken breasts, but it will change the cooking time. If you start with frozen chicken, cook it on high for about 6 to 7 hours. If you’re using low heat, plan for about 8 to 10 hours. Make sure the chicken is fully cooked before serving. Crockpot Creamy Ranch Chicken pairs well with many side dishes. Here are some ideas: - Rice or quinoa for a hearty base - Mashed potatoes for a creamy side - Steamed vegetables like broccoli or green beans - A fresh salad for a light touch - Crusty bread to soak up the sauce Crockpot Creamy Ranch Chicken can fit into a balanced diet. Each serving has protein from the chicken and some fats from the cream cheese. To make it healthier, use low-fat cream cheese or add more vegetables. If you watch your sodium, opt for low-sodium broth and ranch dressing. Don't forget to enjoy it with whole grains or vegetables for added nutrition. Check the Full Recipe for details on the ingredients. In this blog post, we covered how to make easy Crockpot Creamy Ranch Chicken. We looked at the main ingredients, like chicken, ranch mix, and cheese. I shared tips for cooking, flavoring, and presenting your dish. You can also make fun variations or adjust the recipe for special diets. Remember to store leftovers well and use the right methods for reheating. With simple tools and steps, you can create a tasty meal that is enjoyable any night. Cooking should be fun and rewarding!

Crockpot Creamy Ranch Chicken Tasty Weeknight Meal

Looking for an easy and tasty weeknight meal? Look no further! Crockpot Creamy Ranch Chicken will impress your family with

- 4 cups fresh corn kernels (or frozen) - 1 cup heavy cream - 1 tablespoon unsalted butter - 1 small onion, finely chopped - 2 cloves garlic, minced - 1 teaspoon paprika - 1/2 teaspoon cayenne pepper (adjustable) - Salt and pepper to taste - Fresh chives or parsley for garnish I love using fresh corn for this dish. It adds sweetness and crunch. If you can't find fresh corn, frozen corn works well too. The heavy cream makes the dish rich and creamy. It gives a smooth texture that feels indulgent. The butter adds flavor and helps cook the onion. Use a small onion for a milder taste. Garlic gives a nice aroma and taste. Paprika adds a smoky flavor, while cayenne pepper gives a gentle heat. You can adjust the cayenne to make it milder or spicier. Add salt and pepper to bring all the flavors together. Fresh chives or parsley adds a pop of color and freshness on top. - Large skillet - Wooden spoon or spatula - Measuring cups and spoons A large skillet is key for cooking evenly. It's best to have a wooden spoon or spatula for stirring. Measuring cups and spoons help you get the right amounts of each ingredient. Now that you have all the ingredients and tools ready, you can make this tasty dish. Check out the Full Recipe for more details on how to prepare creamy skillet corn! - Gather all ingredients and tools. - If using fresh corn, cut the kernels off the cob. If using frozen corn, measure out four cups. - Finely chop the onion and mince the garlic. - Step 1: Melt one tablespoon of butter in a large skillet over medium heat. - Step 2: Add the chopped onion and sauté for four to five minutes until it turns soft and clear. - Step 3: Stir in minced garlic and cook for one minute until you smell its aroma. - Step 4: Add the corn kernels to the skillet. Stir them around and let them cook for about five minutes. This helps them caramelize and gain flavor. - Step 5: Pour in one cup of heavy cream and mix everything well. - Step 6: Season the dish with paprika, cayenne pepper, salt, and pepper. Stir to combine all flavors. - Step 7: Lower the heat and let the mixture simmer for about ten minutes. Stir it occasionally so it doesn't stick. - Step 8: When it thickens and becomes creamy, taste and adjust the seasoning if needed. - Step 9: Finally, garnish with chopped chives or parsley before serving. Enjoy this creamy skillet corn as a perfect side! For the complete recipe, you can check the Full Recipe. - How to achieve the best texture For the best texture, use fresh corn kernels. Fresh corn has a sweet, crisp bite. If you use frozen corn, thaw it first for even cooking. Sauté the corn until it caramelizes slightly. This adds depth and sweetness. - Tips for caramelizing corn To caramelize corn, cook it over medium heat. Make sure to stir it often. This helps achieve that golden color. The sugars in the corn will slowly develop, giving it a lovely flavor. Don't rush it; let it cook for about five minutes. - Overcooking the garlic Garlic cooks quickly. If it turns brown, it can taste bitter. Add it after the onion is translucent. Cook just until fragrant, usually one minute. This gives you that great garlic flavor without bitterness. - Not seasoning adequately Season your dish well! Add salt and pepper at every step. This helps build flavor layers. Don't wait until the end to taste. Adjust seasoning throughout cooking for the best results. - Best side dishes to accompany creamy skillet corn Creamy skillet corn pairs well with grilled meats. Think chicken, shrimp, or steak. It also works nicely with a fresh salad. A light vinaigrette balances the creaminess. - Ideas for garnishing Sprinkle chopped chives or parsley on top before serving. This adds color and freshness. You can also try crumbled feta or a sprinkle of paprika. These add flavor and a nice visual touch. {{image_2}} You can mix up the corn in this dish. Try using sweet corn for a burst of flavor. Canned corn works, too, if fresh isn't available. Just drain it well before cooking. If you want a dairy-free option, use coconut cream or cashew cream. Both give a nice, creamy texture without dairy. To make it richer, add cheese! Cream cheese or cheddar melts well and adds depth. You can also sprinkle in herbs and spices. Try fresh basil or cilantro for a fresh twist. A pinch of thyme or oregano can elevate the taste, too. You can turn creamy skillet corn into a tasty dip. Just serve it warm with tortilla chips. It also pairs great with proteins like grilled chicken or fish. This makes for a complete meal that everyone will love. For the full recipe, check out the instructions above! To keep your creamy skillet corn fresh, first let it cool. Place it in an airtight container. Store it in the fridge. This will keep it good for around 3-4 days. If you want to store it longer, freezing is an option. For freezing, use freezer-safe containers. Leave some space in the container for expansion. Label and date it, so you know when to use it. It can last for about 2-3 months in the freezer. You have two main options for reheating: the microwave or the stove. The microwave is quick. Just place your corn in a bowl and heat it in short bursts. Stir in between to ensure even heating. If you prefer the stove, pour the corn into a skillet. Heat it over low to medium heat. Add a splash of cream or milk to keep it creamy. This helps prevent it from drying out. Stir it often until it’s warmed through. Enjoy your creamy skillet corn again! You can use milk and butter as a substitute for heavy cream. Mix 3/4 cup of milk with 1/4 cup of melted butter. This works well in creamy skillet corn. If you need a dairy-free option, try coconut milk or cashew cream. These alternatives also add a nice flavor. Yes, you can use frozen corn instead of fresh corn. Frozen corn is quick and easy to use. Just add it directly to the skillet without thawing. This saves time and still gives you great taste in creamy skillet corn. Creamy skillet corn lasts about 3 to 4 days in the fridge. Make sure to store it in an airtight container. When you're ready to eat it, just reheat it on the stove or in the microwave. Yes, creamy skillet corn is great for meal prep. You can make a big batch and store it for later. It pairs well with many dishes and adds flavor to your meals throughout the week. Check out the Full Recipe for easy steps to prepare it in advance. This creamy skillet corn recipe is easy and delicious. We covered key ingredients and simple steps to make it. From cooking tips to smart storage options, you now have all the tools you need. Experiment with variations to keep this dish exciting. Whether as a side or a dip, it’s sure to please. Enjoy making this dish often. It can become a family favorite. Use fresh ingredients, and share it with friends. You’ll love seeing their smiles with each bite.

Creamy Skillet Corn Simple and Delicious Recipe

If you’re craving a side dish that’s both creamy and delightful, look no further! My Creamy Skillet Corn recipe combines

- 8 oz elbow macaroni - 2 cups cooked chicken, shredded - 1 cup barbecue sauce (homemade or store-bought) - 2 cups sharp cheddar cheese, shredded - 1 cup mozzarella cheese, shredded The main ingredients form the heart of this dish. Elbow macaroni holds the sauce well. Shredded chicken adds protein and flavor. The barbecue sauce gives it a sweet and smoky taste. Sharp cheddar and mozzarella make it creamy and cheesy. - 1 cup milk - 1/2 cup cream cheese, softened - 1 tablespoon olive oil - 1 teaspoon garlic powder - 1 teaspoon onion powder - Salt and pepper to taste - 1/2 cup breadcrumbs (for topping) - 1 tablespoon chopped fresh parsley (for garnish) The additional ingredients enhance the dish's flavor. Milk and cream cheese create a smooth sauce. Garlic and onion powder add depth. Salt and pepper bring out the taste. Breadcrumbs give a crunchy topping, while parsley adds a fresh touch. For the full recipe, you can refer to the [Full Recipe]. To start, boil a large pot of salted water. Add 8 oz of elbow macaroni. Cook it until it is al dente, which usually takes about 7-8 minutes. Drain the pasta and set it aside. This step is key for a perfect texture. Next, take 2 cups of cooked chicken that you have shredded. In a medium bowl, mix the chicken with 1 cup of barbecue sauce. Make sure the chicken is well coated. Set this mixture aside for later. This adds a flavorful punch. For the cheese sauce, heat 1 tablespoon of olive oil in a large saucepan over medium heat. Then, add 1 cup of milk and 1/2 cup of softened cream cheese. Stir this mix until the cream cheese melts completely. Now, gradually add 2 cups of shredded sharp cheddar cheese and 1 cup of shredded mozzarella cheese. Stir continuously until everything melts together into a creamy sauce. This is where the magic happens. Then, add 1 teaspoon of garlic powder, 1 teaspoon of onion powder, salt, and pepper to taste. Stir well to combine. This seasoning is vital for a tasty cheese base. Now, combine the cooked macaroni and BBQ chicken with your cheese sauce. Mix until everything is well blended. Pour this mixture into a greased 9x13 inch baking dish, spreading it evenly. For the topping, mix 1/2 cup of breadcrumbs with a little olive oil. Sprinkle this evenly over the mac and cheese. Preheat your oven to 350°F (175°C) and bake for 25-30 minutes. You want the top to be golden brown and crispy. After baking, let it cool for a few minutes. For a nice touch, garnish with 1 tablespoon of chopped fresh parsley before serving. This adds color and freshness. For the full recipe, check out the detailed instructions above. To make a creamy cheese sauce, start with a good base. Heat the milk and cream cheese gently. This helps them blend well. Stir constantly to avoid lumps. Add the shredded cheeses slowly. This keeps the sauce smooth. If your sauce is too thick, add a splash of milk. A pinch of salt boosts the flavor. Using leftover chicken is a smart move. Rotisserie chicken works great. Just shred it and mix with barbecue sauce. You can also use any grilled chicken. This saves time and adds flavor. If you have plain chicken, add more barbecue sauce for taste. Baking your mac and cheese gives it a nice finish. For a crispy top, bake until golden brown. This usually takes about 25-30 minutes at 350°F (175°C). If you want it extra crunchy, broil for a minute at the end. Keep an eye on it to avoid burning. Adjust the bake time for softer or crispier results. Try these tips for a perfect BBQ Chicken Mac and Cheese. For the full recipe, check the [Full Recipe]. {{image_2}} You can boost the taste of BBQ Chicken Mac and Cheese easily. Try adding spices like smoked paprika or cayenne pepper for extra kick. Different cheeses also work well. Swap sharp cheddar for gouda or pepper jack for a creamy twist. Each cheese brings its own flavor, enhancing the dish's richness. If you want to switch up the protein, pulled pork or beef work great too. Both add a smoky flavor. Pulled pork gives a tender bite, while beef can add heartiness. Just mix the protein with the BBQ sauce as you would with chicken. This change makes the dish fun and exciting. For a vegetarian twist, you can substitute the chicken with vegetables. Broccoli and mushrooms are tasty choices. They soak up the BBQ sauce well, adding texture and flavor. You can roast them first to deepen their taste. This way, everyone can enjoy a hearty meal, even those who don’t eat meat. For the complete recipe, check the [Full Recipe]. To keep your BBQ Chicken Mac and Cheese fresh, use airtight containers. Glass or plastic containers work well. Ensure they are clean and dry before adding food. You can also use aluminum foil for quick storage. This helps preserve flavors and texture. When it's time to enjoy leftovers, you have options. The microwave is quick and easy. Place a serving in a microwave-safe dish. Cover it with a damp paper towel to avoid drying out. Heat for 1-2 minutes, stirring halfway. For a crispier top, use an oven. Preheat it to 350°F (175°C). Place the mac and cheese in a baking dish. Cover with foil to keep it moist. Bake for about 15-20 minutes, then remove the foil for the last 5 minutes. If you want to store BBQ Chicken Mac and Cheese for longer, freezing is a great choice. First, let it cool completely. Then, transfer it to a freezer-safe container. Leave some space at the top, as it will expand. Seal tightly and label with the date. To thaw, place it in the fridge overnight. Reheat in the oven or microwave as mentioned before. Enjoy your meal even after a few weeks! For the full recipe, check out the detailed steps above. Yes, you can use gluten-free elbow macaroni. Many brands offer great options. Look for pasta made from rice or corn. They cook similarly to regular pasta. This way, you can enjoy BBQ Chicken Mac and Cheese with everyone. To add heat, try these ideas: - Mix in chopped jalapeños or green chilies. - Use a spicy barbecue sauce. - Sprinkle red pepper flakes into the cheese sauce. - Add a dash of hot sauce before serving. These changes will give your dish a nice kick. Pair your dish with these sides: - Fresh garden salad for crunch. - Steamed vegetables like broccoli or green beans. - Garlic bread for a tasty addition. - Coleslaw for a refreshing contrast. These sides balance the rich flavors of the mac and cheese. Enjoy your meal! This BBQ Chicken Mac and Cheese combines creamy cheese, tender chicken, and bold flavors. You learned about the main ingredients, from macaroni to sharp cheddar. I shared easy steps to prepare and bake your dish. You can enhance the taste with spices or swap proteins too. Proper storage tips ensure your leftovers stay fresh. This dish is flexible for various tastes and occasions. Enjoy cooking and sharing this comforting meal with loved ones!

BBQ Chicken Mac and Cheese Flavorful Family Meal

Get ready to elevate your dinner game with BBQ Chicken Mac and Cheese! This dish combines tender chicken, smoky barbecue

To make a delicious Slow Cooker Cowboy Casserole, you need a few simple ingredients. Each one adds flavor and texture to this hearty dish. - 1 pound ground beef - 1 onion, diced - 2 cloves garlic, minced - 1 can (15 oz) black beans, rinsed and drained - 1 can (15 oz) corn, drained - 1 can (10 oz) diced tomatoes with green chilies - 1 cup frozen mixed bell peppers - 1 tablespoon chili powder - 1 teaspoon cumin - 1 teaspoon paprika - Salt and pepper to taste - 2 cups shredded cheddar cheese - 2 cups tater tots These ingredients combine to create a warm and comforting meal. The ground beef provides protein, while the beans and corn add fiber and nutrients. The spices bring a bold kick of flavor that makes this dish stand out. I love how the cheese melts on top, making every bite gooey and satisfying. You can get creative with these ingredients, too! Feel free to swap beans or veggies based on what you have. This dish is all about making it your own. For the full recipe, check out the earlier section. To start, heat a skillet over medium heat. Add the ground beef, diced onion, and minced garlic. Cook until the beef is brown and no longer pink. This step builds a strong flavor base. After cooking, drain any excess fat from the beef. This makes the dish lighter and healthier. Now it’s time to mix! In your slow cooker, combine the beef mixture with black beans, corn, diced tomatoes, and frozen bell peppers. Add your spices: chili powder, cumin, and paprika. Don’t forget to season with salt and pepper. Stir everything well for even flavor throughout. This ensures each bite is packed with taste. You have two cooking options. You can set your slow cooker to low for about 6 hours or high for 3 hours. Choose the option that fits your day best. About 15 minutes before serving, sprinkle shredded cheddar cheese on top. This step is key for a creamy finish. Cover and let it melt before serving for a delicious topping. For the Full Recipe, refer to the section above. Enjoy your cooking journey! To make a great Slow Cooker Cowboy Casserole, avoid soggy tater tots. To do this, layer the tater tots on top of the dish just before serving. This keeps them crispy and adds a nice texture. You can also try using a brand known for extra crispy tots. Enhancing flavors with seasoning adjustments can take your dish to the next level. Taste your mixture before adding the tater tots. If you want more spice, add extra chili powder or cumin. A splash of hot sauce can also bring more heat if you like it spicy. For a beautiful presentation, serve the casserole in bowls. Top each serving with fresh cilantro or green onions. This adds color and freshness to your dish. A dollop of sour cream or some avocado slices on the side enhances the flavors and looks great too. Pairing ideas can make this meal even better. Try serving it with a simple green salad. A cool, crisp salad balances the warm casserole. You could also enjoy it with some cornbread or tortilla chips for extra crunch. {{image_2}} You can change some ingredients in this dish to suit your taste. For instance, if you want a leaner option, try using ground turkey or chicken instead of beef. This swap still keeps the dish hearty while lowering the fat content. You can also switch the black beans with kidney beans or pinto beans. Both options add a nice twist and bring their own flavor. Feel free to mix and match until you find your favorite combination. If you need a gluten-free option, look for gluten-free tater tots. Many brands offer them, making it easy to enjoy this meal without worry. Just check the labels to be sure. For those who follow a vegan diet, you can replace the ground beef with plant-based protein. Options like lentils or tofu work well. Also, use dairy-free cheese to keep it fully vegan. This way, everyone can enjoy the slow cooker cowboy casserole, no matter their dietary needs. To store leftover cowboy casserole, let it cool first. Place it in an airtight container. This will help keep it fresh. You can store it in the fridge for up to four days. I recommend using glass or plastic containers with tight lids. They do a great job of keeping moisture in and air out. You can also use freezer bags if you want to save space. If you want to freeze portions, follow these steps: 1. Allow the casserole to cool completely. 2. Divide it into single servings or family-sized portions. 3. Place them in freezer-safe containers or bags. Make sure to remove as much air as possible. 4. Label each container with the date and contents. To thaw, place the frozen casserole in the fridge overnight. For quicker results, you can use the microwave. Heat it on low power, checking every few minutes. This way, you get the best quality when you reheat. Enjoy your delicious meal! Yes, you can prep this dish in advance. Cook the beef, onion, and garlic, then cool it. Store this mixture in the fridge for up to two days. You can also mix the beans, corn, tomatoes, and spices in a separate bowl. Just combine everything in the slow cooker when you're ready to cook. This saves time and makes dinner easy. You have many options for sides. A simple green salad adds freshness. Cornbread pairs well for a hearty meal. You might also enjoy tortilla chips for crunch. For drinks, iced tea or lemonade can be refreshing. These choices bring balance and fun to your meal. Slow cookers vary in heat settings. For a newer model, the low setting usually cooks in about 6 hours. Older models may take longer. If you're in a hurry, use the high setting for about 3 hours. Always check your dish a little early to ensure it cooks well. You can find the detailed Full Recipe above. It has all the steps and tips you need to make this tasty dish! You learned how to make a delicious Slow Cooker Cowboy Casserole. We covered the key ingredients, cooking steps, and helpful tips. You can customize the dish with different proteins and dietary choices. Storing leftovers and meal prep options ensure you get the most from the recipe. Enjoy experimenting with flavors and serving ideas! Making this casserole can be fun and rewarding for you and your loved ones. Let's dig in and create tasty meals together!

Slow Cooker Cowboy Casserole Tasty and Simple Dish

Ready to whip up a hearty meal? This Slow Cooker Cowboy Casserole is your ticket to a simple, tasty dish

- 1 lb beef steak (ribeye or sirloin), thinly sliced - 2 tablespoons olive oil - 1 large onion, thinly sliced - 1 green bell pepper, thinly sliced - 1 cup mushrooms, sliced (optional) - 4 slices provolone cheese (or your favorite cheese) - 4 hoagie rolls - Salt and pepper to taste - 1 teaspoon garlic powder (optional) - Suggested side dishes: crispy fries, light salad - Condiments and toppings: hot sauce, mayonnaise The main ingredients make this recipe shine. I use ribeye or sirloin for the beef. These cuts provide great flavor and tenderness. Thin slicing is key; it helps the beef cook fast. I suggest freezing the beef for about 30 minutes to make slicing easier. Next, I add olive oil to a hot skillet. The oil helps sauté the veggies and get them soft. Sliced onions and green bell peppers add a sweet crunch. You can also add mushrooms for extra flavor. Provolone cheese melts beautifully over the beef and veggies. It adds a creamy texture that makes each bite delicious. The hoagie rolls hold everything together. They soak up the flavors and are easy to eat. For sides, crispy fries pair well. A light salad can add a fresh touch. Hot sauce and mayonnaise are great for toppings. You can customize the cheesesteak to fit your taste. For the complete recipe and instructions, check out the Full Recipe. To start, freeze the beef steak for about 30-45 minutes. This makes it easy to slice thin. Once you slice the beef, season it. Use salt, pepper, and garlic powder if you like. This step adds great flavor to your meat. Next, heat a large skillet over medium-high heat. Add one tablespoon of olive oil. Sauté the sliced onions and green bell peppers for about 5-7 minutes. You want them soft and a bit caramelized. If you like mushrooms, add them too. They add nice texture and taste. Remove the veggies from the skillet and set them aside. In the same skillet, add another tablespoon of olive oil. Turn the heat up to high. Add the sliced beef in a single layer. Let it cook for 2-3 minutes without stirring. This gives the beef a nice sear. After that, stir and cook for another 2-3 minutes. Make sure the beef is browned and cooked through. Now, return the sautéed vegetables to the skillet with the beef. Mix everything well. Cook for another minute. This helps all the flavors blend together nicely. Lower the heat to low. Lay the provolone cheese slices over the beef and vegetable mix. Cover the skillet with a lid. Let it sit for about 2-3 minutes. This is the perfect time for the cheese to melt. Finally, spoon the cheesy beef and veggies into the hoagie rolls. Serve them hot and gooey. Enjoy with crispy fries or a light salad on the side. You can find the full recipe to make this easy Philly cheesesteak delicious and quick! To make your Philly cheesesteak burst with flavor, cheese choice matters. Provolone is classic, but American cheese melts well too. If you want a kick, try pepper jack. For seasoning, keep it simple. Salt and pepper are key. A sprinkle of garlic powder adds depth. Just don’t overdo it. You want the beef taste to shine through. A great sear on the beef creates a rich flavor. Heat your skillet well before adding the meat. Lay the beef in a single layer. Resist stirring. Let it sit for a few minutes. This forms a nice crust. Texture balance is vital. Use soft hoagie rolls to hold the filling. Crisp veggies add crunch. Aim for a mix of tender meat and fresh peppers. Each bite should offer something different. For cooking, a cast-iron skillet works wonders. It retains heat and gives excellent sear marks. Non-stick pans are also great if you prefer easy cleanup. Don’t forget handy tools. A sharp knife helps with slicing the beef. A spatula makes mixing easy. A lid for your skillet is key for melting cheese quickly. These little tools make cooking fun and simple. {{image_2}} You can switch up the meat in your Philly cheesesteak. Chicken or pork works great too. Each meat brings its own flavor. Cheese is very important for taste. You can use American cheese for a creamy melt. Swiss cheese also adds a nice twist. Try different cheeses to find your favorite. Want a vegetarian cheesesteak? Use mushrooms as the main filling. You can add more veggies like zucchini or spinach for extra nutrients. If you like spice, add jalapeños or hot sauce. You can also sprinkle in some crushed red pepper. Adjust the heat to match your taste. The type of bread makes a big difference. Hoagie rolls are classic, but you can use baguettes too. Try sourdough for a new flavor. For a fun twist, serve your cheesesteak open-faced. Lay the filling on top of the bread. You can also serve it on a platter for sharing. Check out the Full Recipe for a tasty, quick dinner idea! Store leftover cheesesteaks in the fridge. Use airtight containers to keep them fresh. I recommend glass or plastic containers. They seal well and prevent moisture loss. You can also wrap them tightly in foil. To reheat, use the oven or a skillet. The oven gives a nice crispy texture. Preheat it to 350°F (175°C). Heat for about 10-15 minutes. If using a skillet, warm it on low heat. Stir gently to avoid burning. You want the inside hot, and the outside crispy. You can freeze the filling before adding it to the rolls. Let it cool, then place it in freezer bags. Squeeze out air and seal tightly. For thawing, place it in the fridge overnight. To reheat, warm it in a skillet or microwave. If using a microwave, cover it to keep moisture in. This keeps the filling juicy and tasty. The best cuts for Philly cheesesteak are ribeye or sirloin. These cuts have good flavor and tenderness. Ribeye has more fat, which adds richness. Sirloin is leaner but still tasty. Thin slices are key for a quick cook. Yes, you can make this recipe gluten-free. Just swap hoagie rolls for gluten-free buns. Check labels on all ingredients for hidden gluten. Many brands offer great gluten-free options. You can still enjoy the same great taste! To add spice, use hot peppers like jalapeños. You can also add hot sauce to the meat mix. Another option is to use spicy cheese, like pepper jack. Adjust to your heat level for the perfect kick. Absolutely! While provolone is classic, you can try American or Swiss cheese. Each cheese brings a unique flavor. If you love blue cheese, that works too! Experiment to find your favorite combination. Yes, this recipe is great for meal prep! You can cook the filling ahead. Store it in the fridge for up to three days. Just reheat it before serving. It works well in wraps or with rice too! For the complete recipe, check out the [Cheesy Happiness Philly Cheesesteak recipe](#). In this post, we explored how to make tasty cheesesteaks at home. We discussed the main ingredients, cooking methods, and tips for the best flavor. You learned about variations to suit your taste and how to store leftovers. Remember, you can customize this dish to make it your own. Enjoy these cheesesteaks with your favorite toppings and sides. With practice, you'll master this classic meal. Happy cooking!

Easy Philly Cheesesteak Quick and Flavorful Dinner

Are you craving a taste of Philly without leaving your kitchen? My Easy Philly Cheesesteak recipe is the answer to

To make a flavorful and juicy Cranberry Orange Roasted Chicken, gather these key ingredients: - 1 whole chicken (about 4-5 lbs) - 1 cup fresh cranberries - 2 oranges (zested and juiced) - 4 cloves garlic, minced - 1/4 cup honey - 1/4 cup olive oil - 1 tablespoon fresh rosemary, chopped - 1 tablespoon fresh thyme, chopped - Salt and pepper to taste - 1 medium onion, quartered - 1/2 cup chicken broth The chicken should be fresh, not frozen. A bird weighing around 4-5 pounds is ideal for roasting. The fresh cranberries offer a tart contrast to the sweet oranges. For the oranges, you will need both the zest and the juice. This combination brings brightness to the dish. Minced garlic adds depth of flavor, while honey provides sweetness to balance the tartness. Olive oil keeps the chicken tender and moist as it roasts. Fresh herbs like rosemary and thyme give the dish an aromatic touch. Seasoning with salt and pepper enhances all the flavors in the chicken. The onion goes inside the chicken, adding moisture and taste. Finally, chicken broth helps create a tasty base for the gravy. For the full recipe, check the detailed instructions on preparing and cooking this dish. 1. Start by preheating your oven to 375°F (190°C). This ensures even cooking and a nice roast. 2. In a large bowl, mix the marinade. Combine one cup of fresh cranberries, zest and juice from two oranges, four minced garlic cloves, one-fourth cup honey, and one-fourth cup olive oil. Add one tablespoon of chopped rosemary, one tablespoon of chopped thyme, and season with salt and pepper. Stir until blended. 3. Take your whole chicken and pat it dry with paper towels. Season the inside with salt and pepper. This helps build flavor from the inside out. 4. Place a quartered onion inside the chicken cavity. This adds more flavor as it roasts. 5. Generously rub the marinade over the chicken's skin. Make sure to coat every part evenly for maximum flavor. 1. In your roasting pan, pour half a cup of chicken broth. This adds moisture while cooking. 2. Place the marinated chicken on a rack in the pan. If you don’t have a rack, put it directly in the broth. This keeps the chicken juicy. 3. Scatter any leftover cranberries around the chicken. They will roast and add a delicious touch. 4. Roast in the oven for about 1 hour and 30 minutes. The chicken is done when it reaches an internal temperature of 165°F (75°C). Baste the chicken every 30 minutes with pan juices. This keeps it moist and flavorful. 1. After roasting, take the chicken out of the oven. Let it rest for 10-15 minutes. This helps the juices settle back into the meat. 2. When it's rested, carve the chicken. Serve it with the roasted cranberries and spoon some pan juices over the top for extra flavor. Enjoy your delicious Cranberry Orange Roasted Chicken! For more details, check the Full Recipe. Marinating the chicken is key to great flavor. I recommend letting it sit for at least two hours. This allows the chicken to soak up the cranberry and orange goodness. If you have more time, try marinating it overnight. This gives the flavors a chance to deepen. To keep the chicken juicy, always pat it dry before seasoning. This helps the skin crisp up. Basting the chicken with pan juices every thirty minutes keeps it moist. Use a meat thermometer to check the doneness. Aim for 165°F (75°C) for a perfectly cooked chicken. Serving this dish can be fun and creative. Place the chicken on a large platter for a beautiful display. Scatter roasted cranberries around the chicken for color. This adds a nice touch. Garnish with fresh rosemary sprigs for a lovely aroma and visual appeal. You can also drizzle the pan juices over the chicken. This adds flavor and makes it glisten. Having the right tools makes cooking easier. A sturdy roasting pan is essential. Look for one with a rack to allow air circulation. This helps the chicken cook evenly. A good meat thermometer is also a must. It ensures your chicken is cooked safely. Don’t forget to have sharp knives for carving. They make serving the chicken a breeze. For the full recipe, check the details above. {{image_2}} You can tweak the flavor of your cranberry orange roasted chicken easily. Try adding spices like cinnamon or nutmeg for warmth. You might also enjoy using fresh herbs like sage or dill for a twist. If you want less sugar, swap honey for maple syrup. For a different citrus taste, use lemons or limes instead of oranges. Each change gives a new taste, making dinner exciting. For a slow cooker version, follow these steps: - Rub the chicken with the marinade. - Place it in the slow cooker with some chicken broth. - Cook on low for 6-8 hours. This method keeps the chicken juicy and tender. You can also use an Instant Pot. Here’s how: - Sear the chicken using the sauté function. - Add the marinade and broth. - Cook on high pressure for 25-30 minutes. This method cooks the chicken fast and still gives great flavor. To balance the flavors of your chicken, serve it with side dishes like: - Roasted vegetables, such as carrots or Brussels sprouts. - Creamy mashed potatoes for a comforting touch. - A fresh green salad with a light vinaigrette. For drinks, consider serving a fruity white wine like Riesling. A light red, such as Pinot Noir, also pairs well. These options enhance the meal and make it special. For the full recipe, check out the detailed instructions above. After enjoying your Cranberry Orange Roasted Chicken, let it cool down. Place it in the fridge within two hours to keep it safe. Store the chicken in an airtight container. This will help keep it fresh. If you have leftover cranberry sauce, store it in a separate container. Make sure both containers are labeled with the date. To reheat the chicken, use an oven or microwave. If using the oven, set it to 350°F (175°C). Cover the chicken with foil to keep it moist. Heat for about 20-25 minutes. If using a microwave, heat on medium power for 3-5 minutes. Check the chicken’s temperature. It should reach 165°F (75°C) before eating. You can freeze leftover chicken and cranberry sauce too. Wrap the chicken in plastic wrap and then in foil. This will keep it safe in the freezer for up to three months. For the cranberry sauce, place it in a freezer-safe container. Thaw both the chicken and sauce in the fridge overnight before using. This method keeps the flavors intact. For the best results, use the Full Recipe again to enjoy the dish at its best! How long should I cook Cranberry Orange Roasted Chicken? You should cook the chicken for about 1 hour and 30 minutes. This timing works well at 375°F. Always check that it reaches 165°F inside. This ensures the chicken is safe to eat. Can I use frozen cranberries for this recipe? Yes, you can use frozen cranberries. Just add them directly to the marinade. They will cook well and provide that great tart flavor. What internal temperature should chicken reach? The chicken must reach an internal temperature of 165°F. Use a meat thermometer to check the thickest part of the thigh. This guarantees juicy and safe chicken. Is this recipe good for meal prep? Absolutely! This recipe is great for meal prep. You can roast extra chicken and use it in salads or wraps. The flavors hold up well in the fridge. Can I make this recipe gluten-free? Yes, this recipe is naturally gluten-free. All the ingredients, like chicken and cranberries, do not contain gluten. Just double-check any broth you use to ensure it is gluten-free. What do I serve with Cranberry Orange Roasted Chicken? You can serve this chicken with mashed potatoes or roasted veggies. A simple salad with a light vinaigrette pairs well too. How can I make this a complete meal? To make it a complete meal, add a grain. Quinoa or wild rice works great. This adds fiber and makes your meal more filling. This blog post covers everything you need for a delicious Cranberry Orange Roasted Chicken. We explored the key ingredients, step-by-step instructions, and helpful tips for a perfect roast. Variations allow you to customize flavors and cooking methods. Proper storage and reheating techniques ensure you enjoy leftovers without loss of taste. In the end, this recipe is not just about cooking; it's about creating memorable meals. Try it and enjoy every bite.

Cranberry Orange Roasted Chicken Flavorful and Juicy

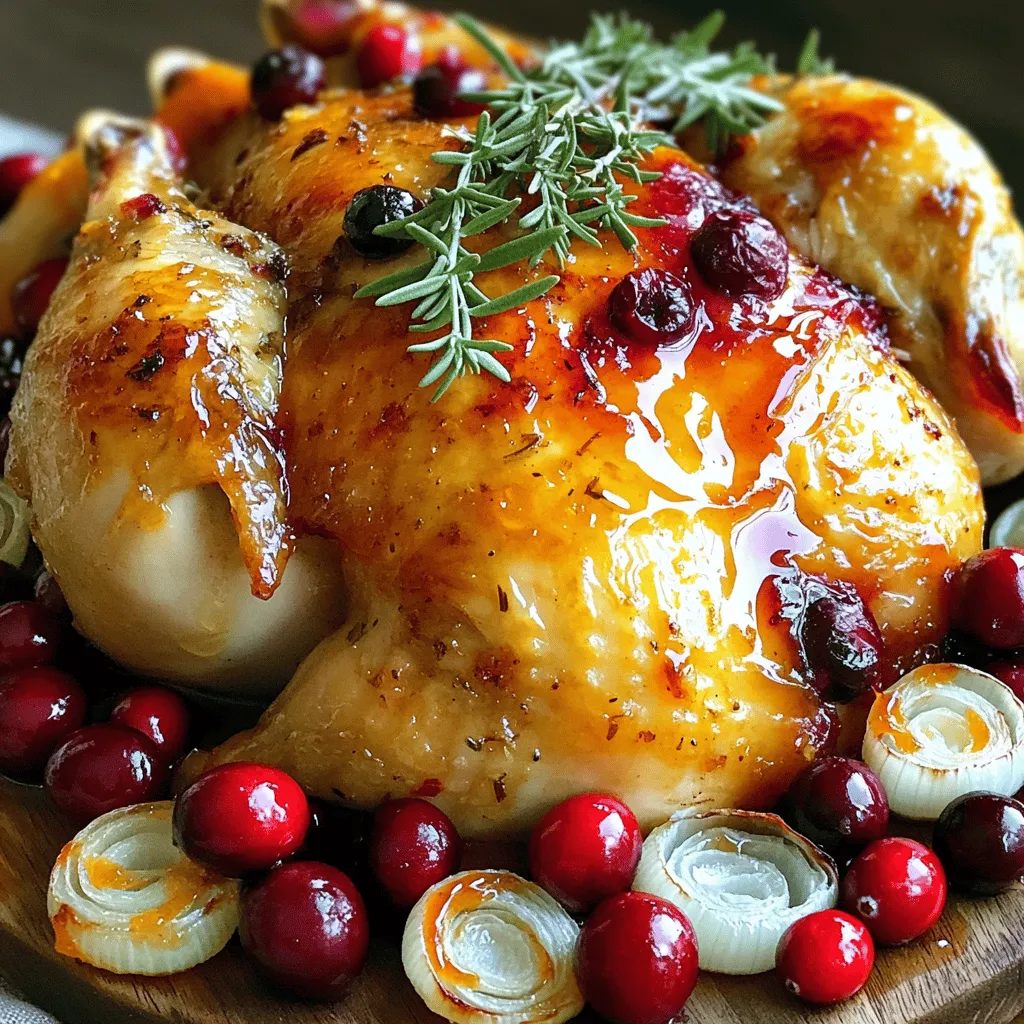
Get ready to impress your family with a delicious dish: Cranberry Orange Roasted Chicken! This meal is not only flavorful

Older posts
Newer posts
← Previous Page1 … Page43 Page44 Page45 … Page84 Next →

dsad

© 2026 Foodish Talk • Built with GeneratePress

Our Policies

  • Copyright Policy
  • Cookie Policy
  • GDPR Policy
  • Privacy Policy
  • Disclaimer
  • Terms Of Use

More Information

  • Home
  • About
  • Contact
  • Appetizers
  • Dessert
  • Dinner
  • Drinks
©2026, Foodish Talk About Back To Top