Skip to content
DisclaimerTerms Of UseGDPR PolicyCookie Policy

Foodish Talk

  • Home
  • Drinks
  • Appetizers
  • Dinner
  • Dessert
  • About
  • Contact
  • Privacy Policy
DisclaimerTerms Of UseGDPR PolicyCookie Policy

NO-ING-IMG

- 1 cup Greek yogurt (plain or vanilla flavored) - 2 tablespoons natural peanut butter - 1 tablespoon honey or maple syrup (for vegan option) - 1/2 banana, sliced - 1/4 cup granola (your choice) - 1 tablespoon chia seeds - 1 tablespoon unsweetened cocoa powder (optional) - Fresh berries (strawberries, blueberries, or raspberries) for topping - Greek yogurt: Packed with protein, it helps build muscle and keeps you full. - Peanut butter: Offers healthy fats and protein, which keep your energy up. - Honey or maple syrup: Adds natural sweetness and antioxidants, aiding digestion. - Banana: Rich in potassium and fiber, it helps with heart health and digestion. - Granola: Provides crunch and fiber, promoting good gut health. - Chia seeds: Full of omega-3s and fiber, these tiny seeds support heart health. - Cocoa powder: Contains antioxidants, which may improve mood and heart health. - Fresh berries: Low in calories, they are high in vitamins and add natural sweetness. - For nut allergies, use sunflower seed butter or tahini instead of peanut butter. - Swap Greek yogurt for coconut yogurt for a dairy-free option. - If avoiding sugar, opt for a sugar-free sweetener. - Use gluten-free granola if you have gluten intolerance. - For a low-carb option, skip the granola and add more chia seeds. - If you prefer other fruits, try mango or peaches for a different twist. Start your Peanut Butter Yogurt Bowl by gathering all your ingredients. You will need: - 1 cup Greek yogurt (plain or vanilla flavored) - 2 tablespoons natural peanut butter - 1 tablespoon honey or maple syrup - 1/2 banana, sliced - 1/4 cup granola - 1 tablespoon chia seeds - 1 tablespoon unsweetened cocoa powder (optional) - Fresh berries (strawberries, blueberries, or raspberries) Make sure to have a mixing bowl and a spoon ready. In your mixing bowl, add the Greek yogurt and peanut butter together. Stir them well until they blend smoothly. If you want a chocolate flavor, add the cocoa powder now. Mix until you don’t see any lumps. Next, drizzle honey or maple syrup into the bowl. Stir again until the sweetener mixes in well. Taste it! If you want it sweeter, add a bit more honey or syrup. Now it's time to build your bowl! Start by adding the yogurt mix as the base. Use a spoon to spread it evenly in your bowl. Top the yogurt with your sliced banana. Arrange them nicely so they look great. Next, sprinkle granola over the bananas. This gives a nice crunch. Add chia seeds on top of the granola for some extra nutrients. Finally, finish with a handful of fresh berries. They will add color and flavor to your bowl. If you like, drizzle a bit more honey or syrup on top. Enjoy your tasty, healthy delight! To make your Peanut Butter Yogurt Bowl perfect, start with the right texture. Use Greek yogurt for creaminess. Mix the peanut butter well with the yogurt. A whisk works best for a smooth blend. If you like chocolate, add cocoa powder slowly to avoid clumps. Serve in a clear bowl to show off the layers. Taste is key! If you want more sweetness, add honey or maple syrup. Start with a small amount, then mix and taste. You can also use a ripe banana for extra natural sweetness. For a tangy twist, add a squeeze of lemon juice. Experiment until you find your favorite flavor. If you have leftovers, store them in an airtight container. Keep it in the fridge for up to two days. The granola may get soggy, so add it just before eating. If you want to enjoy it later, mix the yogurt and peanut butter, but wait to add the toppings. This keeps everything fresh and crunchy. {{image_2}} You can change your peanut butter yogurt bowl by adding different fruits and nuts. Try adding berries like strawberries, blueberries, or raspberries for a fresh taste. You can also use sliced apples or peaches for a juicy bite. If you like nuts, add almonds or walnuts for a crunchy texture. These fruits and nuts not only taste great but also boost the nutrition of your bowl. You can mix flavors to make your bowl unique. For a chocolate twist, add unsweetened cocoa powder to the yogurt. You can also try a pinch of cinnamon or a splash of vanilla extract. If you want something tangy, mix in some lemon zest. Each of these options adds a new layer of flavor. Play around until you find your favorite combo! This recipe is easy to adapt for different diets. To make it vegan, use plant-based yogurt and maple syrup instead of honey. If you want a low-calorie version, use light Greek yogurt and skip the granola. You can also use less peanut butter to cut calories. By making these simple swaps, you can enjoy this bowl while meeting your dietary needs. To keep your peanut butter yogurt bowl fresh, store it in an airtight container. Use a bowl with a tight lid. This helps prevent any odors from your fridge from getting in. If you add fresh fruit, store it separately. This keeps the fruit from getting mushy. The Greek yogurt lasts about one week in the fridge after opening. Natural peanut butter can stay good for months if stored properly. Honey and maple syrup also last a long time. The chia seeds remain fresh for about two years when stored in a cool place. Sliced bananas, however, should be eaten soon after they’re cut. You don’t need to reheat this bowl. It’s best served cold. If you want to enjoy it later, add fresh toppings just before eating. This keeps everything crunchy and tasty. Try adding more berries or a drizzle of honey right before serving for a fresh touch. Yes, you can use other types of yogurt. Greek yogurt is thick and creamy. You might try regular yogurt for a lighter feel. Non-dairy options like almond or coconut yogurt work too. Just check the flavor. Plain yogurt gives a mild taste, while flavored ones add sweetness. If you want more protein, try adding nuts or seeds. Almonds, walnuts, or pumpkin seeds boost protein and crunch. You can also mix in protein powder. Look for a flavor that matches peanut butter. Greek yogurt already has protein, so you get a good start! This recipe is great for meal prep. You can make it ahead of time. Just keep the yogurt mix and toppings separate until you’re ready to eat. This keeps your granola crunchy and the fruit fresh. Store it in airtight containers in the fridge for up to three days. In this blog post, we explored key ingredients, their benefits, and substitutions for dietary needs. I walked you through step-by-step instructions for creating a tasty dish. We also covered tips for mixing, serving, and storing leftovers. You can vary the recipe with different fruits and nuts to suit your taste. Remember, this dish is flexible and fun. Enjoy making it your own while keeping it nutritious and delicious. Each bite can be an exciting journey. Happy cooking!

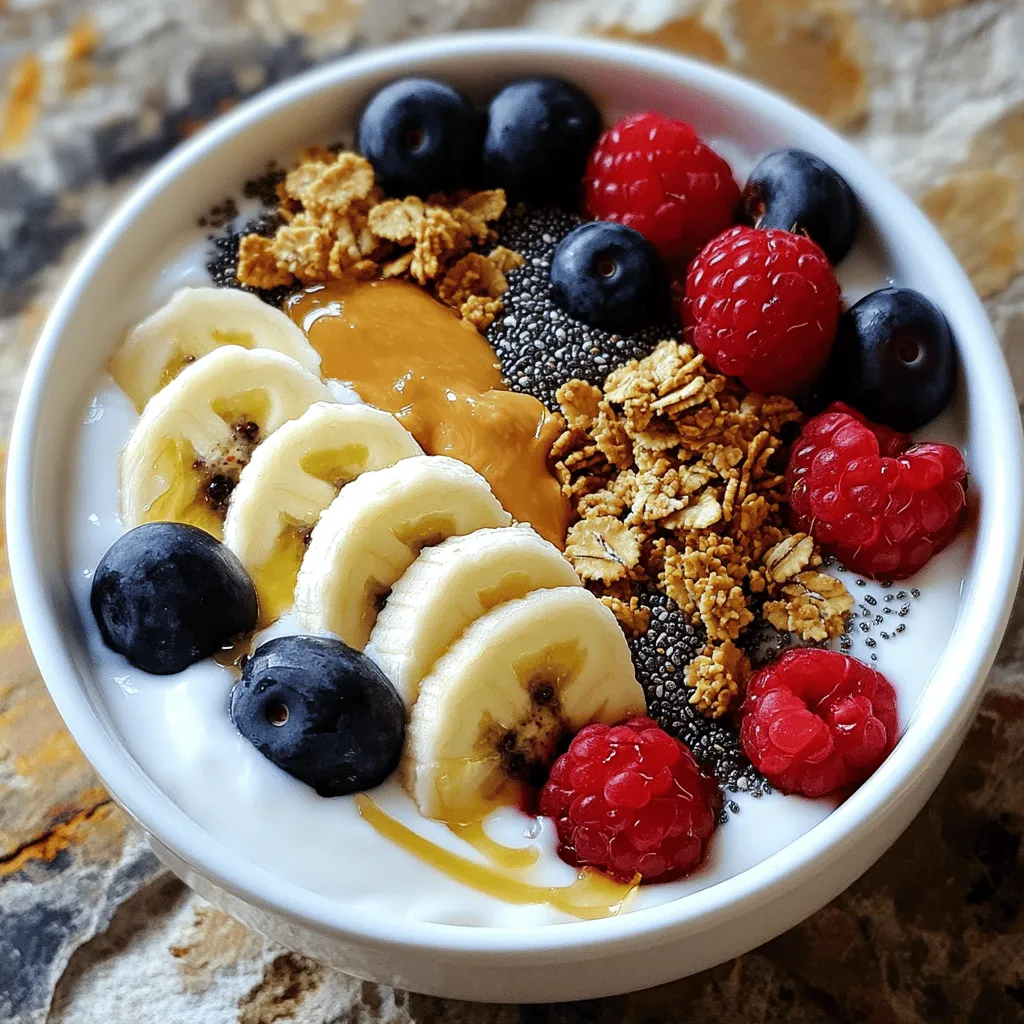
Peanut Butter Yogurt Bowl Tasty and Healthy Delight

Are you ready to whip up a Peanut Butter Yogurt Bowl that’s both tasty and healthy? This quick recipe packs

- Chicken and Marinade Ingredients - 2 boneless, skinless chicken breasts - 1 tablespoon olive oil - 1 tablespoon chipotle chili powder - 1 teaspoon garlic powder - 1 teaspoon onion powder - Salt and pepper to taste - Filling Ingredients - 1 cup cooked brown rice - 1 cup black beans, rinsed and drained - 1 cup corn (fresh, canned, or frozen) - Toppings and Garnish - 1 avocado, sliced - 1 cup shredded cheddar cheese - ½ cup chipotle ranch dressing - 4 large flour tortillas - Fresh cilantro for garnish The key to a great Chipotle Ranch Grilled Chicken Burrito lies in the ingredients. Start with juicy chicken breasts. Marinate them for deep flavor, using olive oil, chipotle chili powder, garlic powder, onion powder, salt, and pepper. This mix adds a smoky and spicy kick that makes each bite special. For the filling, brown rice brings a nutty texture. Black beans add protein and fiber, while corn gives sweetness. This blend creates a hearty base for your burrito. Don’t forget the toppings! Sliced avocado brings creaminess. Shredded cheddar cheese adds a rich flavor. Finally, drizzle on chipotle ranch dressing for a zesty finish. Wrap it all in a soft flour tortilla and you have a meal that bursts with flavor. First, you need to make the marinade. In a small bowl, mix 1 tablespoon of olive oil with 1 tablespoon of chipotle chili powder, 1 teaspoon of garlic powder, and 1 teaspoon of onion powder. Add salt and pepper to taste. Coat the chicken breasts with this mix. Let them rest for at least 30 minutes. This step helps the chicken soak up all the great flavors. Next, preheat your grill to medium-high heat. Place the marinated chicken breasts on the grill. Cook each side for about 6-7 minutes. The chicken is done when the juices run clear. After grilling, let the chicken rest for 5 minutes before slicing. This keeps the juices locked in. While the chicken rests, prepare the filling. In a large bowl, combine 1 cup of cooked brown rice, 1 cup of rinsed black beans, and 1 cup of corn. Add chopped fresh cilantro for a burst of flavor. Mix everything well. This filling will make your burrito hearty and tasty. Now it’s time to build your burrito. Lay a large flour tortilla flat. Spoon a good amount of the rice and bean mixture in the center. Add slices of grilled chicken, shredded cheddar cheese, and a few slices of avocado. Drizzle chipotle ranch dressing on top to add extra flavor. To wrap it up, fold the sides of the tortilla over the filling. Then, roll it up tightly from the bottom to the top. Make sure the filling stays secure inside as you roll. A good wrap keeps everything together while you eat. Preheat a skillet over medium heat for toasting. Place the burrito seam-side down in the skillet. Toast it for 2-3 minutes until the side is golden brown. Flip the burrito and toast the other side for another 2-3 minutes. This step makes the outside crispy and delicious. Finally, slice the burrito in half diagonally. Serve it with extra chipotle ranch dressing on the side. Garnish with fresh cilantro for a pop of color. Your Chipotle Ranch Grilled Chicken Burrito is now ready to enjoy! Grilling chicken well gives your burrito great flavor. Start by marinating the chicken for at least 30 minutes. This lets the spices soak in well. Preheat your grill to medium-high heat. Cook the chicken for 6-7 minutes on each side. Look for clear juices to know it’s done. Let it rest for 5 minutes before slicing. This keeps the juices in. You can make your burrito just how you like it. Swap brown rice for white rice or quinoa. This adds a different taste and texture. Add more veggies like bell peppers or spinach for extra color and nutrients. If you want heat, throw in some jalapeños. Feeling bold? Try adding different beans, like pinto or kidney beans. The choice is yours! Choosing the right tortilla is key for a great burrito. Large flour tortillas work best for wrapping. They hold all the fillings well. If you want a healthier option, try whole wheat tortillas. Corn tortillas are also a tasty choice but may tear more easily. Don’t be afraid to experiment with different types. Each one brings its own flavor! {{image_2}} You can easily make a vegetarian version of this burrito. Instead of chicken, use grilled veggies like bell peppers and zucchini. Add extra black beans and corn for protein. You can also toss in some cooked quinoa for a nutty flavor. The chipotle ranch dressing still adds that creamy zing. If you like heat, spice it up! Use more chipotle chili powder in the marinade. Add sliced jalapeños inside the burrito. You can also switch the cheddar cheese for pepper jack cheese. This will give your burrito a nice kick. Serve it with spicy salsa on the side. Burrito bowls are a fun twist on the classic wrap. Instead of a tortilla, layer all the filling in a bowl. Start with rice, then add beans, grilled chicken, and toppings. Drizzle chipotle ranch on top. This is great for those who want a lower-carb option. Plus, it’s easier to customize each layer! To keep leftovers fresh, wrap each burrito in foil or plastic wrap. Place them in an airtight container. Store in the fridge for up to three days. This keeps the flavors sealed in and helps maintain the taste. When you’re ready to eat, unwrap the burrito. You can reheat it in the microwave or on the stovetop. For the microwave, heat for about 1-2 minutes. Check it often to avoid overcooking. If using the stovetop, place it in a skillet over medium heat. Cook for about 3-4 minutes on each side until warm. This way, you’ll keep that crispy texture. To freeze burritos, wrap each one tightly in plastic wrap, then in foil. Place them in a freezer-safe bag or container. They can last up to three months in the freezer. When you want one, just thaw it in the fridge overnight. Then, reheat using the tips above. This method keeps your burritos tasty and ready for a quick meal anytime. Chipotle ranch dressing is a creamy blend of ranch and smoky chipotle flavors. It adds a nice kick to dishes. You can make it easily at home. Mix ranch dressing with chipotle chili powder and some lime juice. This gives it a zesty flavor. You can use it as a dip or a dressing for salads, too. Yes, you can! While grilled chicken is tasty, you can try other meats. Ground beef, pork, or turkey work great. You can also use shrimp or tofu for a veggie option. Just make sure to season your protein well. This will keep the flavors bold and exciting. Many side dishes go well with these burritos. Here are a few ideas: - Mexican Street Corn: Sweet corn with lime, cheese, and spices. - Guacamole and Chips: Creamy guacamole with crunchy tortilla chips. - Black Bean Salad: A fresh mix of black beans, tomatoes, and cilantro. - Spanish Rice: Flavored rice with spices and vegetables. These sides enhance the flavors and make your meal fun! In this post, we covered how to make delicious Chipotle Ranch Grilled Chicken Burritos. You learned about the key ingredients, from chicken to flavorful toppings. I walked you through marinating, grilling, and assembling your burrito step-by-step. I also shared tips to elevate your grilling game and ideas for customizing your filling. Don’t forget about storage options for leftovers. Enjoy crafting your perfect burrito and get creative with variations. Your next meal can be fun, tasty, and easy!

Chipotle Ranch Grilled Chicken Burrito Flavor Boost

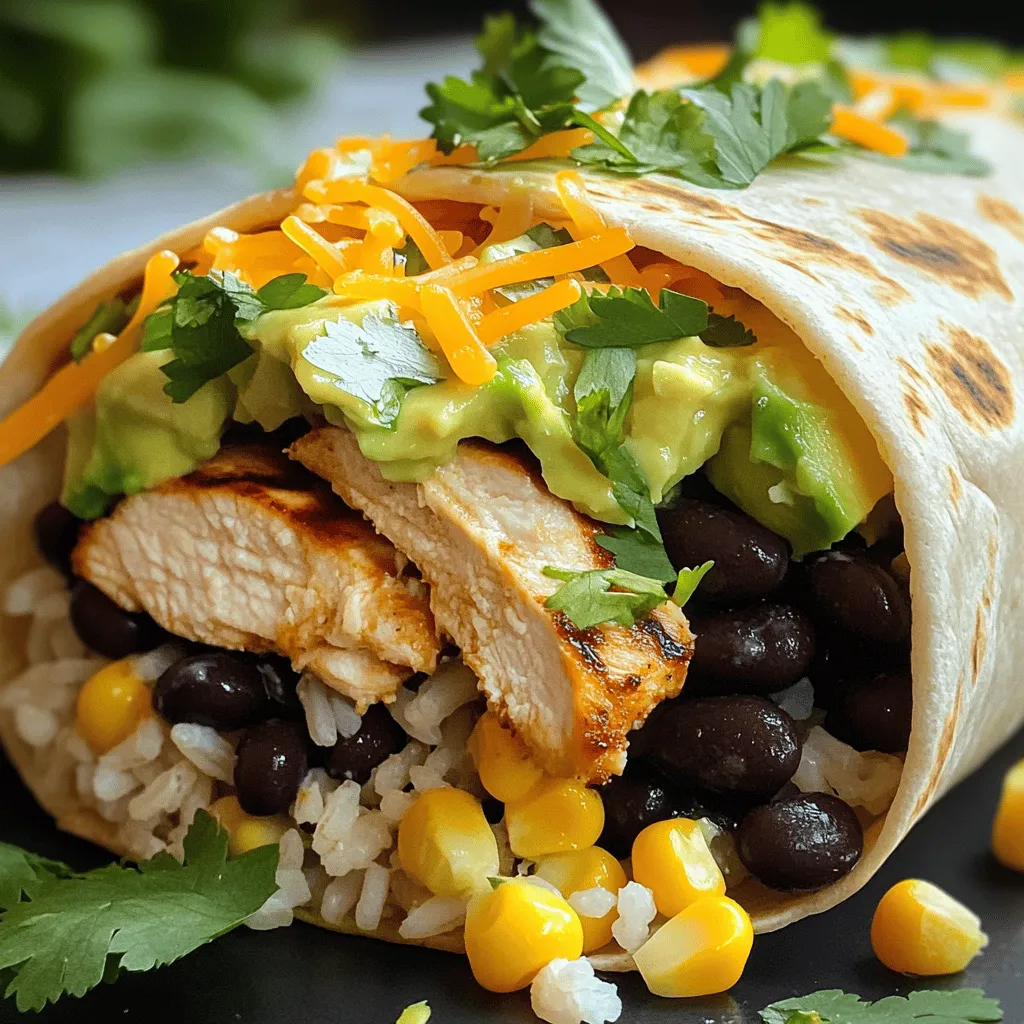
Craving a flavor boost for your next meal? The Chipotle Ranch Grilled Chicken Burrito is your answer! This tasty twist

- 1 lb boneless, skinless chicken breast, thinly sliced - 2 cups mixed bell peppers (red, yellow, green), sliced - 1 medium onion, sliced - 2 cups broccoli florets - 1/4 cup sweet chili sauce - 2 tablespoons soy sauce - 1 teaspoon sesame oil - Sesame seeds - Chopped green onions Sweet Chili Chicken Stir Fry is quick and fun to make. You start by gathering the main ingredients. I like using fresh chicken breast for its juicy flavor. The bell peppers add color and sweetness. Broccoli gives a nice crunch. Next, I mix the sauces and seasonings. Sweet chili sauce brings a nice kick. Soy sauce adds depth. A dash of sesame oil gives a nutty note. For a beautiful finish, I sprinkle sesame seeds and chopped green onions on top. This gives a fresh look and taste. In a medium bowl, take your thinly sliced chicken breast. Add 1 tablespoon of cornstarch, a pinch of salt, and pepper. Mix it well. The cornstarch helps make the chicken crispy when you cook it. Heat 2 tablespoons of vegetable oil in a large skillet or wok over medium-high heat. Once the oil is hot, add the coated chicken. Cook it for about 5-7 minutes. Stir it often until the chicken turns golden brown. Once done, remove the chicken and set it aside. In the same skillet, add 1 sliced onion, 2 cups of mixed bell peppers, and 2 cups of broccoli florets. Stir-fry these veggies for 3-4 minutes. You want them to be tender but still crisp. Then, add 3 minced garlic cloves and 1 tablespoon of minced fresh ginger. Stir everything for one more minute until you smell the great aroma. Now it’s time to bring everything together. Return the cooked chicken to the skillet. Pour in 1/4 cup of sweet chili sauce and 2 tablespoons of soy sauce. Stir well to coat all the ingredients. Cook this mixture for another 2-3 minutes over medium-low heat. This lets all the flavors blend nicely. Drizzle 1 teaspoon of sesame oil over your stir fry. Give it one last gentle stir. Taste your dish and adjust the seasoning with salt and pepper, if needed. Serve the stir fry over cooked jasmine rice. For a special touch, garnish with sesame seeds and chopped green onions. To make your chicken crispy, use cornstarch. This coating helps to create a nice crunch when you fry it. Toss the chicken in cornstarch with a pinch of salt and pepper. Make sure each piece is well coated. This simple step gives the chicken a golden brown finish that tastes great. For crisp-tender veggies, time is key. When you stir-fry, cook the onion, bell peppers, and broccoli for about 3-4 minutes. You want them tender but still crisp. This keeps the veggies vibrant and full of flavor. Add garlic and ginger for just one minute to avoid burning them. This keeps your dish fresh and bright. You can customize the sauce to fit your taste. Try adding a splash of lime juice for brightness. If you like heat, add some red pepper flakes. This can make your dish more exciting. You can also swap the sweet chili sauce for a homemade mix of honey and soy sauce. This gives you control over the sweetness and spice. {{image_2}} You can switch out chicken for shrimp or tofu. Shrimp cooks quickly and adds a sweet flavor. Tofu is great for a plant-based option. Just make sure to press and drain it first. This helps it soak up the sweet chili sauce better. Feel free to change the veggies based on what you have. Snap peas, carrots, or zucchini work well. You can also use spinach or bok choy for a different taste. Just remember to adjust the cooking time so they stay crisp. If you need a gluten-free option, use tamari instead of soy sauce. This swap keeps the dish tasty without gluten. You can also look for gluten-free sweet chili sauce. Always check the labels to ensure everything meets your dietary needs. To store leftover Sweet Chili Chicken Stir Fry, let it cool first. Place it in an airtight container. This keeps it fresh and safe. Refrigerate it within two hours of cooking. You can keep it for up to three days. If you want to keep it longer, consider freezing. For the best texture when reheating, use a skillet. Heat it on medium. Add a splash of water or broth to keep it moist. Stir often for even heating. This brings back the crispiness of the chicken and the crunch of the veggies. You can also use a microwave. Cover the dish loosely and heat in short bursts. Stir in between to avoid hot spots. If you wish to freeze your stir fry, portion it out first. Use freezer-safe bags or containers. Remove as much air as possible to prevent freezer burn. You can freeze it for up to three months. To thaw, place it in the fridge overnight. For quick thawing, use the microwave. Reheat it on the stove for the best texture. You can serve this stir fry with cooked jasmine rice. The rice soaks up the sauce well. You can also add a side salad for extra crunch. Maybe some spring rolls would be nice too. Yes, you can prepare the chicken and veggies ahead of time. Just store them separately in the fridge. When you’re ready to cook, stir-fry them quickly for a fresh meal. To reduce the spice, use less sweet chili sauce. You can also add more sugar or honey. This will balance the heat and add sweetness. Store leftover stir fry in an airtight container. Keep it in the refrigerator for up to three days. Make sure to cool it down before sealing. Yes, you can use frozen vegetables. They are easy and save time. Just thaw them before cooking to ensure even cooking. In this blog post, we explored a tasty sweet chili chicken stir fry. We covered main ingredients like chicken and colorful veggies, along with sauces that bring flavor. Step-by-step, I showed how to cook each part perfectly. I shared tips for crispy chicken and how to customize flavors. We also looked at variations and storage options to help you enjoy leftovers. With these simple steps, you can create a dish that’s full of taste and joy. Enjoy your cooking adventure!

Sweet Chili Chicken Stir Fry Tasty Weeknight Dinner

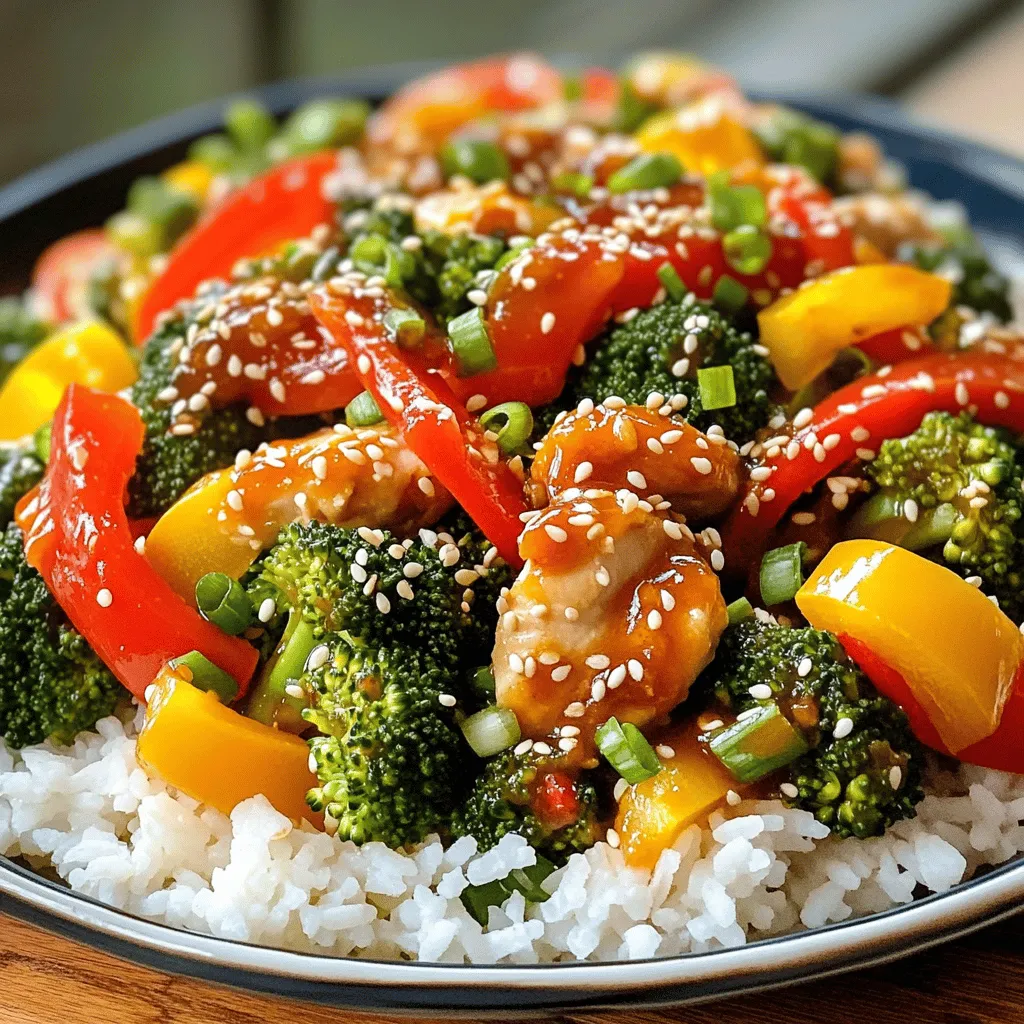
Ready for a quick, tasty meal? In just 30 minutes, you can whip up a Sweet Chili Chicken Stir Fry

- 1 cup jasmine rice - 2 cups chicken broth - 1 cup queso cheese sauce (store-bought or homemade) - 1 lb steak (sirloin or flank), cut into thin strips - 1 tablespoon olive oil - 1 bell pepper (red or yellow), sliced - 1 small onion, sliced - 2 cloves garlic, minced - 1 teaspoon chili powder - 1 teaspoon cumin - Salt and pepper to taste - Fresh cilantro for garnish - Lime wedges for serving Jasmine rice gives a lovely aroma and texture. You can swap it with basmati rice if you like. Chicken broth adds depth, but vegetable broth works too. The queso cheese sauce is key for creaminess. You can make it at home or buy it ready-made. For steak, sirloin or flank is great, but chicken or shrimp can also work. Bell peppers add color and sweet flavor, while onion and garlic bring richness. For spice, chili powder and cumin are perfect; adjust to your taste. Fresh cilantro and lime add freshness and zesty notes at the end. When picking bell peppers, look for firm ones with shiny skin. They should feel heavy for their size. For onions, choose those that are firm with no soft spots. Fresh garlic should be plump and have dry skin. When selecting steak, look for bright red color and some marbling for tenderness. Avoid any meat that looks brown or has a strong odor. Always check the sell-by date to ensure freshness. These tips will help your creamy queso rice dish shine! Start with 1 cup of jasmine rice. Rinse it under cold water until the water runs clear. This step removes excess starch. It helps the rice not to clump together. Next, in a medium saucepan, add the rinsed rice and 2 cups of chicken broth. Bring this mixture to a boil. Once boiling, lower the heat, cover, and let it simmer for about 15 minutes. The rice should absorb all the liquid and become tender. For the steak, use 1 pound of sirloin or flank, cut into thin strips. Heat 1 tablespoon of olive oil in a large skillet over medium-high heat. Add the steak strips and season them with salt, pepper, 1 teaspoon of chili powder, and 1 teaspoon of cumin. Sauté the steak for about 5 to 7 minutes. Cook it until it reaches your desired doneness. Once done, remove the steak from the skillet and set it aside on a plate. In the same skillet, add sliced onion, bell pepper, and minced garlic. Sauté these for about 3 to 4 minutes until they soften and smell great. When the rice is ready, stir in 1 cup of queso cheese sauce. Mix until the rice is well coated. Then, add the cooked steak and sautéed vegetables to the rice. Stir gently to combine all the ingredients. Taste and adjust the seasoning as needed. Let the dish rest for a minute before serving. Enjoy your creamy and flavorful masterpiece! To get the best texture, rinse the jasmine rice well. This helps remove extra starch. Cooking the rice in chicken broth adds flavor. Keep the lid on while it cooks to trap steam. This keeps the rice fluffy and tender. For the steak, thin strips cook faster and stay juicy. Sauté them on medium-high heat for a nice sear. Spice it up! I love adding chili powder and cumin to the steak. These spices bring warmth and depth. You can also try smoked paprika for a smoky taste. A squeeze of lime before serving adds brightness. Fresh cilantro gives a burst of freshness. Adjust salt and pepper to your taste for that perfect kick. Serve the creamy queso rice in bowls for a cozy feel. Top it with fresh cilantro for color. A lime wedge on the side is a nice touch. You can also add a drizzle of extra queso on top. This makes the dish look even more inviting. A sprinkle of chili flakes can add a pop of color and heat. Enjoy your delicious creation! {{image_2}} You can add some fun to your creamy queso rice. Try adding diced tomatoes or jalapeños for a spicy kick. Swap out the jasmine rice for brown rice or even quinoa for a healthier twist. You can also mix in black beans for extra protein and fiber. These small changes can make your dish unique! If you want to switch up the protein, you have many options. Chicken strips or shrimp work great in this dish. For a tasty plant-based choice, use tofu or tempeh. Season them the same way as the steak. This way, you keep that delicious flavor while trying new ingredients. To make this dish vegetarian or vegan, omit the steak and chicken broth. Use vegetable broth instead. You can also replace queso cheese sauce with a vegan cheese option. Many brands offer creamy, plant-based sauces that taste great. These changes keep the dish rich and satisfying without meat. To keep your creamy queso rice tasty, store it in an airtight container. Let the dish cool to room temperature before sealing it up. This helps prevent moisture build-up. Place the container in the fridge. It will stay fresh for up to three days. When ready to eat, check for any off smells or changes in color. You can freeze creamy queso rice for longer storage. Place it in a freezer-safe container or bag. Make sure to squeeze out as much air as possible. It can last up to three months in the freezer. When you're ready to enjoy it again, thaw it in the fridge overnight. Reheat in a microwave or on the stove, adding a splash of chicken broth to restore creaminess. Heat until it's steaming hot. The shelf life of the main ingredients varies. Jasmine rice can last for years if kept dry. Chicken broth in a can or carton can last several months, while homemade broth is best used within a week. Queso cheese sauce usually lasts about a week in the fridge once opened. Fresh vegetables like bell peppers and onions should be used within a week for the best taste. Always check the expiration dates to ensure freshness. To make creamy queso sauce from scratch, start with simple ingredients. You need: - 1 cup shredded cheese (like cheddar or Monterey Jack) - 1 cup milk - 1 tablespoon butter - 1 tablespoon flour - 1 teaspoon chili powder - Salt to taste 1. Melt the butter in a saucepan over medium heat. 2. Stir in the flour and cook for one minute to make a roux. 3. Gradually add the milk, whisking until smooth. 4. Add the cheese and stir until melted. 5. Season with chili powder and salt. This homemade sauce adds a rich flavor to your dish. Yes, you can use brown rice. It has a nuttier taste and is healthier. Just keep in mind that brown rice takes longer to cook. Use the same amount of chicken broth but increase the cooking time to about 40-45 minutes. The result will be a hearty and wholesome version of creamy queso rice. Creamy queso rice pairs well with many sides. Here are some tasty options: - Grilled vegetables for a fresh crunch - A simple green salad for balance - Tortilla chips for a fun crunch - Black beans for added protein These sides enhance the meal and create a well-rounded plate. This article covered how to make delicious Creamy Queso Rice with Steak Strips. We explored all the ingredients, from fresh produce to quality steak. I shared step-by-step instructions for perfect rice and steak. Tips on techniques, flavors, and presentation helped enhance the dish. You also learned about fun variations and best storage practices. Enjoy your cooking journey! This dish is sure to impress.

Creamy Queso Rice with Steak Strips Flavorful Delight

Are you ready to indulge in a rich and creamy dish that combines comfort and flavor? In this blog post,

- 1 pound flank steak - 2 tablespoons soy sauce - 1 tablespoon cornstarch - 1 tablespoon sesame oil Pepper steak starts with high-quality flank steak. This cut is tender and flavorful. The soy sauce adds salt and umami depth. Cornstarch helps to create a nice crust. Sesame oil brings a nutty flavor that brightens the dish. - 2 bell peppers (one red, one green) - 1 large onion - 3 cloves garlic - 1 teaspoon ginger Bell peppers add sweetness and crunch. I like to use one red and one green for color. The onion provides a savory base. Garlic and ginger enhance the flavor profile with warmth and spice. - 1 tablespoon olive oil - 1 tablespoon oyster sauce (optional) - Salt and pepper to taste - Cooked white rice or noodles for serving Olive oil is the perfect fat for cooking. It helps the steak sear nicely. Oyster sauce adds extra depth but is optional. You can season with salt and pepper to your liking. Serve it over rice or noodles for a complete meal. First, we need to make the steak tasty. In a bowl, combine the thinly sliced flank steak with: - 2 tablespoons soy sauce - 1 tablespoon cornstarch - 1 tablespoon sesame oil Mix everything well. This step helps the steak soak up all the flavors. Let it marinate for at least 15 minutes. This gives the meat time to absorb the sauce. Now it’s time to cook. Heat 1 tablespoon of olive oil in a large skillet or wok over medium-high heat. Once hot, add the marinated steak in a single layer. Sear it for about 2-3 minutes until it turns brown. Then, remove the steak and set it aside. In the same skillet, add: - 1 large onion, sliced - 2 bell peppers (one red, one green), sliced - 3 cloves garlic, minced - 1 teaspoon ginger, grated Stir-fry these for about 5 minutes. You want them tender, but still a bit crisp. The colors and smells will fill your kitchen. Return the cooked steak to the skillet with the vegetables. If you want more flavor, drizzle 1 tablespoon of oyster sauce over the mix. Stir everything well and cook for another 2-3 minutes. This warms the steak through and blends the flavors. Finally, season with salt and pepper to taste. You can serve this pepper steak over cooked white rice or noodles. Enjoy your delicious meal! To make your steak shine, marinate it well. Use soy sauce, cornstarch, and sesame oil. This mix adds flavor and keeps the meat tender. Let the steak sit for at least 15 minutes. This time lets the flavors sink in. When cooking, avoid overcrowding the skillet. If you add too much meat, it steams instead of sears. Cook the steak in batches if needed. This keeps it juicy and gives it that nice brown crust. For bell peppers, choose vibrant red and green ones. They add color and crunch. Slice them thin for quick cooking. Aim for crisp-tender veggies. Stir-frying for about five minutes works well. You want them tender but not mushy. Serve your pepper steak over cooked white rice or noodles. Both options soak up the sauce well. For a nice touch, garnish with sesame seeds or sliced green onions. These add flavor and make your dish look great. Enjoy your meal! {{image_2}} You can use many cuts for pepper steak. Flank steak is popular, but you can try sirloin or skirt steak for a different taste. These cuts are tender and absorb flavors well. If you want a leaner option, choose tenderloin. For a vegetarian or vegan version, try using tofu or tempeh. These plant-based proteins soak up the marinade nicely. You can also use seitan, which has a chewy texture that mimics meat. This way, everyone can enjoy a tasty meal. Adding different sauces can change the taste of your pepper steak. Try using hoisin sauce for a sweet twist. You can also add a splash of chili sauce for spice or teriyaki for a sweet-salty mix. Each sauce brings its own flair to the dish. Incorporating other vegetables can enhance the dish too. Consider using snap peas, broccoli, or carrots. These veggies add color and crunch. You can mix and match based on what you have on hand or what you enjoy. Pepper steak varies across the world. In China, chefs may use black bean sauce for a deep flavor. In the Caribbean, they might add allspice for a unique twist. Each region has its own way of making this dish special. Popular regional ingredients include different types of bell peppers or even chili peppers for heat. These ingredients add a local touch to your pepper steak, making it a fun exploration of flavors. To keep your pepper steak fresh, store it right away. Place leftovers in the fridge within two hours. Use airtight containers to prevent odors. Glass or plastic containers work well. Make sure to label them with the date. This helps you know when to eat them. Reheat pepper steak gently to keep its flavor. The best method is using a skillet. Add a splash of water or broth to prevent drying out. Heat over low to medium heat. Stir often until it warms through. If you want to freeze, use freezer-safe bags. Squeeze out as much air as possible before sealing. This helps prevent freezer burn. Pepper steak lasts in the fridge for about three to four days. Always check for spoilage before eating. Signs of spoilage include a strange smell or change in color. If in doubt, throw it out to be safe. The best cut for pepper steak is flank steak. Flank steak is thin and tender. It works well for quick cooking. You can also use sirloin or ribeye. These cuts have great flavor too. When choosing your beef, look for marbling. This will keep the meat juicy and tasty. Yes, you can make pepper steak ahead of time. Cook the dish and let it cool. Store it in an airtight container. It will last in the fridge for about three days. To reheat, use the stove or microwave. Add a splash of water or broth to keep it moist. This is great for meal prep! Pepper steak pairs well with many sides. Here are some great ideas: - Cooked white rice - Noodles - Steamed broccoli - Stir-fried vegetables - A fresh green salad You can also add sauces like soy sauce or chili sauce for extra flavor. Enjoy your meal! Pepper steak brings together simple ingredients for a tasty dish. We explored key components, from flank steak to vibrant bell peppers. I shared step-by-step instructions to ensure your steak is both tender and flavorful. Exploring variations allows for creativity in your meals. Lastly, I provided tips for storing leftovers, so nothing goes to waste. Enjoy this dish, making it your own with new flavors and sides. Cook with confidence and share your delicious pepper steak experience!

Pepper Steak with Bell Peppers Savory Dinner Recipe

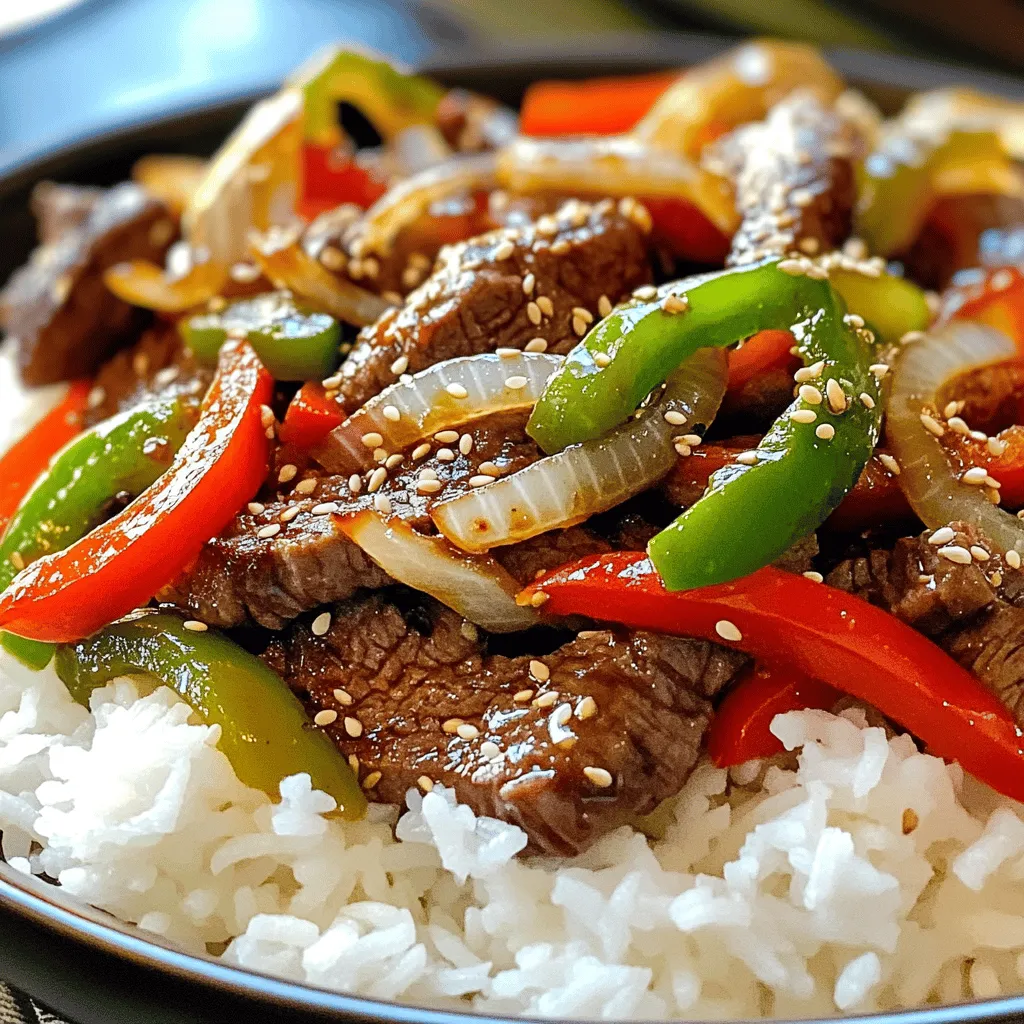
Are you craving a hearty meal that’s quick to make and packed with flavor? This Pepper Steak with Bell Peppers

- 1 medium butternut squash, peeled, seeded, and diced - 2 medium sweet potatoes, peeled and diced - 1 small onion, chopped - 2 cloves garlic, minced The base of this soup is the butternut squash and sweet potatoes. They add natural sweetness and creamy texture. The onion and garlic bring a depth of flavor. Use fresh ingredients for the best taste. - 1 teaspoon ground cumin - 1 teaspoon smoked paprika - 1/2 teaspoon cayenne pepper (adjust to taste) - Salt and pepper, to taste These spices will give your soup a warm, spicy kick. Cumin adds a nutty taste. Smoked paprika brings a hint of smokiness. Cayenne pepper gives it heat. Adjust the cayenne to suit your taste. - 1 can coconut milk (optional, for creaminess) - Fresh cilantro or parsley for garnish Coconut milk adds creaminess and a rich flavor. You can skip it for a lighter soup. Fresh herbs like cilantro or parsley brighten the dish. They add color and freshness when serving. First, gather your ingredients. You need a butternut squash, sweet potatoes, onion, garlic, ginger, and spices. - 1 medium butternut squash, peeled, seeded, and diced - 2 medium sweet potatoes, peeled and diced - 1 small onion, chopped - 2 cloves garlic, minced - 1 tablespoon fresh ginger, grated - 1-2 tablespoons olive oil - 1 teaspoon ground cumin - 1 teaspoon smoked paprika - 1/2 teaspoon cayenne pepper (adjust to taste) - Salt and pepper, to taste - 1 can coconut milk (optional) - Fresh cilantro or parsley for garnish Next, prep the vegetables. Peel and dice the butternut squash and sweet potatoes into small cubes. Chop the onion and mince the garlic. Grate the ginger. This makes cooking easier. Now, measure out the spices. You will need ground cumin, smoked paprika, and cayenne pepper. Use these spices to add depth and warmth to your soup. Heat olive oil in a large pot over medium heat. Add the chopped onion. Sauté it for about five minutes until it becomes soft and clear. Next, stir in the minced garlic and grated ginger. Cook them for one to two minutes until they smell great. This brings out the flavors. Then, add the diced butternut squash and sweet potatoes. Toss them with the spices: cumin, smoked paprika, cayenne, salt, and pepper. Stir well to coat the veggies in those tasty flavors. Pour in the vegetable broth and bring the soup to a boil. Once it bubbles, lower the heat. Let it simmer for 20 to 25 minutes. The vegetables should be tender by now. After simmering, take the pot off the heat. Use an immersion blender to blend the soup until it is smooth. If you don’t have one, carefully transfer the soup to a blender in batches. If you want a creamier soup, stir in coconut milk. Heat it gently for a few more minutes. Taste it and add more salt or spice if needed. Finally, serve the soup hot. Garnish it with chopped cilantro or parsley. You can add a drizzle of coconut milk on top and a sprinkle of cayenne for extra color. Enjoy your delicious soup! Adjusting spice levels You can make the soup as spicy as you like. Start with half a teaspoon of cayenne pepper. Taste the soup as it cooks. If you want more heat, add a little more. Adding acidity for balance To brighten the soup, add a splash of lemon juice. This will balance the sweetness of the butternut squash and sweet potatoes. You can also use lime juice for a different twist. Making it creamier For a richer soup, stir in coconut milk. It adds a nice texture and flavor. If you prefer a lighter soup, skip it and enjoy the natural creaminess from the sweet potatoes. Using different thickening methods If your soup is too thin, try adding a bit of mashed sweet potato. This keeps the flavor strong. Alternatively, you can let it simmer longer to reduce the liquid. Serving suggestions Serve the soup in warm bowls. This keeps it hot and tasty. You can also drizzle extra coconut milk on top for a nice touch. Garnishing ideas Add fresh cilantro or parsley for color. A sprinkle of cayenne pepper makes it look nice too. You might even add a slice of crusty bread for a complete meal. {{image_2}} You can play with the recipe by swapping some ingredients. Try adding other root vegetables like carrots or parsnips. They add sweetness and a unique taste. You can also use spices like curry powder or chili flakes for a different kick. Each swap creates a new twist on the classic flavor. This soup can easily fit many diets. For vegan options, just stick with vegetable broth and coconut milk. It’s naturally gluten-free, so no worries there! If you need a nut-free option, ensure the broth and any toppings are free from nuts. You can still enjoy this soup without any nut products. Using seasonal ingredients makes your soup even better. In fall, butternut squash and sweet potatoes shine. In spring, consider adding fresh peas or asparagus for a lighter touch. For cold weather, serve it warm and cozy. On warm days, enjoy it chilled for a refreshing twist. Each season brings new flavors to explore! To store leftovers, let the soup cool first. Then, pour it into an airtight container. This keeps the soup fresh. In the fridge, it lasts about 4 to 5 days. Always check for any off smells before eating. For freezing, use a freezer-safe container. Make sure to leave some space at the top. The soup will expand as it freezes. It can last up to 3 months in the freezer. When you're ready to eat, thaw it in the fridge overnight. Reheat it on the stove or in the microwave until hot. To refresh reheated soup, stir in a splash of vegetable broth or water. This helps restore its creamy texture. You can also add a bit of coconut milk for extra creaminess. Pair the soup with crusty bread or a fresh salad for a complete meal. Enjoying it with fresh herbs on top adds a nice touch! How spicy is the soup? The soup has a mild to medium spice level. You control the heat by adjusting the cayenne pepper. Start with half a teaspoon for a gentle warmth. If you love spice, add more until it’s perfect for you. Can I use frozen butternut squash or sweet potatoes? Yes, you can use frozen butternut squash or sweet potatoes. They save time and work well in this recipe. Just add them straight to the pot without thawing. You may need to adjust cooking time slightly. Caloric content per serving Each serving of this soup has about 180-220 calories. This number varies based on added coconut milk and portion size. It makes a filling meal without being heavy. Health benefits of the main ingredients - Butternut squash: Full of vitamins A and C, it’s great for your eyes and skin. - Sweet potatoes: Rich in fiber and antioxidants, they help digestion and boost immunity. - Onion and garlic: Both add flavor and have great health benefits, like lowering blood pressure. What to do if the soup is too thick? If your soup is too thick, simply add more vegetable broth. Start with half a cup and stir well. Heat it gently until it reaches your desired consistency. How to fix soup that’s too spicy? If the soup is too spicy, add a bit of coconut milk. This will cool it down and add creaminess. You can also mix in some extra diced potatoes or squash to balance the heat. This blog showcased a flavorful butternut squash soup. We explored main ingredients, spices, and optional additions. I shared easy steps to prepare, cook, and serve it. You can enhance flavors and adjust textures for your taste. Variations allow for swaps and dietary adjustments. Proper storage and reheating tips make enjoying leftovers simple. Remember, cooking should be fun and creative. With these insights, you can make a delicious soup that fits your needs. Enjoy every bowl!

Spicy Butternut Squash Sweet Potato Soup Delight

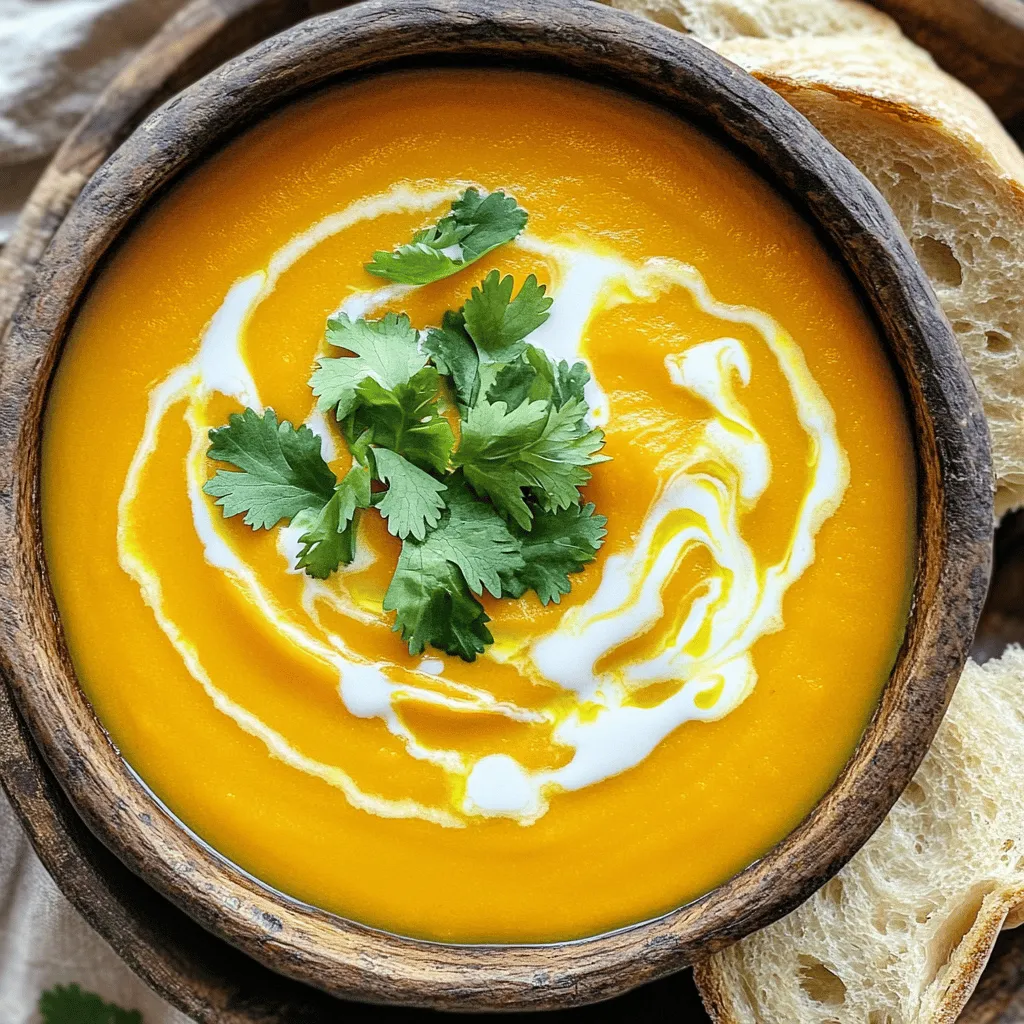
Are you ready to warm up your meals with a burst of flavor? In this post, I’ll guide you through

For this dish, you need four boneless, skinless chicken breasts. These are tender and juicy. Season the chicken with salt and black pepper. Add one teaspoon each of dried rosemary, thyme, and oregano. Rub these spices on the chicken so each piece gets flavor. You will need one cup of long-grain white rice. Rinse it well before use to remove extra starch. For liquid, use two cups of low-sodium chicken broth. This broth makes the rice soft and tasty. Add one lemon for zest and juice. The lemon gives a fresh taste. You will also need two tablespoons of olive oil and four cloves of minced garlic. These add depth and aroma to the dish. Lastly, use one cup of frozen peas for color and nutrition, and fresh parsley for garnish at the end. First, take your four boneless, skinless chicken breasts. Season them with salt, black pepper, dried rosemary, thyme, and oregano. Rub the chicken well with these spices for an even coating. This step brings out the best flavors. Next, use a bowl to mix lemon juice, lemon zest, olive oil, and minced garlic. Pour half of this mixture over the chicken in your slow cooker. Make sure each piece is well-coated. This adds a zesty kick that pairs perfectly with the herbs. Now, rinse one cup of long-grain white rice under cold water. This step helps remove excess starch. Spread the rice evenly over the seasoned chicken in the slow cooker. It’s important to cover the chicken fully. Then, pour in two cups of low-sodium chicken broth. This liquid will cook the rice and keep the chicken moist. You may want to stir gently to mix everything. Drizzle the rest of the lemon and garlic mixture over the rice. This will enhance the flavor as it cooks. Cover your slow cooker and set it to cook. You can choose to cook on low for 4-5 hours or on high for 2-3 hours. The chicken should be tender and fully cooked, while the rice becomes fluffy. About 15 minutes before it’s ready, stir in one cup of frozen peas. This adds a pop of color and sweetness. Once the cooking time is done, shred the chicken using two forks directly in the slow cooker. Mix everything together well. Taste the dish and adjust seasoning if needed. To make the chicken shine, use fresh herbs if possible. They boost the flavor. Start by adding salt and pepper to the chicken. Then rub the dried rosemary, thyme, and oregano all over. This gives the chicken a nice taste. When you mix the lemon juice, zest, and garlic, you create a bright sauce. Pour half over the chicken. This helps lock in the flavor as it cooks. For fluffy rice, rinse it well before adding it to the slow cooker. Rinsing removes extra starch that makes the rice sticky. After placing the rice on the chicken, pour in the chicken broth. Make sure the rice is fully covered. This helps it cook evenly. Stir gently to combine if needed. The right broth amount is key for perfect texture. When serving, I like to use deep bowls. This keeps the meal warm longer. Scoop the chicken and rice into each bowl. Top with fresh parsley for color. Add a lemon wedge on the side. This not only looks nice but adds a fresh kick when squeezed. Enjoy your meal with a simple green salad or crusty bread for a complete dinner. {{image_2}} You can switch chicken breasts for thighs. Thighs add more flavor and stay juicy. If you want a lighter option, use turkey. Cut turkey into small pieces for even cooking. Adjust cooking time to ensure it stays tender. Add color and nutrients by mixing in vegetables. Carrots, bell peppers, and zucchini work well. Chop them into small pieces for quick cooking. You can add them at the start or during the last 15 minutes. Frozen peas are a great addition too, as they heat up quickly. Try different herbs to change the flavor. Basil or cilantro can give a fresh twist. You can also use a pinch of red pepper flakes for some heat. Experiment with spices like cumin or paprika for a unique taste. Each choice can create a new dish from the same recipe. After you finish your meal, let it cool down. Place the leftover chicken and rice in an airtight container. Store it in the fridge for up to three days. Make sure to label the container with the date. This helps you remember when you cooked it. If you want to keep it longer, you can freeze it. First, let it cool completely. Then, transfer the chicken and rice to a freezer-safe container. You can also use freezer bags. Squeeze out the air before sealing. It can last for up to three months in the freezer. When you’re ready to eat, thaw it in the fridge overnight. To reheat, you have a few options. You can use the microwave, stovetop, or oven. If using a microwave, place it in a microwave-safe dish. Add a splash of chicken broth to keep it moist. Heat in 1-minute intervals, stirring in between. For the stovetop, warm it over low heat, stirring often. If using an oven, cover it with foil and heat at 350°F for about 20 minutes. Whichever method you choose, ensure it is heated all the way through before serving. Yes, you can cook this dish on either setting. Cooking on low takes about 4 to 5 hours. Cooking on high takes about 2 to 3 hours. Both methods yield tender chicken and fluffy rice. Choose whichever fits your schedule best. The chicken is done when it reaches 165°F. You can check this with a meat thermometer. The meat should be white and no longer pink inside. If you shred it with forks, it should fall apart easily. This dish goes well with several sides. Here are a few ideas: - Steamed broccoli - Roasted carrots - Fresh garden salad - Grilled asparagus - Garlic bread These sides add color and flavor, making your meal more exciting. This blog detailed how to make a tasty Lemon Herb Chicken and Rice dish. We covered key ingredients like chicken, rice, and herbs. The step-by-step guide helps you prepare it perfectly. Many tips ensure great flavor and fluffy rice. We also discussed fun variations and how to store your dish. In the end, cooking is fun and creative. Feel free to try new ideas, and enjoy your meal!

Slow Cooker Lemon Herb Chicken and Rice Delight

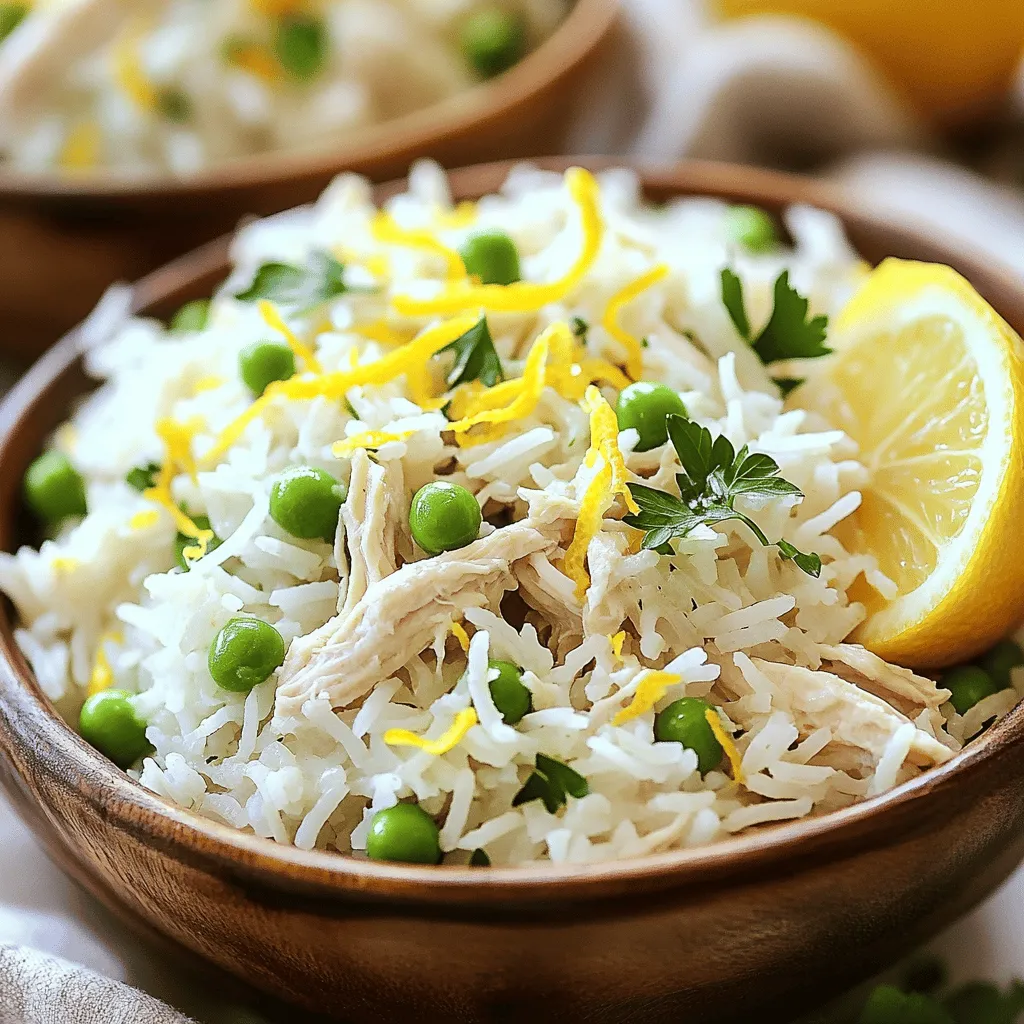
Craving a cozy meal that’s both easy and delicious? Look no further! My Slow Cooker Lemon Herb Chicken and Rice

- 2 cups rolled oats - 1 cup mixed berries (fresh or frozen) - 1/2 cup almond butter (or any nut butter) To make Berry Oat Bars, you need rolled oats as the base. They provide fiber and texture. Mixed berries add sweet and tangy flavors. You can use fresh or frozen berries. Almond butter acts as a binder and adds creaminess. Feel free to swap it with another nut butter if you prefer. - 1/4 cup honey or maple syrup - 1/2 teaspoon vanilla extract - 1 teaspoon cinnamon For sweetness, you can use honey or maple syrup. Both give a nice touch of flavor. Vanilla extract enhances the overall taste. Cinnamon adds warmth and a hint of spice. These ingredients make your bars more delicious and aromatic. - 1/4 cup chopped nuts - 1/4 cup shredded coconut You can add chopped nuts for crunch. They also boost protein and healthy fats. Shredded coconut brings a tropical twist and more texture. Both are optional, but they can make your bars even better. - Preheat your oven to 350°F (175°C). - Line an 8x8-inch baking pan with parchment paper. Leave some overhang to help remove the bars later. - In a large bowl, mix 2 cups of rolled oats, 1/4 teaspoon salt, and 1 teaspoon cinnamon. - If you want, add 1/4 cup chopped nuts or 1/4 cup shredded coconut for extra texture. - In another bowl, blend 1/2 cup almond butter, 1/4 cup honey or maple syrup, and 1/2 teaspoon vanilla extract until smooth. - Pour this wet mixture into the dry mix. Stir until everything is well blended. - Gently fold in 1 cup of mixed berries. Be careful not to break them apart too much. - Transfer the mixture to the prepared baking pan. Press it down evenly using the back of a spoon or your hands. - Bake for 20-25 minutes. Look for golden edges to know when it’s done. Mixing well is key to great bars. Combine the wet and dry ingredients thoroughly. This helps the oats soak up moisture. If you don’t mix enough, some bits may stay dry. After baking, let the bars cool a bit. Use a sharp knife to cut them. This avoids crumbling and helps keep the shape. Want to switch things up? Try different sweeteners. Maple syrup gives a nice flavor. You can also use agave nectar or coconut sugar. For a tasty twist, add spices. Nutmeg or ginger can add warmth. You can even try a splash of almond or coconut extract for extra flavor. Be careful with the berries. Overmixing them can break them apart. This makes your bars mushy instead of chewy. Pay attention to baking time, too. If you bake too long, the bars can get dry. Aim for golden brown edges and a soft center for best results. {{image_2}} You can use many berries to make your bars special. Strawberries, blueberries, and raspberries work well together. You can even mix them up for fun! If you want to change things up by season, try adding blackberries in summer or cranberries in fall. Seasonal fruits add fresh flavors and keep your snack interesting. If you want to cut down on sugar, try low-sugar or sugar-free sweeteners. Options like stevia or erythritol can work great. You can also make these bars gluten-free. Just make sure to use certified gluten-free oats. This way, everyone can enjoy a tasty snack without worries! Want to add a twist? You can mix in chocolate chips for a sweet treat. Dark chocolate adds depth and richness. For a warm flavor, try spices like nutmeg or ginger. These spices pair well with the berries and make each bite exciting. To keep your berry oat bars fresh, use an airtight container. A glass container works well. You can also use a plastic container, but glass is better for taste. Place a piece of parchment paper between layers to stop sticking. It’s smart to keep the bars at room temperature for short-term storage. To keep them fresh longer, store them in the fridge. This way, they stay moist and tasty. You can also wrap them in plastic wrap before placing them in the container. If you want to store these bars for a long time, freezing is a great option. Cut the bars into individual servings. Wrap each piece in plastic wrap or foil. Then put them in a freezer bag. This helps prevent freezer burn. You can freeze them for up to three months. When you want to enjoy a bar, take it out and let it thaw. For the best texture, reheat in the microwave for about 15 seconds. This makes the bar warm and soft again. These berry oat bars last up to a week in the fridge. If you keep them at room temperature, they last about three days. Look for signs of spoilage. If the bars smell bad or feel dry, it’s time to toss them. Mold is another sign. If you see any, do not eat them. Always trust your senses to keep safe! To make gluten-free Berry Oat Bars, use certified gluten-free oats. You can also add a binder like ground flaxseed. Mix it with water to help hold the bars together. Yes, you can swap almond butter for other nut butters. Options include peanut butter, cashew butter, or sunflower seed butter. Each will give a unique taste to your bars. To boost protein, add protein powder to your mix. You can also include seeds like chia, hemp, or flaxseeds. This change will make your bars more filling and nutritious. The best berries for these bars are blueberries, strawberries, and raspberries. Each berry adds a different flavor and texture. Use fresh or frozen, based on what you like. You can make these bars without sweeteners. Try mashed banana or unsweetened applesauce as a natural sweetener. These options will change the taste but still keep them tasty. Making berry oat bars is simple and fun. You learned about key ingredients like oats, berries, and nut butter. We explored sweeteners and flavor enhancers that boost taste. I shared step-by-step instructions for mixing and baking. Plus, you found tips for texture and common mistakes to avoid. In the end, these bars are flexible and easy to customize. Enjoy experimenting with flavors and storage tips. Healthy snacks can be delicious too!

Berry Oat Bars Tasty and Healthy Snack Option

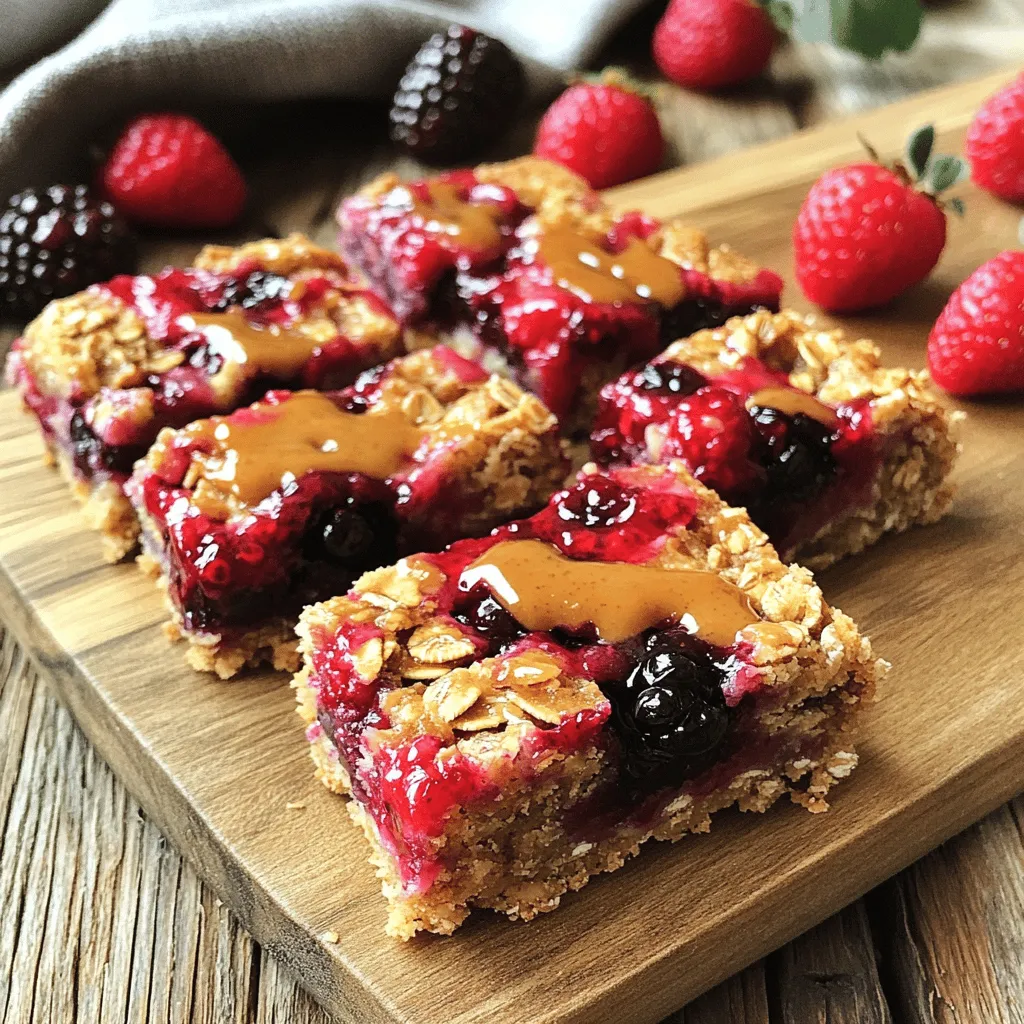
Looking for a tasty and healthy snack? Look no further! These Berry Oat Bars are packed with flavor and nutrients.

- 1 cup almonds, roughly chopped - 1 cup walnuts, roughly chopped - 1 cup cashews, roughly chopped - 1 cup dates, pitted and chopped - 1/4 cup honey or maple syrup - 1/2 cup dark chocolate chips (70% cacao or higher) - 1 teaspoon vanilla extract - 1/2 teaspoon sea salt - Additional sea salt for topping - Variations for sweeteners: agave syrup or brown rice syrup - Different nuts: pecans or hazelnuts - Superfood additions: chia seeds or flaxseeds When I create these nut bars, I love to focus on quality ingredients. The nuts give a great crunch. Almonds, walnuts, and cashews work well together. They provide healthy fats and protein. Dates add natural sweetness, making the bars taste amazing without extra sugar. For the sweetener, I often choose honey or maple syrup. Both options add a rich flavor. You can also try agave syrup or brown rice syrup if you prefer. The dark chocolate is a star in this recipe. I recommend using chocolate with at least 70% cacao. It adds a deep, rich taste. The vanilla extract enhances all the flavors. A pinch of sea salt balances the sweetness. It makes every bite pop with flavor. Feel free to get creative! You can swap in pecans or hazelnuts for a new twist. If you want a superfood boost, add chia seeds or flaxseeds. These small changes can make a big difference. Overall, these ingredients come together to make a delicious and satisfying snack. You can enjoy them any time of day. 1. First, preheat your oven to 350°F (175°C). This step is key for even baking. 2. Line an 8x8 inch baking dish with parchment paper. Let the edges hang over the sides. This helps with easy removal later. 3. In a medium bowl, mix the chopped almonds, walnuts, cashews, and dates. Make sure they are well combined. This mixture is the heart of your bars. 1. In a small saucepan, melt the honey or maple syrup, dark chocolate chips, and vanilla extract together over low heat. Stir often until the chocolate is smooth. 2. Pour this melted chocolate mix over the nut and date blend. Stir well until all pieces are coated. This will give your bars that rich flavor. 1. Transfer the mixture to the prepared baking dish. Press it down firmly and evenly. Use a spatula or your hands for this. 2. Sprinkle a pinch of sea salt on top. This adds a lovely contrast to the sweetness. 3. Bake in your preheated oven for 15-20 minutes. Look for lightly golden edges. 4. Once done, let the bars cool completely in the pan. Use the parchment overhang to lift them out easily. 5. Cut into rectangular or square bars once cooled. Enjoy them as a tasty snack! - Use freshly chopped nuts for better flavor. Fresh nuts give a rich taste. - Ensure a firm press for dense bars. This helps the bars hold together well. - Try adding spices like cinnamon or nutmeg. These spices boost the taste and warmth. - Use high-quality chocolate for richness. Good chocolate makes a big difference in flavor. - Pair these bars with coffee or tea. The flavors blend nicely together. - Serve at parties by stacking bars neatly. Drizzle melted chocolate on top for flair. {{image_2}} You can make your Dark Chocolate Sea Salt Nut Bars even more fun. Try adding dried fruit like cranberries or apricots. These fruits bring a sweet and tangy kick. You can also switch up the chocolate. Instead of dark chocolate, use white or milk chocolate for a different taste. Each option offers a unique twist! If you want to make these bars healthier, swap out sweeteners. Use agave syrup or brown rice syrup instead of honey. This change can lower the sugar content. You can also try making these bars nut-free. Use seeds like sunflower or pumpkin seeds. Puffed grains, like rice, can add crunch too. Seasonal flavors can spice up your nut bars. For holidays, add flavors like pumpkin spice or use festive nuts. In summer, pair bars with fresh berries or tropical fruits like mango. These additions make the bars fun and fresh for any time of year, keeping your taste buds excited! To keep your Dark Chocolate Sea Salt Nut Bars fresh, follow these tips: - Use an airtight container: This helps prevent moisture and keeps bars from getting stale. - Wrap each bar: Use parchment paper or plastic wrap for extra protection. - Store at room temperature: If you eat them quickly, they can sit out for a few days. Your bars can last a while if stored right: - Room temperature: Expect them to stay fresh for about 5 days. - In the fridge: They can last up to 2 weeks, thanks to the cool air. - In the freezer: These bars can last for 3 months. Just wrap them well to prevent freezer burn. Sometimes, bars may get hard. Here’s how to fix that: - Microwave method: Heat for 10-15 seconds to soften them up. - Oven method: Warm them in a low oven (about 200°F) for a few minutes. If you have older bars, try these ideas: - Chop them up: Use them as toppings on yogurt or oatmeal. - Make a trail mix: Combine with dried fruits and seeds for a quick snack. To make these bars vegan, swap honey for maple syrup. Use dark chocolate labeled as vegan. Check the ingredients to ensure it has no milk. This way, you keep all the taste and texture while making it plant-based! Absolutely! You can mix and match nuts to your liking. Try using pecans, hazelnuts, or even pistachios. Just keep the total amount of nuts at three cups. This gives you a chance to create your favorite nut blend! Yes, these bars are gluten-free! All the ingredients listed are naturally gluten-free. Just ensure that all your nuts and chocolate come from a trusted source that avoids cross-contamination with gluten products. These bars are packed with nutrition! Nuts provide healthy fats and protein, which help keep you full. Dark chocolate adds antioxidants and can lift your mood. Together, they create a tasty treat that fuels your body! Making these bars is quick! Prep takes about 15 minutes. Baking adds another 15-20 minutes. After cooling, you can cut them. Overall, you’ll have fresh bars ready in about 35-40 minutes. Perfect for a quick snack! In this blog post, we explored how to make delicious Dark Chocolate Sea Salt Nut Bars. We covered all the required and optional ingredients, along with step-by-step instructions to create these tasty treats. I shared tips for enhancing flavor and texture, and offered fun variations for special occasions. Store your bars properly to keep them fresh and enjoy them longer. With these simple pointers, you can delight in a healthy snack anytime. Enjoy making your own bars and get creative with flavors!

Dark Chocolate Sea Salt Nut Bars Simple Energy Snack

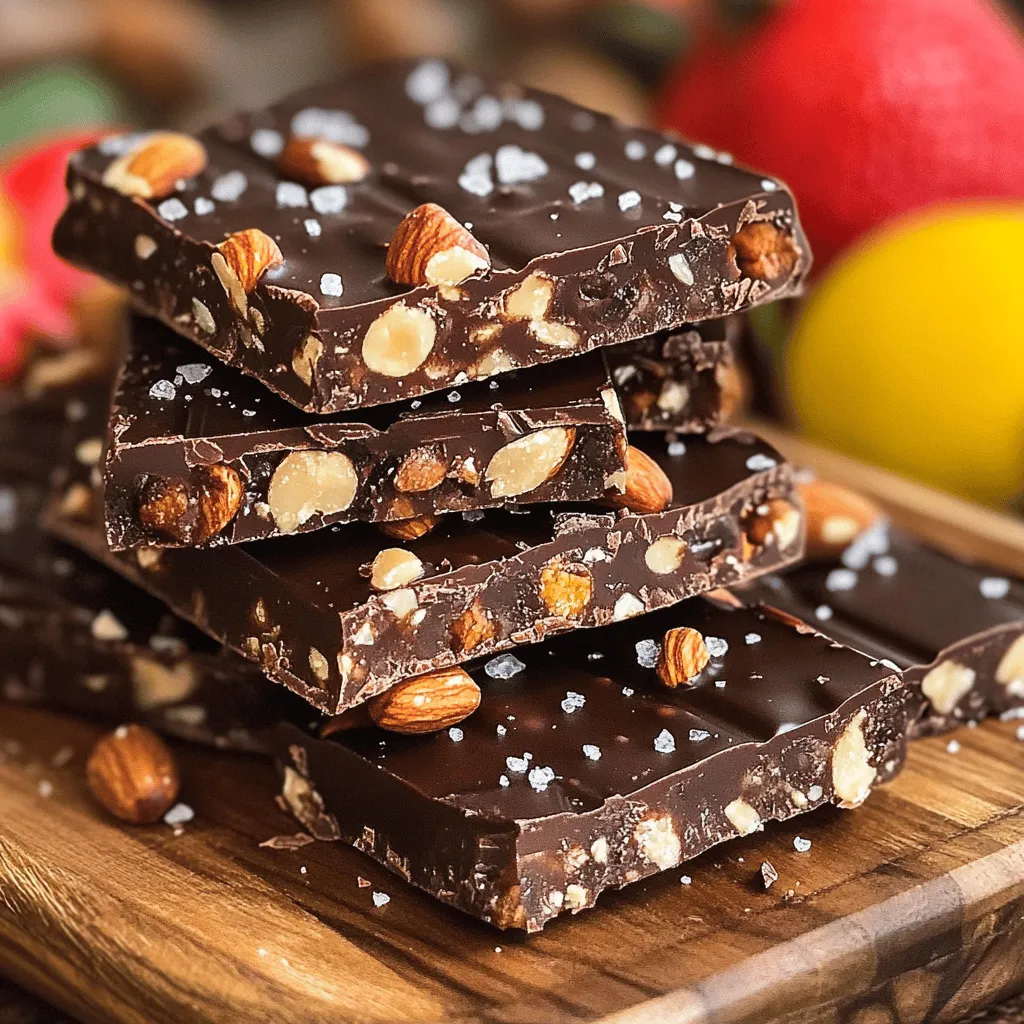
Looking for a quick and tasty energy boost? My Dark Chocolate Sea Salt Nut Bars are the perfect snack! Packed

To make a Cherry Amaretto Tiramisu, you need the following: - 1 cup fresh cherries, pitted and halved - 1 cup strong brewed coffee, cooled - 1/2 cup almond syrup (non-alcoholic amaretto flavor) - 16 oz mascarpone cheese - 1 cup heavy cream - 1/2 cup powdered sugar - 1 teaspoon vanilla extract - 24 ladyfinger cookies - Cocoa powder for dusting - Dark chocolate shavings for garnish These ingredients work together to create a rich and creamy dessert. The fresh cherries add a burst of flavor, while the mascarpone cheese gives it a smooth texture. For a beautiful finish, consider these optional garnishes: - Whipped cream dollops - Mint leaves for freshness - Extra dark chocolate shavings These garnishes enhance the look and taste. They make your tiramisu stand out on the table. If you need alternatives, here are some ideas: - Use frozen cherries if fresh ones are not available. - Swap almond syrup with coffee liqueur for a richer flavor. - Substitute mascarpone with cream cheese for a lighter version. These substitutions still keep the dessert delicious while allowing for personal preference. {{ingredient_image_1}} Start by brewing a cup of strong coffee. Let it cool down. In a shallow dish, mix the cooled coffee with half a cup of almond syrup. Stir it well. This mixture adds flavor and moisture to the ladyfingers. Take a large mixing bowl. Pour in one cup of heavy cream. Add half a cup of powdered sugar and one teaspoon of vanilla extract. Use an electric mixer to whip it until soft peaks form. Stop when it looks fluffy. Be careful not to overwhip, or it will become grainy. In another bowl, take 16 ounces of mascarpone cheese. Gently fold this cheese into the whipped cream. Mix until it is smooth and creamy. Make sure there are no lumps. This will give your tiramisu a rich texture. Grab 24 ladyfinger cookies. Quickly dip each one into the coffee mixture. Make sure they soak but do not get too soggy. Arrange them in a single layer in a rectangular or square dish. Then, spread half of the mascarpone mixture over the ladyfingers. Scatter half of the halved cherries on top. Add another layer of dipped ladyfingers. Then, cover with the remaining mascarpone mixture. Top this layer with the remaining cherries. Cover the dish with plastic wrap. Chill it in the fridge for at least four hours, but overnight is best. When ready to serve, dust the top with cocoa powder. Add dark chocolate shavings for a fancy touch. Enjoy your delicious Cherry Amaretto Tiramisu! To get the best cream, it’s all about the right technique. Start with cold heavy cream. Use a mixing bowl that’s also cold. This helps the cream whip better. Whip until you see soft peaks. Be careful not to overwhip. Overwhipping can make your cream grainy. You want it smooth and fluffy. Gently fold in the mascarpone cheese. This keeps the cream light. A good texture makes your tiramisu taste amazing. Soaking ladyfingers is a key step. Dip each one quickly into the coffee mixture. Don’t let them soak too long. If you do, they become too soggy. You want them soft, but still holding shape. Lay them flat in your dish after dipping. This creates a nice base. Layering is where the magic happens. Be sure to alternate layers of mascarpone and cherries for the best flavor. Want to boost your tiramisu flavor? Consider adding a splash of almond extract. This brings out the amaretto taste. You can also sprinkle in some cinnamon for warmth. If you love chocolate, add dark chocolate shavings between layers. Fresh mint leaves can add a nice touch too. These small tweaks can make your dish stand out. Experiment to find your perfect balance! Pro Tips Use Fresh Cherries: Opt for ripe, fresh cherries for the best flavor and texture in your tiramisu. Chill Overnight: Allowing the tiramisu to chill overnight enhances the flavors and improves the overall texture. Perfectly Whipped Cream: Whip the cream until soft peaks form to ensure a light and fluffy mascarpone mixture. Layer Wisely: Make sure to evenly distribute the mascarpone and cherries in each layer for balanced flavor in every bite. {{image_2}} You can mix in other berries for a fresh twist. Use strawberries, raspberries, or blueberries. They add color and a nice tartness. Just layer them like you would with cherries. This keeps the sweet balance while adding new flavors. If you love chocolate, try adding cocoa to the mix. You can fold in melted dark chocolate with the mascarpone. This gives a rich taste. Top with chocolate shavings for an extra touch. The chocolate pairs well with the cherry and almond flavors. For a gluten-free option, use gluten-free cookies instead of ladyfingers. Look for brands that mimic the texture. You can also make your own using almond flour. This keeps the tiramisu creamy and delicious while being friendly for gluten-tolerant diets. Exploring these variations can keep your Cherry Amaretto Tiramisu exciting and fun! You can store leftover tiramisu in the fridge. Place it in an airtight container. This keeps it fresh and prevents it from drying out. Make sure to cover the dish tightly if you don’t have a container. Enjoy the leftover tiramisu within 3 days for the best taste. You can freeze tiramisu for longer storage. Cut it into individual servings before freezing. Wrap each piece in plastic wrap and then place them in a freezer bag. This method helps to keep the layers intact. For best quality, eat the frozen tiramisu within 2 months. Thaw it in the fridge overnight before serving. When you serve tiramisu after storage, check its texture. If it feels too firm, let it sit at room temperature for 10 to 15 minutes. This helps restore some creaminess. Dust the top with cocoa powder and add dark chocolate shavings just before serving. This keeps it looking fresh and appealing. Enjoy every bite! Yes, you can use frozen cherries. Just thaw them first. Drain any extra juice. Fresh cherries taste best, but frozen ones work well in a pinch. They add a nice, sweet flavor. Definitely! You can use almond syrup instead of amaretto. This gives the same nutty flavor without the alcohol. Just mix the syrup with brewed coffee. It’s simple and tasty. Cherry Amaretto Tiramisu lasts about 3 to 4 days in the fridge. Keep it covered to stay fresh. The flavors get even better as it sits. Yes, you can use cream cheese instead of mascarpone. It will change the taste a bit. Make sure to soften it before mixing. You can also blend it with some heavy cream for a smoother texture. In this post, we explored the delicious Cherry Amaretto Tiramisu. We covered essential ingredients, step-by-step instructions, and useful tips. I shared variations and storage info to help you enjoy this dessert anytime. Remember, perfecting this dish takes practice, so don’t rush. Use the tricks I shared to make it even better. Try different flavors and share with loved ones. Cherry Amaretto Tiramisu is a treat that can impress anyone. Enjoy making this dessert and savor every bite!

Cherry Amaretto Tiramisu Rich and Flavorful Delight

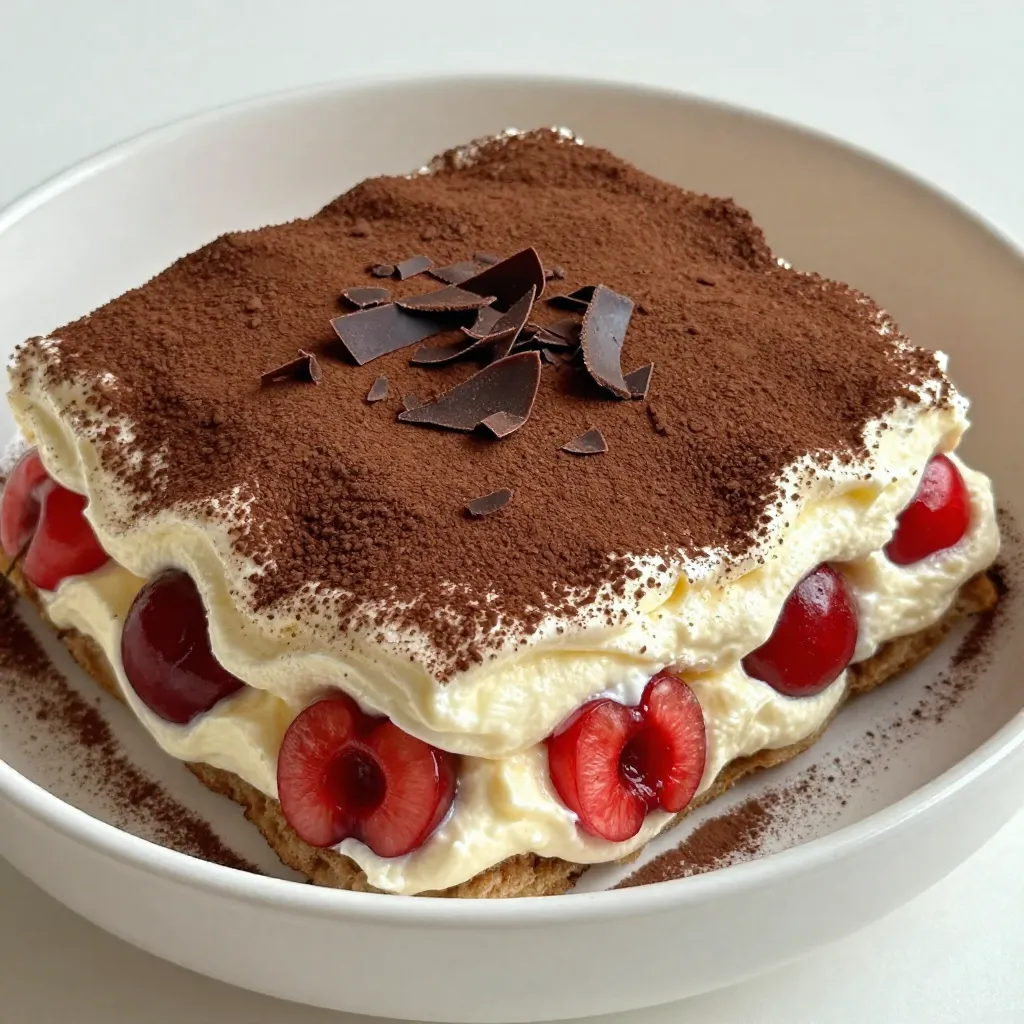
If you’re craving a dessert that’s rich, creamy, and bursting with flavor, look no further than Cherry Amaretto Tiramisu. This

Older posts
Newer posts
← Previous Page1 … Page38 Page39 Page40 … Page84 Next →

dsad

© 2026 Foodish Talk • Built with GeneratePress

Our Policies

  • Copyright Policy
  • Cookie Policy
  • GDPR Policy
  • Privacy Policy
  • Disclaimer
  • Terms Of Use

More Information

  • Home
  • About
  • Contact
  • Appetizers
  • Dessert
  • Dinner
  • Drinks
©2026, Foodish Talk About Back To Top