Skip to content
DisclaimerTerms Of UseGDPR PolicyCookie Policy

Foodish Talk

  • Home
  • Drinks
  • Appetizers
  • Dinner
  • Dessert
  • About
  • Contact
  • Privacy Policy
DisclaimerTerms Of UseGDPR PolicyCookie Policy

NO-ING-IMG

- 8 oz (225 g) whole wheat pasta (penne or fusilli works well) - 2 cups broccoli florets - 3 cloves garlic, minced - 1/4 teaspoon red pepper flakes (adjust to taste) - 1/4 cup olive oil - 1/2 cup grated Parmesan cheese - Zest of 1 lemon - 2 tablespoons lemon juice - Salt and pepper to taste - Fresh basil leaves for garnish - Extra Parmesan cheese for serving - Large pot - Colander for draining - Large skillet or pot for mixing - Cooking spoon or tongs - Zester for lemon zest - Measuring cups and spoons First, fill a large pot with salted water. Bring it to a boil. Once it’s bubbling, add 8 ounces of whole wheat pasta. Cook the pasta according to the package instructions until it is al dente. This usually takes about 10 minutes. With three minutes left to go, add 2 cups of broccoli florets. This blanching step keeps the broccoli bright and crisp. After the time is up, reserve half a cup of pasta water. Then, drain the pasta and broccoli in a colander. Set them aside for later. Next, take the same pot or a large skillet. Heat 1/4 cup of olive oil over medium heat. Add 3 minced garlic cloves and 1/4 teaspoon of red pepper flakes to the oil. Sauté this mixture for about 1-2 minutes. You want the garlic fragrant but not browned. Keep an eye on it! Now, return the drained pasta and broccoli to the pot or skillet. Toss everything well to coat with the garlic oil. Add the zest of one lemon and 2 tablespoons of lemon juice for brightness. Then, mix in 1/2 cup of grated Parmesan cheese. If your pasta looks dry, use the reserved pasta water. Add it a little at a time until you get your desired consistency. Season with salt and pepper to taste. Toss everything again to combine. Serve your pasta hot, garnished with fresh basil leaves and extra Parmesan if you like. Enjoy this simple and flavorful meal! To get the best pasta, cook it al dente. This means it should feel firm when you bite it. Follow the package instructions for time. Near the end, add broccoli florets to the pot. This keeps the broccoli bright and crisp. Remember to save some pasta water! It helps make the sauce creamy. You can add more flavor easily. Try extra garlic for a stronger taste. A squeeze of lemon juice brightens the dish. If you like heat, add more red pepper flakes. Fresh herbs like parsley or thyme give a nice touch. You can also mix in sun-dried tomatoes for a bit of sweetness. To serve, place the pasta on a plate. Sprinkle with fresh basil leaves. Add more grated Parmesan on top if you like. A twist of lemon zest makes it look fancy. Serve it hot for the best taste. This dish pairs well with a simple salad or crusty bread. Enjoy your meal! {{image_2}} You can add protein to your Italian broccoli pasta for a heartier meal. Here are some ideas: - Grilled Chicken: Add sliced grilled chicken for a lean protein boost. - Shrimp: Toss in sautéed shrimp for a quick seafood twist. - Chickpeas: For a plant-based option, mix in canned chickpeas. These proteins pair well with the flavors in the dish. Just cook them separately and mix them in at the end. If you like heat, you can adjust the spice level. Here’s how: - More Red Pepper Flakes: Add extra red pepper flakes for more heat. - Fresh Chili: Slice fresh chili peppers and sauté them with garlic. - Mild Option: For less spice, skip the red pepper flakes entirely. Adjust the spice to fit your taste. You can always add more, but it’s hard to take it out! Feel free to switch up the sauce or cheese. Here are some options: - Alfredo Sauce: For a creamy version, use Alfredo sauce instead of olive oil. - Pesto: Mix in some pesto for a fresh, herbaceous flavor. - Different Cheeses: Try feta or goat cheese for a tangy twist instead of Parmesan. These changes can give your dish a new life. Don’t hesitate to experiment! To store your Italian broccoli pasta, place it in an airtight container. Make sure it cools down first. This keeps the pasta fresh. You can refrigerate it for up to three days. I suggest using it within two days for the best taste. When you’re ready to eat, you can reheat it easily. Place the leftover pasta in a skillet. Add a splash of water or olive oil. Heat it over medium heat. Stir it often until it’s warmed through. This helps keep the pasta from drying out. You can also use a microwave. Just cover it with a damp paper towel. Heat it for 1-2 minutes, checking it often. If you want to keep it longer, freezing is a great option. First, let the pasta cool completely. Then, portion it into freezer-safe bags or containers. Remove as much air as you can. Label the bags with the date. You can freeze your pasta for up to three months. To defrost, move it to the fridge overnight before reheating. This keeps the flavor and texture nice. I recommend using whole wheat pasta for this dish. It adds a nutty flavor and a hearty texture. You can use penne or fusilli, but any short pasta works well. The shape helps catch the sauce and broccoli bits. This makes each bite delicious and satisfying. Yes, you can easily make this dish vegan. Simply replace the Parmesan cheese with a plant-based cheese. You can also use nutritional yeast for a cheesy flavor without dairy. Just be sure to check the pasta for egg ingredients. Many brands offer egg-free options. To make this dish gluten-free, choose a gluten-free pasta. There are many good options available, like brown rice or chickpea pasta. Follow the same cooking steps with the gluten-free pasta. Taste and adjust the seasoning as needed. This keeps the dish tasty and enjoyable. This blog post covered all you need to make a great dish. We looked at key ingredients and tools. I shared simple steps for cooking pasta and broccoli. I also gave tips for perfecting texture and flavor. You learned various ways to change the recipe and how to store leftovers. In the end, this dish is easy and fun to make. You can always adapt it to fit your taste. Enjoy your cooking!

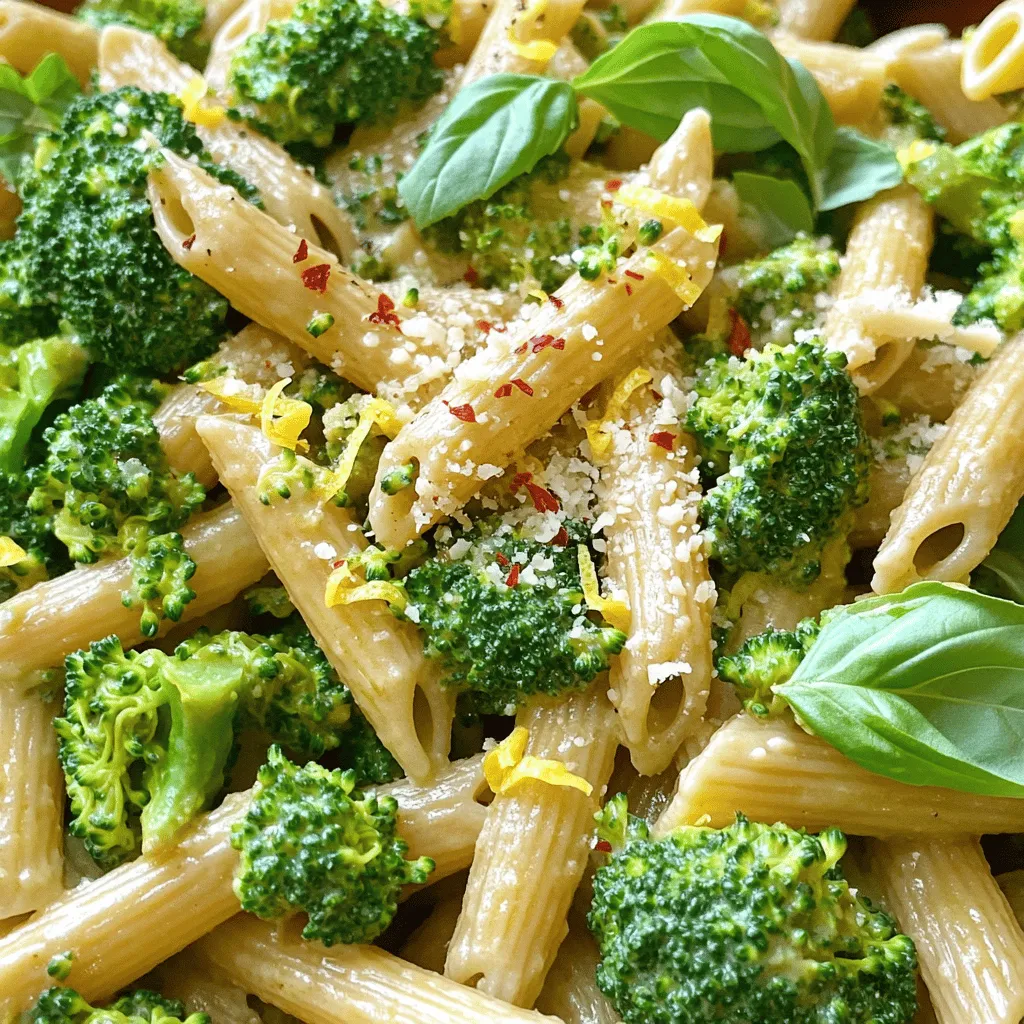
Italian Broccoli Pasta Simple and Flavorful Recipe

Looking for a quick and tasty meal? Let me introduce you to Italian Broccoli Pasta. This dish is simple, colorful,

To make the best chewy chocolate chip cookies, you need the right ingredients. Each one plays a key role in creating that perfect texture and flavor. Here is a complete list of what you'll need: - 2 ¼ cups all-purpose flour - 1 teaspoon baking soda - ½ teaspoon salt - 1 cup unsalted butter, softened - ¾ cup brown sugar, packed - ¾ cup granulated sugar - 1 teaspoon vanilla extract - 2 large eggs - 2 cups semi-sweet chocolate chips - ½ cup chopped walnuts (optional) The all-purpose flour gives the cookies structure. Baking soda helps them rise and adds chewiness. Salt balances the sweetness. Softened butter makes the cookies rich and tender. Brown sugar adds moisture and a hint of caramel flavor. Granulated sugar gives that lovely crisp edge. Vanilla extract enhances the overall taste. Eggs bind everything together, creating a smooth dough. Chocolate chips are the star of the show, providing bursts of sweetness. If you want a nutty crunch, add chopped walnuts. Remember, fresh ingredients make the best cookies. Using high-quality chocolate will also elevate the flavor. Now that you have your ingredients, you’re ready to start baking! Start by preheating your oven to 350°F (175°C). This helps the cookies bake evenly. Next, line two baking sheets with parchment paper. This keeps the cookies from sticking. In a medium bowl, whisk together the flour, baking soda, and salt. This step is key for texture. Set this bowl aside for now. In a large mixing bowl, add softened butter, brown sugar, and granulated sugar. Mix these together until they are light and fluffy. This usually takes about 2-3 minutes. The fluffiness makes your cookies soft. Now, add the vanilla extract and eggs, one at a time. Mix well after each addition. This ensures the batter is smooth and tasty. Gradually add the dry mixture to the wet ingredients. Mix just until combined. Be careful not to overmix. This helps keep the cookies chewy. Use a cookie scoop or a tablespoon. Drop rounded dough onto the prepared baking sheets. Space them about 2 inches apart. Bake for 10-12 minutes. The edges should be golden, and the centers soft. After removing from the oven, let them cool on the baking sheet for 5 minutes. Then, transfer them to a wire rack. Enjoy the warm, chewy chocolate chip cookies! To get that perfect chewy texture, use room-temperature butter. Softened butter mixes well with sugars. This helps create air pockets for a light cookie. Use both brown and granulated sugars. Brown sugar adds moisture, while granulated sugar gives crispness. Don’t overmix the dough. Mix just until combined for a softer bite. If you like, chill the dough for 30 minutes. This helps shape the cookies better when baking. One common mistake is using cold butter. Cold butter will not mix well and give a dense cookie. Another mistake is overbaking. Remove cookies when the edges are golden but the center is soft. This keeps them chewy. Be careful not to pack the flour. Use a spoon to fill the measuring cup. Lastly, don’t skip the salt. It enhances the flavor of chocolate chips. Let cookies cool on the baking sheet for about five minutes. This allows them to set without losing chewiness. After that, transfer them to a wire rack. Let them cool completely there. The air circulation helps prevent sogginess. Enjoy them warm, or store them in a container for later! {{image_2}} If you want to make these cookies nut-free, simply leave out the walnuts. The cookies will still taste amazing with just chocolate chips. You can also replace the walnuts with more chocolate chips or even some dried fruit like cranberries. This keeps the chewy texture while making sure everyone can enjoy them. You can change the flavor by using different types of chocolate. Swap semi-sweet chocolate chips for dark chocolate for a richer taste. Milk chocolate will make the cookies sweeter. For a fun twist, try using white chocolate chips or even a mix of chocolates. Each type brings a unique flavor that can change the whole cookie experience. For an extra kick, sprinkle a bit of sea salt on top before baking. This adds a nice contrast to the sweetness. You can also mix in spices like cinnamon or nutmeg into the dough. Just a pinch can enhance the flavor and make your cookies stand out. Experimenting with these options is a fun way to make each batch unique! To keep your chewy chocolate chip cookies fresh, place them in an airtight container. You can stack them in layers with parchment paper between each layer. This method helps prevent sticking. Store the container at room temperature. Your cookies will stay soft for about a week. If you want them to last longer, consider freezing them. Freezing cookie dough is a great way to enjoy fresh cookies anytime. First, scoop the dough onto a baking sheet lined with parchment. Freeze the dough balls until they are solid, about an hour. Once frozen, transfer them to a freezer bag. Label the bag with the date and type of cookie. The dough can last up to three months in the freezer. When you're ready to bake, just pop them in the oven straight from the freezer. The best container for keeping cookies fresh is one that seals tightly. Glass jars or plastic containers with a good lid work well. Avoid using metal containers, as they can affect taste. If you want extra protection, add a slice of bread to the container. This trick helps maintain moisture and keeps your cookies chewy. Chewy cookies have a special texture. The secret lies in the ingredients. Using brown sugar helps. Brown sugar adds moisture and a rich flavor. It also makes cookies softer. Another tip is to not overbake them. When the edges are golden but centers look soft, they are ready. Yes, you can use dark chocolate chips! They give a deeper taste. Dark chocolate pairs well with the cookie’s sweetness. Feel free to mix semi-sweet and dark chips, too. This adds a fun twist to the flavor. To make cookies softer, try adding an extra egg yolk. The yolk adds moisture, which keeps cookies soft. You can also chill the dough before baking. Chilled dough helps cookies spread less, keeping their shape and softness. Yes, you can make this recipe gluten-free! Use a gluten-free flour blend instead of all-purpose flour. Make sure the blend contains xanthan gum. This helps mimic the texture of regular flour cookies. Always check labels to ensure all ingredients are gluten-free. These cookies last about a week in an airtight container. To keep them fresh, store them at room temperature. If you want them to last longer, freeze them. They can last up to three months in the freezer. Just thaw them before enjoying! This blog post covered all you need to bake perfect cookies. We listed the key ingredients, shared step-by-step instructions, and provided tips for a chewy texture. You learned about variations to try and storage to keep them fresh. Baking cookies is fun and rewarding. Now, you can impress others with your tasty treats. Enjoy the process, and happy baking!

Chewy Chocolate Chip Cookies Irresistible Flavor

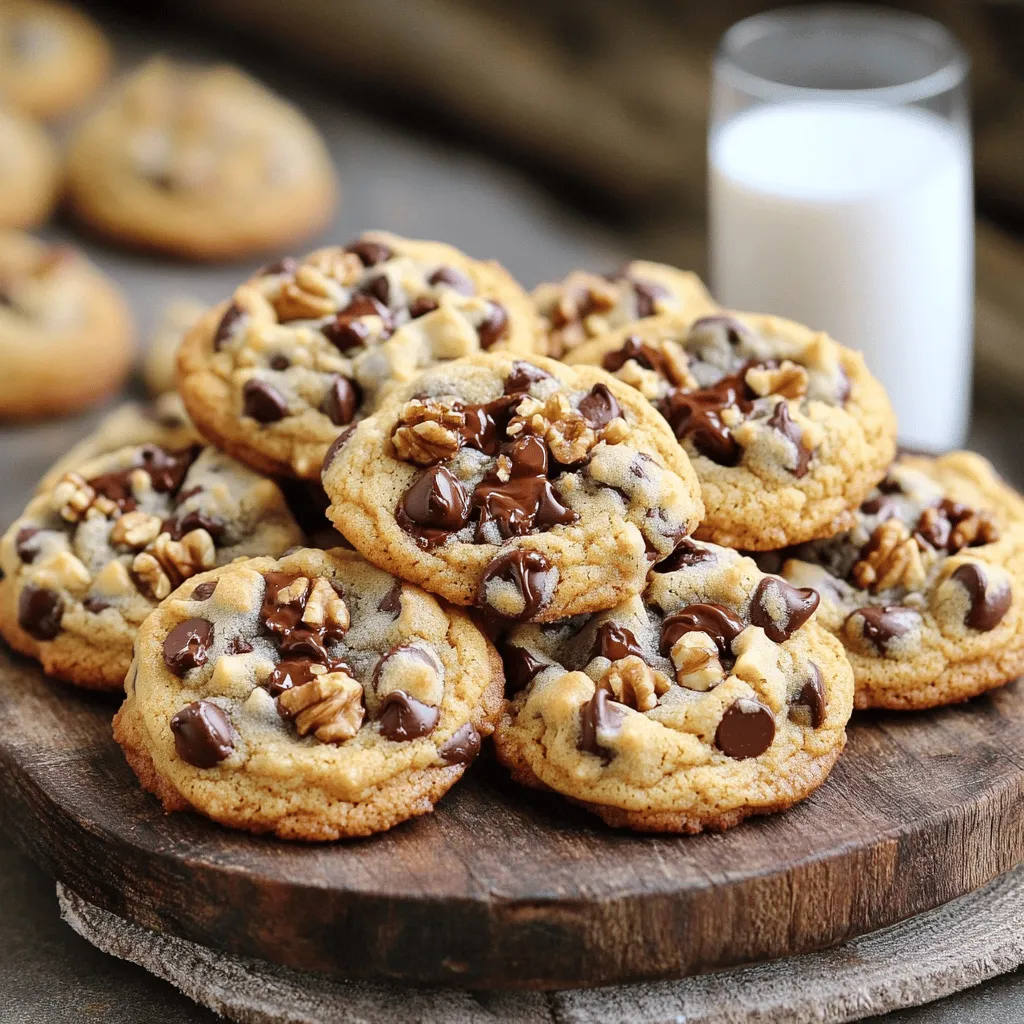
When it comes to baking, few treats can beat the charm of chewy chocolate chip cookies. I’m excited to share

- 1 cup all-purpose flour - 1/2 teaspoon baking soda - 1/4 teaspoon salt - 1/2 cup unsalted butter, softened - 1/4 cup cream cheese, softened - 1/2 cup brown sugar, packed - 1/4 cup granulated sugar - 1 teaspoon vanilla extract - 1 large egg - 1 cup semi-sweet chocolate chips - 1/2 cup chopped walnuts (optional) When you gather your ingredients, focus on quality. Use fresh cream cheese and good chocolate chips. Each element contributes to the cookie's flavor and texture. Start with 1 cup of all-purpose flour. This forms the base of your cookies. Next, grab 1/2 teaspoon of baking soda. This adds lift. Then, you'll need 1/4 teaspoon of salt, which enhances all the flavors. The *richness* comes from 1/2 cup of softened unsalted butter and 1/4 cup of softened cream cheese. Both help give the cookies a soft texture. You will also need 1/2 cup of packed brown sugar and 1/4 cup of granulated sugar. The brown sugar adds moisture and a hint of caramel flavor. Next, don't forget 1 teaspoon of vanilla extract. It adds warmth and depth. You will need 1 large egg to bind everything together. For the best part, use 1 cup of semi-sweet chocolate chips. They melt perfectly and add sweetness. If you like, add 1/2 cup of chopped walnuts for crunch. Make sure you have all these ingredients ready. This step makes cooking easy and fun! {{ingredient_image_1}} - Preheat your oven to 350°F (175°C). - Prepare a baking sheet with parchment paper. First, you want to set the stage for baking. Preheating the oven helps your cookies bake evenly. Lining the baking sheet with parchment paper makes it easy to lift the cookies off later. - Combine flour, baking soda, and salt. In a small bowl, mix the flour, baking soda, and salt. This step is key. It helps the cookies rise and adds flavor. Make sure it is well blended. - Beat butter and cream cheese until smooth. - Add sugars and combine. Next, take a large bowl. Beat the softened butter and cream cheese together until smooth. This mixture should look creamy and fluffy. Then, add the brown sugar and granulated sugar. Beat again until it is well mixed. This step adds sweetness and moisture to your cookies. - Incorporate egg and vanilla. - Gradually add dry mixture and mix gently. Now, it’s time for the egg and vanilla. Mix these into your creamy blend. This adds richness and flavor. Then, slowly add your flour mixture. Stir gently to combine. Be careful not to overmix. We want soft cookies, not tough ones. - Fold in chocolate chips and walnuts. - Drop dough onto prepared baking sheet. - Bake for 10-12 minutes, cool on wire rack. Finally, fold in the chocolate chips and walnuts, if using. Use a cookie scoop or spoon to drop dough onto your baking sheet. Leave space between each cookie for spreading. Bake in your preheated oven for 10 to 12 minutes. Keep an eye on the edges; they should turn lightly golden. Let the cookies cool on the baking sheet for about five minutes, then move them to a wire rack. Now, you can enjoy your soft batch cream cheese chocolate chip cookies! To get the best soft batch cookies, you need to beat the butter and cream cheese well. This step makes your cookies soft and creamy. Make sure to mix until they are smooth and fluffy. When you add the dry ingredients, mix just enough. Overmixing will make your cookies tough. You want them soft and chewy. Quality matters when it comes to chocolate chips. Use semi-sweet or dark chocolate chips for a rich taste. A touch of sea salt on top before baking adds a nice contrast. It makes the sweetness pop and gives your cookies a gourmet touch. How you serve your cookies can make a big difference. Place them on a decorative platter to make them look special. For an extra treat, serve them with a glass of cold milk. This classic combo is always a winner and will impress your guests. Pro Tips Chill the Dough: For an even softer texture, chill the cookie dough for 30 minutes before baking. This helps the cookies maintain their shape and enhances the flavors. Use Room Temperature Ingredients: Ensure that your butter and cream cheese are at room temperature before mixing. This allows for better incorporation and a smoother dough. Don’t Overbake: Keep an eye on the cookies while baking. They should be slightly underbaked when you take them out of the oven to achieve that soft, chewy texture. Experiment with Add-ins: Feel free to customize your cookies by adding different mix-ins like dried fruit, peanut butter chips, or even a sprinkle of cinnamon for extra flavor! {{image_2}} You can change the flavor of these cookies easily. Try swapping the chocolate chips for white chocolate or butterscotch chips. Both options give a nice twist. You can also add spices like cinnamon or nutmeg. These spices can bring warmth and depth to the cookie. They add a cozy feel that makes each bite special. If you need to make these cookies gluten-free, use a gluten-free flour blend. Many blends work well and keep the cookies soft. You can also make them dairy-free. Substitute cream cheese and butter with dairy-free options. Look for vegan butter and cream cheese to keep it tasty. Adding mix-ins can take your cookies to the next level. Dried fruits like cranberries or raisins add a sweet and chewy surprise. Nuts are another fun addition. You can use walnuts, pecans, or even almonds. Each nut brings its own flavor and crunch. Feel free to get creative and mix different ingredients based on your taste! To keep your soft batch cream cheese chocolate chip cookies fresh, store them in an airtight container. This helps them stay soft and chewy. You can keep them at room temperature for up to a week. If you want them to last longer, put them in the fridge. Just remember, chilled cookies may be a bit firmer. You can also freeze the cookie dough for later use. Just scoop the dough onto a baking sheet. Freeze the scoops until firm, then transfer them to a zip-top bag. This lets you bake fresh cookies anytime you want. For baked cookies, let them cool completely. Then, place them in an airtight container and freeze. They can stay fresh for up to three months. At room temperature, these cookies last about a week. They stay soft and tasty, making them perfect for snacking. If you freeze the dough, you can bake them fresh for a month or two. Baked cookies are best enjoyed within three months in the freezer. The cream cheese in this recipe is key. It adds moisture and richness. Cream cheese keeps the cookies soft and chewy. It gives them a unique flavor that sets them apart. Using cream cheese also helps the cookies stay fresh longer. This makes them a perfect treat for any time. Yes, you can change the sugar amounts if you like. Reducing sugar makes the cookies less sweet. This change can also alter the texture. Less sugar can make them denser. If you add more sugar, the cookies might be sweeter and softer. It is all about finding what you prefer. Absolutely! These cookies freeze very well. To freeze them, let them cool completely. Place them in an airtight container or a freezer bag. You can freeze baked cookies for up to three months. To thaw, just leave them at room temperature. You can also warm them in the oven for a few minutes. Look for the edges to be lightly golden. The centers should still look soft and slightly underbaked. This means they will firm up as they cool. Baking for 10 to 12 minutes usually gets the right result. Keep an eye on them, as ovens can vary. Yes, substitutions can work well. You can use plain yogurt instead of cream cheese. This will change the taste but keep the cookies soft. If you want to avoid dairy, try a dairy-free cream cheese. You can also swap semi-sweet chocolate chips for milk chocolate or dark chocolate. Just make sure to adjust for sweetness. We covered how to make delicious cookies using simple ingredients. Remember to cream the butter and cream cheese well for the best texture. Don’t forget the tips for flavor and storage! Customize these cookies with your favorite mix-ins. Enjoy your tasty treats fresh or frozen. Baking is fun and rewarding! Explore different flavors to keep things exciting. Each batch can be unique. Dive into your baking adventure with confidence and creativity!

Soft Batch Cream Cheese Chocolate Chip Cookies Delight

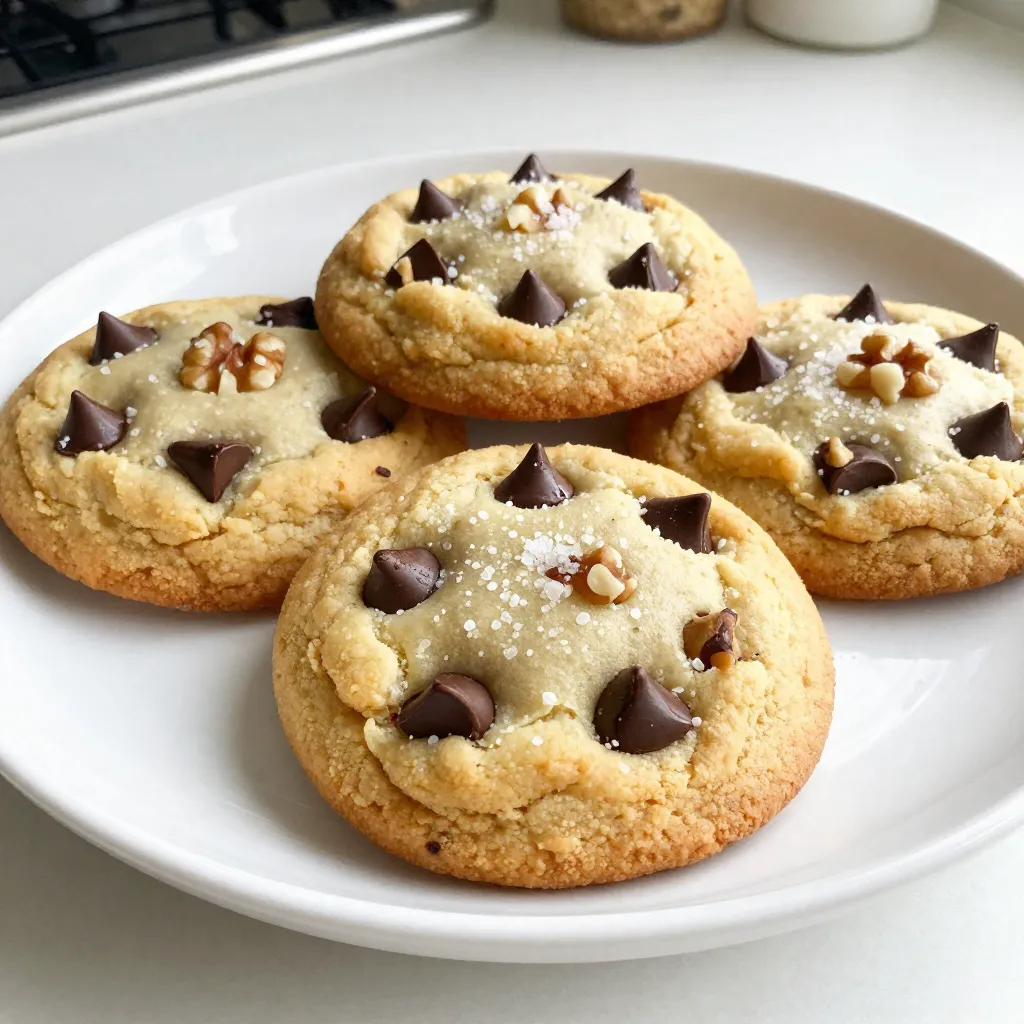
Do you crave cookies that are soft, chewy, and oh-so-delicious? You’ve come to the right place! In this post, I’ll

To make a great Italian pastina soup, gather these key ingredients: - 1 cup pastina (tiny pasta) - 6 cups chicken or vegetable broth - 2 tablespoons olive oil - 1 medium onion, finely chopped - 2 cloves garlic, minced - 2 medium carrots, diced - 1 celery stalk, diced - 1 cup baby spinach, roughly chopped - 1 teaspoon dried oregano - 1/2 teaspoon red pepper flakes (optional) - Salt and pepper to taste - 1/4 cup grated Parmesan cheese (plus extra for serving) These ingredients work together to create a warm and tasty meal. The pastina adds a fun texture, while the broth provides depth. To boost the flavor, consider adding these optional ingredients: - Fresh herbs like thyme or rosemary for aroma - A splash of lemon juice for brightness - A bay leaf for an earthy note These options let you customize the soup to your taste. They can make a simple soup feel special. When serving your Italian pastina soup, consider these garnishes: - Fresh basil or parsley for color and freshness - Extra grated Parmesan for a cheesy kick - Croutons for added crunch Garnishes not only enhance the look but also add fun flavors. They make each bowl feel like a treat. First, gather your fresh vegetables. You need onion, garlic, carrots, and celery. Take a medium onion and chop it finely. Then, mince two cloves of garlic. Dice two medium carrots and one celery stalk into small pieces. This mix gives a great base for your soup. Next, in a large pot, heat two tablespoons of olive oil over medium heat. Once the oil is hot, add the chopped onion. Sauté it for about three to four minutes until it turns translucent. Then, add the minced garlic, diced carrots, and celery. Cook these for five more minutes, stirring often. You want them to soften but not brown. This step builds a lovely flavor for your soup. After the vegetables soften, pour in six cups of chicken or vegetable broth. Bring the mixture to a boil. The broth adds depth to your soup. Once it boils, add one cup of pastina. Stir it well, then lower the heat to a simmer. Cook the pastina for about eight to ten minutes, or until it’s tender. Stir in one cup of roughly chopped baby spinach next. Add one teaspoon of dried oregano and half a teaspoon of red pepper flakes if you like some heat. Season with salt and pepper to taste. Let the soup simmer for another two to three minutes. You want the spinach to wilt nicely. Once the cooking is done, remove the pot from heat. Stir in a quarter cup of grated Parmesan cheese until it melts. This cheese adds creaminess and flavor. Taste the soup and adjust the seasoning if needed. Now, it’s time to serve. Ladle the warm soup into bowls. Garnish with fresh basil or parsley. Don’t forget to add extra Parmesan on top for that special touch. Enjoy your comforting Italian pastina soup! To cook pastina just right, start with lots of water. Use a big pot and bring it to a boil. Add salt to the water for flavor. Once boiling, add the pastina. Stir it gently. Cook for about 8 to 10 minutes. Taste it to check if it’s tender. Drain the pastina, but save a bit of the water to add back later. You can change the soup's taste by adding more veggies. Try zucchini or peas for a fresh twist. For a richer flavor, add a splash of lemon juice. If you love spice, toss in more red pepper flakes. You can also switch the broth. Use beef broth for a hearty taste. Or try a broth made from mushrooms for a unique flavor. If you want to serve more people, it’s easy to scale up. Simply double or triple the ingredients. For every cup of pastina, add about 6 cups of broth. Keep the same amount of veggies. Just make sure to use a larger pot. This way, everyone can enjoy a warm bowl of soup together. {{image_2}} To make a vegetarian version of pastina soup, skip the chicken broth. Use vegetable broth instead. This change keeps the soup rich and tasty. You can also add more veggies. Try zucchini, bell peppers, or peas. Each adds color and flavor. For a heartier feel, toss in some beans. Cannellini beans or chickpeas work great. For a protein boost, consider adding chicken or beans. If you want chicken, cook it first. Dice it into small pieces and add it to the pot with the broth. This gives the soup a nice, savory depth. For a meat-free option, beans are excellent. They fill you up and add protein without meat. Just rinse and drain canned beans before adding them to the soup. If you like some heat, add spices to your pastina soup. Red pepper flakes bring a nice kick. Just a half teaspoon can spice things up. For more flavor, consider Italian seasoning or a bit of smoked paprika. These spices create a warm, inviting taste. Adjust the amount based on your spice level. You can always start small and add more as you taste. Storing your Italian pastina soup is easy. First, let the soup cool down to room temperature. Then, pour it into an airtight container. Make sure to leave some space at the top. This space helps with expansion if you freeze it later. You can keep the soup in the fridge for up to three days. Just remember to label the container with the date. When you’re ready to enjoy your leftover soup, reheating it is simple. Pour the soup into a pot. Heat it on medium until it’s warm. Stir occasionally to prevent sticking. If the soup is too thick, add a splash of broth or water. You can also use a microwave. Place the soup in a microwave-safe bowl. Heat it in short bursts, stirring in between, until it’s hot. Freezing your soup is a great way to save it for later. Pour the cooled soup into freezer-safe bags or containers. Make sure to remove as much air as possible. This keeps the soup fresh. You can freeze it for up to three months. When you’re ready to eat, thaw the soup overnight in the fridge. Then, reheat it as mentioned above. Enjoy your comforting meal any time! Pastina is a tiny type of pasta. It is small and shaped like little stars or grains. This pasta cooks quickly and absorbs flavors well. Kids and adults love it for its fun shape. Pastina is often used in soups, making meals feel warm and cozy. Its small size lets it blend perfectly with broth and veggies. This is why it shines in Italian Pastina Soup. Yes, you can make Italian Pastina Soup ahead of time. This soup tastes even better the next day. To do this, cook the soup but don’t add the pastina yet. Store it in the fridge for up to three days. When you are ready to eat, heat the broth and add the pastina. This keeps the pasta from getting mushy. It’s a great way to have a quick meal ready! To make a gluten-free Italian Pastina Soup, choose a gluten-free pasta. Many stores offer gluten-free pastina or similar tiny pasta shapes. You can also use rice or quinoa as a substitute. Just make sure to adjust the cooking time. Read the package instructions for the best results. This way, everyone can enjoy this comforting soup! Italian Pastina Soup is simple and comforting. We covered key ingredients, variations, and tips for cooking. You can adjust flavors, add proteins, or keep it vegetarian. Remember to store and reheat it properly for the best taste. Making this soup is fun and rewarding. Enjoy creating your version any day of the week. Treat yourself to this classic dish, and embrace its warm, savory flavors. Your kitchen will feel like Italy with each bowl!

Italian Pastina Soup Delicious and Comforting Meal

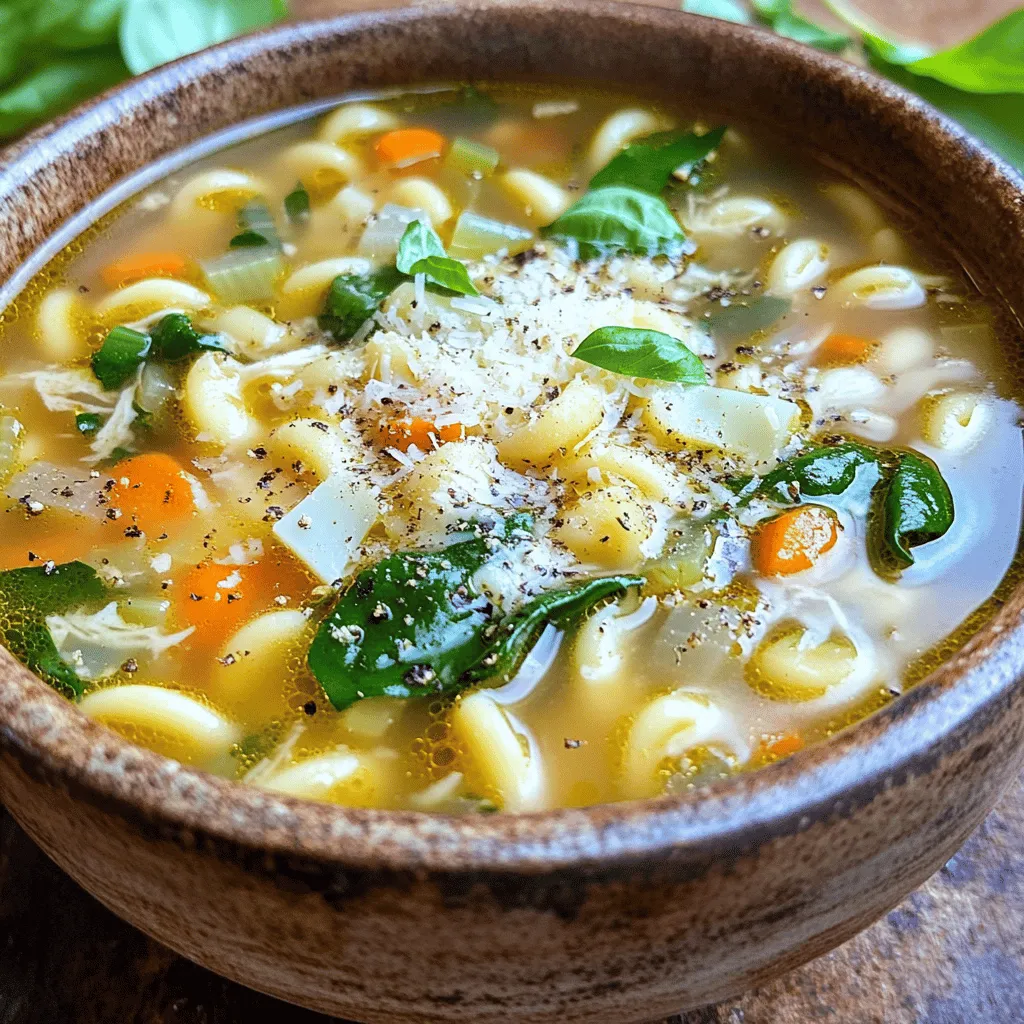
Italian Pastina Soup is a warm hug in a bowl. It’s a dish that brings comfort and joy with every

- 1 sheet of puff pastry (thawed) - 1 cup diced ham - 1 cup shredded cheese (cheddar or Swiss) - 1/4 cup cream cheese, softened - 1 tablespoon Dijon mustard - 1 egg (beaten, for egg wash) - Salt and pepper to taste - Fresh herbs (chives or parsley), chopped for garnish To make these ham and cheese puff pastry turnovers, you need just a few easy-to-find ingredients. Start with one sheet of thawed puff pastry. This flaky pastry makes the base. Next, you will need one cup of diced ham. This adds a savory flavor. For the cheese, choose one cup of shredded cheese. Cheddar gives a sharp taste, while Swiss is mild. You will also need 1/4 cup of softened cream cheese. This helps bind the filling and adds creaminess. Don't forget that tablespoon of Dijon mustard. It gives a nice kick to the filling. For the finishing touch, grab one beaten egg. This will make the pastry golden and shiny. Add salt and pepper to taste. Fresh herbs like chives or parsley add a fresh look and flavor. These ingredients combine to create a warm, tasty snack that everyone will love. - Preheat your oven to 400°F (200°C). - Line a baking sheet with parchment paper. - Roll out the thawed puff pastry sheet on a floured surface. - Cut into 4 equal squares for your turnovers. - In a bowl, combine diced ham and cheese. - Add cream cheese, Dijon mustard, salt, and pepper. - Mix until everything is well combined and creamy. - Spoon about 2 tablespoons of the filling onto each pastry square. - Fold the pastry over to make a triangle. - Press the edges gently to seal, then crimp with a fork. - Brush the tops with an egg wash for a nice glaze. - Bake for 15 to 20 minutes until they are golden brown. - Enjoy the warm, cheesy goodness. To get the best puff pastry, roll it out on a clean, lightly floured surface. This helps prevent sticking. Roll it into a larger rectangle, about 1/8 inch thick. This way, it puffs beautifully in the oven. Make sure to cut the pastry into even squares. This ensures all your turnovers bake evenly. Sealing the edges is crucial. After you fill the pastry, fold it over to create a triangle. Press the edges with your fingers first. Then, use a fork to crimp the edges. This adds a nice design and keeps the filling inside. To take the taste up a notch, try adding fresh herbs like chives or parsley. These add a pop of color and flavor. You can also sprinkle in some garlic powder or a pinch of paprika for warmth. For a twist, consider mixing in a little bit of cooked spinach or bell peppers. When serving, pair your turnovers with dips. A side of mustard adds a tangy kick. You can also serve with ranch or a spicy sauce for extra flavor. For presentation, serve the turnovers warm on a colorful platter. This creates a feast for the eyes. Garnish with fresh herbs for a touch of green. It makes your dish look even more inviting. Some great sides include a light salad or crispy veggies. These add freshness and balance to the dish. You can also offer fruit slices for a sweet contrast. They make your meal feel complete and satisfying. {{image_2}} You can swap ham for turkey or chicken. Diced turkey gives a lighter feel. Chicken adds a nice flavor too. For a vegetarian option, try using mushrooms or spinach. These will add richness and taste. You can also mix in lentils for protein. This way, you keep it hearty without meat. While cheddar and Swiss are classic choices, you can try different cheeses. Gouda or Monterey Jack will give a creamy texture. If you want a sharper flavor, go for blue cheese. For non-dairy options, use almond or soy cheese. These work well and melt nicely. Add some diced vegetables like bell peppers or onions for more flavor. Fresh herbs like basil or thyme can elevate the taste. For a spicy kick, mix in jalapeños or drizzle hot sauce inside. This makes your turnovers exciting and unique. Experiment with flavors to find your favorite mix! To keep your ham and cheese puff pastry turnovers fresh, store them in the fridge. Place them in an airtight container. They will stay good for about 3 days. If you want to keep them longer, freezing is a great option. Wrap each turnover in plastic wrap and place them in a freezer-safe bag. They can last up to 2 months in the freezer. When you are ready to enjoy your leftovers, reheating is easy. You can use the oven for the best results. Preheat your oven to 350°F (175°C). Place the turnovers on a baking sheet. Heat them for about 10-15 minutes until warm. This helps keep the pastry crispy. You can also use the microwave for quick reheating. However, this may make the pastry soft. If you choose the microwave, heat them for 30 seconds, then check. Repeat if needed. You can prepare these turnovers ahead of time. First, assemble the turnovers but do not bake them. Place them on a baking sheet and cover with plastic wrap. You can store them in the fridge for up to 24 hours. For longer storage, freeze them. Just make sure to wrap each turnover in foil or plastic wrap. When ready to bake, you can bake them straight from the freezer. Just add a few extra minutes to the baking time. Yes, you can use frozen puff pastry. It is convenient and works well. Just remember to thaw it before using. You can thaw it overnight in the fridge or leave it out for a couple of hours at room temperature. Frozen puff pastry often puffs up nicely and gives you great results. If you use fresh pastry, it can be a bit easier to work with, but both options will taste wonderful. You can pair these turnovers with many sides. Here are a few tasty suggestions: - A fresh green salad with a light vinaigrette - A side of mustard for dipping - Sliced pickles or olives for a tangy bite - Tomato soup for a cozy pairing These sides add flavor and balance to the meal. You can tell the turnovers are done when they are golden brown. Check for a puffed-up shape as well. The crust should feel crispy and firm to the touch. If you tap the bottom, it should sound hollow. If they look golden and puffed, they are ready to enjoy! You now have a complete guide to making delicious ham and cheese puff pastry turnovers. We covered ingredients, step-by-step instructions, tips, variations, storage info, and common questions. These turnovers are easy to make and packed with flavor. You can customize them to fit your taste. Remember to keep an eye on baking time for the best texture. Enjoy sharing these tasty treats with friends and family! Your cooking can be fun and satisfying.

Ham and Cheese Puff Pastry Turnovers Simple Delight

Are you ready for a tasty treat? Ham and cheese puff pastry turnovers are the perfect snack or meal. They

To make classic French ratatouille, you need fresh, colorful vegetables. Here are the main ingredients: - 1 medium eggplant, diced - 1 medium zucchini, sliced - 1 bell pepper (red or yellow), chopped - 1 onion, diced - 2 cloves garlic, minced - 2 cups ripe tomatoes, chopped (or 1 can of diced tomatoes) - 1 tablespoon tomato paste - 1 teaspoon dried thyme - 1 teaspoon dried basil - 1 teaspoon salt - 1/2 teaspoon black pepper - 3 tablespoons olive oil - Fresh basil leaves for garnish These veggies bring great flavor and texture. Eggplant gives a rich taste, while zucchini adds a nice crunch. Tomatoes add sweetness and acidity, making everything pop. Herbs are key to great ratatouille. Thyme and basil give it a fragrant touch. - Thyme adds an earthy flavor. It works well with the veggies and brings depth. - Basil gives a fresh, bright taste. It is a classic herb in French cooking. Using fresh herbs can elevate your dish. They can make the meal feel special and vibrant. You can add them near the end of cooking for the best flavor. You can boost the flavor of ratatouille with a few optional ingredients. Here are some ideas: - Red pepper flakes for heat - A splash of balsamic vinegar for tang - Olives for a savory kick Feel free to experiment with these extras. They can add your personal touch and make the dish unique. Ratatouille is all about using what you love! Start by gathering your ingredients. You need fresh vegetables for a bright flavor. Dice the onion and eggplant, slice the zucchini, and chop the bell pepper. Mince the garlic and chop the tomatoes if using fresh ones. Heat olive oil in a large skillet over medium heat. Add the diced onion first. Sauté it for about 3-4 minutes until it turns clear. Then, add minced garlic and cook for one more minute. This step builds a strong base for your dish. Next, stir in the chopped bell pepper. Cook it for another 5 minutes until it softens. Now, add the diced eggplant. Let it cook for about 5 minutes, stirring occasionally. Eggplant will soak up the oil and flavors. Then, add the sliced zucchini. Cook all the veggies together until tender, which takes roughly 5-7 minutes. This layering method helps each vegetable shine in the dish. Once your vegetables are tender, it’s time to add the tomatoes, tomato paste, thyme, basil, salt, and black pepper. Stir everything well to mix the flavors. Reduce heat to low and cover the skillet. Let the ratatouille simmer for about 30 minutes. Stir occasionally to prevent sticking. If you want a thicker texture, uncover the pot for the last 10 minutes. This simmering time allows the flavors to meld beautifully. Taste your dish and adjust seasoning if needed before serving. When making ratatouille, select fresh, ripe vegetables. Look for firm eggplants, bright zucchini, and colorful bell peppers. Fresh tomatoes enhance the dish's flavor. Avoid any vegetables with soft spots. Choose seasonal produce for the best taste. Local farmers' markets often have the freshest options. Do not rush the cooking process. Each vegetable needs time to soften and release its flavors. Avoid overcooking; this can make the dish mushy. Use a large enough pan to allow for even cooking. Do not skip the herbs; they add essential flavor. Taste while cooking to adjust seasoning. For an elegant touch, serve ratatouille in a shallow bowl. Garnish with fresh basil leaves to add color. Pair it with crusty bread for a rustic feel. You can also serve it with a drizzle of olive oil on top. This adds richness and enhances the dish's taste. {{image_2}} Ratatouille is a great dish for adding your favorite veggies. You can swap or add vegetables easily. Here are some ideas: - Mushrooms: Add sliced mushrooms for a rich flavor. - Carrots: Grate or chop carrots for a sweet crunch. - Spinach: Toss in fresh spinach for a pop of green. Feel free to experiment! The best part about ratatouille is that you can make it your own. Just keep the basic cooking method the same. Different regions have their own takes on ratatouille. Here are a few interesting twists: - Italian Style: Use Italian herbs like oregano and parsley. Add olives for a salty kick. - Spanish Version: Mix in bell peppers and saffron. Serve with crusty bread or rice. - Provençal Touch: In Provence, they often add more garlic and use fresh herbs straight from their gardens. These regional styles show how versatile ratatouille can be. Each twist brings a new flavor to the classic dish. You can serve ratatouille in different ways. It works well as both a side dish and a main course. - As a Side Dish: Pair it with grilled meats or fish. The fresh veggies complement the main dish nicely. - As a Main Course: Serve it with bread or pasta. This makes it hearty and filling. How you serve ratatouille really depends on your mood and meal. Enjoy it however you like! After enjoying your ratatouille, let it cool to room temperature. Use an airtight container to store any leftovers. Place the container in the fridge. Leftover ratatouille stays fresh for up to four days. Keep an eye on it. If it changes color or smell, it's best to toss it. For long-term storage, freezing is a great option. First, let the ratatouille cool completely. Then, divide it into portions. Use freezer-safe bags or containers. Remove as much air as possible to prevent freezer burn. You can freeze ratatouille for up to three months. Label the containers with the date for easy tracking. When you're ready to enjoy your ratatouille again, reheating it is easy. You can use the stove or microwave. For the stove, heat it in a pot over medium heat. Stir occasionally until warm. If using a microwave, place it in a bowl and cover. Heat for two to three minutes, stirring halfway through. Always check the temperature before serving. Enjoy it warm with fresh basil on top! Traditional ratatouille has a rich, savory flavor. The mix of eggplant, zucchini, and bell peppers creates a sweet and earthy taste. Fresh herbs like thyme and basil add a fragrant touch. The tomatoes give it a nice acidity that balances the dish. Overall, it's a warm and comforting dish that feels like a hug in a bowl. Yes, you can use other vegetables! Ratatouille is quite flexible. You might try adding mushrooms, carrots, or even squash. Just keep in mind that cooking times may vary. Make sure the veggies are cut to similar sizes for even cooking. Feel free to experiment with your favorites! Homemade ratatouille lasts about 4 to 5 days in the fridge. Store it in an airtight container for the best results. If you want it to last longer, consider freezing it. Frozen ratatouille can keep for up to 3 months. Just thaw it in the fridge before reheating. Ratatouille is a simple yet tasty dish packed with veggies and flavor. We explored key ingredients, cooking steps, and tips to make it great. Remember to use fresh herbs for the best taste. Avoid common mistakes for perfect results. You can customize ratatouille to fit any meal. Store leftovers properly to enjoy later. Ratatouille is more than just a side—it can shine as a main dish. Embrace creativity in your cooking and enjoy this classic dish!

Classic French Ratatouille Flavorful and Easy Recipe

Are you ready to dive into the vibrant world of Classic French Ratatouille? This dish combines fresh, colorful veggies and

- 2 ripe bananas, mashed - 1/2 cup granulated sugar - 1/2 cup brown sugar, packed - 1/2 cup unsalted butter, softened - 1 large egg - 1 teaspoon vanilla extract - 2 cups all-purpose flour - 1 teaspoon baking soda - 1/2 teaspoon baking powder - 1/4 teaspoon salt - 1 tablespoon ground cinnamon - 1/2 cup chopped walnuts (optional) - 1/2 cup powdered sugar (for icing) - 2 tablespoons milk (for icing) These ingredients make a soft, sweet dough. The ripe bananas add moisture and flavor. Both sugars add sweetness, while the butter gives richness. The egg helps bind the dough. Vanilla adds a lovely aroma. Start by gathering all your ingredients. This step keeps your cooking smooth. When measuring, use clear cups and spoons. This ensures accuracy. Preheat your oven to 350°F (175°C). Grease your baking dish to prevent sticking. Use room temperature butter for easy mixing. If your bananas are cold, they will mash harder. To get the right amount of flour, spoon it into the cup. Avoid packing it down, or your rolls may be too dense. If using walnuts, chop them small for an even mix. First, you need to preheat your oven to 350°F (175°C). This step is key to getting your rolls just right. While the oven heats up, grease a 9x13-inch baking dish. This helps the rolls come out easily after baking. In a large mixing bowl, mash two ripe bananas until they are smooth. Then, add 1/2 cup of granulated sugar and 1/2 cup of brown sugar. Next, mix in 1/2 cup of softened butter. Use a mixer or a whisk to blend these ingredients until they are creamy. After that, crack in one large egg and add 1 teaspoon of vanilla extract. Mix well until everything is combined. Grab another bowl for the dry ingredients. In this bowl, whisk together 2 cups of all-purpose flour, 1 teaspoon of baking soda, 1/2 teaspoon of baking powder, and 1/4 teaspoon of salt. This mix gives your rolls the right texture and flavor. Now, take the banana mixture and gradually add the dry ingredients. Stir until just combined. Next, sprinkle some flour on your work surface and roll the dough into a rectangle, about 1/4 inch thick. This shape will help you fill and roll the dough easily. Melt some butter and spread it over the rolled-out dough. Then, sprinkle a mix of brown sugar, 1 tablespoon of ground cinnamon, and optional 1/2 cup of chopped walnuts evenly over the top. Starting from one edge, carefully roll the dough into a tight log. Make sure to pinch the seams to seal it well. Slice the rolled dough into 12 equal pieces. Place each slice in the greased baking dish, cut side up. Now, it's time to bake! Put the dish in the oven for 25-30 minutes. Look for a golden brown color and a firm touch to know they are done. While the rolls bake, prepare the icing. In a bowl, whisk together 1/2 cup of powdered sugar and 2 tablespoons of milk until smooth. This icing will add the perfect sweet touch to your rolls. Once the rolls cool for a few minutes, drizzle the icing over the top and enjoy! To get the right dough texture, start with ripe bananas. They should be soft and sweet. Mash them well to remove lumps. Mix the mashed bananas with butter and sugars until creamy. This step adds moisture and flavor. When adding the dry mix, do not over-mix. You want it just combined. This keeps your rolls light and fluffy. Even baking is key for soft rolls. Make sure your oven is at the right temperature, 350°F (175°C). If you can, use an oven thermometer. It helps ensure accuracy. Place the rolls in the center of the oven for even heat. If your oven has hot spots, rotate the pan halfway through. This way, every roll bakes perfectly. One common mistake is not measuring ingredients properly. Use dry measuring cups for flour and sugar. Too much flour can make the dough dry. Another mistake is cutting the rolls unevenly. Try to cut them the same size for even baking. Lastly, don’t skip the icing. It adds the final touch to your rolls. To serve your banana bread cinnamon rolls beautifully, drizzle the icing on top just before serving. You can add a sprinkle of cinnamon or chopped walnuts for extra flair. Arrange the rolls on a nice plate, leaving space between them. This makes them look inviting and fun to eat. Enjoy them warm for the best experience! {{image_2}} You can add nuts to your rolls for extra crunch. Walnuts work great, but you can try other nuts like pecans or almonds. Just chop them up and sprinkle them on top of the butter and sugar filling. This adds a nice texture and flavor. If you want, toast the nuts lightly before adding them. Toasting brings out their flavor. Want to change the flavor? Try adding spices or extracts. Instead of just cinnamon, add some nutmeg for warmth. You can also use cardamom for a unique twist. If you like chocolate, mix in some chocolate chips too! A splash of almond extract can add depth to the rolls. Get creative with what you have at home! You can make these rolls vegan by swapping a few ingredients. Use plant-based butter instead of regular butter. Replace the egg with a flax egg or apple sauce. For the milk in the icing, use almond or coconut milk. These changes keep the rolls soft and tasty without dairy. Enjoy your vegan banana bread cinnamon rolls! You can store leftover cinnamon rolls in an airtight container. Place them at room temperature for up to two days. If you want them to last longer, move them to the fridge. They will stay fresh for about a week. Make sure to wrap them well to keep them moist. If you want to save your cinnamon rolls for later, freezing is a great option. First, let the rolls cool completely. Then, wrap each roll tightly in plastic wrap. Place the wrapped rolls in a freezer bag. They will stay good for up to three months. When you're ready to eat them, you can thaw them in the fridge overnight. To reheat your cinnamon rolls, use the oven for the best results. Preheat your oven to 350°F (175°C). Place the rolls on a baking sheet and cover them with foil. Heat for about 10-15 minutes. This method helps them stay soft and warm. You can also use the microwave. Heat them for 15-20 seconds, but they may not be as soft. Drizzle some icing on top before serving to add extra flavor. To make banana bread cinnamon rolls, follow these steps: 1. Preheat your oven to 350°F (175°C). 2. Grease a 9x13-inch baking dish. 3. In a bowl, mix mashed bananas, granulated sugar, brown sugar, and softened butter. 4. Add one egg and vanilla extract, then mix well. 5. In another bowl, whisk flour, baking soda, baking powder, and salt. 6. Slowly add dry ingredients to the banana mix and stir until just combined. 7. Roll the dough into a rectangle on a floured surface. 8. Spread melted butter on the dough, then sprinkle brown sugar, cinnamon, and walnuts. 9. Roll the dough tightly and slice it into 12 pieces. 10. Place slices cut-side up in the dish and bake for 25-30 minutes. 11. Make icing by whisking powdered sugar and milk until smooth. 12. Drizzle icing over warm rolls and enjoy! Yes, you can use frozen bananas! Just thaw them first. Mash them well before adding to the mix. The flavor remains rich and sweet. This option is great for using overripe bananas you may have stored. Banana bread cinnamon rolls last about 2-3 days in an airtight container. Store them at room temperature for best taste. You can also refrigerate them for a week. For longer storage, freeze them for up to three months. Absolutely! You can make a few swaps: - Use whole wheat flour instead of all-purpose flour. - Replace granulated sugar with honey or maple syrup. - Use unsweetened applesauce instead of butter for a lower-fat option. These changes can make your rolls healthier without losing taste. Serve these rolls warm for the best flavor. Pair them with a scoop of vanilla ice cream or whipped cream. You can also drizzle extra icing on top or add fresh fruit. Enjoy them with coffee or tea for a cozy treat! This blog post shared how to make amazing banana bread cinnamon rolls. You learned about the key ingredients, step-by-step instructions, tips for perfecting the dough, and variations to try. Remember, adding nuts or spice can change the flavor. Store leftovers well to enjoy later, and use our FAQs for quick answers. Baking is fun, and these rolls are a great treat. So, don’t hesitate to try this recipe. Enjoy your baking adventure!

Delicious Banana Bread Cinnamon Rolls Recipe Guide

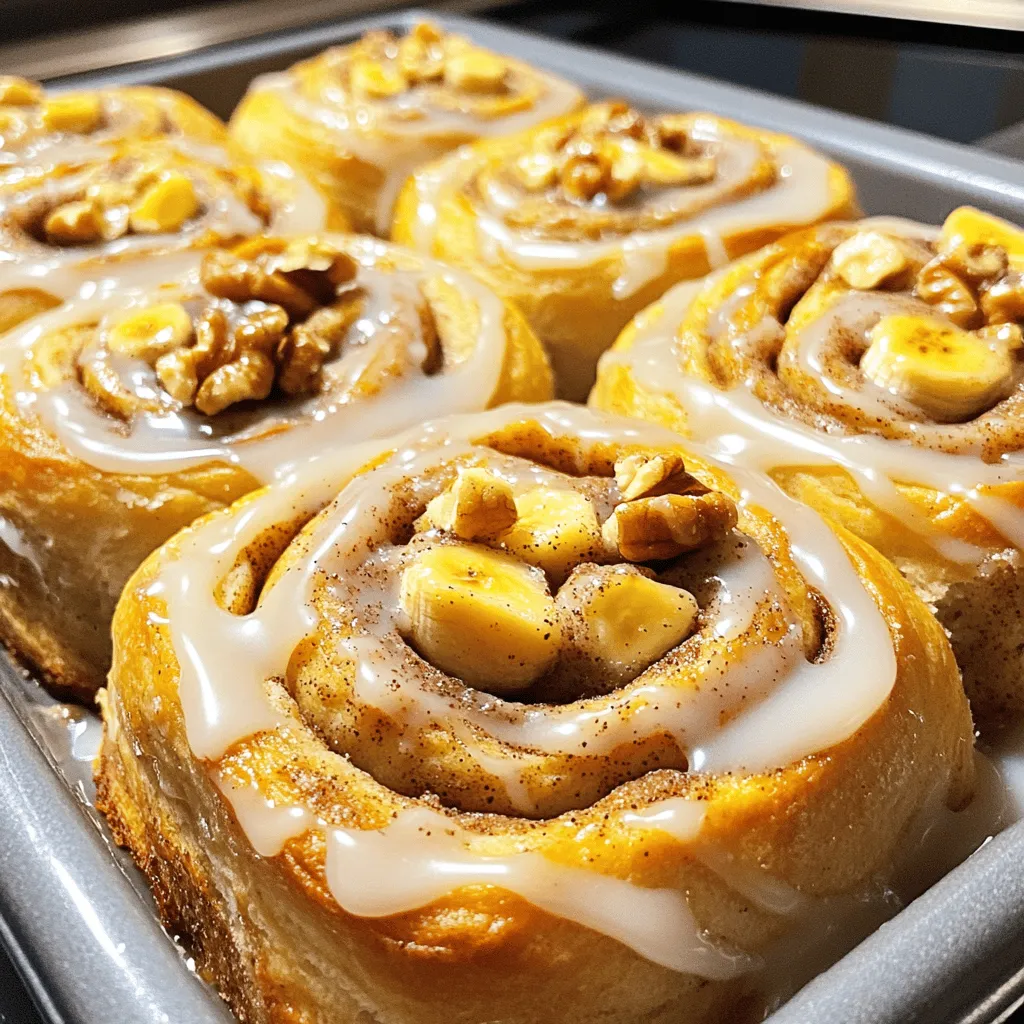
Are you ready to indulge in a warm, gooey treat? My Delicious Banana Bread Cinnamon Rolls Recipe Guide will guide

- 2 cups cooked chicken, shredded - 1 cup black beans, drained and rinsed - 1 cup corn (fresh or frozen) - 1 cup salsa verde - 1 cup shredded cheese (cheddar or Mexican blend) For my chicken enchiladas, I always start with tender shredded chicken. You can use rotisserie chicken for speed. Black beans add protein and a nice texture. Corn brings sweetness and color. Salsa verde gives a tangy kick, while shredded cheese ties everything together. - 8 small flour tortillas - 1/2 cup onion, finely diced - 1 teaspoon ground cumin - 1 teaspoon chili powder - 1/2 teaspoon garlic powder - Salt and pepper to taste I prefer small flour tortillas for easy rolling. They hold the filling perfectly. The diced onion adds crunch and flavor. Cumin, chili powder, and garlic powder spice up the mix. Don't forget salt and pepper to enhance all the flavors. - Fresh cilantro, for garnish - Sour cream, for serving Fresh cilantro adds a burst of color and a fresh taste. I love serving enchiladas with a dollop of sour cream. It cools the spice and adds creaminess. Enjoy your meal with a side of salad or guacamole for extra flavor! First, set your oven to 375°F (190°C) to preheat. This step is key for even cooking. While the oven warms up, grab a big mixing bowl. Add the following ingredients: - 2 cups cooked chicken, shredded - 1 cup black beans, drained and rinsed - 1 cup corn (fresh or frozen) - 1/2 cup onion, finely diced - 1 cup salsa verde - 1 teaspoon ground cumin - 1 teaspoon chili powder - 1/2 teaspoon garlic powder - Salt and pepper to taste Mix everything well. You want all the flavors to blend nicely. Now it's time to fill the tortillas. Take one flour tortilla and place about 1/3 cup of the chicken mixture in the center. Make sure not to overfill it. Roll the tortilla tightly from one end to the other. Place it seam-side down in a greased 9x13-inch baking dish. Repeat this with the other tortillas. You should have a nice row of enchiladas. Once all the tortillas are rolled, pour any remaining salsa verde on top. Then, sprinkle shredded cheese evenly over the enchiladas. Cover the dish with aluminum foil. Bake them for 20 minutes. After 20 minutes, remove the foil. Bake them for another 10-15 minutes. This will make the cheese bubbly and golden. Let them cool for about 5 minutes before serving. Garnish with fresh cilantro for a pop of color and flavor. Enjoy your tasty chicken enchiladas! To make the filling just right, start with shredded chicken. Use cooked chicken from a rotisserie or boil some chicken breasts. Keep the chicken moist. Add black beans and corn for extra flavor and texture. Use salsa verde for a nice kick. Here are some tips for seasoning: - Use ground cumin and chili powder for warmth. - Add garlic powder for depth. - Remember to taste your mixture. Adjust salt and pepper as needed. Tortillas can tear if you're not careful. To prevent this, warm them briefly in the microwave. This makes them soft and easy to handle. When rolling, place the filling in the center. Leave space on the edges. Roll tightly, but not too tight! Place the seam side down in the baking dish. This helps keep them closed as they bake. You can prepare your enchiladas in advance. Assemble them, then cover and refrigerate. Bake them when you’re ready to eat. If you do this, add a few extra minutes to the baking time. Enjoy a delicious meal with less prep on busy nights! {{image_2}} You can choose between green sauce and red sauce for your enchiladas. Green sauce, or salsa verde, gives a bright and zesty flavor. It pairs well with chicken and adds freshness. Red sauce offers a rich, bold taste. It creates a warm, comforting dish. You can also try creamy enchilada variations. A sour cream or cream cheese sauce can make your dish extra rich. This adds a smooth texture that many love. If you want a vegetarian option, swap the chicken for beans or roasted veggies. Black beans work well and provide protein. You can also use gluten-free tortillas. Many stores sell tasty gluten-free options made from corn or rice. This way, everyone can enjoy these enchiladas. You can enhance your filling with veggies. Chopped bell peppers or spinach add color and nutrition. You can also try cheese alternatives for a lighter dish. Nutritional yeast or vegan cheese can work well. They provide flavor without dairy. Feel free to experiment and make this recipe yours! To store your leftover chicken enchiladas, first let them cool down. Place them in the fridge within two hours. Use an airtight container to keep them fresh. This helps prevent moisture loss and keeps flavors intact. You can also wrap them tightly in plastic wrap or foil. To freeze chicken enchiladas, first cool them completely. Then, wrap each enchilada in plastic wrap. Place them in a freezer bag or airtight container. This will protect them from freezer burn. To thaw, move the enchiladas to the fridge for several hours or overnight. This slow thawing helps keep their taste and texture. To reheat chicken enchiladas, the oven is best. Preheat your oven to 350°F (175°C). Place the enchiladas in a baking dish and cover with foil. Bake for about 20 minutes, or until heated through. This keeps the tortillas soft and the cheese melted. If you want a crispy top, remove the foil for the last 5 minutes. Enjoy your flavorful meal! To make chicken enchiladas from scratch, you need to prepare the filling. First, mix shredded chicken, black beans, corn, diced onion, salsa verde, and spices in a bowl. This blend gives you a tasty base. Then, you fill each tortilla with the mixture. Roll them tightly and place them in a baking dish. Finally, bake them until the cheese melts. You can use uncooked chicken, but it needs more time to cook. Start by boiling or baking the chicken until it is fully cooked. After cooking, shred it and mix it into your filling. This method adds flavor but requires careful timing. Make sure the chicken reaches an internal temperature of 165°F. The best cheese for chicken enchiladas is usually a blend of cheeses. Cheddar adds a sharp flavor, while a Mexican blend gives a creamy texture. Look for cheeses that melt well, as they create a nice, gooey topping. Mozzarella is another option if you prefer a milder taste. Choose based on your flavor preference and meltability. In this article, we explored how to make tasty chicken enchiladas. We covered the main ingredients, from shredded chicken to salsa verde. I shared step-by-step instructions, tips for perfect filling, and variations to suit different diets. Remember, using the right tortillas and seasoning makes a big difference. You can easily make these enchiladas ahead of time, freeze them, or store leftovers. Experiment with different sauces and add-ins to find your favorite twist. Enjoy your cooking adventure, and let the flavors shine!

Savory Chicken Enchiladas Easy and Flavorful Recipe

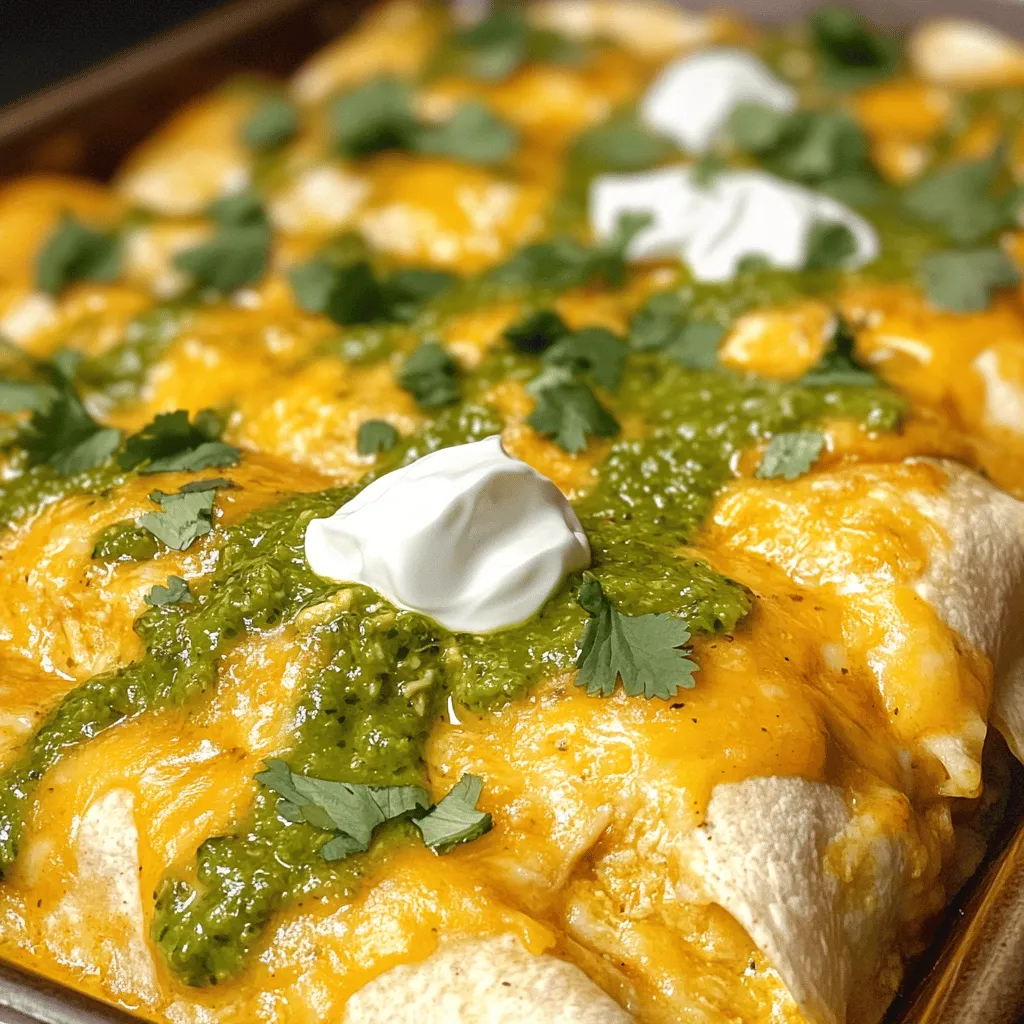
Do you crave a dish that’s easy to make and packed with flavor? Look no further! In my guide to

To make Baked Feta Eggs, you need: - 200g feta cheese, crumbled - 4 large eggs - 200g fresh spinach, washed - 150g cherry tomatoes, halved - 2 tablespoons olive oil - 1 teaspoon dried oregano - Salt and pepper to taste - Fresh basil leaves for garnish (optional) This dish is not only tasty but also healthy. Each serving offers a good mix of protein, vitamins, and healthy fats. The feta cheese adds calcium, while spinach is rich in iron and vitamins A and C. Eggs provide high-quality protein and essential nutrients. This meal is low in carbs, making it a great choice for a balanced breakfast. When choosing fresh produce, look for vibrant colors. The spinach should be bright green and crisp. If you see any yellow leaves, skip that bunch. For cherry tomatoes, select firm ones with smooth skin. They should feel heavy for their size. Always check for any signs of bruising or mold. Fresh basil should smell fragrant and have bright green leaves. This ensures your dish tastes great and looks beautiful. First, gather all your ingredients. You need: - 200g feta cheese, crumbled - 4 large eggs - 200g fresh spinach, washed - 150g cherry tomatoes, halved - 2 tablespoons olive oil - 1 teaspoon dried oregano - Salt and pepper to taste - Fresh basil leaves for garnish (optional) Now, preheat your oven to 375°F (190°C). This helps cook the dish evenly. Take a medium-sized baking dish. Drizzle 1 tablespoon of olive oil at the bottom. This keeps your food from sticking. Next, spread the washed spinach evenly across the dish. Then, scatter the halved cherry tomatoes on top. Now, crumble the feta cheese over the spinach and tomatoes. This adds a rich flavor. After that, make four small wells in the mixture. Carefully crack an egg into each well. Drizzle the remaining olive oil over the eggs. Sprinkle with dried oregano, salt, and pepper. Place the dish in the preheated oven. Bake for 20 to 25 minutes. The egg whites should be set, but the yolks can stay runny. Once baked, take the dish out of the oven. Let it cool for a few minutes. This helps you avoid burns. If you like, garnish with fresh basil leaves. They add a nice touch and extra flavor. Your baked feta eggs are now ready to enjoy! To get the best baked eggs, focus on timing and temperature. Preheat your oven to 375°F (190°C). This helps cook the eggs evenly. Bake them for about 20-25 minutes. Check when the whites are set, and the yolks are still runny. If you want firmer yolks, bake a bit longer. Using the right tools makes cooking easier. Here are a few items I recommend: - A medium-sized baking dish for even cooking. - A whisk to beat the eggs if you prefer them mixed. - A spatula to serve the dish. - Measuring spoons for accurate seasoning. These tools help you create great meals with ease. Many people make simple mistakes that can ruin this dish. First, don’t overcook the eggs. Checking them often helps you avoid this. Second, make sure your ingredients are fresh. Wilted spinach or old tomatoes can spoil the flavor. Lastly, don’t skimp on seasoning. Salt and pepper enhance the taste of the dish. Keeping these tips in mind will lead to a tasty breakfast every time. {{image_2}} You can easily change ingredients to suit your taste. If you want a creamier feel, try goat cheese instead of feta. You can also use kale or arugula if you don’t have spinach. Cherry tomatoes can be swapped for diced bell peppers or zucchini. If you prefer, add a splash of cream or milk for richness. Adding spices can give new life to your dish. Try crushed red pepper for heat or smoked paprika for depth. Fresh herbs like dill or parsley can brighten the flavor. You might even like a dash of lemon juice for tang. For a Mediterranean twist, add olives or sun-dried tomatoes. Serve Baked Feta Eggs with warm bread or toast for a hearty meal. A fresh salad on the side complements the dish well. You can also pair it with roasted potatoes or a light yogurt dip. If you want a more filling breakfast, add bacon or sausage on the side. After enjoying your baked feta eggs, let them cool first. Then, place the leftovers in an airtight container. Store them in the fridge for up to three days. Be sure to keep the eggs and veggies together for the best flavor. To reheat, use the oven or microwave. If using the oven, set it to 350°F (175°C). Place the dish in the oven for about 10 minutes. For the microwave, heat on medium power in 30-second bursts. Check often to avoid overcooking. You can freeze baked feta eggs if you want to save some for later. Cut them into portions and wrap each piece tightly with plastic wrap. Then, place them in a freezer-safe bag. They will stay good for up to three months. To thaw, place them in the fridge overnight before reheating. Yes, you can use different cheeses. Feta adds a nice tang, but goat cheese works too. It has a creamy texture and a mild taste. You can also try mozzarella for a milder flavor. Just remember, each cheese will change the taste a bit. Experiment and find what you like best! You will know the eggs are done when the whites are set. The yolks should still look a bit soft. Baking takes about 20 to 25 minutes at 375°F (190°C). If you want firmer yolks, bake them a bit longer. Keep an eye on them to avoid overcooking. Yes, you can prepare this dish ahead. You can wash the spinach and cut the tomatoes the night before. Keep the ingredients in the fridge. Then, just assemble and bake in the morning. It saves time and gives you a tasty breakfast without much fuss! In this post, we covered how to make baked feta eggs. We explored each ingredient, tips on picking fresh produce, and important baking steps. I shared tricks for perfecting your dish and common mistakes to avoid. You learned about fun variations and how to store leftovers. Enjoy experimenting with this recipe. Easy modifications can lead to delicious results. You'll impress everyone at your next meal! Keep cooking and enjoying new flavors.

Baked Feta Eggs Flavorful and Simple Breakfast Recipe

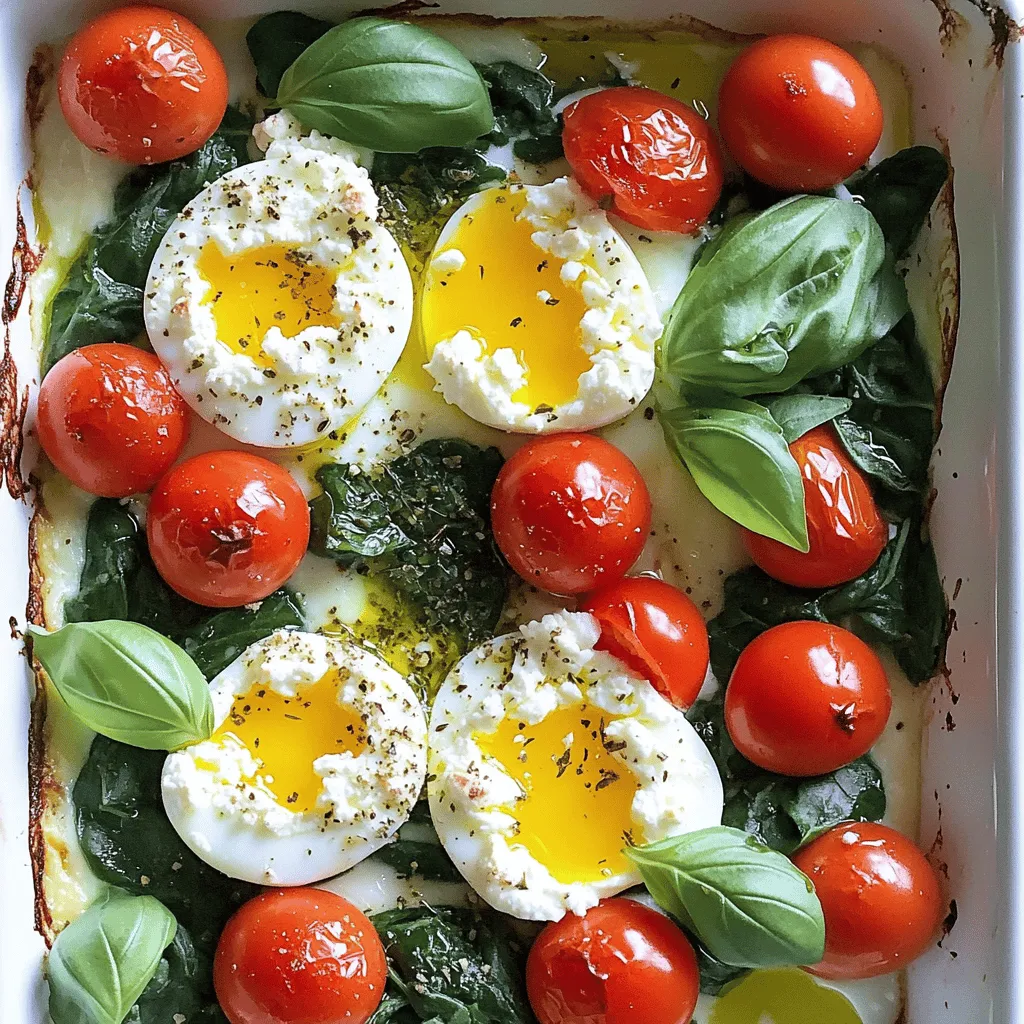
If you’re looking for a tasty and simple breakfast, Baked Feta Eggs are a game-changer! This dish combines creamy feta

For the best fudgy brownies, you need these key ingredients: - 1 cup unsalted butter - 2 cups granulated sugar - 4 large eggs - 1 teaspoon vanilla extract - 1 cup all-purpose flour - 1 cup unsweetened cocoa powder - 1 teaspoon baking powder - 1/2 teaspoon salt - 1 cup semi-sweet chocolate chips These ingredients work together to create a rich, dense brownie. The butter gives moisture, while sugar adds sweetness. Eggs help bind the mix and add structure. Flour and cocoa provide the base, making your brownies fudgy. You can customize your brownies with fun add-ins. Here are some great options: - 1/2 cup walnuts or pecans (optional) - 1 cup additional chocolate chips (for extra chocolate flavor) Adding nuts gives a nice crunch to each bite. More chocolate chips make the brownies even richer. Feel free to mix and match based on your taste! If you have dietary needs, don't worry! Here are some swaps you can make: - Use coconut oil instead of butter for a dairy-free option. - Replace granulated sugar with coconut sugar or a sugar substitute. - Try gluten-free flour instead of all-purpose flour. These substitutions help you enjoy fudgy brownies while meeting different diets. Just be sure to adjust baking times as needed! Start by preheating your oven to 350°F (175°C). Grease a 9x13 inch baking pan. You can also use parchment paper for easy removal. This step makes cleanup a breeze and helps your brownies come out perfectly. In a medium saucepan, melt 1 cup of unsalted butter over low heat. Once the butter is melted, take it off the heat. Stir in 2 cups of granulated sugar until the mixture is smooth. Let it cool for a few minutes. Then, add 4 large eggs one at a time. Mix well after each egg. Finally, stir in 1 teaspoon of vanilla extract for added flavor. In a separate bowl, sift together 1 cup of all-purpose flour, 1 cup of unsweetened cocoa powder, 1 teaspoon of baking powder, and 1/2 teaspoon of salt. Gradually add this dry mix to your wet ingredients. Stir until just combined. Be careful not to overmix; this will keep your brownies fudgy. Now, it’s time to fold in 1 cup of semi-sweet chocolate chips. If you like nuts, add 1/2 cup of walnuts or pecans. Gently mix until the chocolate and nuts are evenly spread throughout the batter. Pour your brownie batter into the prepared baking pan. Spread it evenly with a spatula. Bake in the oven for 25 to 30 minutes. To check for doneness, insert a toothpick into the center. It should come out with a few moist crumbs, not clean. Remove the pan from the oven and let the brownies cool for at least 20 minutes before slicing them into squares. To get that fudgy texture, use less flour. The recipe calls for 1 cup of flour, which is key. Also, do not overmix the batter. Stir just until the dry and wet ingredients blend. The chocolate chips add richness too. Bake them until a toothpick shows a few moist crumbs. This step makes your brownies soft and chewy. One big mistake is using cold eggs. Always use eggs at room temperature. This helps them mix better. Another common slip is overbaking. Keep an eye on the time. Check the brownies around 25 minutes. If you see too many dry crumbs, they are overdone. Lastly, don’t skip the cooling time. Letting them cool helps set the fudgy texture. You can change the flavors easily! Add a teaspoon of espresso powder for a rich taste. Swap semi-sweet chocolate chips for dark chocolate for a bolder flavor. Want nuts? Use walnuts or pecans for crunch. For a fun twist, mix in peppermint extract or sea salt. Feel free to experiment! {{image_2}} To make fudgy peanut butter brownies, add 1 cup of creamy peanut butter to the wet mix. Melt the peanut butter with the butter for a rich, nutty taste. This twist adds a creamy texture and pairs well with chocolate. You can also sprinkle some peanuts on top for crunch. For mint chocolate chip brownies, mix 1 teaspoon of peppermint extract into the wet ingredients. Add 1 cup of mint chocolate chips to the batter for a burst of minty flavor. These brownies bring a refreshing taste, perfect for mint lovers. To create gluten-free brownies, swap the all-purpose flour with 1 cup of gluten-free flour blend. Ensure the blend includes xanthan gum for the best texture. The other ingredients stay the same. This version keeps the fudgy center while catering to gluten-free diets. Each variation offers a unique twist on the classic fudgy brownie, making them fun to try. Feel free to experiment with your favorite flavors and ingredients! To keep your fudgy brownies fresh, store them in an airtight container. This helps maintain their soft texture. You can also wrap them in plastic wrap before placing them in the container. Keep them at room temperature for up to four days. If you want to store them longer, the fridge is a good option. Just remember, chilling may change the texture slightly. For best results, let them sit at room temperature before you eat them. Freezing brownies is easy and keeps them tasty. First, let the brownies cool completely. Cut them into squares, then wrap each square in plastic wrap. Place the wrapped brownies in a freezer-safe bag or container. You can freeze them for up to three months. When you're ready to enjoy, just take out as many as you want. Let them thaw at room temperature for a few hours or microwave them for a few seconds. If your brownies feel stale, you can bring them back to life. Preheat your oven to 350°F (175°C). Place the brownies on a baking sheet. Cover them with aluminum foil to avoid drying out. Heat for about 5-10 minutes. Check to see if they're warm. You can also use the microwave. Heat them for 10-15 seconds. This will soften them and make them taste fresh again. Enjoy your warm, fudgy treats! You can check your brownies at around 25 minutes. Insert a toothpick into the center. If it comes out with a few moist crumbs, they are ready. If it comes out clean, they may be too dry. Keep an eye on them, as baking times can vary. Yes, you can use different types of flour. Whole wheat flour gives a nutty flavor. Almond flour can make them gluten-free. Just remember to adjust the liquid if needed. Each flour type may change the texture and taste. If your brownies are too cakey, try these tips. Use less flour next time. Make sure not to overmix the batter. You can also add an extra egg yolk for more richness. Lastly, bake them for fewer minutes to keep them fudgy. To boost the chocolate flavor, add more cocoa powder or chocolate chips. You can also fold in melted dark chocolate into the batter for a richer taste. Use high-quality chocolate for the best results. Adjust the sugar if it gets too sweet. We covered how to make the best fudgy brownies. You learned essential ingredients, tips, and tricks. We explored delicious variations and storage methods. As you bake, keep experimenting with flavors and textures. This recipe is flexible, so let your creativity shine. You have all the tools to make fantastic brownies, from rich flavors to perfect texture. Enjoy the process and your delicious treats!

Fudgy Best-Ever Brownies Rich and Decadent Recipe

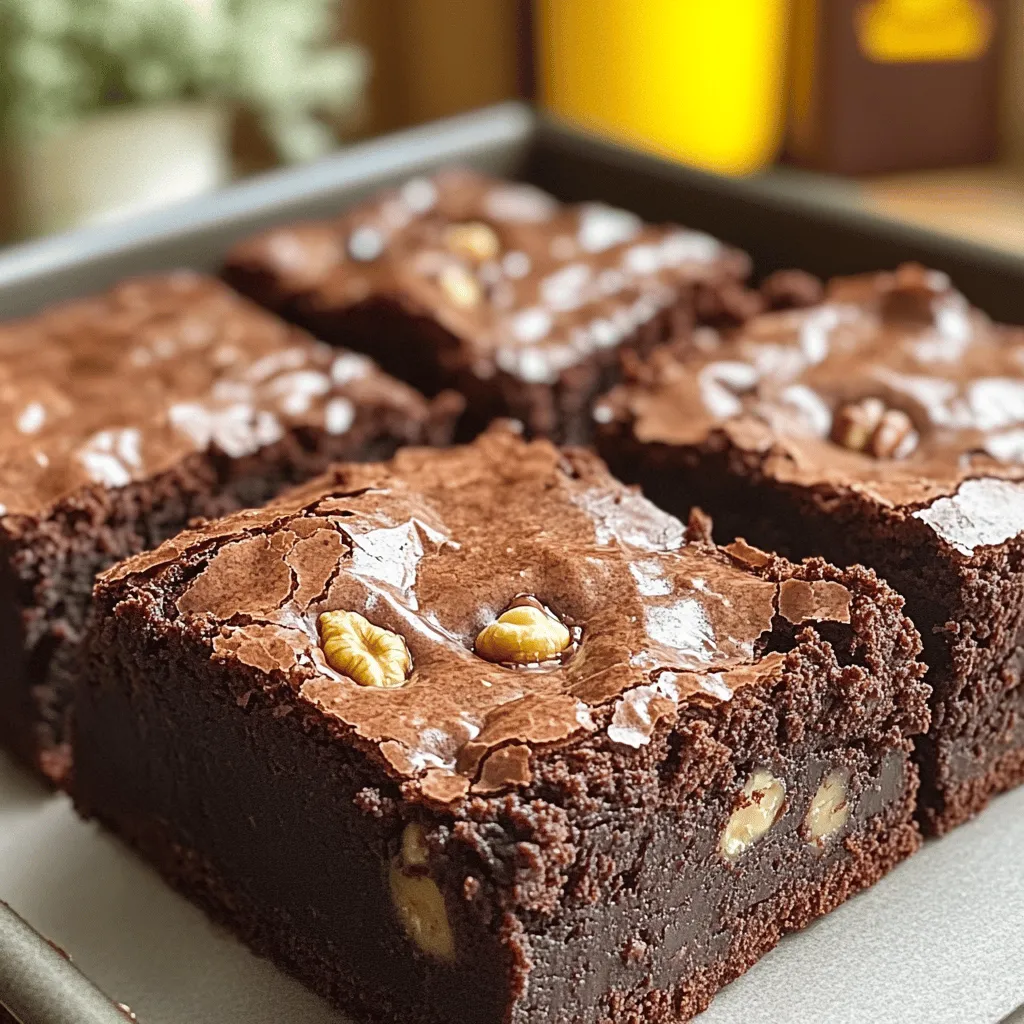
If you crave rich, gooey chocolate, you’ve found your recipe! My Fudgy Best-Ever Brownies promise a decadent treat that’s hard

Older posts
Newer posts
← Previous Page1 … Page32 Page33 Page34 … Page84 Next →

dsad

© 2026 Foodish Talk • Built with GeneratePress

Our Policies

  • Copyright Policy
  • Cookie Policy
  • GDPR Policy
  • Privacy Policy
  • Disclaimer
  • Terms Of Use

More Information

  • Home
  • About
  • Contact
  • Appetizers
  • Dessert
  • Dinner
  • Drinks
©2026, Foodish Talk About Back To Top