Skip to content
DisclaimerTerms Of UseGDPR PolicyCookie Policy

Foodish Talk

  • Home
  • Drinks
  • Appetizers
  • Dinner
  • Dessert
  • About
  • Contact
  • Privacy Policy
DisclaimerTerms Of UseGDPR PolicyCookie Policy

NO-ING-IMG

For this ice cream, use 2 cups of fresh strawberries. Make sure they are ripe and sweet. Remove the green tops and slice them up. This gives a fresh taste that shines through the ice cream. You will need 1 cup of cream cheese, softened. This gives the ice cream its rich and creamy texture. Next, grab 1 cup of heavy whipping cream. This adds a light and airy feel to the ice cream. Don’t forget 1 teaspoon of vanilla extract. It brings out the flavors and adds warmth. Sweeten things up with 1 cup of granulated sugar, split into two parts. Use 1/2 cup for the strawberries and 1/2 cup for the cream cheese mix. Add a pinch of salt to enhance the flavors. Lastly, include 1 cup of crushed graham crackers. This adds a delightful crunch, making each bite feel like cheesecake. To start, take 2 cups of fresh strawberries. Hull and slice them. Place the sliced strawberries in a medium bowl. Add 1/2 cup of granulated sugar. Gently toss to coat the strawberries. Let this sit for about 15-20 minutes. This helps the strawberries release their juices. The sweet syrup forms a tasty base for your ice cream. Next, grab a large bowl. Add 1 cup of softened cream cheese. Mix in the remaining 1/2 cup of sugar and a pinch of salt. Use an electric mixer and beat this mixture until it turns smooth and creamy. This should take about 2-3 minutes. The cream cheese base gives the ice cream its rich flavor. Now, take another bowl and pour in 1 cup of heavy whipping cream. Add 1 teaspoon of vanilla extract for extra flavor. Use a mixer to whip the cream until soft peaks form. This step is key to making your ice cream light and fluffy. Once done, gently fold the whipped cream into the cream cheese mixture until combined. Be careful not to deflate the whipped cream. To get the best texture for your ice cream, start with cold ingredients. Chill the cream cheese and heavy cream before use. This helps them whip up nicely. When you fold in the whipped cream, do it gently. This keeps the air in the cream, making your ice cream light and fluffy. Let it freeze for at least 6 hours. This gives it time to set and firm up. You can boost the flavor in fun ways. Add a splash of lemon juice for a zing. It brightens the strawberry taste. Consider mixing in a bit of almond extract for a nutty twist. You can also blend in other fruits like blueberries or raspberries. They pair well with strawberries and add more color. For serving, scoop the ice cream into bowls or cones. You can top it with whipped cream for extra creaminess. Fresh strawberries or chocolate sauce also make great toppings. If you want to impress, serve it in a waffle cone. It adds a nice crunch and looks fancy. Enjoy your delightful homemade treat! {{image_2}} You can switch up the fruit in this ice cream. While strawberries shine, other fruits work well too. Think about using fresh blueberries, raspberries, or peaches. Just chop them up and mix them in like you do with strawberries. Each fruit brings its own flavor and color, making your treat unique and fun. The crust is key to that cheesecake taste. You can try different types of crusts. Instead of crushed graham crackers, use crushed cookies or even nuts. Oreos add a rich chocolate flavor. Almonds or pecans give a nice crunch. Just remember to crush them well so they mix in nicely. Want a lighter option? You can lower the sugar. Use a sugar substitute like stevia or monk fruit. These sweeteners can cut calories without losing taste. You can also use ripe bananas or applesauce to add natural sweetness. Just adjust the amount based on your taste. Enjoy making this recipe fit your needs! To keep your no churn strawberry cheesecake ice cream fresh, store it in an airtight container. A loaf pan works well, but any container with a lid will do. Cover the top with plastic wrap before sealing it. This helps prevent ice crystals from forming. When you’re ready to serve, let it sit at room temperature for a few minutes to soften. This ice cream will stay good for about two weeks in the freezer. After that, it may lose flavor and texture. Always check for any signs of freezer burn. If it looks icy or strange, it’s best to toss it out. Enjoy your ice cream while it's fresh for the best taste! If you need to re-freeze the ice cream, do so carefully. Avoid leaving it out for too long. Scoop some out, then seal it back up quickly. Try not to let it fully melt. Repeated thawing and freezing can ruin the texture. It’s best to only scoop what you will eat at one time. Yes, you can use frozen strawberries. Just thaw them first. This allows the fruit to release juices. It works well for the ice cream base. However, fresh strawberries give better flavor and texture. If you choose frozen, expect a slightly different taste. To make this ice cream dairy-free, use dairy-free cream cheese. You can find brands made from nuts or soy. For the heavy cream, use coconut cream or a dairy-free alternative. This keeps the ice cream rich and creamy without dairy. If you want a substitute for cream cheese, try mascarpone. It has a similar texture and taste. You can also use silken tofu blended until smooth. This works well for a lighter option. Choose the one that fits your taste best. This guide covered how to make strawberry ice cream. We explored key ingredients, like fresh strawberries and dairy products. You learned step-by-step how to mix, prepare, and whip. Tips helped you achieve the best texture and flavor. I shared delicious variations and provided storage info for your treats. Enjoying homemade strawberry ice cream brings joy and freshness to your summer days.

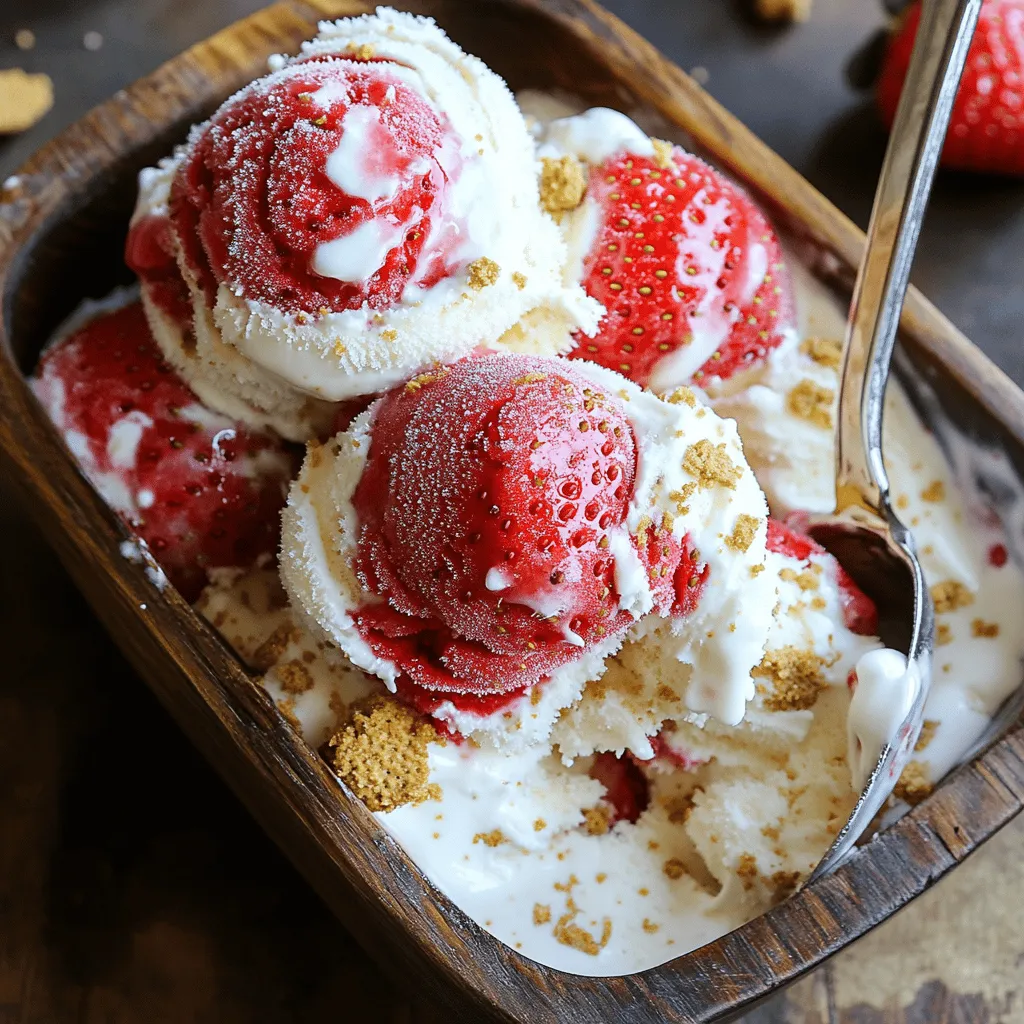
No Churn Strawberry Cheesecake Ice Cream Delight

Craving a sweet treat that’s easy to make? I’ve got you covered with my No Churn Strawberry Cheesecake Ice Cream

- 1/2 cup unsalted butter - 1 cup packed brown sugar - 1/4 cup granulated sugar - 1 large egg - 1 teaspoon vanilla extract - 1 cup all-purpose flour - 1 tablespoon matcha powder - 1/2 teaspoon baking powder - 1/4 teaspoon salt - 1 cup white chocolate chips - Light dusting of matcha powder - Fresh berries for serving You will need simple, fresh items for these blondies. Start with unsalted butter. It adds creaminess without extra salt. Brown sugar gives a deep, rich flavor. You can use granulated sugar too. This mix adds sweetness and helps with texture. Next, grab a large egg. It binds all the ingredients and helps the blondies rise. A teaspoon of vanilla extract brings warmth and comfort to every bite. Now, for the dry ingredients. All-purpose flour forms the base. Matcha powder gives that bright green color and earthy taste. Baking powder makes these blondies fluffy. A little salt balances the sweetness. Finally, white chocolate chips add creamy bursts of flavor. Optional garnishes can make a big difference. A light dusting of matcha on top looks pretty and adds taste. Fresh berries on the side add a pop of color and freshness. They also pair nicely with the sweet blondies. Enjoy creating these delicious treats with these simple ingredients! - Preheat your oven to 350°F (175°C). - Prepare your baking pan with parchment paper. Start by preheating your oven. This step warms the oven for even baking. Line an 8-inch square pan with parchment paper. Leave some paper hanging over the edges; this helps you lift the blondies out later. - Combine wet ingredients: butter, brown sugar, and granulated sugar. - Add in egg and vanilla extract for flavor. In a mixing bowl, whisk the melted butter, brown sugar, and granulated sugar. Mix until the blend is smooth. Next, crack in a large egg and add one teaspoon of vanilla extract. Whisk these in, ensuring everything is well combined. - Sift and mix dry ingredients. - Combine wet and dry mixtures carefully. In a separate bowl, sift together one cup of all-purpose flour, one tablespoon of matcha powder, half a teaspoon of baking powder, and a quarter teaspoon of salt. Sifting breaks up clumps and evenly distributes the matcha. Gradually mix these dry ingredients into your wet mixture. Stir gently; overmixing can lead to a tough texture. - Pour batter into the prepared pan. - Bake duration and doneness indicators. Pour the batter into your prepared pan. Use a spatula to smooth the top. Bake for 20 to 25 minutes. You know the blondies are done when the edges are lightly golden. A toothpick inserted in the center should come out with a few moist crumbs. Let them cool for at least 10 minutes before lifting them out using the parchment paper. Set them on a wire rack to cool completely before cutting into squares. To make fudgy blondies, avoid overmixing the batter. Mix until just combined. Overmixing adds air and makes them cake-like. You want a dense, chewy feel. For the golden edge, watch your oven closely. Bake until the edges turn light golden brown. This usually takes about 20-25 minutes. A toothpick should come out with a few moist crumbs. Presentation matters! Serve these blondies on a nice plate. Sprinkle a light dusting of matcha powder on top. This adds color and a nice touch. Pair them with fresh berries. Berries give a pop of color and freshness. They balance the sweetness of blondies. Enjoy your creation! {{image_2}} You can spice up your matcha white chocolate blondies in fun ways. - Adding nuts: Try mixing in some chopped macadamia or pecans. These nuts add a nice crunch and flavor. They balance the sweetness of the blondies perfectly. - Different types of white chocolate: Use flavored white chocolate, like raspberry or coconut, for a twist. Each type will change the taste and make your blondies unique. You can adapt this recipe to fit your diet. - Gluten-free alternatives: Use gluten-free flour instead of all-purpose flour. This swap keeps the blondies soft and tasty without gluten. - Vegan substitutions: Replace the egg with a flax egg or applesauce. Use vegan butter and dairy-free white chocolate. These changes make the recipe vegan-friendly while still delicious. These variations let you enjoy matcha white chocolate blondies in new ways. Customize them to fit your taste or dietary needs. To keep your Matcha White Chocolate Blondies fresh, follow these simple steps: - Cool Completely: Always let your blondies cool fully before storing. This helps avoid sogginess. - Use Airtight Containers: Place them in a clean, airtight container. This keeps moisture out and flavor in. - Layer with Parchment Paper: If stacking, use parchment paper between layers. This prevents sticking and maintains shape. - Store at Room Temperature: Keep them in a cool, dark place. They stay fresh at room temperature for about 3 to 4 days. Freezing blondies is a great way to enjoy them later. Here’s how to do it right: - Wrap Individually: Wrap each blondie in plastic wrap. This prevents freezer burn and keeps them tasty. - Place in a Freezer Bag: Put the wrapped blondies in a freezer-safe bag. Remove as much air as possible before sealing. - Label and Date: Write the date on the bag. You’ll know how long they’ve been stored. - Freezing Time: They can last up to 3 months in the freezer. When you’re ready to eat, thaw them: - In the Fridge: Move them to the fridge overnight for a slow thaw. This keeps them from getting soggy. - At Room Temperature: For a quicker method, leave them out for about an hour. Enjoy your delicious blondies! You can use green tea powder, but the taste will change. Matcha has a rich, creamy flavor. It is finely ground and bright green. Green tea powder lacks this depth. If you use it, expect a lighter flavor. You might want to add more to get a stronger taste. Check for a few signs. Look for golden edges on the blondies. The center should not jiggle too much. A toothpick inserted in the center should come out with a few moist crumbs. If it comes out clean, they may be overbaked. Yes, you can make them ahead. Bake the blondies and let them cool completely. Once cool, wrap them tightly in plastic wrap. Store them in an airtight container. They will stay fresh for up to a week. You can also freeze them for longer. Just thaw in the fridge before serving. These blondies pair well with many things. Fresh berries add a nice contrast. A scoop of vanilla ice cream complements the flavors. You can also serve with whipped cream for extra sweetness. A cup of tea or coffee goes well, too. You can create delicious matcha white chocolate blondies with simple steps and ingredients. We covered everything from the required ingredients to baking tips. Remember to mix carefully for the right texture and explore flavor variations to suit your taste. Store your blondies properly for freshness. These treats are not just tasty; they offer a fun twist on a classic recipe. Enjoy your baking and share them with friends for added joy. Follow these tips, and your blondies will impress everyone!

Matcha White Chocolate Blondies Irresistible Treat

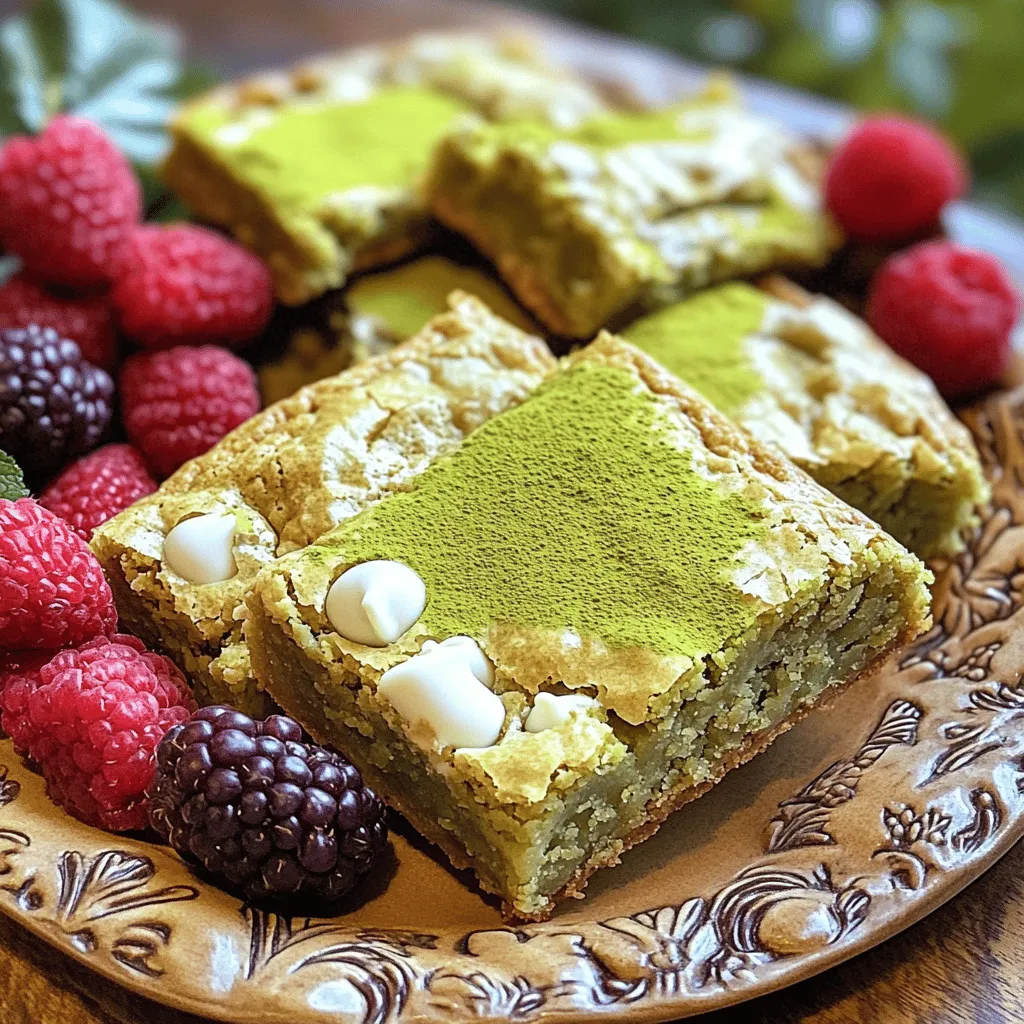
Craving a sweet treat that combines rich flavors with a unique twist? Look no further! These Matcha White Chocolate Blondies

To make Nutella mousse cups, you need a few simple ingredients. Let’s gather them first. - 1 cup Nutella - 1 cup heavy whipping cream - 1/2 cup powdered sugar - 1 teaspoon vanilla extract - 1/4 cup chocolate shavings (for garnish) - Fresh berries (strawberries or raspberries, for garnish) - Mini chocolate cookies (optional, for a crunchy base) Each ingredient plays a key role in creating this delightful dessert. Nutella gives the mousse its rich, chocolatey taste. The heavy whipping cream adds a light and fluffy texture. Powdered sugar sweetens the mousse without making it grainy. Vanilla extract brings a warm flavor that complements the chocolate. Garnishing with chocolate shavings and fresh berries not only makes it look beautiful but also adds a nice contrast in taste. If you love a bit of crunch, you can add mini chocolate cookies at the bottom of your cups. They give a nice base and enhance the chocolate experience. These ingredients are easy to find and make this dessert a breeze to prepare. Now, let’s enjoy making this irresistible treat together! First, grab a mixing bowl. You’ll need to whisk together the heavy whipping cream, powdered sugar, and vanilla extract. This step is crucial. Whisk until you see soft peaks form. It should take about 3 to 5 minutes. If you have an electric mixer, it makes this step easier. Next, take another bowl. Scoop a large spoonful of your whipped cream. Mix it with the Nutella. This softens the Nutella and makes it easier to blend. Stir until you see a smooth, combined mixture. Now, we need to be gentle. Take the remaining whipped cream and fold it into the Nutella mixture. Do this in batches. It’s important to keep the airy texture. If you mix too hard, it becomes flat. Let’s prepare the cups! If you want a crunchy base, crumble some mini chocolate cookies. Layer them at the bottom of each cup. Then, spoon the Nutella mousse into each cup until they’re full. Tap the cups gently to remove any air pockets. Now comes the waiting part. Place your mousse cups in the fridge. They need to chill for at least 2 hours to set properly. This step is key for the right texture. When you whip cream, the goal is to create soft peaks. You can use an electric mixer or a hand whisk. An electric mixer makes it easier. It saves time and energy. If you use a hand whisk, it will take a bit longer, but it’s a great workout! To know when you have soft peaks, check the cream. It should hold its shape but still look fluffy. You can turn the bowl upside down to test it, but be careful. If it falls out, you whipped too much! For serving, use clear cups to show off your mousse. It looks great! You can also place them on a dessert platter. Dust a bit of cocoa powder around the cups for flair. It makes the dish pop! Garnish is key for visual appeal. Top each mousse with chocolate shavings and fresh berries. Strawberries or raspberries work well. They add color and a burst of flavor! If your mousse doesn’t set, don’t panic! This can happen if the cream isn’t whipped enough. Try putting the cups back in the fridge for a bit longer. If you over-whipped the cream, it might look grainy or butter-like. You can fix this by adding a bit of fresh cream. Mix it gently to bring back a smooth texture. {{image_2}} You can add more flavor to your Nutella mousse. A splash of coffee or hazelnut liqueur gives it depth. This twist boosts the rich taste. You can also try different flavors. Peanut butter adds a creamy twist. Dark chocolate brings a more intense flavor. Experimenting with these options makes your mousse even more fun. If you want vegan options, use coconut cream instead of heavy cream. Vegan chocolate makes it rich and creamy. You can also swap out regular cookies for gluten-free ones. This way, everyone can enjoy the mousse, no matter their diet. It’s great to have tasty choices for all. Scaling the recipe is simple. If you have a big group, just double or triple the ingredients. Mini cups are a hit at parties. They look cute and are easy to grab. Use small glasses or dessert cups for a fun touch. You can serve them with fresh berries or chocolate shavings on top. This makes every cup feel special. To keep your Nutella mousse cups fresh, store them in the refrigerator. Use an airtight container or cover them with plastic wrap. This will prevent any odors from other foods affecting your mousse. Nutella mousse cups can stay fresh for up to four days. After that, the texture may change. Always check for any changes in smell or appearance before serving. You can freeze Nutella mousse cups if you want to save some for later. First, place them in a freezer-safe container. Seal tightly to avoid ice crystals. When it's time to eat, thaw them in the fridge overnight. The mousse will lose some of its lightness and creaminess. This means you might notice a change in texture and flavor. But they will still taste great! Yes, you can make Nutella mousse cups ahead of time. I recommend making them up to two days in advance. Just store them in the fridge until you are ready to serve. This lets the flavors meld nicely, making each bite even more delicious. The Nutella mousse needs at least 2 hours in the fridge to set. This time helps it firm up and creates that perfect, creamy texture. If you can wait longer, let it sit overnight for an even better result. Yes, Nutella mousse can be gluten-free if you choose the right ingredients. Nutella itself is gluten-free. If you add mini chocolate cookies, make sure they are gluten-free as well. You can find many brands that offer gluten-free cookie options. You can use store-bought whipped cream. It saves time, but homemade whipped cream tastes fresher. Store-bought often has added sugars and stabilizers. If you want a light and airy mousse, making your own is the best choice. This Nutella mousse is simple and fun to make. We covered the key ingredients, step-by-step instructions, and useful tips. Remember to keep the mousse chilled for the best taste. You can even try different flavors or dietary options. If you follow these steps, you'll create a delightful treat every time. Enjoy sharing your delicious mousse cups with friends and family. Your dessert skills will shine!

Ingredient Nutella Mousse Cups Irresistible Delight

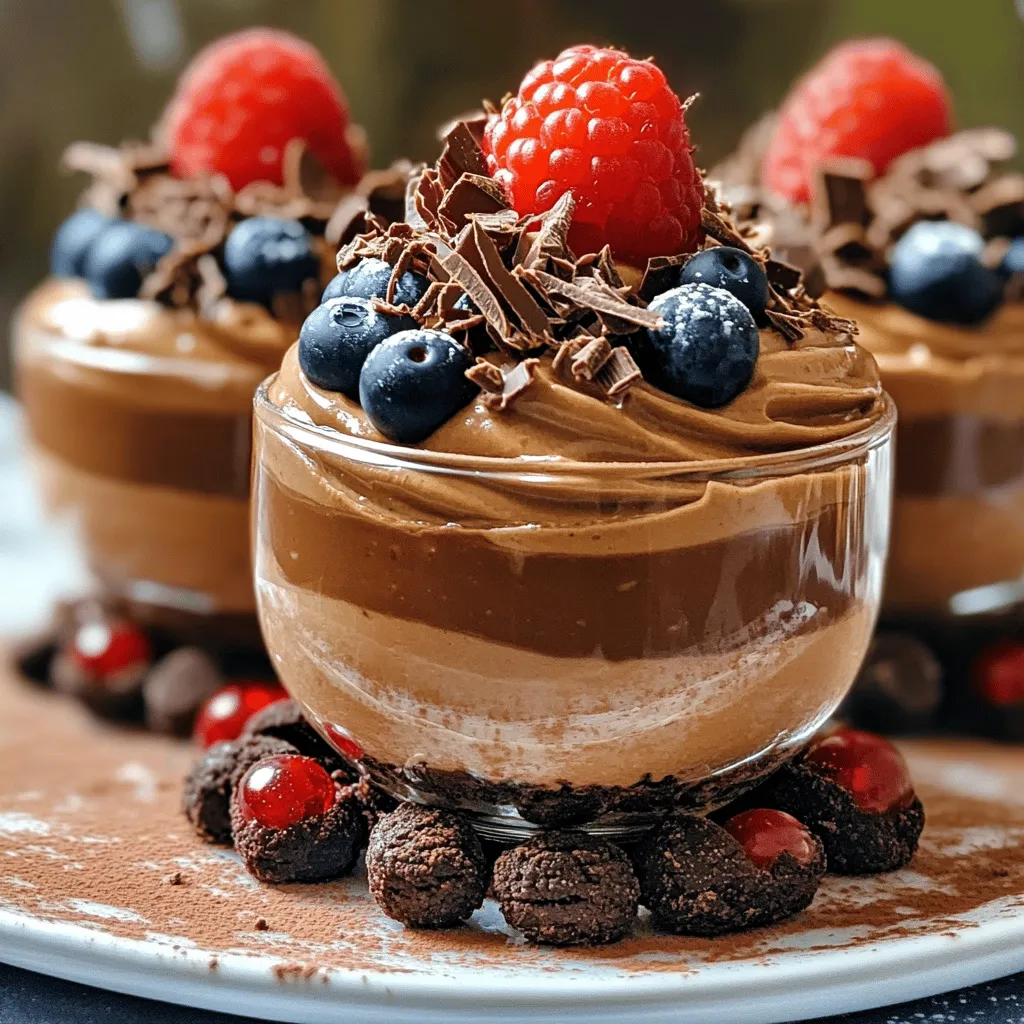
If you love chocolate, you’ll adore my Ingredient Nutella Mousse Cups! These rich and creamy delights combine Nutella with whipped

- 500g beef stew meat, cut into cubes - 2 tablespoons olive oil - 1 large onion, finely chopped - 3 cloves garlic, minced - 1 teaspoon ground cinnamon - 1 teaspoon dried oregano - 1 teaspoon cumin - Salt and pepper to taste - 400g canned diced tomatoes - 4 cups beef broth - 300g orzo pasta - 1 bay leaf - Fresh parsley, chopped (for garnish) - Grated feta cheese (optional, for topping) When you gather your ingredients, make sure you have the best quality. Fresh ingredients make a big difference. The beef should be tender and juicy. The onion adds sweetness, and garlic brings depth. Spices like cinnamon, oregano, and cumin create a warm flavor. You can adjust salt and pepper based on your taste. Don't forget the orzo! It adds a wonderful texture. The canned tomatoes and beef broth give a rich base. The bay leaf adds subtle notes of flavor. Fresh parsley brightens up the dish. Grated feta cheese can be a tasty topping. Enjoy the process of gathering these ingredients! It sets the stage for a delicious meal. - Sauté the onion and garlic Start by heating 2 tablespoons of olive oil in a large pot over medium heat. Add 1 finely chopped large onion and sauté for about 5 minutes. You want the onion to be soft and clear. Then, add 3 minced cloves of garlic. Cook for another minute until you smell that wonderful garlic scent. - Brown the beef cubes Next, add 500g of beef stew meat cut into cubes. You should brown the meat on all sides for about 5 to 7 minutes. This step is key. It gives your dish a deep flavor. - Add spices and tomatoes Once the beef is browned, sprinkle in 1 teaspoon of ground cinnamon, 1 teaspoon of dried oregano, and 1 teaspoon of cumin. Stir well to coat the meat in those lovely spices. Then, pour in 400g of canned diced tomatoes. This adds a nice acidity. - Incorporate beef broth and bay leaf Now, add 4 cups of beef broth and toss in 1 bay leaf. Season with salt and pepper to taste. This mixture needs to come to a gentle simmer. Cover the pot and let it cook on low heat. This should take about 1.5 hours, or until the beef is tender. - Simmer until beef is tender Check on your beef. It should be soft and flavorful after simmering. Stir occasionally to prevent sticking. - Add orzo and cook until al dente Once the beef is tender, add 300g of orzo pasta. Stir it in well. Cook for an additional 10 to 12 minutes. You want the orzo to be al dente, which means it should still have a slight bite. - Adjust seasoning and serve Before serving, remove the bay leaf. Taste your dish and adjust the seasoning if needed. Serve the Beef Giouvetsi in bowls. Top with chopped fresh parsley and, if you like, a sprinkle of grated feta cheese. Enjoy this warm and comforting meal! To make Beef Giouvetsi shine, start with quality beef. A good cut gives you rich flavor. Fresh spices also matter. They bring out the best in your dish. Simmering is key. It allows the beef to tenderize and absorb flavors. Let it cook slowly. This way, your meal becomes both hearty and comforting. Be careful not to overcook the orzo. This pasta cooks fast and can get mushy. Stir it regularly. This helps prevent sticking to the pot. You want your dish to have a nice texture. A few gentle stirs while cooking will keep everything mixed well and delicious. Garnish your Beef Giouvetsi for added flair. Fresh parsley adds color and taste. You can also sprinkle grated feta on top. It brings a creamy touch to each bite. Pair this dish with a simple salad or crusty bread. These sides complement the rich flavors perfectly. Enjoy your meal and share it with friends! {{image_2}} You can switch the beef for other meats. Lamb works well, giving a rich flavor. Chicken is also a great choice. It cooks faster and keeps the dish light. If you want a vegetarian dish, use mushrooms or lentils. They add a nice texture and taste. For gluten-free needs, swap the orzo with gluten-free pasta. Quinoa or rice can be great too. They blend well with the dish and keep it hearty. Check labels to ensure they are gluten-free. You can make this dish even better with added veggies. Carrots, bell peppers, or zucchini fit in nicely. They add color and nutrients. If you like spice, add red pepper flakes or hot sauce. Adjust the spice to your taste to make it perfect for you. To keep Beef Giouvetsi fresh, cool it quickly. Let it sit at room temp for no more than two hours. Once cooled, transfer it to a container. Use an airtight container to prevent drying out. If you have leftovers, store them in the fridge. They will stay good for three to four days. Freezing is a great option if you want to save Beef Giouvetsi. First, let it cool completely. Then, place it in a freezer-safe container. Be sure to leave some space as it expands. You can also use freezer bags, just remove as much air as possible. Beef Giouvetsi can last up to three months in the freezer. When you're ready to eat, thaw it overnight in the fridge. For reheating, the stove is the best method. Heat it gently over low heat. Add a splash of beef broth or water to keep it moist. Stir often to ensure even heating. If you want the orzo to stay al dente, avoid boiling it again. You can also use the microwave. If using a microwave, heat it in short bursts. Stir in between to check the heat. This will help maintain the flavor and texture. Beef Giouvetsi is a Greek dish. It features beef stew cooked with orzo pasta. The dish has roots in Greece, where families make it for gatherings. The warm spices and savory broth create a cozy meal. It is perfect for chilly days or when you want comfort food. The mix of beef, tomatoes, and spices makes it rich in flavor. Yes, you can use a slow cooker for Beef Giouvetsi. Here’s how: - Sauté the onion and garlic in a pan. - Brown the beef cubes in the same pan. - Transfer these to the slow cooker. - Add the spices, tomatoes, broth, and bay leaf. - Cook on low for 6 to 8 hours. - About 30 minutes before serving, add the orzo and cook until tender. Using a slow cooker makes the beef very tender and full of flavor. To add spice to Beef Giouvetsi, try these tips: - Add crushed red pepper flakes for heat. - Use spicy sausage instead of beef for a different flavor. - Stir in chopped jalapeños or other hot peppers. - Mix in a dash of cayenne pepper for extra warmth. - Once cooked, add a splash of hot sauce for more kick. These changes boost the flavor and add depth to your dish. Enjoy experimenting with different spices! In this blog post, we explored how to make Beef Giouvetsi, from the ingredients and cooking steps to flavor tips and variations. You learned about the key components, like beef, orzo, and spices, and how to achieve rich flavors. Remember, using quality beef and fresh spices is essential for a tasty dish. Try different meats or a vegetarian version to fit your taste. With these tips, you can enjoy this hearty meal anytime. Now, gather your ingredients and start cooking!

Beef Giouvetsi Flavorful Comfort Food Recipe

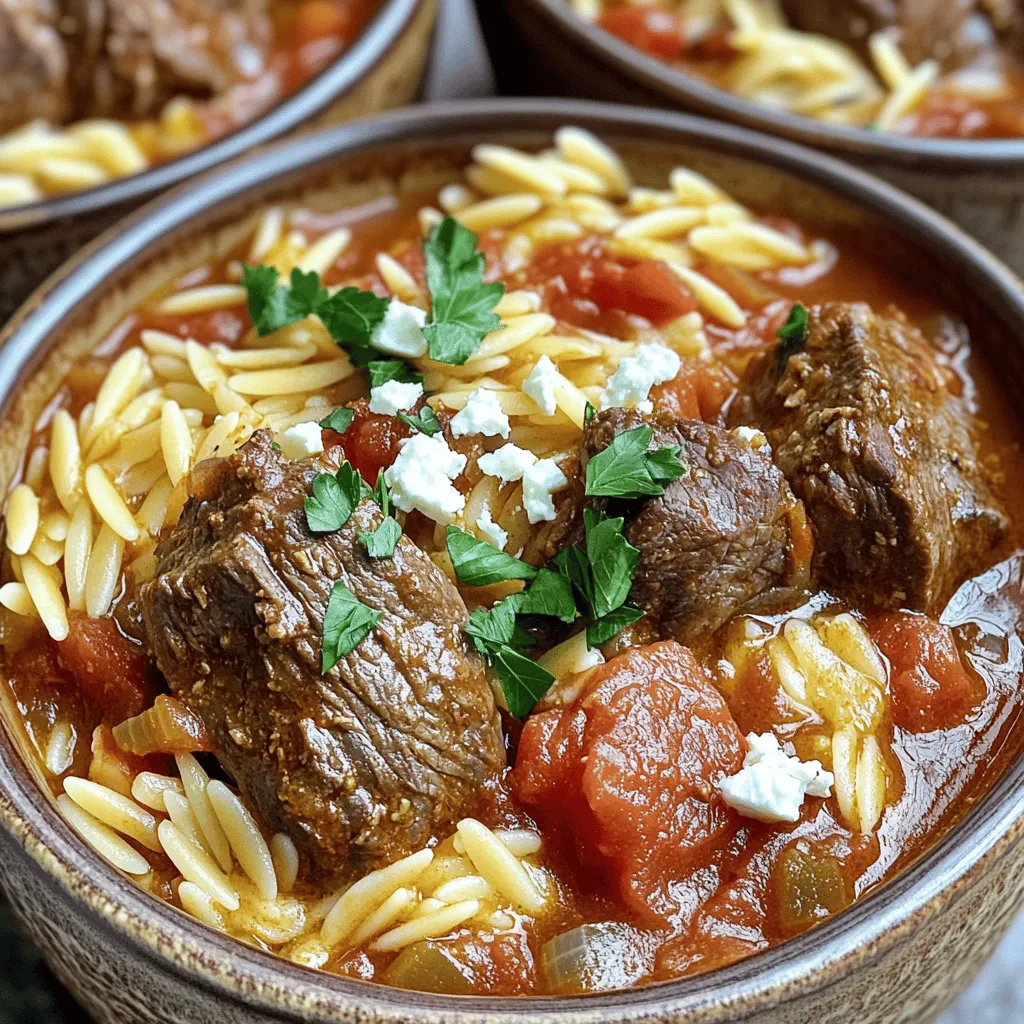
If you’re craving a warm, hearty dish that fills your kitchen with rich aromas, Beef Giouvetsi is your answer. This

In this Sheet Pan Breakfast Bake, you'll need a mix of fresh and tasty items. Let's break it down into three main groups. - Eggs and dairy products - 6 large eggs - 1 cup milk - Vegetables - 1 cup diced potatoes (you can use frozen hash browns) - 1 bell pepper, diced (red or green) - 1 small zucchini, diced - 1 cup baby spinach - Seasonings and oils - 1 teaspoon garlic powder - 1 teaspoon onion powder - Salt and pepper to taste - 1 tablespoon olive oil - 1 cup shredded cheese (cheddar or a mix) - Fresh herbs for garnish (like parsley or chives) Each ingredient plays a big role in flavor. The eggs and milk give it a rich texture. The veggies add color and nutrients. The seasonings make it all pop. It's a great way to start your day! First, set your oven to 400°F (200°C). This temperature helps everything cook evenly. You can line your baking sheet with parchment paper. This makes cleanup easy. If you don’t have parchment, lightly grease the sheet with olive oil. Choose a large baking sheet. A bigger sheet lets you spread the ingredients out well. In a big bowl, crack open 6 large eggs. Add 1 cup of milk. This mix gives great flavor and texture. Then, sprinkle in 1 teaspoon of garlic powder and 1 teaspoon of onion powder. Add salt and pepper to taste. Use a whisk to mix everything until it looks smooth. This helps the eggs cook evenly later. Now, let's prepare the potato layer. Spread 1 cup of diced potatoes on the baking sheet. If you're using frozen hash browns, that works too! Drizzle 1 tablespoon of olive oil over the potatoes. Toss them with salt and pepper. Bake these for about 15 minutes until they are golden. Once the potatoes are ready, take the sheet out of the oven. Scatter 1 diced bell pepper, 1 small diced zucchini, and 1 cup of baby spinach on top of the potatoes. Pour the egg mixture over all the vegetables and potatoes. Make sure it covers everything evenly. Now it's time for the cheese! Sprinkle 1 cup of shredded cheese on top. Cheddar works great, but you can use any cheese you love. Place the baking sheet back in the oven. Bake it for another 20-25 minutes. You know it’s done when the eggs are set and the top is golden. When it’s ready, take it out and let it cool for a few minutes. Cut it into squares, and add fresh herbs on top for a nice touch. Enjoy your meal! Baking time can change due to many factors. The type of oven, the size of your pan, and even the thickness of the egg mixture can all influence how long it takes to cook. - Oven Type: Convection ovens cook faster than regular ones. If you use a convection oven, check the bake a few minutes early. - Pan Size: A larger pan spreads the mixture thin. This can make it cook faster. - Thickness of Mixture: If you add too many veggies, it might take longer to cook through. You can tell when your dish is done by looking for a few signs. The eggs should be firm and not jiggly. The top should be lightly golden. If you insert a knife, it should come out clean. Serving your breakfast bake can be fun and easy. You can serve it right from the pan for a casual meal. This way, everyone can help themselves. You can also cut it into squares and place them on colorful plates. Pairing ideas can make your meal even better. Try serving it with fresh fruit or a simple green salad. A glass of fresh juice or coffee can add a nice touch too. There are many ways to make your breakfast bake even tastier. You can add extra seasonings like paprika or cayenne for a kick. Fresh herbs like parsley or chives can brighten the dish. You can also mix in different ingredients for new flavors. Consider adding cooked bacon or sausage for a heartier meal. Swap in different veggies like mushrooms or broccoli to keep things fresh. The options are endless! {{image_2}} You can easily change some ingredients to fit your needs. If you want a dairy-free option, use almond milk or oat milk instead of regular milk. For the cheese, try a dairy-free version. This way, you keep all the great flavor without the dairy. If you are looking for low-carb options, swap out the potatoes for riced cauliflower. This change makes the dish lighter while still being filling. You can also add more veggies like mushrooms or broccoli to enhance the flavor and nutrition. The type of cheese you choose can change the taste a lot. Cheddar gives a sharp flavor, while mozzarella adds creaminess. You can also try feta for a tangy bite or gouda for a smoky touch. Mixing cheeses can create a rich, complex flavor. Adding meats like cooked sausage or bacon can make this bake heartier. If you prefer a vegetarian option, consider adding more colorful veggies, like bell peppers or sweet corn. Each choice adds unique flavors and textures that keep the dish exciting. For gluten-free adjustments, ensure your ingredients are labeled gluten-free. Most fresh veggies and eggs are naturally gluten-free. Always check labels on packaged items like seasonings. If you are prepping meals for different diets, consider portioning the bake into squares. This makes it easy to grab and go. You can also mix in protein-rich foods like beans or lentils for a balanced meal. To keep your Sheet Pan Breakfast Bake fresh, store leftovers in the fridge. Use an airtight container for best results. This keeps the dish moist and tasty. If you want to freeze portions, let it cool completely first. Cut into squares, then wrap each piece tightly in plastic wrap. Place them in a freezer-safe bag or container. This way, you can enjoy breakfast on busy days. To reheat, the oven is your best friend. Preheat it to 350°F (175°C). Place the breakfast bake on a baking sheet. Heat for about 15-20 minutes until warm. If you're in a hurry, use the microwave. Heat a square on a microwave-safe plate for 1-2 minutes. Check if it's warm all the way through before serving. In the fridge, your breakfast bake lasts about 3-4 days. In the freezer, it can last up to 2 months. Always check for signs of spoilage. If you see mold or it smells off, toss it out. Fresh is best for great taste! Yes, you can prepare the breakfast bake in advance. To do this, follow these tips: - Prep the night before: Mix the egg base and chop your veggies. Store them in the fridge. - Layer and bake: In the morning, layer the potatoes and veggies. Pour the egg mix on top and add cheese. - Bake fresh: This way, you enjoy a hot meal without much morning hassle. For this breakfast bake, I suggest using: - Cheddar cheese: It melts well and gives great flavor. - Mozzarella: It adds a nice stretch and mild taste. - Feta cheese: For a tangy kick, try crumbled feta. Feel free to mix and match for more fun flavors! Yes, you can swap vegetables for variety. Here are some ideas: - Mushrooms: Add sliced mushrooms for extra earthiness. - Broccoli: Chopped broccoli gives a nice crunch and color. - Asparagus: This adds a fresh taste and looks great. Experiment with what you have on hand to make it your own! This blog post covered how to make a tasty breakfast bake. We explored the key ingredients, cooking steps, and helpful tips. You learned about tasty layerings and flavor tricks. Also, we discussed variations for different diets and how to store leftovers. By following these steps, you can create a delicious, filling dish for any meal. Experiment with ingredients and make it your own! Enjoy your cooking and happy baking!

Sheet Pan Breakfast Bake Easy and Delicious Recipe

Looking for an easy and tasty breakfast option? Try my Sheet Pan Breakfast Bake! This dish is simple to make

- Zucchini: 2 cups, sliced into half-moons - Mushrooms: 2 cups, sliced (any variety) - Chicken: 1 lb, cut into bite-sized pieces - Soy Sauce: 3 tablespoons - Sesame Oil: 1 tablespoon - Garlic: 2 cloves, minced - Ginger: 1 tablespoon, grated - Red Bell Pepper: 1, sliced - Cornstarch: 1 tablespoon - Chicken Broth: 1/2 cup - Green Onions: for garnish - Sesame Seeds: for garnish - Salt and Pepper: to taste Gather these fresh ingredients before you start. Zucchini adds a nice crunch and flavor. Mushrooms bring umami, while chicken gives protein. The marinade with soy sauce, garlic, and ginger makes everything taste amazing. Don’t forget the cornstarch; it helps to coat the chicken and gives a nice texture. The red bell pepper adds color and sweetness. Garnish with green onions and sesame seeds for a pretty finish. Enjoy the cooking process; it’s all about the joy of making something tasty! First, you need to mix the chicken pieces with 1 tablespoon of soy sauce and cornstarch. This helps to tenderize the chicken and adds flavor. After mixing, let the chicken marinate for about 15 minutes. This step is important because it allows the flavors to soak into the chicken. Now, heat a large non-stick skillet or wok over medium-high heat. Add 1 tablespoon of sesame oil to the hot skillet. Once the oil is hot, add the marinated chicken. Stir-fry it until the chicken is cooked through, which should take about 5 to 7 minutes. When done, remove the chicken from the skillet and set it aside. In the same skillet, add 2 cloves of minced garlic and 1 tablespoon of grated ginger. Sauté these for about 30 seconds until they smell great. Next, add the sliced mushrooms and 1 red bell pepper, and cook for 4 to 5 minutes until they soften. The garlic and ginger add depth to the dish. Now, add 2 cups of sliced zucchini to the skillet. Stir in the remaining 2 tablespoons of soy sauce. Cook for another 3 minutes. The zucchini should be tender but still a bit crisp. After that, return the cooked chicken to the skillet and pour in 1/2 cup of chicken broth. Stir well to combine everything. Finally, season the stir-fry with salt and pepper to taste. Once seasoned, remove the skillet from heat. Serve the stir-fry hot, garnished with sliced green onions and sesame seeds. This dish is colorful and tasty! To get the best texture for zucchini, cut it into half-moons. This shape helps it cook evenly. Aim for pieces about 1/4 inch thick. This way, the zucchini will stay crisp and not turn mushy. When cooking chicken, make sure to cut it into small, bite-sized pieces. This helps it cook faster and more evenly. Marinating the chicken in soy sauce and cornstarch adds flavor and keeps it tender. Stir-fry the chicken over medium-high heat for 5 to 7 minutes. This gives it a nice golden color. If you want a different taste, try using tamari or coconut aminos instead of soy sauce. Both options work well and offer unique flavors. To add some heat, sprinkle in chili flakes or a dash of sriracha. This adds a nice kick to the dish. Start with a small amount, and adjust to your taste. For side dishes, serve your stir-fry with rice or quinoa. These grains soak up the tasty sauce. You can also pair it with a simple green salad for a fresh touch. If you like meal prep, this stir-fry is great for it. You can make a big batch and store it in containers. It stays good for a few days in the fridge. Just reheat it when you are ready to eat. {{image_2}} You can switch the chicken for shrimp, tofu, or beef. Each option brings its own flavor. - Shrimp: Cook for 3-4 minutes until pink. - Tofu: Use firm tofu, sauté for 5-7 minutes until golden. - Beef: Thinly slice and stir-fry for 3-5 minutes until browned. This gives you tasty choices for your stir-fry. Feel free to try other veggies for fun and flavor. Broccoli and carrots work well. - Broccoli: Add for a nice crunch and color. - Carrots: Slice thinly to blend well with other veggies. Using seasonal veggies adds freshness and taste to your dish. You can easily change the sauce to fit your taste. Want it spicy? Add chili flakes. For a teriyaki flavor, mix in some sugar and rice vinegar. - Broths: Swap chicken broth for vegetable or beef broth for different flavors. - Thickeners: If you like a thicker sauce, use more cornstarch or a splash of arrowroot. These changes keep your stir-fry exciting and new! To keep your stir-fry fresh, store it in an airtight container. This method helps avoid moisture loss. I recommend letting it cool to room temperature before sealing it. Properly stored, the dish stays fresh in the fridge for up to three days. For freezing, divide the stir-fry into portions. Use freezer-safe containers or bags. Squeeze out as much air as possible to prevent freezer burn. The stir-fry can last in the freezer for up to three months. When reheating, thaw it in the fridge overnight. Warm it on the stove over low heat. This method helps keep the texture crisp and tasty. For meal prep, portion the stir-fry into single servings. This way, you can grab a meal when needed. Use glass or BPA-free plastic containers for storage. They are durable and microwave-safe. Label each container with the date to track freshness. This simple step makes your weeknight meals easy and quick! To make your stir-fry gluten-free, use gluten-free soy sauce. Brands like Tamari are great options. Just swap regular soy sauce with this gluten-free version in the recipe. This change keeps the dish flavorful without any gluten. Yes, you can use frozen vegetables in this stir-fry. Frozen veggies save time and are convenient. Just remember to thaw them first. If you skip thawing, the stir-fry may turn out watery. Add them to the pan in the last few minutes of cooking. This helps them heat through without becoming mushy. If your stir-fry is soggy, try these tips. First, avoid overcooking the vegetables. They should stay crisp. You can also use a higher heat when cooking. This helps to evaporate excess moisture. If it’s already soggy, try cooking it longer to dry it out. Just be careful not to burn it. To make this stir-fry vegan, replace the chicken with tofu. Firm tofu works best. Make sure to press it to remove extra moisture. Also, use vegetable broth instead of chicken broth. Finally, ensure your soy sauce is vegan-friendly. These simple swaps keep the dish tasty and plant-based. This blog post shared a simple, tasty stir-fry recipe. We covered the key ingredients like zucchini, mushrooms, and chicken. You learned how to marinate and cook these ingredients step by step. I also offered tips for enhancing flavor and suggested variations for proteins and vegetables. Remember, customizing your dish keeps it fun and fresh. This recipe is easy to store and perfect for meal prep. Try it out and enjoy a healthy, delicious meal.

Zucchini Mushroom Chicken Stir-Fry Quick and Easy Meal

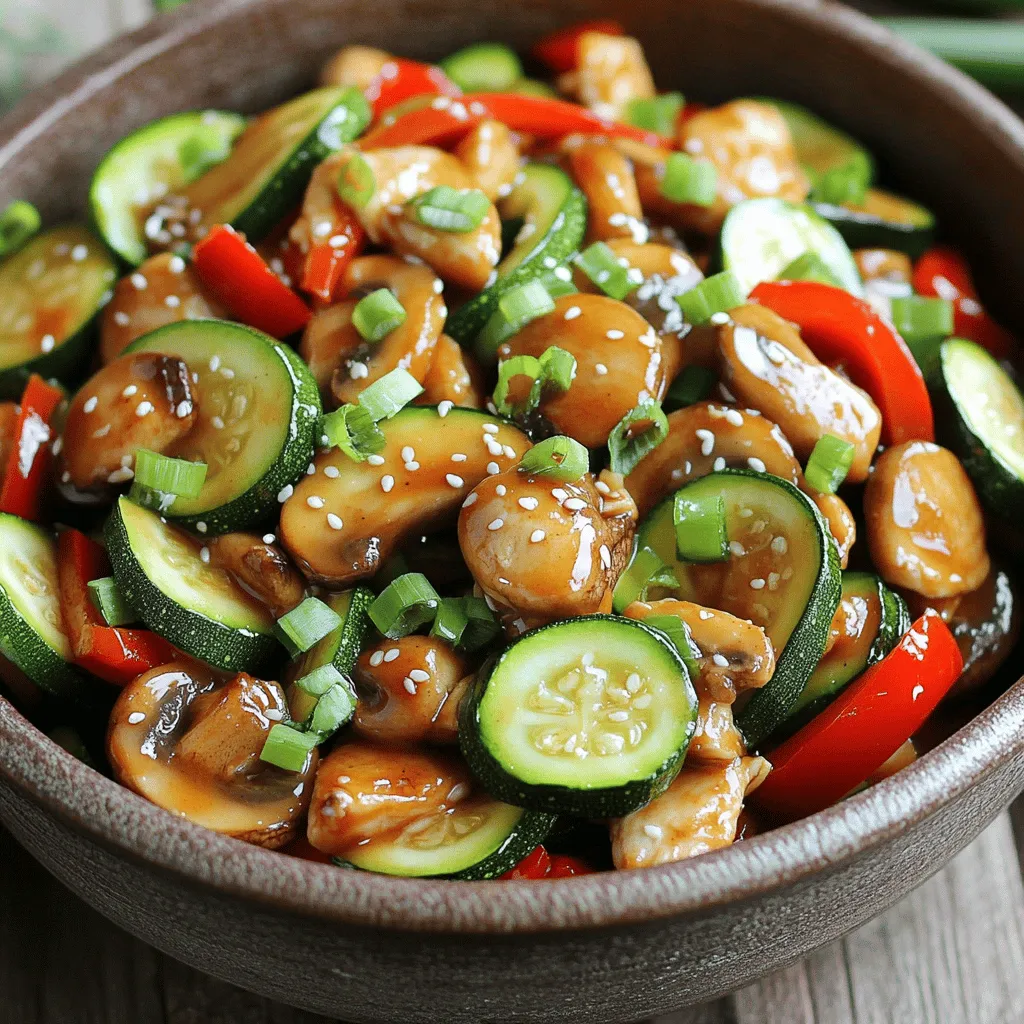
Looking for a quick and easy meal that packs flavor? My Zucchini Mushroom Chicken Stir-Fry is just what you need!

- 8 large pancakes - 1 pound breakfast sausage - 6 large eggs - 1 cup milk - 1/2 cup maple syrup - 1 teaspoon vanilla extract - 1 teaspoon baking powder - 1/2 teaspoon salt - 1 cup shredded cheddar cheese - Fresh berries - Whipped cream - Extra maple syrup Each ingredient plays a vital role in making this casserole a crowd-pleaser. The pancakes provide a fluffy base, while the breakfast sausage adds a savory kick. Eggs and milk create a rich custard that binds everything together. Maple syrup brings sweetness, enhancing the flavors. The vanilla extract adds a lovely aroma, and baking powder helps the dish rise perfectly. A sprinkle of salt balances the sweetness of the maple syrup. Finally, cheddar cheese adds a delightful creaminess that elevates each bite. For a special touch, consider adding fresh berries or a dollop of whipped cream on top. Extra maple syrup is always a winner, giving a sweet finish to your flavorful brunch delight. - Preheat the oven to 350°F (175°C). - In a skillet, cook 1 pound of crumbled breakfast sausage. Brown it over medium heat for about 7-10 minutes. Make sure it cooks fully. Drain any extra grease and set it aside. - Prepare 8 large pancakes using your favorite mix or a homemade recipe. - Once they are cooked, cut the pancakes into quarters. This helps them fit better in the casserole. - In a large bowl, whisk together 6 large eggs, 1 cup of milk, 1/2 cup of maple syrup, 1 teaspoon of vanilla extract, 1 teaspoon of baking powder, and 1/2 teaspoon of salt. Mix until everything is well combined. - In a greased 9x13 inch baking dish, layer half of the pancake quarters at the bottom. Then, sprinkle half of the cooked sausage over the pancakes. Next, add half of 1 cup of shredded cheddar cheese. Repeat this with the remaining pancake quarters, sausage, and cheese to create layers. - Pour the egg mixture evenly over the layered pancakes and sausage. Make sure everything is well coated. - Place the casserole in the preheated oven. Bake for about 30-35 minutes. It is done when the egg is set and the top is golden. To get a fluffy pancake sausage casserole, even cooking is key. Bake the casserole at 350°F (175°C) for 30-35 minutes. This will help the eggs set nicely, giving you a golden top. Here are some quick tips for a perfect texture: - Layering: Start with half the pancake quarters at the bottom. This helps soak up the egg mixture. - Sausage Spread: Distribute the crumbled sausage evenly. This ensures every bite has flavor. - Cheese Layer: Add cheese between layers. It melts nicely and keeps the casserole moist. When it comes to serving, presentation matters. Cut the casserole into squares and place them on a nice plate. Drizzle with warm maple syrup for a sweet touch. Add fresh berries or a dollop of whipped cream for color and taste. These pair well with: - Fresh fruit salad - A side of crispy bacon - Hot coffee or tea You can prep this dish ahead of time. Mix the egg mixture and layer the casserole in the baking dish. Cover it with plastic wrap and place it in the fridge overnight. This saves time in the morning. If you need to store an uncooked casserole, wrap it tightly and freeze it. When you’re ready, just thaw it overnight in the fridge before baking. This way, your casserole is fresh and ready to enjoy! {{image_2}} You can easily change the sausage in this dish. Try turkey sausage or chicken sausage for a leaner option. If you want to keep it plant-based, use a veggie sausage or even crumbled tofu. Both work well and still pack flavor. You can also switch up your cheese. Cheddar is great, but feel free to try mozzarella or pepper jack. Different pancake flavors can add a twist too. Banana pancakes or blueberry pancakes can give your casserole a fun twist. For gluten-free options, choose a gluten-free pancake mix. There are plenty of good brands that taste just as nice. You can also use almond flour or oat flour to make your pancakes from scratch. If you're looking for vegetarian adaptations, skip the sausage. Add sautéed mushrooms or spinach for extra flavor and nutrition. These swaps keep the dish filling while meeting dietary needs. To spice things up, add some black pepper or paprika to the egg mixture. A dash of garlic powder can also add depth to the dish. If you love heat, try adding diced jalapeños or hot sauce. When serving, think about your toppings. Fresh berries or a sprinkle of nuts can boost flavor and texture. A drizzle of honey or extra maple syrup can make it even more special. After you enjoy your pancake sausage casserole, let it cool down. This helps keep it fresh. Place the casserole in an airtight container. It can last in the fridge for up to three days. Make sure to cover it well. This keeps out moisture and odors. To freeze pancake sausage casserole, cut it into squares. Wrap each piece in plastic wrap tightly. Then, place the wrapped squares in a freezer bag. Squeeze out as much air as you can. It will stay good in the freezer for about two months. When you're ready to eat, take it out and thaw it in the fridge overnight. For the best taste, reheat your casserole in the oven. Preheat it to 350°F (175°C). Place the casserole in a dish and cover it with foil. This helps keep the moisture in. Heat for about 20 minutes or until warm. To avoid sogginess, do not use a microwave. Enjoy your tasty leftovers just like when you first baked it! You can use several tasty options in place of sausage. Here are some great choices: - Turkey sausage: A leaner option that still packs flavor. - Veggie sausage: Perfect for vegetarians or those seeking a plant-based meal. - Bacon: Adds a smoky taste but is higher in fat. - Chopped vegetables: Use peppers, onions, or mushrooms for a fresh twist. Each of these alternatives gives a new flavor and feel to your casserole. Choose based on your taste and diet. Making this casserole ahead is easy. Follow these steps: 1. Prepare the casserole: Mix all the ingredients as directed. 2. Layer the dish: Place your pancake layers, sausage, and cheese in the baking dish. 3. Cover it: Use plastic wrap to cover the dish tightly. 4. Refrigerate: Store it in the fridge for up to 24 hours. When you are ready to bake, simply remove the cover and bake at 350°F for 30-35 minutes. You’ll have a warm, delicious meal ready to go. Yes, you can use many types of cheese in this casserole. Here are some good options: - Monterey Jack: This cheese melts nicely and adds a mild flavor. - Swiss cheese: Great for a nutty taste and creamy texture. - Feta cheese: Crumbles easily and gives a tangy kick. - Cream cheese: Makes the casserole extra creamy and rich. Feel free to mix and match to find your favorite flavor profile! This blog post covered how to make a delicious pancake sausage casserole. We discussed the key ingredients, like pancakes, sausage, and eggs, along with tips for cooking and serving. I shared ideas for making ahead and storing leftovers. You can also try different flavors and dietary swaps. This recipe is simple and perfect for brunch. Experiment with your favorite toppings and enjoy! This casserole can be a hit at any gathering. Get ready to impress with this tasty dish!

Pancake Sausage Casserole Flavorful Brunch Delight

Looking for a fun and tasty brunch idea? Let me introduce you to Pancake Sausage Casserole! This dish combines fluffy

To make super moist chocolate chip banana bread, you need a few key ingredients: - 3 ripe bananas, mashed - 1/3 cup unsalted butter, melted - 1/2 cup brown sugar, packed - 1/4 cup granulated sugar - 1 large egg, beaten - 1 teaspoon vanilla extract - 1 teaspoon baking soda - Pinch of salt - 1 cup all-purpose flour - 1/2 cup chocolate chips These ingredients create a rich and moist loaf. The ripe bananas add natural sweetness and moisture. The butter gives it a nice texture. You can use some optional ingredients to boost flavor: - 1/2 teaspoon cinnamon - Extra chocolate chips for added indulgence Cinnamon adds warmth and spice. Extra chocolate chips make it even more decadent. Choosing the right bananas is key. Look for bananas that are: - Yellow with brown spots - Soft to the touch These bananas are at their peak ripeness. They will mash easily and give your bread great flavor. Avoid green bananas as they are too firm and not sweet enough. First, gather your ingredients. You will need ripe bananas, melted butter, sugars, egg, vanilla, baking soda, salt, flour, and chocolate chips. Start by preheating your oven to 350°F (175°C). Grease a 9x5-inch loaf pan to prevent sticking. In a mixing bowl, mash the ripe bananas with a fork until they are smooth. This makes the bread sweet and moist. Next, stir in the melted butter until everything combines well. Add the brown sugar and granulated sugar, mixing thoroughly. This step adds sweetness and flavor. Now, incorporate the beaten egg and vanilla extract. Mix until everything is well blended. Then, sprinkle the baking soda and salt over the mixture. Stir to combine these dry ingredients evenly. Gradually add the all-purpose flour. Stir just until it is mixed. Do not over mix, as this can make the bread tough. Finally, fold in the chocolate chips gently. If you want, add cinnamon for extra flavor. Make sure the chips are evenly spread throughout the batter. Now it is time to pour the batter into your prepared loaf pan. Smooth the top with a spatula to make it nice and even. Place the pan in the oven and bake for 60-70 minutes. A toothpick should come out clean when inserted in the center. If the top begins to brown too fast, cover it with aluminum foil during the last 20 minutes. This helps the bread cook evenly without burning the top. Be patient! The smell will fill your kitchen. Once the bread is baked, remove it from the oven. Let it cool in the pan for 10 minutes. This step helps it firm up. After that, transfer it to a wire rack to cool completely. For serving, slice the banana bread warm. You can sprinkle extra chocolate chips on top or add a dollop of whipped cream on the side. Dusting with powdered sugar adds a fun touch, too. Enjoy your delicious treat! To get a super moist banana bread, use ripe bananas. The darker the peels, the better. They should be very soft and full of flavor. Mash them well; lumps will make your bread dense. Next, don’t skip the butter. Melted butter adds richness. Mixing the butter with the sugars helps create a nice texture. Also, be gentle when adding flour. Over-mixing can lead to a dry loaf. Stir just until the flour disappears. A few common mistakes can ruin your banana bread. First, make sure your oven is preheated. This ensures even baking. Use a toothpick to check for doneness. If it comes out clean, your bread is ready. If the top browns too fast, cover it loosely with foil. This helps bake the inside without burning the top. Lastly, let it cool in the pan. This keeps the bread moist as it cools. To boost the chocolate flavor, use good quality chocolate chips. The more chocolate, the better! You can add a bit of cocoa powder to the batter for extra depth. A half teaspoon of cinnamon adds warmth and pairs well with chocolate. For a fun twist, try chocolate chunks instead of chips. This gives you larger bites of chocolate. {{image_2}} You can swap out the butter for nut butters. Almond or peanut butter adds a nice twist. Use the same amount as the butter. This change makes your banana bread richer. You can also add some chopped nuts for extra crunch. Walnuts or pecans work great in this recipe. To make a lighter banana bread, try using Greek yogurt instead of butter. Use the same amount of yogurt. This swap cuts down on fat while keeping it moist. You can also replace half of the sugar with unsweetened applesauce. This will add sweetness without all the calories. Adding fruits can make your banana bread even better. Blueberries or diced apples add a fresh taste. Toss in up to a cup, depending on your preference. Chopped nuts, like walnuts or pecans, can also be mixed in. They add a nice crunch and extra flavor. Just remember to fold them in gently to keep the texture nice. To keep your banana bread fresh, follow these simple tips. First, let your bread cool completely. This helps prevent moisture buildup. After it cools, wrap it tightly in plastic wrap. You can also use aluminum foil. Store the wrapped bread at room temperature for up to three days. If you want it to last longer, consider the fridge. Just know that chilling may change the texture a bit. Freezing banana bread is a great way to save it for later. Slice the bread before freezing. This makes it easy to grab a piece whenever you want. Wrap each slice in plastic wrap. Then, place the wrapped slices in a freezer bag. Be sure to remove any air before sealing. You can freeze banana bread for up to three months. When you want to enjoy it, simply thaw it in the fridge overnight. Reheating banana bread is quick and easy. You can use the oven or the microwave. For the oven, preheat it to 350°F (175°C). Place the bread on a baking sheet and heat for about 10 minutes. This warms it evenly and brings back its fresh taste. If you choose the microwave, microwave a slice for about 15 to 20 seconds. Keep an eye on it to avoid overheating. Enjoy your warm, moist banana bread! You can tell your banana bread is done by checking a toothpick. Stick it in the center of the bread. If it comes out clean or with a few crumbs, it is ready. If the toothpick is wet with batter, it needs more time. Bake it for 5 to 10 more minutes if needed. The top should look golden-brown and feel firm. Remember, every oven is different, so keep an eye on it! Yes, you can use frozen bananas! In fact, frozen bananas work well in this recipe. Just thaw them first. Let them sit at room temperature or microwave them for a few seconds. Once thawed, mash them as usual. They tend to be sweeter and more flavorful, which makes your banana bread even better! If you need an egg substitute, you have options! You can use 1/4 cup of unsweetened applesauce instead of one egg. This keeps the bread moist. Another option is to use a flax egg. To make one, mix 1 tablespoon of ground flaxseed with 2.5 tablespoons of water. Let it sit for a few minutes until it thickens. Both options work great in this recipe! This blog post covered how to make super moist chocolate chip banana bread. We looked at essential and optional ingredients and tips on selecting ripe bananas. I shared a step-by-step guide for mixing, baking, and cooling. You learned tricks for perfect texture and how to avoid mistakes. We explored delicious variations and storage tips. Now you're ready to bake an amazing loaf that everyone will love. Enjoy your time in the kitchen!

Super Moist Chocolate Chip Banana Bread Recipe Guide

Welcome to my guide on making Super Moist Chocolate Chip Banana Bread! If you’re craving a sweet treat that’s easy

- 1 pound boneless, skinless chicken thighs - 1/2 cup roasted cashews - 1 cup broccoli florets - 1 red bell pepper - 1 cup snap peas - 3 green onions - 2 tablespoons soy sauce - 1 tablespoon oyster sauce (optional) - 1 tablespoon cornstarch - 2 tablespoons vegetable oil - 1 tablespoon ginger - 2 cloves garlic - 1 tablespoon sesame oil - Salt and pepper to taste - Substitutions for chicken: If you want a lighter option, use chicken breast. For a different flavor, try shrimp or tofu. Both will work well in this dish. - Fresh vs. frozen vegetables: Fresh vegetables give the best taste and texture. Frozen can work in a pinch but may lose some crunch. - Importance of roasted cashews: Roasted cashews add a nice crunch and flavor. Always use roasted, not raw, for the best taste. They also bring a nutty richness that enhances the dish. To start, you will marinate the chicken. This step takes about 20 minutes. In a medium bowl, mix soy sauce, oyster sauce, minced garlic, minced ginger, and cornstarch. Add a pinch of salt and pepper to taste. The marinade makes the chicken tender and full of flavor. When you are ready to cook, heat 2 tablespoons of vegetable oil in a large skillet or wok. Make sure the oil is hot before adding the chicken. Spread the chicken in a single layer in the pan. Let it sear without moving it for 3-4 minutes. This helps it brown nicely. Then, stir-fry until fully cooked. This will take another 3-4 minutes. Cook the chicken in batches if your pan is small. This way, it will brown better. Next, it’s time for the veggies. In the same skillet, add the broccoli, red bell pepper, and snap peas. Stir-fry for about 3-4 minutes. You want them to be crisp-tender, not mushy. Add the veggies in this order for the best results. Start with the broccoli, then add the bell pepper. Finally, toss in the snap peas. Now, it’s time to combine everything. Add the cooked chicken back into the skillet. Toss in the roasted cashews and sesame oil. Mix everything well for about 2 minutes. Make sure all the ingredients are evenly coated. Taste and adjust seasoning with more soy sauce if needed. Serve hot over steamed rice or noodles for a delicious meal! To create a true cashew chicken, use quality sauces. I recommend Kikkoman for soy sauce. For oyster sauce, Lee Kum Kee is a great choice. These brands offer rich flavors that enhance your dish. For cooking techniques, always marinate your chicken. This step adds depth and flavor. Use high heat for searing the chicken. This locks in moisture and creates a nice crust. Stir-fry the veggies quickly. This keeps them crisp and vibrant. Serve your cashew chicken on a bed of steamed rice or noodles. Both options soak up the sauce well. For a colorful plate, add bright veggies. You can garnish with extra cashews and green onions on top. This not only adds flair but also enhances the flavor. For a fun twist, serve it in a large bowl. This encourages sharing and makes the dish look inviting. One common mistake is overcooking the vegetables. They should be crisp-tender, not mushy. Keep an eye on them during stir-frying. Another pitfall is under-seasoning your chicken. Make sure to add enough salt and pepper. A well-seasoned chicken base is key to a tasty dish. Always taste as you go to adjust flavors. {{image_2}} If you want to switch things up, try using shrimp, tofu, or beef. For shrimp, cook it for about 2-3 minutes until it turns pink. Tofu needs longer, about 5-7 minutes, to get golden. If you choose beef, cut it thin and cook for about 4-5 minutes until no longer pink. Each protein gives a unique taste, so feel free to experiment. You can make this dish vegan or vegetarian with simple swaps. Use firm tofu instead of chicken. For the oyster sauce, use a mushroom sauce or soy sauce. This keeps the dish flavorful. You may want to add a bit of sugar or a dash of vinegar for extra depth. Don’t forget to taste and adjust as needed! Cashew chicken varies by region. Some places use different sauces or spices. For instance, in Sichuan, they might add chili paste for heat. In Thailand, you could use fish sauce and add basil. Explore your local markets for unique ingredients. This way, you create a cashew chicken that reflects your own taste and culture. Store your leftover cashew chicken in the fridge. Use an airtight container. This keeps the chicken fresh and tasty. Make sure to cool it to room temperature first. You can store it for up to three days. To reheat, use a skillet over low heat. This helps keep the texture of the chicken. Add a splash of water or broth to avoid drying it out. Stir often until it’s hot. You can also use the microwave, but cover the dish to keep moisture. You can freeze cashew chicken for later meals. Use freezer-safe containers for best results. It will last for about two months. To thaw, place it in the fridge overnight. Reheat in a skillet or microwave until hot. This keeps the flavors bright and fresh. Cashew chicken is a tasty dish that comes from Chinese cuisine. It started in the 20th century. A chef named Paul Wong created it in the U.S. He mixed Chinese flavors with American tastes. The dish features chicken, cashews, and colorful veggies. It’s a favorite for its crunchy nuts and savory sauce. Yes, you can use other nuts! Almonds and peanuts work well. Almonds have a mild taste and are crunchy. Peanuts are saltier and add a different flavor. Each nut changes the dish's texture and taste. Cashews are creamy and sweet, making them a top choice. To make cashew chicken gluten-free, swap soy sauce with tamari. Tamari is a wheat-free option. Check the oyster sauce too, as some brands contain gluten. Always read labels. You can also use coconut aminos for a soy-free choice. These swaps keep the dish delicious! Cashew chicken is usually mild. You control the spice! If you want it spicier, add red pepper flakes or chili sauce. Start with a little and taste as you go. You can also add fresh ginger for a warm kick. Make it as spicy as you like! Yes, you can prep cashew chicken ahead! Marinate the chicken and cut veggies a day before. Store them in the fridge. Cook it fresh when you’re ready to eat, or try freezing it. Just remember to thaw it overnight before cooking. Enjoy a quick meal! This blog post covered all you need to know about making Cashew Chicken. We discussed ingredients, how to cook them, and tips for great flavor. Remember to marinate your chicken to boost taste. Avoid overcooking your veggies for the best texture. You can even change up the recipe with different proteins or veggies. Store leftovers well to keep them fresh. With these guidelines, you can enjoy a tasty meal that’s both satisfying and fun to make. Happy cooking!

Authentic Cashew Chicken Flavorful and Easy Recipe

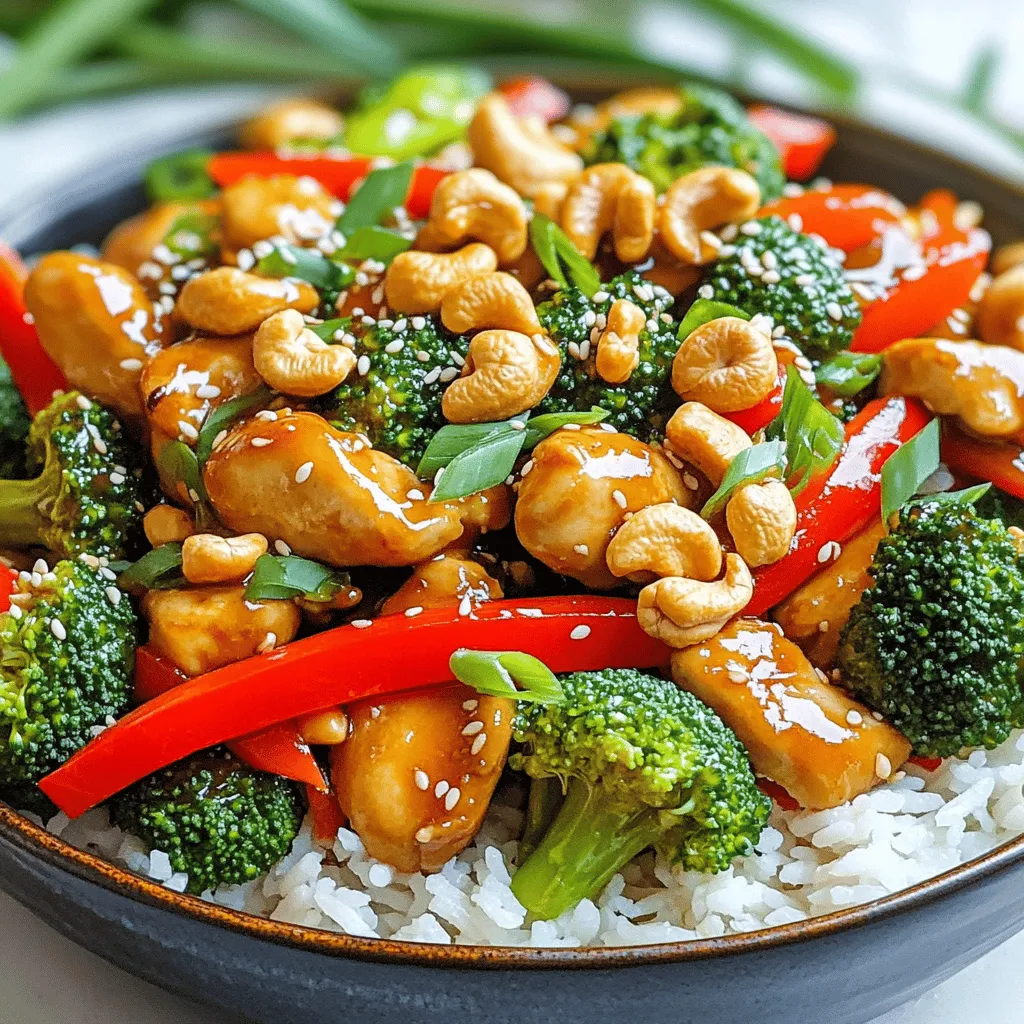
If you crave a quick, tasty meal, you’ll love my Authentic Cashew Chicken recipe! This dish combines tender chicken, crunchy

To make tasty sausage pancake muffins, you'll need just a few simple items. Here is the complete list of ingredients: - 1 cup all-purpose flour - 1 tablespoon baking powder - 1 tablespoon sugar - 1/2 teaspoon salt - 1 cup milk - 1 large egg - 2 tablespoons melted butter - 1 cup cooked sausage, crumbled - 1/2 cup shredded cheddar cheese - 1/4 cup chopped green onions (optional) - Maple syrup for drizzling Each ingredient plays an important role in creating a delicious muffin. The all-purpose flour gives structure, while the baking powder helps it rise. Sugar adds a touch of sweetness. Salt balances the flavors. Milk makes the batter creamy, and the egg binds everything together. Melted butter adds richness and moisture. Using cooked sausage brings in great flavor and protein. Shredded cheddar cheese melts perfectly, giving a savory touch. If you want a fresh crunch, use chopped green onions. Finally, maple syrup on top adds a sweet finish. Gather these ingredients, and you're ready to start! First, preheat your oven to 375°F (190°C). This step is key for even baking. Next, grease a standard muffin tin or line it with muffin liners. Both options work well, so pick your favorite. In a large mixing bowl, combine the following dry ingredients: - 1 cup all-purpose flour - 1 tablespoon baking powder - 1 tablespoon sugar - 1/2 teaspoon salt Use a whisk to stir these ingredients together until they mix well. This helps create a fluffy muffin. In a separate bowl, whisk the wet ingredients together: - 1 cup milk - 1 large egg - 2 tablespoons melted butter Whisk until the mixture is smooth and well combined. This step adds moisture and richness to the muffins. Now, pour the wet ingredients into the dry mix. Stir gently until just combined. Do not overmix, as this can make the muffins tough. Next, fold in: - 1 cup cooked sausage, crumbled - 1/2 cup shredded cheddar cheese - 1/4 cup chopped green onions (optional) The sausage and cheese add flavor and texture, making each bite delightful. Spoon the batter into the prepared muffin tin. Fill each cup about 2/3 full to allow room to rise. Bake for 15-18 minutes. Check if they are done by inserting a toothpick in the center. It should come out clean. Once baked, allow the muffins to cool in the tin for about 5 minutes. Then, transfer them to a wire rack. Serve warm with a drizzle of maple syrup. This adds a sweet touch that pairs perfectly with the savory flavors. Enjoy your delicious creation! To make perfect sausage pancake muffins, follow a few simple steps. First, do not overmix your batter. Mix just until the dry and wet ingredients combine. This keeps the muffins fluffy. Next, fill each muffin cup about two-thirds full. This allows space for the muffins to rise. Lastly, keep an eye on the baking time. Check for doneness with a toothpick. It should come out clean when the muffins are ready. Choosing the right sausage can change the flavor of your muffins. I recommend using breakfast sausage for its classic taste. You can also try spicy sausage for a kick. For a healthier option, turkey or chicken sausage works well too. If you prefer plant-based options, look for vegan sausage. Make sure to cook and crumble the sausage before adding it to your batter. To take your muffins to the next level, consider adding fun ingredients. Shredded cheese adds creaminess. I love using cheddar, but feel free to experiment with mozzarella or pepper jack. Chopped green onions add a fresh crunch. You can also mix in diced bell peppers or spinach for extra veggies. For a sweet twist, drizzle maple syrup over the top before serving. The combination of flavors makes each bite delightful. {{image_2}} You can make sausage pancake muffins without meat. Use cooked veggies instead of sausage. Try mushrooms, bell peppers, or spinach. They add flavor and color. You can also add a plant-based sausage for a meaty taste. This option keeps the muffins filling and tasty. Cheddar cheese is great, but many options exist. You can use mozzarella for a milder flavor. Feta cheese adds a salty kick. If you like strong cheese, try blue cheese or gouda. Each cheese brings a unique taste to the muffins. Choose what you like best! Feel free to play with spices and herbs. Add garlic powder or smoked paprika for depth. Fresh herbs like basil or parsley can brighten the taste. Want a bit of sweetness? Stir in some diced apples or bananas. These variations make every muffin a new delight! To keep your sausage pancake muffins fresh, store them in an airtight container. You can leave them at room temperature for up to two days. If you want to keep them longer, move them to the fridge. This can extend their life for about one week. Make sure they cool completely before you seal them up. This helps avoid soggy muffins. Reheating these muffins is simple. You can use a microwave or an oven. To microwave, place a muffin on a plate and heat for about 15-20 seconds. Check if it’s warm enough. If using an oven, preheat it to 350°F (175°C). Wrap the muffins in foil to keep them moist. Heat for about 10-15 minutes. Enjoy them warm with a drizzle of maple syrup! If you want to freeze your muffins, start by letting them cool completely. Wrap each muffin tightly in plastic wrap. Then, place them in a freezer bag. They can last up to three months in the freezer. When you’re ready to eat, thaw them in the fridge overnight, and then reheat. This way, you can enjoy a tasty snack anytime! Yes, you can use whole wheat flour. It adds fiber and a nutty flavor. The muffins may be denser, so keep this in mind. The muffins are done when they are golden brown. Insert a toothpick into the center. If it comes out clean, they are ready. Yes, you can make these muffins ahead of time. They store well in the fridge for up to three days. Just reheat them before serving for the best taste. If you need an egg substitute, use 1/4 cup unsweetened applesauce. You can also use mashed banana or a flax egg for a vegan option. Sausage pancake muffins can be a balanced snack. They have protein from sausage and cheese. You can make them healthier by using lean sausage or adding veggies. We covered the key steps to make sausage pancake muffins. You learned about the ingredients and how to mix and bake them. Don't forget to try new add-ins and variations for fun flavors. Store muffins well to enjoy them later. With these tips, you can create tasty treats for any occasion. Enjoy your baking adventure and share your muffins with friends and family!

Sausage Pancake Muffins Fast and Flavorful Snack

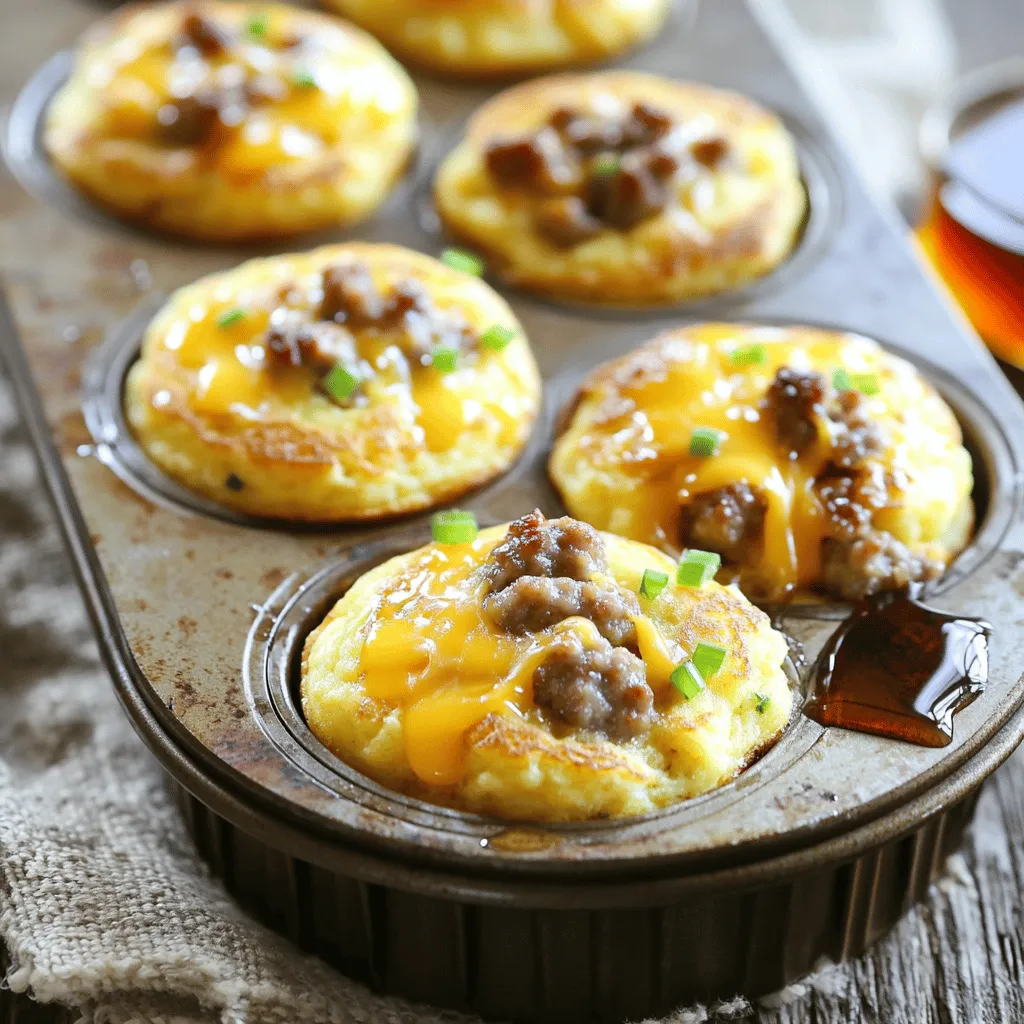
Craving a quick and tasty snack? Look no further! These Sausage Pancake Muffins blend savory sausage and fluffy pancakes into

Older posts
Newer posts
← Previous Page1 … Page31 Page32 Page33 … Page84 Next →

dsad

© 2026 Foodish Talk • Built with GeneratePress

Our Policies

  • Copyright Policy
  • Cookie Policy
  • GDPR Policy
  • Privacy Policy
  • Disclaimer
  • Terms Of Use

More Information

  • Home
  • About
  • Contact
  • Appetizers
  • Dessert
  • Dinner
  • Drinks
©2026, Foodish Talk About Back To Top