Skip to content
DisclaimerTerms Of UseGDPR PolicyCookie Policy

Foodish Talk

  • Home
  • Drinks
  • Appetizers
  • Dinner
  • Dessert
  • About
  • Contact
  • Privacy Policy
DisclaimerTerms Of UseGDPR PolicyCookie Policy

NO-ING-IMG

- 1 whole turkey (12-14 lbs) - 1 cup unsalted butter, softened - 4 cloves garlic, minced - 1 tablespoon fresh rosemary, chopped - 1 tablespoon fresh thyme, chopped - 1 tablespoon fresh sage, chopped - 2 tablespoons lemon juice - Salt and pepper to taste - 2 cups low-sodium chicken broth - 1 large onion, quartered - 2 carrots, chopped - 2 celery stalks, chopped - Fresh herbs for garnish (rosemary, thyme, sage) When you make herb butter roast turkey, start with a fresh, whole turkey. A 12-14 pound bird works best for this recipe. You need one cup of unsalted butter. Make sure it is softened to mix easily. Next, we add flavor with garlic, rosemary, thyme, and sage. Use four cloves of minced garlic and one tablespoon each of chopped fresh herbs. Then, squeeze in two tablespoons of lemon juice to brighten the taste. Don't forget salt and pepper for seasoning. For stuffing, gather aromatics. You need one large quartered onion, two chopped carrots, and two chopped celery stalks. These veggies add great flavor to the turkey. Lastly, have two cups of low-sodium chicken broth ready. This will keep your turkey moist as it roasts. Fresh herbs for garnish give your dish a lovely finish. These ingredients make a flavorful and juicy delight! {{ingredient_image_1}} - First, preheat your oven to 325°F (165°C). This step warms up the oven for even cooking. - Next, make the herb butter. In a bowl, mix 1 cup of softened butter with 4 minced garlic cloves, 1 tablespoon each of chopped rosemary, thyme, and sage, 2 tablespoons of lemon juice, salt, and pepper. Blend until smooth. - Now, pat the turkey dry using paper towels inside and out. This helps the skin crisp up. Gently separate the skin from the turkey breast. Use your fingers to create pockets for the herb butter. - Fill the pockets with half of the herb butter. Spread it evenly under the skin to add flavor to the meat. - Next, use the rest of the herb butter to coat the outside of the turkey. This creates a tasty crust when cooking. - Season the inside of the turkey with salt and pepper. Stuff it with quartered onion, chopped carrots, and celery for added flavor. - Place the turkey breast side up on a roasting rack in a large pan. Pour 2 cups of low-sodium chicken broth into the pan. This keeps the turkey moist while it cooks. - Roast the turkey for about 13-15 minutes per pound. The internal temperature should reach 165°F (75°C) in the thickest part of the breast and thigh. Baste the turkey every 30 minutes with the pan drippings for extra flavor. Follow these steps, and you will have a flavorful and juicy turkey ready to serve! How to ensure even roasting To get an evenly roasted turkey, start with a good setup. Place the turkey breast side up on a roasting rack. This allows hot air to circulate all around. Make sure your oven is fully preheated before putting the turkey inside. This helps it cook evenly. Also, avoid opening the oven door too often. Each time you do, the oven loses heat, which can lead to uneven cooking. Importance of basting Basting is key to a juicy turkey. Every 30 minutes, spoon the pan drippings over the turkey. This keeps the meat moist and adds flavor. The herb butter you spread under the skin will melt and mix with those drippings. This creates a rich, tasty glaze. Basting also helps to brown the skin to a lovely golden color. Garnishing suggestions For a beautiful finish, use fresh herbs to garnish. After carving the turkey, sprinkle some rosemary, thyme, and sage on top. This adds color and a fresh smell. You can also add slices of lemon around the platter. This makes the dish look bright and inviting. Serving suggestions Serve the turkey on a large platter for a striking display. Arrange your favorite sides around it. Think mashed potatoes, green beans, or cranberry sauce. This creates a festive look. Make sure to have a sharp knife ready for carving. Your guests will love how pretty the table looks and enjoy the meal. Pro Tips Resting Time: Allow the turkey to rest for 20-30 minutes after roasting. This helps the juices redistribute, ensuring a moist and flavorful bird. Flavor Depth: For an extra depth of flavor, consider adding citrus slices like oranges or lemons inside the turkey cavity along with the vegetables. Basting Technique: Use a baster or a ladle to baste the turkey every 30 minutes with pan drippings. This enhances the skin's crispiness and adds moisture. Leftover Magic: Don’t forget to save the carcass for making homemade turkey broth! It’s great for soups and gravies. {{image_2}} You can switch up the herbs in the butter. Try using different ones like basil, oregano, or parsley. Each herb brings a new flavor. You might love the freshness of basil or the warmth of oregano. Adding citrus flavors brightens the taste. Squeeze in some orange or lime juice. You can also add lemon zest for a zesty kick. This twist makes the turkey even more exciting. You can get creative with the stuffing. Instead of just onion, carrots, and celery, think about using garlic or leeks. These alternative aromatics add depth to the flavor. Fruits and nuts can make stuffing special. Dried cranberries or apricots add sweetness. Walnuts or pecans bring a nice crunch. Mix these with your usual veggies for a tasty twist. Experimenting with stuffing is fun and delicious! To keep your herb butter roast turkey fresh, follow these simple steps: - Refrigeration guidelines: Wrap the turkey tightly in plastic wrap or foil. Store it in the fridge. It lasts up to four days. For best taste, eat it within two days. - Freezing tips: If you want to save it longer, slice the turkey. Place slices in airtight containers or freezer bags. It can stay frozen for up to three months. Label the bags with the date. When it’s time to enjoy your turkey again, here’s how to do it right: - Best methods for reheating: The oven works best. Preheat it to 325°F (165°C). Place the turkey in a baking dish. Cover it with foil to keep it moist. Heat for about 20-30 minutes. - Maintaining moisture and flavor: Add a splash of chicken broth to the dish before reheating. This keeps the turkey juicy and flavorful. If you use the microwave, heat in short bursts at low power. Check often to avoid drying it out. To check if your turkey is done, use a meat thermometer. Insert it into the thickest part of the breast and thigh. The turkey is safe to eat when it reaches an internal temperature of 165°F (75°C). This ensures the meat is cooked through and safe for your family. Always check both spots for accuracy. Yes, you can use a frozen turkey. But it must be thawed before cooking. The best way to thaw it is in the fridge. Allow 24 hours of thawing time for every 4-5 lbs of turkey. You can also use the cold water method. Submerge the turkey in cold water, changing the water every 30 minutes. This takes about 30 minutes per pound. Roast turkey goes great with many sides. Here are some popular choices: - Mashed potatoes - Green bean casserole - Cranberry sauce - Stuffing - Sweet potato casserole - Dinner rolls These sides add color and flavor to your meal. They create a festive feel for your gathering. Roasting a turkey is simple with the right ingredients and steps. We covered everything from prepping with herb butter to the cooking process. I shared tips for even roasting and how to present your dish. You can also easily adapt recipes with different herbs and stuffing ideas. Proper storage and reheating can keep leftovers tasty. Enjoy your meal, and remember: cooking should be fun and rewarding! Your perfect turkey awaits.

Herb Butter Roast Turkey Flavorful and Juicy Delight

Are you ready to impress your guests with a mouthwatering turkey? In this guide, I’ll show you how to make

- 4 chicken thighs, bone-in, skin-on - 1 cup long-grain rice - 2 cups chicken broth - 1/2 cup honey - 1/2 cup BBQ sauce - 1 tablespoon olive oil - 1 onion, diced - 3 cloves garlic, minced - 1/2 cup corn, frozen or fresh - 1/2 cup green bell pepper, diced When making One-Pan Honey BBQ Chicken and Rice, start with fresh, quality ingredients. The chicken thighs bring rich flavor and tenderness. Bone-in and skin-on thighs are best for this dish. They stay juicy during cooking. You need long-grain rice for a fluffy texture. It cooks well in the broth and absorbs the sauce. For the broth, use a good-quality chicken broth. This adds depth to the dish. The sauce blends honey and BBQ sauce. Honey gives sweetness, while BBQ sauce adds tang. Choose your favorite BBQ sauce for personal taste. Olive oil helps in cooking the chicken and adds richness. Next, we add vegetables. Diced onion and minced garlic create a fragrant base. They add flavor and aroma. Corn adds sweetness and color, while the green bell pepper brings crunch. Together, these ingredients make the dish vibrant and wholesome. {{ingredient_image_1}} Searing the Chicken Thighs First, heat 1 tablespoon of olive oil in your pan over medium-high heat. Make sure the oil is hot before adding the chicken. Add 4 chicken thighs, skin-side down. Sear them for about 5-7 minutes until the skin turns golden brown. Then, flip the chicken and sear the other side for 5 more minutes. This step gives the chicken great flavor and a nice texture. Seasoning Instructions Before you start cooking, season the chicken with 1 teaspoon of smoked paprika, 1 teaspoon of salt, and 1/2 teaspoon of black pepper. Rub the spices all over the chicken. This adds a lovely taste that pairs well with the honey and BBQ sauce. Sautéing Onions and Garlic Once the chicken is done, take it out and set it aside. In the same pan, add 1 diced onion and sauté for 3-4 minutes. Cook until the onion looks soft and translucent. Then, add 3 minced garlic cloves. Cook for 1 more minute. The smell will be amazing! Combining Rice, Broth, Honey, and BBQ Sauce Now it’s time to add in the rice. Pour in 1 cup of long-grain rice, followed by 2 cups of chicken broth. Add in 1/2 cup of honey and 1/2 cup of BBQ sauce. Mix everything well so the rice gets coated in all those sweet and savory flavors. Adding Vegetables Next, return the chicken thighs to the pan, skin-side up. Bring the mixture to a simmer. Cover the pan with a lid. After that, let it cook on low heat for 20-25 minutes. In the last 5 minutes, stir in 1/2 cup of corn and 1/2 cup of diced green bell pepper. This adds color and crunch to the dish. Cooking Time and Checking Doneness After 20-25 minutes, check if the rice is cooked. You want it tender and fluffy. Also, check that the chicken has reached an internal temperature of 165°F (74°C). This ensures the chicken is safe to eat. After cooking, remove the pan from heat and let it sit for 5 minutes before serving. This helps the flavors meld together. To get that lovely crisp skin, choose bone-in, skin-on chicken thighs. Start with a hot pan and add oil. Place the chicken skin-side down. Let it cook without moving it for 5-7 minutes. This creates a nice golden crust. After flipping, sear for another 5 minutes. Timing is key to juicy chicken. After searing, cook the chicken with rice for 20-25 minutes. This ensures the chicken cooks through while the rice soaks up flavor. Always check the chicken reaches 165°F (74°C). Use a meat thermometer for accuracy. Want more flavor? Try adding spices like paprika, garlic powder, or onion powder. A pinch of cayenne pepper adds heat. Mix these spices with salt and pepper before seasoning the chicken. This extra layer of flavor makes the dish pop. Choose a BBQ sauce you love. Sweet sauces pair well with honey. If you like tangy flavors, go for a vinegar-based sauce. Some brands offer spicy options too. Feel free to mix your favorite sauces for a unique taste. To serve, fluff the rice with a fork. This makes it light and airy. Add a sprinkle of fresh parsley on top for color. Serve straight from the pan for a cozy, rustic look. It feels more inviting and casual. Pair this dish with a fresh salad or steamed veggies. Roasted broccoli or green beans work well too. You can also add some crusty bread to soak up the sauce. These sides balance the meal and add more color to your plate. Pro Tips Perfectly Cooked Chicken: Ensure the chicken thighs reach an internal temperature of 165°F (74°C) for juicy, safe-to-eat meat. Rice Texture: Fluff the rice gently with a fork after cooking to prevent it from becoming mushy and to keep the grains separate. Customize Your BBQ Sauce: Feel free to experiment with different BBQ sauces for varied flavors; a spicy sauce adds a nice kick! Vegetable Variations: You can add other vegetables like peas or carrots for extra nutrients and color in the dish. {{image_2}} Substituting Chicken Thighs If you want variety, try other meats. Chicken breasts work well. They cook faster, so check for doneness sooner. Pork chops are another option. They add a nice twist to the dish. Using Cooked Chicken Using leftover cooked chicken makes this meal quick. Just add it after sautéing the onions and garlic. Mix it in with the rice and sauce for flavor. This saves time and still tastes great. Exploring Different Rice Types You can switch up the rice for fun. Brown rice adds a nutty flavor. It needs more cooking time, so adjust the broth and simmer longer. Jasmine rice gives a fragrant touch, perfect for this dish. Quinoa or Cauliflower Rice Options Quinoa offers a protein boost and cooks faster. Use the same amount as rice. Cauliflower rice is a low-carb choice. It cooks quickly, so mix it in during the last few minutes of cooking. Homemade BBQ Sauce Ideas Making your own BBQ sauce brings fresh flavors. Use ketchup, vinegar, and spices for a base. Add honey for sweetness or hot sauce for a kick. Create your unique blend that suits your taste. Adjusting Sweetness with Honey You can change the sweetness to fit your liking. If you want it sweeter, add more honey. For less sweetness, reduce the honey amount. Taste as you go to find your perfect balance. Best Practices for Storage After you finish your meal, let the dish cool for about 30 minutes. This step helps keep the food fresh. Once cooled, place the leftovers in the fridge. They should stay good for about 3-4 days. Containers to Use Use airtight containers for best results. Glass or plastic containers work well. Make sure they have tight lids. This keeps moisture in and prevents smells from mixing. Methods for Reheating You can reheat your One-Pan Honey BBQ Chicken and Rice in different ways. The microwave is quick and easy. Just cover it with a damp paper towel. You can also use a skillet on low heat. This keeps the chicken crispy. Maintaining Texture and Flavor To keep the rice fluffy, add a splash of chicken broth or water. Stir it well while reheating. This helps it stay moist and tasty. How to Freeze One-Pan Honey BBQ Chicken and Rice If you want to save some for later, freezing is a great option. Let the dish cool completely. Then, scoop portions into freezer-safe bags or containers. Squeeze out any air before sealing. This prevents freezer burn. Thawing and Reheating Process When you're ready to eat, thaw the meal in the fridge overnight. You can also use the microwave on the defrost setting. Reheat as mentioned before, adding liquid to keep it moist. Enjoy your flavorful dish anytime! It takes about 50 minutes in total. You spend 10 minutes prepping the ingredients. Cooking takes around 40 minutes. Yes, you can use boneless chicken thighs. Cook them for about 20 minutes instead. This helps them stay juicy and tender. You can use quinoa, farro, or even cauliflower rice. Each substitute has different cooking times. Quinoa needs about 15 minutes, while farro takes about 30 minutes. Cauliflower rice cooks in just 5 minutes. Adjust the liquids based on what you choose. This blog post covered the essential steps to make One-Pan Honey BBQ Chicken and Rice. We discussed the key ingredients, cooking methods, and tips for the best taste. You explored various protein and rice options for flexibility. Storing leftovers and reheating methods help keep your meal fresh. Cooking can be fun and rewarding. With this recipe, you can enjoy a tasty dish that fits your needs. Experiment with flavors and make it your own! Enjoy your cooking adventure!

One-Pan Honey BBQ Chicken and Rice Delight Recipe

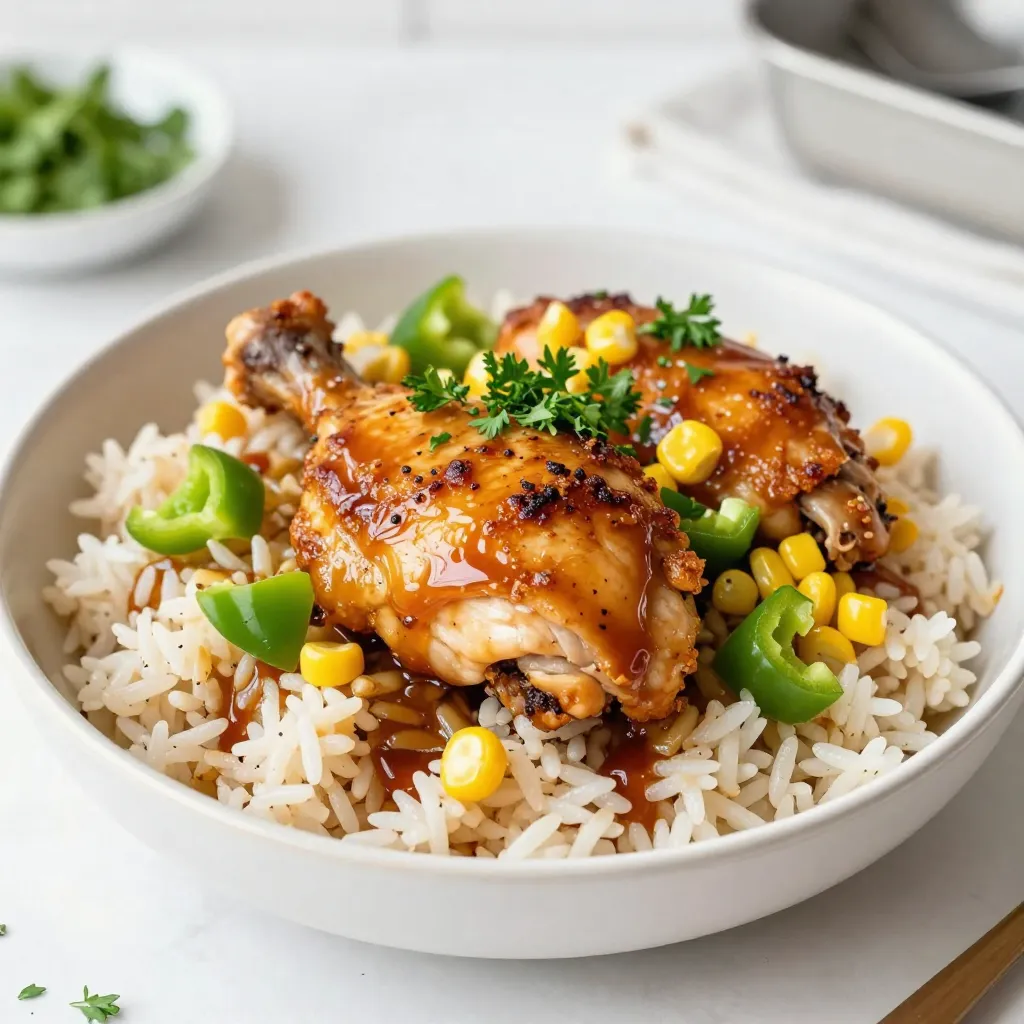
Welcome to my kitchen! If you crave a quick, tasty meal, you’ll love this One-Pan Honey BBQ Chicken and Rice

To make your Pesto Chicken Broccoli Pasta Bake, you need these key ingredients: - 2 cups rotini pasta - 1 cup cooked chicken, shredded - 1 cup broccoli florets, steamed - 1 cup pesto sauce (store-bought or homemade) - 1 cup shredded mozzarella cheese - 1/2 cup grated Parmesan cheese - 1/2 teaspoon garlic powder - 1/4 teaspoon red pepper flakes (optional) - Salt and pepper to taste - 1 cup cherry tomatoes, halved (for garnish) - Fresh basil leaves (for garnish) These items create a tasty mix of flavors. The rotini holds the sauce well. Chicken adds protein, and broccoli brings nutrition. Pesto provides rich taste, while cheeses give creaminess. You can customize this dish with some fun add-ins or swaps: - Vegetables: Spinach, bell peppers, or zucchini work great. - Proteins: Try cooked sausage or tofu for a different twist. - Cheeses: Swap mozzarella with gouda or cheddar for varied flavor. Feel free to get creative! Each choice can change the taste and texture. To make this dish, gather these tools: - Large pot for boiling pasta - Mixing bowl for combining ingredients - Baking dish (9x13 inches works well) - Spoon or spatula for mixing - Oven for baking Having the right tools makes cooking easier. Using a large pot helps cook the pasta evenly. A good baking dish ensures even heat. First, set your oven to 375°F (190°C). This helps the dish cook evenly. Gather your ingredients: rotini pasta, cooked chicken, broccoli, pesto sauce, mozzarella cheese, and Parmesan cheese. Also, get garlic powder, red pepper flakes, salt, and pepper. These spices add flavor. You can also prepare a baking dish by greasing it with cooking spray or olive oil. This keeps the pasta from sticking. Next, cook the rotini pasta. Boil water in a pot and add the pasta. Follow the package instructions. Cook until it is al dente, which means it’s tender but still firm. Drain the pasta and set it aside. While the pasta cooks, steam the broccoli florets until they are bright green and tender. This usually takes about 3–5 minutes. Now, combine all your ingredients in a large mixing bowl. Add the cooked pasta, shredded chicken, steamed broccoli, and pesto sauce. Sprinkle in garlic powder, red pepper flakes, salt, and pepper. Mix everything well. Once combined, pour this mixture into your greased baking dish. Spread it out evenly. Top it with shredded mozzarella and grated Parmesan cheese. Make sure the cheese covers the pasta well. Bake for 25–30 minutes. You want the cheese to melt and bubble. After baking, take it out of the oven and let it cool a bit. Garnish with halved cherry tomatoes and fresh basil leaves before serving. Enjoy your tasty, comforting meal! To make great pesto, start with fresh basil. Use about two cups of basil leaves. Add pine nuts, garlic, olive oil, and Parmesan cheese. Blend until smooth. If you like, use walnuts or almonds instead of pine nuts. You can store pesto in the fridge for a week. Just cover it with olive oil to keep it fresh. For a perfect cheese melt, use a mix of mozzarella and Parmesan cheese. Shred the cheese yourself for the best texture. Spread the cheese evenly over the pasta. This helps it melt without burning. Bake it at 375°F for 25 to 30 minutes. Keep an eye on it as it cooks. You want it bubbly and golden, not too dark. Serve your Pesto Chicken Broccoli Pasta Bake with a side salad. A simple green salad pairs well. You can also add garlic bread for extra comfort. For drinks, try a light white wine or sparkling water. Fresh basil and cherry tomatoes make great toppings. They add color and fresh flavor to each bite. {{image_2}} You can switch up the chicken for other meats. Try cooked turkey or shrimp for a change. If you want a plant-based option, use chickpeas or lentils. These alternatives keep the dish hearty and tasty. For a gluten-free version, choose gluten-free rotini pasta. There are many brands available that taste great. To make it vegan, replace chicken with tofu or tempeh. Use a vegan pesto and swap out the cheese for a dairy-free option. This way, everyone can enjoy the meal. Feel free to mix in seasonal veggies. Spinach or kale can add some green goodness. Bell peppers or zucchini can bring in extra flavor and color. This makes the dish even more nutritious and fun. Enjoy experimenting with what you have on hand! After you enjoy your pesto chicken broccoli pasta bake, store any leftovers in an airtight container. Make sure to let the dish cool before sealing it. This step helps keep moisture in check and flavors fresh. You can store it in the fridge for up to four days. If you want to keep it longer, consider freezing it. When you're ready to enjoy your leftovers, reheating is simple. Preheat your oven to 350°F (175°C). Place the pasta bake in an oven-safe dish. Cover it with foil to keep it moist. Heat for about 20-25 minutes or until warm all the way through. You can also use a microwave. Just place a single serving on a microwave-safe plate and heat for 1-2 minutes. Stir halfway for even warmth. Freezing this dish is a great way to prep meals ahead. After cooking, let it cool fully. Then, cut it into portions. Wrap each portion tightly in plastic wrap, and then place it in a freezer-safe container. Label the container with the date. You can freeze the pasta bake for up to three months. When ready to eat, thaw it overnight in the fridge before reheating. Yes, you can use other pasta shapes. Penne, fusilli, or farfalle work well. Just make sure to cook them until they are al dente. This keeps the pasta firm after baking. This dish lasts about three to four days in the fridge. Store it in an airtight container for best results. Make sure it cools completely before sealing. Yes, you can prep this dish ahead of time. Assemble it and cover it tightly. You can store it in the fridge for one day before baking. Just add a few extra minutes to the baking time if it’s cold. This blog covered the essential ingredients and tools you need for a delicious pasta bake. We explored step-by-step instructions, tips for the best flavor, and how to customize dishes. Don't forget about storage and reheating tips to keep meals fresh. Remember, creating a great pasta bake is fun and easy. With a little practice, you can impress everyone with your cooking. Embrace your creativity and enjoy the process!

Pesto Chicken Broccoli Pasta Bake Flavorful Comfort Meal

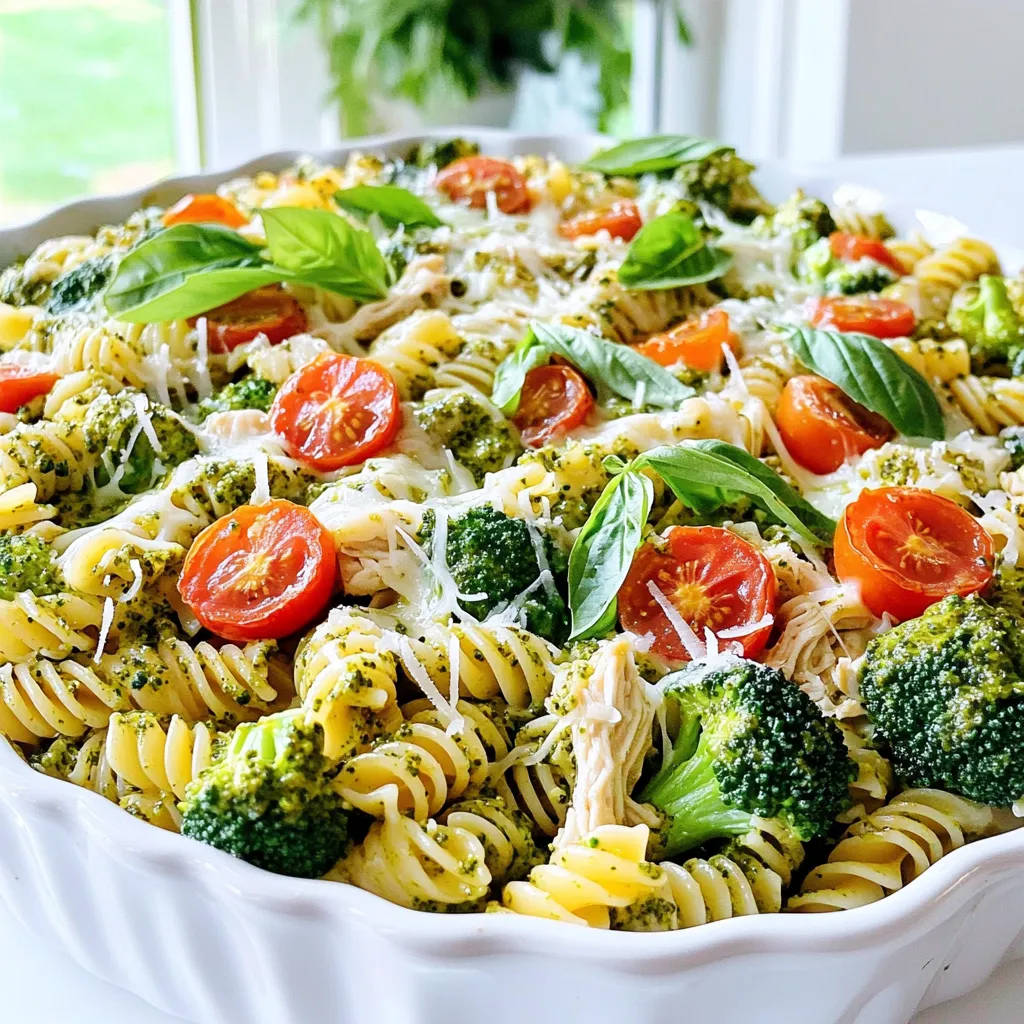
Looking for a dish that warms your heart and delights your taste buds? Try this Pesto Chicken Broccoli Pasta Bake!

- 2 cups cooked chicken breast, shredded - 1 ripe avocado, mashed - 1/2 cup mozzarella cheese, shredded - 1/4 cup mayonnaise - 2 tablespoons fresh cilantro, chopped - 1 tablespoon lime juice - 1 teaspoon garlic powder - 1/2 teaspoon chili powder - Salt and pepper to taste - 4 slices of whole-grain bread - 1 tablespoon olive oil These main ingredients create a tasty and creamy mix for the Chicken Avocado Melt. The shredded chicken adds protein, while the avocado gives a rich texture and flavor. The cheese melts beautifully, making each bite delightful. - Diced tomatoes - Sliced jalapeños - Cooked bacon bits - Sliced red onion Feel free to mix in these options to add your twist. Diced tomatoes add freshness, and jalapeños bring a kick. Bacon bits add a crunchy, savory taste. Customize as you like! - Large mixing bowl - Skillet or frying pan - Spatula - Knife and cutting board - Measuring cups and spoons These tools help you prepare and cook your Chicken Avocado Melt easily. A skillet is key for achieving that perfect golden crust. A mixing bowl makes it simple to blend all the tasty ingredients together. First, gather your ingredients. You need cooked chicken, avocado, cheese, and spices. In a large bowl, combine 2 cups of shredded chicken, 1 ripe mashed avocado, and 1/2 cup of shredded mozzarella cheese. Add 1/4 cup of mayonnaise for creaminess. Toss in 2 tablespoons of chopped cilantro and 1 tablespoon of lime juice. These give great flavor! Next, add 1 teaspoon of garlic powder and 1/2 teaspoon of chili powder. Mix everything well until creamy. Finally, season with salt and pepper to taste. Adjust the spice for your liking. Now, heat a skillet over medium heat and add 1 tablespoon of olive oil. Take 2 slices of whole-grain bread and lay them in the skillet. Spoon half of your chicken-avocado mixture onto each slice. Top with the other two slices of bread. Press down gently. Cook for about 3 to 4 minutes until golden brown. Flip and cook for another 3 to 4 minutes until the other side is crispy and the cheese melts. Once cooked, remove the melts from the skillet. Let them cool for a minute before slicing them in half. For a nice touch, serve the melts on a wooden board. Cut them diagonally. Garnish with extra cilantro and lime wedges for freshness. Enjoy your tasty Chicken Avocado Melts with a side salad or chips for a complete meal! To get the best Chicken Avocado Melt, focus on heat and timing. Use medium heat for your skillet. It helps the bread toast well without burning. Press down gently on the bread as it cooks. This helps the cheese melt evenly. Keep an eye on the color. You want a nice golden brown. If you like it extra cheesy, add more mozzarella. Just make sure it stays creamy and not too thick. If you have extra chicken-avocado mixture, store it in the fridge. Use an airtight container to keep it fresh. It will last for about three days. When you want to use it again, give it a good stir. You may need to add a bit more lime juice or seasoning to refresh the flavors. This mixture works great as a dip or a topping for salads too. Feel free to play with the spices. If you want more heat, add extra chili powder or some cayenne pepper. For a fresh twist, try adding cumin or paprika. If you prefer a milder taste, skip the chili powder altogether. You can also mix in some diced jalapeños for a kick. Experiment with flavors to find your favorite blend. This recipe is flexible and can fit many tastes. {{image_2}} You can make a tasty vegetarian or vegan version. Instead of chicken, use chickpeas or tofu. Mash them to create a similar texture. Use vegan mayonnaise and a plant-based cheese for the melt. Avocado adds creaminess and flavor. You will still enjoy a satisfying meal without meat. If you need a gluten-free meal, swap the bread for gluten-free bread. Many brands offer great taste and texture. You can also use lettuce wraps. Just scoop the chicken-avocado mix into large lettuce leaves. This keeps your melt fresh and light. Feel free to get creative with extra ingredients! Adding sliced tomatoes brings freshness and moisture. Crispy bacon adds a smoky flavor. You can also try jalapeños for a spicy kick. Mix and match to find what you love most. Each extra ingredient can make your Chicken Avocado Melt even more special. After cooking, let the melts cool down. Place them in an airtight container. Store them in the fridge for up to three days. If you want to keep them longer, freezing is a good option. You can freeze the chicken avocado mixture before cooking. Place it in a freezer-safe bag. Remove as much air as possible to avoid freezer burn. Label the bag with the date. The mixture can last up to three months in the freezer. When ready, thaw it overnight in the fridge before cooking. To reheat, use a skillet over medium heat. Add a little olive oil for crispiness. Heat each side for about three to four minutes. You can also use an oven at 350°F. Bake for about 10-15 minutes until warm. Enjoy your melts fresh and tasty! Yes, you can use many types of cheese. Cheddar, pepper jack, or gouda work well. Each cheese gives a unique flavor. Experiment and find what you like best. To make this dish healthier, use low-fat mayonnaise. You can also add more veggies. Try spinach, tomatoes, or bell peppers for extra nutrients. Whole-grain bread is a great choice for fiber, too. You can serve these melts with a side salad. A fresh green salad adds crunch and color. Sweet potato fries are a tasty option, too. For a light touch, pair with fruit salad. In this post, we explored the tasty Chicken Avocado Melt. First, we looked at essential and optional ingredients to customize your dish. Then, I walked you through easy steps to prepare and cook your melts. I shared tips for perfecting your melt and variations for all diets. Lastly, we covered storage and answered common questions. Remember, you can mix and match these ideas to fit your taste. Enjoy creating your own Chicken Avocado Melt!

Tasty Chicken Avocado Melt Simple Recipe Guide

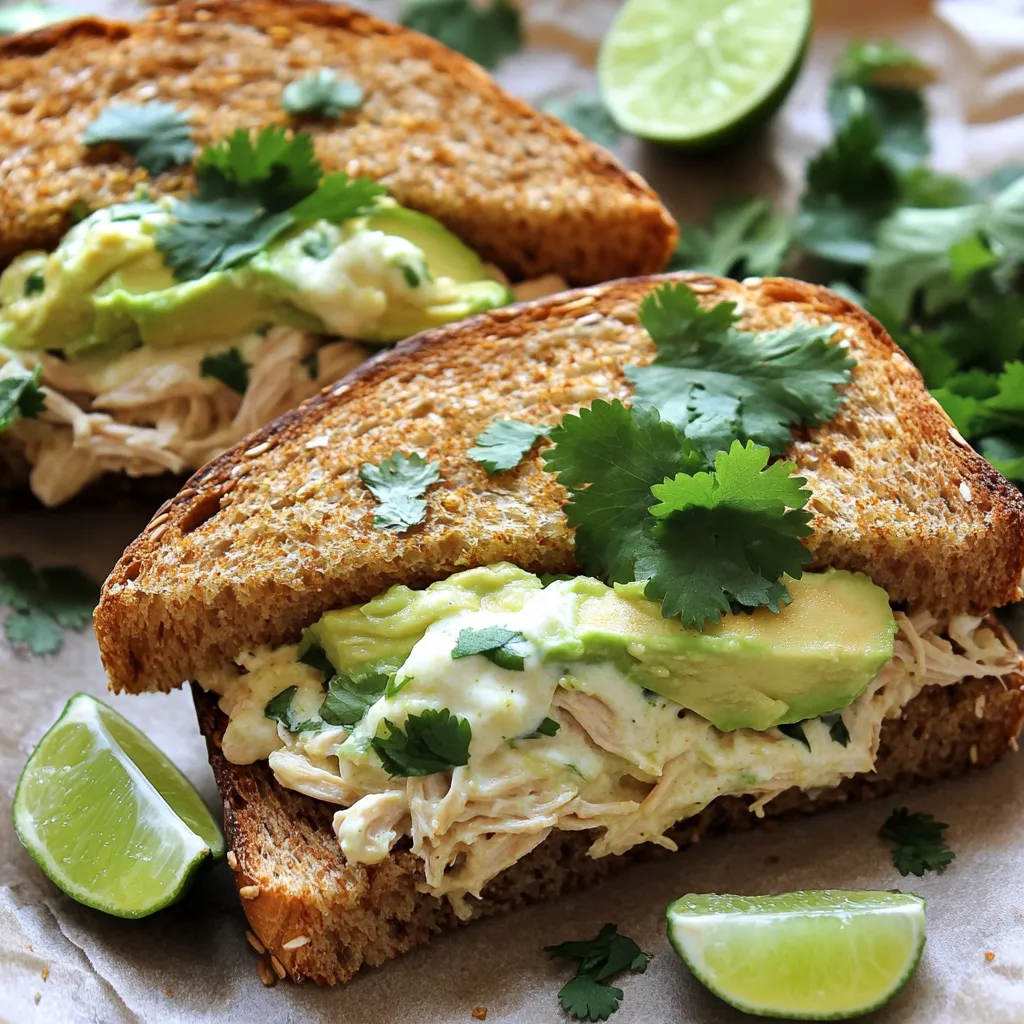
Looking for a quick and tasty meal? You’ll love this Chicken Avocado Melt recipe! It combines juicy chicken with creamy

- 1 medium spaghetti squash - 2 tablespoons olive oil - 1 teaspoon garlic powder - 1 teaspoon Italian seasoning - Salt and freshly ground black pepper to taste - 1 cup cherry tomatoes, halved - 1 large handful of fresh spinach - 1/4 cup grated Parmesan cheese (or nutritional yeast for a vegan option) - Fresh basil leaves for garnish If you don’t have spaghetti squash, you can use zucchini. Zucchini can also make a great noodle base. For olive oil, you can use avocado oil. If you need a dairy-free option, use nutritional yeast instead of Parmesan. Fresh spinach can be swapped for kale or Swiss chard. Cherry tomatoes can be replaced with diced bell peppers or sun-dried tomatoes. Each serving has about 150 calories. You get 7 grams of fat and 9 grams of carbs. It also has 5 grams of protein. This dish is a good source of vitamins A and C. It is low in calories and high in nutrients, making it a healthy choice. 1. First, preheat your oven to 400°F (200°C). This ensures even cooking. 2. Take the spaghetti squash and cut it in half lengthwise. Use a spoon to scoop out the seeds. 3. Drizzle 1 tablespoon of olive oil over each half. 4. Sprinkle garlic powder, Italian seasoning, salt, and pepper on the squash. Rub it all over the flesh. 1. Place the squash halves cut side down on a baking sheet lined with parchment paper. 2. Roast in the oven for 35-40 minutes. Check for tenderness. You should easily shred the flesh with a fork. 3. While the squash cooks, heat the remaining olive oil in a skillet over medium heat. 4. Add halved cherry tomatoes and sauté for 5-7 minutes. They should become soft and juicy. 5. Next, add fresh spinach to the skillet. Cook for another 2-3 minutes until it wilts. Season with salt and pepper. 6. Once the squash is done, let it cool a little. Use a fork to scrape the flesh into spaghetti-like strands. 7. In a large bowl, mix the spaghetti strands with the sautéed tomatoes and spinach. 8. Add grated Parmesan cheese (or nutritional yeast) and toss well. Adjust seasoning if needed. - Roast the squash until it is tender. Overcooking makes it mushy. - Shredding with a fork creates the best spaghetti-like strands. - If you want extra crunch, sauté veggies just until soft, not mushy. - For added flavor, try mixing in herbs like parsley or oregano. - Always choose a medium spaghetti squash. A smaller squash may cook faster, while a larger one may take longer. - Cut the squash carefully. Use a sharp knife and a strong cutting board. This helps avoid slips and injuries. - Roast with the cut side down. This keeps the squash moist and helps it cook evenly. - Test for doneness by piercing the skin. If it feels soft, it’s ready to shred. - Add fresh herbs like thyme or rosemary for extra aroma. They pair well with the squash. - Mix in red pepper flakes for a spicy kick. This adds a fun heat and flavor twist. - Consider using lemon zest. It brightens the dish and balances the rich cheese. - Try other vegetables. Bell peppers or zucchini can add color and taste. - Use a large bowl for mixing. This helps keep everything combined and makes serving easy. - Garnish with fresh basil leaves. They add a pop of color and a fresh aroma. - Serve in the squash shells. This gives a rustic and fun look to your meal. - Drizzle a bit of olive oil on top before serving. It makes everything shiny and inviting. {{image_2}} If you want a vegan version, skip the Parmesan cheese. Use nutritional yeast instead. It adds a nice cheesy flavor without any dairy. This dish is already gluten-free since it only uses spaghetti squash and fresh veggies. You can enjoy a healthy meal that fits many diets. Feel free to get creative! You can add cooked chickpeas for extra protein. Sun-dried tomatoes also work great if you want a richer taste. For some spice, toss in red pepper flakes. You might also try adding olives or artichokes for a Mediterranean twist. These additions make the dish even more fun and tasty. You can cook spaghetti squash in different ways. If you have an Instant Pot, it cooks faster. Cut the squash in half and scoop out the seeds. Place it on the trivet with a cup of water. Cook on high pressure for about 7 minutes. The squash will be soft and easy to shred. An air fryer is another option. Cut the squash like before, and season it. Cook at 375°F for about 25 minutes. You’ll get crispy edges and tender insides. Both methods give you great results and save time in the kitchen. After you enjoy your viral spaghetti squash, store leftovers in an airtight container. Keep it in the fridge for up to four days. Make sure to let it cool down a bit before sealing it up. This helps keep the texture nice and prevents moisture build-up. When you're ready to eat again, reheating is easy. You can use the microwave or stovetop. For the microwave, place the spaghetti squash in a bowl and cover it with a damp paper towel. Heat for about one to two minutes. Stir halfway through to warm evenly. If you choose the stovetop, heat a pan over medium heat. Add a splash of olive oil to the pan, then add the squash. Stir until it's heated through, usually about five minutes. If you want to save some for later, freezing is an option! First, let the squash cool completely. Then, use a fork to scrape the strands into a freezer-safe bag. Remove as much air as possible before sealing. You can freeze it for up to three months. When you're ready to eat, thaw it overnight in the fridge and reheat as mentioned above. Spaghetti squash is a unique vegetable. When cooked, its flesh pulls apart into strands, resembling spaghetti. To cook it, first, preheat your oven to 400°F (200°C). Then, cut the squash in half and remove the seeds. Drizzle olive oil on the inside, and season it with garlic powder, Italian seasoning, salt, and pepper. Place the halves cut side down on a baking sheet. Roast for 35-40 minutes until tender. After that, use a fork to scrape the insides into spaghetti-like strands. You can eat spaghetti squash raw, but it is tough and crunchy. Raw squash lacks the soft texture that cooking provides. If you want to try it raw, slice it thinly or spiralize it. You can add it to salads for a crunchy texture. However, most people prefer it cooked for its softer, more pleasant bite. Spaghetti squash is low in calories, making it a healthy choice. One cup of cooked spaghetti squash has about 42 calories. This makes it a great option if you want to enjoy a filling dish without many calories. Plus, it is high in vitamins and nutrients, which is a bonus! Spaghetti squash is a healthy, tasty veggie option. We covered its ingredients, cooking steps, storage, and creative variations. You can experiment with substitutes and flavor tips to suit your taste. Remember, cooking methods like the Instant Pot add fun. Store leftovers wisely for later meals. With these insights, you can master spaghetti squash and impress with your dishes. Keep exploring flavors, and enjoy the process!

Viral Spaghetti Squash Delightful and Simple Recipe

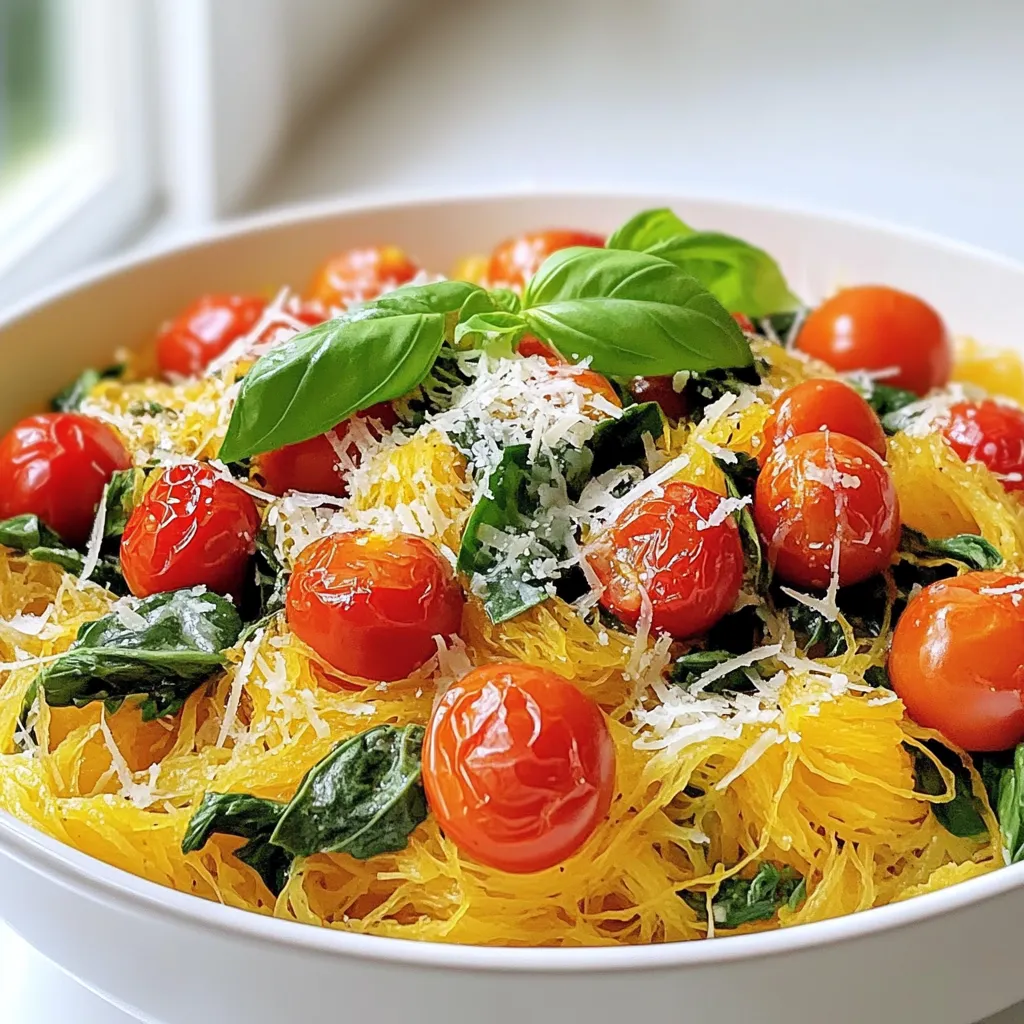
Are you ready to discover a simple and tasty treat? This Viral Spaghetti Squash recipe will make your taste buds

- Chicken - Baby Potatoes - Garlic - Parmesan Cheese - Olive Oil - Italian Seasoning - Paprika - Salt and Pepper - Fresh Parsley - Chicken: 4 boneless, skinless chicken breasts - Baby Potatoes: 2 cups, halved - Garlic: 4 cloves, minced - Parmesan Cheese: 1/3 cup, grated - Olive Oil: 1/4 cup - Italian Seasoning: 1 teaspoon - Paprika: 1 teaspoon - Salt and Pepper: to taste - Fresh Parsley: chopped, for garnish - Oven-safe skillet - Mixing bowls - Measuring cups and spoons Gather these ingredients and tools before you start cooking. This way, you can enjoy a smooth and fun cooking experience. Each item adds flavor and texture to the dish. Plus, having everything ready makes it easier. Trust me; it helps to stay organized! First, preheat your oven to 400°F (200°C). This step is key for even cooking. Next, gather all your ingredients. You will need 4 boneless, skinless chicken breasts, 2 cups of halved baby potatoes, and some fresh garlic. In a large mixing bowl, combine 1/4 cup of olive oil, 4 cloves of minced garlic, 1 teaspoon of Italian seasoning, 1 teaspoon of paprika, and some salt and pepper. Mix these well. Add the chicken breasts to the bowl. Coat each piece evenly with the garlic mixture. Let them marinate for about 15 minutes. This will help the chicken soak up the flavors. In another bowl, add the halved baby potatoes. Toss them with the remaining garlic mixture. Ensure they are well coated with the oil and seasoning. This step makes the potatoes flavorful. Next, take a large oven-safe skillet. Arrange the marinated chicken in the center. Place the seasoned potatoes around the chicken. Sprinkle 1/3 cup of grated Parmesan cheese over the chicken and potatoes. This adds a nice cheesy taste. Now, place the skillet in the oven. Bake for 25-30 minutes. Look for the chicken to be cooked through and the potatoes to be tender. When done, take it out and let it rest for 5 minutes before serving. Marinate your chicken for at least 15 minutes. This short time helps the chicken soak up the garlic and spice flavors. For more flavor, you can marinate it longer, even overnight. Use a zip-top bag to make marinating easy and avoid spills. Add a squeeze of lemon juice for a fresh twist. For even cooking, space the chicken and potatoes well in the skillet. This allows hot air to circulate. If you like crispy edges, bake at 400°F for the full time. Adjust the baking time if using larger chicken pieces or more potatoes. Always check the doneness by cutting into the thickest part of the chicken. To make your dish look nice, sprinkle fresh parsley on top before serving. This adds color and a fresh taste. Serve the chicken and potatoes on a large platter for a beautiful display. Adding a lemon wedge on the side can brighten the flavors. You can also try drizzling balsamic glaze for extra flair. {{image_2}} You can swap out chicken for other proteins. Try using turkey or pork. Both cook well with the garlic and Parmesan flavors. For fish, choose a firm type like salmon or cod. Adjust cooking times to avoid overcooking. Fish usually cooks faster, so check it at 15-20 minutes. To enhance the taste, add fresh herbs like thyme or rosemary. You can also mix in spices like cumin or chili powder for a kick. Consider tossing in vegetables like bell peppers or broccoli. They will roast nicely and add color to the dish. Just make sure to cut them into similar sizes as the potatoes. If you need a gluten-free option, this recipe is naturally gluten-free. Just ensure your Parmesan cheese is certified gluten-free. For low-carb options, swap potatoes for cauliflower. Cauliflower will roast beautifully and absorb the flavors while keeping the carbs low. To keep your Garlic Parmesan Chicken and Potatoes fresh, store them in an airtight container. You can refrigerate leftovers for up to 3 days. If you want to keep them longer, freeze the dish. It can last in the freezer for about 2 months. When you freeze, make sure to use freezer-safe bags or containers. This helps prevent freezer burn. When it's time to eat your leftovers, the best way to reheat is in the oven. Preheat your oven to 350°F (175°C). Place the chicken and potatoes in a baking dish, cover with foil, and heat for about 20 minutes. This keeps the chicken moist and the potatoes soft. You can also use a microwave, but the oven gives better flavor and texture. If you want to make this dish in advance, it’s easy! You can marinate the chicken and prepare the potatoes the night before. Just keep them in the fridge until you are ready to cook. When portioning for meal prep, divide the chicken and potatoes into single servings. Use small containers so they are ready to grab and go during the week. This makes meals quick and simple! Yes, you can use bone-in chicken. Bone-in chicken takes longer to cook than boneless. You should adjust the cooking time to about 40-45 minutes. Check the internal temperature with a meat thermometer. It should reach 165°F (74°C). This ensures it is safe to eat. You can use Pecorino Romano or nutritional yeast as substitutes. Pecorino Romano has a saltier flavor. Nutritional yeast gives a cheesy taste without dairy. Each option will change the flavor slightly, but they still work well in this dish. Check the chicken's internal temperature. It should reach 165°F (74°C) for safety. You can also look for clear juices when you cut into it. The meat should not be pink. Another sign is that the chicken is firm and not soft. This blog post covered how to make a delicious chicken and potatoes dish. We talked about the needed ingredients, measurements, and the best tools for cooking. I provided step-by-step instructions from marinating to baking, plus helpful tips and variations. You can adjust the recipe to fit your tastes and dietary needs. Remember, storing leftovers correctly keeps your meal fresh. Use this guide to create a tasty, satisfying dish that everyone will love. Cooking can be fun and simple with the right steps!

Garlic Parmesan Chicken and Potatoes Simple Recipe

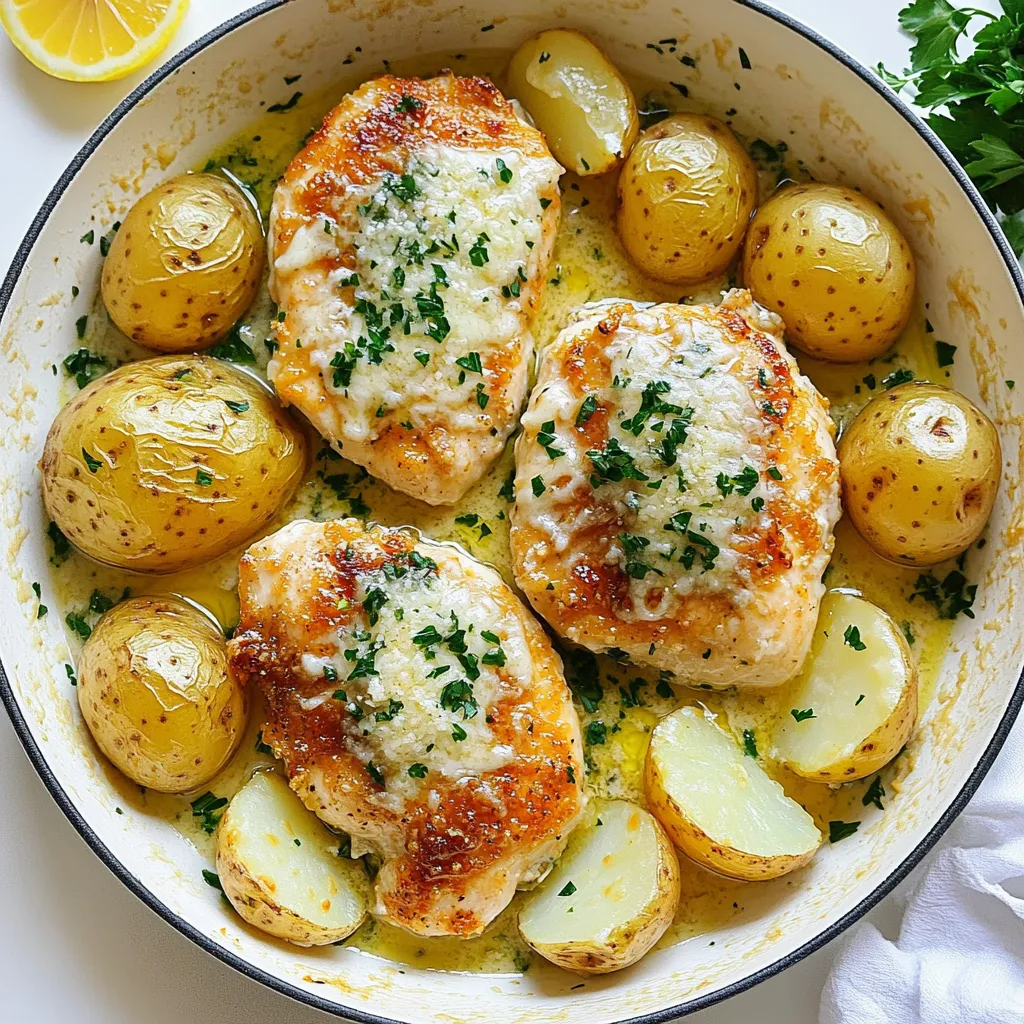
If you’re craving a dish that’s both easy to make and packed with flavor, you’re in the right place! Garlic

- 1 pound ground beef - 4 medium potatoes, thinly sliced - 1 medium onion, diced - 2 cloves garlic, minced - 1 can (15 oz) green beans, drained - 1 can (10.5 oz) cream of mushroom soup - 1 cup shredded cheddar cheese - 1 teaspoon salt - 1/2 teaspoon black pepper - 1 teaspoon paprika - 1 tablespoon olive oil - Fresh parsley, chopped (for garnish) When cooking, I prefer using standard measurements. Here’s a quick guide: - Pounds (lb) for meat - Ounces (oz) for canned goods - Cups for cheese and other dry ingredients - Teaspoons (tsp) for spices - Tablespoons (tbsp) for oils Choosing fresh ingredients makes a big difference. Here are my tips: - Ground Beef: Look for lean beef with less fat. It tastes better and is healthier. - Potatoes: Use medium-sized, firm potatoes. Russets or Yukon Golds work great. - Onion: Choose a fresh onion with no soft spots. A yellow onion adds good flavor. - Garlic: Fresh garlic gives a stronger taste. Avoid pre-minced garlic if you can. - Green Beans: Canned green beans should be low in sodium for a healthier option. - Cream of Mushroom Soup: Check the label for no added preservatives. - Cheddar Cheese: Freshly shredded cheese melts better than pre-shredded. Selecting quality ingredients helps your casserole shine. This dish is all about flavor and comfort! First, gather your ingredients. You will need ground beef, potatoes, onion, garlic, green beans, cream of mushroom soup, cheddar cheese, salt, pepper, paprika, and olive oil. Next, preheat your oven to 350°F (175°C). This ensures your casserole cooks evenly. In a skillet, heat one tablespoon of olive oil over medium heat. Add a diced onion and two minced garlic cloves. Sauté them for 2-3 minutes until they soften and smell great. Now, add one pound of ground beef to the skillet. Cook it until it turns brown, using a spatula to break it up. This should take about 5-7 minutes. Season the beef with one teaspoon of salt, half a teaspoon of black pepper, and one teaspoon of paprika while it cooks. In a large casserole dish, layer half of the sliced potatoes at the bottom. This gives a solid base for your casserole. Spoon the cooked beef mixture over the potatoes. Next, add one can of drained green beans on top. Pour one can of cream of mushroom soup over the beef and green beans. Spread it evenly with a spoon. Now, layer the remaining sliced potatoes on top of the soup. Finally, sprinkle one cup of shredded cheddar cheese over the top layer. Cover the casserole dish with aluminum foil. Bake it in the preheated oven for 45 minutes. After 45 minutes, remove the foil. Bake for an additional 15 minutes. This will make the cheese bubbly and golden brown. Your total cooking time will be about 1 hour. The oven temperature should stay at 350°F (175°C) throughout. After baking, let the casserole cool for a few minutes before serving. This helps the layers set and makes it easier to serve. Garnish with fresh parsley for a nice touch. Enjoy your hearty meal! To get the best texture in your casserole, layer the ingredients well. Start with thin layers of potatoes. This helps them cook evenly. Cook the ground beef until it's nicely browned. This adds flavor and keeps it tender. The cream of mushroom soup gives a creamy finish. It also helps bind the layers together. Bake covered at first to keep moisture in. Then, take off the foil to brown the cheese. This step gives you that nice, crispy top. A few errors can ruin your casserole. First, don’t skip the seasoning. Salt, pepper, and paprika are key to flavor. Next, avoid slicing the potatoes too thick. Thick slices don’t cook well and can be hard. Another mistake is not allowing the casserole to cool a bit before serving. Letting it rest helps it set, making it easier to serve. Lastly, don’t rush the baking time. Follow the full hour for the best results. Hobo Beef and Potato Casserole is filling and tasty on its own. You can serve it with a side salad for freshness. A simple green salad with vinaigrette works well. For a heartier meal, add some crusty bread. If you prefer, top the casserole with fresh parsley for color. This adds a nice touch and a bit of flavor too. Enjoy it warm for the best taste! {{image_2}} You can easily switch up ingredients in Hobo Beef and Potato Casserole. Use chicken instead of beef for a lighter dish. Sweet potatoes can replace regular potatoes for a unique twist. If you don’t have green beans, frozen peas or corn work well too. For a creamier texture, try cream of celery soup instead of mushroom. You can also add bell peppers for extra crunch and flavor. The key is to use what you enjoy or have on hand. You have several options for cooking this casserole. Besides baking in the oven, you can use a slow cooker. Just layer your ingredients as usual and cook on low for 6-8 hours. This gives flavors time to blend well. If you prefer quicker meals, try using an Instant Pot. Cook on high pressure for about 20 minutes, then let it release naturally. Both methods bring out different tastes but will still give you a hearty dish. This dish can fit many diets with some simple changes. For a gluten-free meal, use gluten-free cream of mushroom soup. Swap the cheese for a dairy-free version if you want to avoid dairy. If you are cutting carbs, try a cauliflower mash instead of potatoes. You can also add extra veggies to make it more nutritious. These easy adjustments ensure everyone can enjoy Hobo Beef and Potato Casserole without missing out on flavor. After enjoying Hobo Beef and Potato Casserole, store any leftovers in an airtight container. Let the casserole cool first. Then, place it in the fridge. It will stay fresh for up to three days. Label the container with the date, so you remember when you made it. To reheat your casserole, preheat the oven to 350°F (175°C). Place the casserole in an oven-safe dish. Cover it with foil to keep the moisture in. Bake for about 25-30 minutes until it's hot. You can also reheat individual portions in the microwave. Heat for about 2-3 minutes, stirring halfway through. If you want to save the casserole for later, freezing is a great option. First, let it cool completely before freezing. Use a freezer-safe container or wrap it tightly in plastic wrap. You can freeze it for up to three months. When you're ready to eat, thaw it in the fridge overnight before reheating. To make Hobo Beef and Potato Casserole gluten-free, swap the cream of mushroom soup for a gluten-free version. Many brands offer gluten-free soups. You can also make your own by mixing gluten-free flour with broth and mushrooms. Make sure to check the labels on all your ingredients. For the beef, fresh ground beef is naturally gluten-free. Use gluten-free cheese to avoid any gluten traces. Yes, you can cook Hobo Beef and Potato Casserole in a slow cooker. To do this, layer the ingredients in the slow cooker just like in the oven. Start with half the potatoes, then add the beef mixture, green beans, and soup. Finish with the remaining potatoes and cheese on top. Cook on low for 6-8 hours or high for 3-4 hours. Just make sure the cheese melts well before serving. Hobo Beef and Potato Casserole pairs well with a fresh salad or steamed vegetables. A simple green salad with a light vinaigrette adds crunch and freshness. You could also serve it with crusty bread to soak up the delicious sauce. For a heartier meal, try it with roasted carrots or green beans on the side. This adds color and nutrition to your plate! In this blog post, we explored the key ingredients, cooking steps, and helpful tips for making Hobo Beef and Potato Casserole. We discussed how to choose the right ingredients and avoid common mistakes. I also shared different cooking methods and storage tips to keep your dish fresh. Remember, cooking is all about practice and fun. Experiment with variations and serve your casserole with your favorite sides. Enjoy every bite you create!

Hobo Beef and Potato Casserole Hearty Family Favorite

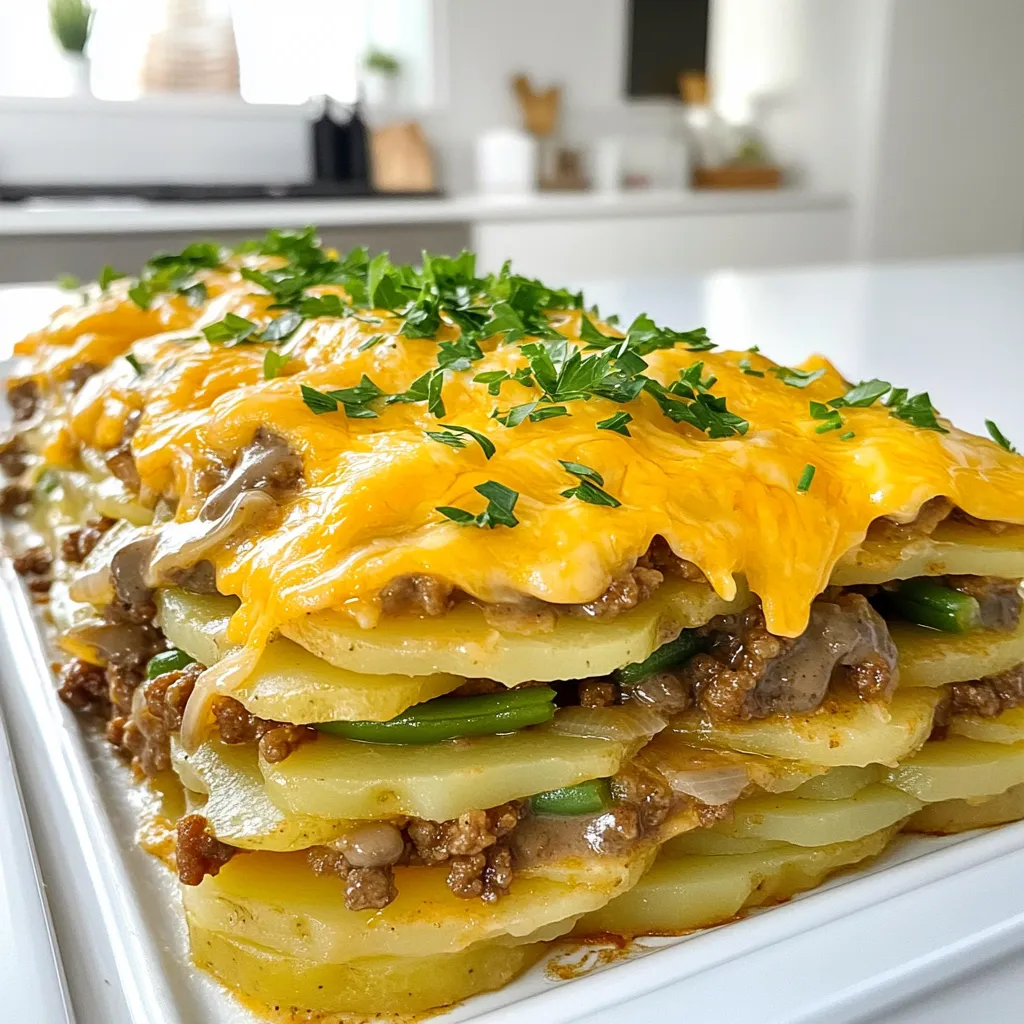
Are you ready to dive into a dish that warms hearts and fills bellies? Hobo Beef and Potato Casserole is

For the base of our grilled chicken and broccoli bowls, you need: - 2 boneless, skinless chicken breasts - 2 cups broccoli florets - 1 cup cooked quinoa - Salt and pepper to taste These ingredients work well together and provide a balanced meal. The marinade adds flavor and moisture to the chicken. You will need: - 2 tablespoons olive oil - 2 tablespoons soy sauce - 1 tablespoon honey - 1 teaspoon garlic powder - 1 teaspoon ginger powder This mix makes the chicken juicy and tasty. To make your bowls even better, consider adding: - 1 tablespoon sesame seeds - Chopped green onions These garnishes give a nice crunch and fresh flavor. To start, we need a tasty marinade for the chicken. In a small bowl, mix together: - 2 tablespoons olive oil - 2 tablespoons soy sauce - 1 tablespoon honey - 1 teaspoon garlic powder - 1 teaspoon ginger powder - Salt and pepper to taste Whisk the ingredients until they blend well. Next, take your chicken breasts and place them in a resealable plastic bag. Pour the marinade over the chicken, sealing the bag tightly. Make sure the chicken is well coated. Place it in the fridge for at least 30 minutes. If you have time, marinate for up to 2 hours. This step adds a lot of flavor. While the chicken marinates, you can prepare the quinoa. First, rinse 1 cup of quinoa under cold water. This helps remove any bitterness. Next, cook it as instructed on the package. Usually, this means adding the quinoa to 2 cups of boiling water. Cover and let it simmer until the water is absorbed. Once it’s done, fluff it with a fork. Set it aside to cool. Now, let’s grill the chicken. Preheat your grill or grill pan to medium-high heat. Take the marinated chicken out of the bag. Place it on the grill. Cook for about 6-7 minutes on each side. You want the chicken to reach an internal temperature of 165°F (75°C). Once cooked, take it off the grill and let it rest for a few minutes. This keeps the juices inside when you slice it. While the chicken cooks, it’s time for the broccoli. You can steam it or blanch it. For steaming, place 2 cups of broccoli florets in a steamer basket over boiling water. Steam for about 4-5 minutes, until it’s bright green and tender-crisp. If you prefer blanching, drop the florets into boiling water for 2 minutes. Then, transfer them to ice water to stop the cooking. This keeps the color vibrant. Now, let’s put it all together. Grab four bowls. Start by adding a scoop of cooked quinoa at the bottom of each bowl. Next, layer the sliced grilled chicken on top of the quinoa. Add the steamed or blanched broccoli next. If you like, sprinkle some sesame seeds on top for added crunch. Your bowls are now ready to serve. Enjoy! To get juicy and tasty grilled chicken, start with marinating. Use a mix of olive oil, soy sauce, honey, garlic powder, and ginger powder. This blend adds great flavor. Make sure to marinate for at least 30 minutes. If you have more time, let it sit for up to 2 hours. This extra time helps the chicken absorb the flavors. When grilling, ensure your grill is hot. Cook the chicken for 6-7 minutes on each side. Check the internal temperature. It should reach 165°F (75°C). Let it rest for a few minutes before slicing. Cooking quinoa can be tricky. Rinsing it first is key. This step removes bitter saponins. Follow the package instructions for cooking. A common mistake is not using enough water. Use a ratio of 1 cup quinoa to 2 cups water. After cooking, fluff it with a fork. This keeps the grains separate. Avoid overcooking; it should be tender but not mushy. To keep broccoli bright and crisp, steaming is best. Steam it for just 4-5 minutes. This time helps it stay green and full of nutrients. If you want a quicker method, blanch it. Boil for 2 minutes, then cool it in ice water. This stops cooking and preserves color. Don’t overcook broccoli; it should be tender-crisp. To add extra flavor, consider spices like paprika or chili powder. You can also try sauces like teriyaki or sriracha for a kick. Experiment with lemon juice for brightness. Adding sesame seeds gives a nice crunch. For more freshness, sprinkle chopped green onions before serving. These small tweaks make your bowls even more delicious. {{image_2}} You can switch the grilled chicken for other proteins. Tofu works great for a vegetarian option. Just press and cube it before marinating. Shrimp is another tasty choice. Cook it on the grill for just 2-3 minutes per side. If you prefer beef, try flank steak. It needs about the same grill time as chicken. Each option brings a unique twist to the bowl. If you're not a fan of quinoa, consider brown rice. It has a nice chewy texture. Cauliflower rice is a smart swap too. It's low in carbs and packed with nutrients. Just sauté it briefly with a little oil for flavor. Both options fit well with the chicken and broccoli. To make this dish entirely plant-based, use tofu and skip the honey. Instead, consider maple syrup or agave for sweetness. You can also add more veggies like bell peppers or carrots. This adds color and crunch. With these adjustments, you'll have a delicious vegan bowl that's still full of flavor. To keep your grilled chicken and broccoli bowls fresh, store leftovers in an airtight container. They stay good for up to 3 days in the fridge. Make sure to let the food cool down before sealing it. This helps prevent moisture buildup, which can make your meal soggy. If you want to save some for later, freezing works well. Pack the grilled chicken, broccoli, and quinoa in freezer-safe bags or containers. Try to remove as much air as possible. This helps prevent freezer burn. You can freeze your meal for up to 3 months. When you’re ready to eat, move the bowl to the fridge to thaw overnight. To reheat, you have a few options. The microwave is quick; just heat in short bursts of 1-2 minutes. Stir it well between each burst. If you want better texture, use the oven. Preheat it to 350°F (175°C), and heat for about 15-20 minutes. Cover your bowl with foil to keep it moist. Enjoy your meal as if it was freshly made! Yes, you can prep this meal in advance. Marinate the chicken and cook the quinoa the night before. Keep the chicken and quinoa in the fridge. Steam the broccoli just before serving for the best taste and texture. These bowls pair well with many sides. Try a light salad, roasted sweet potatoes, or a tangy coleslaw. You can also add avocado for creaminess or serve with a slice of whole grain bread. Marinating chicken is simple. Aim for at least 30 minutes to let the flavors soak in. For a better taste, marinate it for up to 2 hours. Avoid marinating longer than that to keep the chicken tender. Yes, this recipe can be gluten-free. Use gluten-free soy sauce or tamari instead of regular soy sauce. Check all labels for hidden gluten. This makes it safe for those with gluten sensitivities. This post covered a tasty grilled chicken and broccoli bowl. We explored ingredients, marinade, and step-by-step cooking. I shared helpful tips for juicy chicken and perfect quinoa. You also learned about fun variations and how to store leftovers. Cooking can be simple and fun. With these steps and options, you can make your own delicious meals at home. Enjoy your culinary journey!

Grilled Chicken and Broccoli Bowls Healthy Meal Prep

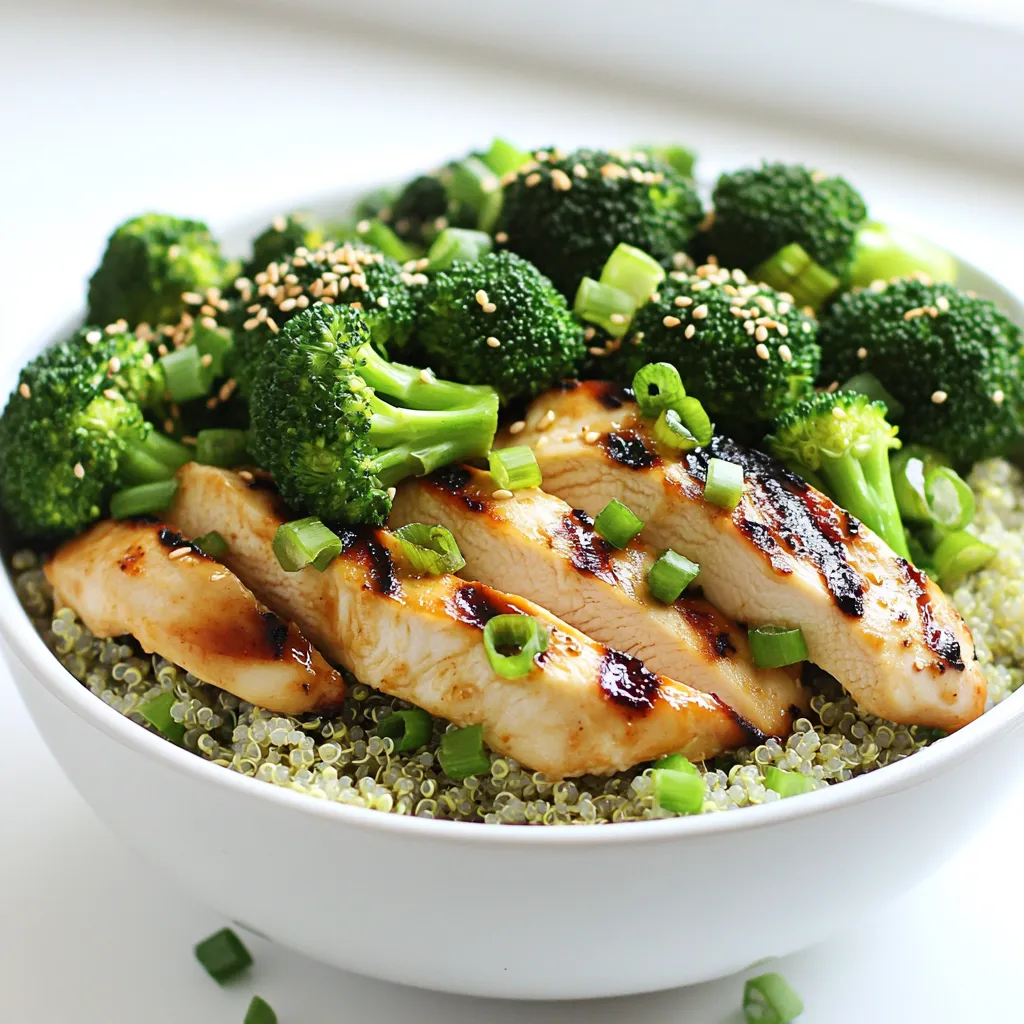
Are you looking for a tasty and healthy meal prep idea? Look no further! Grilled Chicken and Broccoli Bowls are

- 1 lb flank steak - 2 large sweet potatoes, diced - 1 tablespoon olive oil - 1 tablespoon chipotle chili powder - 1 teaspoon garlic powder - 1 teaspoon cumin - Salt and pepper to taste - 1 cup black beans, rinsed and drained - 1 cup corn kernels (fresh, canned, or frozen) - 1 cup cherry tomatoes, halved - 1 avocado, sliced - Fresh cilantro, chopped (for garnish) - Lime wedges (for serving) Each serving contains about: - Calories: 480 - Protein: 32g - Carbohydrates: 55g - Fat: 18g - Fiber: 12g This meal is quite balanced. It offers protein from the steak and beans. The sweet potatoes add healthy carbs and fiber. Avocado gives good fats, and the veggies boost vitamins. When choosing your steak, look for flank steak with good marbling. This helps with flavor and tenderness. Use firm, bright sweet potatoes for the best taste. For beans, canned options are quick and easy. If using fresh corn, select ears that feel heavy. For tomatoes, go for bright and plump ones. Always pick ripe avocados, but not too soft. Fresh cilantro should be vibrant green and fragrant. Start by preheating your oven to 425°F (220°C). This step helps the sweet potatoes roast evenly. In a large bowl, toss the diced sweet potatoes with olive oil, chipotle chili powder, garlic powder, cumin, salt, and pepper. Make sure every piece gets coated well. This mix gives the potatoes a tasty kick. Spread the sweet potatoes on a baking sheet lined with parchment paper. Roast them for about 25 to 30 minutes, stirring halfway through. You want them tender and slightly caramelized. While the sweet potatoes roast, season the flank steak. Use salt, pepper, and a bit of chipotle chili powder for flavor. Heat your grill or pan over medium-high heat. Cook the steak for about 4 to 5 minutes on each side. You want it to reach your desired doneness. After cooking, let it rest for 5 minutes. This step keeps the juices in. Slice the steak thinly against the grain for the best texture. Now it's time to put everything together! In meal prep containers, divide the roasted sweet potatoes, sliced steak, black beans, corn, and halved cherry tomatoes evenly. This mix makes each bowl colorful and nutritious. Top each bowl with avocado slices and a sprinkle of fresh cilantro. Don’t forget to add a lime wedge on the side for a zesty finish. Let the meal prep bowls cool before sealing them with lids. Store them in the fridge for up to 5 days. Enjoy your tasty Chipotle steak and potatoes meal prep! To season the flank steak, start with salt and pepper. This adds a nice base flavor. Then sprinkle chipotle chili powder for that smoky kick. You can adjust the amount based on your spice level. Let the steak sit for a few minutes after seasoning. This helps the flavors soak in. When you grill or pan-sear the steak, keep an eye on the time. Aim for about 4-5 minutes on each side. This ensures it cooks evenly and stays juicy. For the sweet potatoes, cut them into even pieces. This helps them cook the same way. Toss them with olive oil and spices until they are well coated. Spread them out on a baking sheet. Avoid crowding the potatoes, or they will steam instead of roast. Roast them in a preheated oven for 25-30 minutes. Stir halfway through to get that nice caramelization on all sides. They should be tender and slightly golden when done. Choose meal prep containers that are airtight. This keeps your food fresh longer. Glass containers are great options. They resist stains and odors. Use containers with separate sections for each food group. This keeps the steak, potatoes, and veggies from mixing. Allow your bowls to cool before sealing them. This prevents condensation, which can make food soggy. Store them in the fridge for up to 5 days for easy meals. {{image_2}} You can swap flank steak for other proteins. Chicken works well in this dish. Use boneless chicken breasts or thighs. Cook them just like the steak. Tofu is a great option for a plant-based meal. Press and cube firm tofu, then season it. Sauté or grill until golden brown. Feel free to add more veggies to your meal prep bowls. Bell peppers add a nice crunch and color. Zucchini and yellow squash also work great. Just chop them into bite-sized pieces. You can roast them with the sweet potatoes for added flavor. Adjust the spice level to suit your taste. If you want less heat, cut the chipotle chili powder in half. You can also add a pinch of sugar to balance the heat. For more heat, try adding cayenne pepper or diced jalapeños. Just a little can go a long way! To store your meal prep bowls, let them cool first. Once cool, divide the food into containers. I like using glass or BPA-free plastic containers. Seal each container tightly with a lid. This keeps the food fresh. You can store them in the fridge for up to 5 days. Label each container with the date. This way, you know when to eat them. If you want to keep your meal prep bowls longer, freezing is a great option. First, let the bowls cool completely. Next, use freezer-safe containers or bags. Make sure to remove as much air as you can. This helps prevent freezer burn. You can freeze the bowls for up to 3 months. When you are ready to eat, just thaw them in the fridge overnight. Reheating your meal prep bowls is easy. If you stored them in the fridge, you can microwave them. Place the bowl in the microwave and cover it with a lid. Heat for 2-3 minutes, stirring halfway through. If you froze the bowls, thaw them in the fridge first. Then, use the microwave as before or heat them on the stove. Enjoy your meal hot and fresh! Yes, you can use other potatoes. Yukon gold or red potatoes work well. They have a creamy texture that adds flavor. Just chop them into small pieces like sweet potatoes. Cook them the same way to ensure even roasting. These meal prep bowls last for up to 5 days in the fridge. Make sure to store them in airtight containers. This keeps your food fresh and safe to eat. If you want to keep them longer, consider freezing. You can substitute flank steak with chicken breast or tofu. Chicken has a mild flavor and cooks quickly. Tofu is great for a plant-based option. Just season them well and cook until done. In this post, we covered tasty ingredients for Chipotle steak and potatoes. We explored step-by-step instructions, ensuring each meal prep bowl comes out just right. You learned how to pick the best ingredients and season the steak perfectly. We also discussed variations and provided storage tips to keep your meals fresh. As you prepare this dish, remember that small changes can lead to big flavor. Explore your options and have fun with your cooking! Enjoy your delicious meal prep!

Chipotle Steak and Potatoes Meal Prep Made Easy

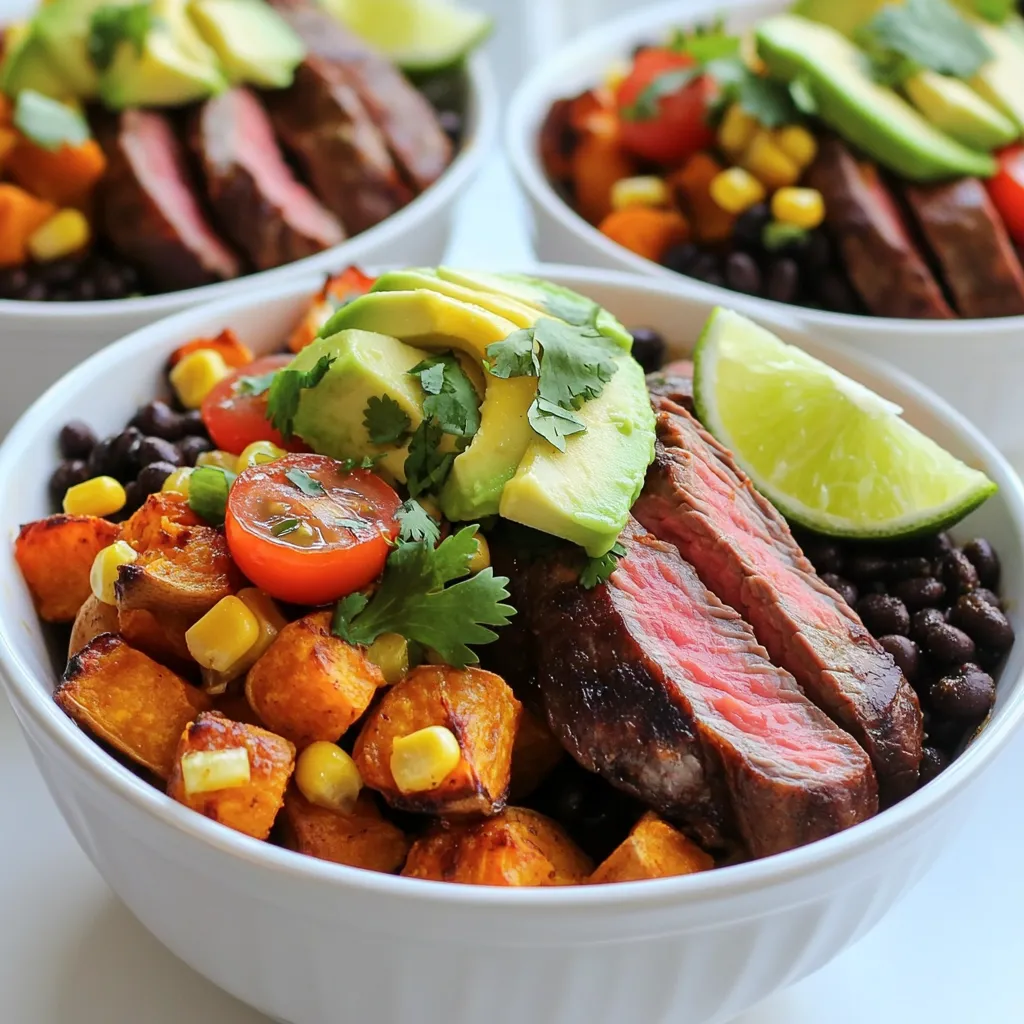
If you’re tired of meal prep getting boring and complicated, I have a fun solution for you. Today, we’re making

To make the best Cottage Cheese Chocolate Mousse, you need: - 1 cup cottage cheese - 1/4 cup unsweetened cocoa powder - 1/4 cup honey (or maple syrup for vegan option) - 1 teaspoon vanilla extract - 1/4 cup milk (dairy or non-dairy) - 1/8 teaspoon salt - 1/4 cup dark chocolate chips (optional, for added richness) - Fresh berries and mint leaves for garnish These ingredients work together to create a rich, creamy dessert. The cottage cheese gives a smooth base. Cocoa powder adds that deep chocolate flavor. Honey or maple syrup sweetens it just right. If you want to switch up the sweeteners, there are great options. Use agave syrup or date syrup for a different taste. You can also try stevia or erythritol for a low-calorie option. Each sweetener has a unique flavor, so adjust the amount to your taste. Start with the same amount as honey, then tweak as needed. Toppings make your mousse even better. Fresh berries like strawberries, raspberries, or blueberries add a bright touch. Mint leaves give a pop of green and fresh flavor. You might also sprinkle some crushed nuts for crunch. Consider adding a dollop of whipped cream for extra creaminess. These toppings make your dessert pretty and tasty! To make your cottage cheese chocolate mousse creamy, blend well. Start with one cup of cottage cheese. Place it in a blender or food processor. Blend it until it is smooth. This step is key. No lumps should remain. A smooth base gives you a light and airy mousse. Temperature matters in this recipe. Use room temperature ingredients for the best results. This includes cocoa powder, honey, and milk. When ingredients are at room temperature, they blend better. Cold ingredients can make the mousse dense and heavy. For a light texture, ensure everything is warm enough. If you choose to add dark chocolate, melt it carefully. Use a double boiler or microwave for this. If using a microwave, heat in short bursts. Stir in between to avoid burning. Once melted, let it cool slightly before adding it to the mix. This keeps the mousse smooth and rich. To make the best cottage cheese chocolate mousse, focus on blending. Start with smooth cottage cheese. Use a high-speed blender or food processor. Blend until creamy with no lumps. This step is key. Next, blend in the cocoa powder, honey, vanilla, milk, and salt. Blend until fluffy. If you choose to add melted chocolate, let it cool first. Then blend again to mix well. This ensures a uniform texture. Sweetness can vary based on personal taste. I suggest starting with the given amount of honey or maple syrup. After blending, taste the mousse. If it needs more sweetness, add a little more honey or syrup. Blend again to mix. This step lets you customize the dessert. Remember, the chocolate flavor should shine through. Balance is key, so don’t overdo it. There are a few common mistakes to watch out for. First, don’t skip blending the cottage cheese until smooth. Lumps will ruin the mousse’s texture. Second, avoid adding hot melted chocolate directly. Let it cool slightly to maintain the mousse's fluffiness. Lastly, don’t rush the chilling time. Refrigerate for at least 30 minutes. This helps the mousse set. Patience rewards you with a better dessert. {{image_2}} You can make this mousse vegan by swapping out a few ingredients. Instead of cottage cheese, use silken tofu. It gives a creamy texture and blends well. For sweetening, use maple syrup instead of honey. Use a non-dairy milk like almond milk or oat milk, too. Follow the same steps in the recipe, and you’ll have a delicious vegan treat. To make your mousse even more exciting, try adding flavors. A splash of peppermint extract brings a refreshing twist. Just use about half a teaspoon. You can also mix in a little espresso powder for a rich taste. This adds depth to the chocolate flavor. Feel free to experiment with other extracts, like almond or coconut. Adding fruit purees can give your mousse a fruity kick. Consider blending in some raspberry or strawberry puree. You could also mix in chopped nuts for crunch. Almonds or hazelnuts add texture and flavor. Just fold in these extras gently after blending. This way, you keep the mousse light and airy. Enjoy your creative spin on this healthy dessert! After you enjoy your Cottage Cheese Chocolate Mousse, store any leftovers in the fridge. Use an airtight container to keep the mousse fresh. This helps prevent it from absorbing other smells or flavors in the fridge. If you don't have a container, cover the bowl tightly with plastic wrap. You can keep your mousse in the fridge for up to three days. After that, it may lose its creamy texture and taste. Check for any signs of spoilage, like changes in color or smell, before eating. If it looks or smells off, it’s best to throw it away. If you want to keep the mousse longer, freezing is a great option. Place the mousse in a freezer-safe container. Leave some space at the top because it will expand when frozen. You can also scoop it into ice cube trays for single servings. When ready to eat, thaw it overnight in the fridge. Enjoy your mousse within three months for the best flavor. Yes, you can use flavored cottage cheese. It will change the taste of the mousse. I recommend using plain cottage cheese for a rich chocolate flavor. If you want a twist, go for vanilla or chocolate-flavored. Just remember, it may add extra sweetness. Adjust your sweetener if needed. Cottage cheese is a healthy choice. It is high in protein, which helps build muscles. It is also low in fat, making it a great option for those watching their weight. Cottage cheese contains calcium, which is good for bones. It has probiotics, too, which aid digestion. These benefits make it a smart ingredient in desserts. You can make this mousse dairy-free easily. Replace cottage cheese with a dairy-free yogurt. Use almond or coconut milk instead of regular milk. Choose maple syrup as your sweetener. You can also skip the dark chocolate chips or use dairy-free ones. This way, you still enjoy a tasty mousse without dairy. Cottage cheese chocolate mousse is easy and fun to make. We covered ingredients, blending techniques, and clever tricks to avoid mistakes. Don’t forget to try different flavors and toppings to make it your own. Storing leftovers is simple, so you can enjoy this dessert later. Mousse can fit your taste, from vegan to fruity options. So go ahead, gather your ingredients, and create your delicious mousse masterpiece today!

Cottage Cheese Chocolate Mousse Healthy Dessert Recipe

Looking for a guilt-free treat? My Cottage Cheese Chocolate Mousse is a deliciously healthy dessert. Packed with protein and rich

Older posts
Newer posts
← Previous Page1 Page2 Page3 Page4 … Page84 Next →

dsad

© 2026 Foodish Talk • Built with GeneratePress

Our Policies

  • Copyright Policy
  • Cookie Policy
  • GDPR Policy
  • Privacy Policy
  • Disclaimer
  • Terms Of Use

More Information

  • Home
  • About
  • Contact
  • Appetizers
  • Dessert
  • Dinner
  • Drinks
©2026, Foodish Talk About Back To Top