Skip to content
DisclaimerTerms Of UseGDPR PolicyCookie Policy

Foodish Talk

  • Home
  • Drinks
  • Appetizers
  • Dinner
  • Dessert
  • About
  • Contact
  • Privacy Policy
DisclaimerTerms Of UseGDPR PolicyCookie Policy

NO-ING-IMG

- Chicken wings (2 lbs) - Honey (1/4 cup) - Sriracha sauce (1/4 cup) - Soy sauce (2 tablespoons) - Apple cider vinegar (1 tablespoon) - Garlic powder (1 tablespoon) - Ginger powder (1 teaspoon) - Salt and pepper to taste - Sesame seeds (for garnish) - Green onions (for garnish) The first step in making Honey Sriracha wings is gathering the right ingredients. You'll need two pounds of chicken wings, which make a great base. Honey and Sriracha sauce are key for that sweet and spicy taste. Soy sauce adds depth while apple cider vinegar gives a nice tang. Now, don't forget the spices. Garlic powder and ginger powder boost the flavor. Salt and pepper help enhance everything. For the finish, sesame seeds and chopped green onions add a pop of color and crunch. These ingredients together create a delicious and balanced dish that is sure to impress. - Preheat the oven to 400°F (200°C). - Line a baking sheet with aluminum foil. This makes cleanup easy. - In a large bowl, combine the honey, Sriracha sauce, soy sauce, and apple cider vinegar. - Add garlic powder, ginger powder, salt, and pepper. Whisk until mixed well. - Toss the chicken wings in the honey Sriracha marinade. Make sure they are fully coated. - For the best flavor, let them marinate for at least 30 minutes. If you have time, marinate for up to 2 hours in the fridge. - Arrange the marinated wings in a single layer on the baking sheet. - Bake them for 40 to 45 minutes. Flip them halfway through to ensure even cooking. - After baking, drizzle any remaining marinade over the wings. - Garnish with sesame seeds and chopped green onions before serving. This adds a nice touch! To get the right mix of sweet and spicy, taste your marinade. If you want more heat, add extra Sriracha. For more sweetness, add a bit more honey. Mix it well! You can also add lime juice for a fresh twist. This kick adds a nice layer of flavor. For crispy wings, start with dry wings. Pat the wings with paper towels before marinating. This removes excess moisture. Bake them on a wire rack placed over a baking sheet. This lets the hot air circulate around the wings. Flip them halfway through to cook evenly. The result? Perfectly crispy wings every time! These wings are great on their own. But add sides for a full meal! Serve with celery sticks and ranch or blue cheese dip. You can also pair them with a fresh salad. A light slaw works well too. Enjoy them with a cold drink for a tasty treat! {{image_2}} To make these wings even hotter, add more Sriracha. You can adjust the heat to your taste. I recommend starting with an extra tablespoon. This gives the wings a nice kick! If you love heat, don't stop there. Add even more Sriracha. Just remember to taste as you go. You want the heat to enhance, not overpower. If you want a different flavor, try honey mustard. Simply swap Sriracha for honey mustard. This change gives a sweet and tangy taste. You can mix equal parts honey mustard and honey for balance. The wings will still be sticky and delicious. Serve them with a side of ranch for dipping! Both the oven and the air fryer work well for cooking wings. The oven gives you a larger batch at once. You can bake many wings together, which is great for parties. The wings get crispy, but it takes longer. Cooking in an air fryer is faster. It cooks wings in about 25 minutes. Plus, they often turn out crispier! Choose the method that fits your needs best. Store leftover Honey Sriracha wings in an airtight container. This keeps them fresh. Make sure to cool the wings to room temp before storing. You can refrigerate them for up to three days. Always label your container with the date. This helps you track how long they stay good. To reheat wings, use your oven for the best results. Preheat your oven to 350°F (175°C). Place the wings on a baking sheet. Heat them for about 10 to 15 minutes. Check that they reach an internal temperature of 165°F (74°C). If you want a crispy texture, broil them for the last 2 minutes. To freeze wings, place them in a single layer on a baking sheet. Put the sheet in the freezer until wings are solid. After that, transfer the wings to a freezer bag. Remove as much air as possible before sealing. Frozen wings can last up to three months. To defrost, place them in the fridge overnight before reheating. Yes, you can use frozen chicken wings. Thaw them in the fridge overnight. If you need them fast, place the wings in a sealed bag. Submerge the bag in cold water for about an hour. This method keeps the wings safe to eat. Once thawed, you can follow the recipe as usual. To make this dish gluten-free, substitute soy sauce with tamari. Tamari is a gluten-free soy sauce. You can also use coconut aminos, which is a tasty, gluten-free alternative. Both options work well in this recipe. Just use the same amount as the soy sauce called for. These wings pair well with a variety of sides. Here are some great options: - Celery sticks with ranch or blue cheese dip - Crunchy carrot sticks for a fresh crunch - A light salad with mixed greens and vinaigrette - Crispy fries or sweet potato fries for a filling side - Cold beer or sparkling water to complement the spice These sides will enhance your Honey Sriracha Wings and make for a tasty meal. This blog post shared a simple way to make tasty Honey Sriracha Wings. We covered the ingredients, from chicken wings to spicy sauces. You learned how to prep, marinate, and bake the wings for the best flavor and texture. Remember, you can tweak the spice level and try new versions. Enjoy these wings with your favorite sides and drinks for a fun meal. Now you are ready to make a delicious dish everyone will love!

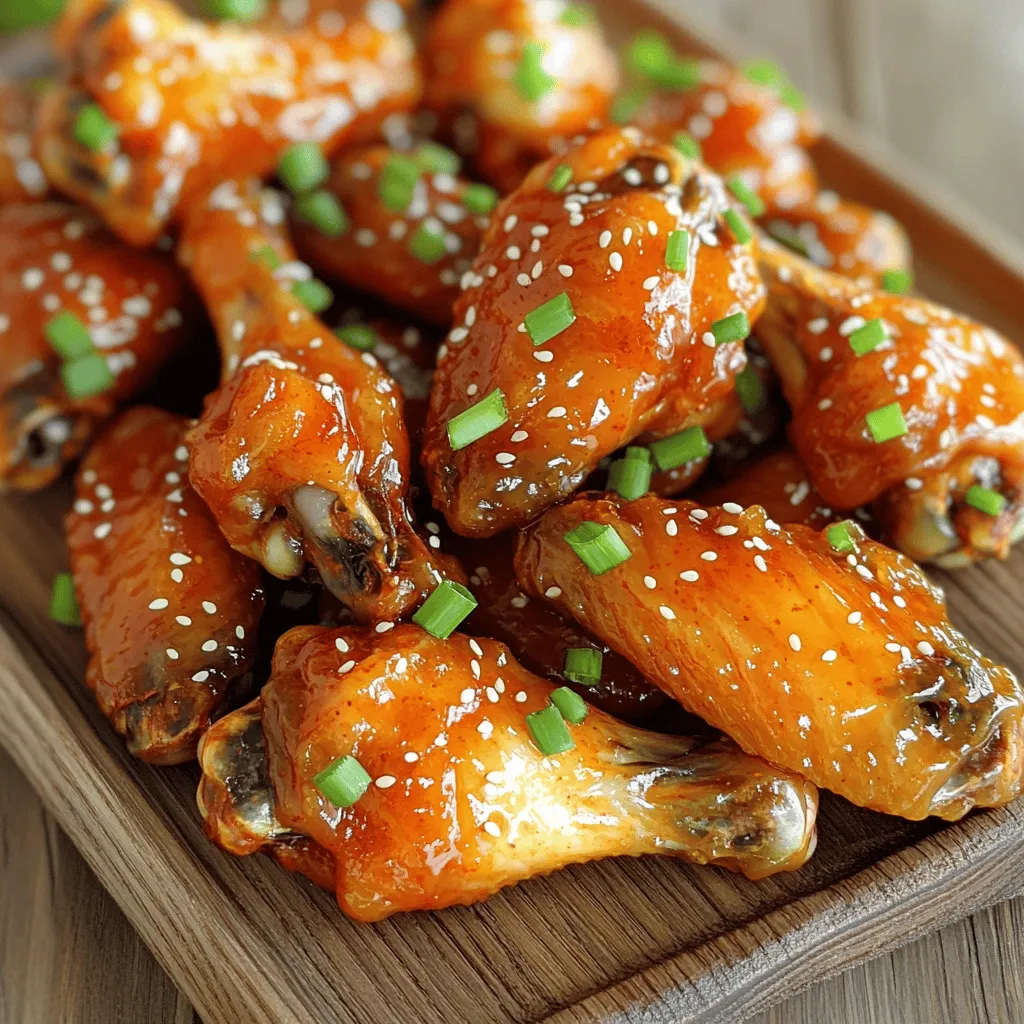
Honey Sriracha Wings Delightful and Spicy Treat

Get ready for a flavor explosion with my Honey Sriracha Wings! These wings are not just any snack; they combine

This recipe for Caramel Pecan Monkey Bread is simple and fun. Here’s what you need: - 2 cans of refrigerated biscuit dough (8 pieces each) - 1 cup packed brown sugar - 1/2 cup granulated sugar - 1 teaspoon ground cinnamon - 1/2 cup unsalted butter, melted - 1 cup pecans, chopped - 1 teaspoon vanilla extract - A pinch of salt These ingredients create a sweet, gooey treat. The biscuit dough forms the base, while the sugar and butter give it that rich caramel flavor. The pecans add a nice crunch. You can find these items at any grocery store, making it easy to whip up this dessert. The mix of flavors and textures makes each bite delightful. 1. Preheat your oven to 350°F (175°C). Grease a 10-inch bundt pan with cooking spray or butter. 2. In a medium bowl, mix the granulated sugar and cinnamon together. This mix adds great flavor. 3. Open the cans of biscuit dough. Cut each biscuit into quarters. This makes them easier to coat. 1. In a separate bowl, combine chopped pecans, melted butter, brown sugar, vanilla extract, and a pinch of salt. Stir until the mixture is well combined. 2. Layer half of the coated biscuit balls at the bottom of the bundt pan. Spread them evenly. 3. Sprinkle half of the pecan mixture on top of the biscuit balls. This adds a nice crunch. 4. Add the remaining biscuit balls on top of the pecan layer. 5. Finish with the rest of the pecan mixture. Pour any remaining melted butter evenly over the top. 1. Bake in the preheated oven for 30-35 minutes. Look for a golden brown color. 2. To check for doneness, insert a toothpick. It should come out clean. 3. Let it cool for about 10 minutes. This helps the bread set. 4. Carefully invert the bundt pan onto a serving plate. The monkey bread should come out easily. Enjoy your warm Caramel Pecan Monkey Bread! To make the best Caramel Pecan Monkey Bread, start with even dough ball coating. After cutting the biscuits, roll each piece into a ball. Make sure each ball gets fully coated in the cinnamon-sugar mix. This step adds great flavor. Check your baking time closely. Bake for 30 to 35 minutes. The bread should turn golden brown. Insert a toothpick in the center to check doneness. If it comes out clean, your bread is ready. To make your monkey bread look stunning, drizzle it with extra caramel sauce. Use a spoon to create a beautiful pattern. This adds sweetness and makes it eye-catching. Also, consider adding toasted pecans on top. They add crunch and a nice touch. To toast, just place them in a dry pan over medium heat for a few minutes. Stir often to prevent burning. This will enhance their flavor and make your dish more appealing. {{image_2}} You can change the flavor of your Caramel Pecan Monkey Bread easily. Adding chocolate chips gives a sweet twist. Just mix in a cup of semi-sweet or dark chocolate chips with the pecans. Dried fruits also work well. Consider raisins, cranberries, or even chopped apples. They add a nice chew and extra sweetness. Try different nuts too! Walnuts or almonds can replace pecans for a new taste. If you need a gluten-free option, use gluten-free biscuit dough. Many brands offer this now. Check your local store for options. For vegan substitutions, swap the butter for coconut oil or a vegan butter spread. Use a plant-based milk in place of any dairy. This way, everyone can enjoy this treat. To store your Caramel Pecan Monkey Bread, let it cool first. Wrap it tightly in plastic wrap or foil. Place it in the fridge. This keeps it fresh for about three days. Avoid using a container that is too tight. This can make the bread soggy. To keep the texture nice, place a paper towel in the container. The towel absorbs extra moisture. Another tip is to store it in a loose bag. This allows some air to flow, keeping the bread from getting too soft. When it comes to reheating, you have two choices: microwave or oven. The microwave is quick. Place a piece on a plate and heat for about 20 seconds. Check if it is warm enough. If not, heat it for another 10 seconds. Using the oven gives a better texture. Preheat your oven to 350°F (175°C). Wrap the monkey bread in foil. Heat it for about 10-15 minutes. This method keeps the bread warm and crispy. Enjoy the warm, gooey goodness! Yes, you can make this dish ahead of time. Prepare the monkey bread and let it cool. Then, cover it well and store it in the fridge. Just reheat it before serving for a warm treat. Caramel Pecan Monkey Bread is great on its own. You can serve it with a scoop of vanilla ice cream or a drizzle of extra caramel sauce. Fresh fruit, like sliced bananas or berries, pairs well too. Store the monkey bread in the fridge for up to three days. Make sure it’s in an airtight container to keep it fresh. Check for any signs of spoilage before eating. Yes, you can freeze it. Wrap the cooled monkey bread tightly in plastic wrap and aluminum foil. It can last in the freezer for up to three months. Thaw it in the fridge overnight before reheating. You now have a simple recipe for Caramel Pecan Monkey Bread. We covered the ingredients and steps to make it perfect. Remember to layer the dough balls well and watch the baking time for the best results. You can customize it with flavors and store leftovers properly. This treat is sure to impress friends and family. Enjoy making it, and have fun with the variations!

Caramel Pecan Monkey Bread Easy and Irresistible Treat

If you’re craving a sweet, sticky, and nutty treat, you’ve found it! My Caramel Pecan Monkey Bread is easy to

For a great Chicken Wild Rice Stew, you need these key ingredients: - 1 lb boneless, skinless chicken thighs, diced - 1 cup wild rice, rinsed and drained - 4 cups low-sodium chicken broth - 1 cup carrots, diced - 1 cup celery, diced - 1 cup onion, chopped - 3 cloves garlic, minced - 1 teaspoon dried thyme - 1 teaspoon dried rosemary - 1 bay leaf - Salt and pepper to taste These ingredients work well together. The chicken gives a nice flavor. The wild rice adds a hearty touch. The veggies bring freshness and color. Each herb boosts the taste. For some extra flavor, consider adding these optional ingredients: - 1 cup heavy cream (for creaminess) - Chopped fresh parsley for garnish Adding heavy cream makes the stew richer. Fresh parsley gives a nice finish and brightens the dish. You can also try adding a squeeze of lemon for a citrus twist. To keep your stew fresh and tasty, follow these tips: - Use fresh herbs when you can. They add a lot of flavor. - Make sure to rinse the wild rice well. This helps remove any grit. - Dice the vegetables evenly. This ensures they cook at the same rate. - Taste the stew before serving. Adjust salt and pepper as needed. These simple tips improve the dish. You’ll end up with a warm, cozy stew perfect for any day. First, gather your ingredients. You need: - 1 lb boneless, skinless chicken thighs, diced - 1 cup wild rice, rinsed and drained - 4 cups low-sodium chicken broth - 1 cup carrots, diced - 1 cup celery, diced - 1 cup onion, chopped - 3 cloves garlic, minced - 1 teaspoon dried thyme - 1 teaspoon dried rosemary - 1 bay leaf - 1 cup heavy cream (optional for creaminess) - Salt and pepper to taste - Chopped fresh parsley for garnish Wash and chop the vegetables. Dice the chicken into small pieces. Rinse the wild rice well to remove excess starch. This step helps the rice cook evenly. Now, take your slow cooker. Add the diced chicken, wild rice, carrots, celery, onion, and garlic. Pour in the chicken broth. Then, sprinkle in the dried thyme, rosemary, and add the bay leaf. Mix everything gently with a spoon. Season with salt and pepper to your taste. Cover the slow cooker with the lid. Set it to low for 6-8 hours or high for 3-4 hours. The chicken should be cooked fully, and the rice should be tender. If you want a creamier stew, remove the bay leaf. Stir in the heavy cream and let it cook for another 15-30 minutes. Before serving, taste and adjust the seasoning if needed. Serve hot, garnished with chopped fresh parsley for a pop of color. To make your Chicken Wild Rice Stew creamier, add heavy cream toward the end. This gives a rich texture. If you want a lighter option, blend in a splash of milk instead. You can also use sour cream or yogurt for a tangy taste. Stir it in just before serving for the best results. Use fresh herbs when possible to boost flavor. Dried thyme and rosemary work great, but fresh ones elevate your stew. Adjust the salt and pepper to your liking. Taste as you go to find the right balance. Adding a squeeze of lemon juice can brighten the flavors too. If your stew is too thick, add more broth or water. Stir well to mix. If it's too thin, let it cook longer with the lid off. This helps reduce the liquid. If the rice isn't tender, check your cook time. Each slow cooker varies, so adjust as needed. {{image_2}} You can easily change the protein in this stew. Chicken is great, but try turkey or even pork. If you want a twist, use diced beef for a heartier meal. Fish can also work, but add it later in cooking. This keeps it from getting tough. If you want to keep it simple, stick to chicken. It pairs well with the rice and broth. Adding more veggies boosts the flavor and nutrients. Think about spinach, kale, or peas. These greens add color and vitamins. You can also toss in bell peppers for a sweet crunch. Just chop them small so they cook well. Root veggies like potatoes or parsnips add heartiness too. Feel free to mix and match based on what you have. To make this stew vegetarian, skip the chicken. Use vegetable broth instead of chicken broth. For protein, add beans or lentils. They give a nice texture. You can also add tofu or tempeh for extra protein. If you want creaminess, use coconut milk instead of heavy cream. This gives it a rich and tropical flavor. This way, anyone can enjoy this warm, cozy stew. After enjoying your Chicken Wild Rice Stew, let it cool down. Use an airtight container to store leftovers. This keeps the stew fresh and tasty. If you plan to eat it within 3 days, store it in the fridge. For longer storage, follow the freezing tips below. When you are ready to enjoy your stew again, reheat it on the stove. Use low heat and stir often. This helps it heat evenly. You can also use the microwave. Place the stew in a microwave-safe bowl and cover it. Heat in short bursts, stirring in between, until it’s hot. If the stew seems thick, add a splash of chicken broth or water to loosen it up. To freeze your Chicken Wild Rice Stew, pour it into a freezer-safe container. Leave some space at the top for expansion. Label the container with the date. The stew can last up to 3 months in the freezer. When you are ready to eat it, thaw it in the fridge overnight. Once thawed, reheat it as mentioned above. Enjoy that cozy flavor again! You can use brown rice. It will change the taste and texture. Brown rice cooks faster, so check it often. Use the same amount, but adjust the cooking time to around 4-5 hours on low. This will help avoid mushy rice. The stew is done when the chicken is fully cooked and tender. The rice should be soft and fluffy. You can also test the chicken with a fork. If it shreds easily, it's ready. Yes, you can cook it on the stovetop. Start by browning the chicken in a pot first. Then, add the veggies and broth. Let it simmer for about 45 minutes until everything is tender. This stew pairs well with crusty bread or a fresh salad. You can also serve it over mashed potatoes for a hearty meal. Rice or quinoa can work, too, if you want more grains. In the fridge, this stew lasts about 3-4 days. Make sure to store it in an airtight container. If you want it to last longer, consider freezing it for up to 3 months. In this post, we explored key ingredients for Chicken Wild Rice Stew. I shared cooking tips for fresh flavors and detailed a step-by-step guide for a smooth cooking process. We also covered ways to tweak your stew, like adding veggies or different proteins. Remember, proper storage helps keep your stew tasty for longer. With these tips, you can enjoy a comforting meal any night. Happy cooking!

Chicken Wild Rice Stew Slow Cooker Delightful Meal

Looking for a cozy meal that warms the heart? My Chicken Wild Rice Stew in the slow cooker is just

- 1 cup unsalted butter, softened - 1 cup granulated sugar - 1/2 cup brown sugar, packed - 1 cup pumpkin puree - 2 large eggs - 1 teaspoon vanilla extract - 2 1/2 cups all-purpose flour - 2 teaspoons cream of tartar - 1 teaspoon baking soda - 1/2 teaspoon salt - 2 teaspoons ground cinnamon - 1 teaspoon ground nutmeg - 1/2 teaspoon ground ginger - 1/2 cup powdered sugar - 1/4 cup cream cheese, softened - 1 tablespoon milk - 1/2 teaspoon vanilla extract You can swap unsalted butter with coconut oil for a dairy-free option. Use maple syrup instead of granulated sugar if you prefer a natural sweetener. If you don't have cream of tartar, you can replace it with lemon juice or vinegar in equal amounts. For the filling, Greek yogurt can replace cream cheese for a lighter option. Also, make sure your pumpkin puree is pure and not the spiced pie filling. This keeps the flavors just right. First, preheat your oven to 350°F (175°C). This step helps the cookies bake evenly. Next, grab a large mixing bowl. In this bowl, combine 1 cup of softened unsalted butter, 1 cup of granulated sugar, and 1/2 cup of packed brown sugar. Mix these ingredients until they become light and fluffy. It should take about 2-3 minutes. Then, add in 1 cup of pumpkin puree, 2 large eggs, and 1 teaspoon of vanilla extract. Mix it all together until fully combined. In a separate bowl, whisk together 2 1/2 cups of all-purpose flour, 2 teaspoons of cream of tartar, 1 teaspoon of baking soda, 1/2 teaspoon of salt, 2 teaspoons of ground cinnamon, 1 teaspoon of ground nutmeg, and 1/2 teaspoon of ground ginger. Now, slowly add the dry mixture into the wet mixture. Stir until everything is well mixed. For easier handling, chill the dough in the fridge for about 30 minutes. After chilling, scoop tablespoon-sized portions of dough and place them on a lined baking sheet. Make sure to space them about 2 inches apart. This spacing helps the cookies spread without touching each other. Bake in your preheated oven for 10-12 minutes. The edges should turn lightly golden. Once done, let the cookies cool on the baking sheet for a few minutes. Then, transfer them to a wire rack to cool completely. This cooling step is key to getting the right texture for your sandwich cookies. While your cookies cool, prepare the filling. In a medium bowl, combine 1/2 cup of powdered sugar, 1/4 cup of softened cream cheese, 1 tablespoon of milk, and 1/2 teaspoon of vanilla extract. Mix these ingredients until you have a smooth and creamy filling. Once your cookies are completely cool, take one cookie and spread a generous tablespoon of filling on the flat side. Then, take another cookie and press it down on top to create a sandwich. Repeat this process until all cookies are filled. Now, you have a delightful treat ready to enjoy! To get the right texture for your cookies, start with room temperature butter. Cream it well with the sugars until it looks fluffy. This helps trap air, which makes the cookies light. Chill the dough for about 30 minutes before baking. This step firms up the dough, making it easier to scoop and shape. Bake until the edges are golden but the centers are soft. They will firm up as they cool. One common mistake is overmixing the dough. Mixing too long can make the cookies tough instead of soft. Another issue is skipping the chilling step. If you skip this, your cookies may spread too much and lose their shape. Also, be sure to measure your flour correctly. Too much flour can lead to dry cookies. Use the spoon and level method for the best results. To bring out the best flavors, use fresh spices when possible. Ground cinnamon, nutmeg, and ginger all add warmth to your cookies. You can also experiment. Try adding a pinch of cloves or allspice for extra depth. For a fun twist, consider mixing in some chocolate chips or chopped nuts. This can add texture and a new flavor layer. {{image_2}} You can change the filling for your Pumpkin Snickerdoodle Sandwich Cookies. Try using whipped cream for a light, airy texture. A chocolate ganache can add richness and depth. You might even love a maple cream filling for a unique twist. Each of these ideas gives a new taste to the cookies. To make these cookies gluten-free, replace all-purpose flour with a gluten-free blend. You can find many good mixes at the store. Just make sure the blend includes xanthan gum for the right texture. This swap keeps the cookies soft and tasty, just like the original recipe. Want to spice things up? Add a bit of orange zest to the dough. This gives a bright, fresh flavor. You could also mix in a dash of cardamom or allspice for warmth. For chocolate lovers, toss in some mini chocolate chips for a sweet surprise. These twists can make your cookies stand out even more. To keep your Pumpkin Snickerdoodle Sandwich Cookies fresh, place them in an airtight container. Layer parchment paper between the cookies to prevent sticking. Store them at room temperature for up to three days. If you want them to last longer, store them in the fridge for a week. Freezing these cookies is easy and smart. First, let the cookies cool completely. Then, place them in a single layer on a baking sheet. Freeze them for about an hour. Once frozen, transfer them to a freezer-safe bag or container. They can last up to three months in the freezer. When you're ready to enjoy, just thaw them at room temperature. These cookies are best eaten fresh but still tasty after freezing. If stored in the fridge, consume them within a week for the best flavor. To keep them soft, avoid exposing them to air. Always check for any signs of spoilage before eating, especially if they sit for a while. Yes, you can use canned pumpkin. Canned pumpkin is easy and saves time. It gives the cookies moisture and flavor. Just make sure to choose pure pumpkin, not pumpkin pie filling. This keeps your cookies from being too sweet. To make these cookies softer, try a few tricks. First, do not over-bake them. Remove them when the edges are light golden. Second, add a little more pumpkin puree. This adds moisture, making the cookies soft. Lastly, chill the dough before baking. This helps the cookies rise and stay tender. If you need a substitute for cream cheese, try mascarpone cheese. It has a similar texture and taste. You can also use Greek yogurt. It will give a tangy flavor but keep the filling creamy. Just make sure to adjust the sugar if you use a tart yogurt. In this article, we explored the key ingredients for cookies and filling, and shared helpful tips. We also covered step-by-step instructions for preparation, baking, and assembly. You learned ways to enhance texture, avoid common mistakes, and explore fun variations. Finally, we discussed proper storage methods to keep your cookies fresh. Now, it’s time to get baking! Trust these tips for delicious cookies that everyone will love.

Pumpkin Snickerdoodle Sandwich Cookies Delightful Treat

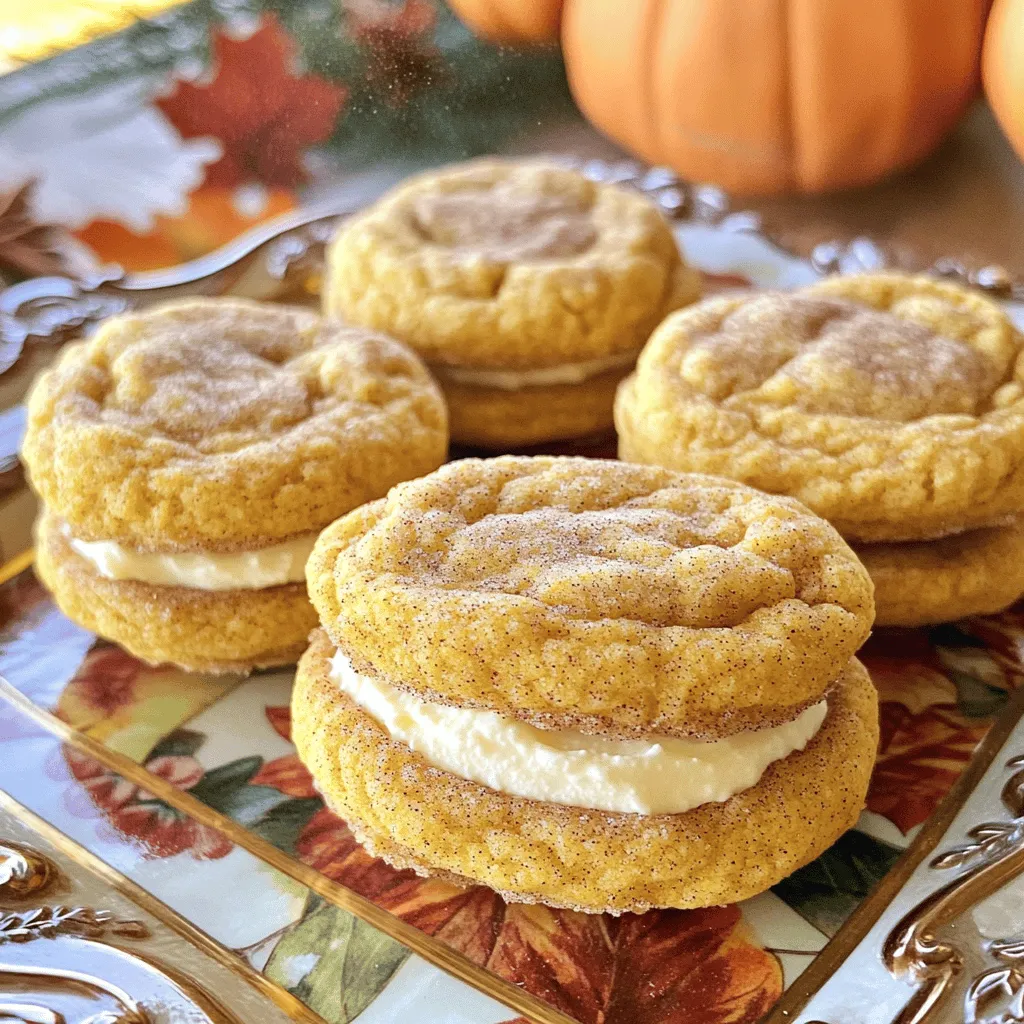
Get ready to indulge in a fall favorite: Pumpkin Snickerdoodle Sandwich Cookies! These delightful treats combine soft, spiced cookies with

- 1 lb chicken or turkey sausage, sliced - 2 medium sweet potatoes, diced - 1 cup Brussels sprouts, halved - 2 carrots, sliced - 1 red bell pepper, chopped - 1 yellow onion, cut into wedges - 3 cloves garlic, minced - 3 tablespoons olive oil - 1 tablespoon maple syrup - 1 teaspoon dried thyme - 1 teaspoon smoked paprika - Salt and pepper to taste In this dish, I love using chicken or turkey sausage for a lighter touch. They bring great flavor without being too heavy. Sweet potatoes add a nice sweetness and creamy texture. The Brussels sprouts and carrots add crunch and color. I always add garlic for a punch of flavor. Olive oil helps everything roast well and keeps it moist. Maple syrup gives a hint of sweetness that balances the savory sausage and veggies. Thyme and smoked paprika add depth to the dish. Salt and pepper bring all the flavors together. - Fresh parsley - Additional herbs Garnishing is a simple way to elevate your dish. Fresh parsley adds brightness and color. You can also use other fresh herbs like thyme or rosemary for extra flavor. A small sprinkle right before serving makes it look and taste even better. 1. Preheating the oven: Start by preheating your oven to 425°F (220°C). This step is key for getting crispy veggies. 2. Preparing the vegetables: Grab a large bowl. Dice 2 medium sweet potatoes. Halve 1 cup of Brussels sprouts. Slice 2 carrots. Chop 1 red bell pepper. Cut 1 yellow onion into wedges. Add all these veggies to the bowl. You want a colorful mix! 1. Mixing ingredients: Drizzle 3 tablespoons of olive oil and 1 tablespoon of maple syrup over the veggies. Add 3 cloves of minced garlic, 1 teaspoon of dried thyme, and 1 teaspoon of smoked paprika. Sprinkle salt and pepper to taste. Toss everything well so the flavors blend. 2. Baking instructions and timing: Spread the veggie mix in a single layer on a large baking sheet. Next, lay 1 pound of sliced chicken or turkey sausage on top. Bake in the oven for 25-30 minutes. Stir halfway through to ensure even cooking. The veggies should be tender and caramelized, while the sausage cooks through. After baking, let it cool for a few minutes. Enjoy! Choosing the right sausage I love using chicken or turkey sausage for this dish. They add great flavor and are lighter than pork. You can also try spicy sausage for a kick. Just slice them thin for even cooking. Adjusting cooking times based on oven type Ovens can cook food differently. If you have a convection oven, reduce the cooking time by about five minutes. Keep an eye on the veggies. They should be soft with a bit of crisp. Plating and presentation ideas You can serve this dish straight from the sheet pan for a cozy look. If you prefer a fancier touch, transfer it to a large serving platter. Drizzle a bit of olive oil on top and sprinkle fresh herbs for color. It makes a big difference! Best side dishes to accompany the meal This dish is filling, but a light side salad pairs well. A simple green salad with lemon vinaigrette will balance the meal. You could also serve crusty bread to soak up any juices. {{image_2}} You can change up the veggies in your sausage harvest veggie sheet pan. If you want a different taste, try these options: - Zucchini: Adds a nice texture. - Cauliflower: A great low-carb choice. - Asparagus: Gives a fresh flavor. You can swap the sausage too. Try pork sausage for a richer taste. Or, use veggie sausage if you want a meat-free meal. When considering seasonal ingredients, think about what is fresh. In fall, add root veggies like parsnips or turnips. In summer, use bell peppers or zucchini. To make this dish gluten-free, ensure your sausage is labeled as such. Most brands offer gluten-free options. If you want a vegan version, use plant-based sausage. You can replace the honey with maple syrup for sweetness. For low-carb options, skip the sweet potatoes. Use broccoli or cauliflower instead. This keeps the dish light while still tasty. After you enjoy your Sausage Harvest Veggie Sheet Pan, store any leftovers in the fridge. Use an airtight container to keep them fresh. This method helps to lock in flavor and moisture. It’s best to eat the leftovers within 3 to 4 days. If you want to save some for later, you can freeze the dish. Let it cool completely before freezing. Use freezer-safe bags or containers. This way, you can enjoy it up to 2 to 3 months later. Just label the containers with the date for easy reference. When you're ready to eat leftovers, you can reheat them in several ways. The oven works great to keep the texture. Preheat your oven to 350°F (175°C) and put the dish in for about 15 to 20 minutes. Stir halfway to ensure even heating. If you're short on time, you can use the microwave. Place the leftovers in a microwave-safe dish. Cover it with a damp paper towel to help keep moisture. Heat in 1-minute bursts until warmed through. This method is quick but may make the veggies a bit softer. No matter how you reheat, make sure to enjoy your meal! Can I use different types of sausage? Yes, you can use any sausage you like. Chicken or turkey sausage works well. You can also try pork or plant-based options. Just make sure to cook them fully. Each type adds its own flavor. Feel free to mix and match. How do I know when the veggies are done? The veggies are done when they are tender and slightly brown. You can poke them with a fork to check. If they are soft and can be pierced easily, they are ready. The edges should have a nice caramel color. What to do if the dish is too soggy? If your dish turns out soggy, try cooking it longer. Remove it from the oven and let it sit for a few minutes to cool. You can also increase the oven temperature slightly. This will help crisp up the veggies and sausage. Can this be made ahead of time? Yes, you can prep the veggies and sausage ahead of time. Just store them in the fridge for up to a day. When ready to cook, mix everything and bake as directed. This saves time during busy weeknights. This blog post covered a simple dish featuring chicken or turkey sausage and sweet potatoes. We explored key ingredients, preparation steps, cooking methods, and helpful tips. You can easily adjust the recipe to match your taste and dietary needs. Remember, using fresh herbs and the right cooking times makes a big difference. With these ideas, you can create a hearty meal. Enjoy the process and make it your own!

Sausage Harvest Veggie Sheet Pan Easy and Quick Meal

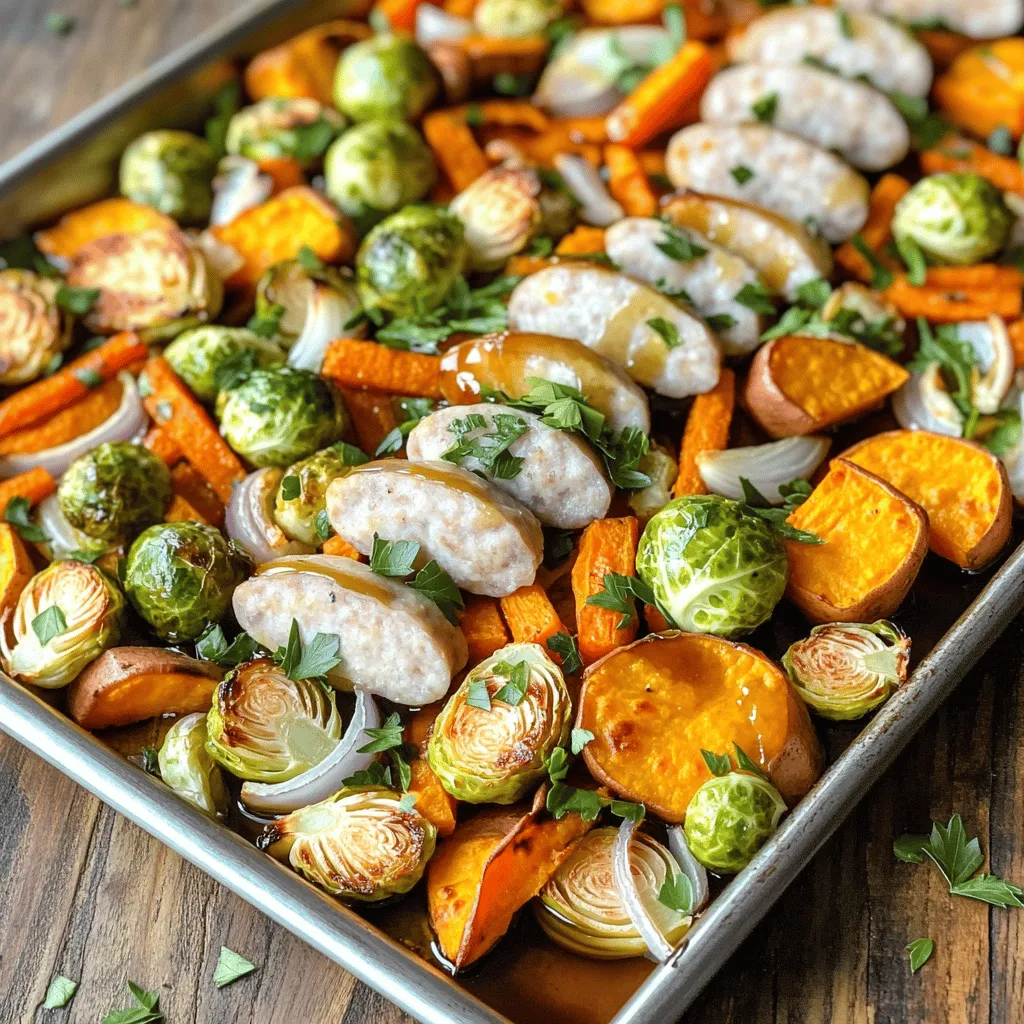
Looking for a quick and easy meal? Try this Sausage Harvest Veggie Sheet Pan recipe! You’ll love how simple it

To make Apple Cinnamon Overnight Chia Pudding, you need the following items: - 1/2 cup chia seeds - 2 cups unsweetened almond milk (or milk of choice) - 1 large apple, grated or diced - 2 tablespoons maple syrup (or honey) - 1 teaspoon ground cinnamon - 1/2 teaspoon vanilla extract - A pinch of salt - Optional toppings: sliced apple, chopped nuts, extra cinnamon These ingredients work together to create a creamy and flavorful pudding. Chia seeds are the star here, providing texture and health benefits. The almond milk adds a subtle nutty flavor. You can use any milk you prefer, but almond milk keeps it light and dairy-free. The apple brings sweetness and a nice crunch. I like using a tart apple for a balanced taste. Maple syrup or honey adds a touch of sweetness, while cinnamon gives warmth and spice. The vanilla extract enhances the overall flavor, and a pinch of salt rounds it out. Feel free to customize your toppings. Sliced apples add freshness, chopped nuts give crunch, and a sprinkle of cinnamon makes it look pretty. These ingredients make this pudding not just tasty, but also fun to serve and enjoy! 1. In a medium bowl, combine 1/2 cup chia seeds and 2 cups of almond milk. You may use any milk you like. 2. Next, add 2 tablespoons of maple syrup, 1 teaspoon of ground cinnamon, 1/2 teaspoon of vanilla extract, and a pinch of salt. Whisk this well until the chia seeds spread out evenly. 3. Now, take 1 large apple and grate or dice it. Stir it gently into the mixture. This adds a nice crunch and flavor. 4. Cover the bowl with plastic wrap or pour everything into a mason jar. 5. Place it in the fridge for at least 4-6 hours or overnight. This soaking time helps the chia seeds turn into a pudding. 1. When you're ready to serve, take the pudding out of the fridge. Stir it well before serving. This helps mix everything again. 2. For extra flavor, add toppings. You can use sliced apple, chopped nuts, or a sprinkle of cinnamon. These add great texture and taste. - If your pudding is too thick, just add a little more almond milk. Stir until it reaches the texture you like. - Make sure to soak the chia seeds long enough. This is key for a nice, creamy pudding. The longer, the better! - Importance of soaking time: Soaking chia seeds is key. Let them soak for at least 4 to 6 hours. Overnight is best. This helps them swell and form a thick pudding texture. If you skip this, your pudding may be too watery. - Achieving the best flavor balance: Use fresh ingredients. A good apple adds sweetness and crunch. Ground cinnamon gives warmth. The maple syrup or honey adds a nice touch of sweetness. Adjust these to your taste for the best flavor. - Flavor variations to try: Want to mix it up? Use bananas or berries instead of apples. You can also switch up the spices. Try nutmeg or ginger for a fun twist. Each option brings a new taste. - Ingredient substitutions: Don’t have almond milk? Use any milk you like. Coconut milk adds a tropical flavor. If you can’t find maple syrup, honey works great too. Feel free to experiment with what you have. - Adding superfoods: Want to boost nutrition? Add a spoonful of nut butter or a sprinkle of flax seeds. These add healthy fats and protein. They also make your pudding more filling. - Increasing protein content: To make it protein-rich, mix in Greek yogurt or a scoop of protein powder. This makes your breakfast even more satisfying and nutritious. {{image_2}} You can switch up the flavor of your chia pudding easily. Try using different fruits. Bananas add a creamy texture. Berries, like strawberries or blueberries, give a tart kick. Each fruit brings a unique taste. You can also play with spices. Nutmeg adds warmth, while ginger gives a nice zing. Mixing spices can change the whole vibe of your pudding. Experiment to find your favorite combo! This recipe fits many diets. It’s vegan since it uses almond milk. For those avoiding gluten, this pudding is safe. You can also make it nut-free by using oat milk or rice milk. Need more protein? Add a scoop of plant-based protein powder. This simple change boosts the nutritional value. You can enjoy your pudding guilt-free! Serving your chia pudding can be fun! Use mason jars for a cute look. Layer it with yogurt for extra creaminess. Top it with sliced apple or chopped nuts for crunch. Pair your pudding with other breakfast items. It goes well with toast or smoothies. This way, you create a balanced meal. Enjoy your delightful breakfast! To keep your apple cinnamon overnight chia pudding fresh, always store it in the fridge. Place it in an airtight container to prevent any smells from other foods. This pudding lasts for about 4 to 5 days. If you notice any strange smell or change in texture, it’s best to throw it away. Yes, you can freeze chia pudding! Just put it in a freezer-safe container. Leave some space at the top because it expands when frozen. To thaw it, place the container in the fridge overnight. If it looks too thick after thawing, mix in a bit of almond milk to rehydrate it. I recommend using glass jars or airtight plastic containers for storage. Glass jars let you see your pudding and keep it fresh. If you add toppings, like sliced apples or nuts, store them separately. This keeps them crisp and tasty when you are ready to eat. How long do chia seeds need to soak? Chia seeds need to soak for at least 4 to 6 hours. This time allows the seeds to absorb the liquid. You can also soak them overnight for a thicker pudding. The longer they soak, the creamier the pudding becomes. Can I use other types of milk? Yes, you can use other types of milk. Almond milk works great, but you can try coconut, soy, or oat milk. Each milk adds its own flavor and texture. Just choose what you enjoy best! Nutritional profile Chia seeds are tiny but mighty. They are high in fiber, protein, and omega-3 fatty acids. One serving has about 140 calories and 10 grams of fiber. This makes them great for digestion and heart health. Health benefits of the other ingredients The apple adds vitamins and antioxidants. Cinnamon can help lower blood sugar levels. Maple syrup offers natural sweetness and minerals. Together, these ingredients make the pudding healthy and tasty. What to do if the pudding is too thick or too runny? If your pudding is too thick, add a splash of almond milk to thin it out. Stir well to combine. If it's too runny, add a bit more chia seeds and let it sit for a little while. It will thicken up. Common mistakes to avoid when making chia pudding One common mistake is not mixing the seeds well. Make sure to whisk the chia seeds into the liquid. This stops clumping. Another mistake is leaving out the soaking time. Always allow enough time for the seeds to absorb the liquid. Chia pudding is simple and healthy. We explored the key ingredients, like chia seeds and almond milk. You learned how to prepare, serve, and store this tasty dish. Remember the tips to perfect your pudding, and try different flavors to keep it exciting. Chia pudding is versatile and packed with nutrients. Enjoy making it your own while enjoying its health benefits. With these easy steps, you'll create a delicious treat every time.

Apple Cinnamon Overnight Chia Pudding Delightful Recipe

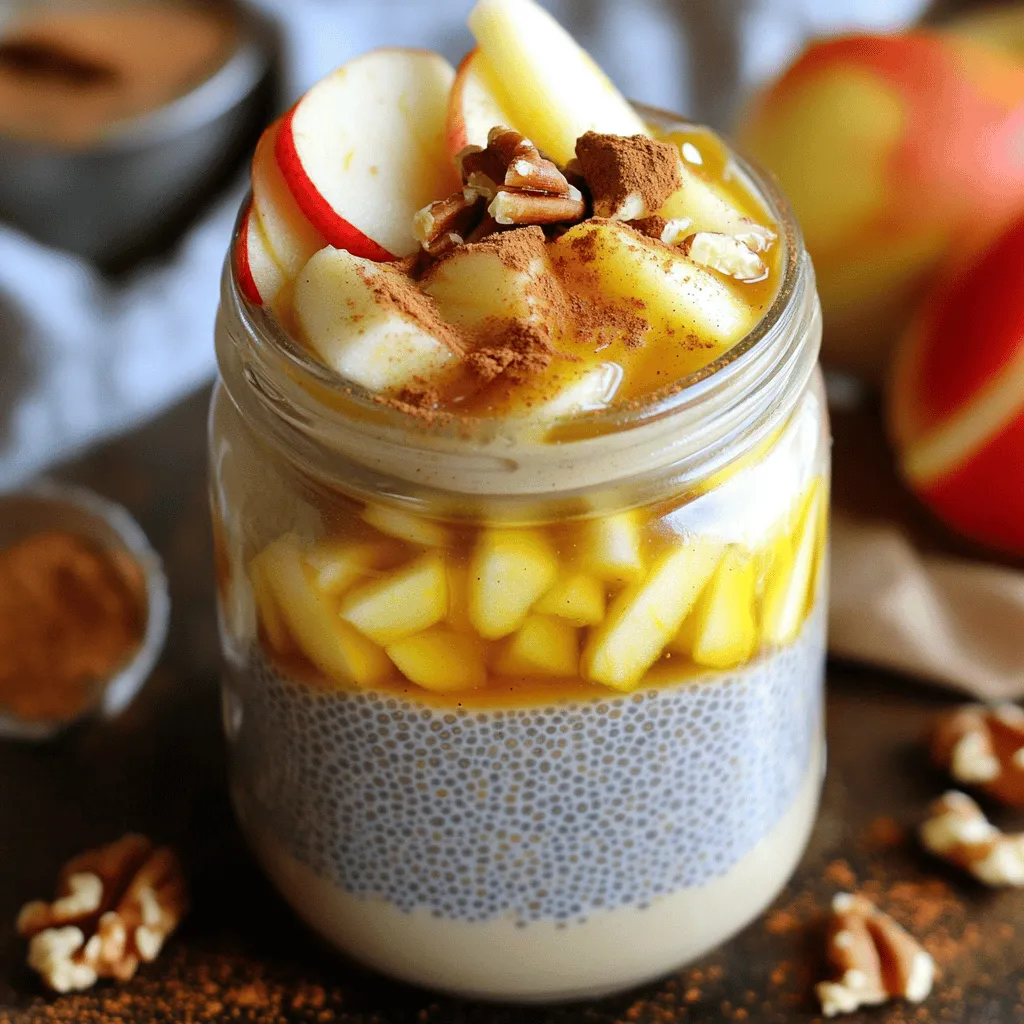
Looking for a simple, tasty breakfast? Try my Apple Cinnamon Overnight Chia Pudding! Packed with flavor and good nutrition, this

- 1 ½ cups graham cracker crumbs - ⅓ cup sugar - ½ cup unsalted butter, melted - 8 oz cream cheese, softened - 1 cup creamy peanut butter - 1 cup powdered sugar - 1 tsp vanilla extract - 1 cup heavy whipping cream - 1 cup mini peanut butter cups, chopped - Extra mini peanut butter cups for topping - Graham cracker crumbs form a crunchy crust. - Sugar adds sweetness to balance flavors. - Unsalted butter binds the crust together. - Cream cheese gives the cheesecake its creamy texture. - Creamy peanut butter provides rich flavor and creaminess. - Powdered sugar sweetens the filling and helps it set. - Vanilla extract adds depth to the flavor. - Heavy whipping cream creates lightness and fluffiness. - Mini peanut butter cups add fun texture and flavor bursts. - For graham cracker crumbs, I recommend Honey Maid. - Use Domino sugar for reliable sweetness. - Land O'Lakes makes great unsalted butter. - Philadelphia cream cheese is my go-to for richness. - Jif is a top choice for creamy peanut butter. - 10X powdered sugar by Domino is perfect for this recipe. - McCormick is a trusted brand for vanilla extract. - For whipping cream, use Horizon Organic for quality. - Reese's mini peanut butter cups are the best topping choice. To start, gather your ingredients. You need graham cracker crumbs, sugar, and melted butter. In a medium bowl, mix 1 ½ cups of graham cracker crumbs, ⅓ cup of sugar, and ½ cup of melted butter. Stir until the mix is crumbly. Next, take a greased 9x9-inch baking dish. Press the crumb mixture firmly into the bottom. This forms your crust. Place the dish in the refrigerator while you make the filling. Now, let’s create the cheesecake filling. In a large bowl, beat 8 oz of softened cream cheese and 1 cup of creamy peanut butter together. Mix until it’s smooth and creamy. Gradually add 1 cup of powdered sugar and 1 tsp of vanilla extract. Keep mixing until everything is smooth. In another bowl, whip 1 cup of heavy cream until stiff peaks form. Gently fold the whipped cream into the peanut butter mix. Finally, stir in 1 cup of chopped mini peanut butter cups, saving some for later. Spread the cheesecake filling evenly over your chilled crust. Use a spatula to smooth the top. Now, take the reserved mini peanut butter cups and press them lightly into the filling. Cover the dish and place it in the refrigerator. Let it chill for at least 4 hours, or until it’s firm. Once set, cut the bars and serve them cold. Enjoy every bite of this no-bake treat! To get a smooth and creamy filling, start with room-temperature cream cheese. This ensures it blends well with peanut butter. Beat them together until there are no lumps. Once mixed, fold in the whipped cream gently. This keeps the mixture light and airy. To avoid a soggy crust, press the graham cracker mixture firmly into the dish. This helps it hold together. Make sure to chill the crust while you prepare the filling. This sets it well before adding the creamy layer. For a beautiful presentation, slice the bars neatly and place them on a nice platter. You can drizzle melted chocolate or caramel on top for flair. Adding some crushed graham crackers enhances the look and adds a nice crunch. Adjust the layout for a neat, inviting display. {{image_2}} You can get creative with toppings for these bars. Try adding a layer of melted chocolate on top. This adds a rich flavor. You can also sprinkle crushed nuts or even drizzle caramel sauce for a sweet touch. If you love texture, add more chopped mini peanut butter cups on top. They look great and taste amazing. Mixing flavors can make these bars even better. You can add a bit of cocoa powder to the filling. This makes a chocolate peanut butter flavor that is hard to resist. If you want a fruity twist, try adding some crushed strawberries or raspberries. They brighten the flavor and add a nice contrast. To make a gluten-free crust, use gluten-free graham cracker crumbs. You can find these at most grocery stores. Another option is to use ground almonds or oats. Just mix them with the same amount of sugar and melted butter. This makes a tasty crust that everyone can enjoy. To keep your Peanut Butter Cup Cheesecake Bars fresh, store them in an airtight container. I suggest putting a layer of parchment paper between the bars and the container. This helps prevent sticking. Place them in the fridge for best results. They will stay fresh and tasty for several days. You can freeze these cheesecake bars to enjoy later. First, cut the bars into pieces. Wrap each piece tightly in plastic wrap. Then, place the wrapped bars in a freezer-safe container. They can last for up to three months in the freezer. To eat, just thaw them in the fridge overnight. These bars taste best when eaten within a week. However, if kept in the fridge, they can last about 5 to 7 days. Always check for any changes in smell or texture before eating. For the best flavor, enjoy them within the first few days. Yes, you can use crunchy peanut butter. It adds a fun texture. The bits of peanut give the bars an extra crunch. Just make sure to stir it well. The flavor will stay rich and tasty. You can tell the bars are set when they feel firm to the touch. After chilling for at least four hours, gently press the top. If it feels solid, they are ready. You can also check by cutting a small piece. It should hold its shape. If it wobbles too much, give it more time in the fridge. Yes, you can use other crumbs. For a gluten-free option, try almond flour or gluten-free crackers. You can also use vanilla wafers for a sweet twist. Just crush them into fine crumbs first. This will give your crust a new flavor. You learned how to make no-bake peanut butter cup cheesecake bars. We covered the key ingredients, their roles, and brand suggestions. I detailed steps for the crust, filling, and assembly. Effective tips help you achieve a creamy texture and prevent a soggy crust. We explored topping variations and gluten-free options. Finally, I shared storage tips to keep your bars fresh. Enjoy creating these delicious treats! They are perfect for sharing or treating yourself.

Peanut Butter Cup Cheesecake Bars No Bake Delight

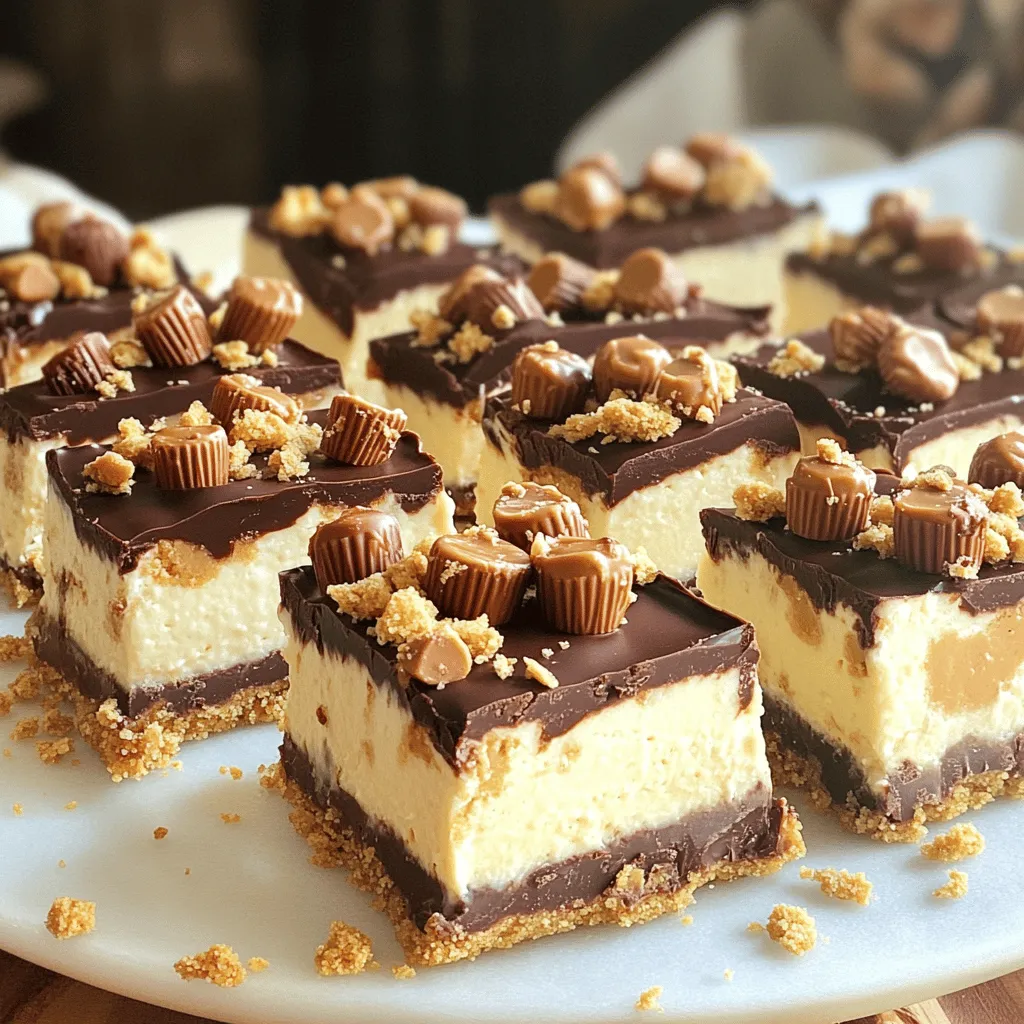
Craving a sweet treat that’s quick and easy? Look no further than these No-Bake Peanut Butter Cup Cheesecake Bars! With

- 1 package (16 oz) gnocchi - 2 tablespoons olive oil - 1 cup heavy cream Gnocchi is the star of this dish. You can find it in the pasta aisle. Olive oil adds richness and flavor. Heavy cream makes the sauce smooth and creamy. - 3 cloves garlic, minced - 1 cup cherry tomatoes, halved - 1 teaspoon Italian seasoning Garlic gives a nice aroma and taste. Cherry tomatoes bring sweetness and color. Italian seasoning adds a blend of herbs that makes everything pop. - 2 cups fresh spinach - 1 cup grated Parmesan cheese - Fresh basil leaves, for garnish Spinach adds a nice green touch and nutrients. Parmesan cheese gives a salty and nutty flavor. Fresh basil leaves are perfect for a bright finish on your dish. 1. Start by heating the olive oil in a large skillet over medium heat. This will take just a minute or two. 2. Once hot, add the minced garlic. Sauté it for 1-2 minutes. It should smell great. Be careful not to burn it; that would change the taste. 3. Next, toss in the halved cherry tomatoes. Cook these for about 3-4 minutes. You want them to soften and start to burst. That’s when the flavor really comes out. 1. Now it’s time to add the fresh spinach. Stir it in and cook until it wilts, which is about 2 minutes. The bright green color is so inviting. 2. While the spinach is wilting, pour the heavy cream into the skillet. Lower the heat to keep it from boiling. Stir it all together to combine. 1. In a separate pot, cook the gnocchi according to the package instructions. When they float to the top, they are done. This usually takes about 2-3 minutes. 2. Once the gnocchi is ready, drain it and set it aside. Add the cooked gnocchi to the skillet with the cream, spinach, and tomatoes. 3. Toss everything gently together. You want the gnocchi to be well coated in that creamy sauce. 4. Season with Italian seasoning, salt, and pepper to your taste. Cook for an additional 2-3 minutes to heat through. 5. Just like that, your creamy Tuscan gnocchi is ready! - Perfectly cooking gnocchi: Always cook gnocchi in boiling water. They are done when they float. This usually takes about 2-3 minutes. Stir gently to prevent sticking. - Achieving creamy consistency: Use heavy cream for a rich sauce. Add it slowly to the skillet. Stir constantly to help it blend well with the other ingredients. - Using high-quality Parmesan: A good Parmesan cheese makes a big difference. It adds depth and richness to your sauce. Freshly grated cheese melts better than pre-grated. - Adding additional herbs: Fresh herbs brighten the dish. Try adding basil or thyme for extra flavor. You can mix them in while cooking or sprinkle them on top before serving. - Serving suggestions: Use shallow bowls for a nice presentation. This helps showcase the beautiful colors of the dish. - Garnishing ideas: Top with extra grated Parmesan and fresh basil leaves. This not only adds flavor but also makes your dish look stunning. {{image_2}} You can make this dish even better by changing a few ingredients. - Alternatives for cream: If you want a lighter option, use half-and-half or unsweetened almond milk. These swaps keep the dish creamy but reduce the calories. - Different leafy greens: Instead of spinach, try kale or arugula. They add a unique flavor and still look great in the dish. Adding protein makes this meal heartier and more filling. - Adding chicken: Cook some diced chicken in the skillet before adding garlic. It’ll soak up the tasty flavors and make it a complete meal. - Incorporating shrimp: Shrimp cooks quickly, making it a great addition. Sauté it with the garlic for a seafood twist that pairs well with the creamy sauce. You can easily adapt this recipe to fit your dietary needs. - Gluten-free options: Use gluten-free gnocchi made from potatoes or rice. It tastes just as good and keeps the dish friendly for gluten-free diets. - Vegan adaptations: Swap heavy cream for coconut cream and use nutritional yeast instead of Parmesan. This keeps the dish creamy and adds a nice cheesy flavor without dairy. To keep your creamy Tuscan gnocchi fresh, store leftovers in an airtight container. Place it in the fridge. It will last for up to three days. If you want to keep it longer, consider freezing it. Use a freezer-safe container or bag. This dish can stay frozen for up to three months. Just remember, freezing may change the texture slightly. To reheat your creamy gnocchi, the stovetop is best. Place it in a skillet over low heat. Add a splash of water or cream to help it heat evenly. Stir often to prevent sticking. If you prefer, you can microwave it. Just cover it with a damp paper towel. This keeps it moist. To keep the creaminess intact, avoid high heat. Slow and steady warms it up without breaking the sauce. Enjoy the rich flavors just like when you first made it! Can I use frozen gnocchi? Yes, you can use frozen gnocchi. Just cook it according to the package instructions. It usually takes a bit longer to cook than fresh gnocchi. Check for doneness when they float to the top. How can I make this dish lighter? To lighten this dish, consider using half-and-half instead of heavy cream. You can also reduce the amount of cheese or use low-fat cheese. Adding more spinach will increase volume without many calories. What can I use instead of heavy cream? You can use coconut milk or cashew cream for a dairy-free option. Both provide a creamy texture and good flavor. If you prefer, Greek yogurt can also work but mix it in off the heat to prevent curdling. Can I use other cheeses? Yes, other cheeses can work well! Try using mozzarella for a stretchier texture or feta for a tangy flavor. Just remember that the flavor profile will change slightly. How long does it take to cook gnocchi? Fresh gnocchi typically takes about 2 to 3 minutes to cook. They are done when they float to the surface. Frozen gnocchi may need an extra minute or two. What side dishes pair well with this recipe? A simple green salad or garlic bread pairs nicely. You could also serve roasted vegetables or a light soup for a balanced meal. This blog post walks you through making a delicious gnocchi dish. We covered key ingredients, like olive oil, heavy cream, and fresh spinach. You learned step-by-step how to sauté, combine, and finish your dish. The tips helped enhance flavors and improve presentation. Variations let you swap ingredients or add proteins. Lastly, I shared storage and reheating methods to keep it fresh. You now have all the tools to create your own tasty meal. Enjoy cooking, and feel free to experiment with your favorite flavors!

Creamy Tuscan Gnocchi Skillet Quick and Easy Recipe

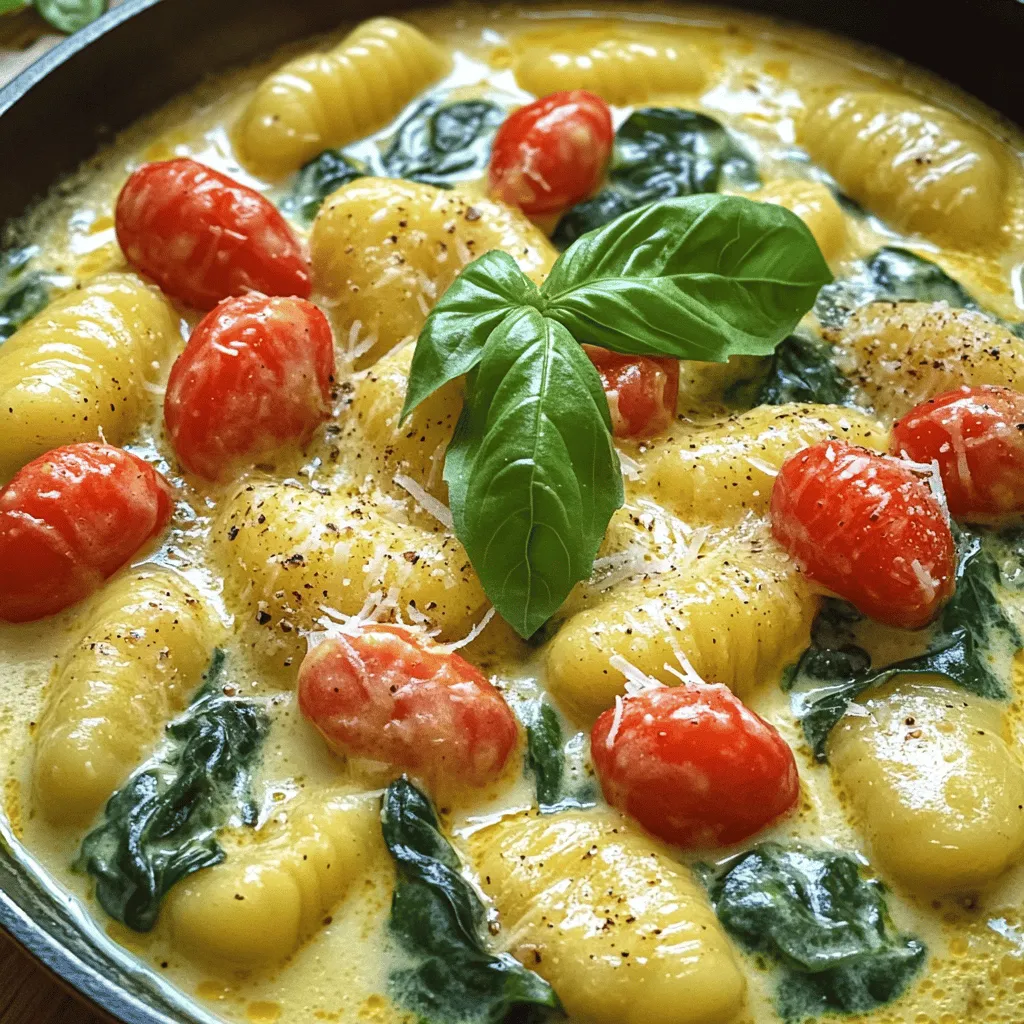
If you’re craving a cozy meal that’s quick and easy, look no further! This Creamy Tuscan Gnocchi Skillet checks all

- 1 lb sirloin steak, cut into bite-sized cubes - 4 tablespoons unsalted butter, melted - 4 cloves garlic, minced - 1 teaspoon dried rosemary - 1 teaspoon dried thyme - 1 teaspoon paprika - Salt and pepper to taste - Fresh parsley, chopped (for garnish) For this recipe, you need an air fryer. I recommend one with a basket style. A sharp knife helps for cutting the steak into cubes. A mixing bowl is also key for blending the garlic butter ingredients. Make sure to have measuring spoons on hand for precise amounts. Lastly, a spatula or tongs will help with flipping and serving the steak bites. The garlic butter blend is simple yet flavorful. Use fresh garlic for the best taste. Dried rosemary and thyme add a nice earthy note. Paprika gives a slight kick and deep color. Adjust salt and pepper to your liking. You can also try fresh herbs like basil or oregano for a twist. Experiment with flavors to find your favorite combination! First, grab a mixing bowl. Add 4 tablespoons of melted butter. Next, include 4 minced garlic cloves. Then, toss in 1 teaspoon of dried rosemary and 1 teaspoon of dried thyme. Now, sprinkle in 1 teaspoon of paprika, along with salt and pepper to taste. Mix everything well until it is fully combined. This garlic butter mixture adds rich flavor to your steak bites. Now, take your 1 pound of sirloin steak and cut it into bite-sized cubes. Place the steak cubes into the bowl with the garlic butter mixture. Toss the cubes until they are evenly coated. Let them sit for about 15 to 20 minutes. This marinating step helps the steak soak up all that tasty flavor. Preheat your air fryer to 400°F (200°C). This should take about 5 minutes. Once heated, place the marinated steak bites in the air fryer basket. Make sure they are in a single layer and not overcrowded. You may need to work in batches. Cook the steak bites for 8 to 10 minutes. Remember to shake the basket halfway through. This ensures even cooking. When done, let the steak bites rest for a few minutes before serving. Garnish with fresh parsley for a pop of color and taste. To ensure your steak bites cook just right, use a meat thermometer. Aim for 130°F for medium-rare. For medium, target 140°F. Remember, the steak will continue to cook after you take it out. Letting it rest for a few minutes helps keep it juicy. Always arrange the steak bites in a single layer in the air fryer. This step allows hot air to circulate and cook them evenly. You can boost the flavor of your steak bites with a few simple changes. Add a splash of Worcestershire sauce to the garlic butter for a savory kick. If you like heat, toss in some red pepper flakes or cayenne. For a fresh twist, try fresh herbs like basil or cilantro instead of dried ones. You can also mix in some grated Parmesan cheese for a rich flavor. To make your steak bites look great, use a wooden board or a nice platter. Arrange them in a circle or a fun pattern. Use toothpicks for easy serving. Drizzle any leftover garlic butter over the top for a glossy finish. Add a sprinkle of fresh parsley for a pop of color. This makes the dish look appealing and makes it more inviting. {{image_2}} If you want to switch things up, try different cuts of steak. You can use ribeye for a richer flavor. Tenderloin also works well and has a nice texture. Flank steak can give a chewier bite, but it’s still delicious. Each cut brings its own taste, so feel free to experiment. While garlic butter is a hit, you can mix it up with new spices. Try adding chili flakes for heat. A bit of cumin can bring a warm flavor. If you love herbs, fresh basil or oregano can add a nice twist. You could even use a steak rub for a bolder taste. These steak bites shine on their own, but sides make them even better. Serve with garlic mashed potatoes for comfort. Roasted veggies add color and nutrients. You can also pair them with a fresh salad for a lighter meal. For a fun twist, try skewering the bites with grilled veggies for easy eating. After enjoying your steak bites, let them cool. Place them in an airtight container. This helps keep them fresh. Store the container in the fridge. They will last for about 3 days. For best taste, eat them before then. To reheat steak bites, use the air fryer again. Set it to 350°F (175°C). Cook for about 3-5 minutes. This keeps them juicy and warm. You can also use a skillet. Heat on medium for a few minutes, turning often to avoid burning. If you want to store steak bites longer, freeze them. First, cool them completely. Then, place them in a freezer bag. Remove as much air as you can. Seal the bag tightly. They can last in the freezer for up to 3 months. When ready to eat, thaw in the fridge overnight before reheating. Yes, you can use frozen steak. However, you need to thaw it first. Place the steak in the fridge overnight to defrost. If you are short on time, use the microwave. Once thawed, cut it into bite-sized cubes. Then, follow the recipe as usual. You can mix and match herbs for your taste. Try oregano, basil, or sage. Fresh herbs add a bright flavor. If you prefer dried herbs, use thyme or Italian seasoning. Experiment to find what you like best! Steak bites can last up to three days in the fridge. Make sure to store them in an airtight container. This keeps them fresh and tasty. Reheat them in the air fryer or on the stove. Enjoy them again without losing flavor! If you use larger steak pieces, increase the cooking time. For each extra half-inch, add about 2 minutes. Always check the doneness with a meat thermometer. Aim for 135°F for medium-rare. Adjust the time based on your preference for doneness. You learned how to make tasty steak bites using simple ingredients and cooking tips. We covered easy steps to prepare, cook, and serve them. You now know how to store leftovers and reheat them perfectly. With various options for flavor and serving, you can impress anyone with your dish. Enjoy the fun of cooking and trying new ideas in your kitchen. Your meals can always be exciting and delicious!

Air Fryer Garlic Butter Steak Bites Savory Delight

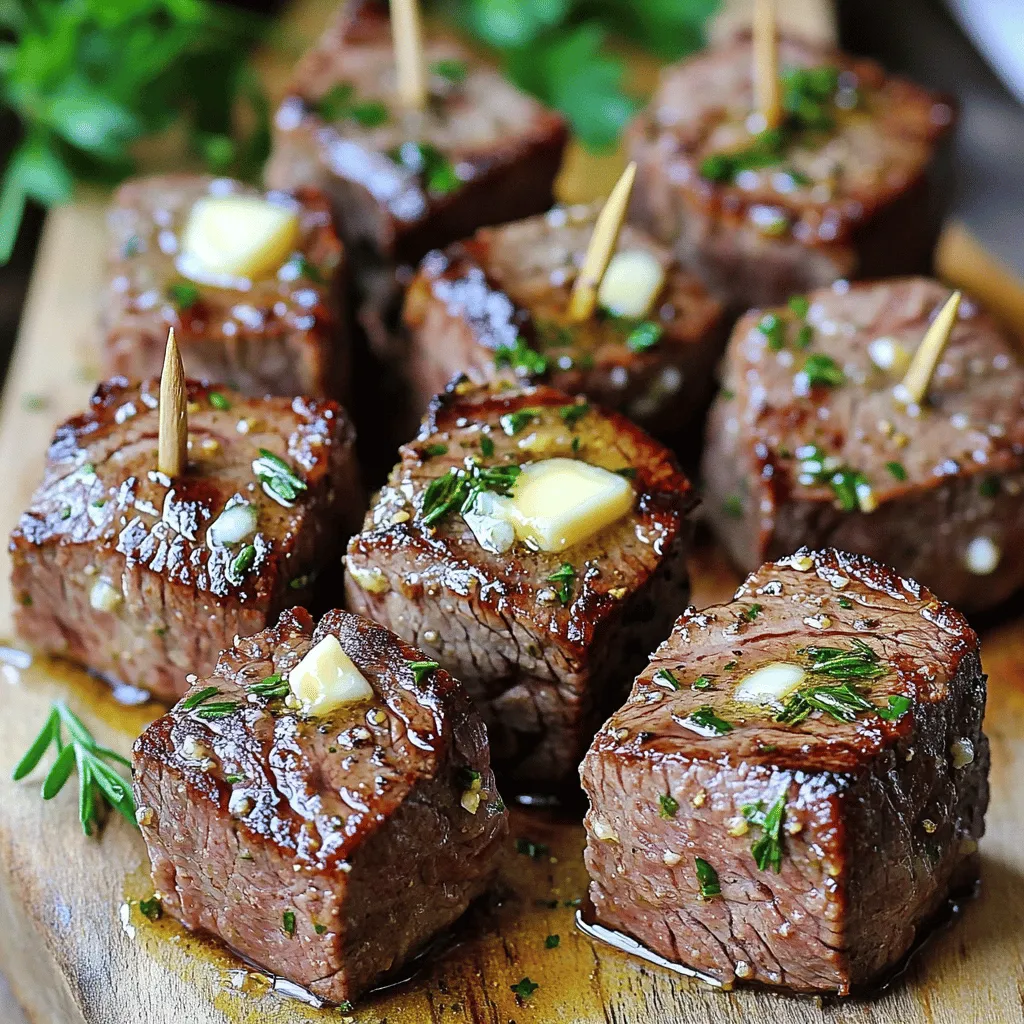
If you crave a quick, tasty meal, you need to try these Air Fryer Garlic Butter Steak Bites! They’re simple

- 2 cups plain Greek yogurt - 1 cup pumpkin puree - 1/4 cup maple syrup (or honey) - 1 teaspoon vanilla extract - 1 teaspoon pumpkin pie spice - 1 cup granola - 1/2 cup chopped pecans - Fresh whipped cream (optional, for topping) - Ground cinnamon for garnish (optional) You need simple ingredients to make Pumpkin Spice Yogurt Parfaits. First, use plain Greek yogurt. This yogurt is thick and creamy, which gives the parfait a nice base. Next, grab some pumpkin puree. It adds that lovely fall flavor we all love. For sweetness, you can choose between maple syrup or honey. Both work great, so pick your favorite! A dash of vanilla extract enhances the taste. Don’t forget pumpkin pie spice! It gives that warm, cozy flavor. You’ll also need granola for crunch. It adds texture and sweetness. Chopped pecans bring a nice nutty flavor. For special touches, consider fresh whipped cream and ground cinnamon on top. These are optional but really make it fancy! Gather these ingredients, and you’re ready to create a delicious treat. First, grab a medium mixing bowl. In this bowl, you will mix 2 cups of plain Greek yogurt, 1 cup of pumpkin puree, and 1/4 cup of maple syrup (or honey). Use a whisk or spoon to blend. Make sure it is smooth and creamy. Next, add 1 teaspoon of vanilla extract and 1 teaspoon of pumpkin pie spice. Stir well until everything is combined. The mix should smell amazing! Now, it's time to layer your parfaits. Take your serving glasses or bowls. Start with a generous spoonful of the pumpkin yogurt mix. Spread it evenly at the bottom. Then, add 1 cup of granola on top of the yogurt. Sprinkle 1/2 cup of chopped pecans over the granola. Repeat this layering process. Aim for at least three layers of yogurt, granola, and pecans. This creates a nice texture and flavor balance. For a special finish, you can add a dollop of fresh whipped cream on top of the last layer. If you love cinnamon, sprinkle some ground cinnamon over it. This gives an extra touch of flavor. Enjoy the beautiful layers and colors! To get a smooth blend, mix the yogurt and pumpkin puree well. A hand mixer works great here. Aim for a creamy texture. Greek yogurt should be thick but not too stiff. The mixture should easily spoon out of the bowl. Try adding a dash of nutmeg or ginger for extra warmth. You can also use vanilla bean for a special touch. If you want it sweeter, use agave syrup, or stevia instead of maple syrup. This makes your parfait your own. Choose clear glasses or bowls to show off the layers. You can use Mason jars for a fun look. For garnishing, add a dollop of whipped cream on top. Sprinkle some cinnamon or add a few pecans for a pop of color. Enjoy the visual treat as much as the taste! {{image_2}} You can make your pumpkin spice yogurt parfait even better by adding seasonal flavors. Try mixing in some apples or caramel. These flavors brighten up the parfait and add a new twist. You can also use flavored yogurt. Yogurts with maple or cinnamon work great. This gives your parfait extra taste without extra effort. If you need to make the parfait gluten-free, choose gluten-free granola. Many brands offer tasty options. For those who want dairy-free parfaits, use coconut yogurt or almond yogurt. Both options taste great and keep your parfait creamy. You can enjoy the same delicious flavors without any dairy. Creating mini parfaits helps with portion control. Use small cups or jars to serve. This way, everyone can enjoy their own little treat. For larger gatherings, just adjust the recipe. You can double or triple the ingredients. Make as many servings as you need, ensuring everyone gets a taste of this yummy dessert. To store parfaits in the fridge, keep them in airtight containers. This keeps them fresh and prevents odors from mixing. You can also cover your parfaits tightly with plastic wrap. The recommended storage duration is up to three days. After that, the granola might get soggy and lose its crunch. Preparing parfaits ahead of time makes life easier. You can layer them in jars or cups and store them in the fridge. For picnics or lunches, pack them in small containers. Just keep the granola separate until you’re ready to eat. This way, it stays crunchy and tasty. Yes, you can freeze parfaits! However, the texture may change after thawing. For proper techniques, layer the yogurt and pumpkin mixture in a freezer-safe container. Leave some space at the top for expansion. When you're ready to eat, let it thaw in the fridge overnight. Enjoy your treat when it’s ready! You can store pumpkin spice yogurt parfaits in the fridge for up to three days. Keep them in an airtight container to maintain freshness. After that, the yogurt may lose its creamy texture. Yes! You can use other types of yogurt. Dairy-free options like almond or coconut yogurt work great. You can also try flavored yogurts if you want to add a twist. Just be mindful of the added sugars in flavored yogurts. If you need a granola substitute, try using crushed nuts or seeds. You can also use oats, puffed rice, or even coconut flakes. These options add crunch and flavor without losing the parfait experience. This blog taught you how to make delicious pumpkin yogurt parfaits. We explored the ingredients, step-by-step instructions, and clever tips. You can customize flavors and adjust for dietary needs. Remember, storing parfaits properly keeps them fresh longer. Try mini versions for easy portion control. With these ideas, your parfaits will impress at any gathering. Enjoy experimenting with flavors and toppings for a tasty treat!

Pumpkin Spice Yogurt Parfaits Easy and Delicious Treat

As the leaves change and the air turns crisp, it’s time to indulge in fall’s favorite flavor: pumpkin spice! Today,

Older posts
Newer posts
← Previous Page1 … Page28 Page29 Page30 … Page84 Next →

dsad

© 2026 Foodish Talk • Built with GeneratePress

Our Policies

  • Copyright Policy
  • Cookie Policy
  • GDPR Policy
  • Privacy Policy
  • Disclaimer
  • Terms Of Use

More Information

  • Home
  • About
  • Contact
  • Appetizers
  • Dessert
  • Dinner
  • Drinks
©2026, Foodish Talk About Back To Top