Skip to content
DisclaimerTerms Of UseGDPR PolicyCookie Policy

Foodish Talk

  • Home
  • Drinks
  • Appetizers
  • Dinner
  • Dessert
  • About
  • Contact
  • Privacy Policy
DisclaimerTerms Of UseGDPR PolicyCookie Policy

NO-ING-IMG

- 1 cup all-purpose flour - 1 cup whole wheat flour - 1 teaspoon baking powder - 1/2 teaspoon baking soda - 1/2 teaspoon salt - 1 teaspoon ground cinnamon - 1/4 teaspoon nutmeg - 1/2 cup brown sugar - 1/4 cup granulated sugar - 1/2 cup unsalted butter, melted - 2 large eggs - 1/2 cup milk - 2 cups diced apples (about 2 medium apples) - 1/2 cup rolled oats (for topping) - 1/4 cup chopped walnuts or pecans (optional, for topping) - 1 tablespoon sugar (for topping) Gather these ingredients for a cozy baking experience. The blend of all-purpose and whole wheat flour gives these muffins a hearty base. Baking powder and baking soda help them rise perfectly. Add salt, cinnamon, and nutmeg for warm, inviting flavors. For the wet mix, combine the richness of brown sugar with the sweetness of granulated sugar. Melted unsalted butter makes the muffins tender. Eggs and milk add moisture and richness. Finally, fold in diced apples for sweetness and texture. The rolled oats and nuts create a crunchy topping that contrasts the soft muffin. Don't forget that sprinkle of sugar for extra sparkle! These simple yet delicious ingredients make the perfect apple crumble muffins. To make your muffins, start by preheating your oven to 350°F (175°C). This temperature ensures even baking. Then, prepare your muffin tin. You can either line it with paper liners or grease it lightly with butter or oil. This step helps the muffins come out easily after baking. Now, let’s combine the dry ingredients. In a large bowl, mix together 1 cup of all-purpose flour, 1 cup of whole wheat flour, 1 teaspoon of baking powder, 1/2 teaspoon of baking soda, 1/2 teaspoon of salt, 1 teaspoon of ground cinnamon, and 1/4 teaspoon of nutmeg. Whisk these together until they are well blended. Next, in another bowl, mix the wet ingredients. Add 1/2 cup of melted unsalted butter, 1/2 cup of brown sugar, and 1/4 cup of granulated sugar. Stir until smooth. Then, add 2 large eggs and 1/2 cup of milk. Whisk until everything is fully combined. Now it’s time to merge the wet and dry mixtures. Gradually add the wet mix to the dry ingredients. Stir gently until just combined. Be careful not to overmix! Then, fold in 2 cups of diced apples, making sure they are evenly spread throughout the batter. In a small bowl, create your crumble topping. Mix 1/2 cup of rolled oats, 1/4 cup of chopped walnuts or pecans (if using), and 1 tablespoon of sugar. Now, divide the muffin batter evenly into the prepared muffin tin. Fill each cup about 2/3 full. Sprinkle the crumble topping generously over each muffin. Finally, bake the muffins in the preheated oven for 20-22 minutes. Check if they are done by inserting a toothpick into the center. If it comes out clean, they are ready! Allow them to cool in the tin for 5 minutes, then transfer to a wire rack to cool completely. Enjoy your delicious apple crumble muffins! - Measure your flour correctly. Use a spoon to fill your measuring cup. - Level it off with a knife for accuracy. - Use room temperature eggs and milk. This helps your muffins rise well. - Do not overmix the batter. Mix just until you see no dry flour. - Serve your muffins warm for the best taste. - They are great at room temperature, too! - Try adding a dollop of whipped cream or yogurt on top. - Pair them with a cup of hot tea or coffee for a cozy treat. - If your muffins turn out dry, try adding a bit more milk next time. - Make sure not to bake them too long. Check for doneness at 20 minutes. - For even baking, rotate the muffin tin halfway through baking. - If you notice uneven tops, consider using an oven thermometer. This checks your oven's true temperature. {{image_2}} You can easily make these muffins fit your needs. - For a gluten-free option, use a gluten-free flour blend. Make sure it has xanthan gum for better structure. - Different apples can change the taste. Try Granny Smith for tartness or Fuji for sweetness. Each type gives a unique flavor. Want to spice things up? - Add a dash of ginger or allspice for an extra kick. Just a little can change the whole muffin. - Dried fruits can add great texture. Raisins or cranberries mix well with the apples. Make your muffins fit the season. - In the fall, add pumpkin spice for a cozy feel. It pairs perfectly with apples. - In summer, swap apples for peaches or berries. These fruits also add freshness and sweetness. To keep your apple crumble muffins fresh, store them in an airtight container. This helps to keep them moist. Place a paper towel inside the container to absorb excess moisture. You can also use a zip-top bag, but ensure you remove as much air as possible. For longer storage, freeze the muffins. Wrap each muffin tightly in plastic wrap. Place them in a freezer bag, and label the bag with the date. They can last up to three months in the freezer without losing flavor. When you want to enjoy your muffins again, reheating is simple. The oven gives the best results. Preheat your oven to 350°F (175°C). Place the muffins on a baking sheet and heat for about 10 minutes. This method keeps them soft and warm. You can also use a microwave for quick reheating. Heat each muffin for about 15-20 seconds at medium power. However, this may make them a bit soggy, so use it as a last resort. These delicious muffins stay fresh for about 3-4 days at room temperature. Store them properly in an airtight container to keep them tasty. If you notice any mold or an off smell, it’s best to toss them. Signs of spoilage include a dry texture or a sour taste. Always trust your senses when checking food freshness. To make your muffins moist, use more apples. The moisture from the apples helps a lot. You can also add a bit more milk or butter. This adds richness and keeps the muffins soft. Avoid overbaking; check them around 20 minutes. You want a toothpick to come out clean, but not dry. Yes, you can use less sugar. Reducing sugar by a quarter is often fine. The muffins will still taste good, but they may not be as sweet. You can also use apple sauce as a natural sweetener. This adds moisture and keeps the flavor balanced. For baking, I love using Granny Smith or Honeycrisp apples. Granny Smith adds a nice tartness, while Honeycrisp is sweet and crisp. You can mix different apples for more flavor. Just make sure they are firm and fresh for the best results. To make vegan muffins, swap eggs for flax eggs. Mix one tablespoon of flaxseed meal with three tablespoons of water for each egg. Use plant-based milk, like almond or oat milk, instead of regular milk. Also, replace the butter with coconut oil or vegan butter. Yes, you can prepare the batter ahead. Just mix it and store it in the fridge for up to 24 hours. When you're ready to bake, stir it gently before pouring into the muffin tin. This keeps the muffins fresh and ready to enjoy! This blog post shared a thorough guide on making delicious muffins. We discussed key ingredients, step-by-step instructions, and helpful tips to improve your baking. You learned about ingredient substitutions and seasonal variations to customize your muffins. Remember, measuring accurately and avoiding overmixing are crucial. Store your muffins right for freshness. Enjoy them warm or with your favorite toppings for a tasty treat. Now, you're ready to bake and create your perfect muffin!

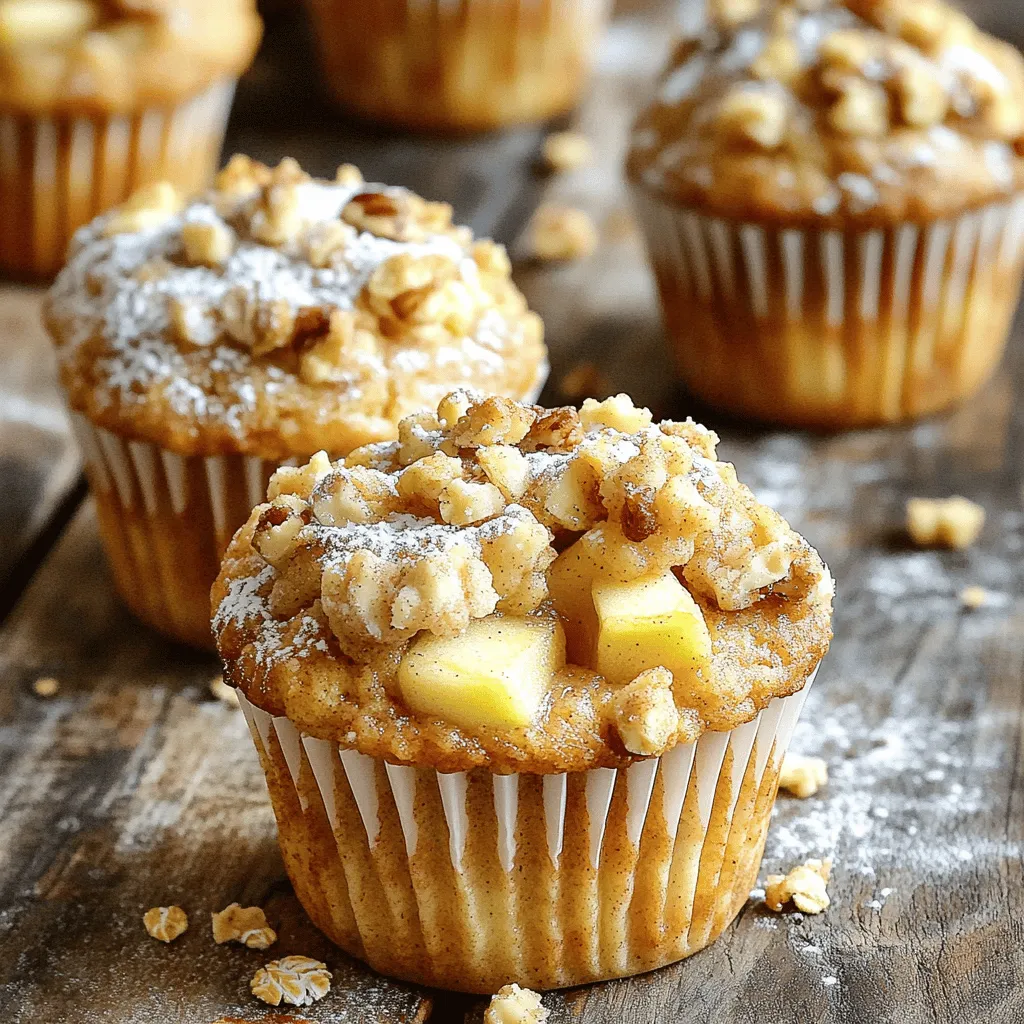
Delicious Apple Crumble Muffins Easy and Quick Recipe

Are you ready to bake up something truly delightful? These Apple Crumble Muffins are not only quick to make but

To make garlic butter gnocchi, gather these key ingredients: - 1 pound gnocchi (store-bought or homemade) - 4 tablespoons unsalted butter - 5 cloves garlic, minced - 1 cup cherry tomatoes, halved - 1 cup spinach leaves, fresh - 1 teaspoon dried oregano - 1/4 teaspoon red pepper flakes (optional) - Salt and pepper to taste - Fresh basil leaves, for garnish - Grated Parmesan cheese, for serving You will need a few basic tools to cook this dish: - A large pot for boiling water - A large skillet for sautéing - A slotted spoon for draining gnocchi - A cutting board and knife for chopping Feel free to customize the dish with these add-ins: - Grilled chicken or shrimp for protein - Extra vegetables like bell peppers or zucchini - Different herbs, such as thyme or parsley for flavor - A splash of lemon juice for brightness To cook the gnocchi, start with a large pot. Fill it with water and add salt. Bring the water to a boil. Once boiling, add the gnocchi. Cook them until they float. This usually takes about 2-3 minutes. Floating means they are ready! Drain them in a colander and set aside. In a large skillet, melt 4 tablespoons of unsalted butter over medium heat. Once the butter is melted, add 5 cloves of minced garlic. Sauté the garlic for about 1-2 minutes. You want it fragrant, but don’t let it burn. Keep an eye on it! Now, add 1 cup of halved cherry tomatoes to the skillet. Cook them for 3-4 minutes. They should start to soften and release their juices. Next, toss in 1 cup of fresh spinach leaves. Stir until the spinach wilts down. This will add nice color and flavor! Add the cooked gnocchi to the skillet. Sprinkle in 1 teaspoon of dried oregano. If you like some heat, add 1/4 teaspoon of red pepper flakes. Season with salt and pepper to taste. Gently toss everything together. Let the gnocchi soak up that delicious garlic butter for 2-3 minutes. Remove from heat and garnish with fresh basil. Serve with grated Parmesan cheese for a tasty finish! To cook gnocchi right, start with plenty of salted water. Bring it to a boil. Gnocchi will float when done, usually in 2-3 minutes. Don't overcook it. Overcooked gnocchi turns mushy and loses its charm. Drain it gently and avoid rinsing. This helps keep the gnocchi’s flavor. Add depth to your dish with fresh herbs. Basil gives a lovely aroma. You can also use parsley or thyme. If you like heat, sprinkle in some red pepper flakes. For a fresh twist, try lemon zest. This adds brightness to the buttery flavor. One mistake is cooking gnocchi too long. Always watch for when they float. Another error is not sautéing the garlic properly. Burned garlic tastes bitter. Keep it on medium heat and stir often. Lastly, don’t skip the cheese. Parmesan enhances the dish and adds richness. {{image_2}} You can add protein to your garlic butter gnocchi skillet for a heartier meal. Chicken or shrimp works well. For chicken, cook bite-sized pieces in the skillet after sautéing the garlic. For shrimp, add them when you add the tomatoes. Cook until they turn pink and firm. This extra step adds flavor and makes the dish more filling. You can easily make this dish vegan. Replace the butter with olive oil or vegan butter. Skip the Parmesan cheese or use a plant-based alternative. Make sure to check for dairy-free gnocchi if buying store-made. This way, you keep all the great taste while fitting your diet. Feel free to swap ingredients based on what you have. You can use kale or arugula instead of spinach. For cheese, try feta or nutritional yeast for a vegan option. You can also add different herbs like thyme or parsley to change up the flavor. These swaps keep the dish fresh and exciting every time you make it. To keep your garlic butter gnocchi fresh, store it in an airtight container. Let the dish cool down first. This helps keep the flavors intact. You can store it in the fridge for up to three days. When you are ready to eat, just take it out. Reheat gnocchi in a skillet over medium heat. Add a bit of butter or oil to help it warm evenly. Stir gently to avoid sticking. You can also use the microwave. Place it in a bowl, cover it, and heat for one minute. Check and stir, then heat for another minute if needed. To freeze garlic butter gnocchi, let it cool completely. Place it in a freezer-safe bag or container. Be sure to remove as much air as possible. It can last up to three months in the freezer. When ready to eat, thaw it overnight in the fridge and reheat as mentioned above. Gnocchi cooks fast! It usually takes about 2-3 minutes in boiling water. When they float, they are done. Just remember to drain them quickly. Yes, you can use homemade gnocchi! It adds a special touch to the dish. Just make sure to cook them the same way as store-bought gnocchi. Garlic butter gnocchi pairs well with many sides. You can serve it with a simple salad. A crusty bread also complements it nicely. You might even try it with grilled chicken. If you like heat, add more red pepper flakes. You can also use fresh chili peppers. Just chop them up and toss them in when you add the garlic. Garlic butter gnocchi has some good points. It has vegetables like spinach and tomatoes. The butter does add fat, but using less can help. It’s all about balance in your diet! This blog post covered all you need for a delicious garlic butter gnocchi dish. We went over ingredients, step-by-step cooking, and tips to avoid mistakes. You can add proteins or swap ingredients for a fun twist. Don’t forget proper storage and reheating methods to enjoy later. Experimenting makes cooking fun, so try new flavors and techniques. Enjoy creating your perfect plate, and share it with others who will enjoy it too!

Garlic Butter Gnocchi Skillet Simple and Cozy Meal

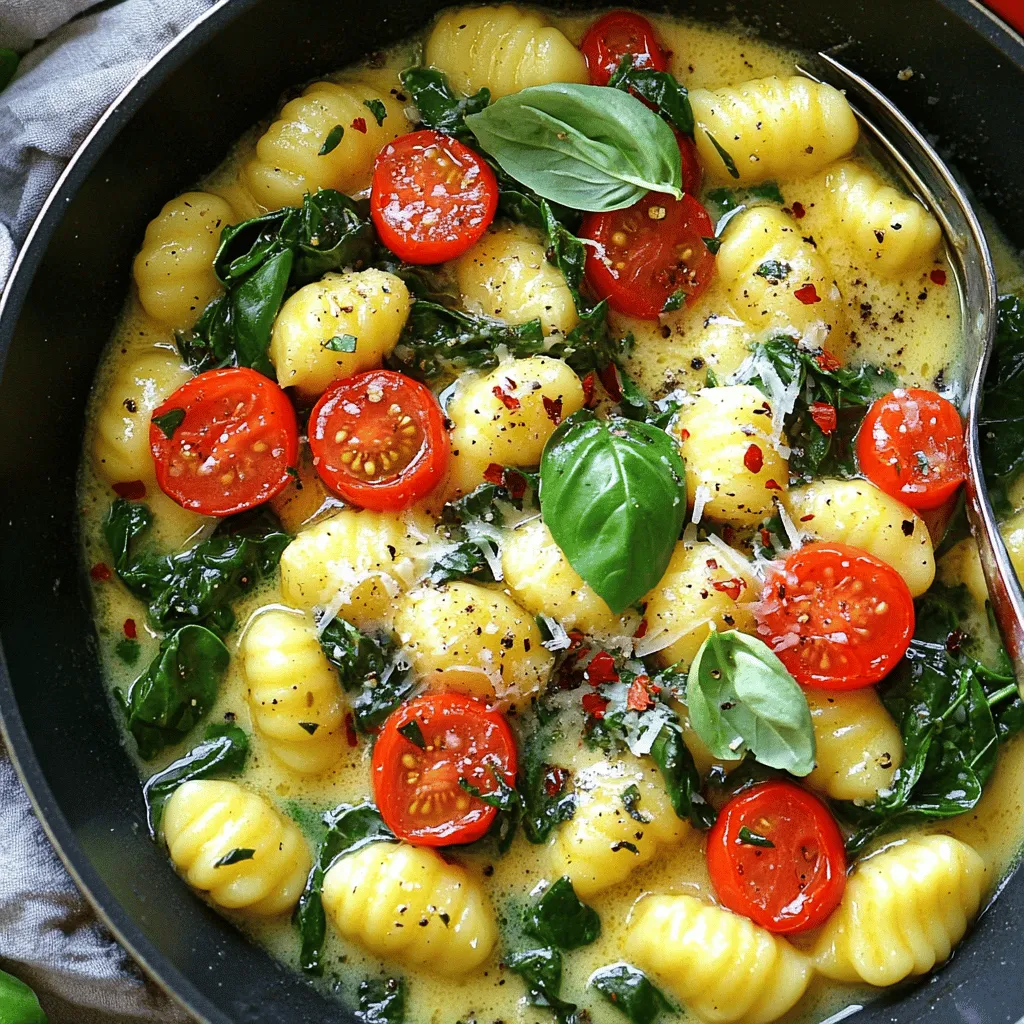
Looking for a warm and tasty meal that’s easy to make? Dive into this Garlic Butter Gnocchi Skillet recipe! With

- 2 cups cooked jasmine rice (preferably day-old) - 1 cup cooked chicken breast, diced - 2 tablespoons sesame oil - 1 cup mixed vegetables (peas, carrots, corn) - 2 green onions, sliced (white and green parts separated) - 2 large eggs, beaten - 3 tablespoons soy sauce (low-sodium) - 1 tablespoon rice vinegar - 1 tablespoon toasted sesame seeds - Salt and pepper, to taste - Fresh cilantro, for garnish (optional) The main ingredients make this dish pop. Day-old jasmine rice gives the best texture. Fresh chicken adds protein. Use mixed veggies for color and crunch. Green onions add a nice bite. Eggs make it creamy and rich. I recommend using jasmine rice for its fragrance. It cooks well and holds flavor. If you don’t have jasmine, use long-grain rice. Make sure your rice is cold before cooking. This prevents clumping. Cook the rice a day ahead for best results. Store it in the fridge. This way, your fried rice will turn out perfect! Start with two cups of cooked jasmine rice. Using day-old rice works best. It helps keep the rice from becoming mushy. Next, take one cup of cooked chicken breast. Dice it into small pieces. Slice two green onions, separating the white and green parts. Gather one cup of mixed vegetables like peas, carrots, and corn. Lastly, beat two large eggs in a bowl and set them aside. Heat two tablespoons of sesame oil in a large skillet or wok over medium-high heat. Once hot, add the beaten eggs. Scramble them until fully cooked, then take them out of the skillet. In the same pan, add the mixed vegetables and the white parts of the green onions. Sauté for about three to four minutes. This helps bring out their flavors. Now, stir in the diced chicken and the cold jasmine rice. Break up any clumps of rice as you mix. Cook this for about five minutes until everything is heated. Pour in three tablespoons of low-sodium soy sauce and one tablespoon of rice vinegar. Mix well to coat the rice evenly. Cook for an extra two minutes. Finally, add the scrambled eggs back to the skillet with the green parts of the green onions. Toss everything together. Season with salt and pepper to taste. For a finishing touch, sprinkle toasted sesame seeds on top before serving. To make great fried rice, use cold, day-old rice. Fresh rice is too sticky. Break up any clumps before cooking. Use a hot skillet or wok to get that nice sear. Don’t overcrowd the pan; this lets the rice fry instead of steam. Stir often to prevent burning. When adding soy sauce, do it slowly. This helps the rice absorb the flavor evenly. If you have extra cooked chicken or veggies, toss them in. You can mix in bell peppers or broccoli too. Leftover rice can be turned into fried rice quickly. If you have fresh herbs, add them for color and taste, like cilantro or basil. You can also use leftover sauces to boost flavor. To save time, prep your ingredients first. Dice chicken and slice veggies ahead of time. Use frozen mixed vegetables; they cook fast and add color. If you need cooked rice fast, try using the microwave. Just add a splash of water to keep it moist. Consider making a big batch of fried rice and enjoy it for lunch. {{image_2}} You can switch up the protein in this dish. If you want to add shrimp, use cooked shrimp. Simply toss it in when you add the rice. Tofu is another great option for a vegetarian twist. Just cube it and sauté it with the veggies. For a hearty meal, try pork or beef. Cook it just before adding the rice. Mixing in different veggies can change the flavor. If you don’t like peas, use broccoli or bell peppers. Spinach or kale can add nice color and nutrients. For a crunchy touch, add water chestnuts or bean sprouts. These swaps can help meet your diet needs while keeping it tasty. Want to amp up the flavor? Add a splash of oyster sauce or sweet chili sauce. You can also mix in hoisin sauce for a richer taste. A bit of Sriracha can add heat if you like spice. Remember to adjust soy sauce to keep the balance right. These little changes can make each meal unique and fun! Store leftover Sesame Chicken Fried Rice in an airtight container. It stays fresh for up to four days in the fridge. Make sure the rice cools down to room temperature before sealing. This helps keep moisture out and flavors intact. When you’re ready to eat, check for any off smells or colors. If it seems off, it's better to toss it. If you want to save some for later, freezing is a great option. Place the cooled fried rice in freezer-safe bags. Remove as much air as possible before sealing. This helps prevent freezer burn. Label the bags with the date. You can freeze it for up to three months. To use, just thaw it overnight in the fridge before reheating. When reheating, keep the rice moist to avoid dryness. Add a splash of water or a drizzle of sesame oil before heating. You can use a microwave or a skillet. If using a skillet, heat it over medium heat. Stir occasionally until it's hot throughout. This keeps the flavors bright and the texture just right. Enjoy your meal as if it was freshly made! Yes, you can use fresh rice. However, day-old rice works best. It is drier and less sticky, which helps in frying. Fresh rice may clump and result in a mushy texture. If you must use fresh rice, spread it out on a tray to cool. Let it sit for about an hour to dry slightly before using. If you don't have sesame oil, try these options: - Peanut oil - Sunflower oil - Canola oil These oils can mimic the flavor and work well in this dish. You can also mix a bit of toasted sesame seeds with another oil for extra flavor. To make this sesame chicken fried rice vegetarian, simply omit the chicken. Replace it with tofu or tempeh for protein. You can also add more vegetables like bell peppers or mushrooms. Adjust the soy sauce to keep the flavor strong and satisfying. We explored the key ingredients and steps for making sesame chicken fried rice. You learned how to prepare, cook, and enhance this dish with tips for the best texture. Remember to customize with your choice of proteins and veggies. Store leftovers properly to enjoy later. This dish is flexible, so have fun making it your own. With these guidelines, you can create a tasty meal that satisfies any palate. Enjoy cooking and sharing your delicious fried rice!

Savory Sesame Chicken Fried Rice Fakeout Recipe

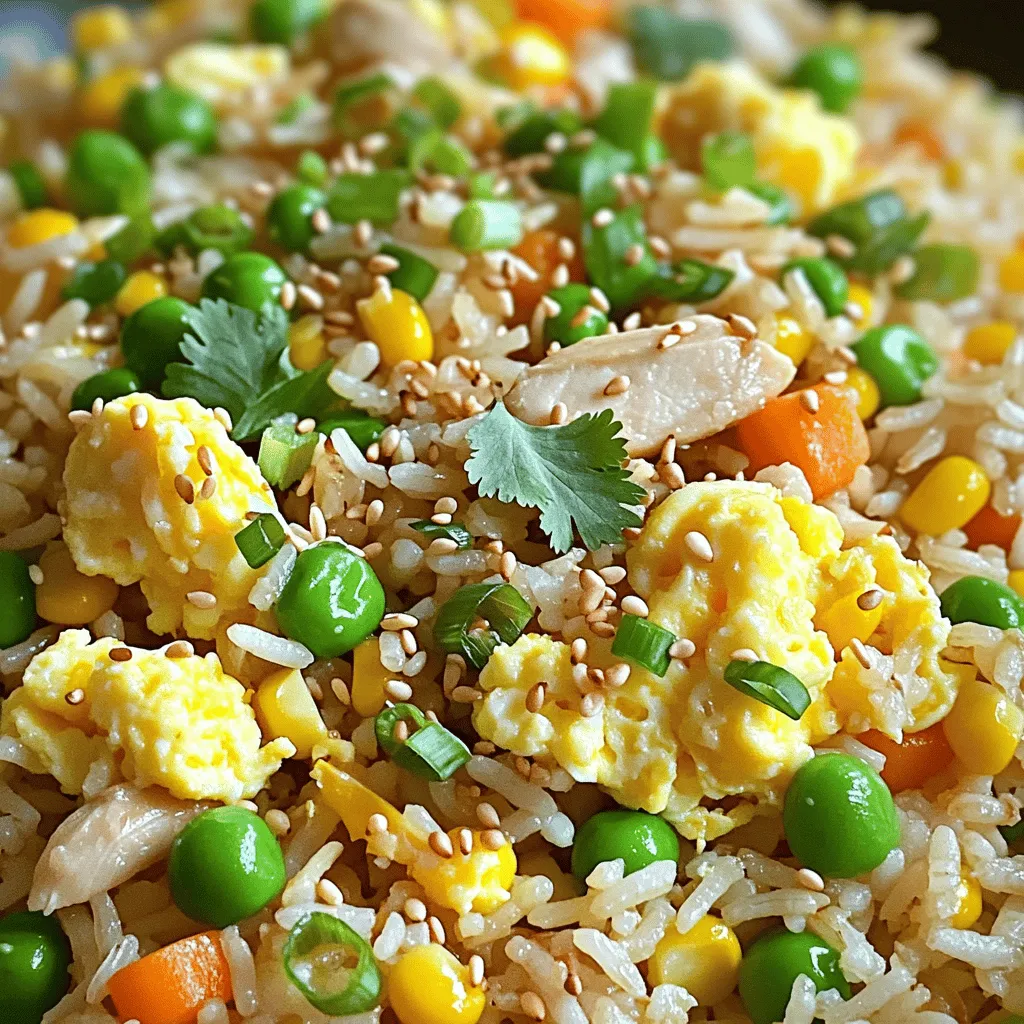
Craving the rich flavors of sesame chicken fried rice? You’re in the right place! This savory sesame chicken fried rice

- 1 cup fresh spinach, chopped - 1 cup artichoke hearts, drained and chopped - 1 cup cream cheese, softened - 1/2 cup sour cream - 1/2 cup mayonnaise - 1 cup shredded mozzarella cheese - 1/2 cup grated Parmesan cheese - 2 garlic cloves, minced - 1 teaspoon lemon juice - 1/2 teaspoon red pepper flakes - Salt and pepper to taste This recipe makes enough dip for 6 to 8 servings. It takes about 10 minutes to prep and 30 minutes to bake. You can add more flavor with a few tweaks: - Mix in chopped green onions for a fresh taste. - Use cooked bacon bits for a smoky twist. - Swap mozzarella for cheddar for a sharp flavor. - Add a dash of Worcestershire sauce for depth. Feel free to get creative! The key is to keep it creamy and tasty. 1. First, preheat your oven to 350°F (175°C). This step gets your oven ready. 2. In a large mixing bowl, add the softened cream cheese, sour cream, and mayonnaise. Mix until it becomes smooth. 3. Next, add the chopped spinach and artichoke hearts to the bowl. 4. Then, stir in the minced garlic, lemon juice, and red pepper flakes. This mix adds great flavor! 5. Now, add the shredded mozzarella and grated Parmesan cheese. Combine everything well. 6. Finally, season with salt and pepper to taste. This is how you customize it just for you. 7. Transfer the dip mixture into a baking dish. Spread it evenly across the dish. 1. Place the baking dish in your preheated oven. 2. Bake for 25-30 minutes. Look for a bubbly and golden top. This shows it’s ready! 3. Once done, remove it from the oven. Let it cool slightly before serving. Serve this dip warm. It tastes great with tortilla chips or sliced baguette. You can also use fresh vegetable sticks for a healthier option. For a nice touch, add a sprinkle of parsley on top. This makes it look even more appetizing! When making baked spinach artichoke dip, avoid these common errors. First, do not skip softening the cream cheese. Softening helps blend it well. Next, overcooking can dry out the dip. Watch it closely while baking. Also, don’t forget to mix in enough salt and pepper. This step is key for great flavor. Lastly, be careful not to use canned artichokes without draining them. Excess liquid can make the dip watery. To boost the flavor of your dip, try adding a few extras. A dash of hot sauce can add heat. You can also mix in some sun-dried tomatoes for a tangy twist. Fresh herbs like parsley or basil brighten the dish. For a smoky taste, add a bit of smoked paprika. These small changes can make your dip stand out at any gathering. You can prepare the dip ahead of time. Just mix all the ingredients and store it in the fridge. Cover the dish well to keep it fresh. When ready to serve, bake it as directed. This method saves you time and stress. You can also freeze the dip. Just thaw it overnight in the fridge before baking. This way, you have a tasty snack ready whenever you need it. {{image_2}} You can make this dip vegetarian by using plant-based cream cheese and sour cream. Replace the mayonnaise with a vegan mayo. For a nutty flavor, try adding cashew cream instead. This way, you keep the creamy texture while staying plant-based. Cheese is key in this dish. You can swap mozzarella with gouda or cheddar for a richer taste. If you love a sharper flavor, try using aged cheddar or a blend of cheeses. Feta cheese can add a nice tang, too. Want to spice it up? Add diced jalapeños or green chilies for a kick. You can mix in sun-dried tomatoes for a sweet and savory twist. For a fresh touch, consider adding chopped herbs like basil or parsley. These simple changes can take your dip to new heights! After enjoying your dip, let it cool down. Transfer any leftovers to an airtight container. This keeps the dip fresh and tasty. Store it in the fridge for up to three days. Make sure to seal the container tightly to avoid any smells from other foods. When you are ready to eat the dip again, preheat your oven to 350°F (175°C). Place the dip in an oven-safe dish. Cover it with foil to keep it from drying out. Heat for about 15-20 minutes or until warm and bubbly again. You can also use a microwave. Heat in short bursts, stirring in between, until heated through. You can freeze leftovers for later use. First, let the dip cool completely. Then, place it in a freezer-safe container. It can last up to three months in the freezer. To use it later, thaw it overnight in the fridge. Reheat as described above for best results. Yes, you can use frozen spinach. Just make sure to thaw and drain it well. Frozen spinach can have a lot of water. If you don’t drain it, the dip may become too watery. I like to squeeze the spinach in a clean towel to remove extra moisture. This way, you keep the dip nice and creamy. This dip pairs well with many foods. Here are some tasty options: - Tortilla chips - Sliced baguette - Fresh vegetable sticks like carrots or celery - Pita chips - Crackers You can even serve it with a side of pickles for a nice crunch. Each option adds a unique twist to your snack time. When stored properly, this dip lasts about 3 to 4 days in the fridge. Keep it in an airtight container. Before you serve it again, just give it a stir. If you want to enjoy it later, you can also freeze it. Just make sure to store it in a freezer-safe container. In this post, we explored every facet of making a delicious spinach artichoke dip. We covered ingredients, measurements, and optional additions. Next, I showed you how to prepare, bake, and serve the dip. We also discussed tips to avoid common mistakes. We shared variations to suit different diets and preferences, plus smart storage tips for leftovers. Remember, with the right approach, you can enjoy this dish any time. Have fun cooking!

Baked Spinach Artichoke Dip Creamy and Tasty Snack

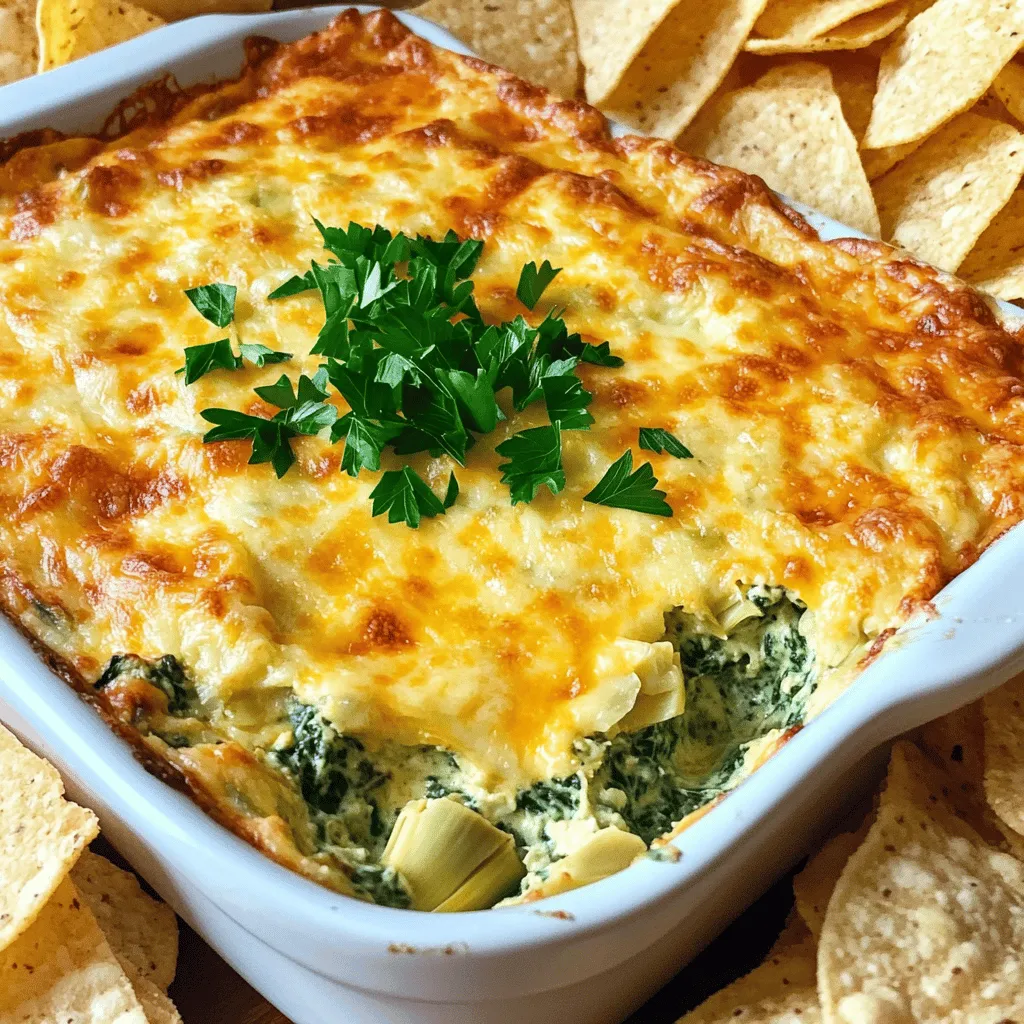
Looking for the perfect appetizer that is creamy, tasty, and easy to make? Baked Spinach Artichoke Dip ticks all the

For this Apple Cinnamon Oatmeal Bake, you need the following: - 2 cups rolled oats - 2 cups almond milk (or any milk of choice) - 2 medium apples, peeled and diced - 1/2 cup brown sugar or coconut sugar - 1/4 cup maple syrup - 2 teaspoons cinnamon - 1/2 teaspoon nutmeg - 1/4 teaspoon salt - 1 teaspoon vanilla extract - 1/2 cup raisins (optional) - 1/4 cup chopped walnuts or pecans (optional) - 1 tablespoon baking powder These ingredients work together to create a warm and filling dish. The oats provide a hearty base, while the apples add sweetness and moisture. The spices give it that cozy, cinnamon flavor we all love. You can tweak this recipe to fit your taste. Here are some optional ingredients: - 1/2 cup raisins for added sweetness - 1/4 cup chopped walnuts or pecans for crunch Adding these gives more texture and flavor. If you like a nutty taste, go for the nuts. If you enjoy sweet bites, add the raisins. If you have dietary needs, you can still enjoy this recipe. Here are some easy swaps: - Use oat milk or coconut milk instead of almond milk for dairy-free options. - Swap brown sugar for coconut sugar for a lower glycemic index. - Leave out the nuts to make it nut-free. These substitutions ensure everyone can enjoy this tasty bake. You can adapt the recipe to suit your dietary needs without losing flavor. First, set your oven to 350°F (175°C). Grab a 9x9 inch baking dish and lightly grease it. In a large bowl, mix the rolled oats and almond milk. Add in the brown sugar and maple syrup for sweetness. Sprinkle in the cinnamon, nutmeg, and salt. Finally, stir in the baking powder and vanilla extract. Mix everything well until it's combined. Now, fold in your diced apples and raisins if you want. Make sure they spread out evenly in the mixture. Once your mixture is ready, pour it into your greased baking dish. Smooth the top with a spatula. If you want some extra crunch, sprinkle chopped walnuts or pecans on top. This step adds a nice texture and flavor to your bake. Place your dish in the oven. Bake for 35 to 40 minutes. You want the top to turn golden brown. To check if it’s done, insert a toothpick in the center. If it comes out clean, your bake is ready. Let it cool for a few minutes before slicing it into squares. Enjoy the warm, cozy flavors of your apple cinnamon oatmeal bake! To achieve the best texture, use rolled oats. They absorb liquid well and stay chewy. Avoid instant oats, as they can turn mushy. When mixing, ensure that all oats are coated in the liquid. This helps them cook evenly. Let the mixture sit for a few minutes before baking. This allows oats to soak up moisture and become soft. To boost flavor, use fresh spices. Fresh cinnamon and nutmeg add warmth. You can also add a splash of vanilla extract for depth. For a fruity twist, mix in dried fruits like cranberries or apricots. If you want a nutty taste, use pecans or walnuts. Toasting these nuts before adding can enhance their flavor. Store leftovers in an airtight container. They can last up to five days in the fridge. For longer storage, freeze the bake in squares. Wrap each piece in plastic wrap and place them in a freezer bag. When ready to eat, reheat in the microwave for quick meals. You can also warm it in the oven at 350°F for about 10-15 minutes. {{image_2}} You can change the fruit in this recipe to fit your taste. Try using pears, bananas, or berries. Each fruit adds a new flavor. For example, mashed bananas give a nice sweetness. You can also mix different fruits for a fun twist. Just make sure to use about two cups of fruit in total. Want to make this dish gluten-free? Use certified gluten-free oats. If you want a vegan option, almond milk works great. You can also swap brown sugar for coconut sugar to keep it vegan. This makes it friendly for many diets while still tasting amazing! You can boost the nutrition by adding seeds or nuts. Chia seeds or flaxseed meal work well. They add fiber and healthy fats. You can also throw in some spinach or shredded zucchini for more veggies. Just make sure to adjust the liquid if you add more ingredients. These add-ins keep the dish healthy and flavorful! You can freeze the Apple Cinnamon Oatmeal Bake easily. First, let it cool completely. Cut it into squares. Wrap each square in plastic wrap. Place the wrapped squares in a freezer-safe bag. Make sure to label the bag with the date. It will stay fresh for up to three months in the freezer. To store leftovers, let the bake cool to room temperature. Cover it with plastic wrap or aluminum foil. You can also place it in an airtight container. It will stay good in the fridge for about five days. For a quick breakfast, just reheat it in the microwave for a minute. The bake tastes best when fresh. However, if kept in the fridge, it will last about five days. If you freeze it, you can enjoy it for three months. Always check for any signs of spoilage before eating. If it looks or smells off, it's best to toss it. Yes, you can make this oatmeal bake ahead of time. Prepare the mixture and pour it into the baking dish. Cover it with plastic wrap and store it in the fridge. Bake it the next day for a warm breakfast. This method saves time and keeps your mornings stress-free. If you want to skip nuts, there are many options. You can use seeds like pumpkin or sunflower seeds. You could also add extra raisins or other dried fruit for texture. This will keep the bake tasty without nuts. To boost protein in this oatmeal bake, try adding Greek yogurt to the mixture. You can also mix in protein powder. Another great option is to add cottage cheese. These choices keep the bake creamy and delicious while packing in more protein. This blog post covered key elements for your recipe, from essential ingredients to unique variations. You learned how to prepare, store, and enhance flavors. I also shared tips to achieve perfect texture and nutritious add-ins. Remember, customizing your dish can make it your own. Try different fruit or dietary options based on your needs. Keep these ideas in mind to elevate your cooking. Enjoy experimenting and share your tasty results!

Apple Cinnamon Oatmeal Bake Delicious and Easy Recipe

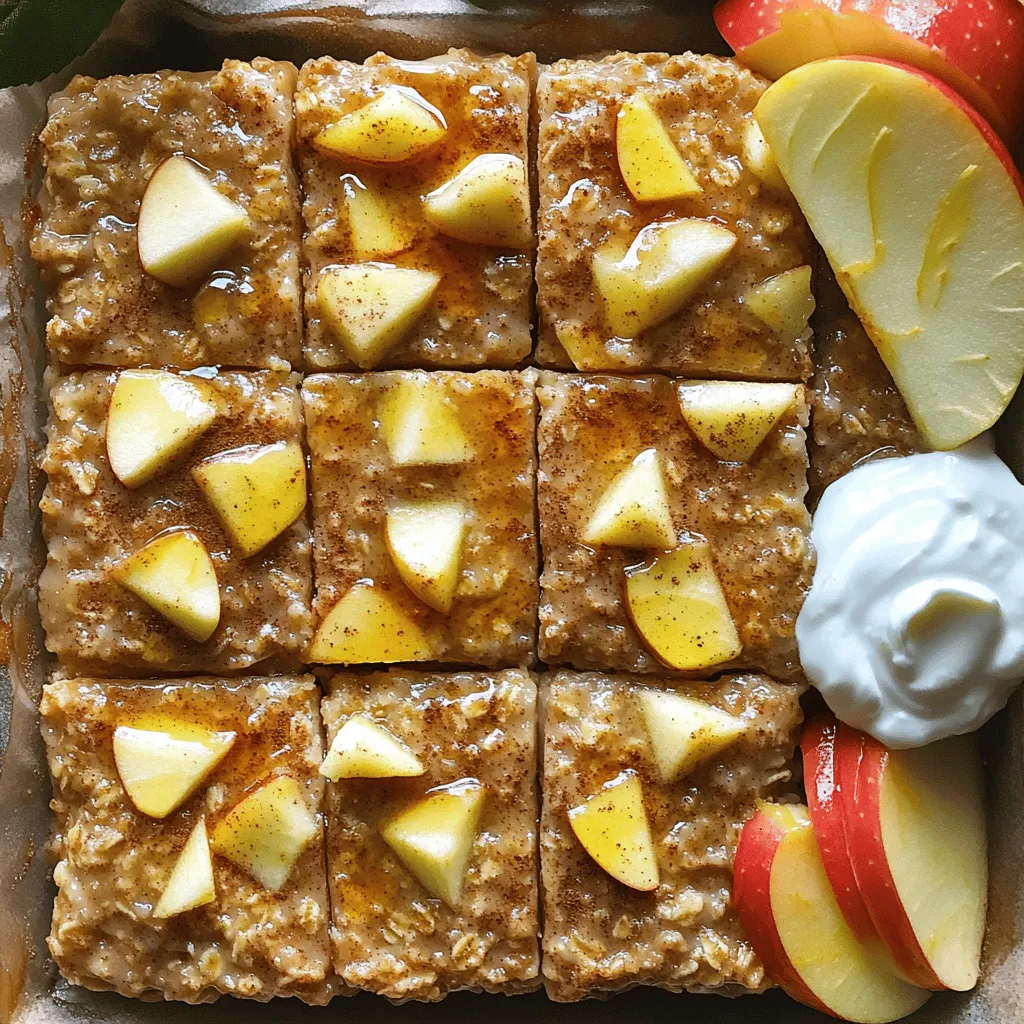
Looking for a warm, tasty breakfast that’s easy to make? Today, I’ll guide you through a delicious Apple Cinnamon Oatmeal

- 2 lb beef tenderloin, trimmed - 4 cloves garlic, minced - 2 tablespoons fresh rosemary, chopped - 2 tablespoons fresh thyme, chopped - 1 lb baby potatoes, halved - 2 cups green beans, trimmed The beef tenderloin is the star of this dish. It is tender, juicy, and packed with flavor. The garlic, fresh rosemary, and thyme add a lovely taste. I use baby potatoes for their creamy texture when roasted. Green beans add a nice crunch and color. - 3 tablespoons olive oil - 1 teaspoon salt - 1/2 teaspoon black pepper - Juice of 1 lemon Olive oil helps to cook the meat and veggies. Salt and black pepper bring out the flavors. Lemon juice adds a fresh zing at the end. These simple ingredients work together to make a great meal. - Sheet pan - Parchment paper - Mixing bowls Using a sheet pan makes cooking easy and cleanup quick. Parchment paper helps prevent sticking. Mixing bowls are perfect for preparing the herb paste and coating the veggies. With these tools, you are set for a fun cooking experience! - Preheat the oven: Set your oven to 425°F (220°C). Line a large sheet pan with parchment paper to make cleanup easier. - Create the herb paste: In a small bowl, mix 4 minced garlic cloves, 2 tablespoons of chopped rosemary, 2 tablespoons of chopped thyme, 3 tablespoons of olive oil, 1 teaspoon of salt, and 1/2 teaspoon of black pepper. This mix adds great flavor. - Rub the beef with herb paste: Take 2 pounds of beef tenderloin and pat it dry with paper towels. Spread the herb paste all over the beef. Make sure every side gets a nice coat. - Prepare and arrange vegetables: In a bowl, toss 1 pound of halved baby potatoes with some olive oil, salt, and pepper. Spread them in a single layer around the edges of the sheet pan. - First roasting phase (beef and potatoes): Place the sheet pan in the oven. Roast the beef and potatoes for about 20 minutes. - Adding green beans and finishing cook time: After 20 minutes, add 2 cups of trimmed green beans to the pan. Toss them with a bit of olive oil, salt, and pepper. Put the sheet pan back in the oven. Cook for another 15-20 minutes. Check that the beef reaches 135°F for medium-rare. This step-by-step guide helps you make a delicious sheet pan garlic herb beef tenderloin. Enjoy the flavors and the ease of cleanup! To check if your beef is done, use a meat thermometer. Insert it into the thickest part of the tenderloin. For medium-rare, aim for 135°F. This ensures the meat is juicy and not overcooked. Resting the meat is just as important. Let it sit for 10 minutes after cooking. This keeps the juices inside, making every bite rich and flavorful. Marinades can add depth to your dish. Try mixing different vinegars or citrus with your herbs. You can also change the seasoning to suit your taste. Adding spices like paprika or a dash of cayenne can give it a kick. Fresh herbs like parsley or oregano can also boost flavor. Experiment with what you like best. Cut potatoes and green beans evenly for even cooking. Halve the baby potatoes to ensure they roast well. Toss them with olive oil, salt, and pepper for the best taste. When you add the green beans, make sure they are spread out. If they are crowded, they may steam instead of roast. Adjust cooking times based on your oven. Check your veggies often to get that perfect crisp. {{image_2}} You can change up the veggies in this dish. Try adding bell peppers, carrots, or zucchini. These options add color and taste. You can also substitute the beef tenderloin. A pork tenderloin works well, too. The cooking time might change slightly, so watch it closely. To boost flavor, add cheese or nuts. Feta cheese adds a nice tang, while walnuts give a crunchy bite. You can also mix herbs. Try parsley, basil, or oregano for new tastes. Each herb brings a unique twist to the dish. Sheet pan cooking is easy and quick. But grilling can give a smoky flavor. Just marinate the beef first for the best taste. If you prefer slow cooking, you can adapt this recipe. Cook the seasoned beef and veggies on low for several hours for tender results. Store your leftovers in airtight containers. This keeps them fresh for up to three days. Use glass or plastic containers that seal tightly. Label them with dates for easy tracking. For longer storage, freeze your prepped meals. Cut the beef into smaller pieces before freezing. Wrap them tightly in plastic wrap and then place them in freezer bags. This helps avoid freezer burn. To reheat, thaw overnight in the fridge. Then, warm in the oven at 350°F until hot. Get creative with your leftover beef and veggies. Make beef tacos or a hearty salad. You can also mix them into a stir-fry for a quick meal. Use any leftover garlic herb paste to add flavor to new dishes. This way, you avoid waste and enjoy new meals from your leftovers. To tenderize beef, you can use a few simple methods. Here are some great techniques: - Pound it: Use a meat mallet to gently pound the beef. This breaks down tough fibers. - Marinate: Soak the beef in a marinade. Use acidic ingredients like vinegar or citrus juice. - Salt it: Rub salt on the beef and let it sit for about an hour. This helps draw out moisture and makes it tender. - Rest it: After cooking, let the beef rest. This allows the juices to redistribute, making it softer. Cooking time depends on the size of the beef tenderloin and how you like it done. Here are some guidelines: - Medium-Rare: Cook for about 20-25 minutes at 425°F (220°C) until it reaches 135°F (57°C). - Medium: Aim for 25-30 minutes until it hits 145°F (63°C). - Medium-Well: Cook for 30-35 minutes until it reaches 150°F (66°C). Always use a meat thermometer for best results. Yes, you can use dried herbs. However, the flavor will differ. Here’s what to know: - Flavor strength: Dried herbs are more potent than fresh. Use only a third of the amount. - Timing: Add dried herbs earlier in the cooking process. This allows their flavors to bloom. - Freshness: Ensure your dried herbs are fresh. Old herbs can lose their flavor quickly. This post covered all you need to create a delicious sheet pan beef tenderloin meal. We looked at main ingredients like beef, garlic, and fresh herbs, along with simple pantry staples. I provided step-by-step instructions to ensure perfect doneness and tasty vegetables. Remember, using the right equipment and following my tips can make a big difference. Feel free to experiment with flavors and storage methods. Now, it's time to enjoy your meal and share your cooking success!

Sheet Pan Garlic Herb Beef Tenderloin Easy Recipe

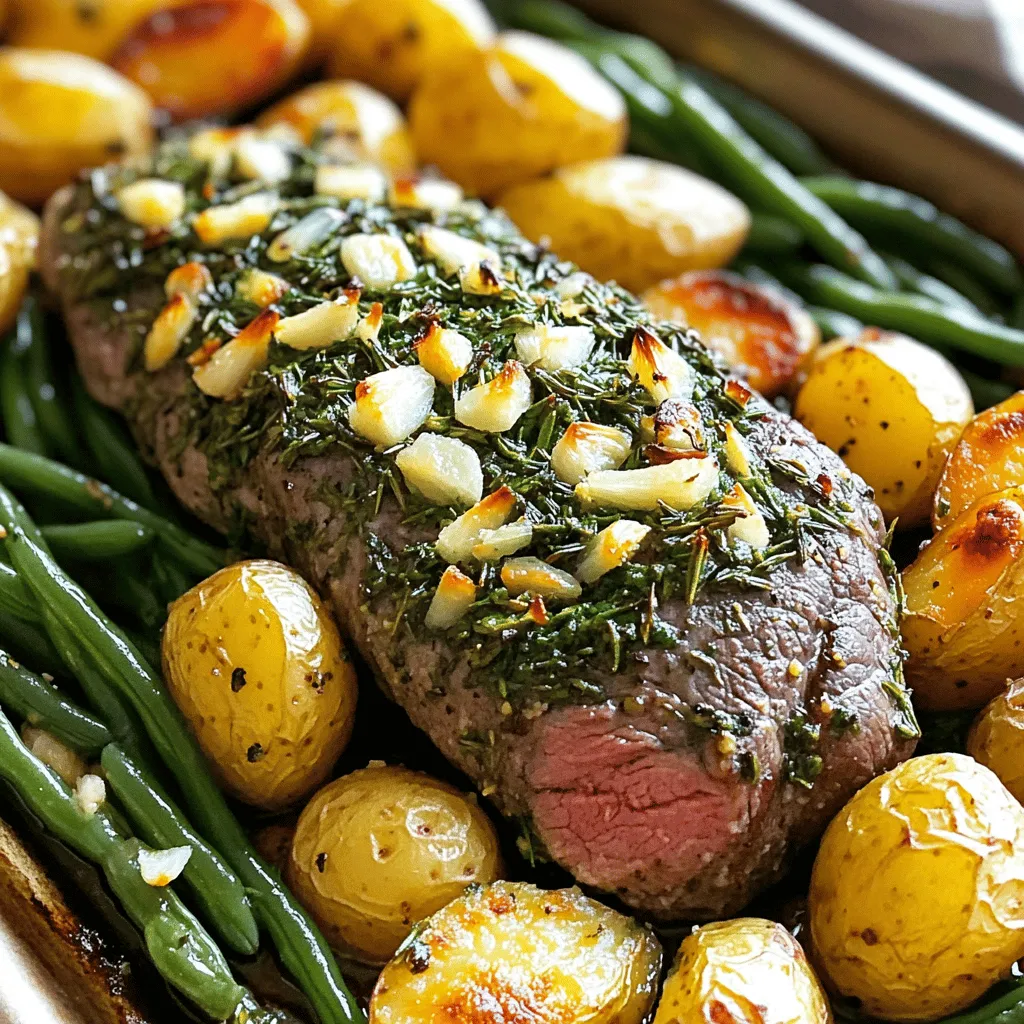
Are you ready to impress your family or guests with a mouthwatering dish? In this easy recipe for Sheet Pan

To make Air Fryer Buffalo Cauliflower Bites, gather these simple items: - Cauliflower florets - 1 cup all-purpose or gluten-free flour - 1 teaspoon garlic powder - 1 teaspoon onion powder - 1 teaspoon smoked paprika - 1/2 teaspoon salt - 1/4 teaspoon black pepper - 1 cup unsweetened almond milk or other non-dairy milk - 1 cup buffalo sauce (mix with a little melted vegan butter if you like) - Fresh parsley, chopped for garnish These ingredients create a tasty snack. The cauliflower is the star. It has a crunchy bite. The flour and spices give it flavor. The buffalo sauce adds a spicy kick. You can adjust the heat by changing the buffalo sauce. Using fresh parsley brightens the dish. Enjoy experimenting with these ingredients! Setting Preheat Temperature First, preheat your air fryer to 375°F (190°C). This step helps ensure even cooking and crispiness. Let it warm up for about 5 minutes. Preparing Cooking Accessories Use a non-stick spray or brush oil on the air fryer basket. This helps prevent sticking and makes cleaning easier later. Combining Dry Ingredients In a mixing bowl, add 1 cup of flour, 1 teaspoon of garlic powder, 1 teaspoon of onion powder, 1 teaspoon of smoked paprika, 1/2 teaspoon of salt, and 1/4 teaspoon of black pepper. Whisk these dry ingredients until they blend well. Mixing in Wet Ingredients Next, slowly pour in 1 cup of almond milk while stirring. Mix until the batter is smooth and free of lumps. This batter will coat the cauliflower bites. Dipping and Coating Process Take each cauliflower floret and dip it into the batter. Make sure each piece is well coated, but let any extra batter drip off. This helps them stay crispy. Air Fryer Cooking Duration and Technique Place the battered florets in the air fryer basket in a single layer. Avoid overcrowding for even cooking. Cook them for 10-12 minutes, shaking the basket halfway through. Adding Buffalo Sauce and Finishing Cook After they turn golden brown, move the cauliflower bites to a bowl. Drizzle 1 cup of buffalo sauce over them, tossing gently to coat. Return them to the air fryer for another 3-5 minutes to set the sauce. Enjoy your tasty snack! To get crispy cauliflower bites, follow these tips: - Proper Batter Coating: Make sure to dip each cauliflower floret well in the batter. This helps create a crunchy layer. Let the excess batter drip off so it isn’t too thick. Too much batter can make them soggy. - Avoiding Overcrowding in Air Fryer: Place the battered florets in one layer in the air fryer. Overcrowding traps steam and prevents crispiness. Cook in batches if needed. This ensures even cooking and a great crunch. You can adjust the flavor to fit your taste: - Adjusting Spice Levels: If you love heat, add more buffalo sauce. For a milder flavor, reduce the amount of sauce. You can also choose a different hot sauce that suits your spice preference. - Customizing Flavor Profiles: Change up the seasonings based on your mood. Try adding a pinch of cayenne for more heat or a sprinkle of parmesan cheese for a cheesy touch. You can mix in herbs like thyme or oregano for extra flavor. {{image_2}} Using Different Hot Sauces You can change the flavor of your buffalo cauliflower bites by using different hot sauces. Try a smoky chipotle sauce for a deeper flavor. You can also use a sweet chili sauce if you want a hint of sweetness. Mix things up to find your favorite! Making It Vegan-Friendly To keep it vegan, choose a hot sauce that does not have animal products. Many brands offer vegan options. You can also make your own buffalo sauce by mixing hot sauce with melted vegan butter or olive oil for a rich taste without dairy. Gluten-Free Options If you need a gluten-free snack, use gluten-free flour instead of all-purpose flour. It works just as well in the batter. You can find many good brands at the store. This small change keeps your bites tasty while meeting dietary needs. Dairy-Free Milk Alternatives For a dairy-free option, use almond milk or any non-dairy milk. Soy milk or oat milk also works great. Just make sure it is unsweetened. This keeps your cauliflower bites flavorful without any dairy. To keep your Air Fryer Buffalo Cauliflower Bites fresh, use airtight containers. Glass or plastic containers work well. Make sure they are sealed tightly to lock in flavor. Store the bites in the fridge if you plan to eat them within a few days. They taste best when eaten fresh but can last up to three days in the fridge. To enjoy your bites again, the air fryer is the best choice for reheating. Set the air fryer to 375°F (190°C) and cook the bites for about 5 minutes. This keeps them crispy. If you use a microwave, place the bites on a microwave-safe plate. Heat them for about 30 seconds. This method may make them a bit soft, so the air fryer is the better option. Yes, you can prep these bites ahead. Cut the cauliflower and make the batter. Store them in the fridge for up to a day. When ready, just coat the florets and air fry them. This saves time and helps you enjoy fresh bites in a snap. To keep your bites crispy, do not overcrowd the air fryer. This allows hot air to circulate. After frying, serve them right away. If you have leftovers, reheating in the air fryer for a few minutes helps restore their crispness. You can serve these bites with many tasty options. Here are a few ideas: - Celery sticks - Carrot sticks - Ranch dressing - Blue cheese dressing - Hummus or guacamole for a twist These pairings make your snack even more fun and delicious! You learned how to make tasty Air Fryer Buffalo Cauliflower Bites. We covered all the key steps, from prepping the air fryer to mixing the batter. I shared tips for getting that perfect crunch and advice for storing leftovers. Remember, you can customize the spices and sauces to match your taste. Enjoy experimenting with flavors! These bites are not just fun to eat; they can fit into many diets. Making them can lead to a new favorite snack in your home. Get cooking and enjoy your tasty creation!

Air Fryer Buffalo Cauliflower Bites Tasty and Easy Snack

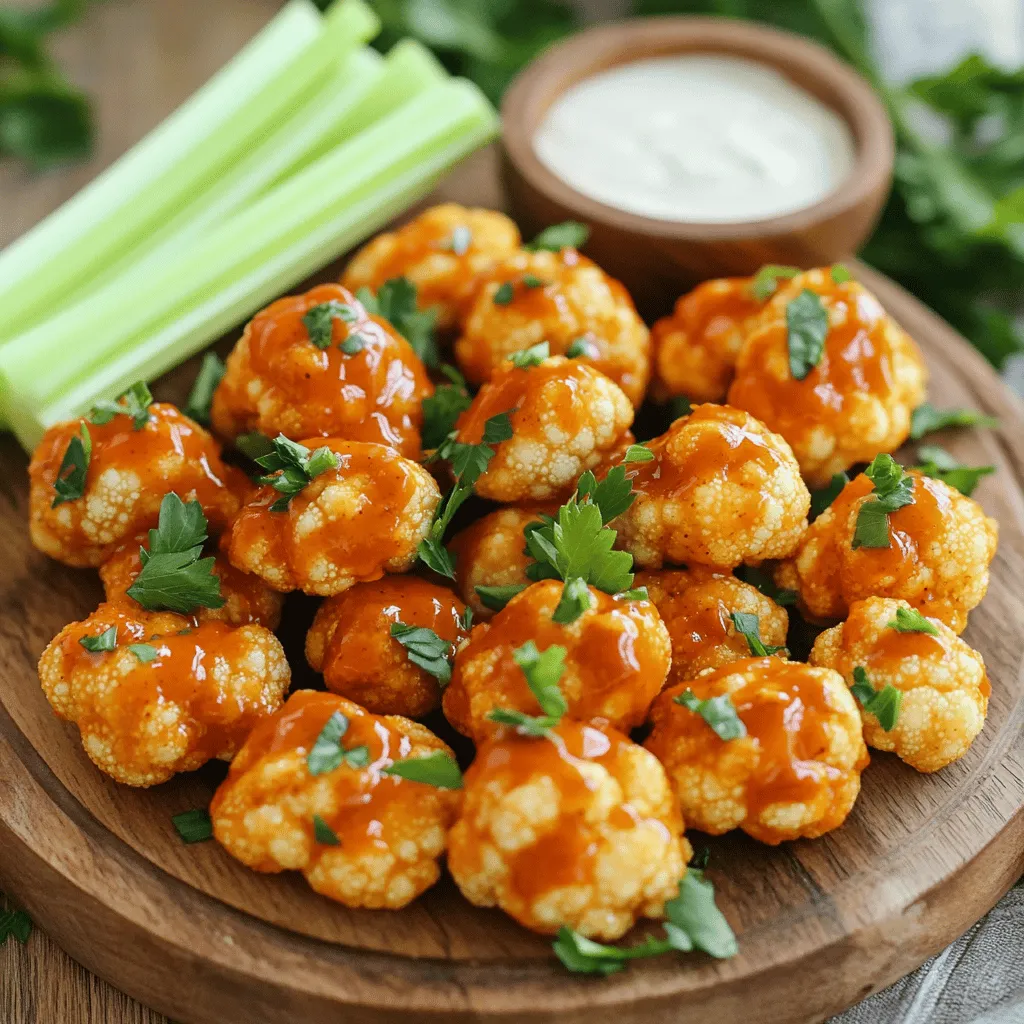
Are you ready to enjoy a snack that’s both tasty and healthy? Air Fryer Buffalo Cauliflower Bites are here to

- 2 cups all-purpose flour - 1/3 cup brown sugar - 1 tablespoon baking powder - 1/2 teaspoon salt - 1/4 cup cold unsalted butter, cubed - 1/2 cup heavy cream - 1/4 cup pure maple syrup - 1 teaspoon vanilla extract - 1/2 cup chopped pecans - 1 egg (for egg wash) - Additional maple syrup and chopped pecans for drizzling on top Gather these ingredients before you start. The dry ingredients create the base. You mix the flour, sugar, baking powder, and salt well. This mix gives your scones structure. Next, the wet ingredients add moisture and flavor. Cold butter is key for flaky scones. It keeps the dough light. Heavy cream and maple syrup add a rich taste. Don’t forget the pecans! They bring a nice crunch and nutty flavor. You can use any nuts you like, but pecans work best here. The egg wash gives your scones a lovely golden color. Finally, drizzle more maple syrup and sprinkle pecans on top. This makes your scones look and taste amazing. With these ingredients, you are ready to bake. Trust me; your kitchen will smell wonderful! Enjoy the process and the delicious results. - Preheat the oven to 400°F (200°C). - Line a baking sheet with parchment paper. Start by getting your oven hot. This step is key for a nice rise. The parchment paper helps the scones not stick. - Whisk together dry ingredients. - Blend in the cubed butter until coarse crumbs form. In a large bowl, mix the flour, brown sugar, baking powder, salt, and pecans. You want these dry ingredients well combined. Add the cold butter. Use your fingers or a pastry cutter to mix until it looks like coarse crumbs. This adds flakiness to your scones. - Combine heavy cream, maple syrup, and vanilla extract. - Gradually add wet mixture to dry ingredients. In another bowl, mix the heavy cream, maple syrup, and vanilla. Slowly pour this into the dry mix. Stir gently until just combined. Overmixing can make the scones tough, and we want them light and fluffy. - Knead the dough, pat into a circle, and cut into wedges. - Transfer to baking sheet, brush with egg wash, and bake. Turn the dough onto a floured surface. Gently knead it a few times until it holds together. Pat it into a circle about 1 inch thick. Cut this into 8 wedges. Place them on your baking sheet. Brush the tops with beaten egg for a nice golden color. Bake for 15-18 minutes until they are golden brown. Enjoy the warm, sweet smell filling your kitchen! To get the best texture in your scones, avoid overmixing. When you add the wet mix to the dry ingredients, stir gently. Mix just until everything is combined. Overmixing makes the dough tough. Cold butter is key for flaky scones. It helps create layers in the dough. Keep your butter in the fridge until you need it. Cut it into small cubes for easy blending. This way, it stays cold and works well. You can play with flavors in your scones. Add spices like cinnamon or nutmeg for warmth. You can also try different nuts. Walnuts or almonds work great too! Using flavored extracts adds depth to your scones. Consider maple extract for a stronger maple taste. You can also try almond or hazelnut extract. These options make your scones more exciting. Drizzling syrup can elevate your scones. Use a spoon to drizzle maple syrup on top. Make sure to cover the scones evenly. This adds sweetness and shine. Sprinkle chopped pecans on top after drizzling. This adds a nice crunch and makes them look pretty. Pair your scones with drinks like coffee or tea. A warm cup of chai tea goes well with the flavors. You can also serve them with hot cocoa for a cozy treat. {{image_2}} You can easily make maple pecan scones more fun. Try adding chocolate chips or dried fruits like cranberries or blueberries. They add a nice burst of flavor. If you want to switch nuts, walnuts or almonds work well too. They give a unique taste and texture. Just chop them up and mix them in with the other ingredients. Each new flavor makes the scones more exciting! If you need a gluten-free option, use a gluten-free flour blend. Make sure it has a binding agent like xanthan gum. For a dairy-free version, swap heavy cream with coconut cream. This gives a lovely richness without the dairy. You can also make vegan scones by using flaxseed meal or chia seeds instead of the egg wash. Just mix one tablespoon of flaxseed or chia with three tablespoons of water and let it sit for a few minutes. This will help bind the scone together. Enjoy your tasty treats no matter your diet! To keep your maple pecan scones fresh, place them in an airtight container. This helps keep moisture in and prevents them from drying out. If you want them to stay nice and soft, store them at room temperature. Avoid the fridge, as it may make them tough. You can also wrap them in plastic wrap before placing them in the container. This extra layer helps protect them. Freezing your scones is easy. First, let them cool completely after baking. Then, wrap each scone in plastic wrap. Place the wrapped scones in a freezer bag or container. This keeps them fresh for up to three months. When you are ready to eat them, take one out and let it thaw at room temperature. You can also reheat it in the oven at 350°F (175°C) for about 10 minutes. This makes the scone warm and fresh again. In an airtight container at room temperature, scones last about 2-3 days. If you store them in the fridge, they can stay good for up to a week. In the freezer, they are safe for up to three months. Just remember, the sooner you eat them, the better they taste! To keep scones moist, use cold butter. Cut it into small pieces and mix quickly. This helps form flaky layers. Use heavy cream instead of milk for extra richness. Avoid overmixing the dough. Stop mixing as soon as the dry ingredients blend with the wet. Also, bake the scones just until they are golden. This keeps them soft and tender. Yes, you can make scones ahead of time! You can prepare the dough and shape the scones. Then, wrap them tightly in plastic wrap. Freeze the shaped scones for up to a month. When ready to bake, just add a few extra minutes to the baking time. You can also bake them, let them cool, and store them in an airtight container. Maple pecan scones pair well with many delicious options. You can serve them with butter or cream cheese for spreading. A drizzle of warm maple syrup adds sweetness. Fresh fruit like berries or sliced apples also makes a great side. If you want a drink, try serving them with coffee or tea. This adds a cozy touch to your meal! In this post, I covered how to make delicious maple pecan scones. We started with the right dry and wet ingredients, then I guided you through mixing and baking. We talked about tips for perfect texture, flavor add-ins, and how to present your scones beautifully. You now have the tools to store and freeze them, too. Enjoy creating your unique twists on this classic treat. Your perfect scone is just a bake away!

Maple Pecan Scones Bakery Style Tasty and Easy Recipe

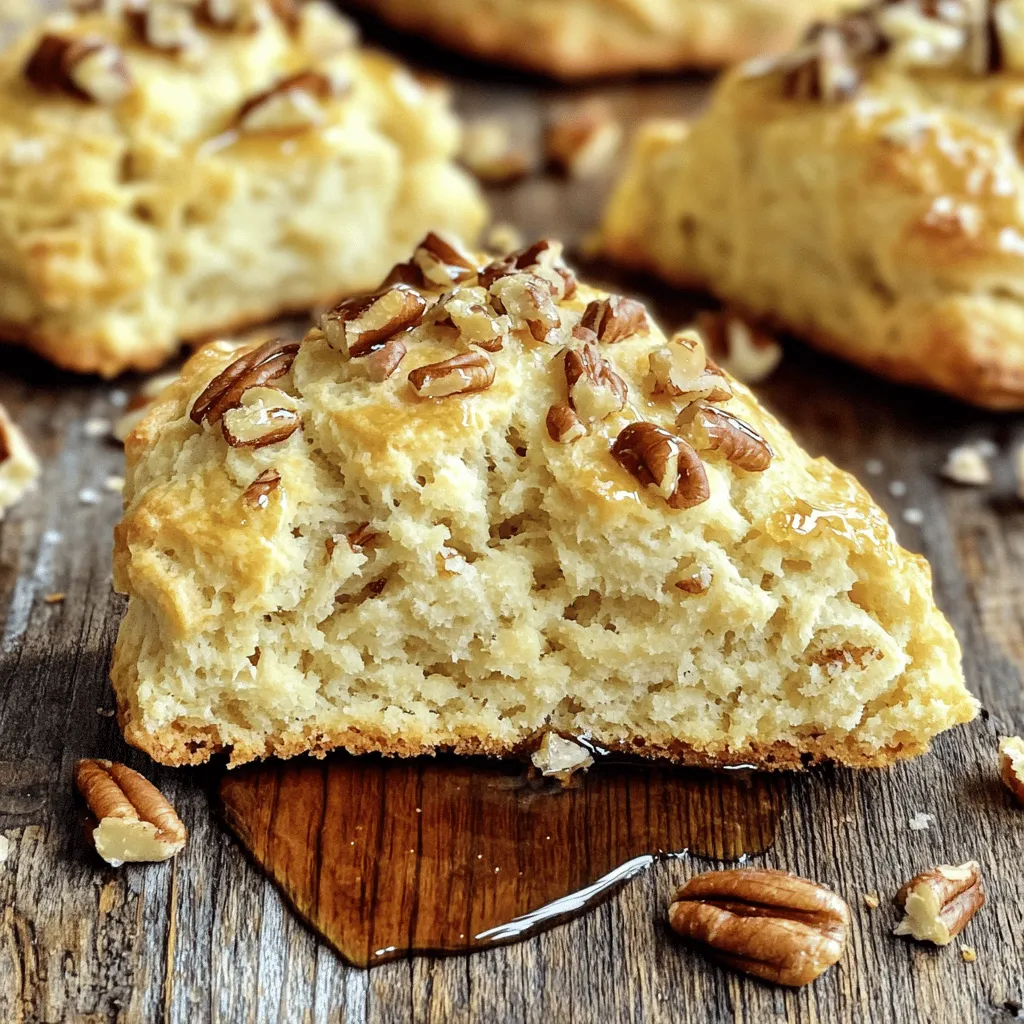
Looking for a delightful treat that’s easy to make? You’re in the right place! These Maple Pecan Scones are packed

- 1 lb boneless, skinless chicken breasts - 1 can fire-roasted diced tomatoes (14 oz) - 1 can black beans, rinsed and drained (15 oz) - 1 can corn, drained (15 oz) - 1 medium onion, diced - 3 cloves garlic, minced - 1 jalapeño, seeded and chopped - 1 teaspoon ground cumin - 1 teaspoon chili powder - 4 cups chicken broth - 1 lime, juiced - Salt and pepper to taste In this recipe, chicken is your main star. I prefer boneless, skinless chicken breasts. They cook well and shred easily. Next, you’ll need some flavorful vegetables. I love adding fire-roasted diced tomatoes for that smoky touch. Black beans give protein, while corn adds sweetness. Don't forget the onion and garlic. They build a strong base of flavor. The jalapeño adds a bit of heat. Adjust the amount if you want less spice. For seasonings, ground cumin and chili powder are essential. They bring warmth and depth to the soup. Finally, chicken broth ties everything together. It keeps your soup rich and comforting. - Fresh cilantro - Tortilla strips - Diced avocado - Shredded cheese Toppings make your soup special. Fresh cilantro adds a burst of color and flavor. I love crunchy tortilla strips for texture. Diced avocado gives creaminess, making each bite delightful. Lastly, shredded cheese adds a savory finish. Try mixing and matching toppings. Each adds a unique twist to the soup. Enjoy experimenting with these fresh elements! First, place the chicken breasts at the bottom of the slow cooker. This helps to keep the chicken juicy. Make sure they fit well and do not overlap. This way, they cook evenly. You want the chicken to soak up all the tasty flavors. Next, add the fire-roasted diced tomatoes, black beans, corn, onion, garlic, and jalapeño. These ingredients add color and taste. I love using fire-roasted tomatoes for that smoky flavor. Then, sprinkle the cumin, chili powder, salt, and pepper over the mix. These spices bring a warm kick to the soup. Use your hands to mix everything gently. This helps blend the flavors together. Now, pour in the chicken broth. Make sure all the ingredients are covered. This keeps the chicken moist while cooking. Cover the slow cooker and set it on low for 6-7 hours or high for 3-4 hours. The chicken is done when it shreds easily. About 30 minutes before serving, take out the chicken. Use two forks to shred it. Then, return the shredded chicken to the slow cooker. Stir in the lime juice to brighten the taste. Adjust the seasoning if needed. Mix well before serving. To make your soup taste even better, start with spices. You can add more chili powder for heat. If you want a smoky taste, try adding a pinch of smoked paprika. Adjust spices to fit your taste. Vegetables also boost flavor and nutrition. You can add bell peppers or zucchini. Corn adds sweetness, while carrots give a nice crunch. More veggies mean more vitamins! Choosing the right slow cooker setting is key. Cook on low for 6-7 hours for juicy chicken. If short on time, use high for 3-4 hours. Avoid overcooking the chicken. It can become dry and tough. Check the chicken about 30 minutes before serving. If it’s cooked, shred it and return it to the soup. This way, it stays moist and flavorful. {{image_2}} You can switch up the protein in your soup. Try using turkey or beef instead of chicken. Turkey gives a leaner taste while beef adds a hearty flavor. Both options work well when cooked slowly. For a vegetarian or vegan twist, use beans or lentils. These options still pack in protein and make the soup filling. Adding different spices can transform your soup. Try smoked paprika for a rich, smoky taste. A pinch of cayenne pepper can add heat. You can also experiment with fresh herbs like thyme or oregano. They give a fresh and vibrant flavor. Toppings can also change your soup's profile. Instead of tortilla strips, try crushed tortilla chips for extra crunch. You can also add diced radishes for a refreshing bite. A dollop of sour cream can add creaminess too. Let your taste buds guide you! To store your soup, let it cool first. Then, place it in an airtight container. Make sure to leave some space at the top for expansion. This soup lasts about 3-4 days in the fridge. Keep it at a safe temperature to avoid spoilage. For long-term storage, freezing is a great option. Divide the soup into portions before freezing. Use freezer-safe bags or containers. Press out as much air as possible to prevent freezer burn. It can stay fresh for up to 3 months in the freezer. When you are ready to eat, take the soup out and thaw it in the fridge overnight. To reheat, warm it on the stove over low heat. Stir often to help it heat evenly. You can also use the microwave, but be careful not to overheat it. Enjoy your soup again! To make this soup, follow these simple steps: 1. Prepare the Chicken: Place 1 lb of boneless chicken breasts at the bottom of your slow cooker. 2. Add Vegetables: Dump in 1 can of fire-roasted diced tomatoes, 1 can of black beans (rinsed), 1 can of corn (drained), 1 diced onion, 3 minced garlic cloves, and 1 chopped jalapeño. 3. Season the Soup: Sprinkle in 1 teaspoon of ground cumin, 1 teaspoon of chili powder, and add salt and pepper to taste. 4. Pour in the Broth: Add 4 cups of chicken broth to cover everything. 5. Cook: Cover the slow cooker and cook on low for 6-7 hours or high for 3-4 hours. 6. Shred the Chicken: About 30 minutes before serving, take out the chicken, shred it, and put it back in the pot. 7. Finish the Soup: Stir in the juice of 1 lime and adjust any seasonings if needed. 8. Serve: Ladle your soup into bowls and top with tortilla strips, cilantro, diced avocado, and shredded cheese if you like. Yes, you can use frozen chicken! Just make sure the chicken is in the slow cooker for 8-10 hours on low. This lets it cook fully and stay safe to eat. The chicken will add extra moisture and taste to the soup. Just shred it as you would with fresh chicken before serving. Here are some great side dishes and accompaniments: - Cornbread: A sweet and soft bread pairs well with soup. - Salad: A fresh green salad adds crunch and balance. - Rice: Serve with some white or brown rice for a filling meal. - Tortilla Chips: Crispy chips are great for dipping. - Guacamole: Creamy avocado dip enhances the flavor. - Sour Cream: A dollop of sour cream adds richness. These options can elevate your soup experience! In this blog post, we explored making Slow Cooker Chicken Tortilla Soup. We went over key ingredients like chicken, veggies, and spices. You learned how to prepare, cook, and enhance your soup. We shared tips for selecting proteins and possible variations. Finally, remember to store leftovers properly and enjoy this dish later. Cooking should be fun and easy. I hope you feel inspired to make your own delicious soup today!

Slow Cooker Chicken Tortilla Soup Flavor Boost Recipe

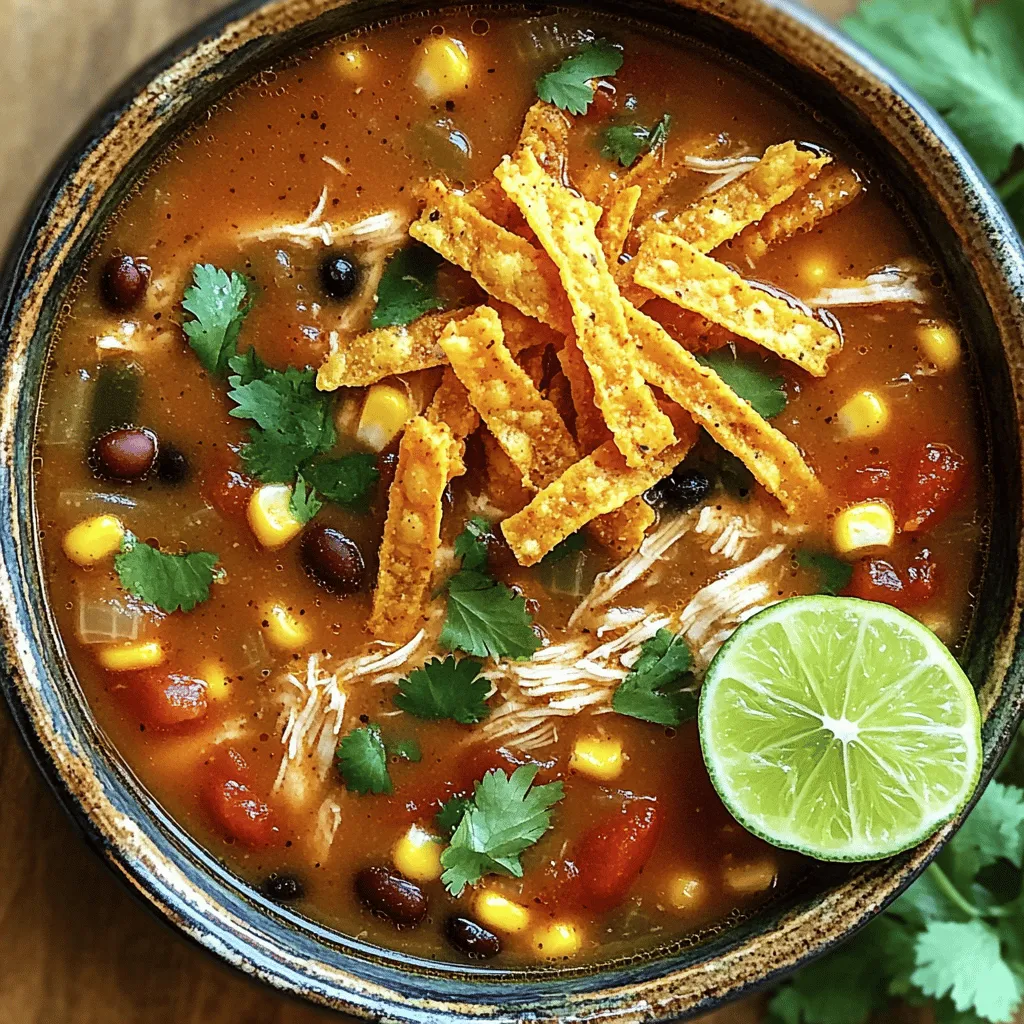
Looking for a hearty meal that’s easy to make? My Slow Cooker Chicken Tortilla Soup is the perfect dish. You

Here are the ingredients you need for lemon ginger brandy snaps: - 1 cup all-purpose flour - 1/2 cup unsalted butter, softened - 1/2 cup brown sugar, packed - 1/4 cup honey - 2 tablespoons fresh ginger, grated - Zest of 1 lemon - 2 tablespoons lemon juice - 1 teaspoon baking soda - 1/4 teaspoon salt - 1 teaspoon ground ginger - 1/2 teaspoon ground cinnamon To make these snaps, gather these tools: - Mixing bowls - Whisk - Baking sheet - Parchment paper - Tablespoon for scooping dough - Wire rack for cooling Using fresh ingredients makes a big difference in flavor. Here are some tips: - Butter: Use unsalted butter for better control over salt levels. - Ginger: Fresh ginger adds a bright zing. Grate it just before use. - Honey: Choose a high-quality honey for a richer taste. - Spices: Ensure your ground spices are fresh for the best flavor. - Flour: Use all-purpose flour for the right texture, not cake or bread flour. These tips help bring out the best in your lemon ginger brandy snaps! {{ingredient_image_1}} 1. Preheat your oven to 350°F (175°C). This step is critical for even baking. 2. Line a baking sheet with parchment paper. This keeps the snaps from sticking. 3. In a large bowl, cream together 1/2 cup softened unsalted butter and 1/2 cup brown sugar. Mix until it looks light and fluffy. 4. Add 1/4 cup honey, 2 tablespoons fresh grated ginger, the zest of 1 lemon, and 2 tablespoons lemon juice. Mix well until everything is combined. 5. In another bowl, whisk together 1 cup all-purpose flour, 1 teaspoon baking soda, 1/4 teaspoon salt, 1 teaspoon ground ginger, and 1/2 teaspoon ground cinnamon. This will be your dry mix. 6. Gradually add the dry mix to the wet ingredients. Stir until a sticky dough forms. Don’t overmix; just combine until you see no dry flour. 1. Using a tablespoon, scoop heaping spoonfuls of dough onto the prepared baking sheet. Space them about 2 inches apart. They will spread while baking. 2. Bake in the preheated oven for 10-12 minutes. The edges should be lightly golden, but the centers should remain soft. 3. Keep an eye on them! Ovens can vary, so check for doneness. 1. Once baked, let the snaps cool on the baking sheet for 5 minutes. This helps them firm up a bit. 2. Carefully transfer the snaps to a wire rack to cool completely. This prevents them from becoming soggy. 3. Store any leftovers in an airtight container. They can stay fresh for several days. Enjoy them with tea or coffee for a delightful treat! One big mistake is overmixing the dough. This can make your snaps tough. Mix until just combined. Another mistake is not spacing the dough properly. They spread out when baking, so leave space. Don't skip cooling on the baking sheet. This helps them set before you move them. For a crispy snap, bake until the edges are golden. The centers should stay soft. Use fresh ginger for a bold flavor. The lemon zest brightens the taste. If you want a stronger lemon flavor, add a bit more zest. Adjust the spices to your taste. More ground cinnamon gives a warm touch. These brandy snaps pair well with tea or coffee. They also make great gifts in a jar. Try serving them with vanilla ice cream for a treat. You can crush them and sprinkle over yogurt. They add a zing to any dessert plate. Enjoy them fresh or store for later. Pro Tips Chill the Dough: For extra crispy snaps, chill the dough for about 30 minutes before baking. This helps prevent the cookies from spreading too much in the oven. Use Fresh Ingredients: Always use fresh ginger and lemon for the best flavor. The zest and juice of fresh fruits will elevate the taste of your snaps. Check for Doneness: Keep a close eye on the snaps while baking. They should be slightly golden around the edges but still soft in the center for the perfect chewy texture. Storage Tips: Store your cooled brandy snaps in an airtight container at room temperature to maintain their crispiness. They can last up to a week! {{image_2}} You can easily add new flavors to your lemon ginger brandy snaps. Try mixing in a bit of cardamom for a warm spice. You can also add some chopped nuts for a nice crunch. Try using orange zest instead of lemon for a fresh twist. If you want a touch of sweetness, add some dried fruit like cranberries or apricots. Each change brings a unique taste to your snaps. If you need gluten-free options, use almond flour or a gluten-free blend. These flours give a different texture, but they still taste great. Just remember to check the flour for gluten-free labeling. You may need to adjust the liquid since almond flour absorbs more moisture. With these changes, you can enjoy the same lemon ginger flavor without gluten. You can switch up the sweeteners in this recipe. Instead of brown sugar, try coconut sugar for a more caramel-like taste. Agave nectar can replace honey if you prefer a lighter sweetener. For a low-calorie option, use stevia or erythritol. Adjust the amounts as needed since each sweetener has a different level of sweetness. This way, you can customize your snaps to fit your dietary needs. To keep your lemon ginger brandy snaps fresh, store them in an airtight container. This helps prevent them from getting soft. Place a piece of parchment paper between layers to avoid sticking. Store them at room temperature. They stay good for several days this way. You can freeze lemon ginger brandy snaps for later enjoyment. First, place them in a single layer on a baking sheet. Freeze them for about an hour. Then transfer the frozen snaps to a freezer-safe bag or container. This keeps them from clumping together. You can store them in the freezer for up to three months. When you want to eat them, let them thaw at room temperature. These delicious snaps have a good shelf life. If stored properly in an airtight container, they last up to a week. You can also enjoy them after freezing, as they taste great even when thawed. Just remember, the fresher they are, the better the taste and texture! Lemon ginger brandy snaps are delightful cookies that blend fresh lemon and ginger flavors. They are soft, chewy, and slightly crisp on the edges. These cookies make a great treat or a nice gift. Their bright taste pairs well with tea or coffee. You will love the sweet and spicy flavor profile. Yes, you can use fresh ginger in place of ground ginger. Fresh ginger adds a zesty kick to your cookies. Use about two tablespoons of grated fresh ginger for every teaspoon of ground ginger. Just remember, fresh ginger has a stronger flavor. Adjust the amount to suit your taste. To make your cookies less chewy, bake them a bit longer. Aim for a golden brown color on the edges. You can also use less brown sugar and more flour for a crispier texture. If you want to keep them soft, don’t overmix the dough. This helps maintain a nice, chewy bite. You've learned about the key ingredients for Lemon Ginger Brandy Snaps, along with equipment and tips for quality. We covered steps for preparation, baking, and storage. I shared tips to avoid common mistakes and enhance texture and flavor. You now know how to add fun variations and store your treats effectively. As you bake these cookies, remember to be creative and enjoy the process. With practice, you'll master this tasty recipe. Happy baking!

Lemon Ginger Brandy Snaps Tasty and Easy Recipe

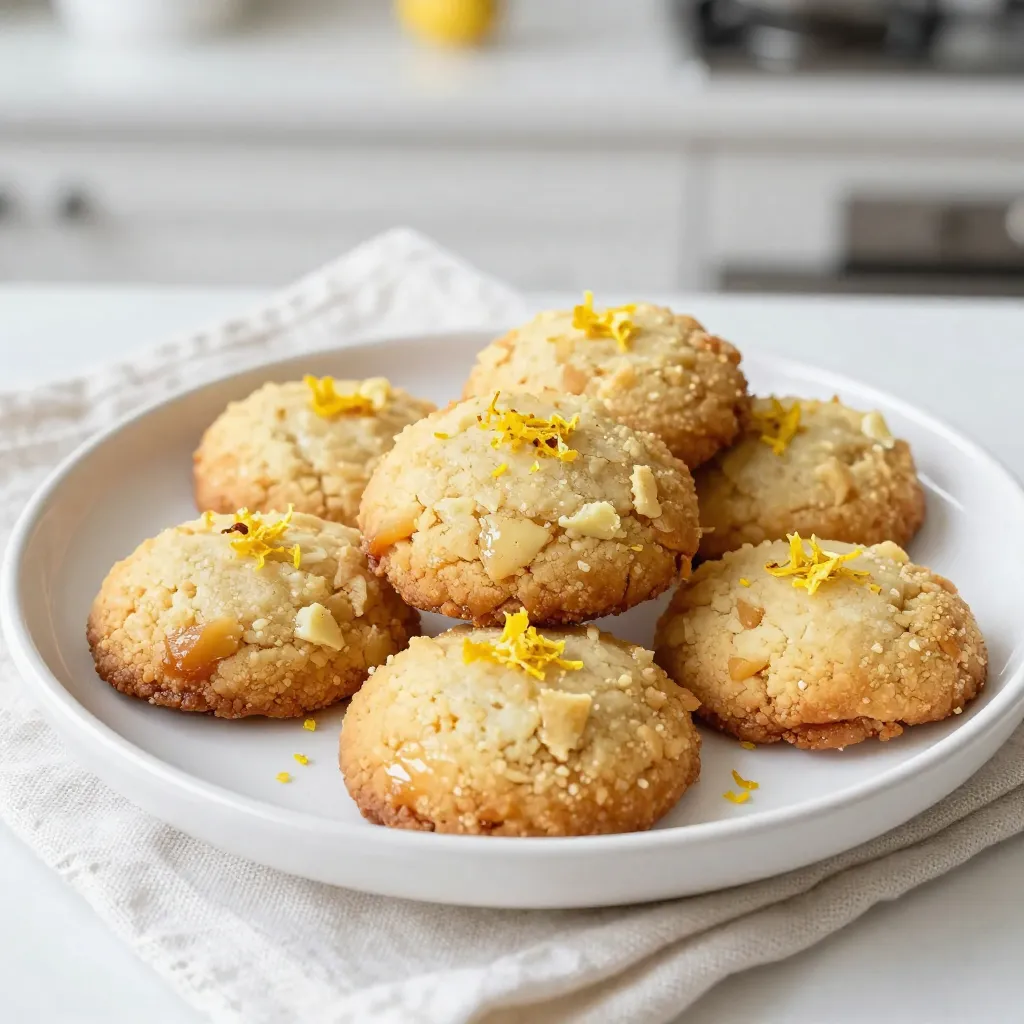
Do you crave a sweet treat with a twist? Lemon Ginger Brandy Snaps are the perfect blend of bright lemon

Older posts
Newer posts
← Previous Page1 … Page24 Page25 Page26 … Page84 Next →

dsad

© 2026 Foodish Talk • Built with GeneratePress

Our Policies

  • Copyright Policy
  • Cookie Policy
  • GDPR Policy
  • Privacy Policy
  • Disclaimer
  • Terms Of Use

More Information

  • Home
  • About
  • Contact
  • Appetizers
  • Dessert
  • Dinner
  • Drinks
©2026, Foodish Talk About Back To Top