
Latest & Greatest
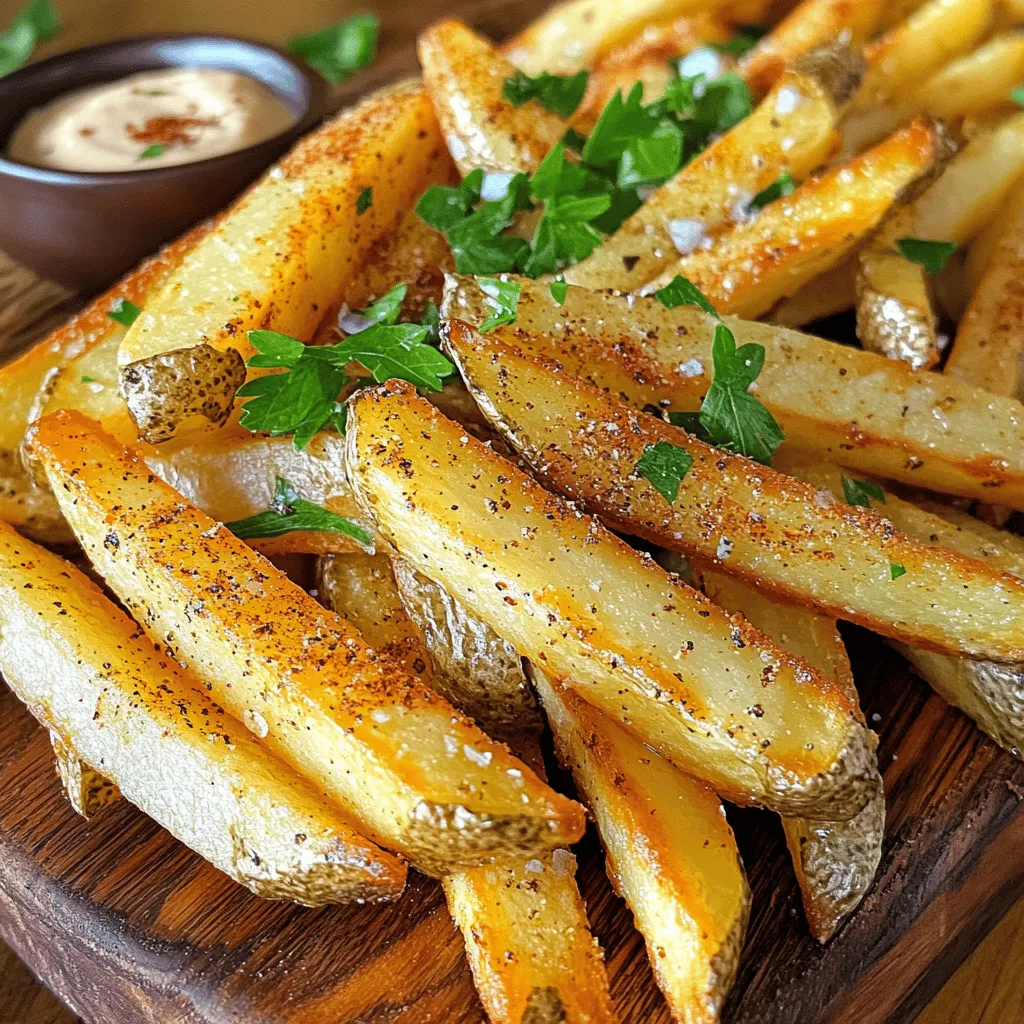
Crispy Oven Baked French Fries Tasty Easy Recipe
Are you ready to whip up a batch of Crispy Oven Baked French Fries that will impress your family and
Read more…
Mini Pineapple Upside Down Cakes Delicious and Easy Recipe
Are you ready to whip up a treat that’s both fun and delicious? Mini Pineapple Upside Down Cakes are the
Read more…
Loaded Buffalo Chicken Casserole Simple and Flavorful Dish
Craving a hearty meal that’s full of flavor? Loaded Buffalo Chicken Casserole is your answer! This dish combines tender chicken,
Read more…
Honey Garlic Chicken and Veggies Flavorful Meal Guide
Are you ready to whip up a delicious meal that’s simple and satisfying? In this Honey Garlic Chicken and Veggies
Read more…
Savory Black Pepper Chicken Easy Recipe to Try
Are you ready to spice up your dinner routine? My easy Black Pepper Chicken recipe brings bold flavor and simple
Read more…
Sausage Breakfast Casserole Simple and Tasty Recipe
Start your day off right with my simple and tasty sausage breakfast casserole! You can whip this dish up with
Read more…
Dump-and-Bake Chicken Tzatziki Flavorful Simple Meal
Looking for a quick meal that packs a punch of flavor? Say hello to Dump-and-Bake Chicken Tzatziki! This simple dish
Read more…
Easy Hummus Recipe Creamy and Flavorful Spread
Are you ready to elevate your snack game with the easiest hummus recipe? This creamy and flavorful spread requires just
Read more…browse recipes


. To get the best pudding texture, use fresh chia seeds. Old seeds may not thicken well. Stir the mixture well when you first add the seeds. This helps them spread evenly. Let the pudding rest for at least four hours, or overnight. This gives the seeds time to soak and expand. If the pudding is too thick, you can add a bit more coconut milk. This will make it creamier. You can adjust the sweetness to your taste. If you like a sweeter pudding, add more maple syrup or honey. Start with a little, then taste before adding more. Want extra flavor? Add a splash of fresh lime juice. You can also mix in spices like cinnamon or cardamom for a twist. These add warmth and depth to the dish. Topping with toasted coconut flakes can also enhance the flavor. A common mistake is not mixing the chia seeds well. If they clump together, you’ll get a lumpy pudding. Always whisk the chia seeds into the liquid thoroughly. Another mistake is not letting the pudding chill long enough. It needs time to set properly. Lastly, avoid using too much sweetener at once. You can always add more, but it’s hard to take it out. For the complete recipe, check the Full Recipe. {{image_2}} You can change the milk to suit your taste. Almond milk adds a nutty flavor. Oat milk makes it creamy and smooth. Soy milk gives a nice protein boost. Use any milk you like. Just keep the same amount as coconut milk in the recipe. Mango shines in this dish, but you can mix it up! Try diced strawberries for a tart twist. Blueberries add a pop of color and sweetness. Pineapple gives a tropical vibe. Even bananas can work well. Choose fruits that you love for your own special touch. This chia pudding works for breakfast or dessert. Serve it in jars for breakfast on the go. Top it with nuts or granola for crunch. For dessert, layer it with whipped cream. Add chocolate shavings for a fun treat. You can enjoy it any time! For the full recipe, check out the detailed instructions above. To keep your mango coconut chia pudding fresh, store it in an airtight container. This way, it stays safe from air and smells. Always place it in the fridge if you have leftovers. Avoid using a metal container, as it can change the taste. Your pudding will stay fresh for about 3-5 days in the fridge. After this time, the texture may change and lose flavor. Always check for any signs of spoilage, like an off smell or unusual texture, before eating. You can freeze mango coconut chia pudding, but it may change in texture once thawed. To freeze, pour the pudding into a freezer-safe container. Leave some space at the top, as it will expand when frozen. It can last for about a month in the freezer. When ready to eat, let it thaw in the fridge overnight. Stir well before serving for the best taste. For the full recipe, check out the Mango Paradise Coconut Chia Pudding 🥭 recipe above! Yes, you can use different sweeteners. Maple syrup and honey work great. You can also try agave nectar or coconut sugar. Each sweetener gives a unique flavor. Just keep the amount the same as in the recipe. Taste the mixture before chilling. Adjust the sweetness if needed. The pudding needs at least 4 hours to chill. I recommend chilling it overnight for the best texture. This time allows the chia seeds to swell. They create that creamy pudding feel. If you’re in a hurry, 4 hours will still work. Just remember to stir it well before serving. Chia pudding is very healthy! Chia seeds are full of fiber, protein, and healthy fats. They help keep you full and satisfied. Coconut milk adds creaminess and healthy fats too. This dessert is low in sugar, especially if you adjust the sweetener. It makes a great treat that is nutritious and tasty. Mango Coconut Chia Pudding is simple and fun to make. You learned about the key ingredients, step-by-step instructions, and helpful tips. There are many ways to enjoy this dish, whether as breakfast or dessert. Storing the pudding is easy, and following my tips will help avoid mistakes. Enjoy experimenting with flavors and toppings that suit your taste. This pudding is not just yummy; it also offers great nutrition. Now, get started and make a batch of this tasty treat!](https://foodishtalk.com/wp-content/uploads/2025/05/ac03baf8-77b8-45c9-849d-5bc435a6c32b.webp)
Mango Coconut Chia Pudding Revitalizing Dessert Recipe
Ready to revitalize your dessert game? This Mango Coconut Chia Pudding recipe is a delicious fusion of tropical flavors and healthy ingredients. It’s easy…
My Latest Desserts

Mini Vanilla Cream Tarts with Raspberries Delight
Welcome to the sweet world of Mini Vanilla Cream Tarts with Raspberries! Today, I’ll show you how to make these Read Full Recipe-
Frozen Yogurt Bark Delightful and Simple Treat
If you’re looking for a quick, tasty treat, frozen yogurt bark is a winner. It’s easy to make and fun Read Full Recipe -
Fruit Salad with Honey Lime Dressing Easy Recipe
Looking for a fresh and easy treat? This Fruit Salad with Honey Lime Dressing is the perfect choice. Bursting with Read Full Recipe -
Blueberry Cheesecake Bars Simple and Delicious Treat
Looking for a dessert that’s easy to make and bursting with flavor? You’ve found it! These Blueberry Cheesecake Bars are Read Full Recipe -
Lemon Cheesecake Crumb Bars Delightful and Fresh Treat
Are you ready to brighten your day with a sweet treat? These Lemon Cheesecake Crumb Bars combine creamy cheesecake with Read Full Recipe -
Blueberry Heaven Cookies Irresistible Sweet Treat
Welcome to your new favorite cookie recipe! Blueberry Heaven Cookies are the perfect blend of sweet and tart, making them Read Full Recipe -
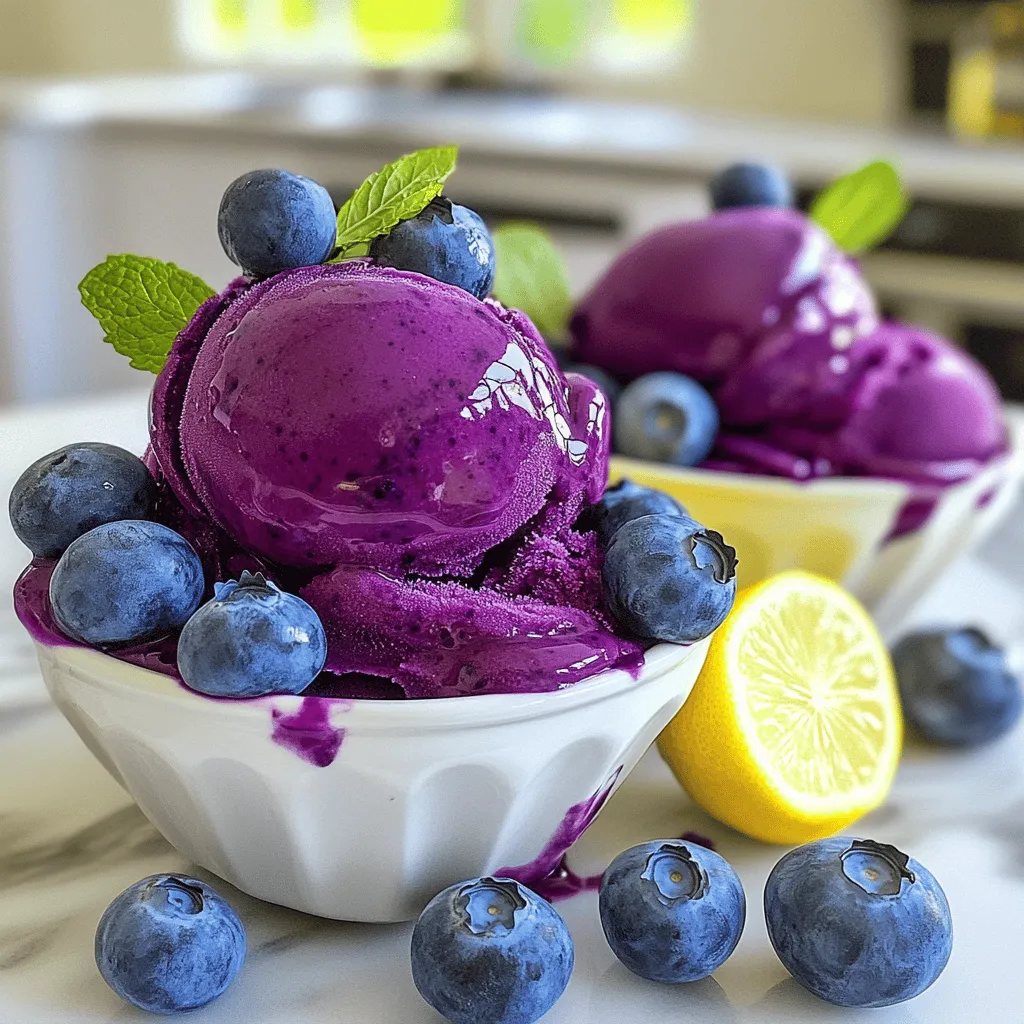
Lemon Blueberry Sorbet Fresh and Refreshing Delight
Cool off with a bowl of Lemon Blueberry Sorbet! This sweet, tangy treat is perfect for hot days. You only Read Full Recipe -
Lemon Blueberry Cupcakes Delightful and Light Treat
Are you ready to indulge in a sweet treat that brightens your day? These Lemon Blueberry Cupcakes are just what Read Full Recipe -
Blueberry Cheesecake Cookies Delightful and Easy Recipe
If you love the sweet and tangy combo of blueberry cheesecake, you’re in for a treat! I’ll show you how Read Full Recipe -
Greek Yogurt Ice Cream Creamy and Simple Delight
Looking for a cool treat that’s both delicious and easy to make? Greek yogurt ice cream is your answer! This Read Full Recipe


hey,
i’m !
I’m so happy you’re here!
I pour heart and skill into every recipe I create. I know you’ll taste the difference now let’s enjoy this flavorful adventure together.
![To make Mango Sago dessert pudding, gather these simple ingredients: - 1 ripe mango, diced - 1 cup small tapioca pearls (sago) - 1 can (400ml) coconut milk - 1/2 cup sugar (adjust to taste) - 1/4 teaspoon salt - 1 cup water - 1/2 teaspoon vanilla extract - Extra mango slices and mint leaves for garnish When picking mangoes, look for ripe ones. They should feel slightly soft when you press them. Check for a sweet aroma near the stem. The skin may have some green or red hues, but color varies with type. Choose mangoes that are not too bruised or have dark spots. The best mangoes will have a smooth skin and vibrant color. Sago pearls add a fun, chewy texture to this dessert. They absorb flavors well, making each bite delightful. Coconut milk gives the pudding a rich, creamy taste. It also brings a hint of sweetness and a tropical essence. Together, sago and coconut milk create a perfect base for the fresh mango. This combination brings out the best in your Mango Sago dessert pudding. 1. First, bring 1 cup of water to a boil in a medium saucepan. 2. Add 1 cup of small tapioca pearls to the boiling water. Cook them for 15-20 minutes on medium heat. Stir occasionally until the pearls turn translucent. 3. Once cooked, drain the pearls and rinse them under cold water. This will stop the cooking process. Set them aside. 4. In the same saucepan, mix 1 can of coconut milk, 1/2 cup of sugar, and 1/4 teaspoon of salt. Heat over low-medium heat, stirring until the sugar dissolves. Do not boil. 5. When the coconut milk is warm, add the cooked sago pearls. Stir in 1/2 teaspoon of vanilla extract. Let it simmer for about 5 more minutes. 6. Remove the saucepan from heat and gently stir in the diced mango, saving a few pieces for garnish. 7. Pour the mixture into cups or dessert bowls and refrigerate for at least 2 hours to set. 8. Serve chilled, topping each pudding with reserved mango slices and mint leaves for a fresh touch. - Always use small tapioca pearls for this recipe. They cook faster and give a better texture. - Stir the pearls often while cooking. This helps to prevent them from sticking together. - If you notice the pearls are still hard after cooking, add a little more water and cook for a few extra minutes. - Rinsing the pearls after cooking is key. It stops the cooking and keeps them from getting gummy. - Ensure you measure the coconut milk accurately. Too much can make the pudding too thin. - The sugar helps to balance flavors but don’t add too much. Start with 1/2 cup and adjust as needed. - The sago pearls should be soft but still hold their shape. They should not be mushy. - Refrigerate the pudding long enough to let it set. This step is crucial for the right texture. You can find the Full Recipe for Mango Sago Bliss Pudding above. When making mango sago pudding, some mistakes can ruin your dish. First, don’t overcook the sago. If you do, it can turn mushy. Always keep an eye on the cooking time. Second, avoid using unripe mangoes. They can taste sour and spoil your dessert. Lastly, don’t skip rinsing the sago. This step stops the cooking and helps keep the pearls separate. To create a balanced flavor, focus on the sweetness. Start with half a cup of sugar, then taste the mix. If it needs more sweetness, add a bit more. The coconut milk brings a creamy texture, but too much can make it heavy. A pinch of salt enhances the flavor without making it salty. Finally, the vanilla extract adds warmth. Use it but don’t overdo it. Having the right tools makes cooking easier. You need a medium saucepan for cooking the sago and the coconut milk mix. A strainer is essential for rinsing the pearls. For mixing, a wooden spoon works well. Use measuring cups for accuracy, especially for the sugar and liquid. Small dessert cups or bowls are great for serving. These tools help you enjoy the process and make cooking fun. For the complete process, check the Full Recipe. {{image_2}} You can switch up the fruit in your Mango Sago Dessert Pudding. Try using pineapple or passionfruit for a tasty twist. Simply replace the mango with your chosen fruit. For pineapple, chop it into small pieces and mix it in. If you love passionfruit, scoop out the seeds and pulp. Blend it into the pudding for a tangy flavor. These tropical fruits add a new layer of freshness. You can explore flavors from different regions with these simple changes. If you want a vegan version, use maple syrup instead of sugar. You can also swap coconut milk for almond or cashew milk. This gives you a lighter dessert while keeping it creamy. For a sugar-free treat, choose sugar substitutes like stevia or erythritol. Both options keep the dessert sweet without added sugar. These adaptations make the dessert suitable for everyone, even those with dietary restrictions. Serving your Mango Sago Dessert Pudding can be fun. Use clear glass cups to show off the vibrant colors. Top each cup with extra mango slices and fresh mint leaves. This adds a pop of color and a nice aroma. You can also drizzle a bit of coconut cream on top for extra richness. For a special touch, serve with a small scoop of sorbet on the side. These ideas make your dessert not just tasty, but also beautiful. For the full recipe, check out the Mango Sago Bliss Pudding. To keep your mango sago dessert pudding fresh, store it in the fridge. Use airtight containers. This prevents the pudding from absorbing other smells. Make sure the pudding is fully cooled before covering it. This helps keep the texture smooth. You can keep leftovers for up to three days in the fridge. After three days, the texture may change. The sago may start to harden, and the flavors may fade. Always check for any signs of spoilage before consuming. If you want to refresh your chilled pudding, add a splash of coconut milk. This will help restore creaminess. Stir it well to blend. You can also serve it over crushed ice for a refreshing twist. Avoid reheating in the microwave, as it can change the pudding's texture. For the full recipe to make this delightful treat, check out the Mango Sago Bliss Pudding. Yes, you can use frozen mango. Just let it thaw before using. Other fruits like diced kiwi or strawberries also work. They add fun flavors and colors to the pudding. Fresh fruits give a nice texture, while frozen ones are handy and quick. Remember to taste and adjust sweetness if needed. If you can't find coconut milk, almond milk is a good choice. It has a light flavor and works well in desserts. You can also use cashew milk for a creamier texture. If you want a dairy option, whole milk or heavy cream can replace coconut milk too. Just keep in mind that it will change the taste slightly. You can make this pudding up to two days ahead. Just follow the recipe and chill it in the fridge. The flavors blend nicely when it sits. If you plan to serve it later, keep the mango garnish separate. Add that right before serving for the best look and taste. For the [Full Recipe], just follow the steps mentioned earlier. Enjoy your cooking! Mango Sago Bliss Pudding is a sweet treat that is perfect for warm days. This dessert is light, creamy, and packed with flavor. The main ingredients are ripe mangoes and small tapioca pearls, known as sago. - 1 ripe mango, diced - 1 cup small tapioca pearls (sago) - 1 can (400ml) coconut milk - 1/2 cup sugar (adjust to taste) - 1/4 teaspoon salt - 1 cup water - 1/2 teaspoon vanilla extract - Extra mango slices and mint leaves for garnish This recipe blends sweet mango with creamy coconut milk. The sago adds a chewy texture. Together, these flavors create a delightful experience. The key is to use ripe mangoes for the best taste. You start by cooking the sago pearls. Bring water to a boil in a pot. Add the sago and cook until they turn clear. This usually takes about 15 to 20 minutes. Stir occasionally to avoid clumping. After cooking, rinse them with cold water. This stops the cooking and keeps them chewy. Next, you mix the coconut milk, sugar, and salt in the same pot. Heat it gently. Stir until the sugar dissolves but do not let it boil. This helps make the pudding smooth and sweet. After your coconut milk is ready, add the cooked sago and vanilla extract. Stir well and simmer for 5 minutes. Then, mix in your diced mango, saving some for garnish. Pour the mix into cups and chill in the fridge for at least 2 hours. When ready to serve, top with extra mango slices and fresh mint leaves. This makes your dessert look beautiful and inviting. The mix of colors and flavors will make your taste buds dance. This Mango Sago Bliss Pudding is a refreshing treat that everyone will love. For the full recipe, check the above section. Enjoy every creamy spoonful! Mango Sago Dessert Pudding combines fresh ingredients for a sweet treat. We explored the best mangoes and the role of sago and coconut milk. I shared easy steps for cooking and tips to perfect your pudding. Remember to avoid common mistakes and consider fun variations. Store leftovers well to enjoy later, and feel free to adapt the recipe. Dive in and create your own Mango Sago Bliss today! You’ll love the taste and texture.](https://foodishtalk.com/wp-content/uploads/2025/06/42995667-644f-4ea5-9ea6-178515365254-300x300.webp)
![- 1.5 lbs chicken thigh fillets, diced - 1 cup long-grain rice - 1 medium onion, finely chopped - 2 cloves garlic, minced - 1 bell pepper (any color), diced - 1 cup chicken broth - 1 can (14 oz) diced tomatoes with green chilies - 1 teaspoon smoked paprika - 1 teaspoon Cajun seasoning - 1/2 teaspoon dried thyme - 1/2 teaspoon black pepper - 1 tablespoon olive oil - Salt to taste - 2 green onions, chopped (for garnish) - Fresh parsley, chopped (for garnish) Using the right amounts makes a big difference. For the chicken, use 1.5 lbs. This gives you nice, juicy pieces. The rice is 1 cup, which helps soak up all the flavors. The onion should be one medium-sized, and it adds a great base flavor. Use two cloves of garlic for a nice kick. For the bell pepper, any color works! The chicken broth should be one cup to keep things moist. The diced tomatoes bring both texture and zest. The spices, like smoked paprika and Cajun seasoning, are key for flavor. You can swap chicken thighs for chicken breasts if you like. Breasts are leaner but can dry out. For the rice, brown rice is a good choice, but it needs a longer cooking time. If you don’t have chicken broth, vegetable broth works well too. You can skip the bell pepper or use zucchini instead. For spices, if you don’t have smoked paprika, regular paprika will do. You can always adjust the heat by adding more or less Cajun seasoning. Check out the Full Recipe for more details. First, you need to prepare the chicken. I like using chicken thigh fillets for this dish. They stay juicy and tender. Dice 1.5 pounds of chicken thighs into bite-sized pieces. Season them with salt and black pepper. Heat 1 tablespoon of olive oil in a large pot over medium heat. When the oil is hot, add the chicken. Cook it for about 5 to 7 minutes. You want the chicken to brown nicely. Once it's done, remove the chicken from the pot and set it aside. This step adds great flavor to your dish. Now, let’s sauté the vegetables. In the same pot, add the chopped onion, bell pepper, and minced garlic. Use one medium onion, one bell pepper, and two cloves of garlic. Sauté these for about 3 to 4 minutes. You want the veggies to soften and release their flavors. This step is key for depth in your dish. Next, stir in the rice. Use 1 cup of long-grain rice. Add in 1 teaspoon of smoked paprika, 1 teaspoon of Cajun seasoning, and 1/2 teaspoon of dried thyme. Cook this mixture for one more minute. This helps the rice soak up all the spices. After the rice is mixed with the spices, it’s time to add the liquids. Pour in 1 can of diced tomatoes with green chilies and 1 cup of chicken broth. Then, return the browned chicken to the pot. Mix everything well. Bring it to a gentle boil. Once it’s boiling, reduce the heat to low. Cover the pot and let it simmer for 25 to 30 minutes. The rice should become tender and absorb most of the liquid. After cooking, let it sit for another 5 minutes. Fluff the rice with a fork and taste for seasoning. Adjust if needed. Serve hot and garnish with chopped green onions and fresh parsley for a pop of color. Enjoy this delightful one pot chicken and dirty rice dish! For the complete recipe, check out the Full Recipe. To make your dish full of flavor, use high heat for browning the chicken. This locks in juices and creates a nice crust. When you sauté the veggies, stir them well. This helps release their natural sweetness. Adding spices like smoked paprika early also boosts the taste. The heat wakes up the spices, making them pop in your dish. For perfectly cooked rice, rinse it first. This removes excess starch and keeps it fluffy. Use the right ratio of liquid to rice. I suggest 1 cup of rice to 1.5 cups of liquid. This ensures the rice cooks well and absorbs all the flavors. Once you add the rice to the pot, don’t stir too much. Stirring can break the grains and make your rice gummy. When meal prepping, chop all your ingredients in advance. Store them in airtight containers in the fridge. This saves time on busy days. You can also cook a double batch of this dish. It keeps well and tastes even better the next day. Just reheat it gently on the stove. For a quick meal, consider preparing the rice in a rice cooker while you cook the chicken. This way, everything is ready at the same time. For the full recipe, check the details above. {{image_2}} You can boost the nutrition and flavor by adding more vegetables. Consider adding carrots, peas, or corn. These veggies add sweetness and color to your dish. You can also use spinach or kale for some leafy greens. Just chop them up and stir them in during the last few minutes of cooking. This way, they stay bright and fresh. If you want to change the protein, you have options! Try using diced turkey, sausage, or even shrimp. Each choice brings its own taste and texture. For a vegetarian option, replace the chicken with chickpeas or lentils. Both will soak up the flavors nicely. Just adjust the cooking time as needed. Do you prefer heat or a milder taste? To add spice, mix in some cayenne pepper or hot sauce. You can also use spicy sausage for a kick. If you want it mild, stick with the original recipe. You can even leave out the Cajun seasoning. This dish is flexible enough to satisfy everyone at your table. After cooking, let your One Pot Chicken and Dirty Rice cool down. Once it cools, place it in an airtight container. Store it in the fridge for up to four days. This keeps the dish fresh and tasty. Make sure to label the container with the date. That way, you know when to eat it! If you want to save it for later, you can freeze it. First, let it cool completely. Then, portion it into freezer-safe bags or containers. Remove as much air as possible to prevent freezer burn. It can last up to three months in the freezer. Just remember to label it too! When you're ready to eat, take it out of the fridge or freezer. If frozen, let it thaw overnight in the fridge. You can reheat it on the stove over low heat. Add a splash of chicken broth to keep it moist. Stir often until it's heated through. You can also use the microwave. Heat it in short bursts, stirring in between. Enjoy your flavorful dish! For the full recipe, check out the details above. Yes, you can use brown rice. Brown rice adds a nutty taste and more fiber. However, brown rice takes longer to cook. You will need to adjust the liquid and cooking time. Use about 1.5 cups of broth and simmer for 40-45 minutes. This way, it cooks well with the chicken. One Pot Chicken and Dirty Rice is a full meal by itself. Still, you can pair it with sides. Consider serving a fresh salad for crunch. A simple coleslaw adds a nice contrast. You might also enjoy cornbread on the side. It soaks up the flavors well and adds warmth. To add heat, you can include chopped jalapeños or a dash of hot sauce. Adding extra Cajun seasoning boosts flavor and spice. You can also use spicy sausage along with the chicken. This will mix well and give a great kick. Adjust the spice to suit your taste. Feel free to experiment! For the full recipe, check out the [Full Recipe]. This blog post covered key ingredients, cooking steps, and useful tips for one-pot chicken and dirty rice. You learned how to prepare chicken, sauté veggies, and cook rice perfectly. I shared ways to add flavors and variations for everyone to enjoy. In cooking, small choices create big flavors. Remember, practice makes you better. Enjoy your cooking journey! You can make a dish everyone loves.](https://foodishtalk.com/wp-content/uploads/2025/04/bf2620c3-78c6-456d-b2bd-a050803f246e-300x300.webp)

![- 1 ½ cups all-purpose flour - 1 cup granulated sugar - 1 cup fresh blueberries The main ingredients are key to making this cake tasty. All-purpose flour gives the cake its structure. Granulated sugar adds sweetness, making every bite delightful. Fresh blueberries bring a burst of flavor and color to the cake. You can also use frozen blueberries if fresh ones are not available. - ½ cup unsalted butter - 2 large eggs - Zest of 1 lemon - 1 tablespoon lemon juice Next, we have the ingredients that boost flavor. Unsalted butter makes the cake rich and moist. The eggs help bind everything together, giving it a fluffy texture. Lemon zest and lemon juice are essential for that bright, zesty taste. They add a refreshing note that pairs perfectly with the blueberries. - ½ cup buttermilk (or milk with 1 teaspoon vinegar) - Powdered sugar for dusting For serving, you can use buttermilk or a mix of milk and vinegar. This adds moisture and tenderness to the cake. A light dusting of powdered sugar on top makes it look pretty and adds a touch of sweetness. These optional ingredients enhance the overall experience of enjoying your lemon blueberry pound cake. For the complete recipe, check out the [Full Recipe]. 1. First, preheat your oven to 350°F (175°C). This step is key for even baking. 2. Grease a 9x5 inch loaf pan. I like to line it with parchment paper too. This helps with easy removal later. 3. In a medium bowl, whisk together the dry ingredients. You will need: - 1 ½ cups all-purpose flour - 1 teaspoon baking powder - ½ teaspoon baking soda - ¼ teaspoon salt 4. In a large bowl, cream the softened butter and sugar together. Use an electric mixer for about 3-4 minutes. This makes the mixture light and fluffy. 5. Add the eggs one at a time. Mix well after each addition. Then, add in the lemon zest and juice. Keep mixing until everything is combined. 6. Gradually add the flour mixture to the wet ingredients. Alternate with the buttermilk. Start and end with the flour. Mix until just combined. Be careful not to overmix. 7. Now, gently fold in the blueberries using a spatula. Make sure they spread evenly throughout the batter. 8. Pour the batter into the prepared loaf pan and smooth the top. Bake in the preheated oven for 50-60 minutes. A toothpick should come out clean when inserted into the center. These steps will guide you to a delicious Lemon Blueberry Pound Cake. For the full recipe, check the previous section. To bake the best lemon blueberry pound cake, avoid overmixing the batter. Mix until just combined. This keeps your cake light and fluffy. If you overmix, the cake can become tough. Check for doneness using a toothpick. Insert it into the center of the cake. If it comes out clean, your cake is ready. If it has wet batter, bake for a few more minutes and check again. Serving your cake with a dusting of powdered sugar adds a nice touch. It looks pretty and gives a slight sweetness. Just sprinkle a little on top before serving. Pairing your cake with tea or coffee works well. The bright flavors of lemon and blueberry match nicely with a warm drink. Enjoy a slice with your favorite brew for a perfect treat. One common mistake is not using room temperature ingredients. Cold butter or eggs can make mixing harder. It can also affect how well the cake rises. Always bring these to room temp before you start. Another mistake is overbaking the cake. Every oven is different, so keep an eye on it. If you bake too long, the cake can dry out. Aim for that perfect golden color and a clean toothpick! {{image_2}} You can add fun flavors to your Lemon Blueberry Pound Cake. Try using different citrus fruits like oranges or limes. Just swap in their zest and juice. This change gives the cake a fresh twist. You can also mix in nuts or coconut for texture. Chopped walnuts or shredded coconut can add great crunch and taste. If you need a gluten-free cake, you can use a gluten-free flour blend. This swap works well without changing the taste. For a vegan version, replace the eggs with flax eggs. Mix 1 tablespoon of flaxseed meal with 2.5 tablespoons of water for each egg. Use a plant-based butter instead of regular butter for the best results. A glaze can make your cake shine. You can mix powdered sugar with lemon juice for a simple glaze. Drizzle it over the cooled cake for a beautiful finish. For a decorative touch, serve slices on a colorful plate. Add fresh blueberries and lemon slices around the cake. This adds color and makes it look special. You can even use edible flowers for more flair. To keep your lemon blueberry pound cake fresh, store it in the fridge. Wrap it tightly in plastic wrap. You can also use an airtight container. This prevents drying and keeps the flavor intact. If you want to freeze it, slice the cake first. Wrap each slice in plastic wrap and then place them in a zip-top bag. This way, you can enjoy a slice whenever you want! In the fridge, your cake will last about 5 days. If you freeze it, the cake can stay good for up to 3 months. Make sure to label your bag with the date. This helps you keep track of how long it’s been stored. If your cake feels a bit dry after storage, don’t worry! You can refresh it easily. Try warming it in the microwave for about 10 seconds. This helps bring back its soft texture. If you want to heat it in the oven, set it to 300°F (150°C) and warm for about 10 minutes. Enjoy your cake with a dusting of powdered sugar for extra sweetness. Yes, you can use frozen blueberries. Just add them directly to the batter without thawing. This keeps them from breaking apart and turning the batter blue. Adjust baking time if needed. Check your cake a few minutes early to ensure it bakes perfectly. If you don’t have buttermilk, mix regular milk with vinegar. Use 1 cup of milk and add 1 teaspoon of vinegar. Let it sit for 5 minutes before using. This gives you the right tangy flavor and helps the cake rise. To keep your cake moist, use room temperature ingredients. This helps them mix better. Don’t overmix the batter when combining wet and dry ingredients. Overmixing can make the cake dense. Make sure to check for doneness with a toothpick. If it comes out clean, your cake is ready! This blog post covered all you need for a delicious lemon blueberry pound cake. You learned about key ingredients like flour and blueberries, plus tips for mixing and baking. Remember to avoid common mistakes like overmixing. Experiment with variations to keep things fresh. Store leftovers correctly to enjoy later. You can make this cake yours with simple changes. Now, roll up your sleeves and bake a treat your friends and family will love.](https://foodishtalk.com/wp-content/uploads/2025/06/ecab5488-e5df-4482-a841-c4aab0316ff5-300x300.webp)
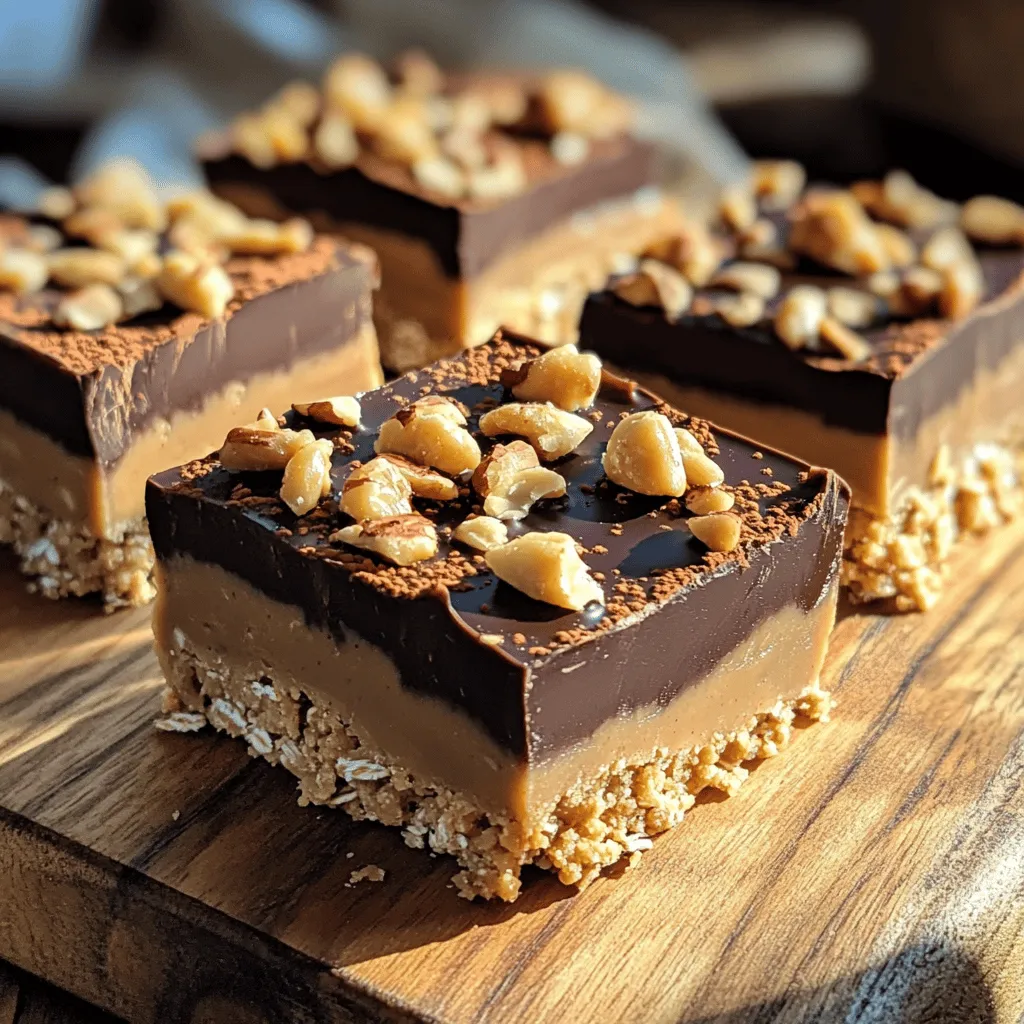
No-Bake Chocolate Peanut Butter Bars Simple Treat
Looking for a sweet treat that’s quick and easy? These No-Bake Chocolate Peanut Butter Bars are the answer! With just a few simple ingredients,…