

Latest & Greatest

Lemon Cheesecake Crumb Bars Delightful and Fresh Treat
Are you ready to brighten your day with a sweet treat? These Lemon Cheesecake Crumb Bars combine creamy cheesecake with
Read more…
Blueberry Heaven Cookies Irresistible Sweet Treat
Welcome to your new favorite cookie recipe! Blueberry Heaven Cookies are the perfect blend of sweet and tart, making them
Read more…
Delicious Asian Chicken Cranberry Salad For Fresh Flavor
Are you ready to delight your taste buds with a fresh and colorful dish? This Asian Chicken Cranberry Salad bursts
Read more…
Lemon Blueberry Sorbet Fresh and Refreshing Delight
Cool off with a bowl of Lemon Blueberry Sorbet! This sweet, tangy treat is perfect for hot days. You only
Read more…
Easy Summer Dinner Salad Fresh and Flavorful Dish
Summer nights call for light and refreshing meals, and there’s nothing better than a delicious salad! In this post, I
Read more…
Egg Roll in a Bowl Flavorful and Simple Recipe
Are you craving something quick, tasty, and easy to make? Let’s talk about Egg Roll in a Bowl! This flavorful
Read more…
Garlic Parmesan Chicken Tasty and Quick Dinner Idea
Looking for a tasty and quick dinner idea? Garlic Parmesan Chicken is your answer! This dish is simple to make
Read more…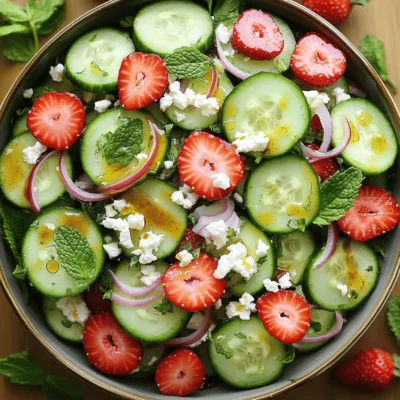
Cucumber Strawberry Salad Fresh and Flavorful Dish
Looking for a fresh and tasty dish to impress your family or friends? Try my Cucumber Strawberry Salad! It blends
Read more…browse recipes


![- 1 3/4 cups all-purpose flour - 2 cups granulated sugar - 3/4 cup unsweetened cocoa powder - 1 jar (24 oz) Morello cherries, drained and juice reserved These main ingredients create the rich, moist cake. All-purpose flour gives the cake structure. Granulated sugar adds sweetness, while unsweetened cocoa powder provides that deep chocolate flavor. The Morello cherries and their juice bring a tart twist that makes this cake delightful. - 1 cup heavy whipping cream - 2 tablespoons powdered sugar - 1 teaspoon vanilla extract Whipped cream is a must for this cake. Heavy whipping cream forms the base. Powdered sugar sweetens the cream, while vanilla extract adds a lovely flavor. You whip these ingredients together until they form soft peaks. This cream layers beautifully with the cake and cherries. - Dark chocolate shavings - Fresh cherries Garnishes add a touch of elegance. Dark chocolate shavings give a rich look and taste. Fresh cherries on top make the cake pop. These extras not only enhance the visuals but also boost the flavor. You can add these just before serving for a stunning finish. For the complete delicious recipe, check the Full Recipe link. Mixing dry ingredients Start by gathering your dry ingredients. In a large bowl, mix together: - 1 3/4 cups all-purpose flour - 2 cups granulated sugar - 3/4 cup unsweetened cocoa powder - 1 1/2 teaspoons baking soda - 1 1/2 teaspoons baking powder - 1 teaspoon salt Whisk these dry ingredients well until they are combined. This helps ensure even mixing. Combining wet ingredients In a separate bowl, combine: - 2 large eggs - 1 cup buttermilk - 1/2 cup vegetable oil - 2 teaspoons vanilla extract Beat these together with an electric mixer for about two minutes until smooth. Then add the wet mixture to the dry mixture. Finally, pour in 1 cup of boiling water and mix on low speed. The batter will be thin, and that’s perfect! Preheating the oven Preheat your oven to 350°F (175°C). While the oven heats, grease and flour two 9-inch round cake pans. Baking time and tests for doneness Pour the cake batter evenly into the prepared pans. Bake for 30 to 35 minutes. To check if they are done, insert a toothpick into the center. If it comes out clean, your cakes are ready! Let the cakes cool in the pans for 10 minutes. Then, remove them from the pans and cool completely on a wire rack. Layering process with cherry juice and whipped cream Once the cakes are cool, slice each one in half to create four layers. Place the first layer on a serving plate. Drizzle it with reserved cherry juice, then add half of the morello cherries. Spread a dollop of whipped cream on top. Repeat this process with the second and third layers. Final decoration instructions Place the fourth layer on top. Spread whipped cream over the top and sides of the entire cake. For the final touch, garnish with dark chocolate shavings and a few whole cherries. Chill the cake in the refrigerator for at least 1 hour before slicing. This allows all the flavors to mix beautifully. Enjoy your creation! [Full Recipe] Use room temperature ingredients. This helps the batter mix well and rise nicely. Cold eggs or milk can slow the process. Ensure your cake layers bake evenly. Grease and flour your pans well to prevent sticking. You can also rotate the pans halfway through baking. This gives a nice, even bake. To make the perfect whipped cream, beat the heavy cream until medium peaks form. Add powdered sugar and vanilla for flavor. Do not overbeat, or it can turn grainy. Store leftover whipped cream in the fridge. Use an airtight container to keep it fresh. It can last for a few days if stored right. When slicing the cake, use a sharp knife. Clean the knife between cuts for neat slices. This keeps the layers pretty and intact. Pair your cake with fresh coffee or tea. The rich chocolate and cherries go well with a warm drink. You can also serve it with a scoop of vanilla ice cream for a special treat. For the full recipe, check out the complete details to make your Black Forest cake unforgettable! {{image_2}} The classic Black Forest Cake has rich layers of chocolate and cherries. It uses chocolate sponge cake, whipped cream, and morello cherries. This cake shines with its dark, moist layers and sweet, tangy fruit. The combination is simply divine. Many modern twists exist. Some use chocolate sponge instead of the traditional cake. Others add unique flavors like coffee or orange zest. These changes keep the cake fresh and exciting. Each variation brings a new taste while honoring the original. Some people seek eggless options for Black Forest Cake. You can use applesauce or yogurt as a substitute for eggs. This method keeps the cake moist and fluffy. Vegan and gluten-free options also exist. For vegan cake, swap eggs and dairy with plant-based alternatives. Use almond or coconut flour for a gluten-free version. These adaptations make the cake friendly for various diets while retaining great taste. You can add liqueurs like Kirsch to enrich the flavor. Just drizzle a bit over the cake layers. This gives a lovely, subtle kick to the dessert. Incorporating other fruits or flavors can also enhance this cake. Consider adding raspberries or strawberries for extra color and taste. You might even try hazelnuts for a nutty crunch. These additions can make your Black Forest Cake truly unique. For the full recipe, follow the steps above to create your own delicious masterpiece! To keep your Black Forest cake fresh, refrigerate any leftovers. Place the cake in an airtight container. This will help it stay moist and tasty. If you don’t have a container, wrap the cake in plastic wrap. Make sure the wrap is snug to prevent air from getting in. This helps to avoid dryness. You can freeze Black Forest cake before or after you assemble it. To freeze before assembly, wrap each layer in plastic wrap and then in foil. This keeps the layers safe from freezer burn. For freezing after assembly, wrap the whole cake in plastic wrap. You can also put it in a large airtight container. To thaw the cake, move it from the freezer to the fridge. Let it sit overnight. When you're ready to serve, take it out and let it sit at room temperature for about 30 minutes. This way, your cake will taste fresh and delicious. Enjoy your cake with friends or family! If you want the full recipe, check out the Full Recipe section. A Black Forest Cake is a rich chocolate cake from Germany. It features layers of chocolate sponge, whipped cream, and cherries. The name comes from the Black Forest region, known for its cherry trees. Traditionally, it uses morello cherries and Kirsch, a cherry liqueur. The cake is both sweet and tart, making it a favorite for many. Yes, you can prepare this cake in advance. Bake the cake layers a day before serving. Store them in an airtight container at room temperature. You can also prepare the whipped cream ahead. Just keep it in the fridge until you are ready to assemble. This way, your flavors will meld beautifully. To avoid a collapsing cake, follow these tips: - Use fresh ingredients, especially baking powder and baking soda. - Do not overmix the batter. - Check your oven temperature with a thermometer. - Bake until a toothpick comes out clean. These steps help create a stable cake that holds its shape. You can find authentic Black Forest Cake at many bakeries. Look for German or European bakeries in your area. Some popular chain bakeries might also offer it. If you're in a city, check local dessert shops. They often have unique takes on this classic cake. If you cannot find morello cherries, try these options: - Fresh Bing cherries for a sweet taste. - Tart cherries in a jar, if available. - Even raspberry preserves can work for a twist. These substitutes keep the flavor profile similar while adding a personal touch to your cake. You now know how to make a stunning Black Forest Cake. We covered key ingredients like cherries, cocoa, and whipping cream. You learned step-by-step instructions on baking and assembling the cake. I shared tips for perfect results and variations to suit everyone. Baking can bring joy and delicious treats. Enjoy making this cake for friends or family. Remember, practice makes perfect!](https://foodishtalk.com/wp-content/uploads/2025/05/fdd6ac1e-1695-41e4-abf5-21d4089138b5.webp)
Black Forest Cake Delightful and Easy Recipe Steps
Craving a slice of rich, decadent Black Forest Cake? I’ve got you covered! In this easy guide, I’ll walk you through the simple steps…
My Latest Desserts

Mini Vanilla Cream Tarts with Raspberries Delight
Welcome to the sweet world of Mini Vanilla Cream Tarts with Raspberries! Today, I’ll show you how to make these Read Full Recipe-
Frozen Yogurt Bark Delightful and Simple Treat
If you’re looking for a quick, tasty treat, frozen yogurt bark is a winner. It’s easy to make and fun Read Full Recipe -
Fruit Salad with Honey Lime Dressing Easy Recipe
Looking for a fresh and easy treat? This Fruit Salad with Honey Lime Dressing is the perfect choice. Bursting with Read Full Recipe -
Blueberry Cheesecake Bars Simple and Delicious Treat
Looking for a dessert that’s easy to make and bursting with flavor? You’ve found it! These Blueberry Cheesecake Bars are Read Full Recipe -
Lemon Cheesecake Crumb Bars Delightful and Fresh Treat
Are you ready to brighten your day with a sweet treat? These Lemon Cheesecake Crumb Bars combine creamy cheesecake with Read Full Recipe -
Blueberry Heaven Cookies Irresistible Sweet Treat
Welcome to your new favorite cookie recipe! Blueberry Heaven Cookies are the perfect blend of sweet and tart, making them Read Full Recipe -
Lemon Blueberry Sorbet Fresh and Refreshing Delight
Cool off with a bowl of Lemon Blueberry Sorbet! This sweet, tangy treat is perfect for hot days. You only Read Full Recipe -
Lemon Blueberry Cupcakes Delightful and Light Treat
Are you ready to indulge in a sweet treat that brightens your day? These Lemon Blueberry Cupcakes are just what Read Full Recipe -
Blueberry Cheesecake Cookies Delightful and Easy Recipe
If you love the sweet and tangy combo of blueberry cheesecake, you’re in for a treat! I’ll show you how Read Full Recipe -
Greek Yogurt Ice Cream Creamy and Simple Delight
Looking for a cool treat that’s both delicious and easy to make? Greek yogurt ice cream is your answer! This Read Full Recipe


hey,
i’m !
I’m so happy you’re here!
I pour heart and skill into every recipe I create. I know you’ll taste the difference now let’s enjoy this flavorful adventure together.
![- 1 lb boneless chicken breast, cut into bite-sized pieces - 1 tablespoon coconut oil - 1 medium onion, diced - 3 cloves garlic, minced - 1 tablespoon fresh ginger, grated - 1 can (14 oz) coconut milk - 1 cup chicken broth - 1 bell pepper, sliced - 1 medium zucchini, sliced - 1 cup snap peas The chicken breast forms the heart of this dish. It absorbs the rich flavors and cooks perfectly when diced small. I love using coconut oil for its light taste and high smoke point. Onions, garlic, and ginger create a base that fills your kitchen with amazing aromas. Fresh vegetables add color and crunch. I prefer bell peppers, zucchini, and snap peas for their vibrant look and taste. These vegetables cook quickly, keeping their shape and nutrients. - 2 tablespoons red curry paste - 2 tablespoons fish sauce - 1 tablespoon brown sugar - Juice of 1 lime Red curry paste brings warmth and depth. It combines chili, garlic, lemongrass, and spices, making each bite exciting. Fish sauce adds a savory note, balancing the dish well. Brown sugar gives a hint of sweetness, while lime juice brightens everything up. - Fresh cilantro, chopped - Cooked jasmine rice Cilantro adds freshness and a pop of green. I always sprinkle it on top before serving. Jasmine rice is the perfect side. Its fluffy texture soaks up the curry, making every bite satisfying. For the full recipe, check out the [Full Recipe]. 1. Start by heating coconut oil in a large skillet over medium heat. 2. Add the diced onion and sauté for about 2-3 minutes until it turns soft and clear. 3. Next, stir in the minced garlic and grated ginger. Cook for one more minute until you smell the spices. 1. Now, add the chicken pieces into the skillet. Cook them until they are no longer pink, which takes about 5-7 minutes. 2. Once the chicken is cooked, stir in the red curry paste. Mix it well with the chicken and onions. This step builds a strong flavor base. 1. Pour in the coconut milk and chicken broth. Stir everything together until well combined. 2. Bring this mixture to a gentle simmer. Then, add the sliced bell pepper, zucchini, and snap peas. 3. Let it simmer for 5-7 more minutes until the veggies are tender but still bright. 4. Finally, stir in the fish sauce, brown sugar, and lime juice. Taste and adjust the seasoning if needed. This simple yet flavorful process brings out the best in Thai Coconut Curry Chicken. For the full recipe, check the earlier section. Adjusting spice levels To make your curry just right, taste as you cook. Start with a small amount of red curry paste. You can always add more if you want extra heat. If it gets too spicy, add more coconut milk to cool it down. Ensuring tender chicken Cook the chicken pieces until they are no longer pink. This usually takes about 5-7 minutes. Overcooking can make the chicken tough. Always check the chicken’s internal temp; it should reach 165°F (75°C) for safety. Best sides to serve with Serve your curry with jasmine rice. The rice soaks up all the tasty sauce. You can also add a side of cucumber salad for a fresh crunch. Alternative garnishing ideas Fresh cilantro adds a nice touch. You can also use lime wedges for a tangy kick. If you want more color, try adding sliced red chili on top. Overcooking veggies Cook veggies until they are tender but still bright. This keeps them crisp and colorful. Overcooked veggies can turn mushy and lose their flavor. Not balancing flavors Taste your curry before serving. If it’s too salty, add a pinch of sugar. If it’s too sweet, a squeeze of lime can help. Finding the right balance makes the dish shine. For a detailed guide, check the Full Recipe. {{image_2}} You can switch up the protein in this dish. If you want to use shrimp, add it in the last few minutes of cooking. Shrimp cooks fast and will stay juicy. For a plant-based option, try tofu. Cut firm tofu into cubes. Sauté it until golden before adding it to the curry. If you prefer beef, you can substitute chicken with thinly sliced beef. Cook it first until it's browned. Then, follow the same steps as you would with chicken. You can make this dish even better by adding more veggies. Seasonal vegetables work great. Try carrots, broccoli, or bell peppers for color and crunch. You can also add zucchini for a nice texture. Incorporating leafy greens like spinach or bok choy adds nutrition. Just toss them in at the end of cooking. They will wilt quickly and retain their bright color. For a gluten-free version, substitute fish sauce with soy sauce or tamari. This will keep the salty flavor without gluten. To make a fully plant-based version, leave out the chicken and fish sauce. Add more vegetables or beans for protein. You can also use vegetable broth instead of chicken broth. This way, you keep all the flavor and make it suitable for vegans. For the complete recipe, check the [Full Recipe]. Thai Coconut Curry Chicken stays fresh for about 3-4 days in the fridge. Make sure to cool the dish to room temperature before storing it. Use an airtight container to keep the flavors intact. This way, you can enjoy the rich taste later in the week. You can freeze Thai Coconut Curry Chicken for up to 3 months. Portion it into meal prep containers for easy meals. To freeze, let the dish cool completely. Then, cover it tightly with plastic wrap or foil before sealing it in a freezer bag. When you’re ready to eat, thaw it overnight in the fridge. This keeps the texture nice. You can also use the microwave for a quicker option, but I recommend the fridge for best results. To reheat, use the stove for best flavor and texture. Warm it gently over medium heat until hot. Stir often to prevent sticking. You can also microwave it, but be careful not to overcook it. This dish tastes best when it’s just heated through. Enjoy it over fresh jasmine rice for a delightful meal. For the complete recipe, check out the Full Recipe. If you want a non-dairy option, almond milk works well. Use unsweetened almond milk to keep the flavor in check. You can also use cashew milk or soy milk. For a thicker texture, blend soaked cashews with water. For low-fat options, try using light coconut milk. This still gives a nice coconut flavor but with less fat. Another option is to mix chicken broth with a splash of coconut extract. This keeps some flavor without the creaminess. The spice level can vary based on the curry paste used. Some pastes are mild, while others pack a punch. You can adjust the heat by adding less curry paste. Start with one tablespoon and taste as you go. If you want more heat, add chili flakes or fresh chilies. Remember, you can always add more spice, but it’s hard to take it away. So, go slow to find your perfect heat level. Yes, you can make this dish ahead. I recommend cooking it and then cooling it down before storage. Store it in an airtight container in the fridge for up to three days. For meal prepping, cook the chicken and sauce first. Then, add fresh veggies later to keep them crisp. This helps the flavors meld together nicely. Reheat gently to avoid overcooking the chicken or veggies. You can also freeze the curry. Just let it cool, then transfer it to a freezer-safe container. It will stay fresh for up to three months. When ready to eat, thaw in the fridge overnight and reheat on the stove or microwave. Thai Coconut Curry Chicken is a flavorful dish packed with fresh ingredients. We explored key components like chicken, coconut oil, and vegetables, along with essential spices such as red curry paste and fish sauce. I shared step-by-step cooking instructions to ensure you achieve the perfect curry. Remember to adjust spice levels based on your taste. With tips for different proteins and storage advice, this dish is versatile and easy to enjoy. Use these ideas to create a delicious meal that fits your needs. Cooking Thai coconut curry at home can be both fun and rewarding.](https://foodishtalk.com/wp-content/uploads/2025/06/fb555cd1-bbb9-42b7-9087-7639f6ec817e-300x300.webp)

![- Baby spinach: Use 4 cups of fresh baby spinach. This leafy green is vibrant and nutritious. It adds a fresh crunch and rich color to your salad. - Strawberries: Grab 1 cup of strawberries. Make sure to hull and slice them. Their sweetness balances the salad and brings a burst of flavor. - Red onion: You need 1/4 cup of thinly sliced red onion. It gives a nice zing and a beautiful contrast in color. - Feta cheese: Use 1/2 cup of crumbled feta cheese. Its salty and creamy taste pairs well with the strawberries. - Walnuts: Add 1/4 cup of toasted walnuts. They add a rich, nutty flavor and a satisfying crunch to the mix. - Balsamic vinaigrette: You will need 1/3 cup of balsamic vinaigrette. This dressing adds a tangy sweetness that ties everything together. - Honey: Just 1 tablespoon of honey brings extra sweetness. It balances the tang of the dressing. - Salt and pepper: Season to taste. A pinch of salt and a dash of pepper enhance all the flavors in your salad. For the Full Recipe, follow the easy steps to bring everything together. Enjoy creating this delightful Strawberry Spinach Salad! First, let's wash and dry the spinach. Rinse 4 cups of fresh baby spinach under cold water. Then, use a salad spinner or clean towel to dry it well. Next, we need to hull and slice the strawberries. Take 1 cup of strawberries. Remove the green tops with a knife. Then, slice the strawberries into thin pieces. This will help them mix well in the salad. Now, it's time to combine the spinach and strawberries. In a large salad bowl, add the dried spinach and sliced strawberries. Toss them gently so they mix well. Next, we’ll add feta and walnuts. Crumble 1/2 cup of feta cheese and sprinkle it over the salad. Then, add 1/4 cup of toasted walnuts, roughly chopped. This adds a nice crunch to our dish. For the dressing, whisk together balsamic vinaigrette and honey. In a small bowl, pour in 1/3 cup of balsamic vinaigrette. Add 1 tablespoon of honey. Use a whisk to blend them until smooth and well combined. Now, let’s drizzle the dressing over the salad. Pour it evenly across the salad. Then, toss everything gently to coat the ingredients well. Finally, season the salad with salt and pepper to taste. This will enhance all the fresh flavors. Enjoy your delicious Strawberry Spinach Salad! For the full recipe, check the details above. Serve the salad on a large platter. This makes it look inviting. Use whole strawberries and walnut halves to garnish. This adds color and makes it more appealing. You can add herbs for extra flavor, like basil or mint. These herbs brighten the dish. If you want spice, add a pinch of red pepper flakes. This gives a nice kick without being too hot. Serve the salad right after you prepare it. This keeps the spinach fresh and crisp. If you wait too long, the spinach wilts and loses its crunch. Aim to serve within 15 minutes of making it for the best taste. {{image_2}} For this strawberry spinach salad, you can swap different nuts and cheeses. Instead of walnuts, try pecans or almonds. They add a nice crunch and flavor. For cheese, goat cheese works well too. It gives a creamy texture that pairs nicely with strawberries. You can also add seasonal fruits. In summer, peaches or blueberries shine in this salad. In fall, consider apples or pears. Each fruit brings a new taste, keeping the salad fresh and exciting. If you want to mix it up, try making your own dressing. A simple lemon vinaigrette is quick and bright. Just whisk lemon juice, olive oil, salt, and pepper together. It tastes great on the salad and is very light. For a vegan option, use a tahini dressing. Blend tahini, water, lemon juice, and garlic for a creamy taste. This dressing adds a rich flavor while keeping it plant-based. You can serve this salad as a main course. Just add grilled chicken or shrimp on top. It makes the meal more filling and satisfying. For side dishes, pair this salad with grilled steak or fish. The fresh flavors of the salad balance well with hearty proteins. You can enjoy this dish in many ways, making it versatile for any dining occasion. For the complete recipe, check out the [Full Recipe]. To keep your Strawberry Spinach Salad fresh, store it in the fridge. Use an airtight container. This helps to keep moisture in and air out. If you have leftovers, try to eat them within two days. The spinach can wilt if stored too long. Keep the dressing separate until you are ready to enjoy the salad. This way, the salad stays crisp and fresh. Freezing this salad is not recommended. The spinach and strawberries will lose texture and flavor. If you want to save some ingredients, you can freeze the walnuts. Just place them in a freezer bag. They can last for up to six months in the freezer. When ready to use, just thaw them at room temperature. You don't need to heat the salad. It’s best served cold. If you want to refresh it, just add a little more dressing. Toss the salad gently to mix. You can also add fresh strawberries or nuts to boost the flavor. This will make it taste just like when you first made it. Enjoy your Strawberry Spinach Salad! For the details on how to make it, check the Full Recipe. You can try goat cheese or ricotta. Both have a creamy taste. Goat cheese adds a tangy flavor, while ricotta is mild and sweet. If you want a dairy-free option, try tofu. Crumbled tofu can mimic feta’s texture. Just season it with salt and lemon juice for more flavor. To make this salad vegan, swap feta for vegan cheese. Look for brands that offer a feta-like flavor. You can also skip cheese altogether and add more nuts for crunch. Instead of honey, use maple syrup or agave nectar. This keeps the sweetness and makes it vegan-friendly. Yes, you can prepare this salad in advance. Wash and dry the spinach, then store it in a sealed container. Slice the strawberries and keep them separate to avoid sogginess. You can mix the salad up to an hour before serving. Just add the dressing right before you eat. This salad is very healthy! Spinach is high in iron and vitamins A and C. Strawberries are rich in antioxidants and fiber, which help digestion. Walnuts provide healthy fats and protein. Feta cheese can add calcium, but watch portions if you're mindful of fat. This salad gives you a tasty boost of nutrients! For the full recipe, check the Strawberry Spinach Bliss Salad! This blog post covered a delightful strawberry spinach salad. You learned about fresh ingredients, like baby spinach and strawberries, as well as nuts and cheeses. We walked through step-by-step instructions for making the salad and dressing. You also discovered tips for presentation and flavor. Plus, I shared variations and storage tips to keep your salad fresh. Remember, this salad is simple and full of flavor. Enjoy making it your own!](https://foodishtalk.com/wp-content/uploads/2025/06/6d598bfa-df10-4422-a0ce-68733d2f7b50-300x300.webp)

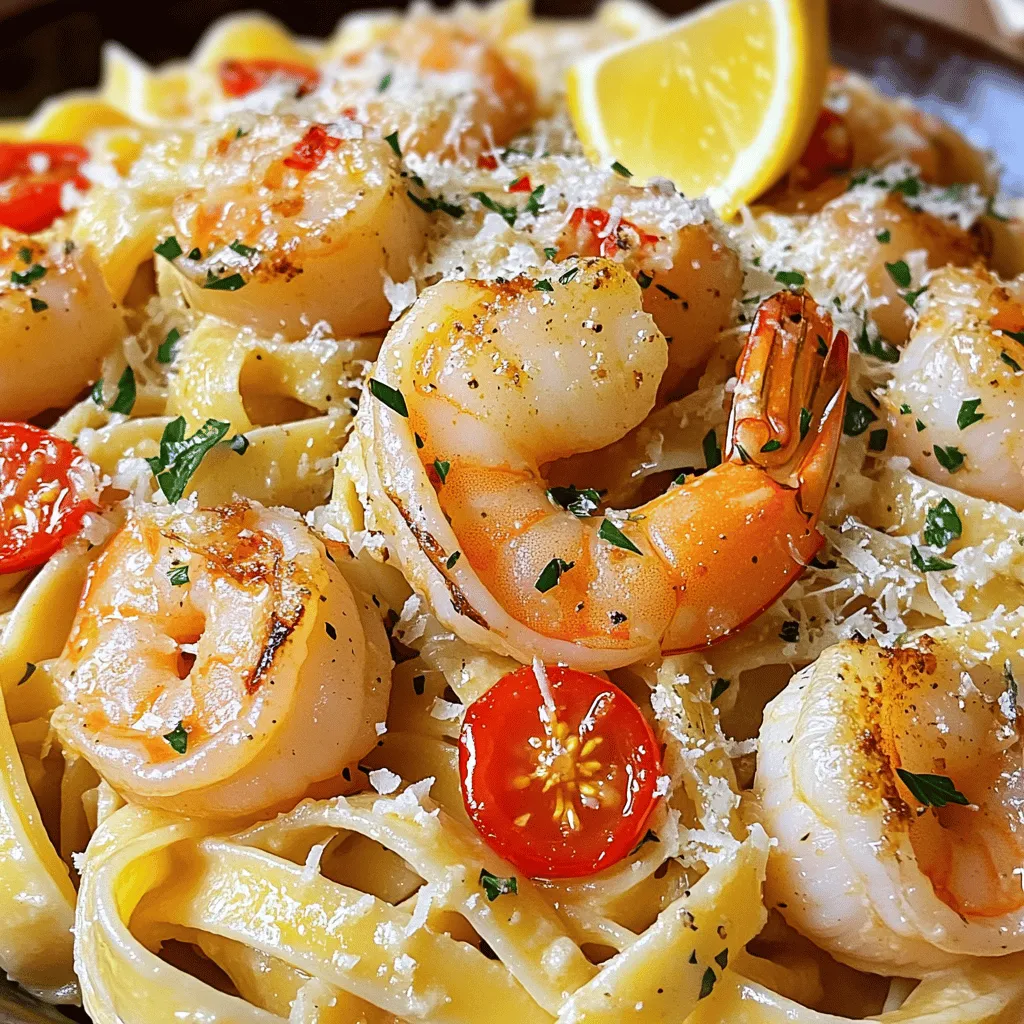
Savory Shrimp Scallop Pasta Easy Dinner Delight
If you’re looking for a quick and tasty dinner, look no further! This Shrimp Scallop Pasta is a delicious marvel that you can whip…