

Latest & Greatest
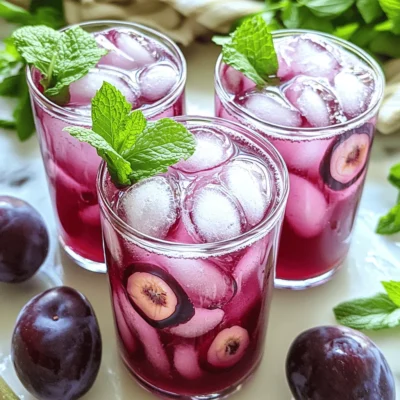
Plum Ginger Kombucha Pop Refreshing and Flavorful Drink
Are you ready to discover a drink that bursts with flavor and refreshment? In this blog, I’ll show you how
Read more…
Blue Curacao Butterfly Pea Spritz Refreshing Drink Idea
Looking for a fun and colorful drink to impress your friends? The Blue Curacao Butterfly Pea Spritz is a vibrant
Read more…
Cardamom Vanilla Oat Latte Cozy and Flavorful Drink
Looking for a warm, cozy drink that’s packed with flavor? My Cardamom Vanilla Oat Latte is just what you need.
Read more…
Tangerine Turmeric Tonic Refreshing Healthy Drink
Looking for a drink that bursts with flavor and boosts your health? Meet the Tangerine Turmeric Tonic! This vibrant beverage
Read more…
Chocolate Cherry Almond Milkshake Creamy Delight
Indulging in a Chocolate Cherry Almond Milkshake is a treat you deserve! This creamy delight blends rich chocolate, tart cherries,
Read more…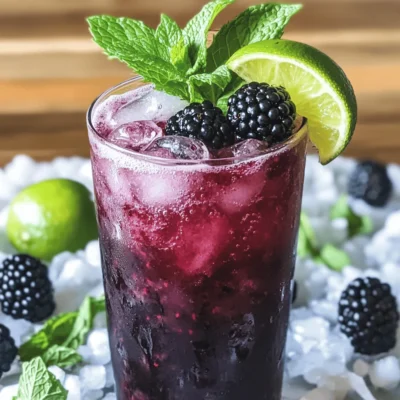
Blackberry Mint Julep Mocktail Refreshing Drink Recipe
Looking for a refreshing drink that packs a flavorful punch? Let’s dive into making a Blackberry Mint Julep Mocktail! With
Read more…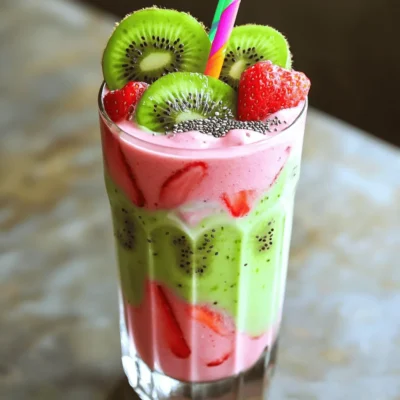
Strawberry Kiwi Yogurt Smoothie Refreshing and Tasty Drink
Looking for a refreshing drink that bursts with flavor? This Strawberry Kiwi Yogurt Smoothie is just what you need! Packed
Read more…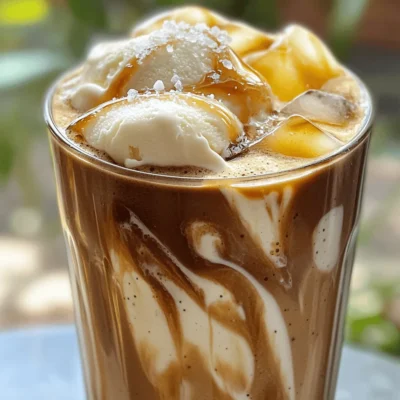
Espresso Salted Maple Shake Flavorful and Rich Treat
Craving a sweet and rich treat? The Espresso Salted Maple Shake has your name on it! This creamy delight blends
Read more…browse recipes


Easy Poke Cake Recipes for Delicious Desserts
Looking for an easy dessert that impresses? Look no further! I’m excited to share simple poke cake recipes that anyone can make. These cakes…
My Latest Desserts

Fig Cake with Almond and Honey Delight Recipe
Are you ready to indulge in a delightful treat? My Fig Cake with Almond and Honey recipe combines rich flavors Read Full Recipe-
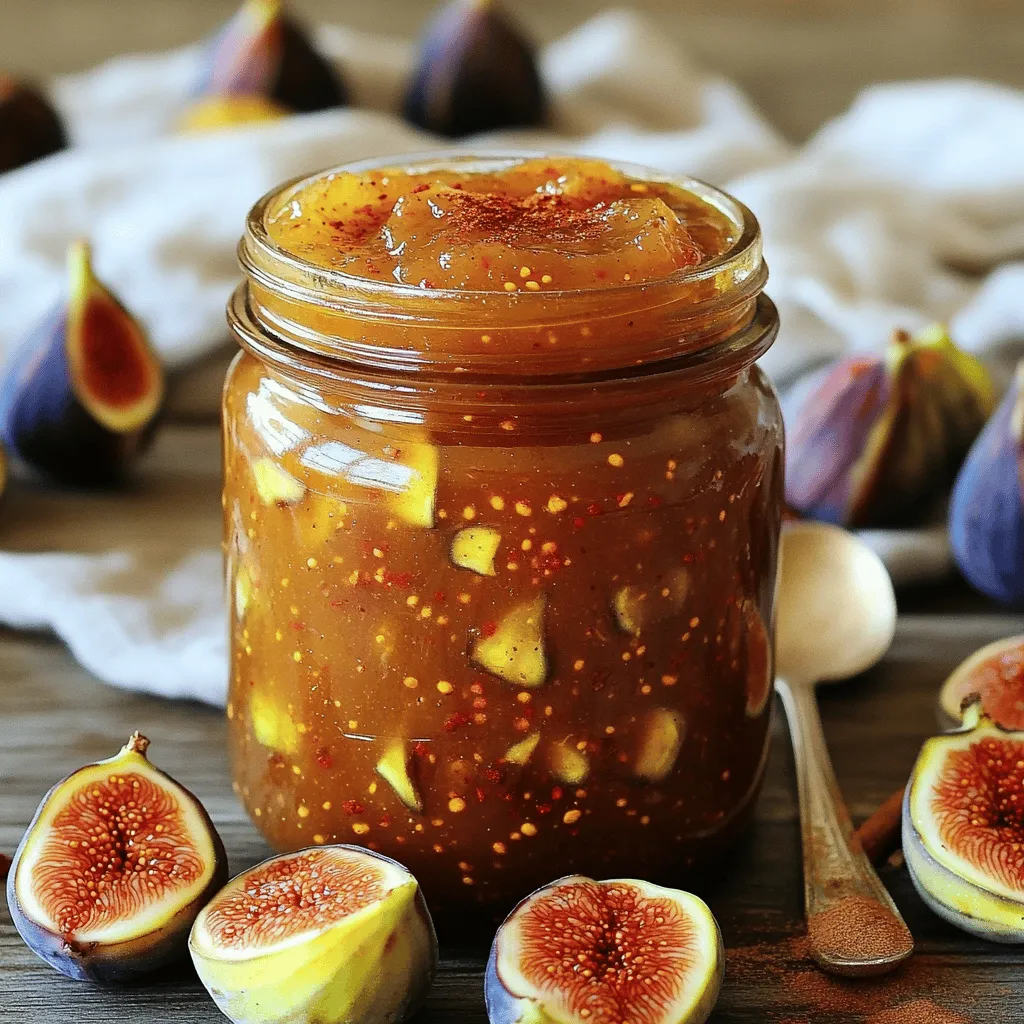
Simple Fig Jam Easy Recipe to Savor and Enjoy
Are you ready to make a burst of flavor with your next kitchen project? This Simple Fig Jam recipe is Read Full Recipe -
Mini Vanilla Cream Tarts with Raspberries Delight
Welcome to the sweet world of Mini Vanilla Cream Tarts with Raspberries! Today, I’ll show you how to make these Read Full Recipe -
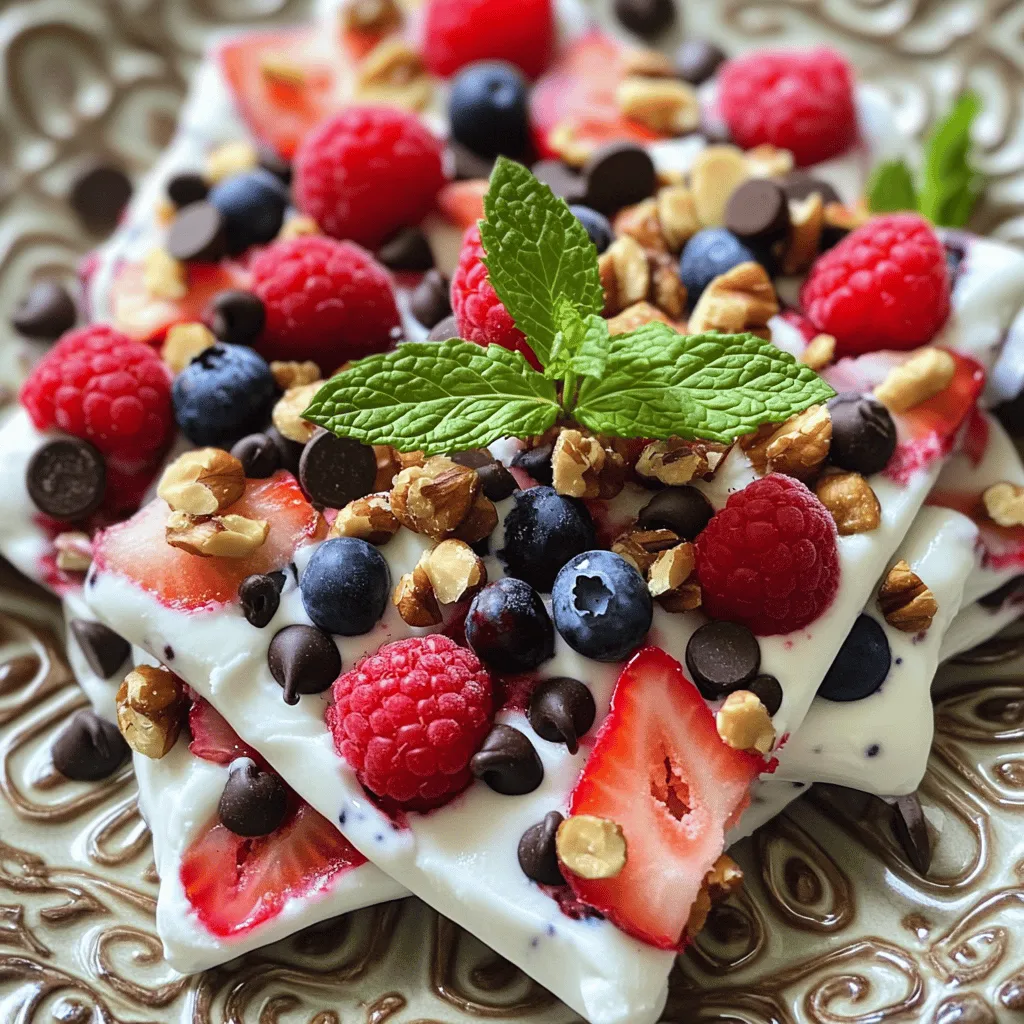
Frozen Yogurt Bark Delightful and Simple Treat
If you’re looking for a quick, tasty treat, frozen yogurt bark is a winner. It’s easy to make and fun Read Full Recipe -
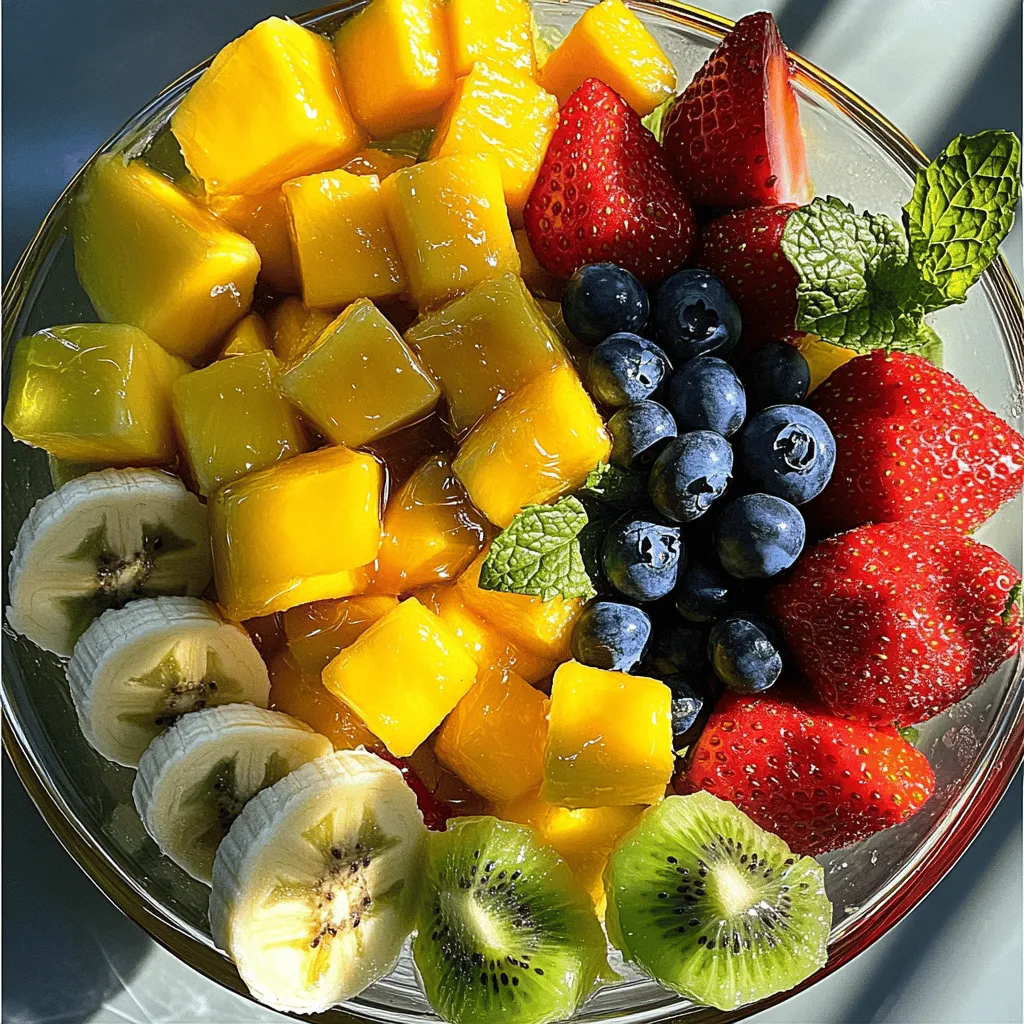
Fruit Salad with Honey Lime Dressing Easy Recipe
Looking for a fresh and easy treat? This Fruit Salad with Honey Lime Dressing is the perfect choice. Bursting with Read Full Recipe -
Blueberry Cheesecake Bars Simple and Delicious Treat
Looking for a dessert that’s easy to make and bursting with flavor? You’ve found it! These Blueberry Cheesecake Bars are Read Full Recipe -
Lemon Cheesecake Crumb Bars Delightful and Fresh Treat
Are you ready to brighten your day with a sweet treat? These Lemon Cheesecake Crumb Bars combine creamy cheesecake with Read Full Recipe -
Blueberry Heaven Cookies Irresistible Sweet Treat
Welcome to your new favorite cookie recipe! Blueberry Heaven Cookies are the perfect blend of sweet and tart, making them Read Full Recipe -
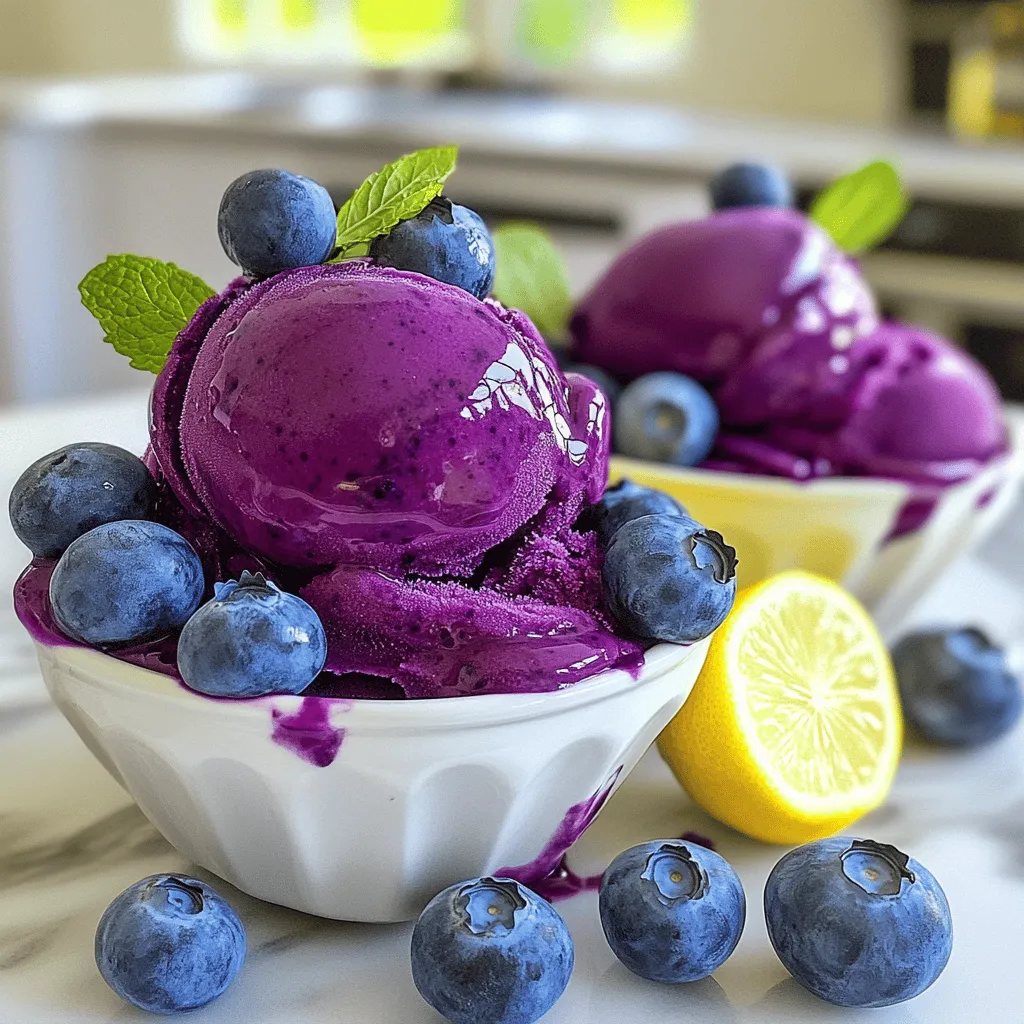
Lemon Blueberry Sorbet Fresh and Refreshing Delight
Cool off with a bowl of Lemon Blueberry Sorbet! This sweet, tangy treat is perfect for hot days. You only Read Full Recipe -
Lemon Blueberry Cupcakes Delightful and Light Treat
Are you ready to indulge in a sweet treat that brightens your day? These Lemon Blueberry Cupcakes are just what Read Full Recipe


hey,
i’m !
I’m so happy you’re here!
I pour heart and skill into every recipe I create. I know you’ll taste the difference now let’s enjoy this flavorful adventure together.
![To make Garlic Parmesan Roasted Brussels Sprouts, you need some key items. Here’s what you will need: - 1 pound Brussels sprouts, trimmed and halved - 3 tablespoons olive oil - 4 cloves garlic, minced - ½ cup grated Parmesan cheese - 1 teaspoon salt - ½ teaspoon black pepper - ½ teaspoon red pepper flakes (optional for heat) - 2 tablespoons balsamic vinegar - Fresh parsley, chopped (for garnish) These ingredients come together to create a dish that is both savory and satisfying. The Brussels sprouts turn crispy, while the garlic and cheese add rich flavors. You can add a few optional ingredients to boost the taste. Consider these: - Lemon zest for brightness - A splash of lemon juice for tang - Smoked paprika for a smoky twist - Chopped nuts like almonds or walnuts for crunch Adding these can elevate your dish and make it unique. Feel free to mix and match based on your taste. If you don’t have certain ingredients, here are some easy swaps: - Use canola oil instead of olive oil. - Swap Parmesan with Pecorino Romano for a sharper taste. - If you're out of Brussels sprouts, try cauliflower or broccoli. These substitutions help you adapt the recipe to what you have on hand. Making this dish can be simple and fun. For the full recipe, refer to the details above. To start, gather all your ingredients. You’ll need 1 pound of Brussels sprouts. Trim and cut them in half. This helps them cook evenly. Next, mince 4 cloves of garlic. Fresh garlic adds great taste. Measure out 3 tablespoons of olive oil, ½ cup of grated Parmesan cheese, 1 teaspoon of salt, and ½ teaspoon of black pepper. If you want heat, add ½ teaspoon of red pepper flakes. Finally, chop some fresh parsley for garnish. Now, preheat your oven to 400°F (200°C). In a large bowl, add your halved Brussels sprouts. Pour in the olive oil and sprinkle the garlic, salt, black pepper, and red pepper flakes on top. Mix well to coat each sprout evenly. Next, spread them on a baking sheet in a single layer. This helps them roast well. Roast the Brussels sprouts in the oven for about 20 minutes. After that, take them out and sprinkle the grated Parmesan evenly over them. Return the baking sheet to the oven for another 10-15 minutes. The sprouts should turn golden brown and crispy. The cheese will melt and bubble. When done, drizzle balsamic vinegar over the sprouts for extra flavor. For the best results, make sure your Brussels sprouts are dry before adding oil. Wet sprouts can steam instead of roast. Use a large enough baking sheet to avoid crowding. This allows air to circulate and crisps them up. If you want more flavor, try adding lemon zest or a squeeze of lemon juice before serving. Always taste and adjust seasoning as needed. For the full recipe, check out the detailed instructions above. Seasoning is key to great flavor. I use a mix of salt, black pepper, and garlic. For a kick, add red pepper flakes. Toss the Brussels sprouts well to coat them fully. Use fresh garlic for the best taste. The Parmesan cheese adds a salty, rich flavor that makes this dish shine. Experiment with herbs too, like thyme or rosemary! No one likes soggy sprouts! To avoid this, make sure to dry the sprouts well after washing. When you toss them with oil, use enough to coat, but not drown them. Spread them out on the baking sheet in a single layer. If they touch too much, they will steam instead of roast. Roasting at a high temperature is also crucial for crispiness. These sprouts are great on their own, but you can dress them up! Serve them with grilled chicken or fish for a full meal. They pair well with a light salad too. Drizzle extra balsamic vinegar on top for added flavor. You can also sprinkle more Parmesan cheese just before serving for that cheesy goodness. For a fun twist, try these sprouts on a pizza or mixed into pasta! For the full recipe, check out the Garlic Parmesan Roasted Brussels Sprouts section. {{image_2}} You can switch up the cheese for a new taste. Try feta for a tangy kick. Goat cheese adds creaminess and depth. Cheddar brings a sharp flavor that pairs well with the sprouts. Always remember, cheese melts and adds richness. Choose what you love! Want to jazz up your dish? Add some crispy bacon pieces for a smoky touch. Nuts, like walnuts or almonds, give a nice crunch. Dried cranberries can add sweetness. Experiment with herbs like thyme or rosemary for extra flavor. Each add-in makes the dish unique! To make this dish vegan, swap the Parmesan with a vegan cheese. Nutritional yeast is a great option too. For gluten-free needs, ensure all ingredients are certified gluten-free. You can still enjoy the flavors without any worries. These changes keep the dish tasty! For the full recipe, check out the [Full Recipe]. To keep your Garlic Parmesan Roasted Brussels Sprouts fresh, place leftovers in an airtight container. Make sure the sprouts cool completely before sealing. Store them in the fridge for up to three days. This will help maintain their flavor and texture. To reheat, use the oven for the best results. Preheat your oven to 350°F (175°C). Spread the sprouts on a baking sheet. Heat them for about 10-15 minutes, or until warm. This helps keep them crispy. You can also reheat in the microwave for about 1-2 minutes, but they may lose some crunch. You can freeze Garlic Parmesan Roasted Brussels Sprouts, but they will change in texture. To freeze, place cooled sprouts in a single layer on a baking sheet. Freeze them for about 2 hours until solid. Once frozen, transfer them to a freezer bag. Remove as much air as possible and seal. They can last up to three months in the freezer. To cook from frozen, roast them straight from the freezer. Adjust the cooking time by adding a few extra minutes. For the full recipe, check out the complete guide. To make Garlic Parmesan Roasted Brussels sprouts, start by trimming and halving 1 pound of Brussels sprouts. In a bowl, mix the sprouts with 3 tablespoons of olive oil and 4 minced garlic cloves. Add 1 teaspoon of salt, ½ teaspoon of black pepper, and ½ teaspoon of red pepper flakes if you like some heat. Toss until the sprouts are well-coated. Spread them on a baking sheet in a single layer. Roast at 400°F for 20 minutes. After that, sprinkle ½ cup of grated Parmesan cheese on top and roast for another 10 to 15 minutes until golden brown. Drizzle with balsamic vinegar and garnish with fresh parsley. For a detailed guide, check the Full Recipe. The ideal roasting temperature for Brussels sprouts is 400°F (200°C). This high heat helps them get crispy on the outside while staying tender on the inside. Roasting at this temperature allows the natural sugars to caramelize, enhancing their flavor. You can adjust the time slightly, but keep the temperature the same for the best results. You can use frozen Brussels sprouts, but the texture may change. Frozen sprouts often have more moisture, which can lead to a soggy outcome. If you choose to use them, be sure to thaw and drain them well before mixing with oil and spices. You may also need to adjust the cooking time, so keep an eye on them to achieve that perfect crispiness. In this post, we covered the key ingredients for Garlic Parmesan Roasted Brussels Sprouts and cooking steps. You learned tips for perfect seasoning, preventing sogginess, and creative variations. Plus, I shared smart storage and reheating tips for leftovers. Remember, roasting at the right temp makes all the difference. Trust these steps to bring out the best flavor. Enjoy making this dish to delight your taste buds!](https://foodishtalk.com/wp-content/uploads/2025/06/14e6e303-70ee-47e4-86a5-a4c1295d598b-300x300.webp)


Big Mac Wraps with Special Sauce Easy and Tasty Meal
If you love Big Macs but want a fun twist, try Big Mac Wraps with Special Sauce! This easy recipe gives you all the…