
Latest & Greatest
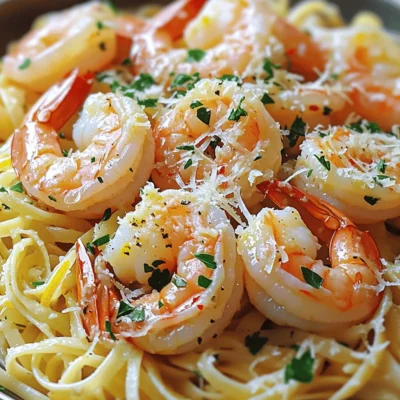
Lemon Garlic Shrimp Scampi Flavorful and Simple Dish
If you’re craving a dish that’s both bright and simple, look no further! Lemon Garlic Shrimp Scampi is a quick
Read more…
Crispy Honey Chicken Tenders Flavorful and Easy Recipe
Looking for a mouth-watering meal that’s both simple and satisfying? You’ve found it! My Crispy Honey Chicken Tenders are golden,
Read more…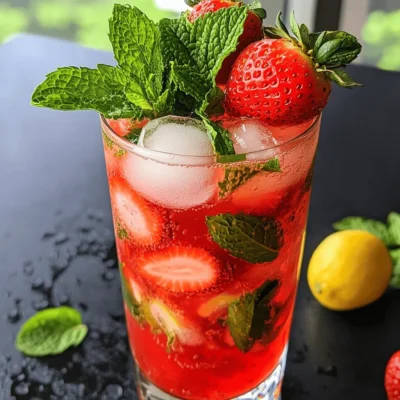
Strawberry Dirty Sprite Refreshing Cocktail Recipe
Looking for a refreshing drink to cool you off? The Strawberry Dirty Sprite cocktail is a delightful mix of fruity
Read more…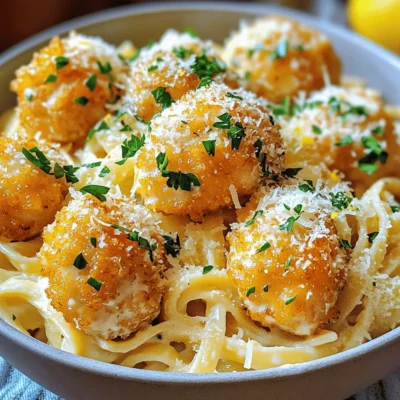
Garlic Butter Chicken Bites with Creamy Pasta Delight
Love rich flavors and creamy dishes? You’re in for a treat! This Garlic Butter Chicken Bites with Creamy Pasta recipe
Read more…
Bang Bang Chicken Bowl Flavorful and Easy Recipe
Are you ready to try a simple recipe that packs a punch? The Bang Bang Chicken Bowl is not just
Read more…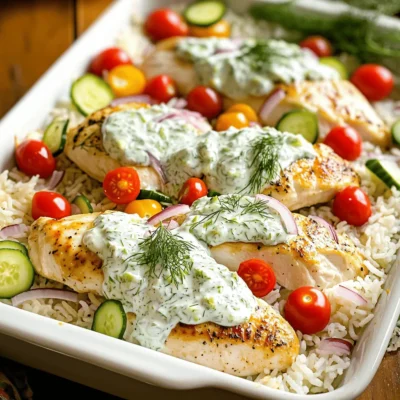
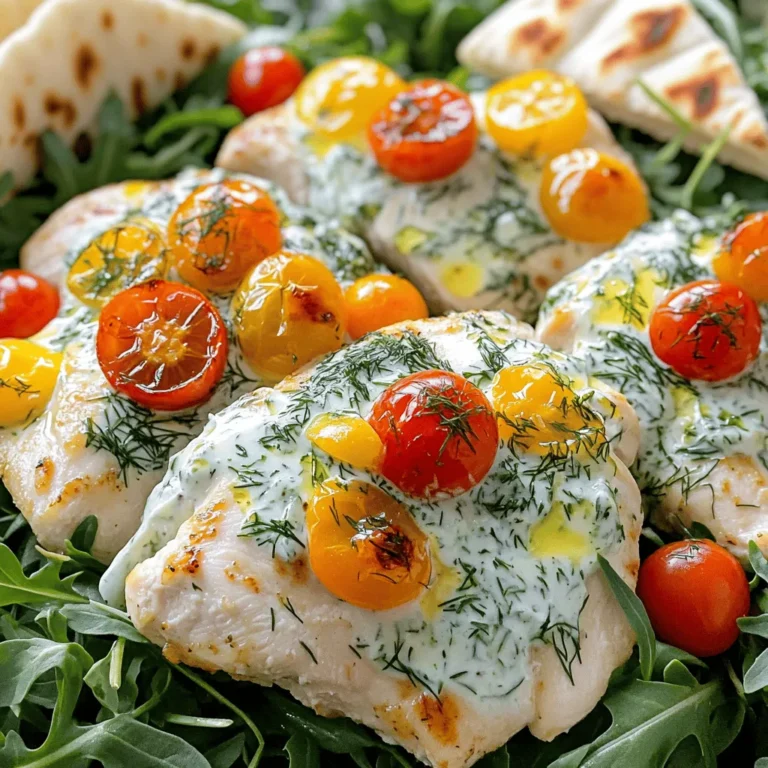
Dump and Bake Chicken Tzatziki Rice Simple Dish
Looking for a simple, delicious meal that practically cooks itself? Let me introduce you to Dump and Bake Chicken Tzatziki
Read more…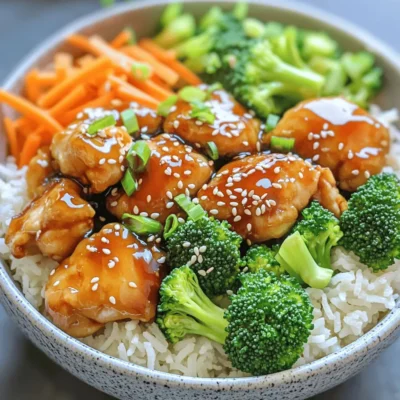
Teriyaki Chicken Rice Bowl Flavorful and Easy Meal
Looking for a quick and tasty meal? The Teriyaki Chicken Rice Bowl is your answer! This dish combines juicy chicken,
Read more…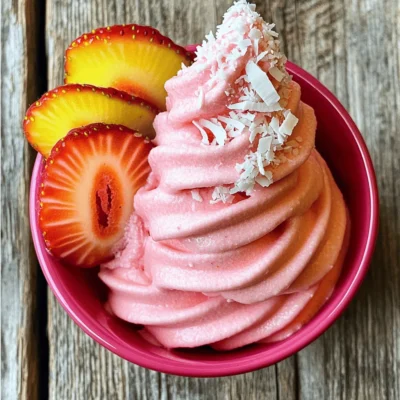
Strawberry Dole Whip Refreshing Treat for Summer
Ready to beat the summer heat? Try this delicious Strawberry Dole Whip! It’s cool, fruity, and super easy to make.
Read more…browse recipes
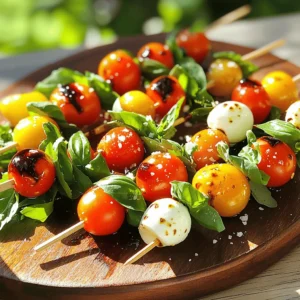


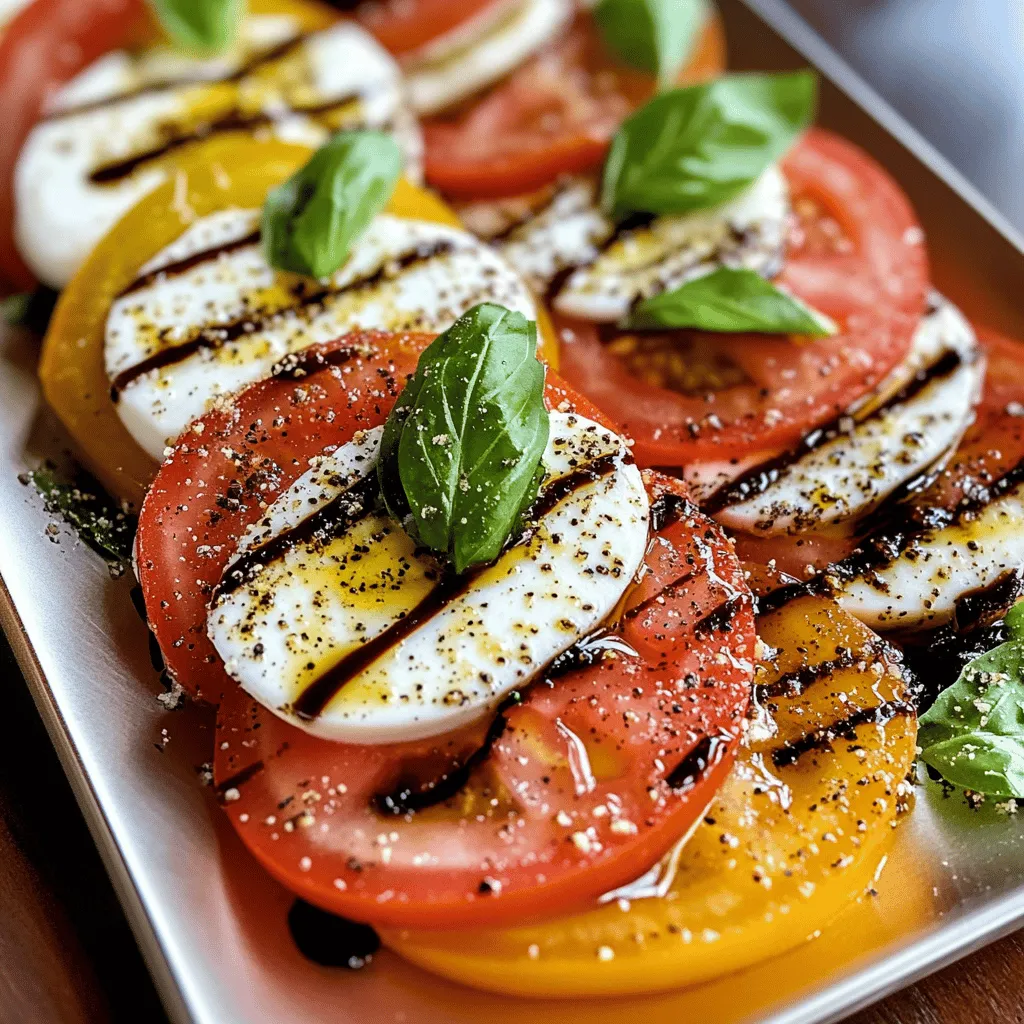
Classic Caprese Salad with Balsamic Reduction Delight
If you crave the fresh taste of summer all year round, Classic Caprese Salad with Balsamic Reduction is your answer. Bursting with ripe tomatoes,…
My Latest Desserts

Fig Cake with Almond and Honey Delight Recipe
Are you ready to indulge in a delightful treat? My Fig Cake with Almond and Honey recipe combines rich flavors Read Full Recipe-
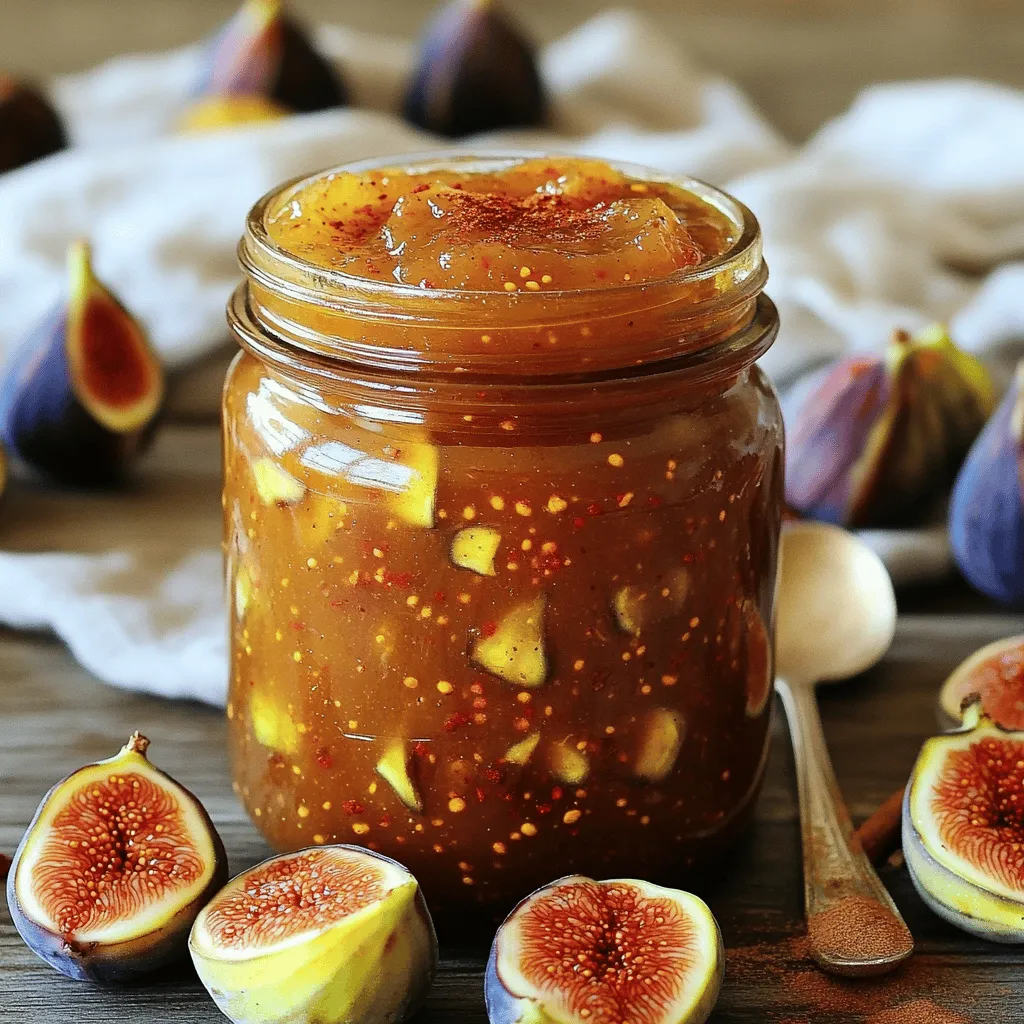
Simple Fig Jam Easy Recipe to Savor and Enjoy
Are you ready to make a burst of flavor with your next kitchen project? This Simple Fig Jam recipe is Read Full Recipe -
Mini Vanilla Cream Tarts with Raspberries Delight
Welcome to the sweet world of Mini Vanilla Cream Tarts with Raspberries! Today, I’ll show you how to make these Read Full Recipe -
Frozen Yogurt Bark Delightful and Simple Treat
If you’re looking for a quick, tasty treat, frozen yogurt bark is a winner. It’s easy to make and fun Read Full Recipe -
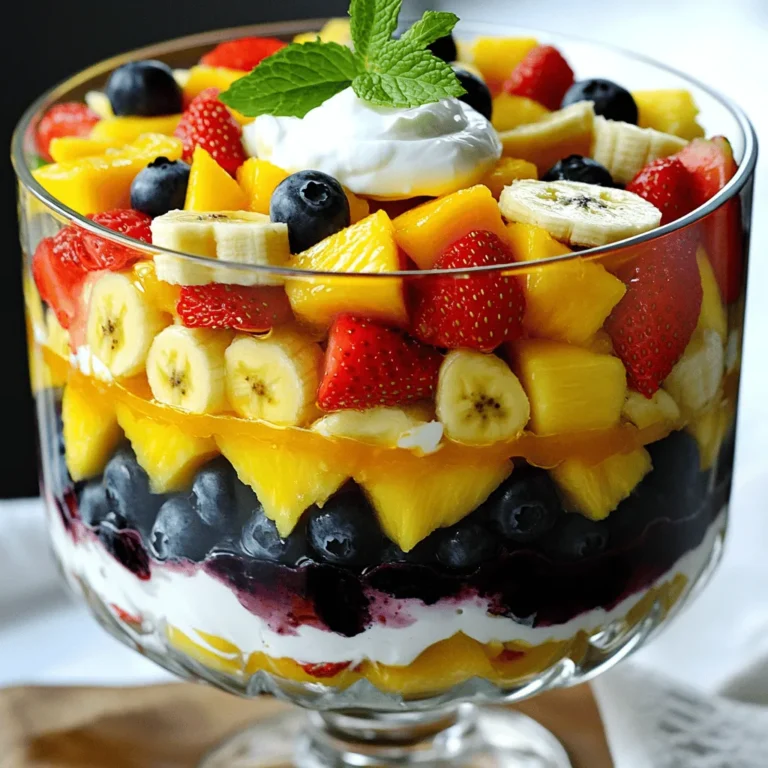
Fruit Salad with Honey Lime Dressing Easy Recipe
Looking for a fresh and easy treat? This Fruit Salad with Honey Lime Dressing is the perfect choice. Bursting with Read Full Recipe -
Blueberry Cheesecake Bars Simple and Delicious Treat
Looking for a dessert that’s easy to make and bursting with flavor? You’ve found it! These Blueberry Cheesecake Bars are Read Full Recipe -
Lemon Cheesecake Crumb Bars Delightful and Fresh Treat
Are you ready to brighten your day with a sweet treat? These Lemon Cheesecake Crumb Bars combine creamy cheesecake with Read Full Recipe -
Blueberry Heaven Cookies Irresistible Sweet Treat
Welcome to your new favorite cookie recipe! Blueberry Heaven Cookies are the perfect blend of sweet and tart, making them Read Full Recipe -
Lemon Blueberry Sorbet Fresh and Refreshing Delight
Cool off with a bowl of Lemon Blueberry Sorbet! This sweet, tangy treat is perfect for hot days. You only Read Full Recipe -
Lemon Blueberry Cupcakes Delightful and Light Treat
Are you ready to indulge in a sweet treat that brightens your day? These Lemon Blueberry Cupcakes are just what Read Full Recipe


hey,
i’m !
I’m so happy you’re here!
I pour heart and skill into every recipe I create. I know you’ll taste the difference now let’s enjoy this flavorful adventure together.

. {{image_2}} To give your bow tie pasta salad a Mediterranean twist, add sun-dried tomatoes and artichokes. These ingredients bring a rich flavor that brightens each bite. You can also try mixing in fresh herbs like oregano or dill. These herbs add a fresh pop that complements the tangy feta cheese. For a fun Asian-inspired version, use sesame oil and soy sauce as your dressing. This adds a nutty flavor that pairs well with the pasta. You can also add colorful carrots and crunchy edamame. These ingredients not only taste great but also make your salad look vibrant and fresh. Seasonal vegetables can make your pasta salad even better. In the summer, try adding zucchini for a light, fresh taste. In the fall, roasted root vegetables like carrots and sweet potatoes work wonders. These swaps ensure your salad stays exciting throughout the year. Feel free to explore these variations for a new take on your bow tie pasta salad! You can find the full recipe [here](#). Store your leftover salad in an airtight container. This keeps the salad fresh and safe. Place it in the fridge right after serving. Bow tie pasta salad stays fresh for about 3 to 5 days. Always check for any changes in smell or texture before eating. You can freeze pasta salad, but it may change texture. If you choose to freeze it, make sure to use a freezer-safe container. Divide the salad into portions to make it easier to thaw later. When you’re ready to eat, place the salad in the fridge overnight to thaw. Avoid refreezing after thawing. When reheating, focus on keeping the texture nice. Use a microwave for quick reheating, but do it in short bursts. Stir the salad between bursts to heat it evenly. If your salad seems dry, add a splash of olive oil or vinegar to freshen it up. This keeps everything tasty and vibrant. Bow Tie Pasta Salad can last about 3 to 5 days in the fridge. For best taste, eat it within this time. Store it in an airtight container. This keeps it fresh and safe. Yes, you can make this pasta salad ahead of time. In fact, it tastes better after chilling. Prepare it a day before serving. Just follow these best practices: - Store it in a sealed container. - Let it cool completely before refrigerating. - Mix it again before serving to refresh the flavors. To make your pasta salad pop, try these suggestions: - Spices and Herbs: Fresh basil, oregano, or dill add great taste. - Crunchy Additions: Add nuts like walnuts or almonds for texture. You can also try crispy veggies like carrots or bell peppers. These tips will bring your dish to the next level! Bow tie pasta salad is simple and fun to make. We covered key ingredients, cooking tips, and variations. Remember to choose fresh veggies and don’t overcook the pasta. Feel free to customize the salad with flavors you love. Practice these tips, and your salad will shine at any meal. Enjoy creating your perfect dish!](https://foodishtalk.com/wp-content/uploads/2025/07/a18d47cf-1772-4758-b947-974ac8cdcd4c-300x300.webp)


Stuffed Bell Peppers with Quinoa Flavorful Delight
Looking to spice up your dinner with a nutritious twist? Stuffed bell peppers with quinoa are the perfect solution! They are vibrant, flavorful, and…
![- 4 large bell peppers (any color) - 1 cup quinoa, rinsed - 2 cups vegetable broth - 1 cup black beans, canned and rinsed - 1 small red onion, finely chopped - 2 cloves garlic, minced - 1 teaspoon cumin - 1 teaspoon smoked paprika - 1 teaspoon chili powder - 1 cup diced tomatoes (canned or fresh) - 1 cup shredded cheese (cheddar or mozzarella) - Fresh cilantro or parsley, for garnish Stuffed bell peppers are a hearty meal, and they’re simple to make. Start by gathering your main ingredients. For this recipe, I choose four large bell peppers. I love using a mix of colors, like red, yellow, and green. Each one adds a pop and a bit of sweetness. Next, I rinse one cup of quinoa. This step is key. Rinsing removes a bitter coating. I cook the quinoa in two cups of vegetable broth for extra flavor. You can also use chicken broth if you prefer. Black beans add protein and fiber. I use one cup of canned black beans, rinsed well. This saves time and makes cooking easier. You can also mix in some corn if you like a bit of sweetness. Now for the flavorings. I finely chop one small red onion and mince two cloves of garlic. These two ingredients make the dish smell wonderful as they cook. I add one teaspoon each of cumin, smoked paprika, and chili powder. These spices give the filling a nice kick and warmth. Finally, for toppings, I use one cup of diced tomatoes and one cup of shredded cheese. Cheddar or mozzarella works great. Fresh cilantro or parsley brightens the dish and adds color. For the full recipe and step-by-step instructions, check out the [Full Recipe]. Enjoy making these tasty stuffed peppers! 1. Preheat your oven to 375°F (190°C). This helps cook the peppers evenly. 2. Prepare the bell peppers by cutting off the tops and removing the seeds. Set them aside. 3. In a medium saucepan, combine 1 cup of rinsed quinoa with 2 cups of vegetable broth. Bring this to a boil. Once boiling, reduce the heat, cover, and let it simmer for 15 minutes or until the quinoa is cooked and the liquid is gone. 1. In a large skillet over medium heat, add a drizzle of olive oil. 2. Sauté 1 small chopped red onion and 2 minced garlic cloves for about 3-4 minutes. The onion should look translucent. 3. Next, mix in 1 cup of black beans, 1 cup of corn, 1 cup of diced tomatoes, 1 teaspoon of cumin, 1 teaspoon of smoked paprika, and 1 teaspoon of chili powder. Stir this well and cook for another 5 minutes. 1. Once the quinoa is ready, fluff it with a fork. Add it to the skillet mixture and stir everything together. Season with salt and pepper to taste. 2. Spoon this quinoa mixture evenly into each bell pepper. Pack the filling down gently. 3. Place the stuffed peppers upright in a baking dish. 4. Top each stuffed pepper with 1 cup of shredded cheese. Cover the dish with foil and bake for 25 minutes. 5. After 25 minutes, remove the foil and bake for another 10-15 minutes. The peppers should be tender, and the cheese should be bubbly and golden. 6. When done, take them out of the oven and let them cool slightly before serving. For the full recipe, check out the earlier section. How to ensure the quinoa is fully cooked? To cook quinoa perfectly, rinse it well to remove bitterness. Combine one cup of quinoa with two cups of vegetable broth in a saucepan. Bring it to a boil, then lower the heat. Cover the pot and let it simmer for about 15 minutes. Check for fluffy grains and no liquid left. If it feels crunchy, let it cook a bit longer. Tips for selecting the best bell peppers? Choose bell peppers that feel firm and heavy in your hand. Look for bright colors, which mean they're fresh. Check for smooth skin without any soft spots or wrinkles. If you prefer sweetness, red peppers are best. For a bit of bite, go for green ones. Best baking dishes for stuffed peppers? A glass or ceramic baking dish works well. These materials help the peppers cook evenly. Make sure the dish is deep enough to hold the peppers upright. If you have a cast-iron skillet, it can add great flavor too. Essential cookware for sautéing? A large non-stick skillet is perfect for sautéing. It helps prevent sticking and makes cleanup easy. Use a wooden spoon or spatula for stirring. If you want extra flavor, a heavy-bottomed pan can give a nice sear to your onions and garlic. Suggested side dishes to complement the peppers? A light side salad pairs nicely with stuffed peppers. Try a mix of greens, cherry tomatoes, and a tangy vinaigrette. You could also serve with rice or a small bowl of guacamole. These sides bring a fresh taste to your meal. Ideas for customizing the presentation Make your dish pop by adding fresh herbs on top. Chopped cilantro or parsley adds color and flavor. You can also drizzle a bit of sour cream or yogurt on top. For a fun twist, serve the peppers on a colorful platter with lime wedges. {{image_2}} You can easily make vegan stuffed peppers. Skip the cheese and use plant-based cheese instead. Replace the vegetable broth with water if needed. This keeps the dish light and tasty. For gluten-free options, stick to quinoa and check your canned goods. Ensure they are gluten-free, especially the beans. You can also swap black beans for lentils or chickpeas. Both add great flavor and protein. To make your stuffed peppers even more exciting, try adding spices. You can mix in cayenne pepper for heat or Italian herbs for a new twist. Each spice brings its own flair. For cheese lovers, experiment with different types. Feta adds a tangy taste, while goat cheese offers creaminess. You can even try a mix of cheeses for more depth. Seasonal veggies are a fun way to change things up. In summer, add zucchini or yellow squash. In fall, try mushrooms or spinach. These additions keep the dish fresh and lively. For special occasions, adjust the filling to match the season. You could use pumpkin and sage for a cozy autumn feel. This way, you can celebrate each season with a new flavor journey. Store your leftover stuffed peppers in an airtight container. This keeps them fresh and tasty. You can place them in the fridge for up to four days. If you want to enjoy them later, refrigerate them right after they cool. This helps to keep the flavors locked in. To freeze stuffed peppers, let them cool completely first. Wrap each pepper tightly in plastic wrap. Then, place them in a freezer-safe bag or container. They can stay frozen for up to three months. When you’re ready to eat, thaw them overnight in the fridge. Reheat in the oven at 350°F (175°C) for about 20-25 minutes. This warms them through and makes the cheese nice and melty. You can prepare the ingredients ahead of time. Cook the quinoa and mix it with the veggies. Store the filling in a separate container. Keep the bell peppers whole in the fridge. When you’re ready to cook, just stuff the peppers and bake. This makes dinner quick and easy! How do I know when the stuffed peppers are done? You can tell the stuffed peppers are done when they are soft. The cheese should be golden and bubbly. A fork should easily pierce the pepper. If the pepper skin is tender, it is ready to eat. Can I use cooked quinoa instead of raw? Yes, you can use cooked quinoa. Just make sure to adjust the liquid in the recipe. Since cooked quinoa has moisture, you may need less vegetable broth. This change will help keep the filling from being too wet. What to do if peppers are too crunchy? If your peppers are too crunchy, cover them with foil and bake longer. Check every five minutes until they reach your desired softness. You can also try cooking them in boiling water for a few minutes before stuffing. How to fix overcooked quinoa in the filling? If your quinoa is overcooked, try adding a little vegetable broth. This can help restore some moisture. Mixing in a fresh ingredient like diced tomatoes can also add texture. Can I use other grains instead of quinoa? Yes, you can use rice, farro, or bulgur instead of quinoa. Just ensure they are fully cooked before mixing with the filling. Each grain will give a different flavor and texture. What are good alternatives for black beans? Good alternatives for black beans include kidney beans, pinto beans, or lentils. These options will add protein and texture. Each choice will bring its own unique taste to the stuffed peppers. Stuffed peppers are a fun and tasty dish. We explored the key ingredients, from bell peppers to quinoa and spices. I shared steps for preparing, cooking, and baking them to perfection. Don't forget my tips for making your dish shine, including storage and meal prep ideas. You can easily adapt this recipe for different diets and occasions. Enjoy your cooking and feel free to experiment with flavors and toppings. Happy cooking!](https://foodishtalk.com/wp-content/uploads/2025/05/ff2147a1-fca7-41d0-ae2c-900f1d0fc493.webp)
