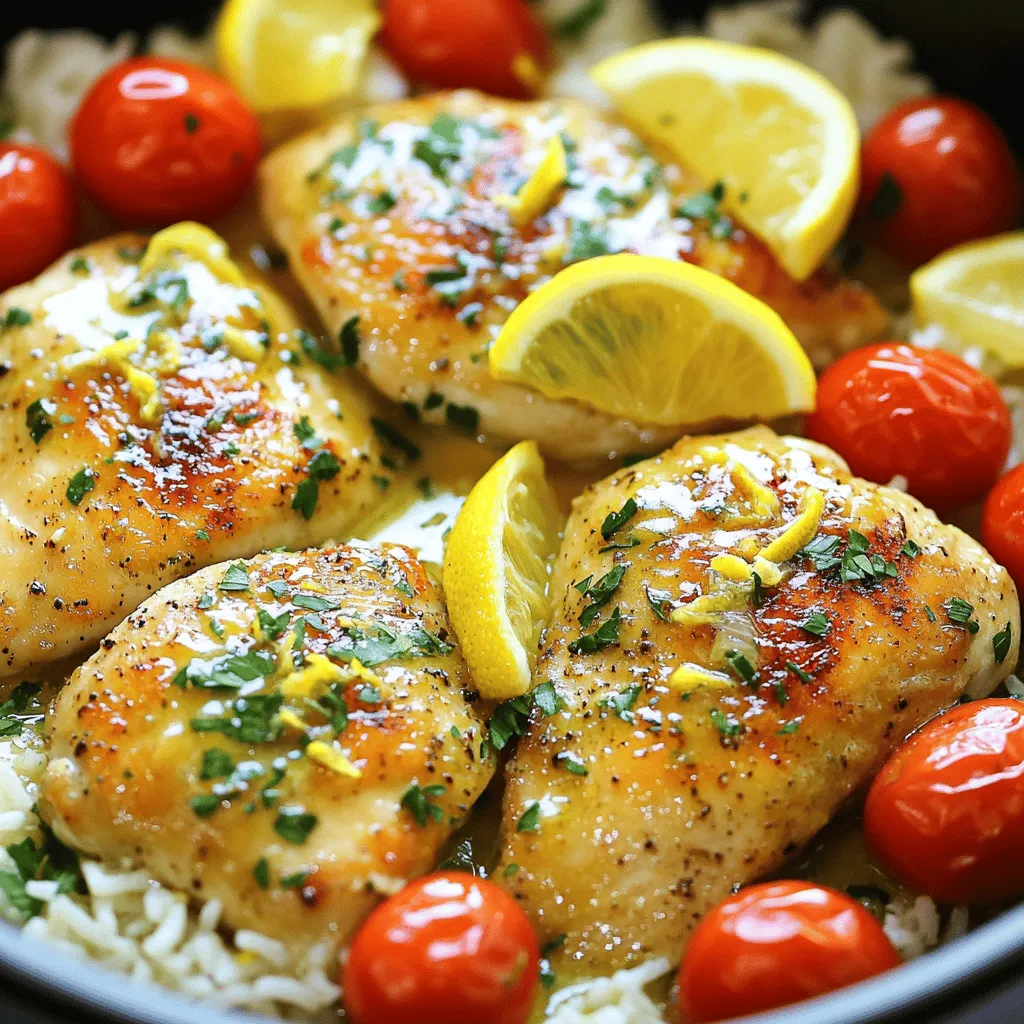
Looking for a quick and tasty dinner? Try my One-Pan Lemon Butter Chicken! This dish is juicy, zesty, and full of flavor. With just one pan, you can whip up a meal that impresses. I’ll share tips, tricks, and simple steps to make your cooking easy and fun. Let’s dive into this recipe that will change your weeknight dinners forever!
Ingredients
Complete List of Ingredients
– Chicken and Marinade Components
– 4 boneless, skinless chicken breasts
– Juice and zest of 2 lemons
– Aromatics and Seasonings
– 4 tablespoons unsalted butter
– 2 tablespoons olive oil
– 4 cloves garlic, minced
– 1 teaspoon dried oregano
– 1 teaspoon dried thyme
– Salt and pepper to taste
– 1 cup chicken broth
– Optional Garnishes and Serving Suggestions
– 1 cup cherry tomatoes, halved
– Fresh parsley, chopped (for garnish)
This dish shines with simple yet bold flavors. The chicken breasts soak in the bright lemon juice, making them juicy and tender. The butter and olive oil create a rich base. Garlic adds a warm aroma, while oregano and thyme provide depth. Each ingredient plays a key role in creating a mouth-watering harmony.
For a pop of color, I add cherry tomatoes. They burst with sweetness as they cook. Fresh parsley on top adds a lovely finish. You can serve this dish with rice or mashed potatoes, soaking up all the delicious lemon butter sauce.Enjoy the simple yet satisfying process of cooking!
Step-by-Step Instructions
Preparation Steps
– Prepping the Chicken
Start with four chicken breasts. Trim any fat. Pat them dry with paper towels. This step helps the chicken brown nicely when you cook it.
– Searing the Chicken Breasts
Heat two tablespoons of olive oil and two tablespoons of butter in a large skillet. Get it hot, but not smoking. Season the chicken with salt and pepper. Place the chicken in the pan. Sear for five to seven minutes on each side until golden. This gives great flavor and a nice crust.
– Cooking the Garlic
Remove the chicken from the pan. In the same skillet, add four minced garlic cloves. Cook for about thirty seconds. You want it fragrant but not burnt.
Building the Sauce
– Deglazing with Chicken Broth
Pour in one cup of chicken broth. This helps lift the tasty bits stuck to the pan. Add the juice and zest of two lemons. Stir to mix well.
– Adding Lemon Juice and Herbs
Toss in one teaspoon of dried oregano and one teaspoon of dried thyme. Bring this mixture to a gentle simmer. It will smell amazing!
Finishing Touches
– Combining Tomatoes and Chicken
Add one cup of halved cherry tomatoes to the skillet. Stir gently. Return the chicken to the pan, nestling it among the tomatoes.
– Adding Final Butter and Seasoning
Turn the heat to low. Cover the skillet and let it cook for ten to fifteen minutes. Make sure the chicken reaches 165°F (75°C). When done, stir in the remaining two tablespoons of butter. This adds richness. Adjust the salt and pepper to taste.
Once you follow these steps, you will have a dish bursting with flavor.
Tips & Tricks
Perfecting the Chicken
To ensure juiciness and flavor, start with quality chicken. I recommend using boneless, skinless chicken breasts. They cook evenly and stay moist. Season them well with salt and pepper. This simple step makes a big difference.
For cooking time and temperature, aim for 5-7 minutes on each side. This gives you a nice golden crust. Once you sear the chicken, check the inside temperature. It should reach 165°F (75°C) to be safe to eat. Use a meat thermometer for best results.
Enhancing the Flavor Profile
You can add more flavor with extra seasonings. Consider using herbs like rosemary or basil. A dash of paprika can also add a nice kick. Fresh or dried herbs both work well in this dish.
For presentation, serve the chicken and sauce over fluffy rice or creamy mashed potatoes. This adds a nice base. Drizzle the lemon butter sauce on top. Garnish with lemon wedges and fresh parsley for color. This makes your dish look as good as it tastes.
Variations
Dietary Alternatives
Gluten-Free Modifications
You can easily make this dish gluten-free. Simply use gluten-free chicken broth. Check labels to ensure the broth has no hidden gluten. The rest of the recipe is already gluten-free.
Dairy-Free Options
For a dairy-free version, swap the butter with vegan butter or olive oil. This keeps the dish rich and tasty without dairy. You can also use coconut cream for a creamy feel.
Flavor Variants
Adding Spices like Paprika or Chili Flakes
Want to spice things up? Add paprika for a smoky twist. Chili flakes give a nice kick. Start with a small amount, then adjust to your taste. These spices work well with the lemon flavor.
Substituting Different Vegetables
You can change the vegetables to suit your taste. Try zucchini, bell peppers, or spinach. These add color and nutrients. Just remember to cook them until soft. Each veggie brings its own flavor to the dish.
Storage Info
Proper Cooling and Storing
To keep your leftovers fresh, start by cooling them. Let the One-Pan Lemon Butter Chicken cool at room temperature for about 30 minutes. This step helps prevent moisture buildup in your storage container. Once cool, place the chicken in an airtight container. You can refrigerate it for up to three days.
For longer storage, you can freeze it. Wrap the chicken tightly in plastic wrap. Then place it in a freezer-safe bag or container. This method helps to keep the flavors intact. You can store it for up to three months in the freezer.
Reheating Recommendations
When it’s time to enjoy your leftovers, choose the right reheating method. The best way to reheat is on the stove. Place the chicken in a skillet over low heat. Add a splash of chicken broth or water to keep it moist. Cover the pan to help heat evenly.
If you’re short on time, you can use the microwave. Place the chicken on a microwave-safe plate. Cover it with a damp paper towel to maintain moisture. Heat in short bursts of one minute, checking often.
To keep the flavor and texture, avoid high heat. High heat can dry out the chicken. Instead, take your time and reheat gently. This way, your One-Pan Lemon Butter Chicken will taste just as good as when it was fresh.
FAQs
Common Questions About One-Pan Lemon Butter Chicken
How do I know when the chicken is fully cooked?
You can check the chicken by using a meat thermometer. The chicken should reach 165°F (75°C). If you don’t have a thermometer, cut into the thickest part. The meat should be white, and the juices should run clear.
Can I use bone-in chicken pieces instead?
Yes, you can use bone-in chicken pieces. Just adjust the cooking time. Bone-in chicken takes longer to cook. Aim for about 20-25 minutes on low heat after searing.
What can I pair with this dish for a complete meal?
This dish pairs well with rice or mashed potatoes. You can also serve it with a fresh salad or roasted vegetables. The lemon butter sauce adds a nice flavor to any side.
Additional Queries
Can I make this recipe in advance?
Yes, you can prepare the chicken and sauce ahead of time. Cook the dish, then cool it before storing. Keep it in the fridge for up to two days.
What are some good side dishes to serve?
You can serve this dish with steamed broccoli, garlic bread, or a light salad. These sides complement the lemon flavor well.
How can I store the lemon butter sauce?
Store the sauce in an airtight container. It will last for about three days in the fridge. You can also freeze it for longer storage. Just thaw and reheat before using.
You now have a complete guide to making One-Pan Lemon Butter Chicken. We covered every step, from ingredients to cooking tips. You learned how to prepare juicy chicken and build a rich sauce. You also discovered variations to suit different diets and flavor preferences. Remember to store leftovers properly so you can enjoy the dish later. This recipe is simple yet full of flavor, and it’s perfect for any meal. Happy cooking, and enjoy your delicious creation!