Are you ready to add a zesty kick to your meals? Dill Pickled Okra is not just tasty; it’s also simple to make! In this guide, I will walk you through the steps to create crisp, flavorful okra at home. From the best ingredients to handy tips, I’ve got you covered. Let’s dive into this delicious recipe that you can enjoy all year round!
Ingredients
Fresh Okra and Other Main Ingredients
To make the best dill pickled okra, you need fresh okra. Aim for about 1 pound of okra. Make sure the stems are trimmed, and the pods are firm and bright green. You will also need 1 cup of distilled white vinegar and 1 cup of water. The vinegar gives a tangy flavor that is key to pickling.
Essential Seasonings and Flavorings
Flavor is what makes your pickled okra stand out. You will need:
– 2 tablespoons kosher salt
– 2 tablespoons sugar
– 4 cloves garlic, smashed
– 1 tablespoon dill seeds
– 1 tablespoon black peppercorns
– 1 teaspoon red pepper flakes (optional)
– 2 sprigs fresh dill
These flavors blend perfectly to create a delicious balance.
Tools and Equipment Needed
You will need a few tools to make this recipe easy:
– 1 quart-sized jar with a lid
– A saucepan for the brine
– A clean cloth to wipe the jar rim
– A cutting board and knife for prepping the okra
This simple setup helps streamline the process, so you can enjoy your pickling adventure!
Step-by-Step Instructions
Preparation of Okra
First, rinse the fresh okra under cold water. This step cleans off any dirt. After that, trim the stem ends. Be careful not to cut into the pods. Once you have trimmed the okra, set it aside. This prep is key for a good pickle.
Making the Pickling Brine
Next, we make the pickling brine. In a saucepan, combine the distilled white vinegar, water, kosher salt, and sugar. Stir these ingredients well. Heat the mixture over medium-high heat until it boils. Keep stirring until the salt and sugar dissolve. Once dissolved, remove the pan from heat. Let the brine cool slightly. This brine will give the okra its great flavor.
The Packing Process for the Jar
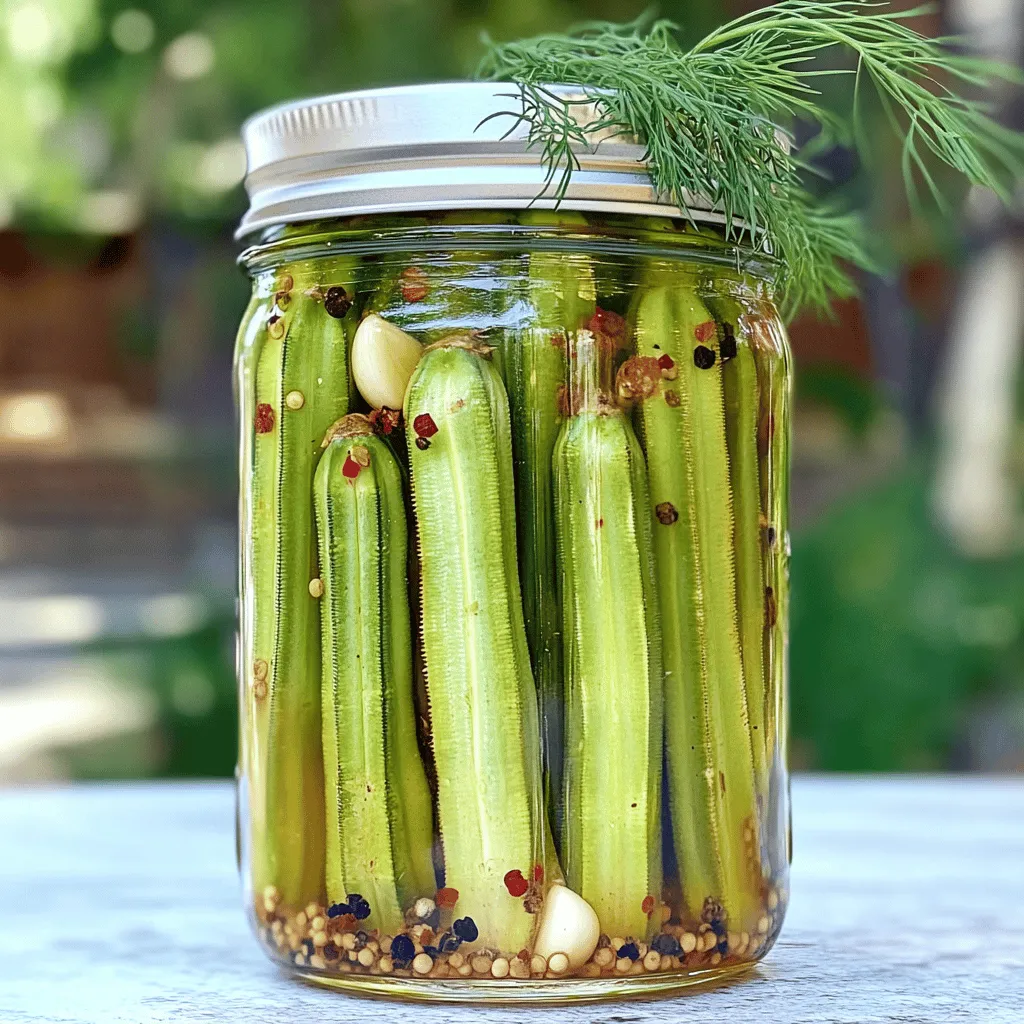
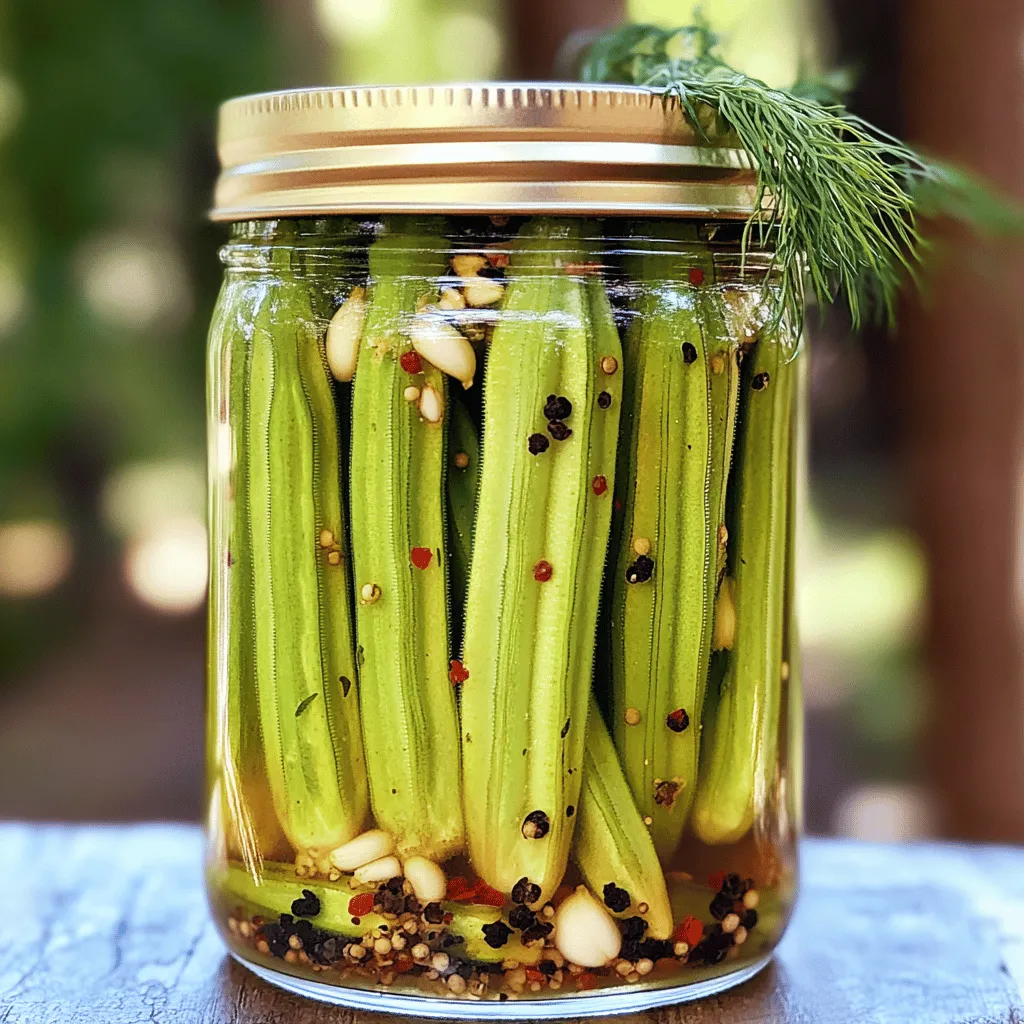
Now it’s time to pack the jar. Start with a clean, sterilized quart jar. Place the smashed garlic, dill seeds, black peppercorns, and red pepper flakes at the bottom. If you enjoy some heat, add the red pepper flakes. Then, carefully pack the okra upright in the jar. Pour the warm brine over the okra. Make sure the pods are fully submerged. Leave about half an inch of space at the top of the jar. Wipe the rim with a clean cloth to remove any residue. Seal the jar tightly with the lid. Let it cool to room temperature. This step is essential for the pickling process.
Tips & Tricks
Best Practices for Picking Fresh Okra
When choosing fresh okra, look for firm pods. They should be bright green and smooth. Avoid any that are dull or have dark spots. Smaller pods are usually more tender. Larger ones can be tough and less enjoyable. Always buy okra from reliable sources, like local farms or farmers’ markets.
How to Adjust Salt and Sugar Levels
To change the taste of your pickled okra, adjust the salt and sugar. If you want a saltier pickle, add more kosher salt. You can add a teaspoon at a time to test the flavor. For a sweeter taste, increase the sugar. Start with one extra tablespoon and taste as you go. Keep in mind that too much sugar can mask the unique flavor of okra.
Suggestions for Flavor Enhancements
You can make your pickled okra even better. Try adding spices like mustard seeds or coriander seeds for extra flavor. You might also enjoy adding sliced jalapeños for a spicy kick. If you love garlic, add more smashed cloves for a bolder taste. Fresh herbs like thyme or basil can also bring new flavors to your pickling brine. With a few tweaks, you can make this recipe your own and enjoy new tastes.
Variations
Spicy Dill Pickled Okra Recipe
To make spicy dill pickled okra, add more heat. Start with the basic recipe. Use the same ingredients but add more red pepper flakes. You can also include sliced jalapeños for a kick. The heat level depends on your taste, so adjust as needed. This spicy version adds a fun twist. Pair it with sandwiches or enjoy it as a snack.
Sweet and Spicy Pickling Options
For a sweet and spicy version, mix sweet and heat. Use the basic recipe but add more sugar. Try using a mix of sugar and honey for extra flavor. You can also add sliced bell peppers for a sweet crunch. This version is great for those who love a balance of flavors. It pairs well with barbecue dishes or as a unique snack.
Herb-Infused Dill Pickled Okra
Want to add more depth? Try herb-infused dill pickled okra. Use the basic recipe and add fresh herbs. Good options include thyme, basil, or even a bit of oregano. Herbs can change the flavor profile and make it special. Just remember to keep the dill as the star. This variation shines in salads or as a gourmet appetizer.
Storage Information
How to Store Homemade Dill Pickled Okra
To store your dill pickled okra, keep the jar in the refrigerator. Make sure the lid is tight to keep out air. Always use clean utensils when taking out okra. This keeps it safe and fresh.
Shelf Life of Pickled Okra
Homemade dill pickled okra lasts about 2 to 3 months in the fridge. The flavor gets better as it sits. However, it’s best to eat it within the first month for the best taste.
Signs of Spoilage to Look For
Check for these signs of spoilage:
– Off smell: If it smells bad, throw it away.
– Mold: Any mold on the surface means it’s not safe.
– Discoloration: If the okra turns dark or mushy, discard it.
Following these tips will help you enjoy your dill pickled okra safely.
FAQs
How long does it take to pickle okra?
It takes about 48 hours to pickle okra. During this time, the flavors blend well. After two days, the okra will taste great. You can eat it sooner, but longer pickling gives better taste.
Can I use frozen okra for pickling?
I do not recommend using frozen okra for pickling. Frozen okra becomes soft after thawing. Fresh okra stays crunchy and firm when pickled. For the best texture, opt for fresh okra.
What are the health benefits of pickled okra?
Pickled okra has many health benefits. It is low in calories and rich in fiber. The fiber helps digestion and keeps you full. Okra is also high in vitamins A and C. It may boost your immune system, too.
Where can I buy dill pickled okra?
You can find dill pickled okra at many grocery stores. Look in the pickle aisle or near the canned goods. Some farmers’ markets sell homemade pickles, too.
Can I use another type of vinegar for pickling?
Yes, you can use other types of vinegar for pickling. Apple cider vinegar gives a fruity taste. Rice vinegar adds a mild flavor. Make sure to choose a vinegar with 5% acidity for safe pickling.
This blog post covered everything you need to create delicious dill pickled okra. We discussed the key ingredients and tools, step-by-step instructions, and essential tips. You learned about different pickling variations and how to store your pickled okra correctly.
In summary, making dill pickled okra is simple and fun. You now have the knowledge to get started and try new flavors. Enjoy your pickling journey!