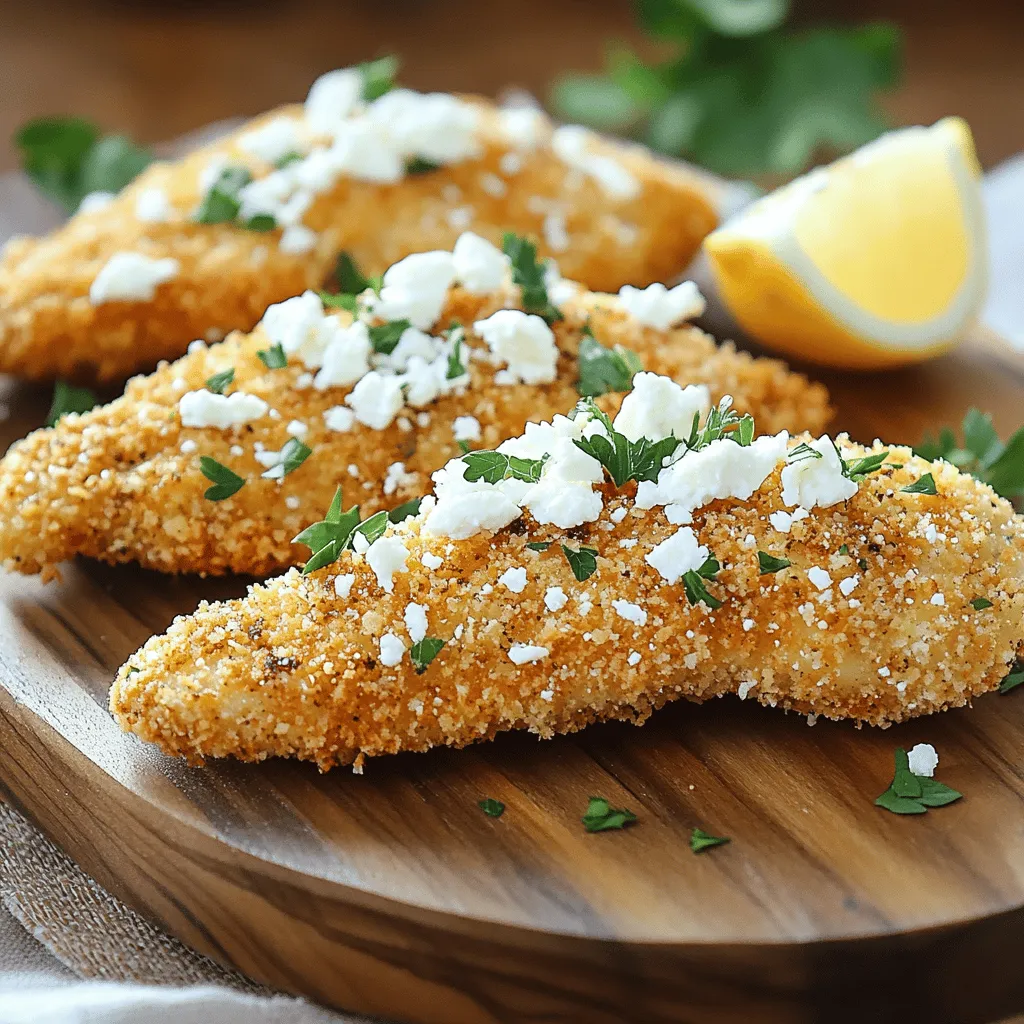
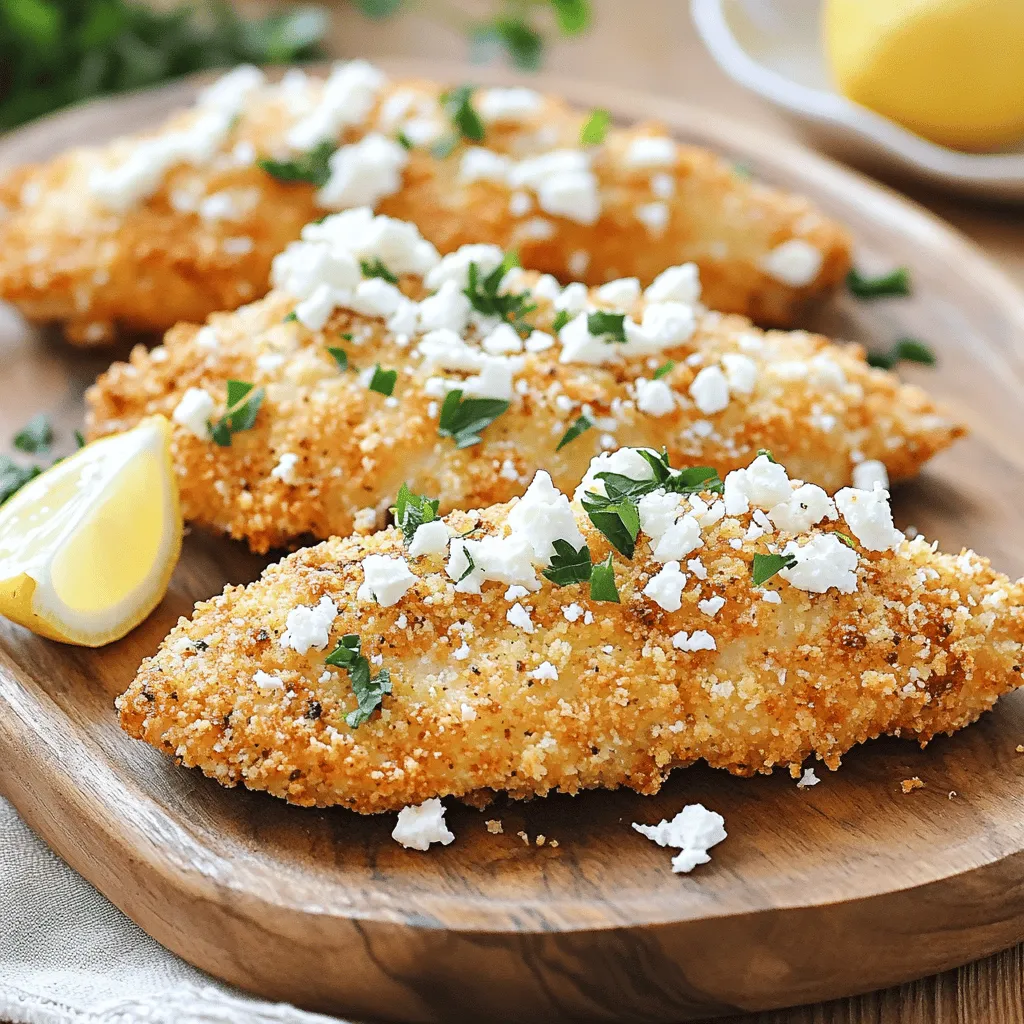
If you’re craving a quick and tasty meal, these Crispy Greek Chicken Tenders are perfect for you! With savory spices and a light, crunchy coating, they bring the flavors of Greece right to your kitchen. Plus, they’re simple to make. In this guide, I’ll walk you through the ingredients, steps, and tips to create this delicious dish. Get ready to impress your family with a meal that’s as fun to make as it is to eat!
Ingredients
List of Required Ingredients
– 1 pound chicken tenderloins
– 1 cup buttermilk
– 1 teaspoon garlic powder
– 1 teaspoon onion powder
– 1 teaspoon dried oregano
– 1 teaspoon dried thyme
– 1 teaspoon paprika
– Salt and pepper to taste
– 1 cup all-purpose flour
– 1 cup breadcrumbs (preferably panko for extra crunch)
– 1/2 cup feta cheese, crumbled
– 1/4 cup fresh parsley, chopped
– Olive oil for frying
These ingredients make the dish pop! The chicken tenderloins shine, while the buttermilk helps to keep them moist. The spices, like garlic powder and oregano, add a nice flavor. The flour and panko breadcrumbs give that perfect crunch. Feta cheese and parsley bring a fresh twist to the breading.
Suggested Tools and Equipment
– Shallow bowls for breading
– Large skillet for frying
– Cooking thermometer (optional)
Using shallow bowls makes breading easier. A large skillet helps fry the chicken evenly. A cooking thermometer can ensure your chicken reaches a safe temperature, which is 165°F.
Step-by-Step Instructions
Marinating the Chicken
First, combine the buttermilk and spices in a bowl. Add garlic powder, onion powder, oregano, thyme, paprika, salt, and pepper. Whisk them together until smooth. Next, add the chicken tenderloins. Make sure they are fully coated in the mixture. Cover the bowl and place it in the fridge. Marinate for at least one hour. For even more flavor, let them marinate overnight.
Setting Up the Breading Station
Now, let’s set up the breading station. You will need three shallow bowls. In the first bowl, add all-purpose flour. In the second bowl, pour the remaining buttermilk mixture, but discard any extra. In the third bowl, mix breadcrumbs with crumbled feta cheese and chopped parsley. Each step is key in this process. This setup helps the breading stick better to the chicken.
Coating and Frying Chicken Tenders
Take the chicken from the marinade. Let the excess buttermilk drip off. Start by dredging each tender in flour. Then, dip it back into the buttermilk. Finally, coat it in the breadcrumb mixture. Press gently so the crumbs stick well. Heat olive oil in a large skillet over medium-high heat. Once hot, carefully add the chicken tenders in batches. Do not overcrowd the pan. Fry for about 4-5 minutes on each side. Look for a golden brown color. This shows they are cooked through. Transfer to a plate lined with paper towels to drain excess oil.
Tips & Tricks
Choosing the Right Chicken
Using chicken tenderloins makes this dish quick and easy. Tenderloins are small strips of meat that cook fast. They stay juicy and tender, making them perfect for frying. You can also use chicken breasts, but they need more care. They can dry out if overcooked. Tenderloins let you enjoy a tasty meal without stress.
Ensuring Crispy Coating
To get a crispy coating, follow these tips. First, make sure your chicken is dry before breading. Pat it with paper towels. This helps the breading stick better. Next, double dip your chicken. Dredge it in flour, then buttermilk, and finally breadcrumbs. Press gently to ensure the crumbs stick. Using panko breadcrumbs is key. They provide extra crunch that you will love.
Perfecting Flavor
Adjusting the seasoning can change the flavor. You can add more garlic or herbs if you want a stronger taste. A pinch of cayenne pepper gives heat, while lemon zest adds freshness. Don’t forget the salt; it enhances all flavors. You can also mix in different spices. Consider trying dill or rosemary for a unique twist. Each tweak allows you to create your version of Crispy Greek Chicken Tenders.
Variations
Different Flavor Profiles
You can easily change the flavors of your crispy Greek chicken tenders. Try adding different spices to the buttermilk marinade. For a spicy kick, use cayenne pepper or chili powder. If you love herbs, add fresh dill or basil. You can also mix in some lemon zest for a bright taste. These simple changes make the dish fun and fresh every time.
Alternative Cooking Methods
You can bake or fry these tenders, depending on your preference. Baking is a healthier option and still gives you a tasty result. To bake, preheat your oven to 400°F (200°C) and place the coated tenders on a baking sheet. Spray them lightly with olive oil and bake for about 20-25 minutes, flipping halfway through. Frying gives you that crispy texture, but both methods work well.
Serving Suggestions
Pair your crispy Greek chicken tenders with tasty sauces and sides. A classic tzatziki sauce adds a cool touch. You can also try a honey mustard dip for sweetness. Serve with a fresh Greek salad or roasted vegetables for a complete meal. These pairings enhance the flavors and make your meal more exciting.
Storage Info
Storing Leftovers
To store your Crispy Greek Chicken Tenders, let them cool first. Place the tenders in an airtight container. You can keep them in the fridge for up to three days. If you want to keep them longer, freeze them. Use a freezer-safe bag or container. They can last up to three months in the freezer. Just remember to label the bag with the date.
Reheating Tips
To reheat your chicken tenders, avoid the microwave. It can make them soggy. Instead, use an oven or an air fryer. Preheat your oven to 375°F (190°C). Place the tenders on a baking sheet for about 10-15 minutes. If using an air fryer, set it to 350°F (175°C) and heat for about 5-7 minutes. This keeps them crispy and delicious.
Shelf Life Information
Leftovers can stay in the fridge for three days. If frozen, they can last up to three months. Always check for any changes in smell or texture before eating. If they look or smell off, it’s best to throw them away. Enjoy your meal safely!
FAQs
Can I make Crispy Greek Chicken Tenders ahead of time?
Yes, you can prepare the chicken tenders ahead of time. Marinate them the night before for the best flavor. After marinating, bread the chicken and store it in the fridge. Fry them right before serving. This way, they stay fresh and crispy.
What can I substitute for buttermilk?
If you don’t have buttermilk, you can make a simple swap. Mix one cup of milk with one tablespoon of vinegar or lemon juice. Let it sit for about five minutes. This creates a tangy milk that works well in the recipe.
How do I ensure my chicken stays juicy inside?
To keep your chicken juicy, marinate it for at least one hour. The buttermilk tenderizes the meat. Fry the tenders at the right temperature. Too hot can dry them out, while too low can make them greasy. Aim for medium-high heat.
Is there a gluten-free option for this recipe?
Yes, you can make this dish gluten-free. Use gluten-free flour and gluten-free breadcrumbs instead of regular ones. The flavor will still be delicious and crispy! Check the labels to ensure all ingredients are gluten-free.
In this post, I covered how to make Crispy Greek Chicken Tenders. You learned about key ingredients like chicken, buttermilk, and spices. I explained the steps for marinating, breading, and frying, along with helpful tips. You also discovered variations and how to store leftovers.
Remember, experimenting with flavors and cooking methods makes this dish your own. Enjoy perfecting your chicken tenders and impressing your family and friends! The journey is as delicious as the result.