Are you ready for a cool and fruity treat? These Berry Coconut Popsicles are not just delicious; they’re also easy to make! With just a few simple ingredients, you can create a refreshing snack perfect for hot days. Imagine the blend of sweet berries and creamy coconut melting together in your mouth! Let’s dive into how to whip up these tasty popsicles that will impress your family and friends.
Ingredients
List of Main Ingredients
– 1 cup mixed berries (strawberries, blueberries, raspberries)
– 1 cup coconut milk (canned for a creamier texture)
– 2 tablespoons honey or maple syrup
– 1 teaspoon vanilla extract
– 1 tablespoon lime juice
– A pinch of sea salt
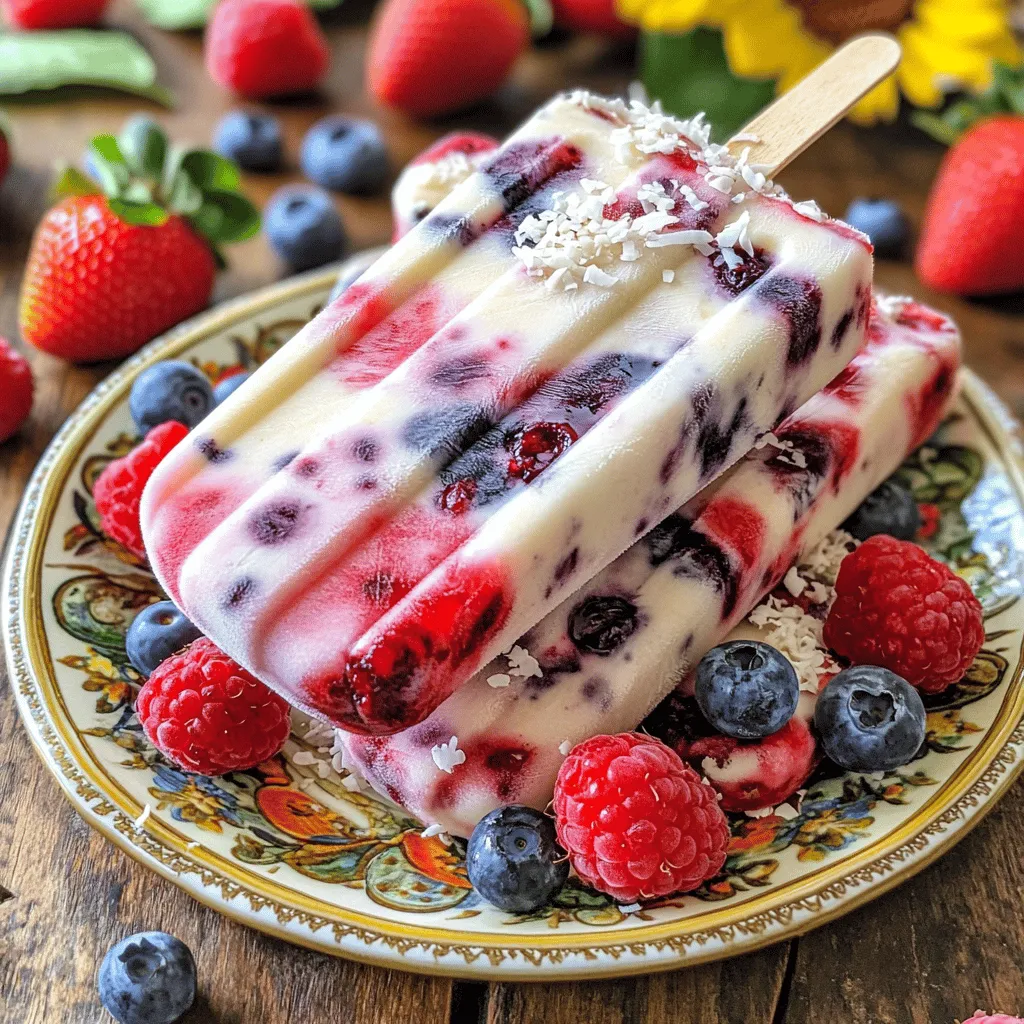
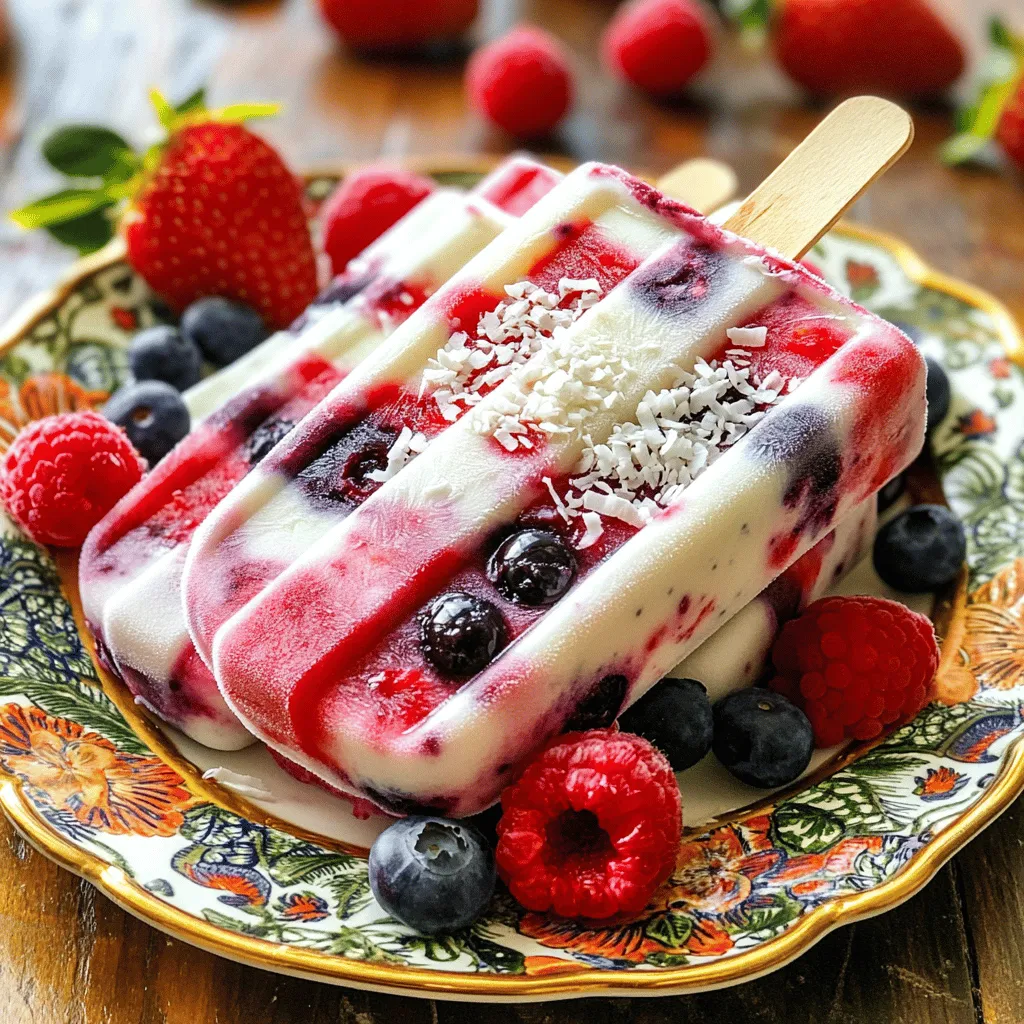
The main ingredients for your berry coconut popsicles are simple and fresh. The mixed berries give the popsicles a vibrant color and a sweet-tart flavor. You can choose any combination of berries you like. I often use strawberries, blueberries, and raspberries for a good balance of taste.
Coconut milk adds a creamy texture. I recommend using canned coconut milk for an extra rich taste. The honey or maple syrup serves as the sweetener, but you can adjust it to your taste. The vanilla extract enhances the flavor, while lime juice adds a bright zing. A pinch of sea salt rounds it all out.
Optional Add-ins
– Whole berries for texture
– Shredded coconut for serving
For added fun, consider using whole berries as an add-in. They create little surprises in each bite. Shredded coconut can be a great topping when you’re ready to serve. It adds a nice crunch and visual appeal.
Substitutions
– Alternative sweeteners (agave syrup, stevia)
– Dairy-free options for coconut milk
If you want to change the sweetness, feel free to use agave syrup or stevia. Both work well in this recipe. You can also find dairy-free coconut milk options at most stores if you prefer those.
This berry coconut popsicle recipe is flexible and allows you to get creative.
Step-by-Step Instructions
Preparation of Ingredients
First, rinse your mixed berries under cold water. Use strawberries, blueberries, and raspberries for the best flavor. After rinsing, pat them dry with a clean towel. Next, measure out 1 cup of coconut milk. Canned coconut milk gives a creamy texture. Then, get your sweeteners ready. You can use either 2 tablespoons of honey or maple syrup, depending on your taste.
Blending Process
Now, it’s time to blend! Combine the berries, coconut milk, sweeteners, 1 teaspoon of vanilla extract, 1 tablespoon of lime juice, and a pinch of sea salt in your blender. Blend it all together on high speed until you achieve a smooth consistency. After blending, taste the mixture. If you want it sweeter, add more honey or maple syrup.
Molding and Freezing
Get your popsicle molds ready. Pour half of the berry mixture into the molds, filling them halfway. Insert wooden sticks into each mold. Freeze this first layer for 1-2 hours until it starts to set but is not completely frozen. While that layer freezes, pour the remaining mixture into a separate bowl. You can add whole or sliced berries to this mix for fun texture. Once the first layer is set, pour the remaining mixture over it. Fill the molds to the top and return them to the freezer. Freeze for 4-6 hours until the popsicles are solid. To remove them, run warm water over the molds for a few seconds. Gently pull the popsicles out and enjoy!
Tips & Tricks
Perfecting the Popsicle Texture
To achieve a creamy texture, always use canned coconut milk. This type has more fat, which gives your popsicles a rich feel. Blend the coconut milk well with the berries. This step breaks down any clumps and helps mix the flavors.
Layering is key for great taste. Pour half of the berry mixture into the molds, then freeze it for a short time. This creates a nice base. When you add the second layer, you get a fun visual and flavor mix.
Serving Suggestions
For a fun presentation, serve the popsicles on a bright plate. Scatter fresh berries around them for color. A sprinkle of shredded coconut adds a nice touch, too. You can also wrap the base of the popsicle in parchment paper. This gives a playful look and makes it easy to hold.
Pair your popsicles with more fresh fruits. Slices of bananas or mangoes work well. You can also drizzle honey or yogurt on top for extra flavor.
Avoiding Common Mistakes
To stop popsicles from sticking in the molds, run warm water over the outside. This helps loosen them. Make sure to freeze them long enough, too. Aim for at least six hours. If they are not frozen enough, they may break when you try to remove them.
Always check the freezing time. If you want firm popsicles, let them freeze overnight. This way, you will have a solid treat ready for hot days.
Variations
Flavor Combinations
You can get creative with flavors in your Berry Coconut Popsicles. For a tropical twist, add pineapple or mango. These fruits blend well with coconut milk, giving you a refreshing treat. If you want something richer, try a chocolate coconut swirl. Simply melt some dark chocolate and swirl it into the berry mixture before freezing. This adds depth and a delightful surprise.
Dietary Adjustments
If you follow a vegan diet, swap honey for maple syrup. This keeps the popsicles sweet without any animal products. For those watching sugar intake, use a low-sugar sweetener like stevia. Remember to adjust the amount based on your taste. These small changes make the popsicles suit your diet without sacrificing flavor.
Seasonal Ingredients
Using seasonal fruits can take your popsicles to the next level. Fresh strawberries in summer or apples in fall can enhance the taste. You can also add herbs like mint or basil for a fresh kick. Just chop them finely and mix them in. This adds an exciting layer of flavor that makes your popsicles unique and delicious.
Storage Info
Freezing Guidelines
To freeze your berry coconut popsicles properly, follow these simple steps:
– Use high-quality molds. Silicone molds work best.
– Pour the mixture into the molds, leaving a little space at the top.
– Insert sticks when the mixture is partially frozen. This helps them stay upright.
– Freeze for at least 4 to 6 hours. They will stay fresh for up to 2 months in the freezer.
Defrosting Tips
When you want to enjoy your popsicles, defrost them safely. Here’s how:
– Run warm water over the outside of the molds for a few seconds.
– Gently pull the popsicles out. This method keeps the texture smooth and creamy.
– Avoid using a knife or any tool to pry them out. That can ruin the shape.
Reusing Popsicle Molds
Taking care of your popsicle molds is easy. Here are some tips:
– Clean them with warm soapy water after each use.
– Let them dry completely before storing.
– Get creative! Use leftover molds for yogurt bites or mini ice cubes for drinks.
These easy storage tips will help you enjoy your berry coconut popsicles longer and keep your kitchen tools in great shape.
FAQs
How long do berry coconut popsicles need to freeze?
Berry coconut popsicles should freeze for about 4 to 6 hours. This time ensures they become firm and solid. If you want a softer texture, you can check them after 4 hours. For best results, leave them in the freezer overnight. This way, they stay ready for a hot day.
Can I use fresh berries instead of frozen?
Yes, you can use fresh berries. Fresh berries add a bright taste and lovely texture. However, frozen berries make it easier to blend smoothly. If you use fresh berries, they might not create the same creamy texture. To compensate, you may need to add a little more coconut milk for smoothness.
What is the best way to remove popsicles from molds?
To remove popsicles easily, run warm water over the outside of the molds. This warms the sides, loosening the popsicles. Make sure to do this for a few seconds. After that, gently pull the popsicles out. If they stick, give them a little twist while pulling.
How can I make these popsicles healthier?
You can make these popsicles healthier by reducing the sweetener. Try using less honey or maple syrup. You can also add more berries to increase fiber and vitamins. Another option is to use unsweetened coconut milk. This keeps the flavor rich without extra sugar.
Making berry coconut popsicles is simple and fun. You only need a few key ingredients, like mixed berries and coconut milk. I shared steps to blend, mold, and freeze to create creamy treats. You can even personalize your popsicles with different flavors or toppings.
Explore seasonal fruits and swaps to fit your diet. Remember, freezing them properly ensures a smooth texture. Enjoy trying new variations, and soon you’ll have delicious popsicles ready in your freezer!


