Skip to content
DisclaimerTerms Of UseGDPR PolicyCookie Policy

Foodish Talk

  • Home
  • Drinks
  • Appetizers
  • Dinner
  • Dessert
  • About
  • Contact
  • Privacy Policy
DisclaimerTerms Of UseGDPR PolicyCookie Policy

Ava

For the chicken, I use: - 2 large chicken breasts - Olive oil - Lemon juice - Oregano - Salt - Pepper I marinate the chicken in olive oil, lemon juice, oregano, salt, and pepper. This adds great flavor and makes the chicken juicy. You can choose either: - 1 cup quinoa - 1 cup bulgur wheat I love quinoa for its nutty flavor, but bulgur is also a tasty choice. Both are healthy and full of fiber. You will need: - 1 cup cherry tomatoes, halved - 1 cucumber, diced - 1 red onion, thinly sliced - 1 cup kalamata olives, pitted and halved - 1 cup feta cheese, crumbled - ¼ cup fresh parsley, chopped The fresh vegetables add crunch and color. They brighten the dish and add nutrients. For the tzatziki sauce, gather: - 1 cup Greek yogurt - 1 cucumber, grated and excess water squeezed out - 2 cloves garlic, minced - 1 tablespoon olive oil - 1 tablespoon lemon juice - Salt and pepper to taste This sauce is creamy and refreshing. It pairs perfectly with the chicken and veggies. You can find the full recipe for this dish above. Marinating the chicken is the first step. In a bowl, mix olive oil, lemon juice, oregano, salt, and pepper. This blend gives the chicken a bright flavor. Add the chicken breasts, making sure they are fully coated. Let them marinate for at least 30 minutes. For best taste, marinate overnight in the fridge. Next, we cook the quinoa or bulgur. First, rinse it under cold water to remove any bitterness. In a pot, bring vegetable or chicken broth to a boil. Once boiling, stir in the quinoa or bulgur. Cover and simmer for about 15 minutes. It should be fluffy and ready to enjoy. Now, let’s prepare the tzatziki sauce. In a mixing bowl, combine Greek yogurt, grated cucumber, minced garlic, olive oil, and lemon juice. Add salt and pepper to taste. Mix everything well until smooth. Chill in the fridge until you are ready to serve. It’s time to cook the chicken. Preheat your grill or grill pan to medium heat. Take the chicken out of the marinade and place it on the grill. Cook for about 5-7 minutes on each side. The chicken should reach an internal temperature of 165°F (75°C). After cooking, let it rest for about 5 minutes, then slice it. Assembling the bowls is fun! Start with a scoop of quinoa or bulgur as the base. Top it with sliced chicken, halved cherry tomatoes, diced cucumber, red onion, olives, and crumbled feta cheese. For the finishing touch, drizzle a generous dollop of tzatziki sauce on top. Garnish with fresh parsley for a pop of color. Now you have a vibrant and nourishing meal. Enjoy your Greek chicken bowls! For the full recipe, refer to the previous section. To get juicy grilled chicken, start with a good marinade. Use olive oil, lemon juice, oregano, salt, and pepper to soak the chicken. Let it marinate for at least 30 minutes. This step adds flavor and keeps the chicken moist. When cooking, preheat your grill to medium heat. Cook each side for 5-7 minutes. Check that the chicken reaches 165°F (75°C). Let it rest before slicing. This helps keep the juices inside. Tzatziki is key to your Greek chicken bowls. Use high-quality Greek yogurt for a thick, creamy texture. Grate your cucumber and squeeze out excess water. This step prevents a watery sauce. Mix in minced garlic, olive oil, lemon juice, salt, and pepper. Taste and adjust the seasoning if needed. For extra freshness, add chopped fresh dill or mint. Chill the sauce before serving. This makes the flavors pop! Meal prep can save time during busy weeks. Start by marinating several chicken breasts at once. Cook them all and slice them up. Store the chicken in airtight containers in the fridge. Prepare a big batch of quinoa or bulgur too. Store it separately to keep it fluffy. Chop your veggies in advance and keep them fresh in the fridge. This way, you can quickly assemble your bowls when hunger strikes. Presentation matters in making your meal inviting. Use colorful, fresh veggies like cherry tomatoes and cucumbers. Layer the ingredients in your bowl for a beautiful look. Start with quinoa or bulgur as a base. Add the chicken on top, then pile on the veggies. Finish with a generous dollop of tzatziki. Sprinkle fresh parsley for a pop of color. A well-presented bowl is as pleasing to the eyes as it is to the taste buds. For more details, check out the Full Recipe. {{image_2}} You can switch the chicken for other proteins. Try lamb or shrimp for a twist. Both options offer rich flavors that pair well with the bowl's ingredients. If you go for lamb, marinate it just like the chicken. For shrimp, just cook them until pink. This keeps the meal quick and easy. To make this dish vegetarian, use chickpeas or grilled vegetables. Chickpeas add protein and fiber. They also soak up the marinade well. Grilled vegetables like zucchini, bell peppers, or eggplant bring great taste. Just marinate and grill them until tender. You'll enjoy a hearty, satisfying meal without meat. If you're gluten-free, swap quinoa or bulgur with rice or cauliflower rice. Both options work well and keep the bowl filling. For a fun touch, try brown rice for more texture. Cauliflower rice keeps it light and low-carb. Enjoy the same flavors without any gluten. Feel free to swap ingredients based on what you have. Use different olives or cheeses from your area. For a Mediterranean twist, add artichokes or roasted red peppers. You can also try different herbs like dill or mint for a fresh kick. These changes keep the dish exciting and unique every time. Check out the Full Recipe for more details on creating your Greek Chicken Bowls! To keep your Greek chicken bowls fresh, store leftovers in an airtight container. Place the chicken, quinoa, and veggies in separate sections or containers. This way, each part stays crisp and tasty. They can last in the fridge for up to three days. When ready to eat, a quick check for any off smells or colors is always smart. If you want to save your Greek chicken bowls for later, freezing is a great option. First, let everything cool down to room temperature. Then, divide the chicken and quinoa into portions. Use freezer-safe bags or containers. Make sure to remove as much air as possible to avoid freezer burn. These can stay good for up to three months in the freezer. Remember, fresh vegetables do not freeze well, so it's best to add them later. When you're ready to enjoy your Greek chicken bowls again, reheating is simple. If you stored them in the fridge, you can heat in the microwave. Cover the bowl to keep moisture in and warm for 1-2 minutes. For frozen bowls, thaw them overnight in the fridge. Then, microwave or heat on the stove until hot. Always check that chicken reaches 165°F before eating. Enjoy your meal just like the first time! If you don't have quinoa or bulgur, you can use rice or couscous. Both options work well as a base for your Greek chicken bowls. Rice adds a nice texture. Couscous cooks quickly and absorbs flavors well. You can also try farro or barley for a different taste. To kick up the heat, add some crushed red pepper flakes. You can also mix in diced jalapeños or a splash of hot sauce. If you like a smoky flavor, try smoked paprika. Just a little goes a long way. Adjust the spices based on your taste. Yes! This meal is great for meal prep. You can marinate the chicken a day before. Cook the quinoa or bulgur ahead of time and store it in the fridge. Chop your veggies in advance too. Just assemble the bowls when you're ready to eat. This saves time during busy days. Consider serving a Greek salad or some roasted vegetables. A light lemony side works well too. Pita bread or hummus are tasty choices as well. These sides complement the flavors in the bowls. They also add extra freshness to your meal. Tzatziki sauce is not strictly necessary, but it adds a creamy and cool element. It enhances the flavors of the chicken and veggies. If you prefer, you can skip it or use a yogurt dressing instead. However, I recommend trying it for the full experience! For the complete recipe, check out the Full Recipe. This blog post covered how to make delicious Greek chicken bowls. We discussed the key ingredients, from chicken and marinade to fresh veggies and tzatziki. You learned step-by-step instructions for marinating, cooking, and assembling your bowls. We also shared tips for great seasoning and meal prep. Plus, we offered variations to suit different diets and storage info for leftovers. Now, it’s time to enjoy these flavorful bowls. Use what you learned to create your version! Healthy meals like this can make a big difference in your lifestyle.

Greek Chicken Bowls Flavorful and Nourishing Meal

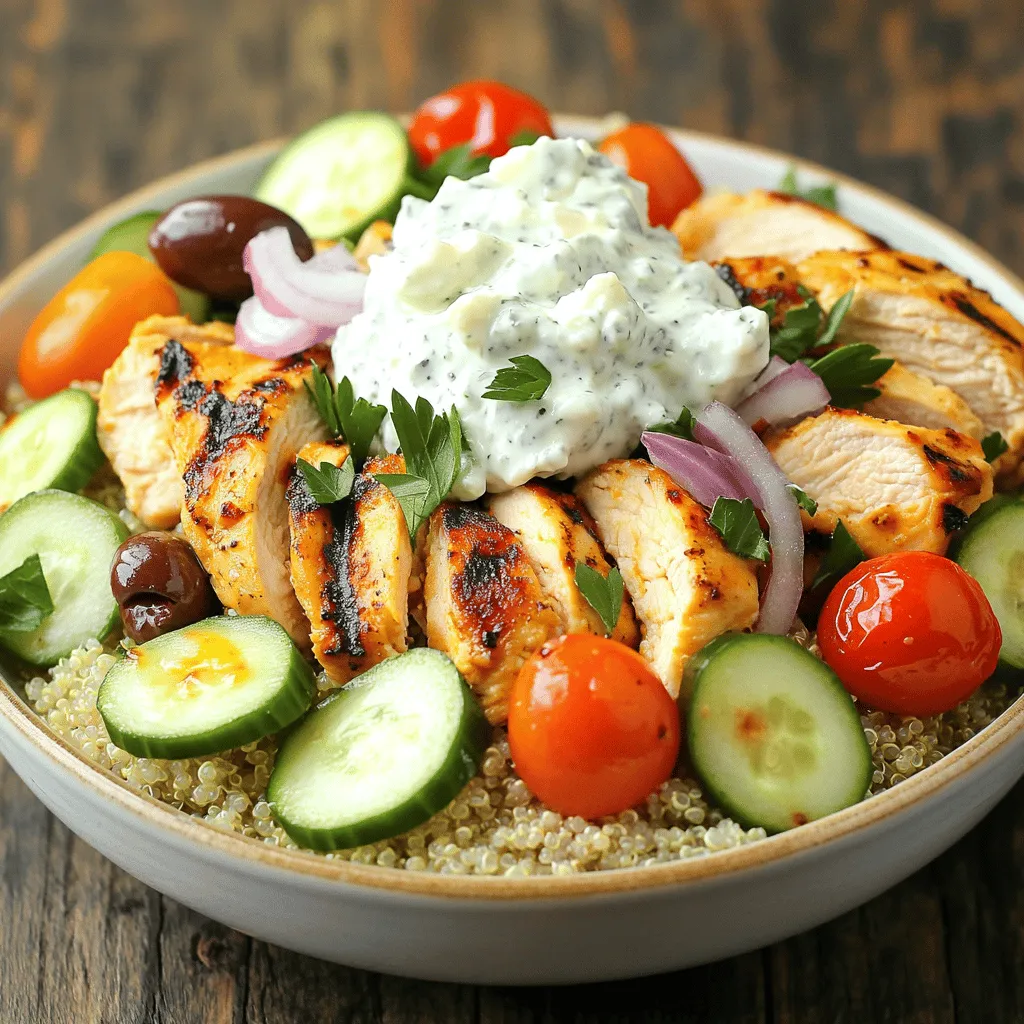
Are you ready to enjoy a meal that’s tasty and healthy? Greek Chicken Bowls pack bold flavors and nutrition in

To make these tasty garlic knots, you will need: - 1 package (1.5 lbs) pizza dough (store-bought or homemade) - 4 tablespoons unsalted butter, melted - 5 cloves garlic, minced - 1 teaspoon dried oregano - 1 teaspoon dried basil - 1 teaspoon garlic powder - Salt, to taste - Freshly cracked black pepper, to taste - Fresh parsley, chopped (for garnish) - Grated Parmesan cheese (optional, for serving) If you want to switch up the pizza dough, you can use bread dough or even biscuit dough. Both options work well for garlic knots. Just make sure the dough is soft and easy to shape. When you select herbs and garlic, look for bright green leaves and firm bulbs. Fresh garlic should feel hard and not sprout. For herbs, smell them! Fresh herbs should have a strong aroma. This will add more flavor to your knots. If you can’t find fresh parsley, try using chives or thyme. They give a nice taste too. With these tips, you can create the best garlic knots ever. For the full recipe, check the section above. To make garlic knots, we start with the dough. You can use store-bought pizza dough or make your own. If you choose store-bought, let it sit for about 30 minutes. This makes it easier to work with. Next, sprinkle some flour on your counter. Roll out the dough into a rectangle, about ½ inch thick. Then, slice the dough into strips that are about 1 inch wide and 5-6 inches long. Now comes the fun part! Take each strip and tie it into a knot. Tuck the ends underneath to keep them secure. Place each knot on a baking sheet lined with parchment paper. This helps with clean-up later. Preheat your oven to 400°F (200°C). This step is key for crispy knots. While the oven heats, prepare the garlic butter mix. In a small bowl, combine melted butter, minced garlic, oregano, basil, garlic powder, and a pinch of salt and pepper. Once the oven is ready, brush the garlic butter mixture over each knot. Make sure to cover them well! Bake the knots for 15-18 minutes. They should look golden and puffed when done. When the garlic knots finish baking, take them out of the oven. Brush them with any leftover garlic butter. This adds more flavor. Garnish with chopped parsley for a fresh touch. If you like, sprinkle some grated Parmesan cheese on top. Serve the knots warm. They are a tasty treat and perfect for sharing. Enjoy your garlic knots! To make great garlic knots, avoid common mistakes. First, don’t skip the dough resting time. Letting the dough relax helps it rise better. If you roll the dough too thin, knots won’t puff well. Aim for a thickness of about half an inch. Another tip is to tie the knots gently. Pulling too tight can make them dense. You want them fluffy and airy. Use fresh dough for the best texture. If your dough seems old, it may not rise properly. To make your garlic knots even better, think about adding spices. Red pepper flakes can give a nice kick. You can also add fresh herbs, like thyme or rosemary, for an earthy taste. When making the garlic butter, customize it to your liking. Mix in some lemon zest for a bright twist. You could also swap out regular butter for herb-infused olive oil. This adds a unique flavor and keeps things light. For the full recipe, check out the detailed instructions above. Enjoy crafting your own garlic knots! {{image_2}} You can easily add flavor to your garlic knots. One of the best ways is to incorporate cheese. Try adding mozzarella inside the dough before tying the knots. For a cheesy twist, sprinkle some grated Parmesan on top before baking. You can also mix different herbs into your garlic butter. Adding red pepper flakes gives a nice kick. Another fun option is to stuff the knots with cooked spinach or sun-dried tomatoes. This adds a burst of flavor. You can experiment with smoked gouda or feta cheese for a unique taste. If you need gluten-free options, use gluten-free pizza dough. Many brands offer good choices at stores. Just make sure to follow the package instructions for best results. For vegan alternatives, replace butter with olive oil or vegan butter. Nutritional yeast is a great substitute for cheese. It adds a cheesy flavor without dairy. You can also use non-dairy milk to brush on the knots for added richness. Making these simple changes lets everyone enjoy garlic knots. You can find the full recipe to explore more ways to delight your taste buds! To keep garlic knots fresh, you need to store them right. Let the knots cool down first. Place them in an airtight container. You can keep them in the fridge for up to three days. If you want to keep them longer, freeze them! Wrap each knot in plastic wrap and put them in a freezer bag. They can stay frozen for up to three months. When you're ready to eat, just take out what you need. Reheating garlic knots can be easy and quick. To keep the texture nice, use the oven. Preheat your oven to 350°F (175°C). Place the knots on a baking sheet. Bake them for about 10 minutes. This way, they will get warm and stay soft. You can also use a microwave. Just heat them for about 20-30 seconds. But be careful! They might get a bit chewy this way. For the best taste, stick to the oven. Enjoy your garlic knots warm and tasty! What should I serve with garlic knots? You can serve garlic knots with marinara sauce for dipping. They also pair well with a fresh salad or a warm bowl of soup. For a fun twist, try them with a cheese platter. Garlic knots are great as a snack, appetizer, or side dish. How long do garlic knots stay fresh? Garlic knots stay fresh for about 2 to 3 days at room temperature. To keep them longer, store them in an airtight container in the fridge. They will last for up to a week this way. If you want to keep them for even longer, freeze them in a zip-top bag for up to 3 months. Can I use homemade pizza dough for this recipe? Yes, you can use homemade pizza dough for garlic knots. In fact, it can give your knots a more personal touch. Just ensure the dough is well-kneaded and has risen properly before shaping the knots. Follow the same steps as you would with store-bought dough. What is the best way to make garlic knots crispy? To make garlic knots crispy, make sure to bake them until they are golden brown. Brush them with garlic butter before and after baking for extra flavor and crunch. Also, spacing the knots apart on the baking sheet helps them crisp evenly. You learned how to make delicious garlic knots with fresh ingredients and step-by-step instructions. We covered tips for perfect texture and flavor, plus fun variations to try. Remember to store your knots right for freshness and reheat them well. Making garlic knots can be easy and fun. With these methods, you can enjoy a tasty treat at home anytime. Now, go and impress your family and friends with your new skills!

Garlic Knots Irresistible Homemade Bread Delight

Garlic knots are a tasty treat that everyone loves! In this guide, you’ll learn how to make these delicious bites

To make crispy chicken nuggets, gather these items: - 1 pound boneless, skinless chicken breasts, cut into bite-sized pieces - 1 cup buttermilk (or milk with 1 tablespoon vinegar added) - 1 teaspoon garlic powder - 1 teaspoon onion powder - 1 teaspoon smoked paprika - 1 teaspoon salt - 1/2 teaspoon black pepper - 1 cup all-purpose flour - 2 large eggs, beaten - 2 cups panko breadcrumbs - Oil for frying (such as vegetable or canola oil) Buttermilk is key for flavor and moisture. It helps the chicken stay tender. The spices add depth to the taste. Garlic powder and onion powder bring a savory kick. Smoked paprika gives a nice color and a hint of smokiness. The mix of spices makes every bite exciting. If you have allergies, here are easy swaps: - For dairy: Use non-dairy milk with vinegar instead of buttermilk. - For gluten: Swap all-purpose flour and breadcrumbs with gluten-free options. - For eggs: Use a flaxseed mix or unsweetened applesauce in place of eggs. These changes keep the recipe safe and just as tasty! Start by making the chicken marinade. In a large bowl, mix buttermilk, garlic powder, onion powder, smoked paprika, salt, and black pepper. This mix adds flavor and tenderizes the chicken. Next, cut your chicken breasts into bite-sized pieces. Add them to the marinade, making sure they are fully covered. Cover the bowl with plastic wrap. Place it in the fridge for at least 30 minutes. If you have more time, let it marinate for up to 2 hours. The longer it sits, the better the flavor. Now, it’s time to set up your breading station. Grab three shallow bowls. In the first bowl, add all-purpose flour. In the second bowl, beat two large eggs. In the third bowl, place the panko breadcrumbs. These breadcrumbs give the nuggets a nice crunch. When the chicken is ready, take it out of the marinade. Let the excess buttermilk drip off. First, coat each piece in flour, shaking off the extra. Then, dip it into the beaten eggs. Finally, cover the chicken in panko breadcrumbs. Make sure each piece is well-coated, so they get crispy when cooked. Next, heat oil in a deep skillet or fryer to 350°F (175°C). You want enough oil to cover the nuggets halfway. Avoid overcrowding the pan to ensure even cooking. Carefully place a few nuggets in the hot oil. Fry them for about 4 to 5 minutes on each side. Keep an eye on them until they turn golden brown. Use a slotted spoon to take the nuggets out of the oil. Drain them on a paper towel-lined plate to remove excess oil. Repeat this process with the remaining chicken pieces. For the best results, make sure the internal temperature reaches 165°F (75°C). Now you're ready to enjoy your crispy chicken nuggets! For the full recipe, check the recipe section. To get crispy chicken nuggets, use panko breadcrumbs. They add great crunch. First, coat the chicken in flour. Then, dip it in beaten eggs. Finally, cover it with panko. Fry them in hot oil. This method locks in moisture while keeping the outside crunchy. For frying, I suggest using vegetable or canola oil. These oils have high smoke points. They can handle the heat without burning. You want enough oil to cover the nuggets halfway. This helps them cook evenly and become crispy. One common mistake is overcrowding the pan. If you add too many nuggets, they will steam instead of fry. Fry them in small batches. Another mistake is not letting the oil heat up enough. Use a thermometer to check the temperature. Oil should be about 350°F. This ensures a golden, crispy finish. {{image_2}} You can make your chicken nuggets gluten-free easily. Instead of all-purpose flour, use gluten-free flour or cornstarch. For the breading, swap panko with gluten-free breadcrumbs or crushed rice cereal. This keeps the crunch while being safe for those with gluten allergies. To spice things up, add cayenne pepper to the buttermilk marinade. You can also mix in some hot sauce for an extra kick. For herb flavors, try adding dried oregano or thyme to the breading mix. These changes make your nuggets unique and full of flavor. Frying gives you that crispy texture we all love. But you can also bake your nuggets for a healthier option. Preheat your oven to 400°F (200°C). Place the breaded nuggets on a baking sheet lined with parchment paper. Spray them lightly with oil. Bake for 15-20 minutes, flipping halfway through. They won't be as crispy, but they will still taste great. For the full recipe, check out the Crispy Chicken Nuggets section. To keep your crispy chicken nuggets fresh, store them in an airtight container. Let the nuggets cool down first. If you put hot nuggets in the container, moisture builds up. This moisture can make them soggy. Use parchment paper between layers if you stack them. This helps keep them crisp. When you are ready to enjoy your nuggets again, reheating is key. The oven works best to keep them crispy. Preheat your oven to 400°F (200°C). Place the nuggets on a baking sheet. Heat them for about 10-15 minutes. Flip them halfway through for even warmth. You can also use an air fryer. Set it to 375°F (190°C) and cook for about 5-7 minutes. Both methods help keep that crunchy outside. To freeze your crispy chicken nuggets, first, let them cool completely. Place them in a single layer on a baking sheet. Freeze them for about an hour. This step prevents them from sticking together. After freezing, transfer them to a freezer-safe bag. Remove as much air as you can. Label the bag with the date. You can store them like this for up to three months. When you're ready to eat, cook them straight from the freezer. Just add a few extra minutes to your cooking time. You can make crispy chicken nuggets without frying by baking them. Preheat your oven to 425°F (220°C). After breading the nuggets, place them on a baking sheet lined with parchment paper. Spray the nuggets lightly with cooking oil. Bake for 20-25 minutes, turning halfway through. This method gives you a healthier option with less oil. You still get a nice crunch! Dipping sauces can enhance your chicken nuggets. Some popular choices include: - Honey mustard - BBQ sauce - Spicy sriracha mayo - Ranch dressing - Sweet and sour sauce These sauces add flavor and fun. Feel free to mix and match based on your taste. Yes, you can meal prep crispy chicken nuggets. Make a batch and store them in the fridge for up to three days. To reheat, bake them in the oven at 375°F (190°C) for about 10-15 minutes. You can also freeze them for longer storage. Just ensure they are fully cooled before freezing. This way, you have easy meals ready to go! This article covered the key ingredients, step-by-step instructions, and useful tips for making crispy chicken nuggets. You learned how buttermilk and spices play a role in flavor. I shared ways to avoid common mistakes and how to store leftovers properly. In conclusion, with practice, you can make tasty nuggets at home. Experiment with flavors and techniques to find your favorite version. Happy cooking!

Crispy Chicken Nuggets Quick and Easy Recipe Guide

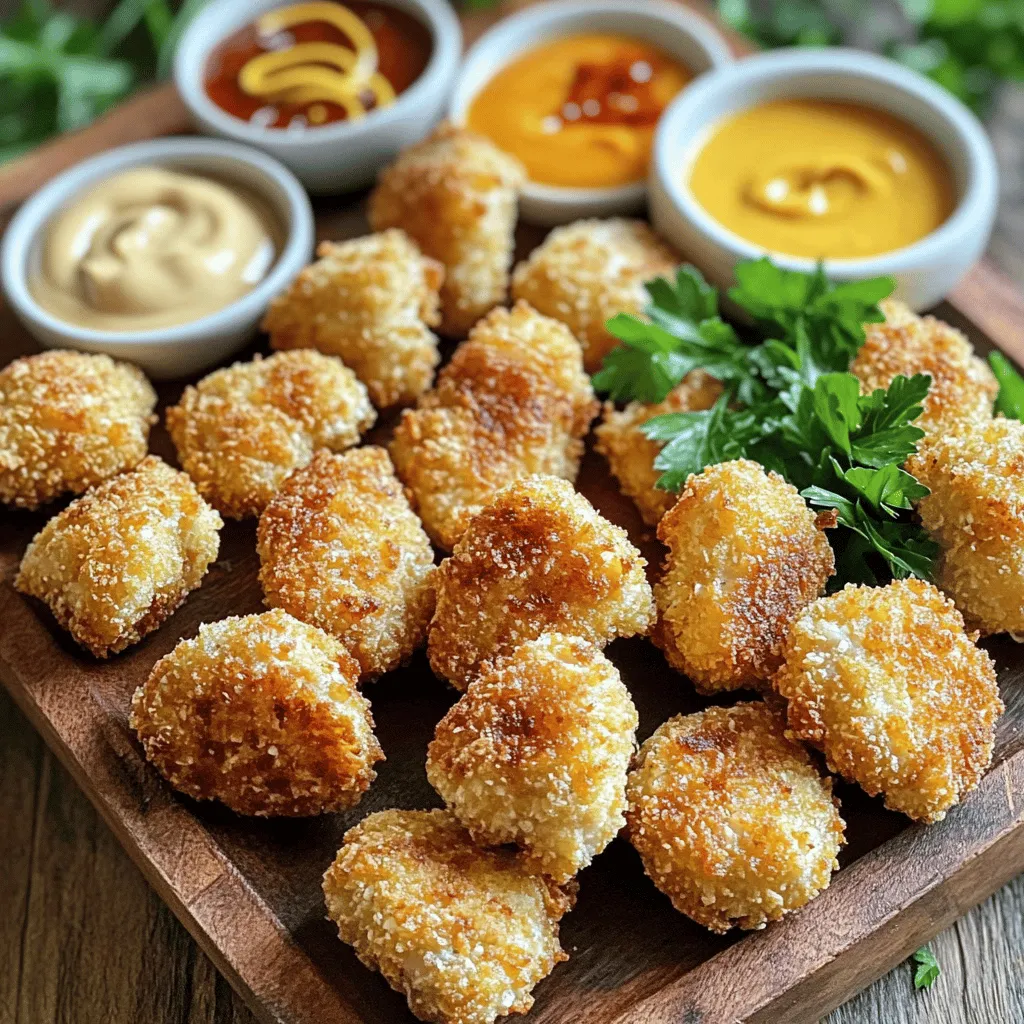
Craving delicious crispy chicken nuggets? You’ve come to the right place! In this quick and easy recipe guide, I will

To make fluffy biscuits, gather these key items: - 2 cups all-purpose flour - 1 tablespoon baking powder - 1 teaspoon baking soda - 1 teaspoon salt - 1/4 cup cold unsalted butter, cubed - 3/4 cup buttermilk (you can use regular milk with a splash of lemon juice) - 1 tablespoon honey (optional, to add sweetness) - Extra flour for dusting These ingredients work together to create a light and airy texture. The buttermilk adds a slight tang and helps with rising. Cold butter is crucial because it creates flaky layers. If you need to swap ingredients, here are some ideas: - Flour: You can use whole wheat flour, but it may change the texture. - Baking powder: If you run out, use 1/4 teaspoon baking soda and 1/2 teaspoon vinegar. - Butter: Coconut oil or shortening can replace butter. - Buttermilk: Mix regular milk with vinegar or yogurt for a quick substitute. These swaps can help you stay flexible in the kitchen while still making tasty biscuits. When selecting your ingredients, keep these tips in mind: - Flour: Look for a brand that is finely milled for the best texture. - Baking powder: Check the expiration date for freshness. Old baking powder may not rise well. - Butter: Choose unsalted butter to control the salt level in your biscuits. - Buttermilk: If using store-bought buttermilk, check for a creamy texture. Choosing quality ingredients sets the foundation for great flavor and texture. This attention to detail makes a noticeable difference in your final biscuits. For the complete process, see the Full Recipe. To make fluffy homemade biscuits, follow these simple steps. First, preheat your oven to 450°F (232°C). Line a baking sheet with parchment paper to prevent sticking. In a large bowl, mix 2 cups of all-purpose flour, 1 tablespoon of baking powder, 1 teaspoon of baking soda, and 1 teaspoon of salt. This mix creates the base for your biscuits. Next, add 1/4 cup of cold, cubed unsalted butter. Use a pastry cutter or your fingers to blend until it looks like coarse crumbs. Now, pour in 3/4 cup of buttermilk. If you don’t have buttermilk, mix regular milk with a splash of lemon juice. You can add 1 tablespoon of honey for a hint of sweetness. Use a wooden spoon to stir gently until just combined. Your dough will be a bit sticky, which is perfect! On a floured surface, turn out the dough and pat it into a rectangle, about 1-inch thick. Be careful not to overwork the dough. This keeps your biscuits light and fluffy. Fold the dough over itself 3-4 times to create layers, which add flakiness. Then roll it out again into a 1-inch thick rectangle. Using a round biscuit cutter or a glass, cut out biscuits. Place them on your prepared baking sheet. Press the cutter straight down without twisting for the best rise. Gather any scraps, re-roll, and cut more biscuits. Bake for 12-15 minutes. Look for golden brown tops. Enjoy your warm biscuits with butter, jam, or honey. - Mixing Dry Ingredients: Make sure to whisk the dry ingredients well. This helps the baking powder and soda distribute evenly. - Butter Temperature: Keep your butter cold. This helps create flaky layers. - Handling the Dough: Always handle the dough gently. Overworking it can make your biscuits tough. - Cutting the Biscuits: Use a sharp cutter. A dull cutter can squash the dough and prevent rising. - Baking Time: Keep an eye on the biscuits. Ovens vary, so check them a couple of minutes early. - Using Warm Butter: Warm butter can lead to flat biscuits. Always use cold butter. - Not Measuring Ingredients: Accurate measurements are key. Use dry measuring cups for flour. - Overmixing the Dough: Stop mixing as soon as the dough comes together. Overmixing can ruin texture. - Twisting the Cutter: Twisting when cutting can seal the edges. This stops the biscuits from rising properly. - Skipping the Oven Preheat: Always heat your oven first. A hot oven is crucial for a good rise. Follow these steps, tips, and avoid common mistakes. Soon, you'll be enjoying delicious, fluffy homemade biscuits. For the complete recipe, check out the Full Recipe. To make your biscuits fluffy, use cold butter. Cold butter creates steam when baking, which helps the biscuits rise. Cut the butter into the flour mixture until it looks like coarse crumbs. This step is key for lightness. Fold the dough over itself multiple times to create layers. These layers help make each biscuit flaky and airy. To keep your biscuits moist, don’t overmix the dough. Stir just enough to combine the wet and dry ingredients. Also, using buttermilk adds moisture, making biscuits tender. If you want a touch of sweetness, add honey to the mix. This can help keep the biscuits soft and flavorful. Ovens can vary in heat. If your oven runs hot, check biscuits a few minutes early. If your oven is cooler, they may need extra time. Always look for golden tops as a sign they are done. For even baking, try rotating the baking sheet halfway through. This helps ensure all biscuits bake evenly. {{image_2}} The buttermilk biscuit recipe is a classic. It gives a rich flavor and fluffy texture. When you mix buttermilk with baking soda, it creates a great rise in your biscuits. This recipe uses simple ingredients like flour, butter, and buttermilk. If you need gluten-free biscuits, you can swap regular flour for a gluten-free blend. Look for one that has xanthan gum, as it helps bind the ingredients. Use the same amount as you would with regular flour. This keeps your biscuits light and fluffy, just like the original recipe. You can make biscuits sweet or savory. For sweet biscuits, add chocolate chips or dried fruit. A little honey or sugar can also add sweetness. For savory options, mix in cheese or herbs. Try cheddar and chive for a tasty twist. You can even add cooked bacon for extra flavor. Explore these variations to find your favorite! For the full recipe, check out the Fluffy Buttermilk Biscuits 🥯 section. To keep your biscuits fresh, store them in an airtight container. This keeps out air and moisture. Place a paper towel inside to absorb extra moisture. Biscuits stay soft for about two days at room temperature. If you want them to last longer, refrigerate them. Just remember to wrap them tightly. To reheat your biscuits, preheat the oven to 350°F (175°C). Place the biscuits on a baking sheet. Heat them for about 5 to 10 minutes. This warms them through and keeps them fluffy. You can also use a microwave for quick heating. Just wrap them in a damp paper towel and heat for about 15 seconds. Freezing biscuits is a great way to save some for later. After baking, let them cool completely. Wrap each biscuit in plastic wrap and place them in a freezer bag. Make sure to remove as much air as possible. You can freeze them for up to three months. To use, thaw them in the fridge overnight, then reheat as mentioned earlier. Enjoy your homemade biscuits anytime! For the full recipe, check out the Fluffy Buttermilk Biscuits 🥯 section. If your biscuits turn out too dense, don’t worry! You can fix this. First, check your measurements. Too much flour can weigh them down. Make sure to use a light hand when measuring. Next, use fresh baking powder. Old baking powder loses its power. You can also try cutting the butter into smaller pieces. This helps create more air pockets, which makes them fluffier. Lastly, don’t over-mix the dough. Mix just until combined to keep them light. Yes, you can still make great biscuits without buttermilk! If you don’t have any, use regular milk. Just add a splash of lemon juice or vinegar to it. Let it sit for about five minutes. This will mimic buttermilk's tangy taste and help with rise. You can also use yogurt or sour cream. Just thin them out with a little water or milk until you get a smooth consistency. You will know your biscuits are done when they look golden brown on top. If you press them gently, they should feel firm but soft. You can also check the bottom. It should be lightly browned. If you want to be sure, you can insert a toothpick into the center. If it comes out clean, your biscuits are ready. Enjoy them warm from the oven! You learned about the key ingredients for great biscuits and their best substitutes. I detailed each step to make perfect homemade biscuits and ways to avoid common mistakes. You discovered helpful tips to achieve a light and fluffy texture, along with various biscuit recipes to try. Proper storage and reheating methods ensure your biscuits stay fresh. Remember, practice makes perfect. With these guidelines, you can bake delicious biscuits every time. Enjoy your baking journey!

Homemade Biscuits Simple Fluffy Texture Recipe

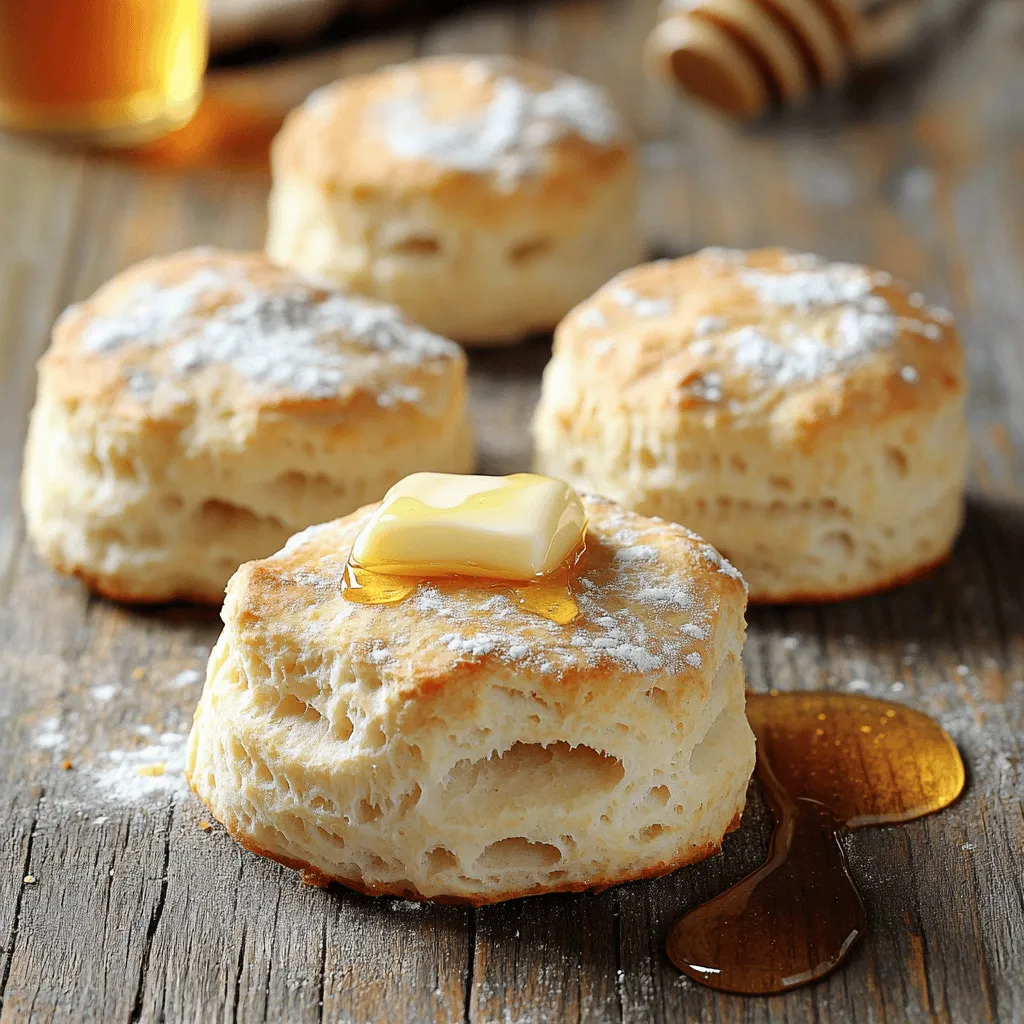
Are you ready to elevate your baking skills with homemade biscuits? This simple recipe guarantees a fluffy texture that will

To make these tasty mini cheesecakes, you need simple ingredients. Here’s the list: - 1 cup graham cracker crumbs - 1/4 cup unsalted butter, melted - 2 tablespoons brown sugar - 8 oz cream cheese, softened - 1/2 cup granulated sugar - 1 teaspoon vanilla extract - 1/4 cup sour cream - 2 large eggs - 1 cup crushed pineapple, drained - Maraschino cherries for garnish These ingredients blend well together. The graham crackers form a crunchy base. Cream cheese gives a rich taste. Pineapple adds a sweet and tangy flavor. You can get creative with your cheesecakes. Here are a few ideas for toppings: - Sliced fresh pineapple - Whipped cream - Toasted coconut - Chopped nuts These add fun textures and flavors to your dessert. They also make your cheesecakes look beautiful. To make your life easier, gather these tools: - Muffin tin - Paper liners - Mixing bowls - Electric mixer - Spatula - Measuring cups and spoons Having the right tools makes the process smooth. It ensures every step is easy and fun. Follow the full recipe to guide you through making these delightful treats. To start, preheat your oven to 325°F (160°C). Grab a mixing bowl and add: - 1 cup graham cracker crumbs - 1/4 cup unsalted butter, melted - 2 tablespoons brown sugar Mix these together until it looks like wet sand. Now, line a muffin tin with paper liners. Spoon the crust mixture into each liner. Press it down firmly to form a solid base. Bake the crusts for 5-7 minutes until slightly golden. Once done, remove them from the oven and let them cool. In a large mixing bowl, beat 8 oz of softened cream cheese with an electric mixer. Mix until it’s smooth. Next, add: - 1/2 cup granulated sugar - 1 teaspoon vanilla extract Blend these ingredients until they combine well. Then, add in 1/4 cup sour cream and mix until it's fully incorporated. Now, add 2 large eggs, one at a time. Mix on low speed after each egg until just combined. Avoid overmixing to keep it light and fluffy. Finally, gently fold in: - 1 cup crushed pineapple, drained Ensure the pineapple spreads evenly throughout the mixture. Now it’s time to fill the cups. Pour the cheesecake batter into each muffin tin, filling just above the crust. Bake for 20-25 minutes, or until the edges set but the center has a slight jiggle. After baking, turn off the oven but leave the cheesecakes inside for 10 more minutes. This helps them cool gradually. Once cooled, take them out and let them sit at room temperature. Then, transfer them to the refrigerator. Chill for at least 2 hours or until fully set. For the final touch, before serving, top each mini cheesecake with a maraschino cherry and a small scoop of crushed pineapple. Enjoy your delightful treat! For the full recipe, check out the previous section. To make these cheesecakes shine, use room-temperature cream cheese. It blends smooth and creamy. When mixing, go slow. This keeps air from getting in and helps avoid cracks. Also, don’t skip the chilling time. Chilling helps the flavors meld and sets the texture. For crusts, press firmly to avoid crumbly bases. A firm crust gives a solid bite. One big mistake is overmixing the batter. This adds air and causes cracks. Another error is not draining the crushed pineapple well. Excess moisture can make the cheesecake soggy. Lastly, don’t rush the cooling process. Let the cheesecakes cool in the oven first. This slow cooling helps prevent cracks. Serve these mini cheesecakes cold for the best taste. Top each one with a maraschino cherry. It adds color and flavor. For a fun twist, add a small scoop of crushed pineapple on top. You can also use a mint leaf for fresh flavor. Arrange them on a platter for a beautiful display. For a special touch, drizzle some caramel sauce over the cheesecakes. For the complete recipe, check out the Full Recipe section. {{image_2}} You can play with flavors to make these cheesecakes your own. Try adding coconut for a tropical twist. Mix in some lime zest for a zingy taste. You can also swirl in caramel sauce for a rich, sweet layer. Each variation brings a new joy to your mini cheesecakes. Want gluten-free cheesecakes? Use gluten-free graham crackers for the crust. For a vegan option, swap the cream cheese for a plant-based cream cheese. You can also replace the eggs with flaxseed meal mixed with water. These changes keep the taste great while meeting dietary needs. Serve your mini cheesecakes in fun ways to impress guests. Use colorful plates or jars for a cute look. Top with fresh fruit or whipped cream for added flair. You can also drizzle with honey or chocolate sauce. These touches make each serving special and inviting. For the full recipe, check out the [Full Recipe]. To keep your mini cheesecakes fresh, store them in the fridge. Use an airtight container. This helps prevent drying out and keeps them tasty. If you plan to keep them longer, wrap each cheesecake in plastic wrap before placing them in the container. This adds extra protection. To enjoy these cheesecakes warm, heat them gently. Use a microwave set to low power. Heat for about 10-15 seconds. Check to avoid overheating. If you prefer them chilled, serve them straight from the fridge. They taste great cold, too. Add extra crushed pineapple on top for added flavor. These cheesecakes stay fresh in the fridge for about 5 days. If you want to freeze them, wrap each one tightly in plastic wrap, then place them in a freezer bag. They can last for up to 2 months in the freezer. To thaw, place them in the fridge overnight. For the full recipe, check out the provided link. Mini Pineapple Upside-Down Cheesecakes stay fresh for about 5 days in the fridge. Store them in an airtight container to keep them tasty. If you freeze them, they can last for about 2 months. Just thaw them overnight in the fridge before serving. Yes, you can make these cheesecakes a day in advance. This gives them time to set and taste even better. Just keep them in the fridge until you’re ready to serve. If you need to swap ingredients, here are some easy ideas: - Use digestive biscuits instead of graham crackers for the crust. - Coconut cream can replace sour cream for a tropical twist. - For a dairy-free option, try vegan cream cheese. To prevent overmixing, mix on low speed and add ingredients one at a time. Beat the eggs in slowly and stop mixing once everything is just combined. This keeps your cheesecakes light and fluffy, which is key for a great texture. For the complete process, check out the Full Recipe. In summary, you learned about making Mini Pineapple Upside-Down Cheesecakes. We covered key ingredients, step-by-step instructions, and helpful tips. You also discovered variations and storage options. Remember, simple adjustments can change the flavors. Focus on quality ingredients and avoid common mistakes. Experimenting makes baking fun. Enjoy creating your own delightful cheesecakes!

Mini Pineapple Upside-Down Cheesecakes Delight

Get ready for a treat with Mini Pineapple Upside-Down Cheesecakes! These delightful bites combine sweet pineapple with rich cheesecake for

- 1 medium head of cauliflower (or 4 cups pre-riced cauliflower) - 1 cup cherry tomatoes - 1 cup cooked chickpeas - 1 small red bell pepper - 1 small cucumber - ½ avocado - ¼ cup feta cheese - 2 tablespoons olive oil - 1 tablespoon lemon juice - 1 teaspoon garlic powder - ½ teaspoon cumin - Salt and pepper to taste - Fresh parsley for garnish Cauliflower rice is a great base for a healthy bowl. Start with one medium head of cauliflower. If you want a quick option, just grab 4 cups of pre-riced cauliflower. Ricing fresh cauliflower is easy. Cut it into florets and pulse it in a food processor until it looks like rice. Next, add some color and flavor with cherry tomatoes, chickpeas, red bell pepper, and cucumber. These veggies not only add taste but also make the bowl pretty. Slice half an avocado and a sprinkle of feta cheese for creaminess and tang. Drizzle 2 tablespoons of olive oil and 1 tablespoon of lemon juice over your veggies. This will brighten up the dish. For seasoning, use 1 teaspoon of garlic powder and ½ teaspoon of cumin. Add salt and pepper to taste. Finish with fresh parsley for a pop of green and flavor. This recipe is all about balance and freshness. You can find the full recipe above for more details. Enjoy making your Cauliflower Rice Bowl! To make cauliflower rice, start with a medium head of cauliflower. Cut it into small florets. Place the florets in a food processor. Pulse until the pieces look like rice grains. This fresh riced cauliflower gives great flavor and texture. If you want a quicker method, use pre-riced cauliflower. You can find this in most grocery stores. It saves time and effort in the kitchen. Next, heat 1 tablespoon of olive oil in a large skillet on medium heat. Once the oil is hot, add the riced cauliflower. Sprinkle in 1 teaspoon of garlic powder and ½ teaspoon of cumin. Add salt and pepper to your taste. Sauté the mixture for about 5-7 minutes. You want the cauliflower to become tender, not mushy. Once done, remove it from heat and set it aside. Now it’s time to put everything together. In a large mixing bowl, combine 1 cup of halved cherry tomatoes, 1 cup of cooked chickpeas, 1 small diced red bell pepper, and 1 small diced cucumber. Drizzle the remaining olive oil and 1 tablespoon of lemon juice over the veggies. Mix well to combine. Layer the sautéed cauliflower rice in the bottom of your bowl. Top it with the vegetable mixture. Arrange ½ sliced avocado on one side of the bowl. Finally, sprinkle ¼ cup of crumbled feta cheese on top. For a fresh touch, garnish with chopped parsley. Your Cauliflower Rice Bowl is now ready to enjoy! Check out the Full Recipe for more details. To avoid mushy cauliflower rice, you need to manage moisture. Start by cooking it over medium heat. This heat level helps release steam without boiling the cauliflower. I suggest sautéing it for about 5 to 7 minutes. This timing cooks it just right, keeping it tender but firm. Herbs and spices can elevate your dish. Use fresh parsley or cilantro for brightness. Cumin adds a warm depth, while garlic powder packs a punch. Consider drizzling your bowl with tahini or a yogurt sauce for creaminess. These dressings tie all the flavors together. You can prepare this bowl ahead of time for quick meals. Pack it for lunch or serve it at dinner. Pair it with grilled chicken or fish for added protein. For guests, use a large platter and let everyone build their bowls. It makes for a fun and interactive meal! {{image_2}} For a vegetarian or vegan Cauliflower Rice Bowl, swap out the feta cheese. Use a vegan cheese that melts well. Nutritional yeast is a great option too. It adds a cheesy flavor without dairy. You can also boost protein by adding more chickpeas or black beans. Tofu or tempeh works well, too. Just sauté them until golden. These changes keep the dish filling and tasty. This recipe is naturally gluten-free. Just make sure all your ingredients are safe. Check labels for any hidden gluten. If you want more texture, try using quinoa or millet instead of cauliflower rice. Both grains add a nice crunch and flavor. Enhance your bowl with fun toppings. Nuts and seeds add crunch and healthy fats. Try slivered almonds or pumpkin seeds for a nutty twist. Seasonal veggies can also change the taste. Add roasted zucchini in summer or roasted butternut squash in fall. Mixing these options gives you a fresh taste every time. To keep your cauliflower rice bowl fresh, use airtight containers. Glass or BPA-free plastic works well. Store the bowl in the fridge within two hours of cooking. This will help keep it safe to eat. The dish will stay good for up to three days. If you see any changes in smell or texture, it's best to toss it out. When reheating, choose the microwave or a skillet. For the microwave, place the bowl on a microwave-safe plate. Heat in short bursts of 30 seconds, stirring in between. For a skillet, heat a small amount of olive oil over low heat. Add the bowl and stir until warm. This method helps keep the texture nice. Avoid high heat, as it can make the cauliflower mushy. Enjoy your leftovers just as much as the first time! Cauliflower rice is finely chopped cauliflower that looks like rice. It is low in carbs and high in fiber. This makes it a great choice for healthy eating. It provides vitamins C and K, plus antioxidants. You can use it in many dishes, from stir-fries to salads. Cauliflower rice also absorbs flavors well, making it very versatile. To prep cauliflower rice for meal prep, start by ricing the cauliflower. You can do this by cutting it into florets and using a food processor. Once riced, store it in an airtight container. Keep it in the fridge for up to five days. You can also sauté it lightly before storing. This will save time when you are ready to cook. Yes, you can freeze cauliflower rice! Spread it out on a baking sheet and freeze it for a few hours. Once frozen, transfer it to a bag or container. This method helps keep it from clumping. When you want to use it, just take the desired amount and thaw it in the fridge overnight. You can also cook it straight from frozen, just add a few extra minutes to your cooking time. This blog post covered how to create a delicious cauliflower rice bowl. I discussed key ingredients and how to prepare them. You learned the steps to make and assemble the bowl. I also shared tips for enhancing flavor and serving suggestions. In conclusion, this dish is not only tasty but also healthy. You can customize it easily. Don't hesitate to try different ingredients or spices. Enjoy making this meal your own!

Cauliflower Rice Bowl Fresh and Flavorful Delight

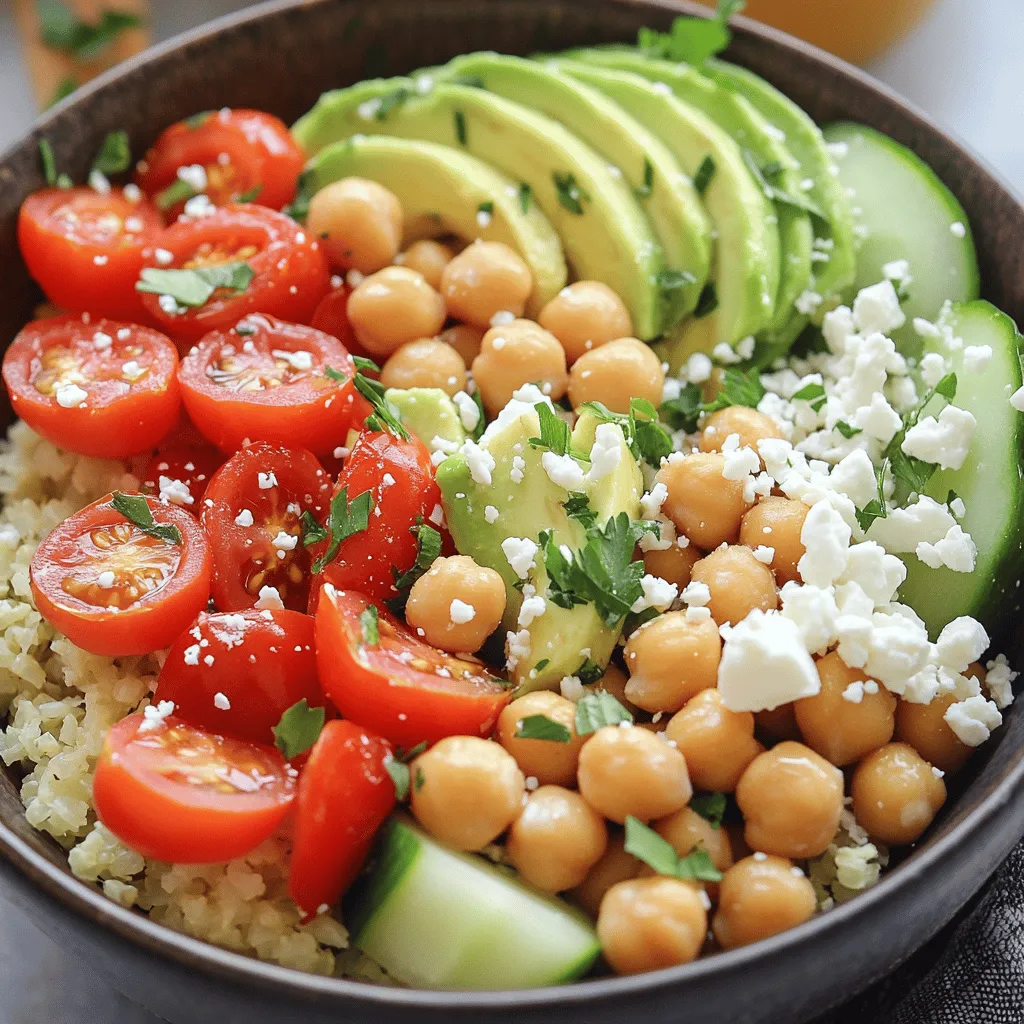
Are you looking for a fresh and flavorful meal? Let me introduce you to the Cauliflower Rice Bowl! This dish

- Chicken: I recommend using boneless, skinless chicken breasts. They cook evenly and stay moist. If you prefer, chicken thighs also work well. - Butter: Use unsalted butter for this recipe. It allows you to control the salt level, enhancing the dish's flavor. - Herbs and Spices: - Thyme: This herb adds a warm, earthy taste. - Smoked paprika: This spice gives a lovely smoky depth. - Onion powder: It adds a sweet, mild onion flavor. - Additional Ingredients: - Chicken broth: It builds a rich, savory base for the sauce. - Lemon juice: This brightens the dish with a fresh zing. - Parsley: Fresh parsley adds color and a fresh taste. For the full recipe, check out the detailed instructions! To make garlic butter chicken, start by seasoning the chicken. Pat the chicken breasts dry with paper towels. This helps the seasoning stick. Sprinkle salt, pepper, dried thyme, smoked paprika, and onion powder on both sides. Make sure each piece is well-coated. Next, let's melt the butter. Use a large skillet and set it over medium heat. Add 2 tablespoons of unsalted butter. Wait until it melts and bubbles. This means it's ready for the chicken. Now, cook the chicken. Place the seasoned chicken breasts in the skillet. Cook them for about 5-7 minutes on one side. When they turn golden brown, flip them over. Cook the other side for the same time. The chicken should reach an internal temperature of 165°F (75°C). This ensures it's safe to eat. Once done, remove the chicken from the skillet and set it aside. Let's make the sauce. In the same skillet, add the remaining 2 tablespoons of butter. Let it melt. Then, add minced garlic. Sauté the garlic for 1-2 minutes. You'll know it's done when it smells fragrant but not burnt. Now, pour in the chicken broth and lemon juice. Stir well to mix everything. Scrape any browned bits from the bottom. This adds extra flavor. Bring the mixture to a simmer. Let it cook for about 3-5 minutes. This helps it reduce and thicken. Finally, return the chicken to the skillet. Spoon the garlic butter sauce over it. Cook for another 2-3 minutes to heat everything through. Your garlic butter chicken is now ready to serve! For a detailed recipe, check out the Full Recipe. How to prevent chicken from drying out To keep your chicken juicy, don’t overcook it. Cook it until it reaches 165°F (75°C). Use a meat thermometer for accuracy. Also, let the chicken rest for a few minutes after cooking. This helps the juices spread within the meat. Tips for ensuring garlic doesn't burn Garlic can burn fast, which makes it bitter. Cook it on medium heat and watch it closely. Stir it often and remove it as soon as it turns golden. This way, you keep all its tasty flavor without the bitterness. Best side dishes to pair with garlic butter chicken Garlic butter chicken pairs well with steamed vegetables, like broccoli or green beans. Fluffy rice is great too, as it soaks up the sauce. You can also serve it with a crisp salad for a fresh touch. Plating ideas for appealing presentation When plating, place the chicken in the center of the plate. Drizzle the garlic butter sauce over the top. Add a sprinkle of fresh parsley for color. You can also add a side of vegetables or rice around the chicken for a nice look. {{image_2}} You can easily swap out chicken breasts for thighs. Thighs have more fat, giving juicy flavor. If you're plant-based, try tofu or tempeh. Both will soak up the garlic butter sauce well. For butter, use olive oil or coconut oil for a dairy-free option. These choices keep the dish rich and tasty. You can also try vegan butter, which works great in this recipe. Adding veggies makes this dish even better. Bell peppers add sweetness and color. Mushrooms bring an earthy taste that pairs well with garlic. Sauté them in the skillet before adding the chicken for extra flavor. If you like it spicy, try red pepper flakes or hot sauce. Just a pinch can turn up the heat. Adding these spices brings a fun twist to the classic garlic butter chicken. For the full recipe, check out Garlic Butter Chicken Delight! To store leftover garlic butter chicken, let it cool first. Place it in an airtight container. This helps keep the chicken juicy and fresh. You can store it in the fridge for up to four days. If you want to keep it longer, freeze it. Properly stored, it can last for three months in the freezer. When reheating, I recommend using the oven or stovetop. These methods help keep the chicken moist. If using the oven, set it to 350°F (175°C). Place the chicken in a baking dish and cover it with foil. Heat for about 15 to 20 minutes. For stovetop reheating, add a splash of chicken broth to the skillet. This adds moisture. Heat it over medium-low heat. Cook for about 5 to 7 minutes, turning the chicken occasionally. To refresh flavors, drizzle a bit of lemon juice before serving. This will brighten up the dish. Enjoy your garlic butter chicken, even as leftovers! Can I use frozen chicken for this recipe? Yes, you can use frozen chicken. But, you must thaw it first. Thaw it overnight in the fridge. If short on time, place the chicken in cold water for a quick defrost. Once thawed, follow the recipe as usual. What can I do if I don't have chicken broth on hand? If you lack chicken broth, use water with added seasoning. You can mix water with a bit of soy sauce. This gives a nice flavor. Vegetable broth is also a good substitute. Overview of calories, protein, and other nutritional facts Garlic butter chicken has about 350 calories per serving. Each serving packs around 30 grams of protein. It also provides essential vitamins from garlic and herbs used. Healthy modifications: Making it lower in calories To lower calories, use less butter. You can replace it with olive oil. Opt for skinless chicken thighs for more flavor with fewer calories. Adding more veggies can also help boost nutrition. Can this recipe be made in the oven or slow cooker? Yes, you can bake the chicken at 375°F (190°C) for 25-30 minutes. Keep the garlic butter sauce to pour on after cooking. For a slow cooker, cook on low for 4-5 hours. Is it possible to grill the chicken for a smoky flavor? Absolutely! Grilling adds a nice smoky taste. Marinate the chicken in the garlic butter sauce before grilling. Cook it for about 6-7 minutes on each side. Enjoy the unique flavor! This blog post covered key ingredients, detailed steps, and helpful tips for making garlic butter chicken. You learned the best cuts of chicken, the right way to season, and how to make a tasty sauce. Remember to avoid burning garlic and to keep chicken juicy. Try using alternative proteins or adding veggies for a twist. Store leftovers properly and refresh flavors when reheating. Enjoy exploring this dish, and happy cooking!

Garlic Butter Chicken Savory and Simple Delight

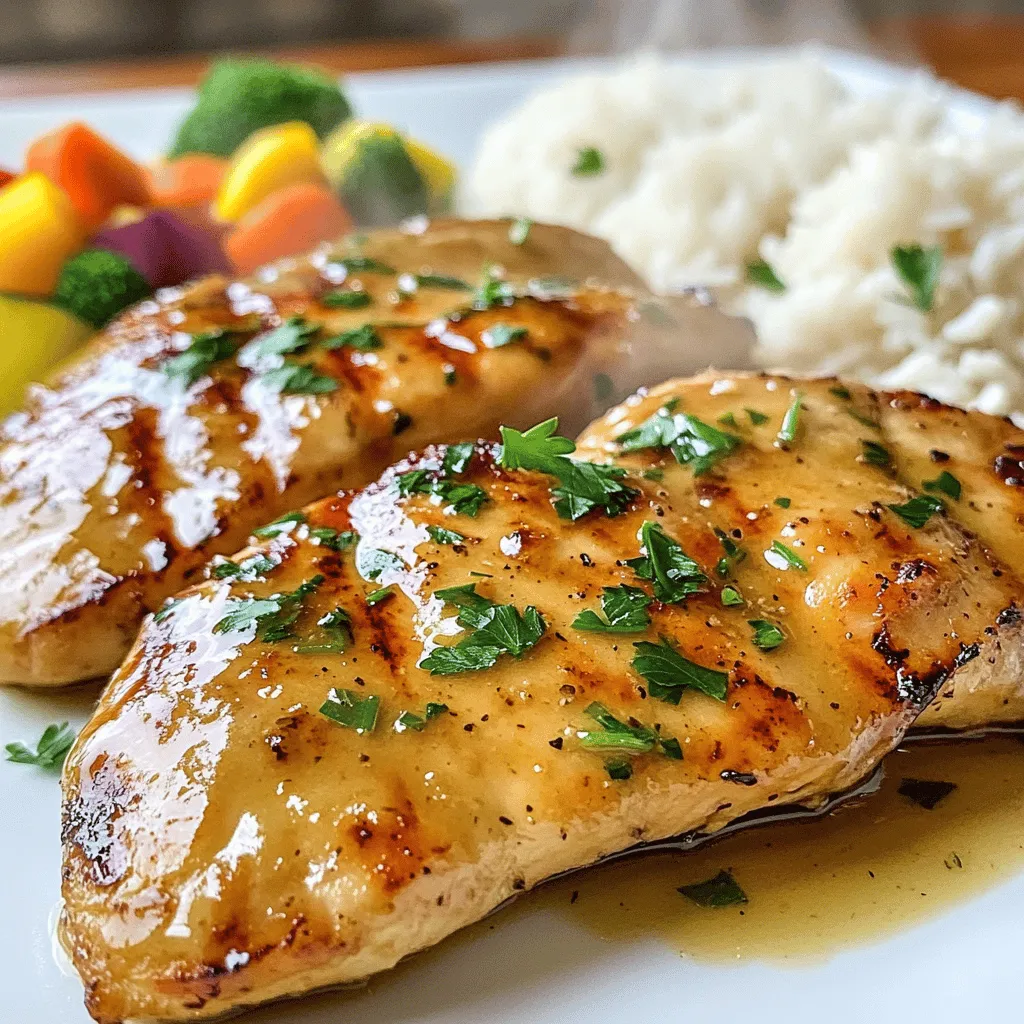
Are you ready to spice up your dinner routine? In my latest post, Garlic Butter Chicken: Savory and Simple Delight,

To make creamy smothered chicken and rice, gather these key ingredients: - 4 boneless, skinless chicken thighs - 1 cup long-grain white rice - 2 cups chicken broth - 1 cup heavy cream - 1 medium onion, finely chopped - 3 cloves garlic, minced - 1 cup frozen peas and carrots mix - 1 teaspoon paprika - 1 teaspoon dried thyme - 1 tablespoon olive oil - Salt and black pepper to taste - Fresh parsley for garnish For this recipe, you will need: - A large skillet - A cutting board - A sharp knife - Measuring cups and spoons - A spoon for stirring - A lid for the skillet If you need to make swaps, here are some easy options: - Use chicken breasts instead of thighs for a leaner choice. - Swap heavy cream with half-and-half or coconut milk for a lighter dish. - If you don’t have peas and carrots, use any mixed veggies you like. - For a gluten-free option, check that your broth is certified gluten-free. These ingredients and tools will help you create a rich, creamy dish that warms the heart. For the full recipe and detailed steps, check out the Full Recipe link. First, gather your chicken thighs. Season them with salt, black pepper, and paprika. This adds great flavor. Let the chicken sit for about 15 minutes. This short wait helps the spices soak in. While the chicken rests, you can chop the onion and garlic. These will add depth to your dish. Grab a large skillet and heat some olive oil over medium heat. Once hot, add the chopped onion. Cook it until it turns translucent, about 3-4 minutes. Next, add the minced garlic and stir for a minute. This releases a lovely aroma. Now, add the seasoned chicken thighs to the skillet. Brown them for about 4-5 minutes on each side. They don't need to cook all the way through yet. Just get a nice golden color. After browning, take the chicken out and set it aside. In the same skillet, add the rice. Stir it well to coat it in the oil and juices. Toast the rice for about 2 minutes. This step adds a nutty flavor. Now, pour in the chicken broth and heavy cream. Mix everything well and bring it to a boil. Once boiling, reduce the heat to a simmer. Add the browned chicken back to the skillet. Toss in the frozen peas and carrots. Stir to combine all the ingredients. Cover the skillet with a lid and let it simmer for about 20-25 minutes. Check it occasionally to make sure nothing sticks to the bottom. When the rice is tender, sprinkle dried thyme over the dish. Fluff the rice gently with a fork. Adjust the seasoning if needed. Now, you are ready to serve your creamy smothered chicken and rice! For the full recipe, check out the instructions above. To get juicy chicken thighs, start with seasoning. Use salt, black pepper, and paprika. Let them marinate for about 15 minutes. This step adds great flavor. Heat your skillet with olive oil over medium heat. Brown the chicken for 4-5 minutes on each side. Don't worry about cooking it through; we will finish cooking it later. The secret to a creamy dish lies in the heavy cream and chicken broth. When you add the rice, make sure to coat it well in the skillet. Toasting it for a few minutes helps build flavor. When you mix in the liquids, bring it to a boil first. Then, reduce the heat to a simmer. Covering the skillet helps trap steam, which thickens the sauce. Creamy Smothered Chicken and Rice pairs well with simple sides. Try a fresh green salad for crunch. You can also serve it with steamed veggies for color and nutrients. For a heartier meal, add some crusty bread to soak up the sauce. Enjoy your meal with a glass of white wine for a nice touch! {{image_2}} You can use many proteins in Creamy Smothered Chicken and Rice. If you want a twist, try boneless turkey thighs. They add a nice flavor. For a seafood version, shrimp works well, too. Just cook it until it turns pink. You can also swap chicken for tofu. It absorbs flavors well and provides a great texture. To make this dish vegan, replace chicken with hearty vegetables like mushrooms or cauliflower. Use vegetable broth instead of chicken broth. For creaminess, swap heavy cream with coconut milk or cashew cream. You can also add chickpeas for protein. They blend well with the spices and cook quickly. This way, even plant-based eaters can enjoy a creamy bowl. To make your dish pop, add flavor boosters. Use fresh herbs like basil or rosemary in place of dried thyme. A splash of lemon juice brightens the dish. For heat, add crushed red pepper flakes or cayenne pepper. If you love garlic, throw in extra minced cloves. You can also mix in a splash of soy sauce for depth. Experiment with these options to make it your own. For the full recipe, check out the detailed instructions above. To keep your creamy smothered chicken and rice fresh, let it cool first. Then, place it in an airtight container. This helps keep the flavors intact. Store it in the fridge for up to three days. Make sure to label the container with the date. When you’re ready to enjoy leftovers, use the stove or microwave. If using the stove, heat it in a pan over low heat. Stir it often to warm it evenly. If using a microwave, place it in a microwave-safe bowl. Cover it with a damp paper towel to keep moisture in. Heat in short bursts, stirring in between, until hot. You can freeze creamy smothered chicken and rice for easy meals later. First, let it cool completely. Then, transfer it to a freezer-safe container. It’s best to use it within three months. When you’re ready to eat, thaw it in the fridge overnight. Reheat as mentioned above for the best taste. Yes, you can make Creamy Smothered Chicken and Rice ahead. Simply prepare the dish as directed. After cooking, let it cool completely. Store it in an airtight container in the fridge. It stays fresh for up to three days. Reheat it on the stove or in the microwave. Add a bit of broth or cream to keep it creamy. This makes it easy for busy days. Creamy Smothered Chicken and Rice is tasty on its own. However, you can pair it with some sides for balance. Here are a few ideas: - Steamed broccoli - Garlic bread - Mixed green salad - Roasted vegetables These sides add color and nutrition. They also complement the creamy dish well. To serve more people, simply increase the ingredients. Double or triple the chicken, rice, and other items. Keep the same cooking times, but check for doneness. You may need a larger skillet or pot. Ensure there's enough space for everything to cook evenly. This way, everyone can enjoy this creamy, comforting meal together. For the full recipe, check the earlier sections. This blog post explored creating Creamy Smothered Chicken and Rice with ease. We covered key ingredients, essential tools, and helpful substitutions. I shared step-by-step instructions to make your dish perfect and tips for cooking techniques. You learned about protein variations and storing leftovers properly. Now, you have all you need to whip up a tasty meal. Enjoy the process and the great flavors this dish brings to your table!

Creamy Smothered Chicken and Rice Simple Comfort Dish

Looking for a cozy meal that warms both the heart and belly? This Creamy Smothered Chicken and Rice dish is

To make creamy chicken and rice, you will need: - 2 cups cooked rice (white or brown) - 2 chicken breasts, diced - 1 cup chicken broth - 1 cup heavy cream - 1 cup frozen peas and carrots mix - 1 yellow onion, finely chopped - 3 cloves garlic, minced - 1 teaspoon dried thyme - 1 teaspoon paprika - Salt and pepper to taste - 2 tablespoons olive oil - Fresh parsley, chopped (for garnish)

Creamy Chicken and Rice Flavorful Family Meal

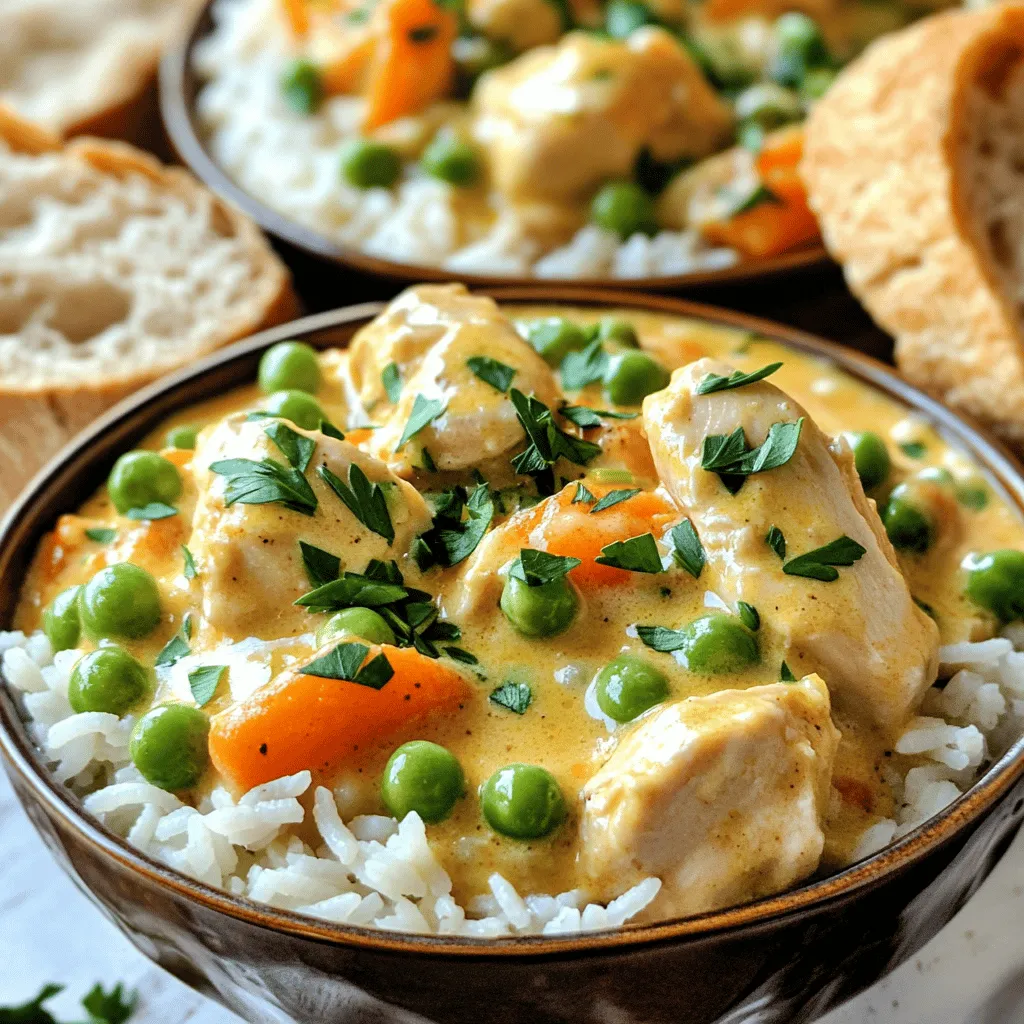
Looking for a delicious and easy family meal? Creamy Chicken and Rice is the answer! This cozy dish brings warmth

- 4 boneless, skinless chicken breasts - 2 tablespoons olive oil - Salt and pepper to taste - 1 teaspoon paprika - 1 teaspoon cumin - 1 tablespoon garlic powder - 1 lime, juiced

Peruvian Chicken with Creamy Green Sauce Delight

If you crave a dish bursting with flavor, you’re in for a treat! My Peruvian Chicken with Creamy Green Sauce

Older posts
Newer posts
← Previous Page1 … Page58 Page59 Page60 … Page62 Next →

dsad

© 2025 Foodish Talk • Built with GeneratePress

Our Policies

  • Copyright Policy
  • Cookie Policy
  • GDPR Policy
  • Privacy Policy
  • Disclaimer
  • Terms Of Use

More Information

  • Home
  • About
  • Contact
  • Appetizers
  • Dessert
  • Dinner
  • Drinks
©2025, Foodish Talk About Back To Top